

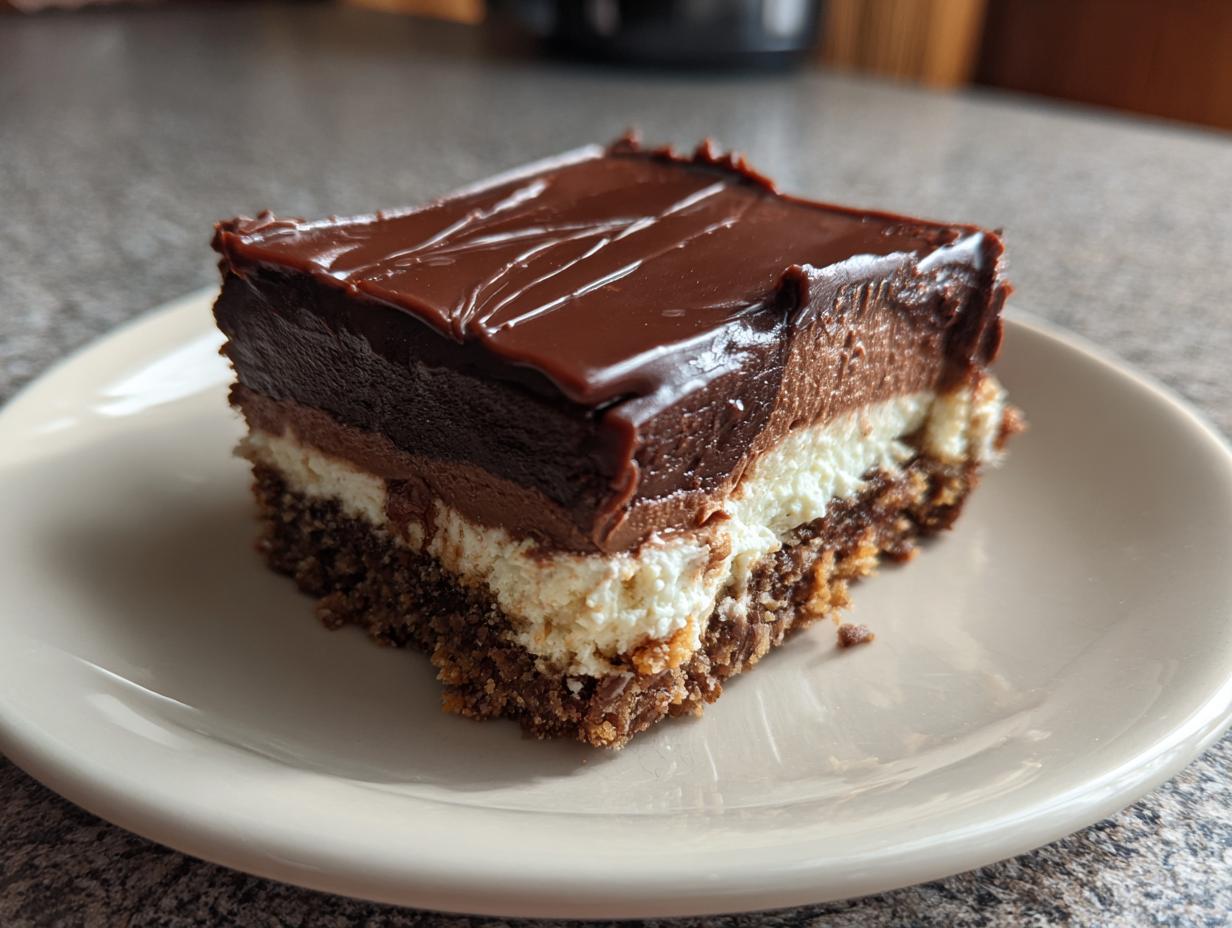
You know, sometimes the most incredible desserts are the ones that don’t require heating up the oven one bit! Life gets busy, and I love having go-to recipes that are just as impressive as any baked good but come together in a flash. That’s exactly why I’m so excited about these Chocolate Dream Bars. Seriously, they’re a dream come true for anyone craving something rich, creamy, and totally chocolatey without the fuss. It’s all about layering simple ingredients to create pure magic. This recipe is a perfect example of what we believe here at DelishCraze – that amazing food should be accessible and bring joy, not stress. We’ve tested and tweaked this one countless times to make it foolproof for *you*, our everyday home cooks, so you can whip up a dessert that’s truly something special. For more on our philosophy, you can check out our story.
Why You’ll Love These Chocolate Dream Bars
Honestly, who doesn’t need a dessert that tastes like a million bucks but barely breaks a sweat? Here’s why these bars are about to become your new best friend:
- Seriously Easy to Make: No fancy techniques, no oven required! Just mix, layer, and chill. If you can stir, you can make these.
- Crowd-Pleaser Guaranteed: Seriously, I’ve never met anyone who didn’t rave about these. That perfect blend of creamy, chocolatey, and that slight crunch from the crust? Perfection!
- Make-Ahead Magic: Plan ahead! These just get better as they chill, so you can totally make them a day or two before your party and forget all about dessert duty.
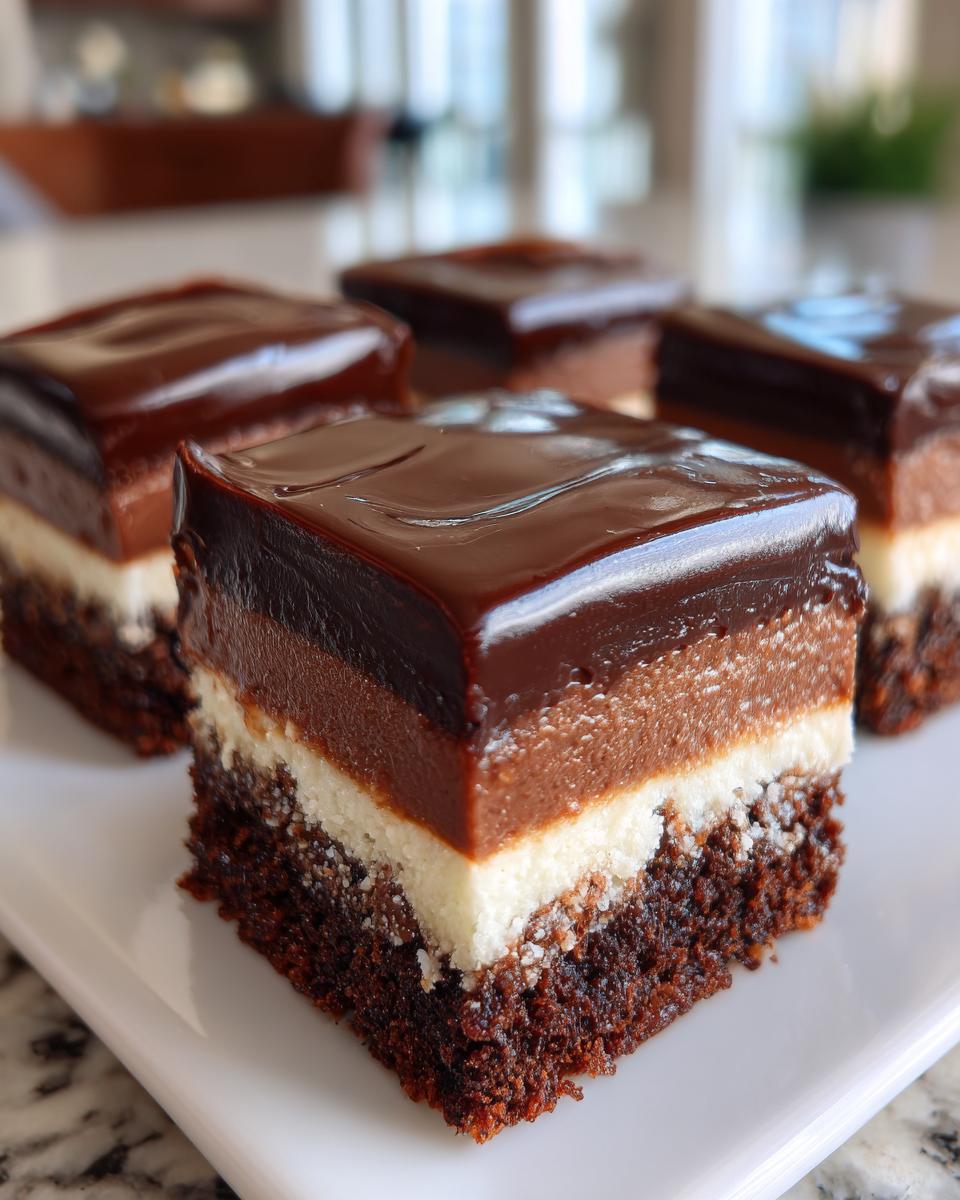
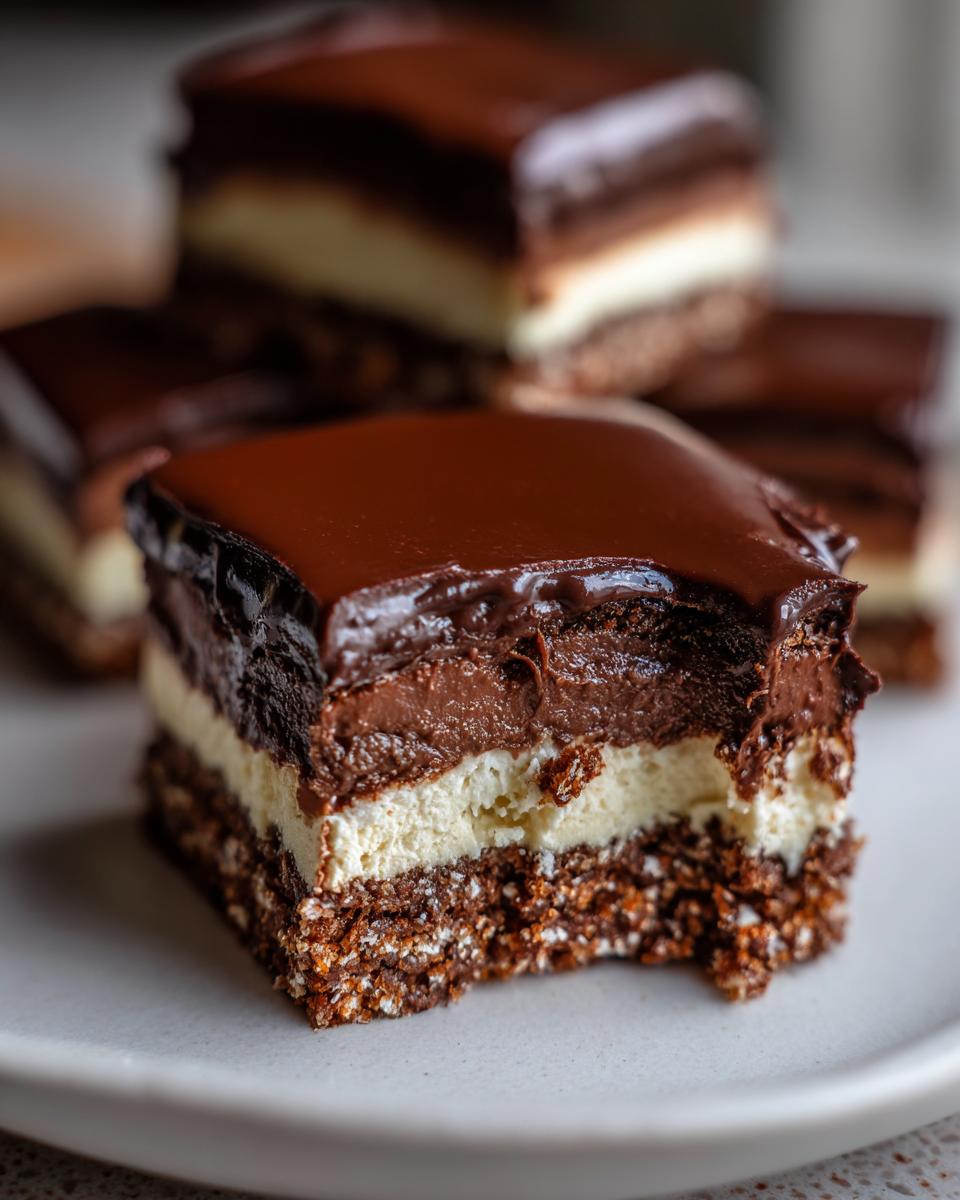
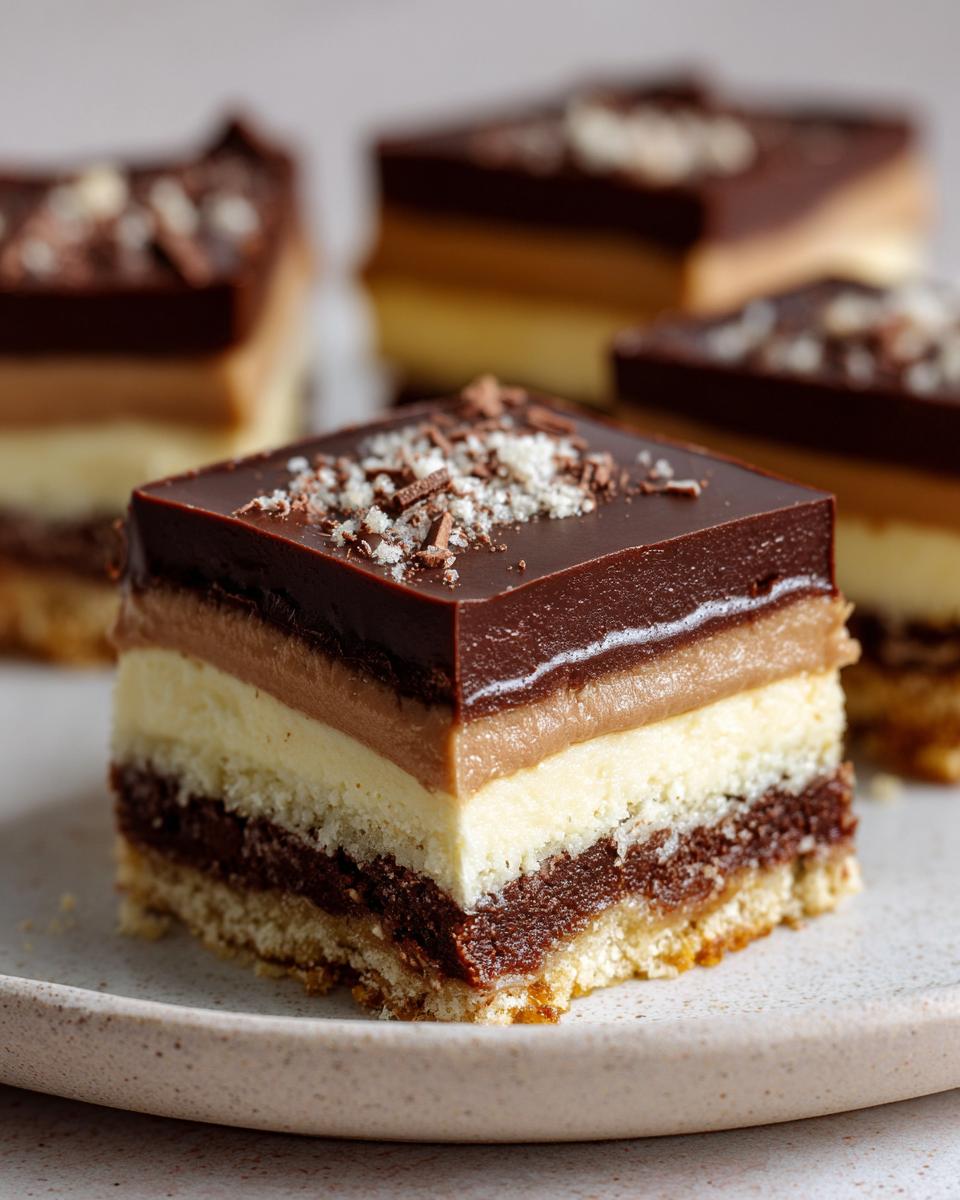
- Incredible Flavor & Texture: We’re talking a luscious cream cheese layer, smooth chocolate pudding, and a dreamy chocolate topping all on a buttery crumb base. It’s a texture and flavor party in every bite!
- Perfect for Any Occasion: Kids’ birthdays, potlucks, holiday gatherings, or just a Tuesday night treat – these bars fit right in.
Ingredients for Your Chocolate Dream Bars
Okay, so gathering your goodies is half the fun! These ingredients are pretty standard pantry staples, which is exactly why I love them. You’ll need a few things to build those beautiful layers:
For the Graham Cracker Crust:
- 1 ½ cups graham cracker crumbs (that’s about 10-12 full graham crackers, crushed up nice and fine)
- 6 tablespoons unsalted butter, melted (gotta get it nice and liquidy!)
For the Cream Cheese Layer:
- 1 (8 ounce) package cream cheese, softened (let it hang out on the counter for a bit, so it’s nice and pliable)
- 1 cup powdered sugar (for that silky smooth sweetness)
- 1 teaspoon vanilla extract (because vanilla just makes everything better)
- 1 (12 ounce) container frozen whipped topping, thawed (make sure it’s fully thawed, no icy bits!)
For the Pudding Layer:
- 2 (3.4 ounce) packages instant chocolate pudding mix (the instant kind is key here!)
- 3 cups milk (whole milk gives the best richness, but whatever you have works!)
For the Chocolate Topping:
- 2 cups semi-sweet chocolate chips (or milk chocolate if you’re feeling extra sweet!)
- ¼ cup heavy cream (this makes our ganache super glossy and smooth)
Crafting Your Perfect Chocolate Dream Bars
Alright, let’s get down to business and build these beauties layer by layer! Making these Chocolate Dream Bars is honestly so satisfying, and seeing them all come together is part of the fun. Don’t worry if things aren’t perfectly smooth; that’s part of the charm of a homemade dessert! Here’s how we do it:
Creating the Graham Cracker Crust
First things first, grab your 9×13 inch baking dish. In a medium bowl, just toss those graham cracker crumbs with the melted butter. Give it a good stir until all the crumbs are nicely coated. Then, press this mixture down really evenly into the bottom of your dish. You want a solid base for all those yummy layers to come!
Assembling the Cream Cheese Layer for Chocolate Dream Bars
Now for that dreamy, creamy middle part! In a nice big bowl, beat together your softened cream cheese, powdered sugar, and that splash of vanilla extract until it’s all smooth and wonderful. Gently, and I mean *gently*, fold in the thawed whipped topping. You don’t want to deflate all that air! Spread this luscious mixture evenly over your graham cracker crust. Trust me, this layer is pure happiness.
Preparing the Pudding for Your Chocolate Dream Bars
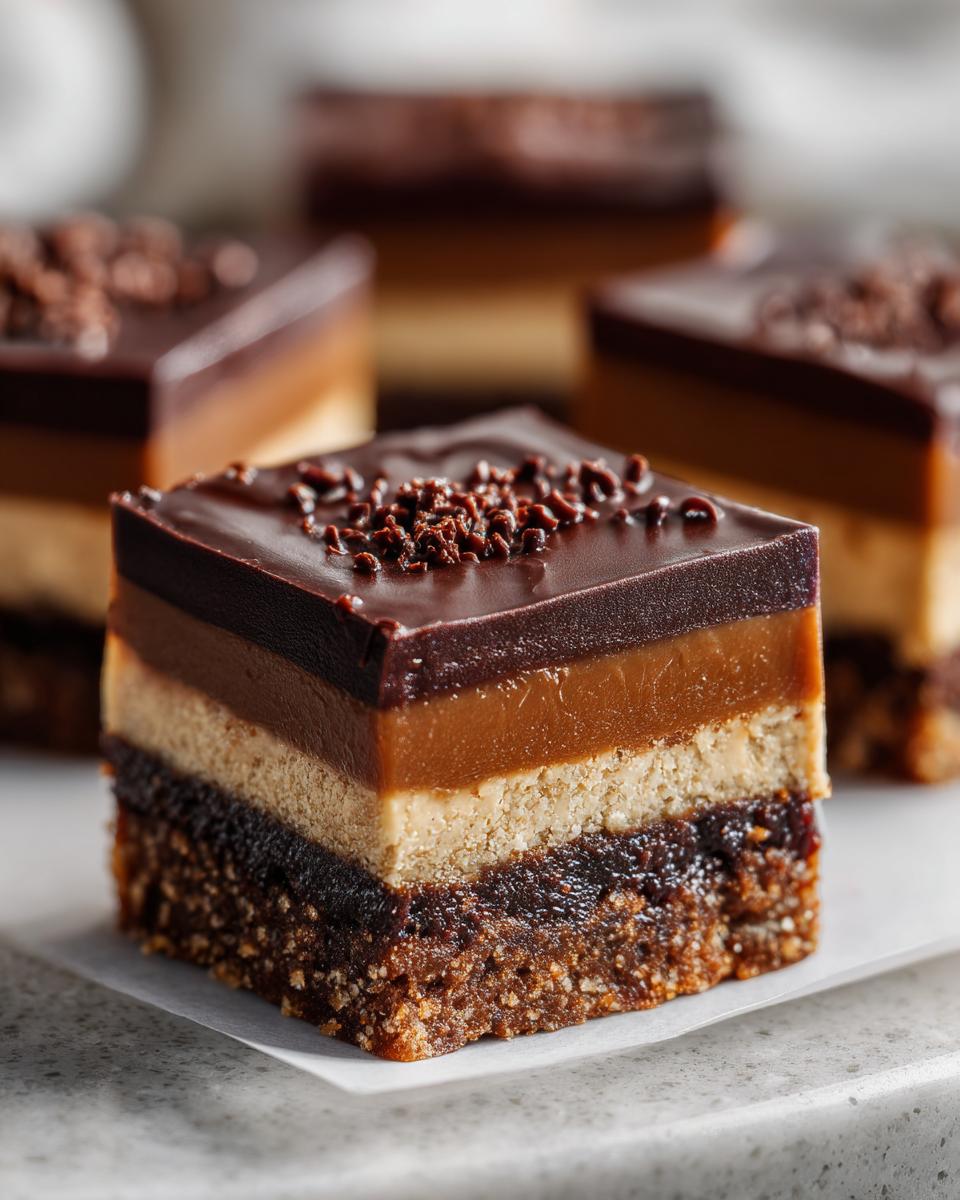
Next up, the quick-and-easy pudding layer! Grab another bowl, and whisk together the instant chocolate pudding mix and your milk. You’ll want to whisk it up pretty good, usually just about two minutes, until it starts to get nice and thick. Spoon this right over the cream cheese layer, making sure you cover it all evenly. It smells so good already, right?
Making the Chocolate Ganache Topping
For the grand finale topping, we’re making a super simple ganache. Pop your semi-sweet chocolate chips and heavy cream into a small microwave-safe bowl. Microwave in like, 30-second bursts, stirring each time, until it’s all melted and smooth. You want it glossy and pourable. Pour this gorgeous chocolate mixture right over the pudding layer and spread it out all the way to the edges. If you love chocolate, you might also want to check out our recipe for classic chocolate chip cookies – they’re a total winner!
Chilling Your Chocolate Dream Bars to Perfection
This is the hardest part – waiting! Cover your baking dish really well with plastic wrap. Now, pop it into the refrigerator and let it chill for at least 4 hours. I know, it feels like forever, but this chilling time is SO important to let everything set up perfectly. It’s what makes these Chocolate Dream Bars slice up so beautifully clean!
Tips for the Best Chocolate Dream Bars
Alright, so you’ve got the recipe, and that’s fantastic! But sometimes, a little extra nudge from someone who’s made these a million times just makes them go from ‘really good’ to ‘OMG, I need the recipe NOW!’ These Chocolate Dream Bars are pretty foolproof, but here are a few little tricks I swear by to make them absolutely perfect every single time:
Crust Swap: While graham crackers are classic, don’t be afraid to switch it up! For a richer, darker vibe, try crushing up about 24 chocolate sandwich cookies (like Oreos, filling and all!) and mixing them with that melted butter. It makes for an incredible base, especially if you’re a serious chocolate lover. It’s like a decadent chocolate lasagna!
Whipped Topping Whisper: When you’re folding in that thawed whipped topping into the cream cheese mixture, be gentle! You want to keep all those lovely air bubbles intact. Overmixing can make the layer a bit dense, and we want it light and fluffy, right? Think of it like giving it a soft hug, not a wrestling match.
Pudding Power: Make sure you’re using *instant* chocolate pudding mix. The regular kind won’t set up correctly in the short time needed for these bars. Also, give the milk and pudding a good whisk for the full two minutes to ensure it thickens up properly before you spread it. Nobody wants a runny middle layer!
Ganache Glory: If your chocolate chips seem a little stubborn to melt, don’t overheat them in the microwave! It’s better to do shorter bursts and stir really well in between. If it’s still not perfectly smooth, a tiny splash more cream can help rescue it. Honestly, you can even peek at our no-bake pumpkin cheesecake ; it has some great tips for creamy fillings!
Frequently Asked Questions About Chocolate Dream Bars
Got questions? I’ve got answers! Making these layered chocolate bars is pretty straightforward, but it’s always good to know a few extra things. Here are some common questions I get:
Can I use different cookies for the crust?
Oh, absolutely! While graham crackers are a classic for a reason, you can totally get creative. Chocolate sandwich cookies, like Oreos (filling included!), are amazing for a more decadent vibe. You could even try shortbread or vanilla wafers if that’s what you have on hand. Just crush ’em up and mix with melted butter like the recipe says!
How long do these refrigerator bars last?
These are fantastic make-ahead desserts. They’ll stay yummy in the refrigerator for up to 3 days. The longer they chill, the more set they get, which is perfect for getting those clean slices. Just make sure they’re covered well with plastic wrap so they don’t dry out or pick up any funky fridge smells.
Can I freeze these layered chocolate bars?
You sure can! Freeze them in a single layer on a baking sheet until they’re firm, then wrap them tightly in plastic wrap and then in foil. They should keep well in the freezer for about a month. Just thaw them in the refrigerator overnight before you plan to serve them. They make for a fantastic surprise dessert!
What if I don’t have instant chocolate pudding?
Unfortunately, you really need the *instant* kind for this recipe because it’s formulated to thicken quickly without cooking. Regular pudding mix needs to be cooked on the stovetop, and it won’t set up quite the same way in this no-bake dessert. Stick to the instant for the best results!
Nutritional Information (Estimated)
Just a heads-up, these numbers are an estimate and can wiggle around a bit depending on the brands of ingredients you use and how big you slice your bars. We’re looking at roughly 250 calories, about 14g of fat (with 8g being saturated), 30g of carbs, and 3g of protein per serving. That also averages out to around 25g of sugar. Enjoy every bite – it’s worth it!
Share Your Chocolate Dream Bars Creations!
Alright, bakers! Now that you know how to whip up these incredible Chocolate Dream Bars, I’m just dying to know how yours turned out. Did you try the Oreo crust? Did your family devour them in minutes? Snap a pic and tag us on social media, or drop a comment down below telling me all about your experience! You can also reach out via our contact page if you have any questions. And if you loved them, please give them a star rating – it really helps other home cooks discover them. Your feedback means the world to us!
PrintChocolate Dream Bars
A no-bake, layered chocolate dessert with a cookie crust, creamy filling, and rich chocolate topping. These bars are perfect for making ahead and chilling for a crowd-pleasing treat.
- Prep Time: 20 min
- Cook Time: 0 min
- Total Time: 4 hr 20 min
- Yield: 24 bars 1x
- Category: Dessert
- Method: No-Bake
- Cuisine: American
- Diet: Vegetarian
Ingredients
- 1 ½ cups graham cracker crumbs (about 10–12 full sheets)
- 6 tablespoons unsalted butter, melted
- 1 (8 ounce) package cream cheese, softened
- 1 cup powdered sugar
- 1 teaspoon vanilla extract
- 1 (12 ounce) container frozen whipped topping, thawed
- 2 (3.4 ounce) packages instant chocolate pudding mix
- 3 cups milk
- 2 cups semi-sweet chocolate chips
- ¼ cup heavy cream
Instructions
- In a medium bowl, combine graham cracker crumbs and melted butter. Press mixture evenly into the bottom of a 9×13 inch baking dish.
- In a large bowl, beat together softened cream cheese, powdered sugar, and vanilla extract until smooth. Gently fold in the thawed whipped topping until well combined. Spread this cream cheese mixture evenly over the graham cracker crust.
- In a separate bowl, whisk together the instant chocolate pudding mix and milk until thickened, about 2 minutes. Spread the pudding mixture evenly over the cream cheese layer.
- In a small microwave-safe bowl, combine chocolate chips and heavy cream. Microwave in 30-second intervals, stirring in between, until the chocolate is melted and smooth. Stir until fully combined.
- Pour the chocolate ganache over the pudding layer, spreading it evenly to cover the entire surface.
- Cover the baking dish with plastic wrap and refrigerate for at least 4 hours, or until firm and set.
- Cut into bars and serve chilled.
Notes
- For an Oreo crust, use 2 cups of finely crushed Oreo cookies (about 24 cookies) instead of graham crackers.
- You can substitute milk chocolate chips for semi-sweet if you prefer a sweeter topping.
- These bars can be made up to 2 days in advance and stored in the refrigerator.
Nutrition
- Serving Size: 1 bar
- Calories: 250
- Sugar: 25g
- Sodium: 150mg
- Fat: 14g
- Saturated Fat: 8g
- Unsaturated Fat: 6g
- Trans Fat: 0g
- Carbohydrates: 30g
- Fiber: 1g
- Protein: 3g
- Cholesterol: 30mg