

Oh, listen—do you smell that? That rich, comforting aroma of a truly fresh loaf filling your kitchen? That is the goal, friends! For years, I thought getting that perfect bakery-style crusty italian bread at home was some kind of complicated, messy secret reserved only for professionals. Nope! Here at DelishCraze, we live by Olivia Rosewood’s philosophy: if it comes from the kitchen, it should feel like connection, not a chore. That’s why I spent ages perfecting this recipe. Trust me, this tutorial makes achieving that beautiful, golden, crunchy exterior and perfectly soft, airy interior totally accessible for everyone, even if you just started kneading yesterday! You can read more about our whole approach to simple, reliable home cooking on our About Page, but right now, let’s get this bread!
- Why This Easy Crusty Homemade Italian Bread Recipe Works
- Ingredients for Your Homemade Italian Bread Recipe
- Step-by-Step Instructions for Easy Crusty Bread Baking
- Tips for Success Making Chewy Italian Loaf
- Serving Suggestions for Dipping Bread Recipes
- Storage & Reheating Instructions for Fresh Baked Bread Aromas
- Frequently Asked Questions About This Italian Bread Recipe
- Nutritional Data for This Classic Italian Baking Loaf
- Share Your Crusty Italian Bread Creations
Why This Easy Crusty Homemade Italian Bread Recipe Works
I know you’re looking for that elusive combination: bread that looks like it just came from a fancy bakery but was made right here on your counter. Well, this recipe delivers on every promise. It’s surprisingly beginner-friendly, uses simple pantry staples, and manages to get you that show-stopping crust without the fuss.
- It’s designed for home ovens—no special stones or complicated preheats needed to start.
- The dough is forgiving, requiring minimal kneading, which is great for anyone new to baking.
- It perfectly balances the golden, crunchy exterior with a wonderfully soft interior.
If you decide you want to slather this amazing italian bread with some homemade seasoning later, check out my favorite garlic butter spread—it works perfectly.
Achieving the Perfect Bakery Style Italian Loaf
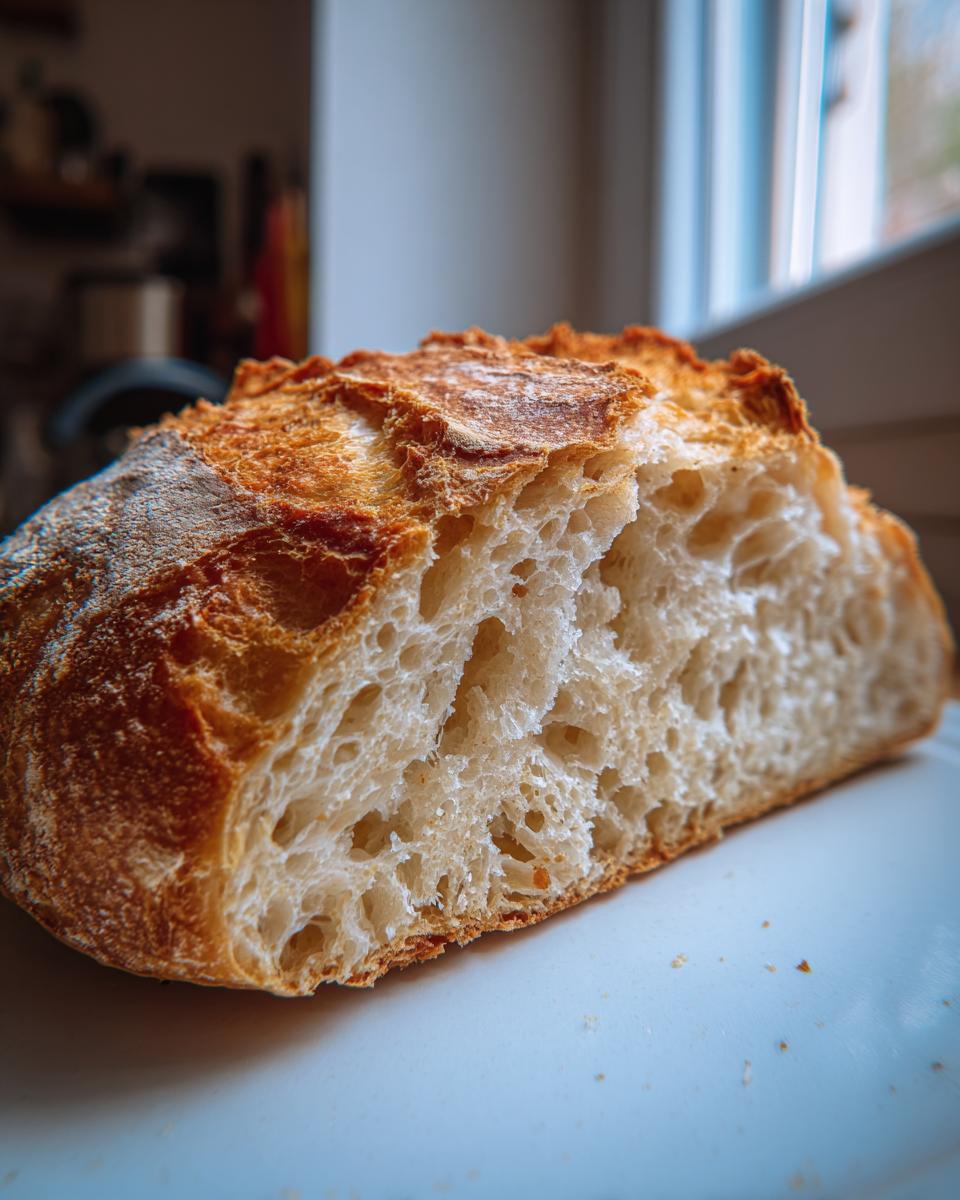
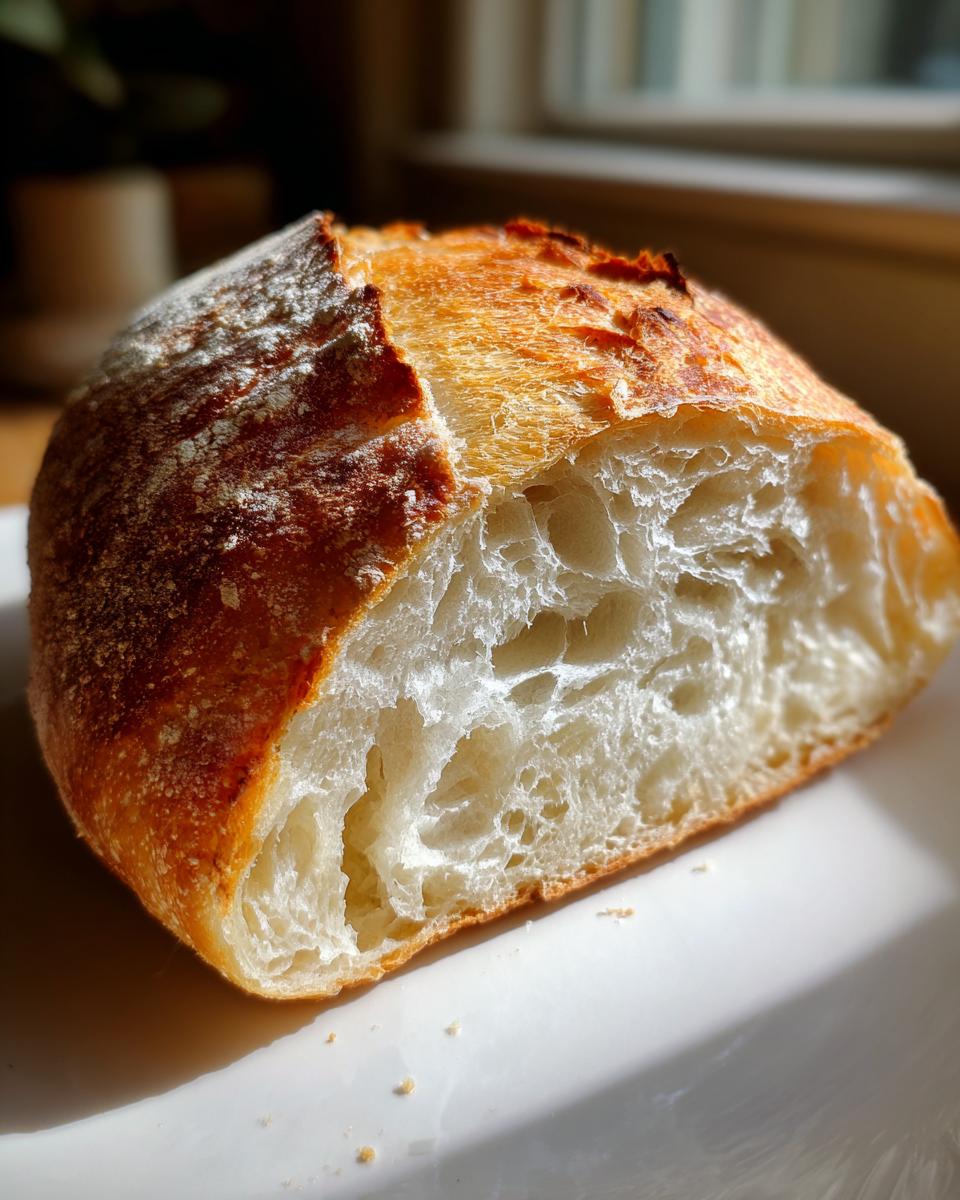
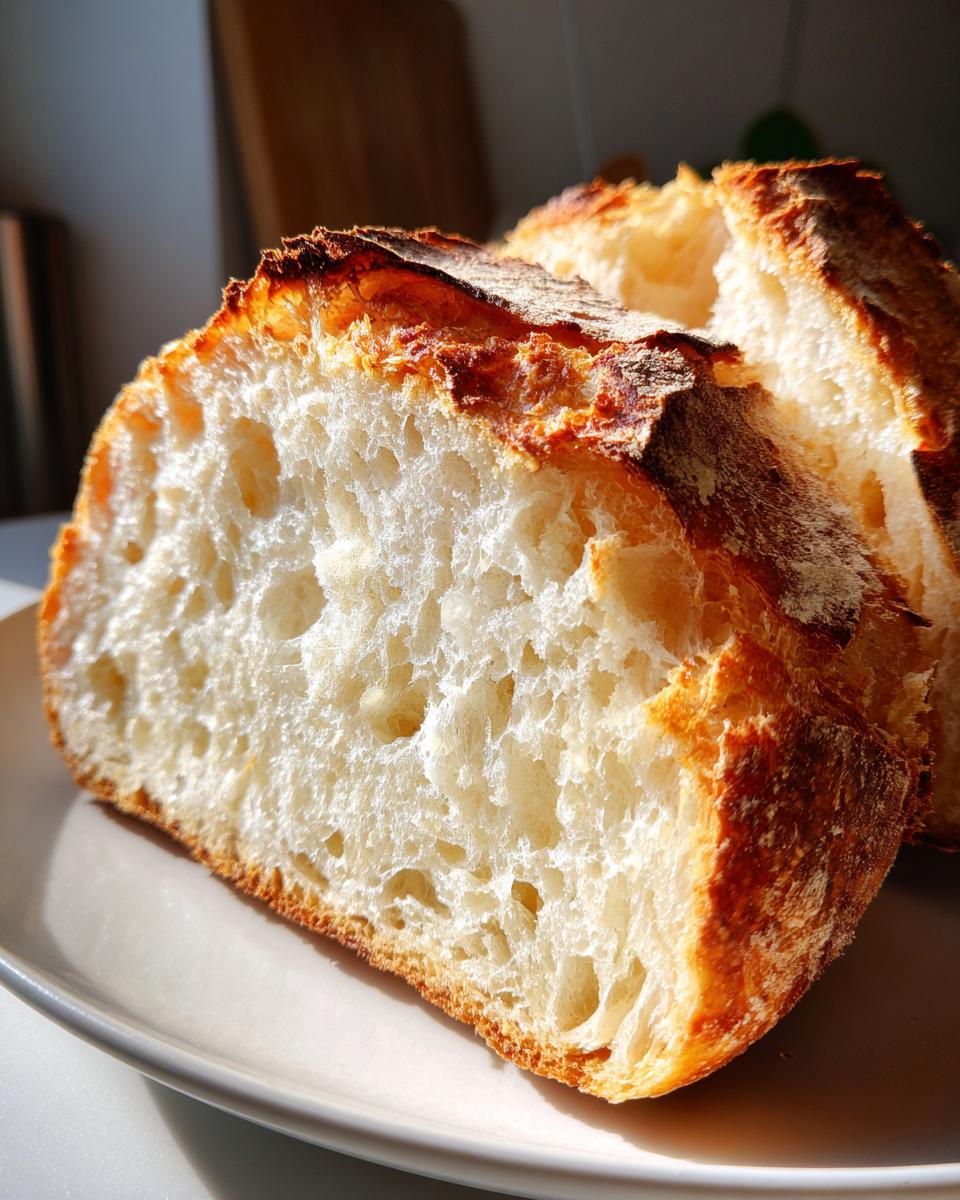
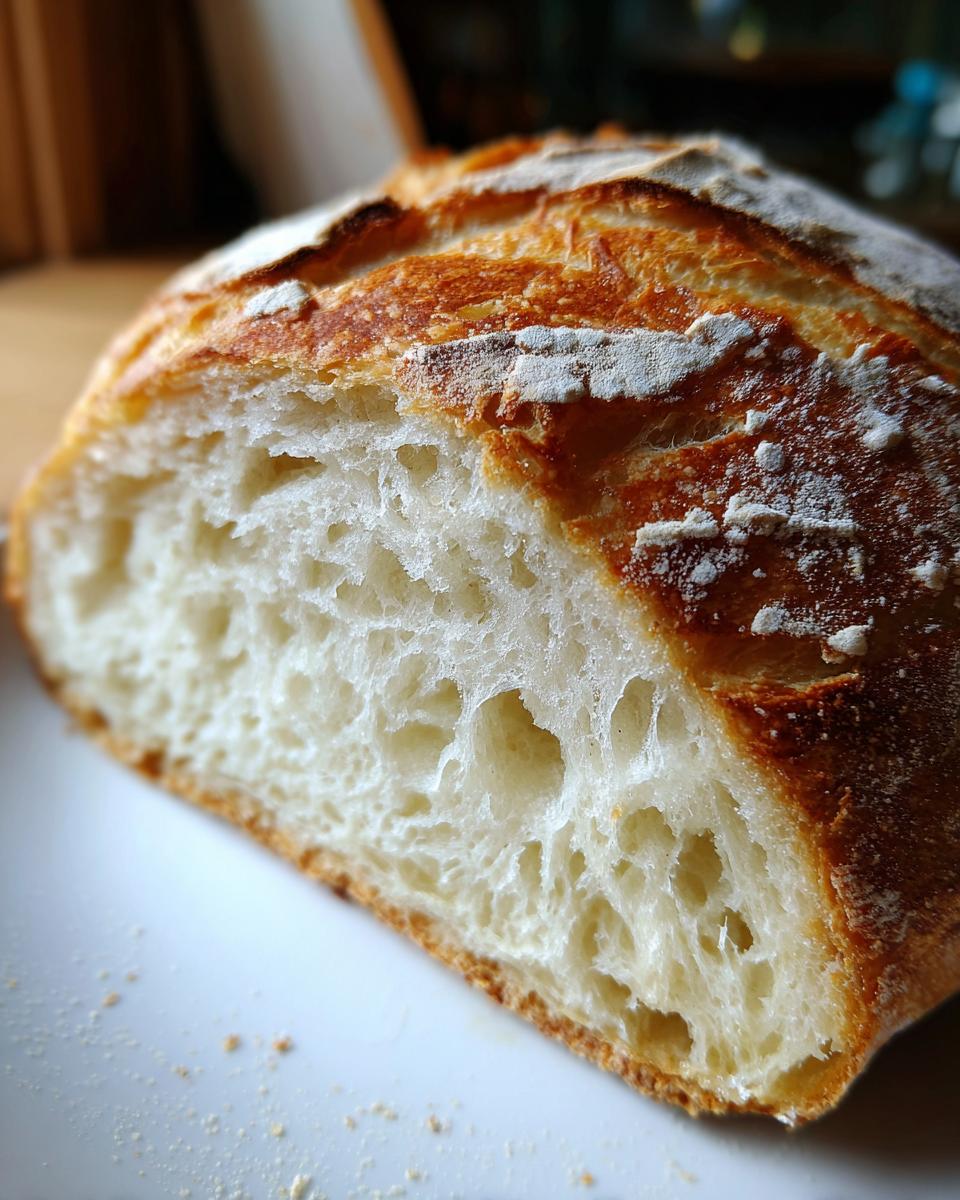
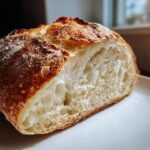
The secret weapon here, truly, is steam. When we bake this bread, we create a wet environment in those first crucial minutes. Why? Because that moisture keeps the outside of the dough pliable just long enough for the loaf to expand fully before the crust sets hard. This method locks in the gases, ensuring you get that deep, crackly, golden brown crust that screams professional! That’s what makes this a true Bakery Style Italian Loaf, even when you’re just using a standard baking sheet at home.
Simple Sandwich Bread Texture Inside
Don’t let the crust fool you; the inside is exactly what you want for dipping or layering up a great sandwich. We achieve that soft, airy, and chewy texture by just doing a gentle mix and a moderate knead. You aren’t looking for brick-hardness here! This bread is the ideal Simple Sandwich Bread because it holds up to heavy fillings but remains wonderfully airy so it doesn’t weigh down your meal. Beginners, breathe easy—this interior is totally achievable!
Ingredients for Your Homemade Italian Bread Recipe
Okay, assembling the cast of characters for this bread is so simple. Honestly, if your pantry is stocked for basic American cooking, you probably have everything we need. That’s the beauty of this recipe—it uses honest, basic pantry ingredients that everyone can find easily. But precision matters here, especially with the water, since we are dealing with yeast! Get these ready on your counter before you start mixing so everything flows smoothly.
Dry Ingredients
- All-Purpose Flour: You need exactly 3 1/2 cups. Don’t substitute whole wheat here; we want the classic texture!
- Salt: 1 1/2 teaspoons. Yep, don’t skip it; salt is flavor, plus it controls the yeast just a tiny bit.
- Granulated Sugar: Just 1 teaspoon. This is just a little booster food for our little yeast friends to wake up happy.
- Active Dry Yeast: 2 1/4 teaspoons, which is usually one whole packet. Make sure it’s actually active dry yeast, not instant, so we can bloom it.
Wet Ingredients and Finishes
- Warm Water: This is the most crucial temperature-sensitive item! It has to be really warm, but not hot—aim for 1 1/2 cups heated between 105–115°F. If it’s too cold, the yeast snoozes. If it’s too hot, you cook the yeast, and we’ll end up with a hard brick, not artisan bread at home!
- Olive Oil: Just 1 tablespoon needed to lightly brush the finished loaf right before it goes into the oven. It helps that crust turn that gorgeous, deep golden brown.
Step-by-Step Instructions for Easy Crusty Bread Baking
Alright, now for the fun part! Turning those simple ingredients into the most amazing italian bread you’ve ever smelled wafting through your house. Don’t feel intimidated by the kneading—it’s quick, trust me. We’re aiming for that airy, bakery-style feel, and the steps are straightforward! If you’re looking for other quick dough secrets, I share tons of tips over on my garlic naan bread tutorial, but let’s focus on this loaf right now.
Mixing and First Rise for Your Italian Bread
First things first, get your dry ingredients—the flour, salt, and sugar—all tossed together in a big bowl. While that waits patiently, bloom your yeast in that warm water. Remember that 105-115°F sweet spot? Once it gets foamy (that means your yeast is yelling hello!), pour it right into the dry stuff. Mix it up with a sturdy wooden spoon until you can’t mix anymore. Don’t try for perfection yet; you want it to look like a messy, shaggy dough. Cover that bowl up—I usually use plastic wrap—and find a warm spot. Let it chill out and grow for about 60 to 90 minutes until it’s doubled up. This first slow rise builds all the flavor!
Shaping and Creating the Steam for Golden Brown Crust Bread
Once it’s puffy, give it a gentle *whomp* right in the middle to deflate it. Lightly flour your counter and turn the dough out. Just knead it for about five to seven minutes until it starts looking smooth and feels elastic. You’re building structure here for that beautiful bite! After kneading for your Chewy Italian Loaf, gently shape it into a long oval. Pop it onto parchment paper on your baking sheet, cover it loosely, and let it rest for just 30 more minutes. While it’s resting, crank that oven up to 400°F (200°C), and remember that trick for the crust? Place an empty shallow pan on the bottom rack now! We need that set-up for our future steam bath.
Baking Your Artisan Bread at Home
Time to bake this gorgeous Artisan Bread at Home! Brush the top of your loaf lightly with olive oil, then grab a sharp knife—not a butter knife, something sharp!—and make 2 or 3 quick, shallow slits across the top. This scoring lets the steam escape nicely during the bake. Now, for the magic: carefully—and I mean carefully—pour about half a cup of hot water into that preheated pan on the bottom rack and *immediately* shut the oven door. That burst of steam is exactly what gives you that amazing Golden Brown Crust Bread look! Bake it for 30 to 35 minutes. You’ll know it’s done when the color is deep brown and if you tap the bottom, it sounds hollow—like tapping a drum! I found a great link explaining how professionals nail the crust over here if you want to geek out on crust science!
Tips for Success Making Chewy Italian Loaf
Getting that perfect texture when you bake your own italian bread is all about those little finishing touches. The recipe gets you 90% of the way there, but these final steps truly guarantee that gorgeous, Chewy Italian Loaf you’re dreaming of. Honestly, if you skip cooling, you might as well have bought a store loaf! These tips elevate standard home baking into something truly special.
Pro Tips for an Extra Crispy Italian Bread Crust
We used steam to get the crust started, but if you want it truly crackly and loud when you slice it, we need a second burst of moisture a few minutes into baking. In those first 10 minutes, open the oven door quickly (don’t lose too much heat!) and give the walls of the oven a generous spritz with a spray bottle filled with water. Do this maybe two or three times. It sounds dramatic, I know, but that extra humidity right when the bread is setting creates an unbelievably thin, shatteringly crisp outer layer. Wow!
Cooling the Loaf Correctly
This is non-negotiable, friends! When that beautiful loaf comes out—golden brown and smelling divine—you must resist the urge to cut into it for at least an hour. Seriously, wait! If you slice it right away, the steam trapped inside rushes out, and that wonderful chewiness turns into a weird gummy texture. Place it on a wire cooling rack immediately. This allows air to circulate underneath the loaf, preventing the bottom from getting soggy and letting that outer crust fully set and crisp up properly. Patience pays off!
Serving Suggestions for Dipping Bread Recipes
This is where the real fun begins! Once you have this beautiful, rustic loaf cooling, you start planning what you’re going to dip it into or slather it on. This isn’t bread you save for later; this is bread you serve immediately! It’s sturdy enough for heavy sauces but soft enough for simple snacking straight out of the oven.
Because we worked hard for that amazing crust, we need to honor it with equally delicious partners. Have you ever just torn off a hunk, dipped it in good olive oil, and called that dinner? I certainly have! But if you want to get a little fancy, my go-to is always my easy garlic butter spread—it’s simple, but it makes everything better.
This loaf is practically a required side dish when you’re making anything soupy or saucy. It’s perfect for soaking up every last drop of sauce from a spaghetti night. Seriously, don’t let that sauce go to waste! I think it’s the only thing capable of standing up to a hearty bowl. Speaking of hearty, if you are looking for a fantastic pairing, you absolutely must try making my Italian sausage and white bean soup. It’s rich, savory, and needs that crunchy exterior to mop up the broth. These are the ultimate Dipping Bread Recipes for any gathering!
Storage & Reheating Instructions for Fresh Baked Bread Aromas
Okay, so you made this gorgeous loaf of italian bread, and now you have leftovers (if you manage to have any!). We want to keep that home-baked magic alive for as long as possible, right? The smell of Fresh Baked Bread Aromas fading is just sad, so we have to store it right. Frankly, this bread is best eaten the day it’s made—that crust is just unbeatable when fresh—but it lasts respectfully for a day or sometimes two.
Never, ever put this bread in the refrigerator! It dries it out instantly and ruins that soft interior texture we worked so hard for. Keep it on the counter, but you need to protect that crust. The best way is to wrap it tightly in a paper bag first, and then place that whole thing inside a slightly open plastic zip-top bag or a clean kitchen towel. This lets the bread breathe a little bit so the crust doesn’t turn soggy, but it keeps the crumb from becoming rock hard overnight.
Now, when you want to eat the second-day loaf, you need to wake that crust back up! Don’t just eat it cold and slightly chewy. Reheating is critical. You want to wrap the entire loaf loosely in aluminum foil—this traps just enough humidity to steam the inside gently. Then, pop it into a preheated 350°F oven for about eight to ten minutes. When you pull it out, carefully peel that foil back and let it sit directly on the counter for five minutes before slicing. That quick blast of heat and trapped steam brings that crunchy crust right back to life. It’s like magic every single time!
Frequently Asked Questions About This Italian Bread Recipe
I always get so many questions once people start baking this bread at home! It’s totally normal when moving from store-bought to fresh. People always ask about speed and if they can shortcut the process. Don’t worry if you need a little clarification on any step—that’s what I’m here for! We want every attempt to result in that fantastic golden crust.
Can I make this Italian bread recipe without kneading?
That’s the million-dollar question for folks short on time! You *could* technically skip the 5-7 minutes of kneading I ask for, but I really advise against it for this particular Homemade Italian Bread Recipe. Kneading is what aligns the gluten strands just right, and without that little workout, your loaf will be quite dense and maybe even a bit crumbly instead of having that lovely, soft, chewy interior we crave. Think of that short knead as a power-up for your dough—it makes all the difference between ‘okay bread’ and ‘Easy Crusty Bread Baking perfection’!
What if I don’t have a shallow pan for steam?
Oh, that happens all the time! If you don’t have a shallow metal baking sheet perfect for holding boiling water, don’t panic about your crust! Grab the heaviest, oven-safe pan you own—a cast iron skillet works beautifully, or even a small, sturdy metal loaf pan if that’s all you have. The key isn’t the pan shape, it’s the hot water creating that initial dramatic burst of steam. Right before you shut the oven door after scoring your loaf, carefully pour that hot water into your substitute pan and slam the door shut fast! Works like a charm every time.
How long does this Beginner Bread Making recipe stay fresh?
Because this is made with simple ingredients and no artificial preservatives, it tastes best right out of the oven or the next day. Honestly, if you are practicing your Beginner Bread Making skills, try to eat most of it within 24 hours. If you store it correctly (remember, no fridge!), it should still be perfectly good for up to two days. After that, it’s better repurposed into croutons or breadcrumbs than eaten plain because the crust will definitely start taking a backseat!
Nutritional Data for This Classic Italian Baking Loaf
I always feel a tiny bit silly posting nutrition facts for something so pure and simple, but I know some of you lovely readers track things like that! Remember, this is for education’s sake, and since we are working with real, whole ingredients, these numbers are just estimates. They can change wildly based on the brand of flour you use or exactly how much olive oil you brush on top. Treat this as a fun guide rather than strict rules for your Classic Italian Baking masterpiece!
The serving size here is estimated at one slice, but let’s be real—who stops at one slice of fresh, crusty bread? Ha! Here’s a quick rundown based on the recipe yields:
- Calories: About 150 per slice. Not bad for something this satisfying!
- Fat: Very low, sitting around 1.5g total fat. Most of that is the healthy olive oil we brushed on top.
- Carbohydrates: Around 30g, giving you that wonderful energy boost that only fresh bread can provide.
- Protein and Fiber: We get a nice little 5g of protein and about 1.5g of fiber from the flour content.
- Sugar and Cholesterol: Both are wonderfully low, sitting under 1g for sugar and zero cholesterol, which is exactly what you want in a simple bread recipe.
My biggest advice? Don’t stress the numbers too much. This bread is made from the most basic ingredients—flour, water, yeast, salt—so it’s naturally clean! Just trust the process, enjoy the aroma, and know you made something fantastic from scratch.
Share Your Crusty Italian Bread Creations
Look, I’ve given you all my hard-won secrets for getting that perfect golden-brown crust and that soft, totally irresistible middle. Now the ball is totally in your court! I would be absolutely thrilled if you tried out this Homemade Italian Bread Recipe and let me know how it went. Seriously, my favorite part of running this site is hearing from you about your kitchen successes—or even when you accidentally burn the bottom (we’ve all been there!).
Once you’ve pulled that glorious loaf out of the oven, I need all the details! Did you manage to wait the full hour before slicing? How crunchy was that crust? Did you use it for dipping, or did you manage to build a truly epic sandwich? Please drop a rating right near the top of the page—it helps other people who are just starting their Beginner Bread Making journey see that this recipe really delivers.
And if you snapped a picture of that beautiful golden exterior or a cross-section of the chewy interior, I would love to see it! Feel free to tag me on social media so I can celebrate with you. Seeing your creations makes all the testing and tasting worthwhile. Speaking of tastiness, if you’re looking for another guaranteed winner that always gets rave reviews, check out my classic chocolate chip cookies recipe next time you need a sweet treat!
Go bake something wonderful today!
PrintEasy Crusty Homemade Italian Bread
Bake a bakery-style Italian loaf at home with this simple recipe. You get a golden, crunchy crust and a soft, chewy interior using basic pantry ingredients.
- Prep Time: 20 min
- Cook Time: 35 min
- Total Time: 2 hours 25 min
- Yield: 1 loaf 1x
- Category: Bread
- Method: Baking
- Cuisine: Italian
- Diet: Vegetarian
Ingredients
- 3 1/2 cups all-purpose flour
- 1 1/2 teaspoons salt
- 1 teaspoon granulated sugar
- 2 1/4 teaspoons active dry yeast (1 packet)
- 1 1/2 cups warm water (about 105-115°F)
- 1 tablespoon olive oil (for brushing)
Instructions
- In a large bowl, combine the flour, salt, and sugar.
- In a separate small bowl, dissolve the yeast in the warm water and let it sit for 5 minutes until foamy.
- Pour the yeast mixture into the dry ingredients. Mix with a wooden spoon until a shaggy dough forms.
- Turn the dough out onto a lightly floured surface. Knead for 5 to 7 minutes until the dough is smooth and elastic.
- Lightly oil a clean bowl. Place the dough in the bowl, turning to coat. Cover the bowl with plastic wrap or a clean towel.
- Let the dough rise in a warm place for 60 to 90 minutes, or until it has doubled in size.
- Gently punch down the dough. Shape it into a long, oval loaf.
- Place the loaf on a baking sheet lined with parchment paper or on a pizza stone. Cover loosely and let it rise for a second time for 30 minutes.
- Preheat your oven to 400°F (200°C). Place a shallow pan on the bottom rack to create steam.
- Brush the top of the loaf lightly with water or olive oil. Score the top of the loaf with a sharp knife 2 or 3 times.
- Carefully pour about 1/2 cup of hot water into the shallow pan on the bottom rack to create steam, then quickly close the oven door.
- Bake for 30 to 35 minutes, or until the crust is deep golden brown and sounds hollow when tapped.
- Remove the bread from the oven and let it cool completely on a wire rack before slicing.
Notes
- For an extra crispy crust, spray the oven walls with water a few times during the first 10 minutes of baking.
- If you want a softer crust, skip the steam pan and brush the loaf with melted butter immediately after it comes out of the oven.
- This bread is excellent for dipping in olive oil or serving with pasta dishes.
Nutrition
- Serving Size: 1 slice
- Calories: 150
- Sugar: 0.5
- Sodium: 300
- Fat: 1.5
- Saturated Fat: 0.2
- Unsaturated Fat: 1.3
- Trans Fat: 0
- Carbohydrates: 30
- Fiber: 1.5
- Protein: 5
- Cholesterol: 0