
I don’t know about you, but I am constantly chasing that perfect bite of shrimp—you know the one—where the coating shatters when you touch it, it’s impossibly golden, and the shrimp inside is sweet and tender? Seriously, why is getting fried shrimp that tastes exactly like your favorite seafood shack almost impossible at home? Well, stop searching! I’ve cracked the code here. This recipe isn’t just another list of steps; it’s a guaranteed technique that starts with a silky buttermilk soak. It’s all about making the classics simple and accessible, just like Olivia Rosewood set out to do when she started DelishCraze. Trust me, this crispy fried shrimp recipe will put you right up there with the pros.
- Why This Crispy Fried Shrimp Recipe Delivers Restaurant Style Crunch
- Ingredients Needed for Ultimate Fried Shrimp
- Step-by-Step Easy Shrimp Fry Tutorial for Crunchy Results
- Southern Fried Shrimp Secrets and Tips for Success
- Making Jumbo Fried Shrimp and Variations
- Serving Suggestions and Best Dipping Sauce for Fried Shrimp
- Storage and Reheating Instructions for Crunchy Fried Shrimp
- Frequently Asked Questions About Your Fried Shrimp
- Share Your Homemade Seafood Platter
Why This Crispy Fried Shrimp Recipe Delivers Restaurant Style Crunch
The number one reason people run into soggy seafood? They skip the steps that professionals never skip! I’ve tested every method out there so you don’t have to waste oil doing the work. This isn’t your average quick fry; this is how we achieve that incredible, shattering texture you only expect from a proper seafood joint. This crispy fried shrimp recipe relies on two non-negotiable techniques to beat sogginess every single time. If you’re serious about making incredible restaurant style fried shrimp, listen up!
The Power of the Buttermilk Soak for Perfect Fried Shrimp
That tangy buttermilk isn’t just for tenderizing, although it does a wonderful job making the shrimp juicy. Its real trick is creating a slightly sticky surface. When the warm shrimp hits the seasoned flour after that cold soak, the film of buttermilk grabs onto that coating like glue. This ensures you get a thick, satisfying crust instead of a flimsy dusting that peels off when you dunk it in sauce.
Achieving the Golden Fried Shrimp Coating
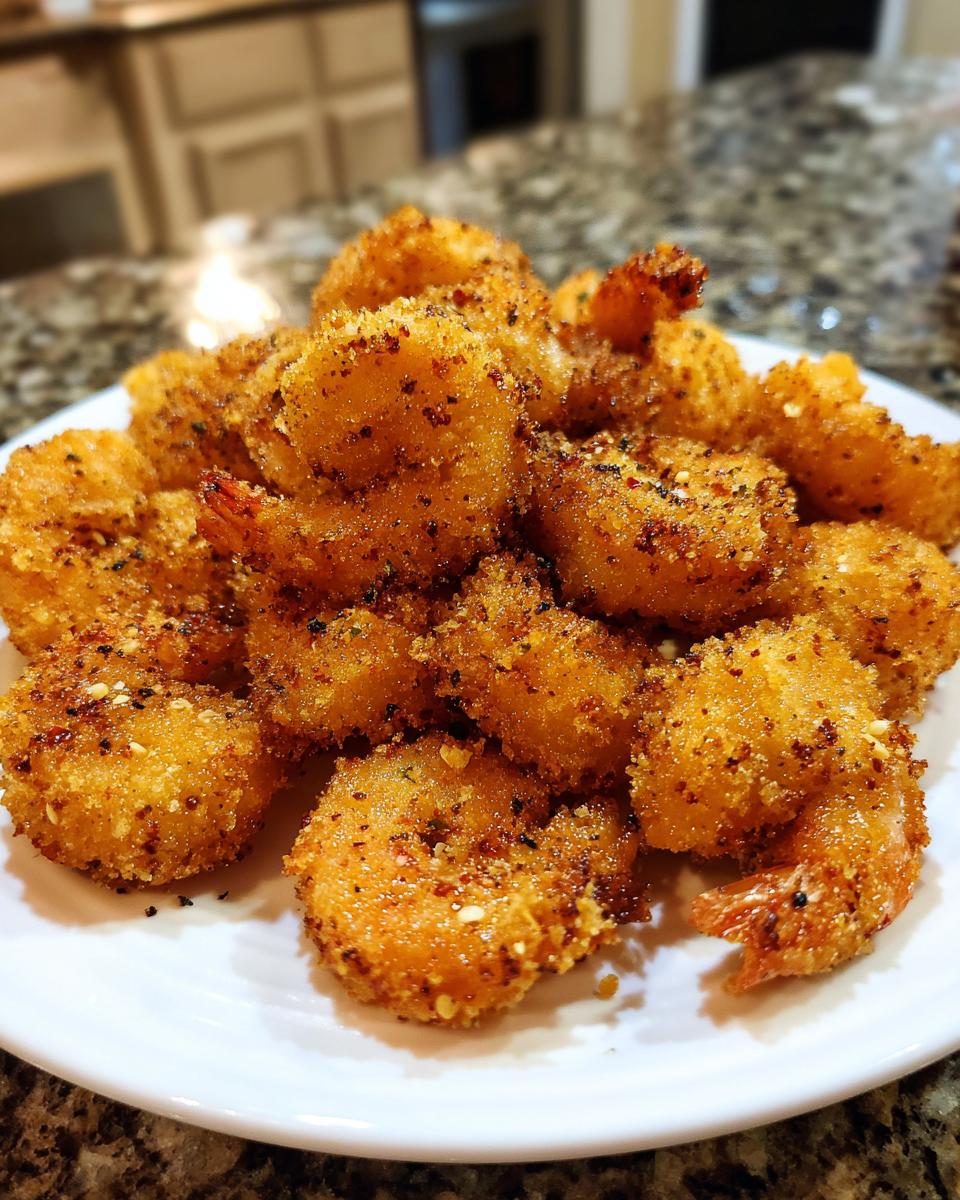
We use a blend of flour and cornstarch in the dry mix. The cornstarch is a champion at keeping things truly light and crisp, preventing that heavy, greasy mouthfeel. Then we load it up with paprika and powders for that vivid color—that’s your golden fried shrimp coating! If you’re aiming for that classic, slightly rougher Southern texture, don’t think twice about swapping some of that flour for fine cornmeal. It adds another layer of unbeatable crunch. You can find some great ideas for pairing this up with quick weeknight sides over here at my weeknight dinner roundup, just saying!
Ingredients Needed for Ultimate Fried Shrimp
Okay, let’s talk about what you need! Getting the right ingredients, measured correctly, is half the battle won before you even turn on the stove. I’ve listed exactly what I use every time to make sure we get that signature shatter in the crust. Remember, for this fried shrimp recipe, the quality matters, especially with what you dunk them in first!
- You will need about 2 lbs of shrimp. Make sure they are large or, even better, jumbo shrimp! They should already be peeled and deveined—saves so much frustration later.
- For the marinade bath, grab 1 cup of buttermilk. This is non-negotiable for that great flavor and coating adhesion.
- Seasoning for the marinade: 1 teaspoon of salt, 1/2 teaspoon of black pepper, and if you like a little kick, 1/2 teaspoon of cayenne pepper.
- Now for the dry coating powder: We need 1 1/2 cups of all-purpose flour.
- To make it crispy, add 1/2 cup of cornstarch to the flour.
- Spice time for color and flavor: 1 tablespoon of paprika, 1 teaspoon of garlic powder, and 1 teaspoon of onion powder.
- And for frying? You’ll need plenty of vegetable oil—aim for about 2 inches deep in your pot.
That’s it! Simple pantry staples that come together to make some seriously impressive, crunchy seafood. Don’t try to substitute the cornstarch right now; we need it for this particular texture!
Step-by-Step Easy Shrimp Fry Tutorial for Crunchy Results
This is where the magic happens, friends! If you want that satisfying crunch every single time you make fried shrimp, listening to the oil temperature is more important than following the clock. This entire easy shrimp fry tutorial moves fast once the oil is hot, so have everything prepped and ready. We are going to move from soak to serving in about ten minutes flat once we get to the frying stage!
Marinating and Preparing the Shrimp for Frying
First things first, let those shrimp take a bath! Combine your buttermilk, salt, pepper, and that optional cayenne in a bowl and make sure every single shrimp is coated well. Cover that bowl up tight and put it in the fridge for at least 30 minutes. Seriously, don’t skip this—it tenderizes them beautifully. While that’s chilling, whisk together your flour, cornstarch, and all those lovely seasonings in a separate, shallow dish. You want that coating mix to be perfectly uniform!
Deep Fried Shrimp Technique: Oil Temperature is Essential
The secret to crunchy shrimp is maintaining a steady 360°F. Use that thermometer, please! If your oil is too cool when you drop the shrimp in, the coating soaks up grease instantly. If it’s too hot, the coating burns before the shrimp cooks through. When you start frying, only drop in about 6 to 8 pieces at a time. If you overload the pot, the temperature drops instantly, and BAM—soggy coating time. Give the oil a minute or two to climb back up to 360°F between batches. That recovery time is everything!
Coating and Frying to Golden Perfection
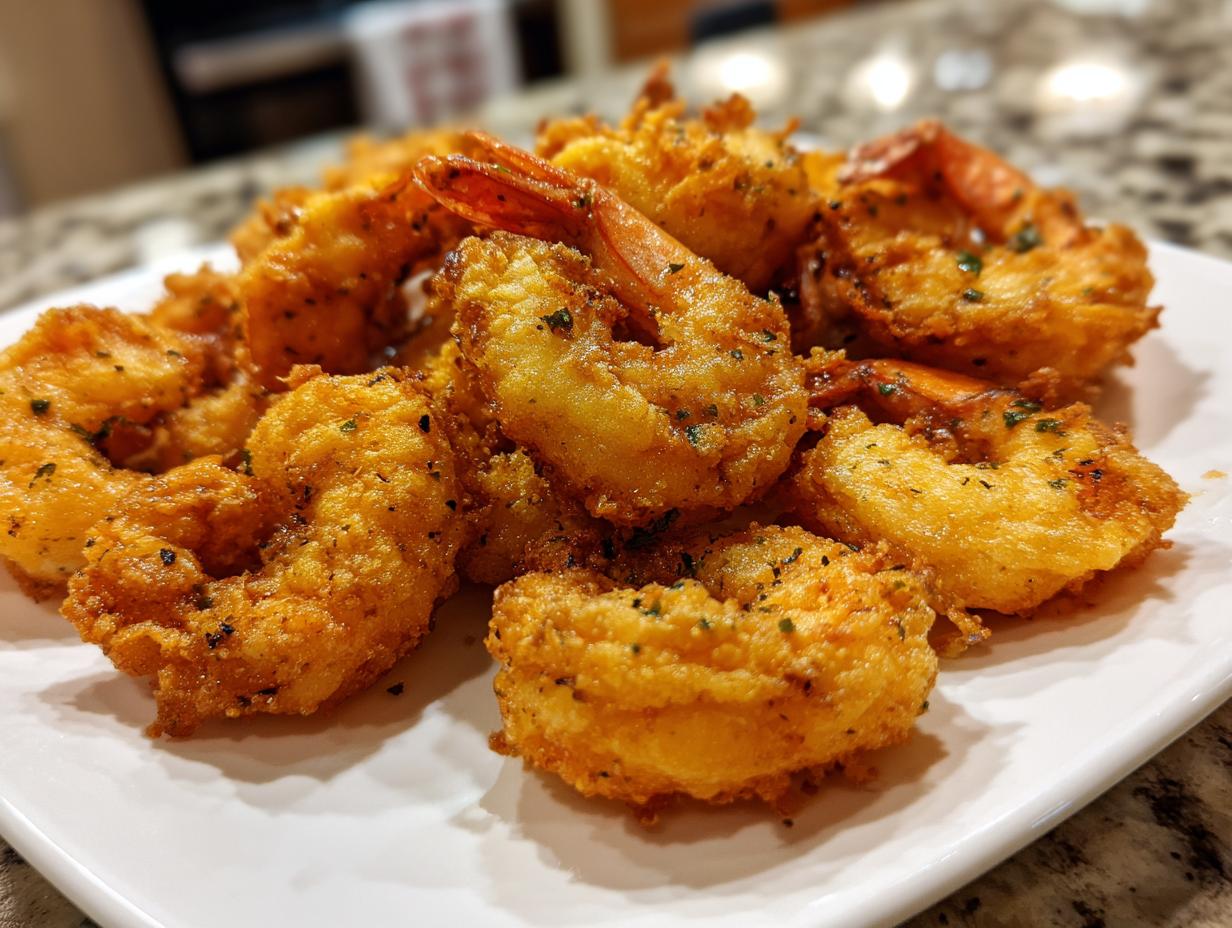
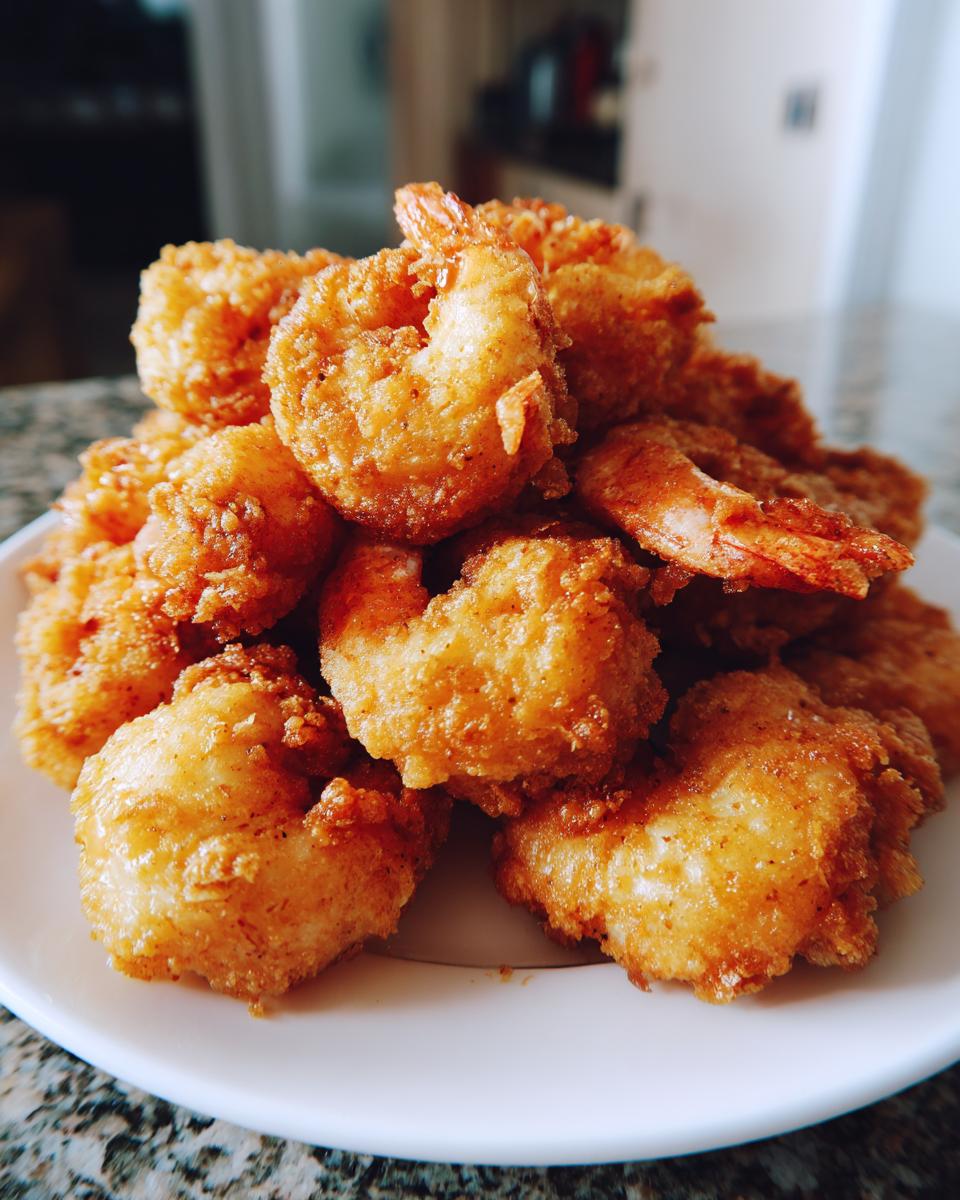
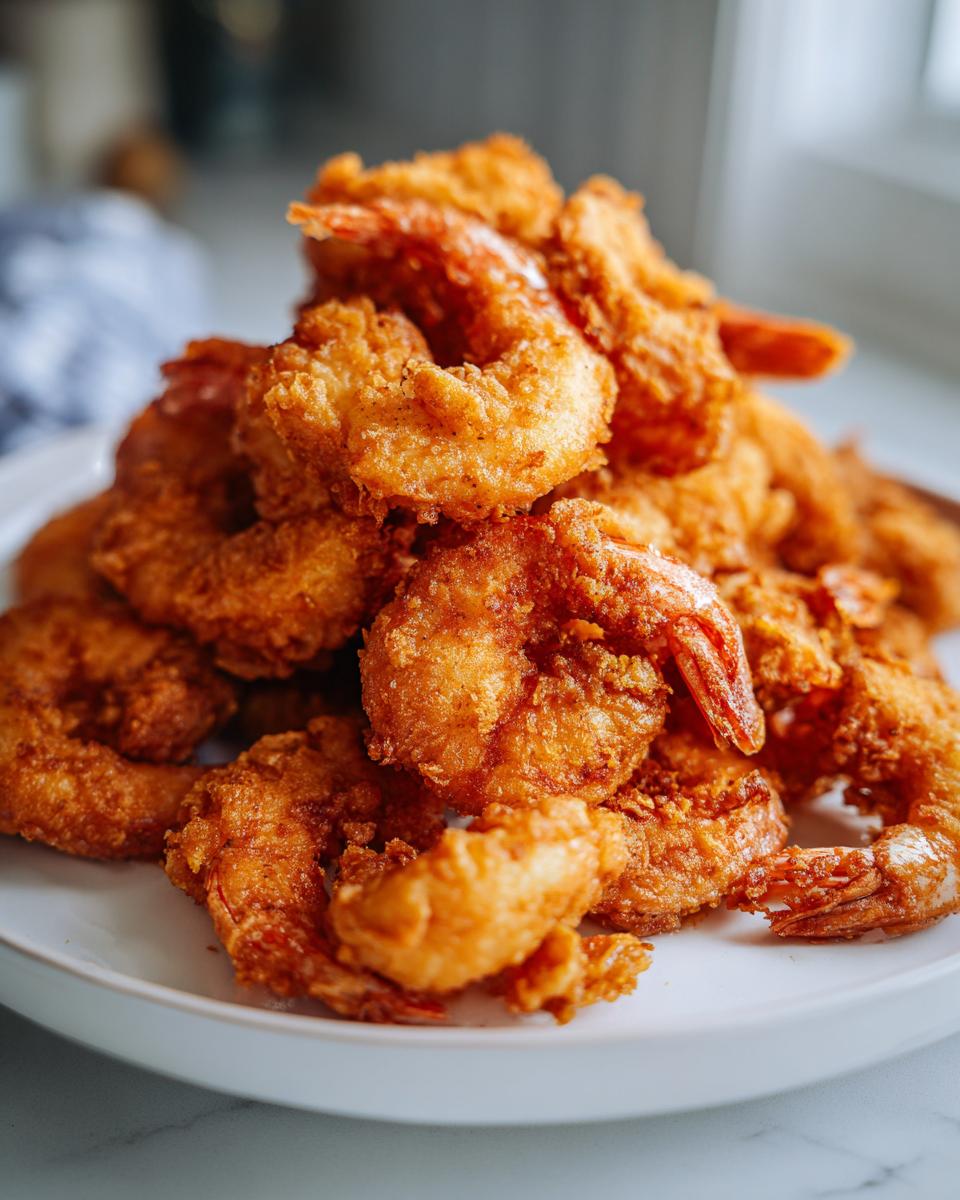
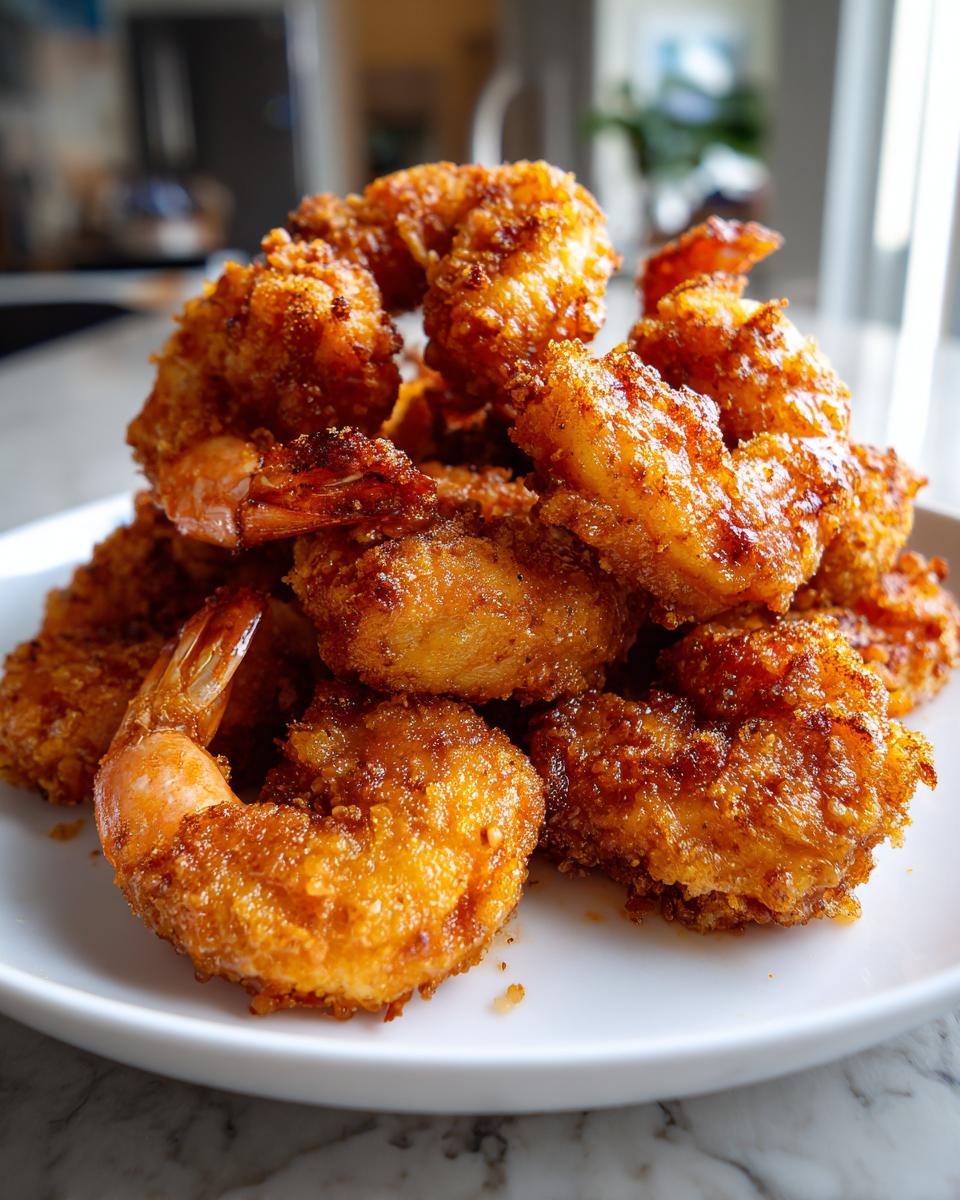
Pull those marinated shrimp out, letting a little extra buttermilk drip off, and immediately toss them into that flour mix. Press that mixture on gently but firmly so you build a decent crust. Shake off the excess—we want coating, not clumps! Immediately transfer them into the hot oil. They only take 2 to 3 minutes total to turn that perfect golden brown. As soon as they look ready, use a slotted spoon to lift them out and set them *immediately* on a wire rack set over paper towels for draining. Paper towels alone make the bottom steam; the rack lets air circulate and keeps that bottom crust crisp!
Southern Fried Shrimp Secrets and Tips for Success
Listen, I know you want those southern fried shrimp secrets that turn weeknight shrimp into something special. While the buttermilk and the oil temp are huge, there are a couple of other little things that really elevate the final product from good to absolutely unforgettable. These are the little cheats I picked up watching my auntie fry seafood years ago!
Pro Tip: Chilling Coated Fried Shrimp Before Frying
This step is so simple, yet it makes a massive difference in getting that robust, crunchy shell. Once you dredge those shrimp in the seasoned flour, don’t rush them straight into the oil. I actually place them—still coated—on that same wire rack and stick the whole tray into the freezer for about 10 minutes. Chilling the coating helps it adhere even harder to the wet shrimp surface as it hits the heat. It sounds weird, but that brief chill time solidifies the coating just enough so it fries up faster and stays put. It’s a game-changer for texture.
After that quick chill, they are ready for oil hotter than the surface of the sun!
If you wanted an extra burst of flavor alongside your shrimp, you absolutely must try making some of my famous fried cornbread to go with it! You can find the recipe for those amazing fried cornbread hoecakes right here.
Making Jumbo Fried Shrimp and Variations
Everybody loves a big piece of seafood, right? If you managed to track down some of those glorious, enormous shrimp—the ones they call ‘jumbos’—you might worry that this recipe won’t hold up. Don’t you worry one bit! This recipe is absolutely fantastic for making a jumbo fried shrimp recipe that feels special enough for a party. Since they are thicker, they just need an extra minute or so in that 360°F oil to make sure the center is perfectly cooked without burning the outside crust.
I usually give the jumbos about 30 seconds to a minute extra on each side compared to the regular ones. You aren’t frying them until all the shrimp are gone, so take your time just slightly with the bigger guys! Since you are putting in more effort to get those beautiful big shrimp, why not switch up the flavor profile too?
If you want to kick things up a notch and explore some spicy fried shrimp ideas, it’s super easy to adapt the dry coating. Instead of just relying on the cayenne in the wet marinade, try adding a teaspoon of smoked paprika or even a pinch of ground mustard powder right into your flour and cornstarch blend. It gives you a deeper, layered heat that works wonderfully with the sweet shrimp.
For an extra layer of flavor that’s become really popular lately, check out my recipe for Hot Honey Fried Shrimp. It takes this core crispy coating technique and adds that perfect sweet-spicy element right at the end. It turns regular fried shrimp into an absolute show-stopper!
Serving Suggestions and Best Dipping Sauce for Fried Shrimp
Once your fried shrimp are golden, crunchy, and perfectly seasoned, the next step is deciding how you’re going to serve this masterpiece! Honestly, these are so good right out of the fryer that they basically melt in your mouth as a quick, impressive appetizer. Just pile them high on a platter with some lemon wedges and watch them disappear. We love doing a big spread of appetizers like this for game nights or when folks drop by unexpectedly.
But if you’re turning this into a proper weeknight dinner, try spreading out some crunchy lettuce leaves, adding a few slices of ripe tomato, and piling those crispy beauties right on top. It makes for a surprisingly easy but totally satisfying homemade fried seafood platter!
The Best Dipping Sauce for Fried Shrimp: The Speedy Classic
You absolutely cannot have crispy shrimp without the perfect dunk. Everyone asks me what the best dipping sauce for fried shrimp is, and while I love fancy things, I usually default to the quick mix that tastes like it came straight from a seaside shack. You just need three things: mayonnaise, ketchup, and a solid dash of your favorite hot sauce. Mix those until you get that pale-orange color and taste it—adjust the hot sauce until it tickles your tongue just right.
It’s creamy, it’s tangy, and it cuts through the richness of the frying oil beautifully. If you happen to have some extra time, whipping up something smoky and sweet is also amazing. I have an excellent recipe for easy homemade honey BBQ sauce that makes these shrimp totally addictive, though it takes a little longer than our quick fry classic!
Simple Pairings to Complete Your Meal
Keep the sides simple so they don’t distract from that perfectly crunchy coating. For a traditional Southern vibe, you can’t beat creamy coleslaw and some fluffy hush puppies. If you want something a little lighter, a simple side of seasoned french fries or onion rings works perfectly. The goal here is to let that fantastic, crunchy shrimp shine as the star of the show!
Storage and Reheating Instructions for Crunchy Fried Shrimp
Oh, leftovers! It’s the eternal problem with anything deep-fried, isn’t it? If you’ve managed to save any of this fried shrimp—which, knowing how good it is, I highly doubt—you must treat it right if you want that crunch to come back. The absolute, number one rule of reheating crispy food is this: never, ever, ever use the microwave. I mean it! The steam generated in there turns that beautiful crust into sad, wet batter instantly. We are not doing that to our hard work!
The best way to save these beauties is to let them cool completely after the first fry. Once they are room temperature, place them in a container lined with paper towels—but don’t seal the lid tightly! You want some air circulation so no moisture gets trapped against that coating. An airtight container seals in the cooling steam, setting you up for failure later.
The Secret to Reheating Fried Shrimp to Restore the Crunch
If you are reheating the next day and craving that golden brown shrimp recipe perfection again, you need dry heat. I always reach for my oven or, even better, my air fryer if one is handy. Preheat your oven to a decent temperature, around 400°F. Spread the cooled shrimp out in a single layer on a baking sheet. Parchment paper is okay here, but a wire rack inside that baking sheet is even better because it lets the air circulate underneath them, re-crisping the bottom.
They only need about 5 to 8 minutes in that high heat. You’ll know they are ready when they sizzle lightly and you can hear that satisfying snap when you gently poke one. If you use the air fryer, you can usually get away with about 5 minutes at 380°F. Quick, hot, dry heat is the key to bringing your homemade fried seafood back to life without making it greasy. Enjoy those leftovers—they taste almost as good as the first batch!
Frequently Asked Questions About Your Fried Shrimp
I totally get it—when you try a new method, you always have a few lingering questions. Frying can feel a little intimidating, but honestly, once you nail down the temperature, you’re set for life! I’ve pulled together the questions I hear most often when people try this crispy fried shrimp recipe for the first time. Hopefully, this clears everything up so you can confidently make the best crunch frying method a kitchen staple!
Can I bake or air fry this fried shrimp recipe instead of deep frying?
That is such a common question, especially if you’re trying to keep things lighter! You absolutely *can* bake or air fry these, but I have to be upfront: the texture won’t be exactly the same as the deep fried shrimp technique we used here. Deep frying gives you that rich, all-over golden crust that is almost impossible to replicate otherwise. If you bake, you’ll need to spritz the coated shrimp heavily with oil and they will come out more ‘toasty’ than shatteringly crisp.
For the air fryer, you’ll get closer! Make sure to pre-chill those coated shrimp for those 10 minutes first, then spray them generously with cooking spray before cooking in a single layer. They come out pretty good, but for that true, restaurant style fried shrimp result, you need the oil bath.
What is the secret to making crunchy shrimp that stays crispy?
If I had to narrow down the absolute two biggest secrets to that lasting crunch, forget everything else and focus here! First, that oil temperature must be steady at 360°F. If it drops too low, the coating turns greasy fast. Second, and this one trips almost everyone up: chilling the shrimp *after* they have been fully coated in the flour mixture before they ever touch the oil is essential. That little chilling time lets that buttermilk-flour hug set into place, creating the ultimate barrier against sogginess. Follow those two steps, and you’ll have the crunchiest, most satisfying batch of fried shrimp ever!
If you’re looking for other great seafood ideas to round out a platter, my easy crab salad is a fantastic no-cook pairing!
Share Your Homemade Seafood Platter
Whew! You’ve done it! You have conquered the deep fryer and produced beautiful, golden, unbelievably crunchy fried shrimp. I have absolutely loved guiding you through these steps today, from the simple marinade to keeping that oil temperature steady. This amazing seafood dish is exactly what I aim for here at DelishCraze—taking something that seems hard, like that perfect restaurant style fried shrimp, and making it totally achievable in your own kitchen.
I truly hope this recipe brings a little bit of that seaside flavor right to your table. When you finish plating your gorgeous homemade seafood platter, please come back and let me know how it went! Leave me a rating right below the recipe card—it really helps other home cooks know what’s working. And if you want to read a little more about why I obsess over making simple, delicious food standards like this one accessible to everyone, you can always check out the story behind DelishCraze on our About page!
Happy frying, and enjoy every single crunchy bite!
PrintThe Ultimate Crispy Fried Shrimp Recipe
Make restaurant-quality, ultra-crispy fried shrimp at home using this simple technique featuring a buttermilk soak and seasoned coating. This recipe delivers golden, crunchy shrimp every time.
- Prep Time: 15 min
- Cook Time: 10 min
- Total Time: 55 min
- Yield: 4 servings 1x
- Category: Dinner
- Method: Deep Frying
- Cuisine: American
- Diet: Vegetarian
Ingredients
- 2 lbs large or jumbo shrimp, peeled and deveined
- 1 cup buttermilk
- 1 teaspoon salt
- 1/2 teaspoon black pepper
- 1/2 teaspoon cayenne pepper (optional)
- 1 1/2 cups all-purpose flour
- 1/2 cup cornstarch
- 1 tablespoon paprika
- 1 teaspoon garlic powder
- 1 teaspoon onion powder
- Vegetable oil, for frying
Instructions
- In a medium bowl, combine the buttermilk, salt, pepper, and cayenne pepper. Add the shrimp and toss to coat completely. Cover the bowl and refrigerate for at least 30 minutes, or up to 2 hours.
- In a separate shallow dish, whisk together the flour, cornstarch, paprika, garlic powder, and onion powder. This is your seasoned coating.
- Heat about 2 inches of vegetable oil in a deep, heavy-bottomed pot or Dutch oven to 360°F (182°C). Use a thermometer to monitor the temperature; maintaining this heat is key for crunch.
- Remove the shrimp from the buttermilk mixture, letting excess drip off slightly. Do not shake off too much liquid; you want some buttermilk residue to help the coating adhere.
- Dredge the shrimp thoroughly in the seasoned flour mixture, pressing gently to ensure the coating sticks well. Place the coated shrimp on a wire rack set over a baking sheet. Do not let them sit for long; move them quickly to the hot oil.
- Carefully place 6 to 8 shrimp into the hot oil, ensuring you do not overcrowd the pot, which lowers the oil temperature.
- Fry for 2 to 3 minutes per side, turning once, until the coating is deep golden brown and crispy.
- Remove the fried shrimp with a slotted spoon and place them immediately onto a clean wire rack set over paper towels to drain excess oil.
- Repeat with the remaining shrimp, allowing the oil temperature to return to 360°F between batches.
- Serve the crispy fried shrimp immediately with your favorite dipping sauce.
Notes
- For the best crunch, chill the coated shrimp on the wire rack for 10 minutes in the refrigerator before frying. This helps the coating set.
- If you want a Southern Fried Shrimp style, use a mix of flour and finely ground cornmeal in your dry coating instead of cornstarch.
- Serve with a simple dipping sauce made from mayonnaise, ketchup, and a dash of hot sauce.
Nutrition
- Serving Size: 6 shrimp
- Calories: 350
- Sugar: 2
- Sodium: 650
- Fat: 18
- Saturated Fat: 3
- Unsaturated Fat: 15
- Trans Fat: 0
- Carbohydrates: 25
- Fiber: 1
- Protein: 24
- Cholesterol: 180