
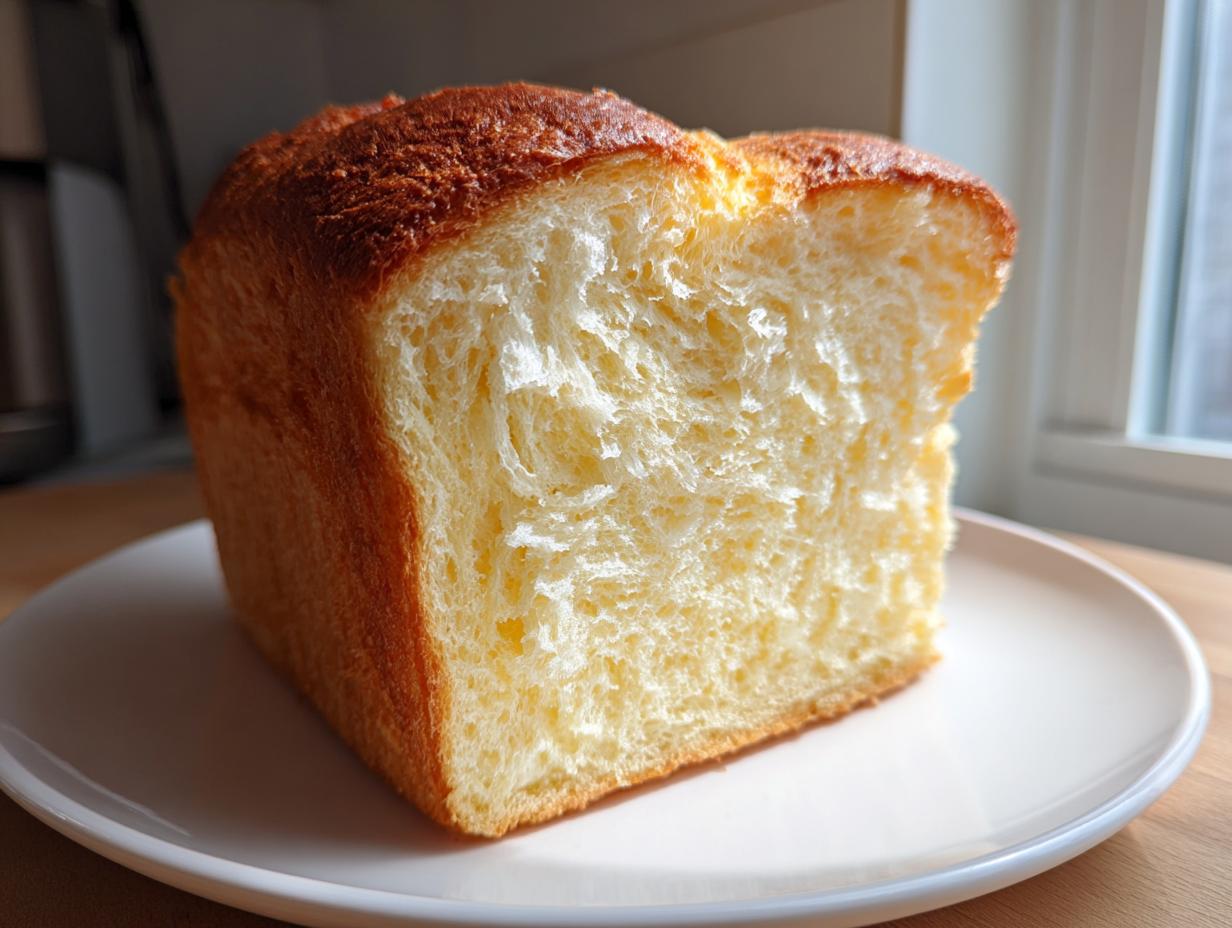
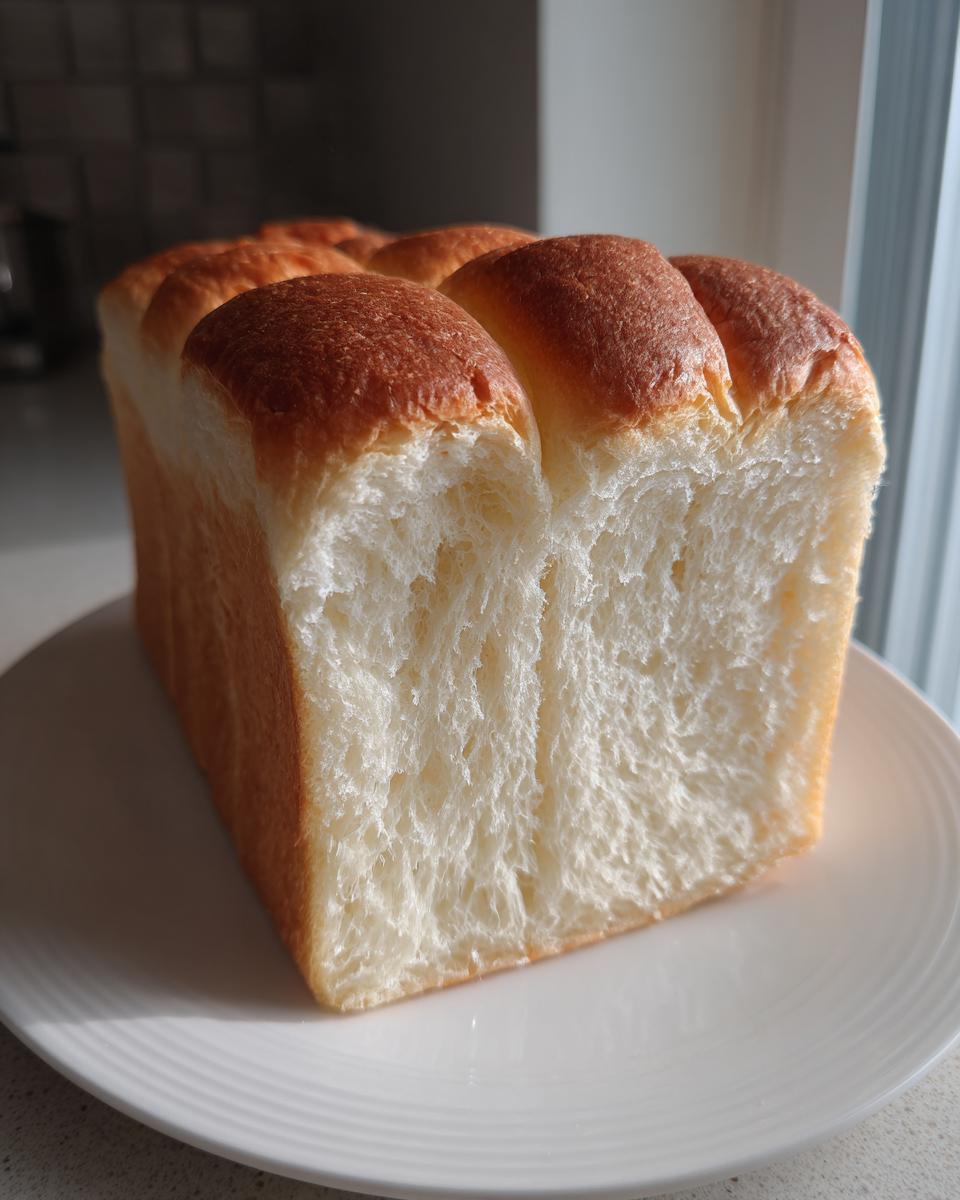
Oh my goodness, there is truly nothing more satisfying in the baking world than pulling apart a slice of bread that feels like a literal cloud, right? If you’ve been dreaming about that impossibly soft, pillowy texture you only find in the very best Japanese bakeries, well, stop dreaming! I have spent so much time tweaking and testing because I was determined to bring that magic right into your kitchen.
This is it—my ultimate guide to making real **japanese milk bread**, or Shokupan, using the famous Tangzhong method. Trust me, after trying this comprehensive **Asian bread recipe**, you won’t look at white bread the same way again. We’re making homemade perfection that truly holds up! If you’re looking for other amazing soft breads, my recipe for homemade pita bread is fantastic, but this Shokupan is something special. You absolutely need to see what they are doing over at Hokkaido style bread recipes for inspiration!
- Why This Tangzhong Bread Recipe Delivers the Best Japanese Milk Bread Ever
- Essential Ingredients for Your Japanese Milk Bread Loaf
- Step-by-Step Instructions to Make Shokupan at Home
- Baking the Perfect Japanese Milk Bread
- Tips for Success When Making Japanese Milk Bread
- Storage & Reheating Instructions for Bread That Stays Soft
- Serving Suggestions for Your Pillowy Bread
- Frequently Asked Questions About Japanese Milk Bread
- Understanding the Nutrition of This Homemade Bread
Why This Tangzhong Bread Recipe Delivers the Best Japanese Milk Bread Ever
Okay, so what is the real secret to getting that cloud-like, pillowy texture that makes **japanese milk bread** legendary? It all comes down to the Tangzhong. You need to make this little starter paste first! Tangzhong is just a simple mixture of flour, milk, and water cooked gently until it turns into this amazing, gelatinous pudding.
When you mix that cooked paste into your main dough, it traps moisture like crazy. That moisture is locked in there while baking, which is why this bread stays incredibly soft for days—seriously, it’s the secret to **bread that stays soft**!). If you’ve ever made my recipe for fluffy French toast, you know the magic that cooked starch can perform.
- It gives you that famous **Cloud Bread texture** you see all over Instagram.
- Your **Shokupan Recipe** stays perfectly fresh for 3-4 days at room temperature—no preservatives needed!
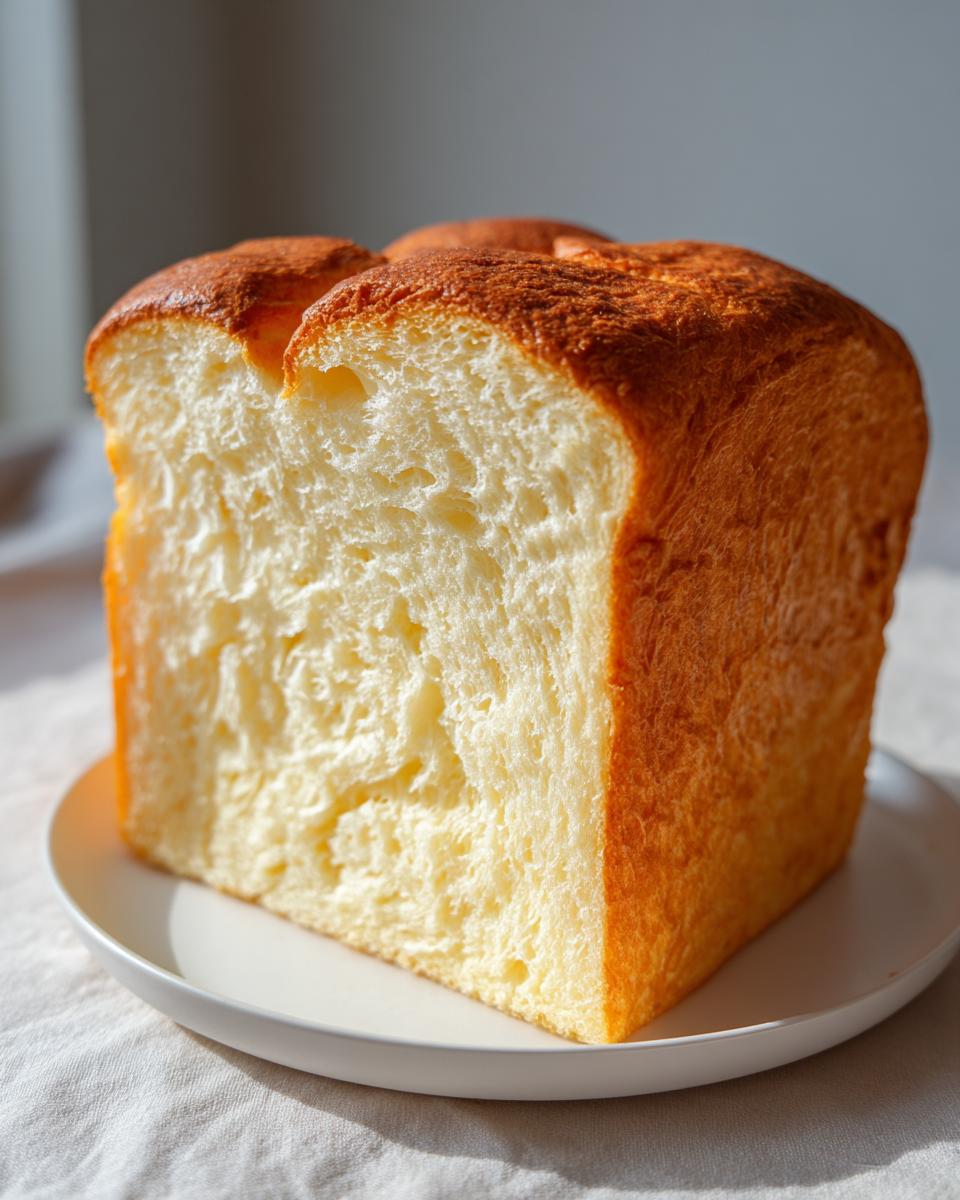
- It results in a rich, buttery crumb that melts in your mouth every single time.
I always tell people, if you want the truly supreme **soft homemade bread**, you have to trust the Tangzhong process. If you want more depth on this concept, check out why others love the Tangzhong milk bread technique!
Tangzhong vs Yudane Method Bread Comparison
You’ll hear people talk about the Yudane method too, and honestly, they are cousins in the soft bread family! Tangzhong is the cooked paste approach, which is what I use here because I find it gives me the most precise, consistent results for this recipe. Yudane, on the other hand, uses hot water poured over the flour to cook the starch right in the bowl. Both yield that incredible, tender texture we are chasing for our **Japanese Milk Bread Recipe**, but I stick with Tangzhong for my classic loaf.
Essential Ingredients for Your Japanese Milk Bread Loaf
Now that you know *why* this bread is so fluffy, let’s talk about what you actually need to wrangle together. This **japanese milk bread** recipe isn’t fussy, but the ingredients need to be precise, especially the flour! Since we rely so much on structure and those airy pockets, you absolutely need good quality bread flour. Don’t try this with all-purpose if you can help it; the higher protein makes a huge difference for that perfect structure.
I organize everything into two groups—what you need for the Tangzhong magic and what goes into the main dough. Measure everything out before you even turn on the stove, because once you start the Tangzhong, things move pretty quickly!
Ingredient Notes and Substitutions for Soft Homemade Bread
A few little details make this work perfectly. First, when it comes to the butter needed for your main dough, make sure it is truly softened—I mean, squishy soft, but not melted. If it’s cold, it won’t cream correctly with the sugar, and you’ll lose those air pockets we worked so hard to create in the Tangzhong!
When you measure your milk and egg for the dough, make sure they are at room temperature. Cold ingredients can shock the yeast and prevent a nice, steady rise, which will totally compromise how **fluffy bread** turns out. Also, we use instant dry yeast here; it whisks right in and doesn’t need proofing first, making this a much easier process overall. Don’t worry about swapping the milk though; this **sweet milk bread** really needs the full-fat dairy for that iconic flavor profile.
If you need a substitute for other things around your kitchen, I often use my homemade applesauce recipe in muffins, but for this bread, stick to the dairy. The richness is what makes the **Shokupan Recipe** shine. Seriously, don’t skimp on the high quality flour here!
Step-by-Step Instructions to Make Shokupan at Home
Alright, deep breath! This is where the real fun begins, and honestly, where we separate the okay bread from the utterly divine **japanese milk bread**. Don’t panic because of the steps; they just ensure every bite rivals what you’d find in a specialty spot. We need patience, especially when mixing, but the stand mixer does most of the hard work for us.
Preparing the Tangzhong: The Secret to Fluffy Bread
You have to start with the Tangzhong, remember? Put the small amount of bread flour, water, and milk into a little saucepan. And listen to me on this: use low heat. If you blast it, it will clump up instantly, and we want smooth, creamy magic. Stir constantly—I mean, don’t walk away—until it starts looking like thick pudding. Seriously, that thick paste is your goal! Once it’s done, yank it off the burner right away. Cover the top surface directly with plastic wrap—that’s vital so a dry skin doesn’t form. Then, you have to let this cool completely. I usually put mine in the fridge for about 30 minutes just to speed things up. It must be room temperature before it meets the rest of the dough!
Mixing and Kneading the Japanese Milk Bread Dough
Grab your mixer bowl! First, toss in all your dry stuff: the rest of the flour, salt, sugar, and the yeast. Give it a quick, lazy spin on low speed just to mingle everything together. Now, in go the wet ingredients: the cooled Tangzhong paste, the cold milk, and your egg. Mix this on low until it stops looking like a shaggy mess and starts pulling together into a dough mass. This takes maybe 5 minutes. If you’re pairing this bread with something savory later, like a roasted main, my recipe for creamy garlic lemon chickpea soup would be fantastic!
Next comes the serious kneading, which is non-negotiable for the best **japanese milk bread**. Once the dough cleans the sides of the bowl slightly, start adding that softened butter, piece by sticky piece. It seems slow, but you need to incorporate each bit before adding the next. Keep kneading on medium-low for a solid 10 to 15 minutes after the butter is gone. You are looking for the windowpane test. Take a tiny bit of dough, gently stretch it out between your fingers—if you can stretch it thin enough that light shines through without the dough immediately tearing? Bingo! That means the gluten structure is perfect for holding all that beautiful milkiness.
Proofing and Shaping Your Milk Bread Rolls or Loaf
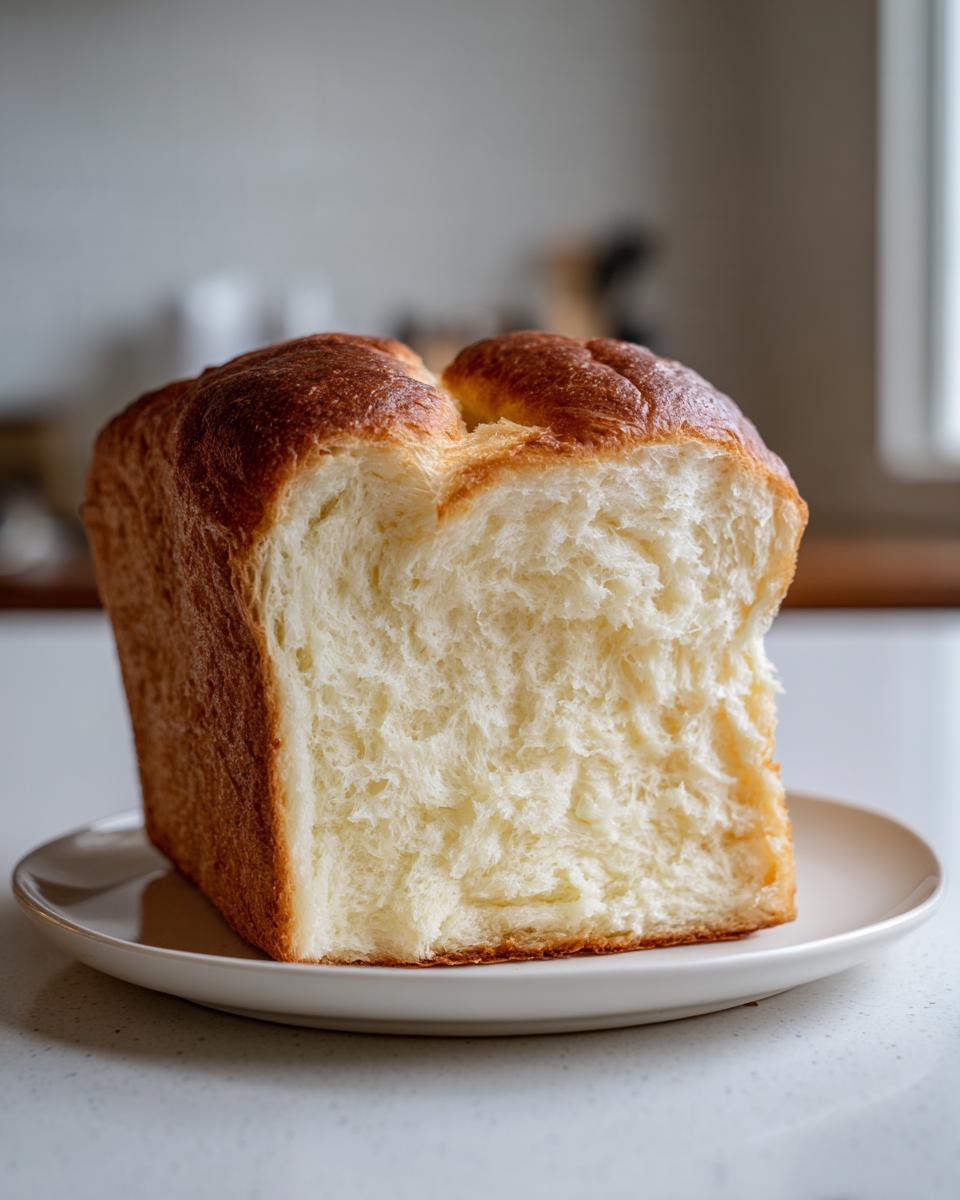
Once you ace that windowpane test, put the elastic dough into an oiled bowl and cover it up. Let it rest in a warm spot until it has doubled, usually about an hour to 90 minutes. When it’s ready, gently press the air out—don’t punch it hard; we want to preserve some of those air bubbles we worked hard to develop! Now, you can make your **milk bread rolls** or shape the loaf.
For the classic look, divide the dough into three equal chunks. Roll each one into a tight little log. Set those logs side-by-side in your greased loaf pan. Don’t crowd them too tightly yet! Cover everything loosely and let it proof a second time. This second rise is key; wait until the dough has puffed up nicely and is cresting about an inch over the top rim of the pan. If it’s not high enough, it’ll bake short and squat. If you’re looking for great roll ideas, check out how they shape things over at Joyous Apron for milk bread rolls!
While that second proof is happening, you should be preheating that oven. Seriously, paying attention to that second rise is just as important as the first!
Baking the Perfect Japanese Milk Bread
This is the moment of truth! After all that kneading and waiting, we finally get to the oven. Remember how we talked about the importance of the second rise? Make sure your dough has puffed up nicely and is almost touching the top of your pan—that visual cue tells you it’s ready to bake.
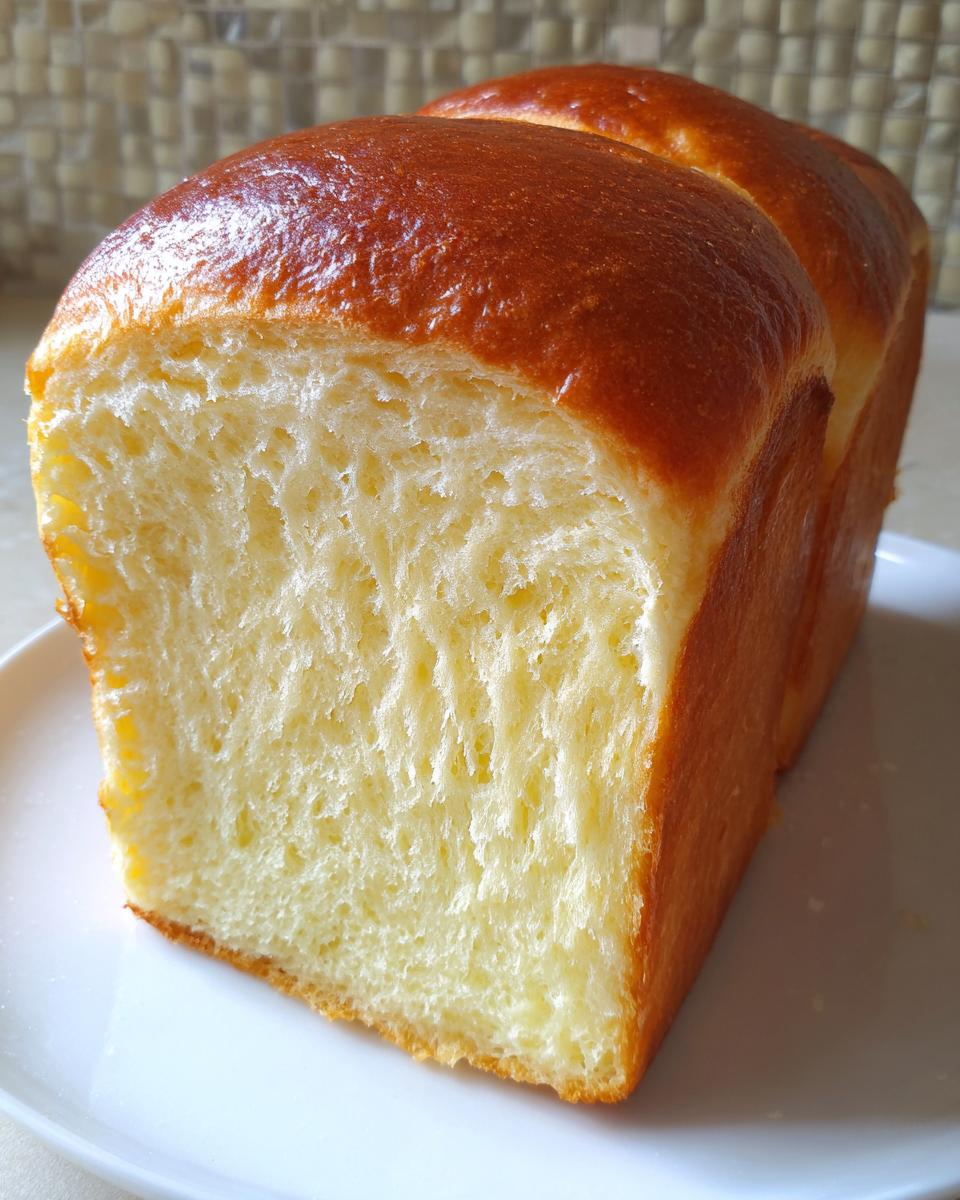
Preheat your oven to 350°F (175°C). Give that top crust a little love if you want a beautiful golden seal; I whisk one egg with a splash of milk—that’s our optional egg wash. A light brush over the top gives the **milk bread loaf** that gorgeous sheen reminiscent of a professional Japanese bakery. Don’t let the wash pool near the edges, though, or the crust can get too thick!
Bake this beauty for about 30 to 35 minutes. Now, here’s the pro tip that separates good baking from *great* baking—don’t just rely on the color. While a golden top is lovely, the real indicator of doneness for this rich bread is the internal temperature. Stick an instant-read thermometer right into the center (avoiding the pan sides) and you are looking for 200°F (93°C). If you hit that number, you know you’ve cooked the Tangzhong starch perfectly, and your **fluffy bread** won’t collapse.
If you are having trouble getting juicy results in your oven in general, sometimes a simple method like my oven-baked BBQ chicken thighs can help you practice temperature control! But honestly, once you nail the 200°F mark on this **japanese milk bread**, you’ll never look back. Don’t forget to cool it properly on a wire rack right away so the bottom doesn’t get steamy and soft!
Tips for Success When Making Japanese Milk Bread
Listen, I’m not going to lie, making **japanese milk bread** involves dough that feels a little… different. It’s going to feel much wetter and sticker than your standard pizza dough, even after all that kneading. That’s okay! If you are using a stand mixer, resist the urge to dump a ton of extra flour in just because it’s sticking to the sides early on. If you add too much flour now, you’re going to negate all the incredible moisture built up by the Tangzhong, and your final loaf won’t be that **pillowy bread** we are aiming for.
Patience during the kneading process is your absolute best friend here. I know I mentioned 10 to 15 minutes after the butter is added, but if your mixer sounds like it’s struggling, just let it rest for five minutes and then get back to it. We need that high elasticity, and that takes time. If you stop too soon, the bread will feel heavy, and you won’t get that signature airy crumb. Think of it like a workout for your dough!
Another crucial step that people sometimes mess up when trying to make this **soft homemade bread**? The cooling! As soon as that loaf comes out of the oven, you must turn it out of the pan onto a wire rack immediately. If you leave it sitting in that hot metal pan, the trapped steam underneath is going to condense, and you will end up with a soggy, gummy bottom crust. We want golden elegance, not steamed mush, right?
If you want a dip ready for when you slice that warm loaf, you should try my recipe for whipped ricotta dip—it is surprisingly good with slightly sweet bread!
And seriously, when you are shaping those rolls or logs for the loaf pan, roll them tightly! Tight shaping creates surface tension, which helps the dough hold its shape beautifully during the final proof and bake. For more ideas on shaping, especially if you’re tackling those **Japanese Milk Bread Rolls**, I always check out what the folks at River Ten Kitchen are doing. Master these three things—don’t add too much flour, knead long enough, and cool immediately—and you’ve mastered Shokupan!
Storage & Reheating Instructions for Bread That Stays Soft
One of the absolute best parts about making **japanese milk bread** with the Tangzhong method is that you get more than just one great day! Unlike regular white bread that gets stale faster than you can blink, this loaf truly lives up to the hype of being **bread that stays soft**. You earned this fluffy perfection, so let’s make sure it lasts!
The number one rule for storage is: keep it wrapped tightly at room temperature. Do not put this in the fridge! I know, I know, we often refrigerate things to make them last longer, but the fridge actually speeds up staling in bread rich in dairy and sugar like this. Instead, wrap the entire cooled loaf tightly in plastic wrap—I usually use two layers just to be safe—and keep it tucked away on the counter. If you made rolls, keep them together in a sealed container.
Because this is all-natural, it won’t last forever, but you should easily get 3 to 4 days of amazing, pillow-soft slices. If you somehow manage to have leftovers after that, you can absolutely freeze it! Just make sure it’s wrapped super tightly in plastic wrap first, and then maybe put it inside a freezer bag to prevent freezer burn. This locks in that wonderful moisture.
Reheating for That Fresh-Baked Feel
Okay, so you’ve waited a couple of days, and now you want that melt-in-your-mouth experience again. We are going to bring it back to life! You don’t need to microwave the whole loaf, just the slice you are about to eat. Microwave time is dangerously short for bread; you turn your back for three seconds and you go from soft to rubbery!
Here’s my trick for the perfect warm slice: Lightly brush the piece of homemade bread with a tiny bit of water or milk right before tossing it in the toaster oven or a dry skillet over medium-low heat. Pop it in for just a minute or two. That tiny bit of moisture essentially steams lightly as it heats up, making the Tangzhong work its magic one more time. It comes out soft on the inside, perfectly toasted on the outside, ready for butter or jam. It tastes almost exactly like you just pulled it out of the oven!
If you are looking for something to pair with your perfectly reheated slice, I have an easy recipe for homemade applesauce that is fantastic on warm, sweet bread!
Serving Suggestions for Your Pillowy Bread
Now comes the fun part: eating this gorgeous **japanese milk bread**! Honestly, you could just sit there and eat it plain, tearing off little pieces while it’s still warm from the cooling rack because it is that good. But I want you to see how versatile this **pillowy bread** really is. Its mild sweetness and incredible texture mean it works for just about any meal.
For breakfast? Forget that dry, boring stuff from the grocery store. Slice this **Shokupan Recipe** thickly—I mean, really thick—brush with some melted butter, and toast it until it’s just lightly golden. It takes toast to a whole new level; seriously, call it ‘Cloud Toast.’ That airy interior holds up beautifully to toppings, too!
When it comes to lunch, this makes the most tender sandwiches you can imagine. Because the crumb is so dense and yet so light, it doesn’t fall apart when you fill it with savory fillings. It’s wonderful with egg salad, or if you want something richer, try it with sliced ham and Swiss cheese. If you are looking for a great savory dish to eat alongside your bread, my creamy Caesar chicken recipe pairs surprisingly well with a slightly sweet dinner roll version of this bread!
And don’t forget dinner! If you shaped this as **Milk Bread Rolls**, they are the perfect accompaniment to any big meal or soup night—way better than standard yeast rolls. They are buttery enough on their own, but a tiny swipe of salted butter right before serving makes them irresistible. Honestly, once you taste how soft this **Asian bread recipe** is fresh from the oven, you’ll be looking for excuses to bake another loaf immediately!
Frequently Asked Questions About Japanese Milk Bread
I know tackling a new bread technique like Tangzhong can sound intimidating, but don’t let it scare you off! Most of the questions I get are about technique or longevity, so let’s clear those up right now so you feel confident walking into the kitchen to make this amazing **japanese milk bread**.
Can I use the Yudane Method instead of Tangzhong for this japanese milk bread?
Yes, you absolutely can! The Yudane method works on the same principle: scalding the starch to lock in moisture. The main difference is how you achieve that paste. With Tangzhong, which I used in the primary recipe above, you cook the flour/liquid mixture on the stovetop until it thickens into a pudding. With Yudane, you just pour boiling water directly over the flour and stir immediately until it gels. Both methods create phenomenal **soft homemade bread**, but I just find the controlled stovetop method for Tangzhong easier to measure precisely for beginners.
How long does this fluffy bread stay soft?
This is the magic of the Tangzhong, my friend! Because that cooked starch paste holds onto water so well, this **fluffy bread** definitionally lasts longer than standard bread. If you wrap it tightly at room temperature (remember, no fridge!), you should expect it to stay perfectly soft and cloud-like for a solid three to four days. That’s why it’s perfect for making a full **milk bread loaf** on Sunday and still having amazing toast all week long. Try slicing it thin and using it for your next round of French toast—it’s incredible!
Is this sweet milk bread recipe difficult for beginners?
I completely understand why you might think so because of the term “Tangzhong,” but please don’t stress! While it does have one extra (but simple!) step compared to a standard white bread recipe, this is actually an **Easy Milk Bread** project if you follow the instructions carefully. The stand mixer handles all the hard work of kneading that long process, and as long as you watch that Tangzhong paste carefully so it doesn’t burn, you’ll be totally fine. If you are nervous, try making a small batch of **Milk Bread Rolls** first; they bake up faster and build your confidence!
If you’re looking for a great savory dip to serve alongside your fresh loaf, you have to try my recipe for creamy garlic sauce; it’s fantastic for dipping soft dinner rolls!
Understanding the Nutrition of This Homemade Bread
Listen, I know a lot of you are tracking macros or just want to know what you’re feeding your family, and that’s smart! We’ve created this decadent **japanese milk bread** using quality ingredients, but because baking at home means you control everything—down to the brand of butter or percentage of whole milk—the final numbers can shift around quite a bit.
So, just keep this in mind: the nutritional information I provide on this page (which you might peek at below or in a linked section) is always just an estimate, okay? It’s a helpful guide based on the specific amounts listed in the recipe card.
If you end up using a richer butter or decide to brush on extra egg wash, or if you make **milk bread rolls** instead of a full loaf, those numbers will change! Treat the listed data as an educated guess rather than a precise lab result. The most important thing is that you know you are keeping those scary preservatives out of your house! That’s why making your own **white bread recipe** is always the best choice.
If you are looking for a healthier beverage pairing for your bread, you have to try my recipe for quick homemade chocolate milk—it tastes amazing and is way better than anything store-bought!
PrintThe Ultimate Soft and Fluffy Japanese Milk Bread (Shokupan) Recipe using the Tangzhong Method
Make Shokupan, the famous Japanese Milk Bread, known for its cloud-like, pillowy texture and milky flavor. This recipe uses the Tangzhong method to keep your bread incredibly soft and moist for days.
- Prep Time: 45 min
- Cook Time: 35 min
- Total Time: 2 hr 20 min
- Yield: 1 loaf (about 12 slices) 1x
- Category: Baking
- Method: Baking
- Cuisine: Japanese
- Diet: Vegetarian
Ingredients
- 10g Bread Flour (for Tangzhong)
- 50ml Water (for Tangzhong)
- 50ml Milk (for Tangzhong)
- 250g Bread Flour (for Dough)
- 30g Granulated Sugar
- 4g Instant Dry Yeast
- 4g Salt
- 40ml Milk (for Dough)
- 30g Unsalted Butter, softened
- 1 Large Egg, lightly beaten
Instructions
- Prepare the Tangzhong: In a small saucepan, whisk together the 10g bread flour, 50ml water, and 50ml milk until smooth. Heat over low heat, stirring constantly, until the mixture thickens into a paste (about 170°F or 77°C). It should resemble thick pudding. Remove from heat, cover the surface directly with plastic wrap to prevent a skin from forming, and let it cool completely to room temperature.
- Mix Dry Ingredients: In the bowl of a stand mixer fitted with the dough hook, combine the 250g bread flour, sugar, yeast, and salt. Mix briefly on low speed to combine.
- Add Wet Ingredients: Add the cooled Tangzhong, 40ml milk, and the beaten egg to the dry ingredients. Mix on low speed until a shaggy dough forms.
- Knead: Increase the speed to medium-low and knead for about 5 minutes until the dough starts to come together.
- Incorporate Butter: Add the softened butter, piece by piece, allowing each piece to incorporate before adding the next. Continue kneading on medium-low speed for another 10 to 15 minutes. The dough should become very smooth, elastic, and pass the windowpane test (you can stretch a small piece thin enough to see light through it without tearing).
- First Proof: Place the dough in a lightly oiled bowl, turning to coat. Cover the bowl and let it rise in a warm place until doubled in size, about 1 to 1.5 hours.
- Shape the Loaf: Gently punch down the risen dough. Divide the dough into three equal pieces (for a standard loaf pan) or shape as desired for rolls. Roll each piece into a tight log. For a Pullman loaf, place the three logs side-by-side in a greased 9×5 inch loaf pan.
- Second Proof: Cover the pan loosely with plastic wrap or a clean towel. Let the dough proof again in a warm place until it has nearly doubled and crests about 1 inch over the rim of the pan, about 45 to 60 minutes.
- Bake: Preheat your oven to 350°F (175°C). Brush the top of the dough lightly with an egg wash (optional, for color). Bake for 30 to 35 minutes, or until the top is golden brown and the internal temperature reaches 200°F (93°C).
- Cool: Immediately remove the bread from the pan and cool completely on a wire rack before slicing.
Notes
- For an even softer crust, brush the top of the hot loaf with melted butter immediately after removing it from the oven.
- If you are making rolls, shape them into tight balls and place them close together in a baking dish for a pull-apart effect.
- This bread stays soft for several days due to the Tangzhong; store it tightly wrapped at room temperature.
Nutrition
- Serving Size: 1 slice
- Calories: 150
- Sugar: 6
- Sodium: 150
- Fat: 4
- Saturated Fat: 2
- Unsaturated Fat: 2
- Trans Fat: 0
- Carbohydrates: 24
- Fiber: 1
- Protein: 5
- Cholesterol: 25