
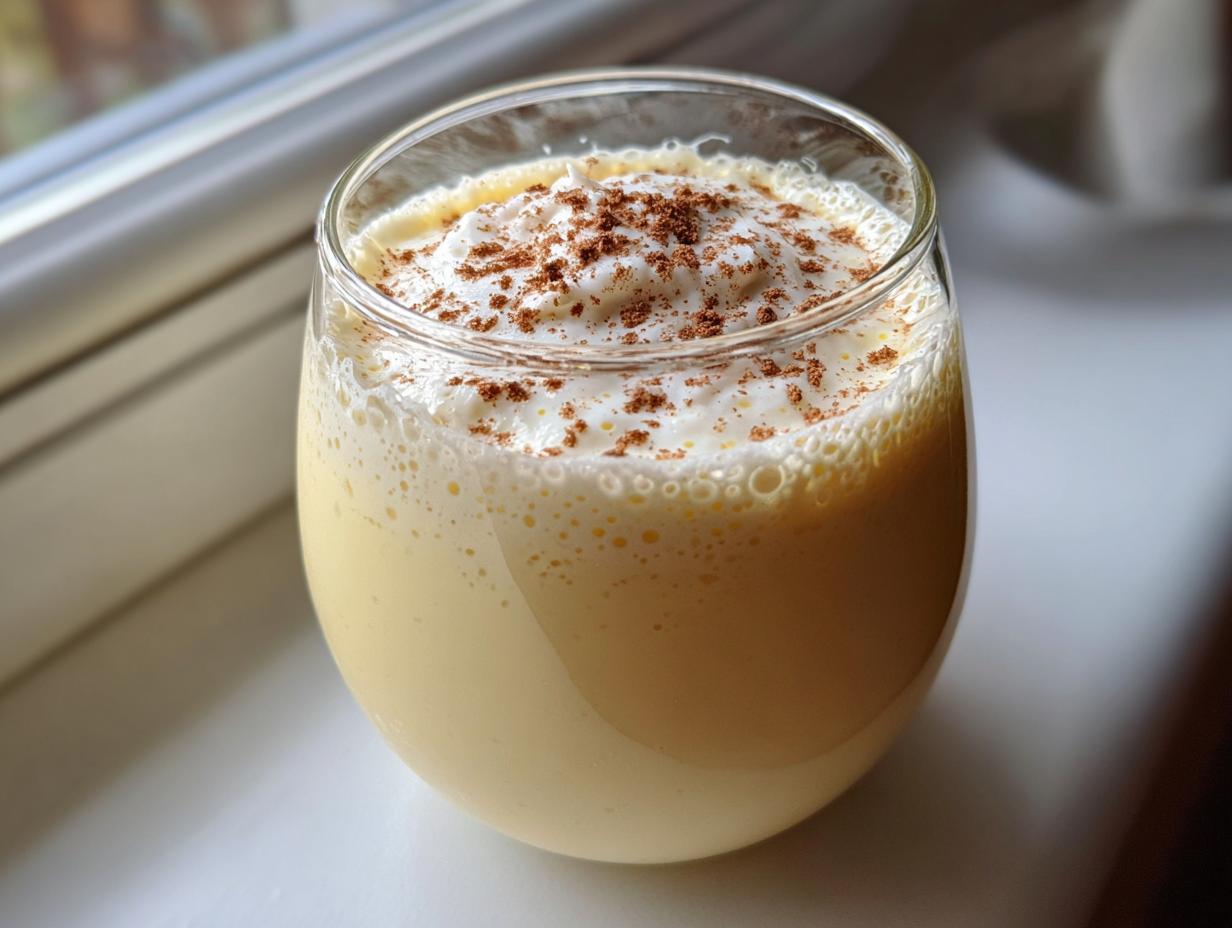
There is just something about that first sip of rich, spiced holiday drink that brings the whole season into focus, right? Forget those watery, sad cartons you find after Thanksgiving; we’re making the ultimate, classic, creamy homemade eggnog from scratch. This is the recipe that Olivia Rosewood perfected, ensuring that even when life gets hectic, you can still create that deep sense of connection and comfort in your own kitchen. Trust me, once you taste this velvety smooth eggnog, you’ll be making it every single year, and we’ve got easy directions for both the spiked version for adults and a perfect non-alcoholic option for everyone else.
- Why This Classic Creamy Homemade Eggnog Recipe is Your Holiday Must-Make
- Gathering Ingredients for the Best Homemade Eggnog Recipe
- Step-by-Step Instructions for Perfect Stovetop Eggnog
- Making Your Spiced Eggnog Recipe Alcoholic or Virgin
- Tips for the Ultimate Homemade Eggnog Experience
- Storage and Make Ahead Eggnog Instructions
- Frequently Asked Questions About Classic Christmas Drink Eggnog
- Estimated Nutritional Data for This Creamy Holiday Beverage
- Share Your Perfect Eggnog Creation
Why This Classic Creamy Homemade Eggnog Recipe is Your Holiday Must-Make
I’ve tested countless holiday drink solutions, and this one just *wins* every time. People think making real eggnog is hard, involving scary raw eggs or thin, overly sweet bases. Well, we’re ditching those myths with this tried-and-true, old-fashioned method. When you cook the base properly, you unlock a rich flavor and texture that nothing store-bought can touch.
This recipe delivers everything you want in a festive drink. You should absolutely bookmark this one for easy reference, maybe even checking out how others have made similar amazing creations here. This homemade eggnog is what Christmas tastes like!
- It’s genuinely velvety smooth—no grittiness, just pure holiday comfort coating your tongue.
- The spice blend is perfectly balanced; it’s warmly spiced without tasting like cough syrup.
- It sets up beautifully when chilled, turning into that coveted, thick, custardy consistency that makes you swoon.
- It’s completely adaptable, working perfectly for your kids’ party or your cocktail hour.
Achieving Velvety Smooth Eggnog Texture
The secret to avoiding that thin, watery texture everyone hates is ensuring we cook those egg yolks correctly. We temper them gently over low heat, which is just cooking them enough to thicken the milk and cream base into a custard. This process pasteurizes the eggs while creating microscopic stability in the drink. Trust me, once you see that mixture coat the spoon perfectly, you’ll feel like a culinary wizard!
Gathering Ingredients for the Best Homemade Eggnog Recipe
Okay, this next part is critical; you can’t rush quality when making something this classic. Lay out all your measuring cups because we need precision here. I want you to focus on fresh ingredients—especially the spices! Before you grab your nutmeg shaker, if you can grind it fresh, do it; the smell alone makes this homemade eggnog taste 10 times better. Having fun browsing those other great ideas? You can see how seriously folks take their mixers over here.
You need six large egg yolks—yes, yolks only for that richness! We use both whole milk and heavy cream because we aren’t messing around; we want creamy luxury, not skim milk sadness!
Ingredient Notes and Substitution Guidance
Since this recipe is so foundational, ingredient choices really shout in the final flavor of your eggnog. If you’re making the spiked version—and honestly, why wouldn’t you?—I love using a good bourbon; it adds lovely vanilla depth. Dark rum is also beautiful with these spices. If you’re skipping the spirits entirely for the kids, no sweat! Just leave out step six; it makes a fantastic non-alcoholic version.
Also, a quick shout-out regarding milk: please use whole milk, not low-fat. We need that fat content to carry all the beautiful spice notes. Don’t worry about getting fancy with obscure spices; the nutmeg, cinnamon, and cloves are the standard trio that sings best here.
Step-by-Step Instructions for Perfect Stovetop Eggnog
Now for the fun part, though it requires a bit of dedicated stirring! Remember, we are gently making a cooked custard here, not scrambling our precious yolks. Patience is your best friend during the cooking phase. If you’ve ever had trouble making creamy scrambled eggs, you know that constant motion saves the day, and that applies here too! You can check out my tips for perfect eggs right here if you feel nervous about this cooking part.
The Crucial Step: Cooking the Egg Base
Get your saucepan over medium-low heat—and I mean *low-medium*. We are not rushing this, ever! Begin whisking that yolk, sugar, and salt mixture until it’s pale and smooth, then slowly whisk in the whole milk. Now, stand there and stir constantly with a wooden spoon or a heatproof spatula. You need to scrape the bottom and edges constantly! After about 10 to 15 minutes, test it: Dip your spoon in and run your finger across the back. If the line stays clean and the mixture coats the spoon without running off immediately, bam—it’s done. Never, ever let this boil, or you’ll have bits!
Chilling and Flavor Development for Rich Eggnog
Once it coats the spoon, take that pan *off* the heat immediately! Stir in your cream and all those wonderful spices like cinnamon and nutmeg. The next move is vital for that velvety smooth eggnog we crave: pour the whole mixture through a fine-mesh sieve into a clean bowl. This catches any tiny bit of cooked egg that might have formed, giving you that perfect, luxurious finish.
After straining, cover it up tightly. This is where the magic happens. You must chill it for at least four hours, but seriously, make it the day before! Overnight chilling lets the flavors deepen beautifully and really thickens the drink into that rich, custardy texture everyone talks about.
Making Your Spiced Eggnog Recipe Alcoholic or Virgin
This is where you make the final call—do you want a festive kick or a family-friendly treat? It’s so easy to customize this recipe right at the end, which is one of the reasons I love starting with a cooked base. The wonderful, warm spices are already infused, so we just need to decide if we’re adding the spirits or keeping things strictly cozy and non-alcoholic.
If you are spiking it, wait until *after* you’ve removed the mixture from the heat and strained it. You stir in about a cup of your chosen spirit right before chilling. Seriously, test your options! A good quality bourbon brings out the sweetness in the sugar notes, but a dark rum gives it that ancient, traditional holiday punch. If you want to check out how I handle spirits in another festive drink, take a peek at my strawberry daiquiri tips here.
For the adults who love that deep, oaky finish, a bourbon eggnog is amazing. You can see a fantastic take on that flavor profile in this resource. For everyone else? Just skip step six entirely, cover that bowl, and go stick it straight into the fridge. It will be just as delicious and safe for absolutely everyone to enjoy!
Tips for the Ultimate Homemade Eggnog Experience
Now that you have this gorgeous, creamy base, let’s talk about taking your homemade eggnog from great to absolutely legendary at your next holiday gathering. My biggest secret, which I learned from avoiding flat, dusty pre-ground spices in everything else, is grating your nutmeg fresh! It just has a brightness that pre-ground stuff loses immediately. Don’t be afraid to rely on this recipe; it’s so stable that you can even adjust the thickness by chilling it longer for a super thick eggnog consistency.
Plus, if you happen to love baking spicy desserts, you can see how I use similar warm spices in my famous spice cake here!
Serving Suggestions for Your Festive Winter Drinks
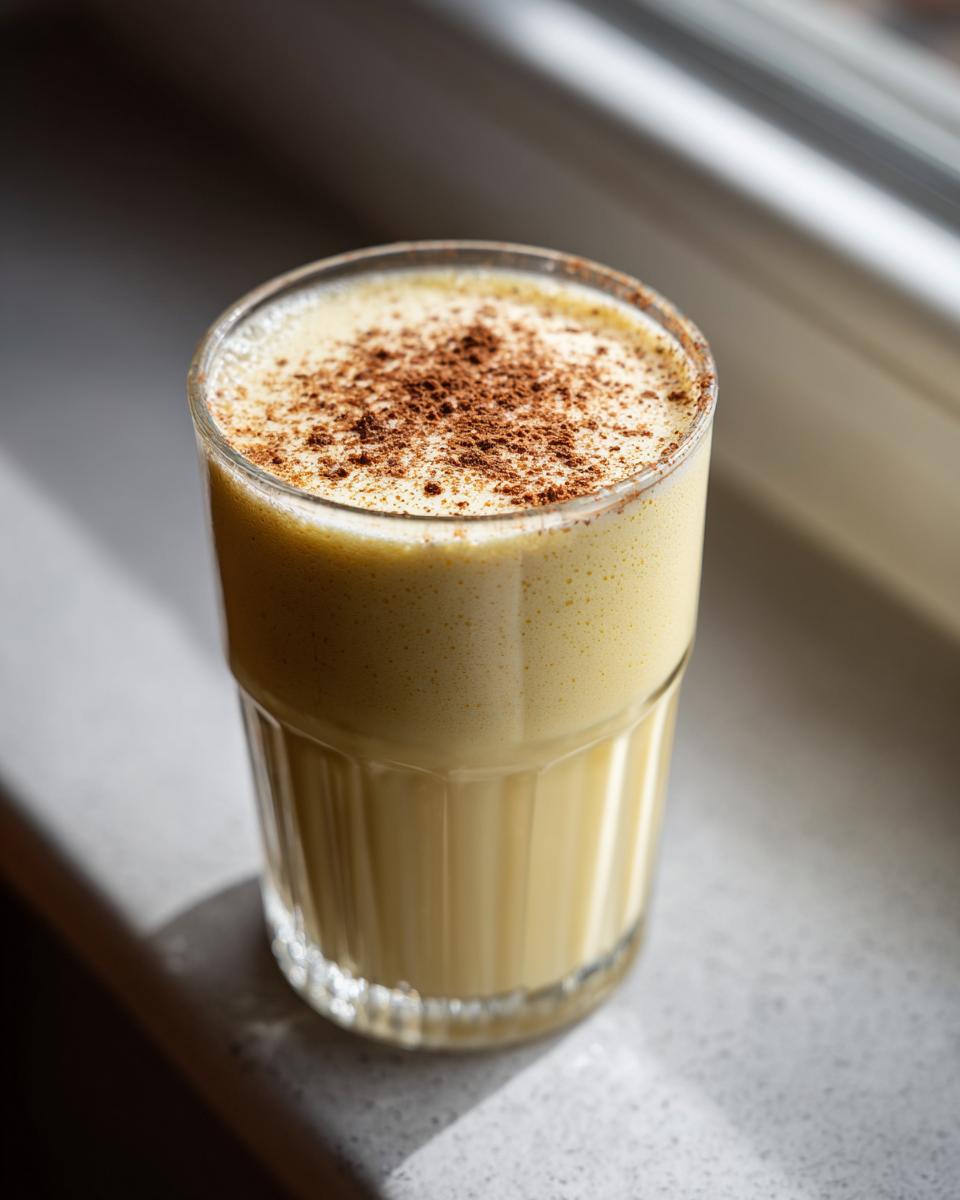
Presentation seriously matters during the holidays, even for drinks! When you pour your chilled eggnog, make sure you dust that top generously with a final grate of nutmeg right before handing it over. Seriously, it makes it look professional.
I love serving this rich drink alongside something slightly crisp to cut through the creaminess. Think about pairing it with simple, buttery shortbread cookies or maybe even my easy cranberry brie bites! It’s the perfect sweet and savory moment for any festive occasion.
Storage and Make Ahead Eggnog Instructions
This is truly a lifesaver during crazy holiday weeks: you can absolutely make this ahead of time! In fact, I highly encourage it. Remember how I kept talking about chilling overnight? That’s not just for flavor; that extra time in the fridge helps this already creamy mixture thicken up even more. You seriously won’t believe how luxurious it gets in the morning.
Once you’ve cooked and strained your mixture—and added your bourbon if you’re spiking it—pour it into an airtight container. You can use a big glass pitcher or even Mason jars if you’re making smaller batches. Keep it tucked away in the coldest part of your refrigerator. This recipe, because we cooked the eggs, is quite stable, and it lasts beautifully for about five days.
It’s the absolute best way to prep for a big party. You focus on the appetizers and decorating earlier in the week, knowing your show-stopping beverage is already done and just needs a good whisk before serving. If you’re looking for other great make-ahead kitchen wins, you should check out my easy make-ahead egg muffin recipe right here.
It does settle a bit when it sits, that’s natural, so the most important final step is giving it a really hard whisk—or even pulsing it quickly in a blender—before you pour it into the glasses. That brings back all that beautiful, thick airiness. For those of you watching dairy intake, you can see how others adapt holiday drinks over here, but for our classic version, chilling equals perfection!
Frequently Asked Questions About Classic Christmas Drink Eggnog
I know you probably have a few last-minute worries when diving into a new holiday recipe, especially when it involves dairy and eggs! That’s totally normal. We want this festive winter drink to be perfect and safe for everyone at the party. Since we’re aiming for that thick, custardy texture, people often ask about consistency and safety—so let’s tackle those common hurdles right now. You’ve got this!
If you are looking for other great holiday kitchen wins, you should check out my recipe for easy homemade toffee right here!
Is it safe to use raw eggs in eggnog?
That’s a fantastic question and one I get asked every single year about homemade eggnog! The short answer for *this* recipe is no, you aren’t drinking raw eggs here. We are past the scary raw egg stage! Remember Step 3 where we cooked the yolk mixture until it coats the back of a spoon? That gentle cooking process actually cooks the yolks through, making this a much safer preparation than eggnog recipes that skip cooking altogether. You get all the traditional richness without the worry, giving you peace of mind for your holiday gatherings.
How can I make my chilled eggnog even thicker?
If you followed the directions and chilled it overnight, and it still seems a touch thinner than you hoped, don’t panic! The best way to guarantee a truly thick eggnog is really just time. The longer the mixture sits in the fridge—up to 24 hours—the more the fats and milk solids settle and thicken into that beautiful custardy consistency. If you’re in a massive rush, you can briefly whisk it vigorously right before serving. Avoid adding extra thickeners; the natural chilling process is what unlocks the creamy magic in this old fashioned recipe.
How long does homemade eggnog last in the fridge?
Because this creamy holiday beverage base is cooked, it lasts quite well, but you should always consume it fresh! Since it contains milk and eggs, I recommend using it up within 4 to 5 days maximum. Make sure it is stored in a completely airtight container in the coldest part of your fridge. And don’t forget what I said earlier: always give it a good, hard whisk before you pour it, as it will naturally separate a little while resting!
Can this spiced eggnog recipe be made sugar-free?
While this recipe is built around the structure that granulated sugar provides (it helps stabilize the yolks when cooking!), you certainly can experiment if you need a sugar-free option. You’d need to substitute the sugar 1:1 with a zero-calorie sweetener that measures like sugar, like monk fruit blend or erythritol. Just proceed with extra caution during the cooking phase, as alternative sweeteners sometimes react differently to heat. I haven’t personally tested it, but I know some readers have amazing luck adapting holiday drinks that way!
Estimated Nutritional Data for This Creamy Holiday Beverage
When you’re making a rich, full-fat, completely decadent treat like this classic creamy homemade eggnog, you know the numbers are going to be a little indulgent—and honestly, that’s perfectly okay for a special holiday treat! I always feel better enjoying something when I know exactly what’s in it, even if I don’t look at the details too closely until after I’ve had my second glass.
Keep in mind that these figures are just estimates based on the recipe shown, and they are calculated for the lower-calorie, non-alcoholic version. If you decide to stir in a whole cup of bourbon or brandy, those numbers—especially the calories and sugar—are going to jump up quite a bit! So, treat this chart as a helpful guide, not a strict scientific analysis.
- Serving Size: 1 cup
- Calories: 450
- Fat: 28g (with 16g Saturated Fat)
- Cholesterol: 250mg (Yes, those lovely yolks pack a punch!)
- Carbohydrates: 38g
- Sugar: 35g
- Protein: 10g
We are using quality ingredients here, which means that saturated fat comes from the heavy cream and whole milk—the stuff that makes this eggnog so wonderfully thick and wonderful. Don’t stress about the numbers too much; just soak in the holiday spirit and remember this is an occasional indulgence. That fresh nutmeg on top adds zero calories, so sprinkle away!
Share Your Perfect Eggnog Creation
Okay, that’s my whole process for getting you the most delicious, classic creamy homemade eggnog you’ll ever taste! I truly hope this recipe becomes a staple at your family’s festive gatherings. Honestly, I can’t wait to hear what you think once you’ve chilled it overnight and had that first incredible sip.
Did you go full Bourbon Eggnog, or did you stick to the non-alcoholic version? Did the fresh nutmeg make a huge difference for you? I always love knowing which spirit pairs best with this creamy holiday beverage for different folks.
Take a moment when you get a chance to leave me a rating below—it really helps other people find this recipe!
And while you are dreaming up your next party spread, maybe you should try making those easy cranberry brie bites I mentioned earlier; they pair perfectly with a glass of this spiced eggnog! You can find my recipe for those right here.
Happy holidays, and enjoy every single rich, festive drop!
PrintClassic Creamy Homemade Eggnog Recipe
Make rich, velvety smooth homemade eggnog from scratch. This recipe provides instructions for both a classic non-alcoholic version and a spiked option perfect for holiday gatherings.
- Prep Time: 15 min
- Cook Time: 15 min
- Total Time: 4 hours 30 min
- Yield: 6 servings 1x
- Category: Dessert Drink
- Method: Stovetop Cooking
- Cuisine: American
- Diet: Vegetarian
Ingredients
- 6 large egg yolks
- 3/4 cup granulated sugar
- 1/4 teaspoon salt
- 1 pint whole milk
- 1 pint heavy cream
- 1 teaspoon vanilla extract
- 1/2 teaspoon ground nutmeg, plus extra for garnish
- 1/4 teaspoon ground cinnamon
- 1/4 teaspoon ground cloves
- Optional: 1 cup bourbon, dark rum, or brandy
Instructions
- In a medium saucepan, whisk the egg yolks, sugar, and salt until pale and smooth.
- Slowly whisk in the whole milk until combined.
- Cook the mixture over medium-low heat, stirring constantly with a wooden spoon or heatproof spatula, until the mixture thickens enough to coat the back of the spoon (do not let it boil). This usually takes 10 to 15 minutes.
- Remove the saucepan from the heat immediately. Stir in the heavy cream, vanilla extract, nutmeg, cinnamon, and cloves.
- Strain the mixture through a fine-mesh sieve into a clean bowl to remove any cooked egg bits and ensure a smooth texture.
- If making the alcoholic version, stir in your chosen spirit now.
- Cover the bowl and chill the eggnog in the refrigerator for at least 4 hours, or preferably overnight, to allow the flavors to meld and the mixture to thicken.
- Before serving, whisk the chilled eggnog well. Pour into glasses and garnish each serving with a sprinkle of fresh nutmeg.
Notes
- For a non-alcoholic version, simply omit the liquor in step 6.
- To achieve a very thick, custardy texture, chill the eggnog overnight.
- If you prefer a quicker method, you can use a blender to combine all ingredients (after cooking the milk/yolk base) and chill immediately.
- Use high-quality vanilla extract for the best flavor.
Nutrition
- Serving Size: 1 cup
- Calories: 450
- Sugar: 35g
- Sodium: 80mg
- Fat: 28g
- Saturated Fat: 16g
- Unsaturated Fat: 12g
- Trans Fat: 1g
- Carbohydrates: 38g
- Fiber: 0g
- Protein: 10g
- Cholesterol: 250mg