
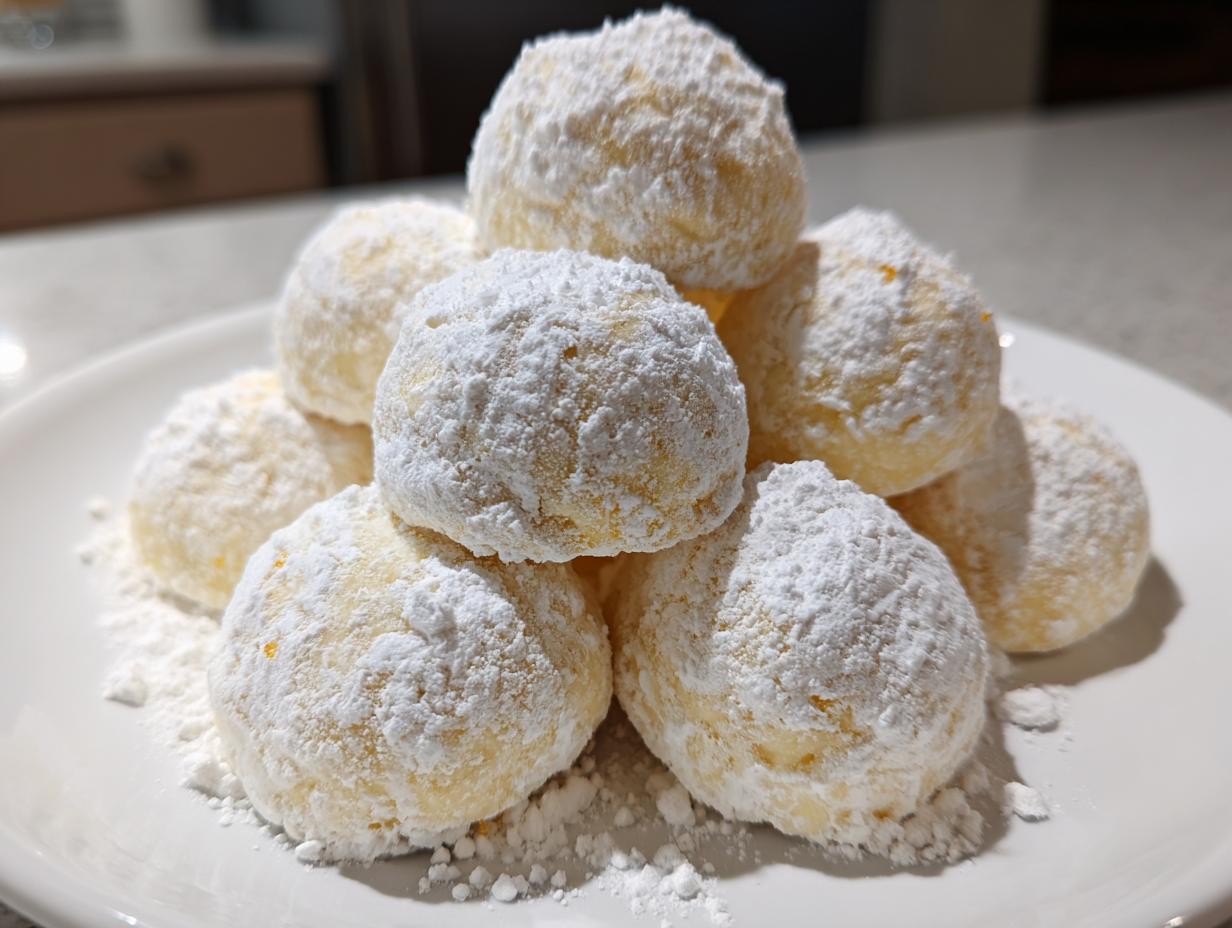
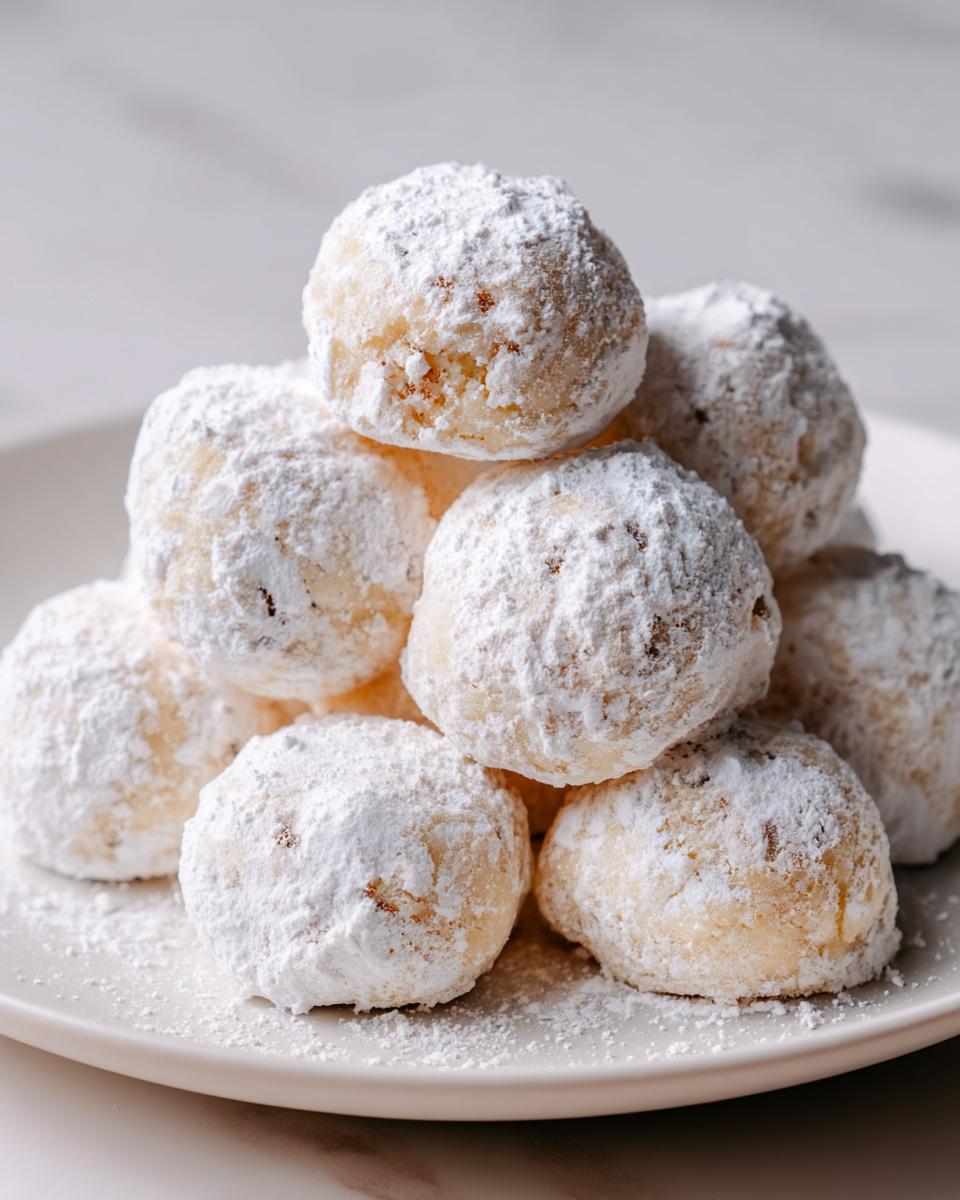
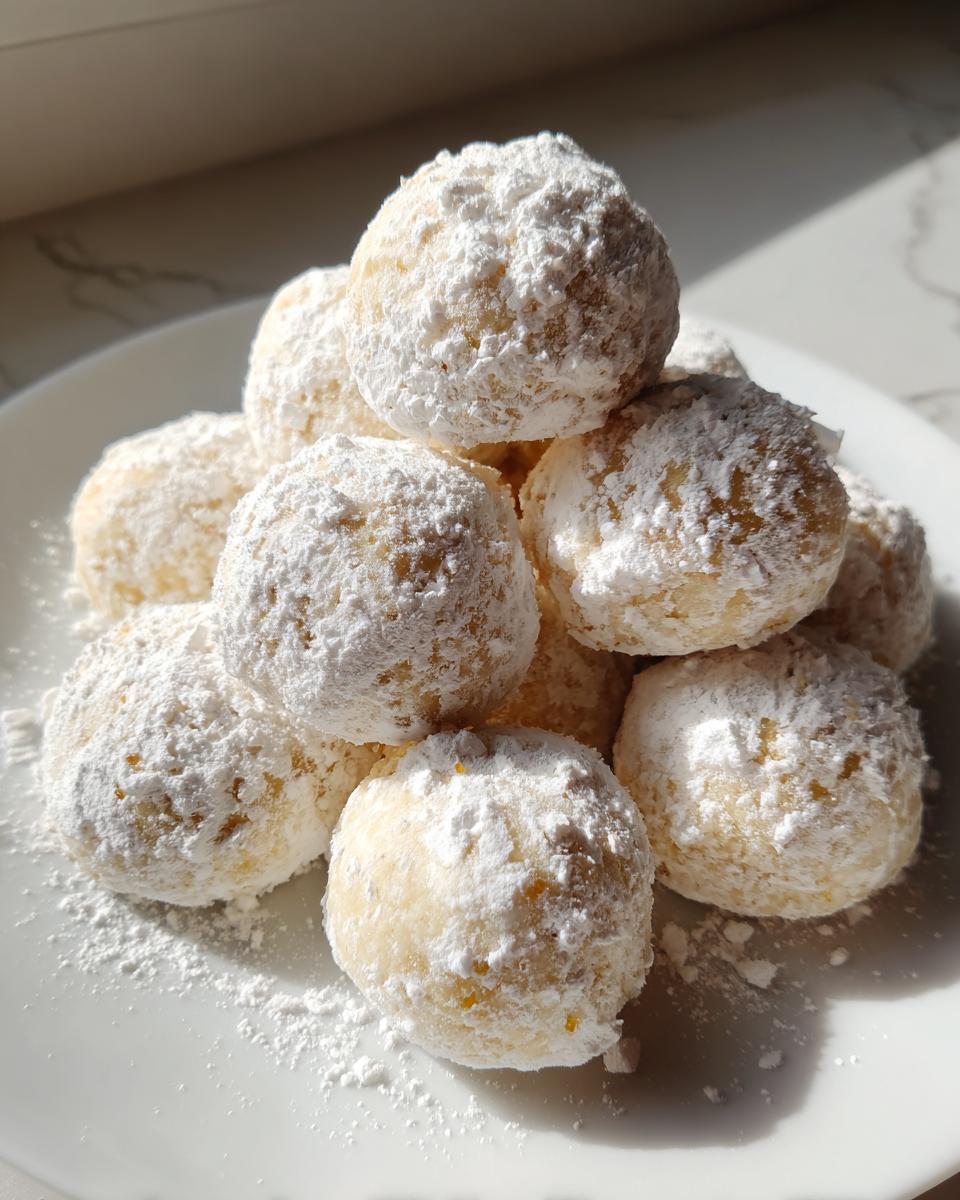
There is just something pure about baking during the holidays, isn’t there? It’s always the simplest, most butter-laden treats that end up being the biggest crowd-pleasers on the platter. That’s why I’m sharing my go-to recipe for what I affectionately call the ultimate melt-in-your-mouth classic: Russian Tea Cakes. When I first started DelishCraze, my mission was always to bring back those timeless American comfort foods that connect us, and these cookies—so richly buttery and nutty—do exactly that. Forget fussy assembly; these are the perfect little snowballs when you need delicious results without spending your whole afternoon in the kitchen.
- Why This Classic Russian Tea Cakes Recipe Works Every Time
- Gathering Ingredients for Your Russian Tea Cakes Recipe
- Simple Steps to Prepare Perfect Russian Tea Cakes
- Understanding the Many Names for Russian Tea Cakes
- Tips for Success When Baking Your Russian Tea Cakes
- Storage and Make-Ahead Tips for Classic Butter Cookies
- Serving Suggestions for Your Tea Time Treats
- Estimated Nutrition for These Russian Tea Cakes
- Your Questions Answered About Russian Tea Cakes
- Share Your Experience Making These Russian Tea Cakes
Why This Classic Russian Tea Cakes Recipe Works Every Time
Honestly, what’s not to love about these? They are proof that the best things in life are often the simplest. I keep coming back to this version because it delivers on that perfect promise every single time. You get that gorgeous, delicate crumb that truly melts away the second it hits your tongue. If you want to see another great version, check out this favorite recipe here.
- They are truly an Easy Tea Cakes Recipe—no chilling required unless your kitchen is boiling hot!
- The texture guarantees you’ll get the famous Melt in Your Mouth Cookies effect.
- They are the ultimate classic, perfect for showing off your baking skills without any stress.
The Secret to Buttery Nut Cookies Texture
It all comes down to high-quality butter and knowing when to stop mixing. We use a lot of butter here, no cutting corners! When you mix the flour in, you just want it barely combined. Overmixing develops gluten, which makes cookies chewy. We want buttery, crumbly perfection, not chewiness. That slight under-mixing stops the dough from becoming tough and locks in that beautiful texture.
Gathering Ingredients for Your Russian Tea Cakes Recipe
I always lay out my ingredients before I start anything—it keeps me calm, organized, and honestly, I find the cookies come out better when I’m not scrambling for the salt. The beauty of these Russian Tea Cakes Recipe favorites is that they use pantry staples. You don’t need fancy extracts or exotic flours here, which is wonderful for quick baking sessions!
Here is exactly what you need to make about three dozen of these delightful little cookies. Pay close attention to the state of the butter; that makes a huge difference, trust me on this one!
- 1 cup unsalted butter, softened (it needs to feel cool but give easily when pressed)
- 1/2 cup powdered sugar, plus more for coating (we need two bowls of this stuff!)
- 1 teaspoon vanilla extract (use the good stuff if you have it!)
- 2 cups all-purpose flour
- 1/2 cup finely chopped pecans or walnuts
- 1/4 teaspoon salt
If you want to keep things streamlined and check out a great resource for sourcing ingredients, have a look at this collection of recipes here. It’s always great to see how others approach these classics!
Ingredient Notes and Substitutions for Pecan Tea Cakes
So, the nuts! This is where people usually ask me what I prefer. Traditionally, many versions lean toward pecans, and I love that classic pairing with butter. However, if you only have walnuts on hand—use them! They bake up beautifully and give you that slightly different, earthy depth. I’ve even used finely chopped almonds once, just to mix things up, and they were fantastic. You see these variations all the time; some folks call them Pecan Tea Cakes, others go straight for walnuts. It really comes down to what you prefer in your Buttery Nut Cookies.
Also, about the butter: it absolutely must be softened, not melted. If it’s even slightly greasy, you won’t get that essential air incorporated when you cream it with the sugar, and that’s half the battle won for that signature crumb!
Simple Steps to Prepare Perfect Russian Tea Cakes
Okay, now for the fun part! These steps are straightforward, which is why I love keeping this recipe tucked away for quick holiday baking emergencies. We’re aiming for buttery goodness that practically vanishes the second it touches your tongue. I really enjoy how quickly this process moves; it feels like magic turning simple butter and flour into dozens of delicious Russian Tea Cakes. For more simple step-by-step visuals, I often refer you to helpful guides like the one here! Just remember our main goal: light color, tender texture.
- First things first: get that oven warmed up to 350°F (175°C). Line your baking sheets with parchment paper so cleanup is a breeze.
- In a big bowl, you’ll beat that softened butter with the first measure of powdered sugar (the half cup) until everything looks pale and fluffy. Add that vanilla now, too.
- In a separate bowl, whisk the flour and salt together—just a quick mix. Now, add these dry guys gradually to your wet mixture, mixing on low speed. Stop as soon as they come together. Seriously, stop while you can still see a few flour streaks!
- Fold in your finely chopped nuts. The dough is going to feel soft—that’s normal. Roll them into little one-inch balls and space them out generously on your trays.
- Bake them for just 10 to 12 minutes. You want the edges to look set, but they must stay very pale. If they look golden brown, you’ve gone too far and they’ll lose that melt-in-your-mouth quality.
- Let them cool on the pan for five minutes—this is key before you move them to the wire rack to cool completely.
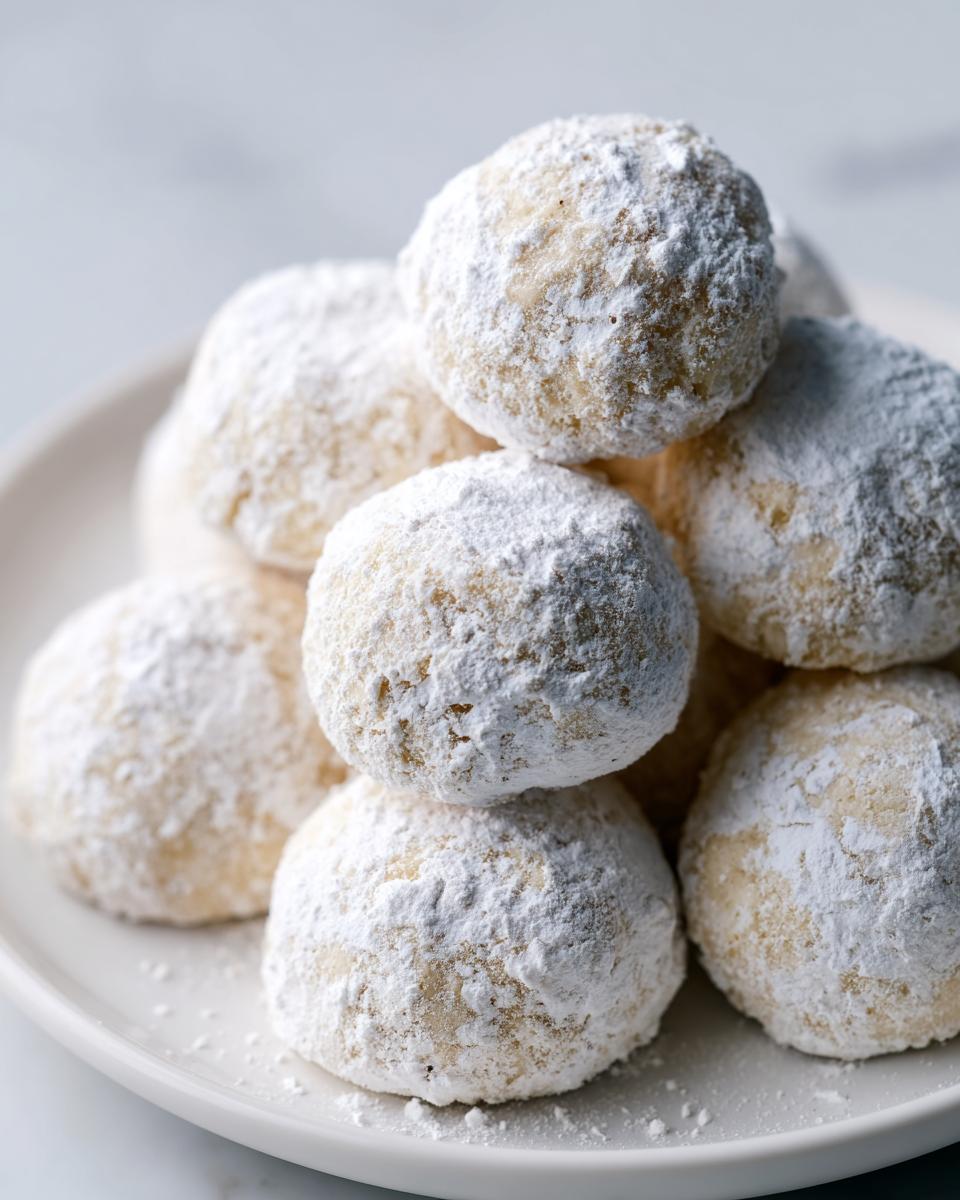
Tips for Achieving the Best Powdered Sugar Cookies Coating
This is the grand finale, and it’s where many people mess up their beautiful Powdered Sugar Cookies! You absolutely must wait until the cookies are stone cold before you roll them in the sugar. If they are even slightly warm, the sugar will melt right into a sticky, thin mess instead of creating that lovely, snowy white coat we love.
For that extra thick, beautiful frosting layer that makes these famous, do a double dip. Roll them once, let them sit for about ten minutes so that first layer can set up, and then roll them again through a fresh pile of sugar. They’ll look gorgeous and taste even better!
If you want to see more simple baking inspiration for these kinds of treats, check out this great resource here. That’s all there is to it!
Understanding the Many Names for Russian Tea Cakes
This is one of those funny things in the baking world, isn’t it? You see a recipe that looks exactly like what you thought was called ‘Snowball Cookies,’ but someone else insists it’s ‘Mexican Wedding Cookies.’ I promise you, it’s the same glorious, buttery dough inside! Back when I was doing deeper research into American baking classics for the blog, I realized just how many names these melt-in-your-mouth treats go by.
If you search for any of these variations, you’ll likely get similar results, and none of them are wrong! It just shows how beloved this simple cookie is across different traditions and holidays. It’s fascinating how a recipe crosses borders.
The most common ones you’ll hear are:
- Snowball Cookies: This name just makes perfect sense, right? Given how generously we roll them in white powdered sugar, they look exactly like little snowdrifts, perfect for those winter cookie exchanges.
- Mexican Wedding Cookies: This name often shows up, especially around celebrations. They have that beautifully delicate, crumbly texture that just disappears when you take a bite. For more on these cultural variations, you can see how others bake them over here.
- And sometimes, you’ll even see them listed as Pecan Dreams or just basic Tea Cakes.
The core idea remains the same whether you call them Russian Tea Cakes or something else entirely: simple ingredients, tons of butter, a good crunch from the nuts, and that snowy white finish. So, don’t worry if you grab one jar of walnuts and call it a day! They’ll still be delicious.
Tips for Success When Baking Your Russian Tea Cakes
I think people get intimidated by these little balls of buttery goodness, but honestly, they are so forgiving! The most important thing I learned, which I often share when I talk about my favorite Holiday Cookie Recipes, is temperature control. If you are baking during the summer, or if your kitchen just runs warm when the oven is on, you really do need to chill that dough.
When the dough gets too soft, those little balls spread out too much in the oven and lose that perfect round shape and that delicate crumb. If you feel things getting mushy, just pop the bowl into the fridge for about 30 minutes. It firms everything right up!
Also, let’s revisit the butter, because it bears repeating: room temperature is the magic phrase for creaming. You want it soft enough to incorporate air when you mix it with the sugar, but not so warm that it looks shiny or greasy. That trapped air is what gives these Classic Butter Cookies their signature lightness! If you want to see how another great baker handles timing, you can review Natasha’s guidance here.
Stick to those two things—creaming temperature and dough chilling if needed—and you’ll have perfect treats every time.
Storage and Make-Ahead Tips for Classic Butter Cookies
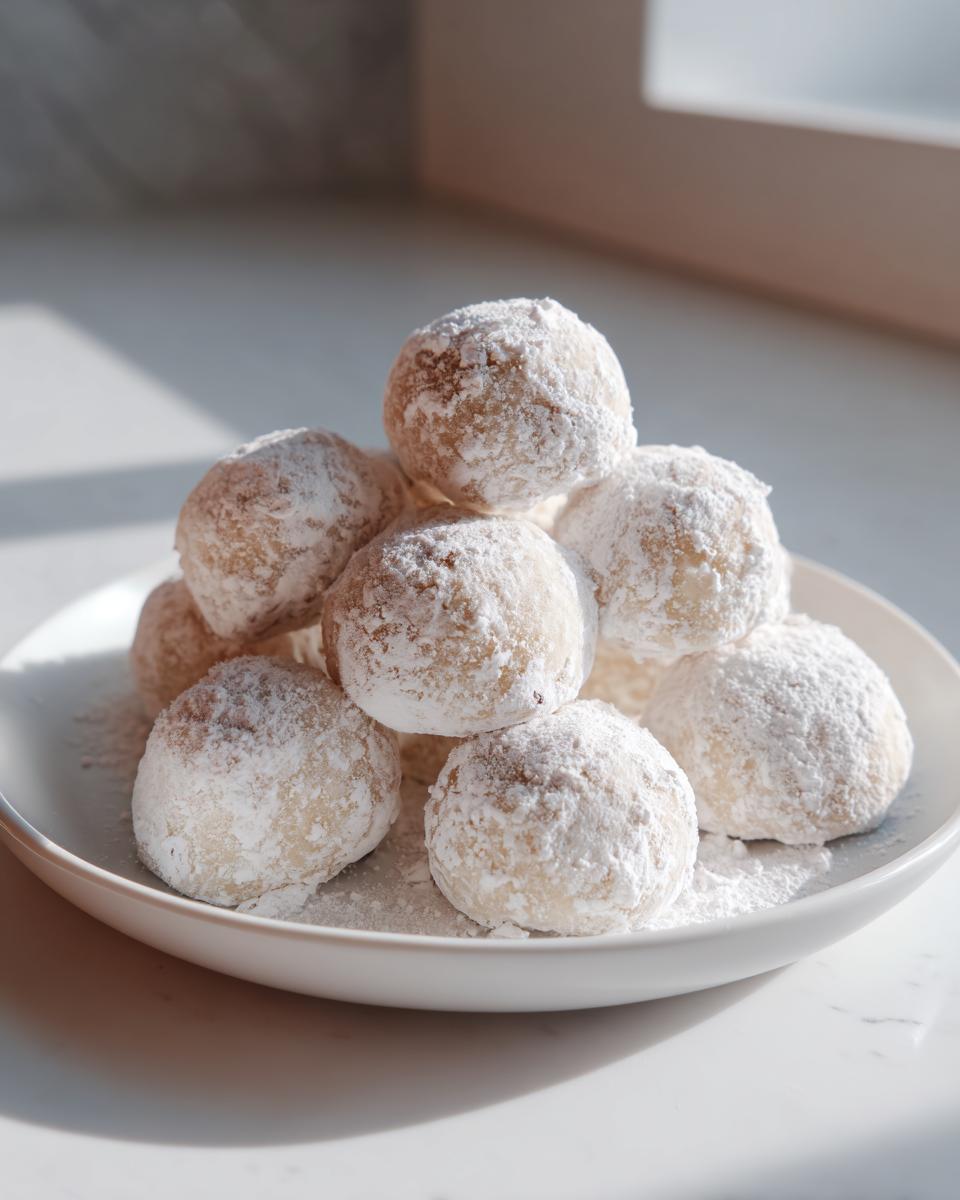
One of the biggest reasons I adore these Classic Butter Cookies is that they are fantastic make-ahead treats! Seriously, you can bake these days before your big holiday party, and they hold up beautifully. That thick coating of powdered sugar isn’t just for looks; it actually helps preserve that delicate, buttery texture for a while. That’s why they are such legendary Cookie Exchange Favorites—you bake them once, and they are perfect all week!
When it comes to storage, the most important rule is to keep them airtight. I usually use a sturdy cookie tin, but any quality airtight container works great. I always put a piece of parchment paper between layers if I’m stacking them high, just to make sure that lovely white sugar coating doesn’t get smooshed or rubbed off in transit.
If you are making these for a huge event or want to get way ahead, guess what? You can freeze them! You should roll them in the *first* layer of powdered sugar before freezing, but save that second, snowy coat for right before you serve them. Chilling helps them keep their shape, and they thaw out perfectly. I learned this trick ages ago when I was trying to get ahead for Christmas baking; trust me, it saves so much stress later on. You can see how another busy home baker handles her favorites here!
They stay fresh at room temperature for about a week if stored correctly. I’ve never personally kept them longer than that because they always disappear way faster!
Serving Suggestions for Your Tea Time Treats
These little beauties are absolutely perfect for any occasion, but they truly shine when they are paired with something hot and comforting. They were practically invented to accompany an afternoon break, which is why they fit right into that Tea Time Treats category so well. Since these Russian Tea Cakes are so rich with butter and nuts, they only need a simple accompaniment.
My favorite way to enjoy them? Freshly brewed coffee. The slight bitterness of a good dark roast cuts through the sweetness of that powdered sugar coating just perfectly, creating a wonderful balance on your palate. It’s my favorite way to wind down after putting the kids to bed!
Why these are perfect with tea
If you are more of a tea drinker, these work beautifully with black teas—think Earl Grey or a simple English Breakfast. Because the cookie itself is quite rich and crumbly, you don’t want a weak tea that gets overpowered. You want something with a little backbone to stand up to that melt-in-your-mouth texture.
Don’t feel limited to just hot drinks, though! Because they are so delicate, they are wonderful alongside a bowl of fresh fruit or maybe served alongside a lighter dessert, like a lemon sorbet, if you’re having a big dinner. If you see how these come together, it’s easy to understand why they are so versatile—you can see another classic take at this link.
They really don’t need anything else, honestly. They are meant to be enjoyed simply, perhaps with a nice big glass of cold milk for the kids (or the very nostalgic adults, like me!).
Estimated Nutrition for These Russian Tea Cakes
I always try to keep track of what we’re eating, even when it comes to the best Holiday Cookie Recipes. Now, I have to be super honest with you guys: I’m a baker, not a nutritionist! These values are based on the standard recipe I’ve provided here, using standard measurements for butter and flour.
As I always tell my friends, consider these figures a good general guideline rather than a strict count. The exact numbers will change depending on the brand of butter you use or if you decide to go heavy on the pecans! This is just to give you a rough idea of what’s going into these magnificent Russian Tea Cakes.
- Serving Size: 1 cookie
- Calories: 110
- Sugar: 5g
- Sodium: 25mg
- Fat: 7g
- Saturated Fat: 4g
- Carbohydrates: 10g
- Protein: 1g
Because these are made with pure butter and nuts, you see a healthy amount of fat, which is really what gives them that incredible, decadent, melt-in-your-mouth feeling! If you substitute pecans for walnuts, the nutritional breakdown will shift just a tiny bit, but nothing drastic. Enjoy them because they are worth every crumb!
Your Questions Answered About Russian Tea Cakes
I always get so many great questions when I post these little beauties! They are such a classic, and it’s natural to wonder about substitutions or storage, especially when you’re preparing for a big holiday event. I’ve gathered the most common things people ask about these Powdered Sugar Cookies right here to save you some time!
Can I skip toasting the nuts?
Oh, that’s a great question about the nuts! Look, since these are technically Simple Shortbread Cookies without much baking time, toasting the nuts beforehand makes a huge, significant difference in flavor. You don’t need to toast them for very long—just five minutes in a dry pan over medium heat until you can really smell that roasted aroma. Toasted nuts taste deeper and punchier, which you need to balance all that butter. If you skip it, they will taste fine, but trust me, they won’t be *as* amazing. For some great variations on nuts, you can check out this link here.
Why are they called Snowball Cookies and Mexican Wedding Cookies?
This is the fun history part! They definitely fall into the family of wonderful Holiday Cookie Recipes, and a lot of that history dictates the name. They are called Snowball Cookies because, well, once that thick coat of sugar sets, they look exactly like tiny snowballs resting on the plate. It’s just visual! As for Mexican Wedding Cookies, that name is rooted in tradition; they are often served at Mexican wedding celebrations (and many other big family events) because they are so delicate.
I think keeping track of the names is half the fun. No matter what you call them, they are guaranteed Cookie Exchange Favorites because everyone loves that rich, buttery flavor!
Can I make the dough ahead of time and freeze it?
Yes, you absolutely can, and I highly recommend it if you’re batch-baking for the holidays! The dough freezes like a dream. You just roll out all your little balls, put them on a parchment-lined tray, and freeze them until they are solid little rocks. Then, transfer them to a freezer bag. They keep wonderfully for up to three months!
When you’re ready to bake, just pull the frozen dough balls right off the tray and put them onto your parchment-lined baking sheet, adding just an extra minute or two onto the baking time. Voila! Freshly baked Buttery Nut Cookies right when you want them. This is one of my biggest secrets for surviving Christmas week!
Do I have to use powdered sugar, or can I use granulated sugar for coating?
Please, please stick to powdered sugar! This is a major sticking point for achieving that signature texture. If you use granulated sugar, you won’t get the snowy, melt-in-your-mouth effect. Granulated sugar will just sit on the outside like raw, gritty sugar crystals. The powdered sugar mixes with the residual warmth of the cookie (if you do the double-dip trick I showed you!) to bond into that wonderful, soft, thick white coating that defines these Russian Tea Cakes. If you want to see more tips on getting that perfect coating, I linked another great guide here for you!
Share Your Experience Making These Russian Tea Cakes
Now that you’ve got the secrets to these absolutely perfect, buttery beauties, I really want to hear what you thought! Did you stick with the pecans, or did you try walnuts like I mentioned? Baking is always a shared experience, and seeing your results is genuinely the best part of running DelishCraze.
Please take a moment to rate the recipe—it helps other home cooks know this classic treasure is worth their time! A simple five-star rating tells me you achieved that perfect, melt-in-your-mouth moment.
If you snapped a picture of your finished Holiday Cookie Recipes platter, I’d love for you to share it in the comments below, or tag me on social media! I’m especially keen to see how well your powdered sugar coating turned out after that double-dusting trick.
If you try freezing the dough or doubling up on the vanilla, let us know how that worked for you too! Your feedback helps everyone improve their baking game. Don’t forget to check out the beautiful photos others have taken here for a little inspiration before you start mixing up your next batch!
Happy baking, everyone. I hope these little snowballs bring as much joy to your table as they do to mine!
PrintClassic Melt-In-Your-Mouth Russian Tea Cakes (Snowball Cookies)
Make these classic buttery, nutty cookies that melt in your mouth, coated in powdered sugar. These are perfect for holiday baking or any time you want a simple, delicious treat.
- Prep Time: 15 min
- Cook Time: 12 min
- Total Time: 27 min
- Yield: About 3 dozen cookies 1x
- Category: Dessert
- Method: Baking
- Cuisine: American
- Diet: Vegetarian
Ingredients
- 1 cup unsalted butter, softened
- 1/2 cup powdered sugar, plus more for coating
- 1 teaspoon vanilla extract
- 2 cups all-purpose flour
- 1/2 cup finely chopped pecans or walnuts
- 1/4 teaspoon salt
Instructions
- Preheat your oven to 350°F (175°C). Line baking sheets with parchment paper.
- In a large bowl, beat the softened butter and 1/2 cup powdered sugar together until light and fluffy. Mix in the vanilla extract.
- In a separate bowl, whisk together the flour and salt. Gradually add the dry ingredients to the butter mixture, mixing on low speed until just combined.
- Stir in the chopped nuts. The dough will be soft.
- Roll the dough into small balls, about 1 inch in diameter. Place them on the prepared baking sheets, leaving about 2 inches between each cookie.
- Bake for 10 to 12 minutes, or until the edges are barely set and very light golden. Do not overbake; these cookies should remain pale.
- Let the cookies cool on the baking sheet for 5 minutes before transferring them to a wire rack to cool completely.
- Once the cookies are completely cool, place a generous amount of extra powdered sugar in a shallow dish. Roll each cookie in the powdered sugar until fully coated.
- For a thicker coating, let the first layer of sugar set for 10 minutes, then roll them in the powdered sugar a second time.
Notes
- You can substitute pecans with walnuts or almonds for a different flavor profile.
- For the best melt-in-your-mouth texture, chill the dough for 30 minutes before rolling if your kitchen is warm.
- These cookies store well in an airtight container at room temperature for up to one week.
- These are also known as Mexican Wedding Cookies or Snowball Cookies.
Nutrition
- Serving Size: 1 cookie
- Calories: 110
- Sugar: 5
- Sodium: 25
- Fat: 7
- Saturated Fat: 4
- Unsaturated Fat: 3
- Trans Fat: 0
- Carbohydrates: 10
- Fiber: 0
- Protein: 1
- Cholesterol: 15