
When the summer berries are at their peak—bright red, perfectly tart, and smelling like sunshine—the last thing I want is a complicated, fussy recipe standing between me and that jar of goodness. After years in the demanding design world, trying to fit cooking into tiny windows, I swore I wouldn’t let complexity steal my joy in the kitchen anymore. That’s why I am thrilled to share what I consider my absolute gold standard for preserving that flavor: the easiest 3-ingredient no-pectin raspberry jam you will ever make. Honestly, it’s so fast, you can whip up a batch before lunch is even over. This is the jam that helped me reclaim my kitchen, and I know it’ll bring that simple, vibrant pleasure right to your table, too.
- Why This Easy Raspberry Jam Recipe is a Kitchen Staple
- Gathering Ingredients for Your 3 Ingredient Jam
- Step-by-Step Instructions for Perfect Raspberry Jam
- Tips for Success Making Raspberry Jam
- Variations on Your Easy Raspberry Jam Recipe
- Serving Suggestions for Your Fresh Raspberry Preserves
- Frequently Asked Questions About Raspberry Jam
- Estimated Nutritional Information for Raspberry Jam
- Share Your Homemade Raspberry Jam Creations
Why This Easy Raspberry Jam Recipe is a Kitchen Staple
When I first started experimenting with preserves again, I was intimidated by pectin boxes. Who needs another specialty ingredient? This recipe proves you don’t! This ends up being the best homemade jam because it lets the fresh fruit shine through. It’s the ultimate quick berry jam for busy weeks.
Here’s why this streamlined approach is so reliable:
- It delivers incredible, bright flavor every single time.
- It’s fast enough to batch for the fridge or freezer without a major time commitment.
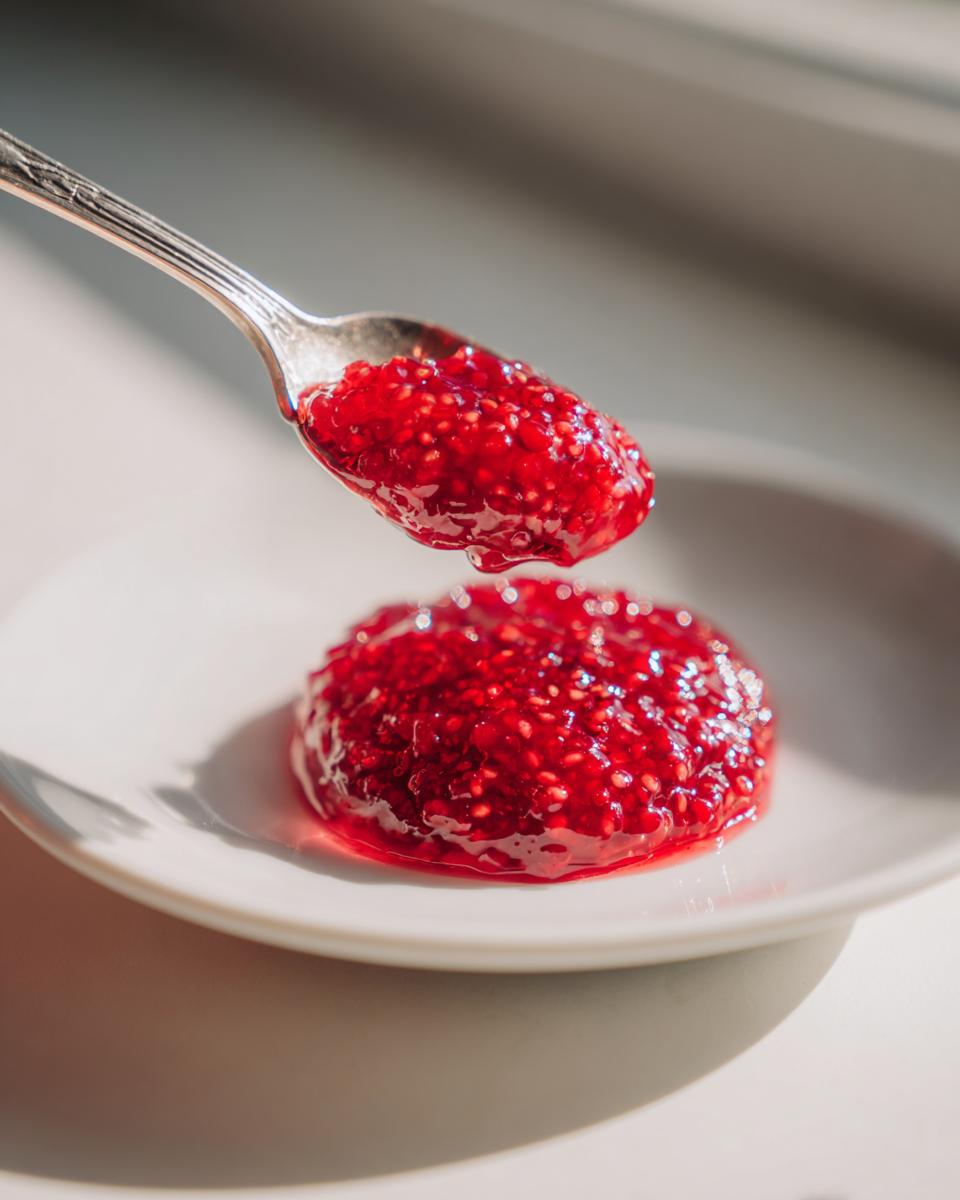
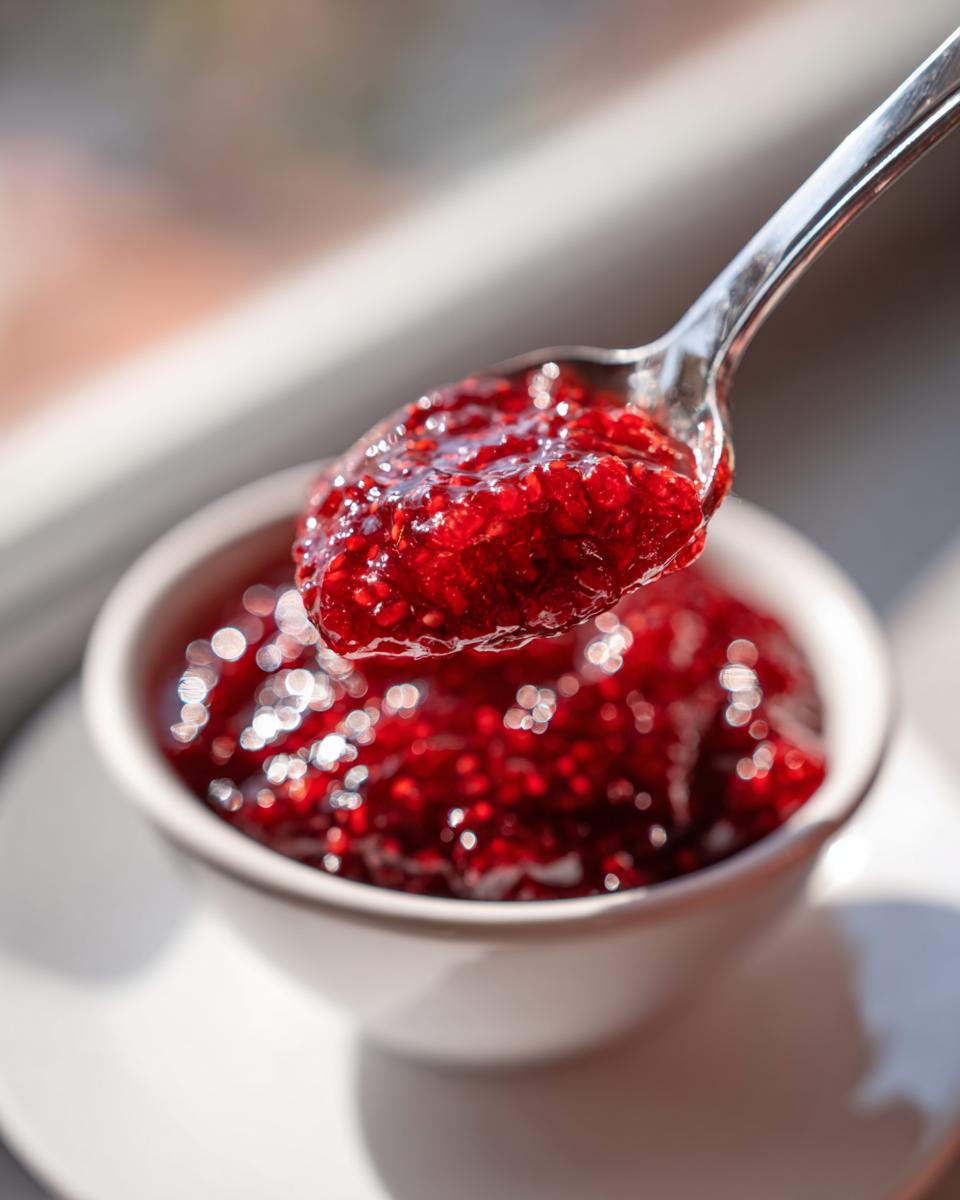
If you’re ready to see how simple it is to make something truly special, check out this gorgeous version for inspiration on presentation!
The Magic of No Pectin Jam Recipe
Don’t worry about added thickening agents! Raspberries actually have a good amount of natural pectin hidden in them, but you need an acid to wake it up. That’s where the lemon juice comes in. It’s a natural activator. A little squeeze, a full boil, and boom—you have a glorious, naturally thickened no pectin jam recipe.
Speed and Simplicity: Perfect for Beginner Jam Making
Seriously, the total time commitment is under 30 minutes if you’re ready to go. That’s why I love pushing this version on people new to preserving; it feels like magic but requires no special equipment beyond a heavy pot. It’s the perfect project for a Saturday morning. You’ll have a stunning, thick quick breakfast topping ready before your coffee even cools!
Gathering Ingredients for Your 3 Ingredient Jam
Okay, let’s look at what you need. This is where the beauty of simplicity really shines. You only need three things to make this amazing raspberry jam, and they are all things you likely have or can easily grab. Remember, this works beautifully whether you have perfect market berries or you’re using up lovely frozen ones!
You are going to gather:
- Two pints of raspberries (fresh or frozen—I love using frozen when the season is over!).
- Four cups of plain old granulated sugar. Yes, that much! That’s what helps it thicken naturally.
- The juice from one large lemon—and I mean just the juice, no zest needed here. That acid is our secret weapon.
That’s it! If you’re looking for another great take on a simple fruit spread, check out Stephanie’s recipe for comparison.
Step-by-Step Instructions for Perfect Raspberry Jam
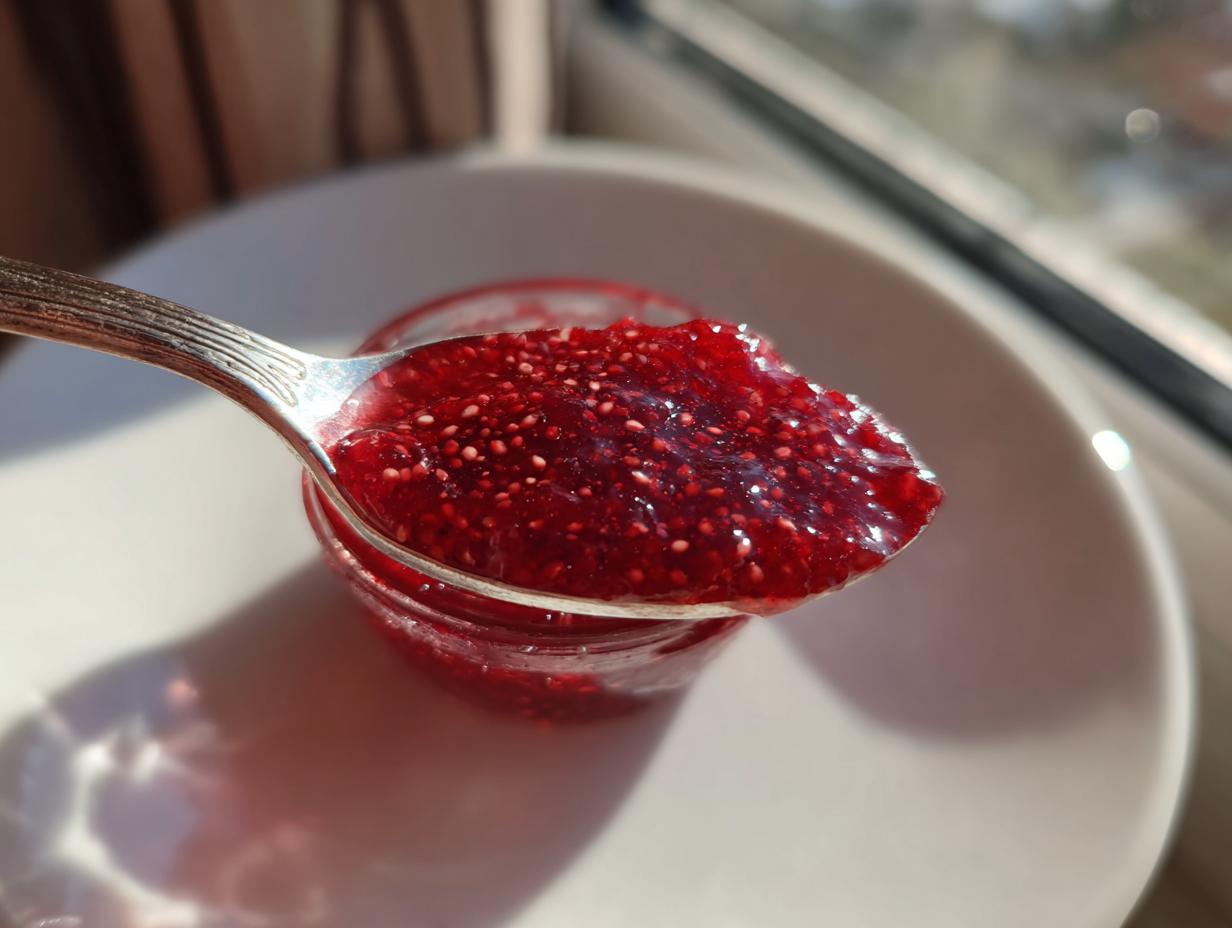
Alright, here is where the magic really happens! This whole batch is about two cups, so it’s a lovely small batch raspberry jam that won’t overwhelm you. Don’t rush these steps, especially the setting test, and you’ll have the most vibrant, flavorful homemade raspberry jam imaginable. Trust me, setting aside those 25 minutes to manage this process is the best way to learn how to preserve raspberries!
Preparing Containers and Breaking Down Berries
First things first: get your storage ready. If you’re keeping this in the fridge, make sure your jars are squeaky clean. If you know you want to freeze some, grab your freezer-safe containers now and leave about a half-inch of space at the top—that headspace is crucial!
Next, the berries go into a big, heavy pan. Heat them over medium, stirring gently until they start looking saucy and letting off steam—that’s about five to seven minutes. If you like things super smooth, this is your moment to grab a potato masher and smoosh them down!
Achieving the Set Point in Your No Pectin Jam Recipe
Once the berries are soft, stir in all that sugar until you absolutely can’t see any grains anymore. Now crank up the heat and bring it to a full, rolling boil—the kind you can’t stir down, you know the one. Right after that, stir in your precious lemon juice. That acid helps the natural pectin do its job, giving you that wonderful balance for a sweet and tart jam.
The critical part is the test: take the pot off the heat. Drop a tiny spoonful onto a plate you chilled in the freezer earlier. Wait one minute, then push it with your finger. If the surface wrinkles up, you nailed it! If it just slides, pop it back on for another minute and test again. This stage separates “berry syrup” from *jam*!
Storing Your Homemade Raspberry Jam
When you pull the jam off the heat for the final time, use a spoon to skim off any bubbly foam sitting on top—it keeps the jam looking pretty and clear. Carefully ladle the hot jam into your waiting jars. If you want the pure flavor for longer, this is the moment to plan for a freezer jam recipe! Just let it cool on the counter completely before sealing and freezing.
For the speedy fridge version, just let it cool completely on the counter, seal it up, and pop it in the cold until you’re ready to dive in. You can check out all the tips for easy canning alternatives over at iHeartNaptime!
Tips for Success Making Raspberry Jam
I’ve made this recipe so many times trying variations, and I’ve learned a few little tricks to guarantee success, even for those of you making your first preserves. Remember, this recipe relies on Mother Nature’s pectin, so sticking close to the process is important!
Rule number one, which is listed in the notes above, is: don’t skip that lemon juice. It might seem small, but that acid is what wakes up the fruit’s natural agents. You need it to get that thick, spreadable result instead of runny berry soup. If you are aiming for a super-smooth, professional-looking raspberry spread for toast, save a few of those raspberries and push them through a fine-mesh sieve before you even start cooking them down with the sugar. It’s a little extra work, but wow, the texture is absolutely luxurious.
I remember the first time I thought I could eyeball the setting point. Oops! I thought it was done, ladled it all into the jars, and when I checked it the next morning, it was… well, jiggly. Not set, just jiggly. I learned my lesson fast: you *must* perform that cold plate test! It’s the only way to know for certain before you seal up your container. If you’re feeling brave and want to try a slightly smaller batch, check out these tips over at Brooklyn Farm Girl for inspiration. Seriously, trust the plate test!
Variations on Your Easy Raspberry Jam Recipe
Just because this is simple doesn’t mean it has to be boring! Once you master this basic three-ingredient formula, the world of flavor opens up. This is the perfect base for experimenting with other summer fruit preserves. You can play around with mixing berries; try tossing in a pint of blueberries with your raspberries for a gorgeous deep color, or maybe a handful of blackberries for extra earthiness.
If you want to lean into a more complex, almost savory flavor profile, try adding a tiny pinch of black pepper or even a whisper of cardamom right when you add the lemon juice. It sounds wild, but it makes the brightness of the raspberry jam pop! For ideas on how to incorporate these new flavors into your preserves, peek at some beautiful shelf-stable ideas over at Canning Magic. You’ll be surprised how versatile this base recipe is.
Serving Suggestions for Your Fresh Raspberry Preserves
Now that you have this incredible, vibrant jar of fresh raspberry preserves, you might be thinking, “Okay, beyond toast, what now?” Believe me, I’ve been there! This jam is way too good to just sit around waiting for breakfast, though it is, of course, divine on a warm slice of sourdough. It behaves beautifully as a luxurious raspberry dessert topping.
Think about stirring a spoonful right into plain Greek yogurt—it cuts the tanginess perfectly and makes an instant, beautiful breakfast. If you’re baking, you can use it as a filling for thumbprint cookies or swirl it through muffin batter before it goes into those tins.
But here’s my favorite slightly unexpected idea: cocktails! A little splash of this sweet-tart jam mixed with gin, lemon juice, and topped with soda water makes a fantastic summer fizz. It’s just so much better than any store-bought syrup. You can see some amazing ways people get creative with their batches over at It’s Not Complicated Recipes. Honestly, once you have this raspberry jam ready, you’ll start finding uses for it everywhere!
Frequently Asked Questions About Raspberry Jam
I get so many questions once people start making their first batch of this homemade raspberry jam! Don’t worry if things don’t go exactly to plan the first time; learning takes practice. Here are the things I hear most often from others trying out this easy raspberry jam recipe.
Can I use frozen raspberries instead of fresh ones?
Absolutely, yes! That’s one reason I love this whole process so much—we aren’t bound by perfect fruit availability. You can definitely use frozen berries. Just toss them straight from the freezer into the pot. They might take an extra minute or two to start releasing their liquid, but the end result for your natural fruit jam is the same gorgeous texture.
Why didn’t my jam set properly?
This usually goes back to one of two things in a no pectin jam recipe. First, did you hit that full, rolling boil? It needs to boil hard enough that you can’t stir down the bubbles. Second, the plate test is non-negotiable! If it was still runny when you tested it, it needs a little more time on the heat. This recipe relies heavily on that natural pectin needing high heat and acid to kick in.
How long does refrigerator jam last?
Since we aren’t water bath canning this version, it’s designed for quicker consumption. If you keep your jar sealed tight and store it in the fridge, it’s generally good for about three weeks. It should be consumed before the three-week mark for the freshest flavor. This is why making a small batch raspberry jam is so perfect!
What’s the best way to make this into a seedless raspberry spread?
If the texture is more important than the seeds for your raspberry spread for toast, you have an extra step! Wait until the berries have cooked down (Step 2 in the instructions) but *before* you add the sugar. Pour the hot, cooked fruit through a fine-mesh sieve placed over a clean bowl. Use a spoon to push all the pulp through, leaving the seeds behind. Then, add your sugar and lemon to the seedless pulp and continue cooking!
Estimated Nutritional Information for Raspberry Jam
I know some of you are focused on keeping things balanced while still enjoying the sweet things in life, and that’s completely fair! Since this raspberry jam is made with just fruit, sugar, and lemon, it’s a wonderfully honest spread. I always preach honesty in the kitchen, right?
Here is the estimated nutritional rundown. Please keep in mind that this is just a guide based on the three simple ingredients listed in the recipe. If you decide to use a different type of sugar or adjust the amounts—which you totally can do when following these homemade raspberry jam rules—the final count will shift a little.
The values below are based on a serving size of two tablespoons:
- Calories: 105
- Sugar: 27 grams (Yep, it’s jam, but it tastes like summer!)
- Fat: 0.2 grams
- Fiber: 1.5 grams
- Protein: 0.3 grams
It’s naturally low in sodium and cholesterol, which is a big win for a sweet spread! It’s proof that you can create something incredibly delicious and still keep track of what you’re putting in your homemade treats.
Share Your Homemade Raspberry Jam Creations
Friends, making food isn’t just about following steps in a recipe card; it’s about connection! I truly put my whole heart into developing this quick, no-pectin raspberry jam so you could have that same moment of kitchen calm and eventual delight. Now it’s your turn to join the fun!
Please, if you try this out—whether you’re making a fridge batch for the week or stocking up your freezer for winter snacking—let me know how it went! Did you try my favorite trick of swirling it into vanilla ice cream? Did your plate test wrinkle perfectly on the first try?
Head down to the comments below and leave a rating. Five stars means the world to me (and helps others looking for the best homemade jam find this reliable recipe!). If you managed to get some gorgeous photos of your finished jars, tag me on social media so I can celebrate your success. Sharing our creations is what makes this whole cooking adventure worthwhile. I can’t wait to see all your vibrant, summery jars!
And if you want to share your beautiful bounty with others, remember that a jar of homemade preserves always makes a thoughtful gift. Check out some inspiration for packaging your beautiful work over at The Charming Recipes! Keep cooking with intention, and never let the hustle take away the joy of making something real.
PrintThe Easiest 3-Ingredient No-Pectin Raspberry Jam (Refrigerator/Freezer Friendly)
Make bright, flavorful homemade raspberry jam with just three simple ingredients. This recipe requires no added pectin and thickens naturally, making it perfect for beginners. Store it in the refrigerator for short-term use or freeze it to enjoy the taste of summer all year.
- Prep Time: 10 min
- Cook Time: 15 min
- Total Time: 25 min
- Yield: About 2 cups 1x
- Category: Preserves
- Method: Stovetop Cooking
- Cuisine: American
- Diet: Vegetarian
Ingredients
- 2 pints fresh or frozen raspberries
- 4 cups granulated sugar
- 1 large lemon (juice only)
Instructions
- Prepare your storage containers. If you plan to keep the jam in the refrigerator, use clean jars. If you plan to freeze it, use freezer-safe containers or jars, leaving about 1/2 inch headspace.
- Place the raspberries in a large, heavy-bottomed saucepan. Cook over medium heat, stirring occasionally, until the berries break down and release their juices, about 5 to 7 minutes. You can gently mash them with a potato masher for a smoother texture now, if desired.
- Stir in the granulated sugar until it is completely dissolved. Bring the mixture to a full, rolling boil that cannot be stirred down.
- Stir in the fresh lemon juice. Continue to boil, stirring constantly to prevent scorching, for about 1 minute. The lemon juice helps activate the natural pectin in the fruit.
- Test the jam for set. To test, remove the pan from the heat. Place a small spoonful of jam onto a chilled plate. Return the plate to the freezer for 1 minute. Push the jam with your finger; if the surface wrinkles, the jam has reached the setting point. If it is still runny, return the pan to the heat and boil for another minute, then test again.
- Remove the jam from the heat. Skim off any foam that has formed on the surface using a spoon.
- Carefully ladle the hot jam into your prepared jars or containers, leaving the specified headspace. Wipe the rims clean.
- For Refrigerator Jam: Let the jam cool completely on the counter, then seal and store in the refrigerator for up to 3 weeks.
- For Freezer Jam: Let the jam cool to room temperature, seal the containers, and transfer to the freezer for up to 1 year. Thaw overnight in the refrigerator before using.
Notes
- This recipe relies on the natural pectin in the raspberries and the acidity from the lemon for thickening. Do not skip the lemon juice.
- For a seedless raspberry spread, press the cooked berries through a fine-mesh sieve before adding the sugar and continuing the process.
- This small batch recipe is excellent for quick breakfast toppings or for making gifts.
Nutrition
- Serving Size: 2 tablespoons
- Calories: 105
- Sugar: 27
- Sodium: 1
- Fat: 0.2
- Saturated Fat: 0
- Unsaturated Fat: 0.1
- Trans Fat: 0
- Carbohydrates: 27
- Fiber: 1.5
- Protein: 0.3
- Cholesterol: 0