
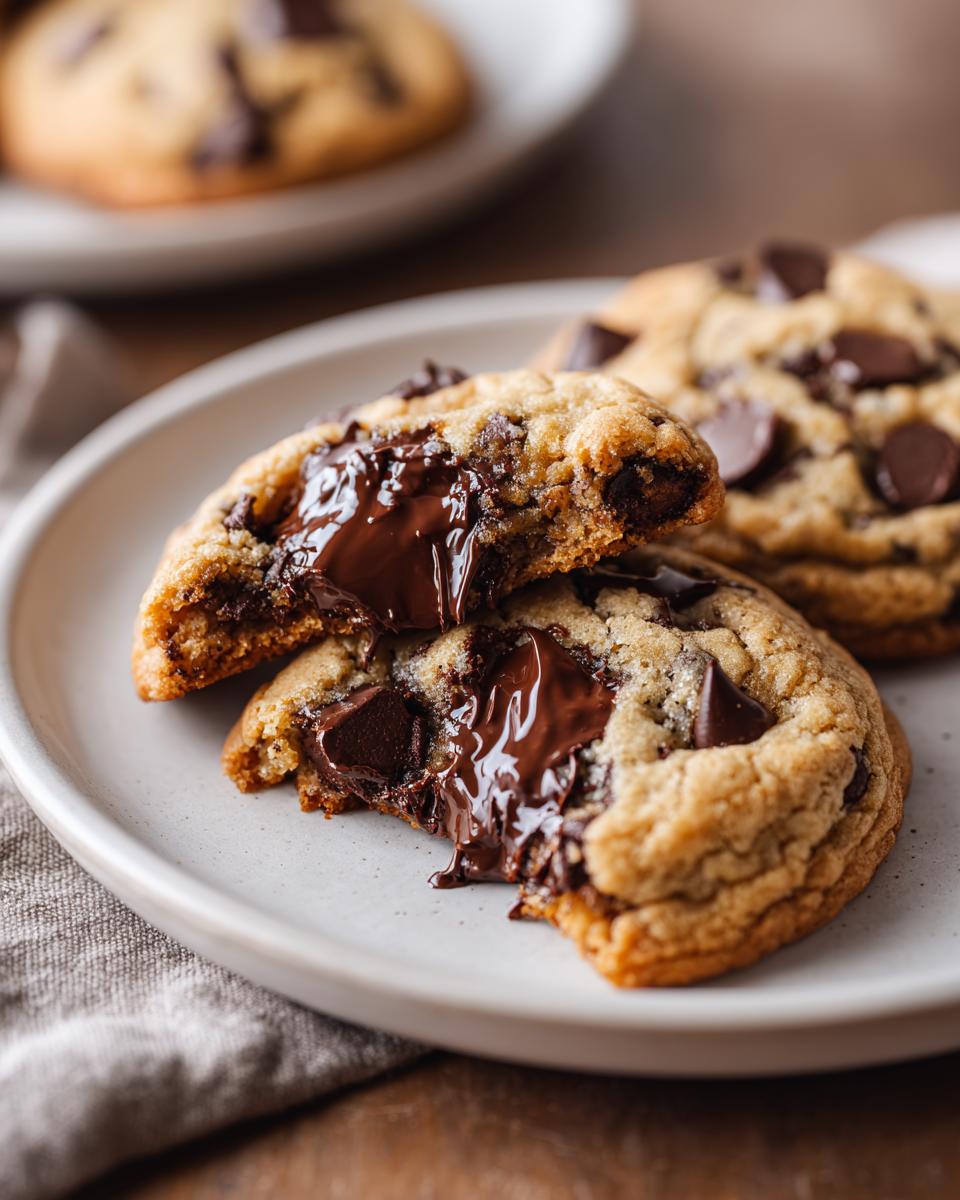
I swear, the search for the perfect chocolate chip cookies haunts every home baker. We’ve all bought those puffy, expensive ones from the local bakery, right? I spent years trying to replicate that magic—you know, the ones that manage to be gloriously thick, impossibly chewy inside, but still have those caramelized, slightly crispy edges? Well, friends, stop searching! I finally cracked the code on these Bakery Style chocolate chip cookies. This recipe isn’t just another printout; it’s the culmination of my mission here at DelishCraze to transform classic American comfort foods into ridiculously delicious, yet surprisingly simple, realities. Trust me, this homemade recipe is going to change your cookie game forever.
- Why This Homemade Chocolate Chip Cookie Recipe Delivers Bakery Style Cookies
- Gathering Ingredients for Ultimate Chocolate Chip Cookies
- Step-by-Step Instructions for Perfect Chocolate Chip Cookies
- Essential Cookie Baking Tips for Ultimate Chocolate Chip Cookies
- Serving Suggestions for Your Crispy Edge Cookies
- Storage and Make-Ahead Tips for Chocolate Chip Cookies
- Frequently Asked Questions About Making Chocolate Chip Cookies
- Estimated Nutritional Data for Classic Chocolate Chip Recipe
- Share Your Bakery Style Chocolate Chip Cookies Creations
Why This Homemade Chocolate Chip Cookie Recipe Delivers Bakery Style Cookies
It all snaps into place in this recipe because we’re focusing on texture over speed. Achieving those Best Chocolate Chip Cookies—thick, chewy, and those lovely crispy edges—is about controlling how the dough spreads and sets. We rely on a specific ratio of brown sugar, which attracts moisture and creates that fantastic chewiness. Plus, using softened, *not* melted, butter ensures we capture enough air when creaming, which keeps the cookies nice and stout in the oven. For other chewy delights, check out my recipe for maple brown sugar cookies!
Achieving Thick Chocolate Chip Cookies: The Secret is Dough Temperature
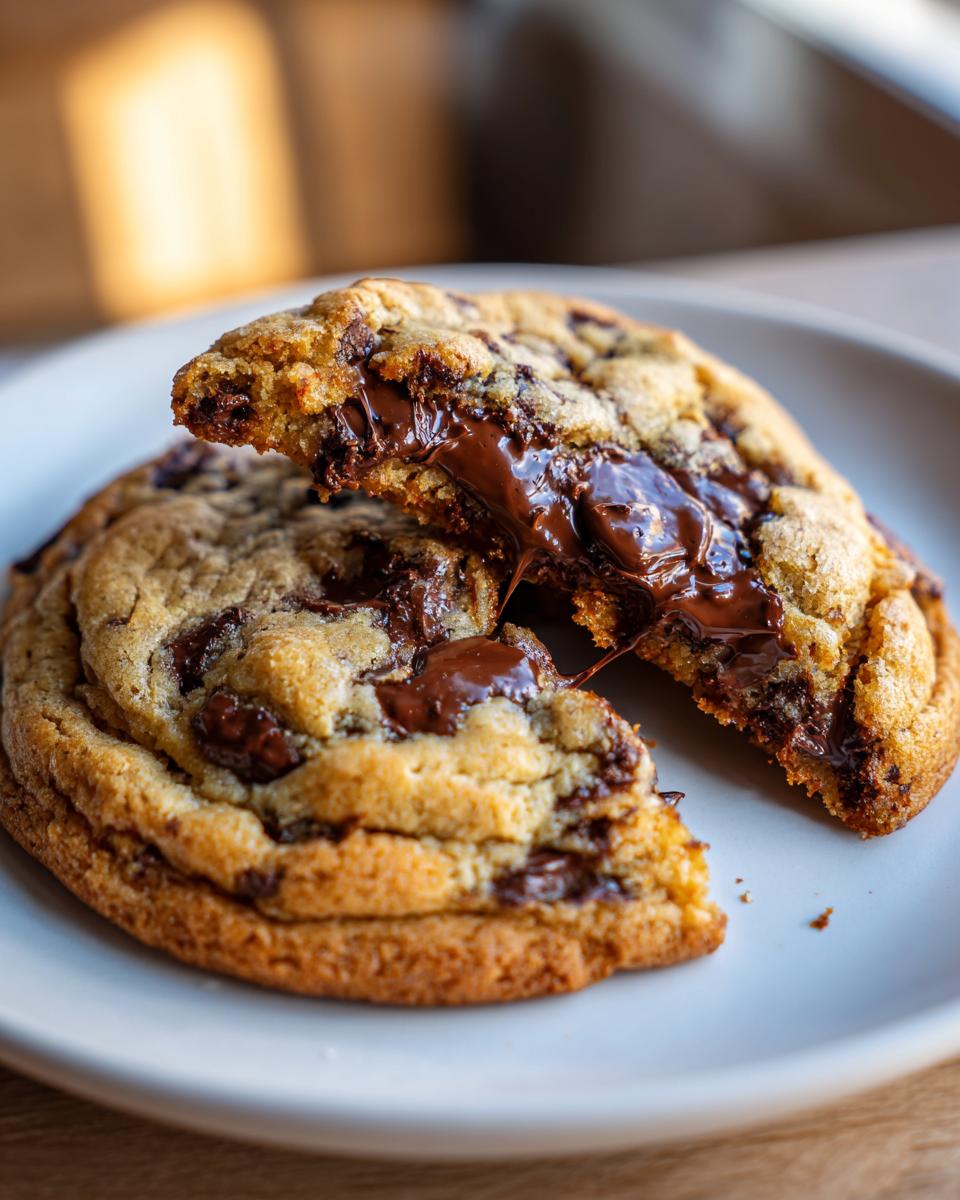
If you want cookies that look like they came from a swanky bakery display case and not a flat hockey puck, you absolutely must chill your dough. Seriously, don’t skip the chill time mentioned in the instructions! When the cold dough hits that hot oven, the edges start setting immediately, preventing the cookie from spreading out too far. This guarantees those wonderfully Thick Chocolate Chip Cookies with that gooey center we all adore.
Gathering Ingredients for Ultimate Chocolate Chip Cookies
Getting started is the fun part—seeing all those beautiful components laid out before the mixing begins! For this recipe, keep your ingredients ready to go. Remember, we need unsalted butter that’s softened, two big eggs that are at true room temperature, and that light brown sugar should be nicely packed into your measuring cup. Don’t forget the vanilla, that’s a flavor booster!
Ingredient Notes and Substitutions for Your Chocolate Chip Cookies
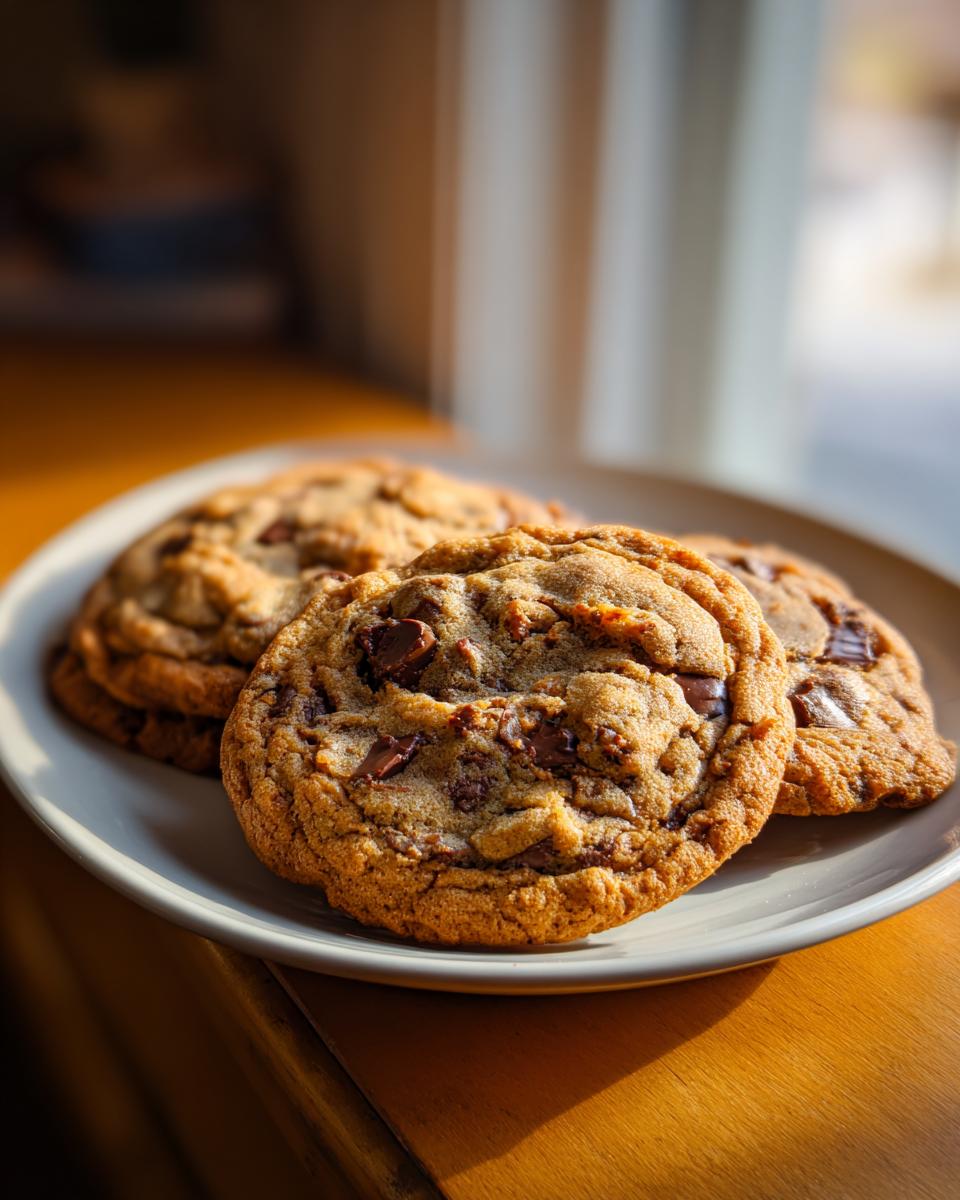
A few non-negotiables help us achieve perfection here. Always use **unsalted butter**; that way, I’m in complete control of the salt level, which is super important for flavor depth. You’ll notice we use more brown sugar than white granulated sugar—that molasses in the brown sugar is what guarantees a wonderful chewiness, pulling moisture into the batter. Also, don’t skimp on the chocolate! I love using a mix of standard semi-sweet chips and tearing up a good quality chocolate bar into chunks. Those little melty pools are the best part!
Step-by-Step Instructions for Perfect Chocolate Chip Cookies
Okay, time to roll up our sleeves! Even though these turn out like gourmet finds, making these Homemade Chocolate Chip Cookies from scratch is surprisingly straightforward. We’re going to build the cookie layer by layer to make sure every single one of these bakery darlings comes out exactly as intended. Ready to mix up the best dough ever? Don’t forget, if you’re looking for a plant-based alternative, I’ve got a great vegan chocolate chip cookies recipe too!
Mixing the Wet Ingredients for Chewy Chocolate Chip Cookies
First up is achieving that fluffy base. Grab your mixer—or a sturdy whisk if you’re feeling determined! Beat that softened butter with both the brown and white sugars until it gets genuinely light and airy, almost pale yellow. This takes a few minutes, but it’s so important for incorporating air. Then, add those room temperature eggs one at a time. I always make a point to use room temperature eggs because they blend seamlessly, creating a smoother base that leads directly to those wonderfully Chewy Chocolate Chip Cookies later on.
Combining Dry Ingredients and Folding in Chocolate for Bakery Style Cookies Recipe
Next, in a separate bowl, whisk your flour, baking soda, and salt together really well. This is the dry mix. Now, this is where we need patience! Add those dry ingredients to the wet mixture gradually on low speed, only mixing until you *just* see the last streaks of flour disappear. Stop mixing immediately! Overmixing at this stage develops gluten and makes tough cookies, which ruins our whole Bakery Style Cookies Recipe vibe. Once it’s combined, grab your spatula and gently fold in all those gorgeous chocolate chips—no aggressive stirring allowed!
Baking and Cooling for Gooey Center Cookies
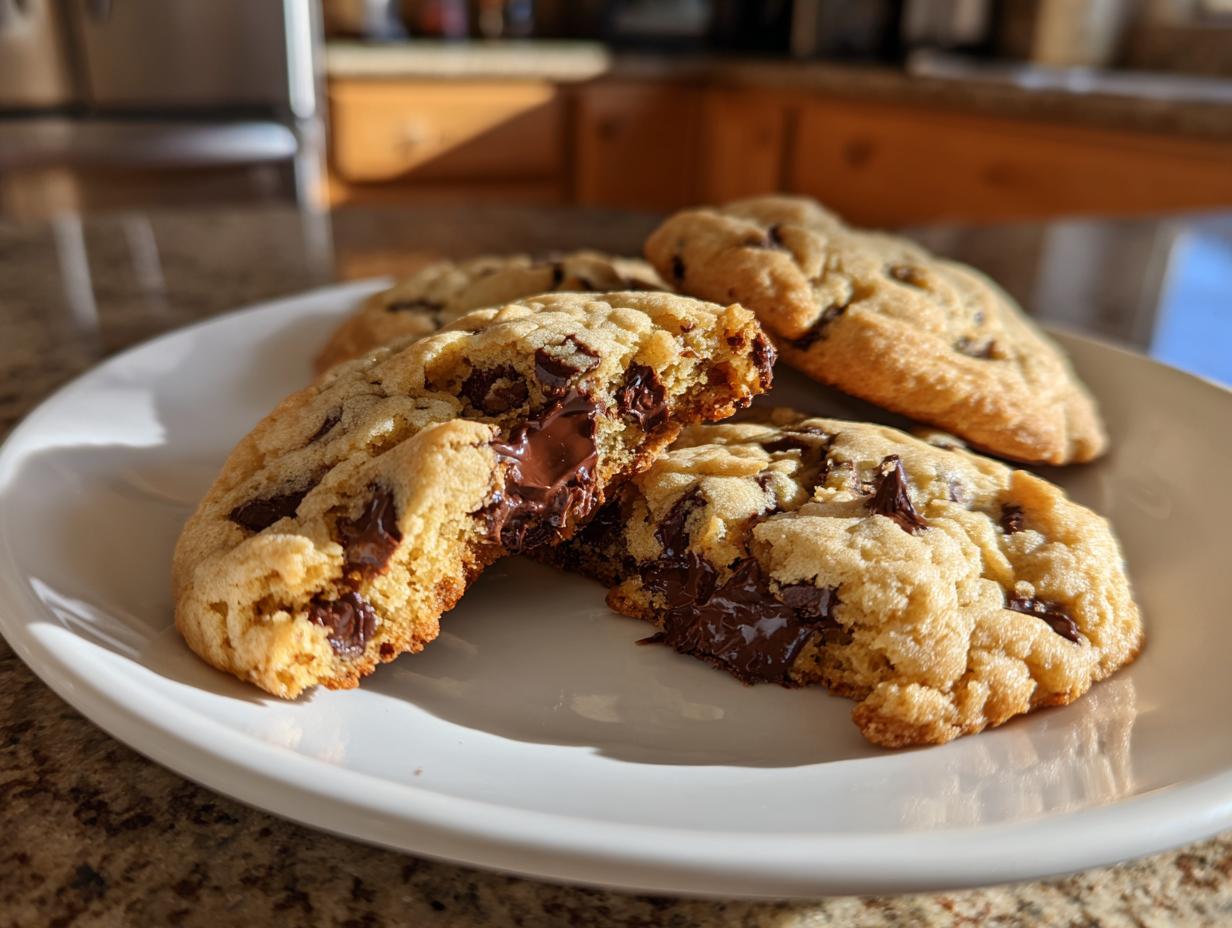
Scoop out large balls of dough, about three tablespoons each, and get them onto your parchment-lined sheets. If you chilled the dough, you’re already ahead of the game! Pop them into that 375°F oven. Here’s the trick for those Gooey Center Cookies: Pull them out when the edges look golden brown but the centers still look slightly soft, even a little underbaked. Seriously, trust your eyes over the timer sometimes! Immediately sprinkle on that flaky sea salt if you’re using it. They *must* rest on the hot pan for a full five minutes before you dare move them. That time lets the centers finish cooking just enough to set, giving you that perfect chew without drying out.
Essential Cookie Baking Tips for Ultimate Chocolate Chip Cookies
Even with the best recipe in hand, a few extra bits of know-how can elevate your baking from great to truly unforgettable. Mastering these chocolate chip cookies is all about the small details, like not trusting your oven temperature straight out of the box! For my best advice on getting that iconic towering look, you should peek at the secrets I uncovered for Levain-style cookies, but a few general rules apply here too. Always measure your flour by scooping it lightly into the cup and leveling it off—packing it down makes your cookies dense and sad, not thick. Also, if you want the deepest flavor, chilling the dough overnight is non-negotiable!
Troubleshooting Common Chocolate Chip Cookies Issues
Look, even I mess up sometimes. If your beautiful dough balls spread out into thin, lacy disks, nine times out of ten it’s because your butter was too warm or you skimped on the chilling time. Pop that pan back into the fridge for an extra 20 minutes! On the flip side, if your cookies come out dry and crumbly, you likely overbaked them. Remember, those edges should be set, but the middle needs to look slightly gooey when you pull them out. For advanced tips on getting that perfect crisp edge, this article shares some great insights.
Serving Suggestions for Your Crispy Edge Cookies
Honestly, eating these straight up is perfect, but half the fun of baking is the presentation and the pairing, right? You absolutely need a tall, icy-cold glass of whole milk waiting for these beauties. That contrast between the warm, buttery cookie and the cold milk is pure nostalgia. If you’re having them as an afternoon treat, a strong cup of black coffee really cuts through all that rich chocolate beautifully.
But if you want to step it up and make it an event, serve your Crispy Edge Cookies slightly warm with a scoop of the best vanilla bean ice cream—let it melt just a touch into the gooey center. For something a bit more grown-up, I sometimes whip up a quick, light dessert like a simple tiramisu as a follow-up!
Storage and Make-Ahead Tips for Chocolate Chip Cookies
We never *actually* have leftovers, but if you manage to resist eating all these chocolate chip cookies immediately, proper storage is key to keeping that bakery texture! For cookies you plan to eat within three or four days, stack them in an airtight container right after they cool completely. I usually put a small square of wax paper between layers just to keep them from sticking together.
Here’s the real game-changer for future-you: dough storage! Scoop out all your dough balls like you are ready to bake, place them on a parchment-lined tray, and freeze them solid. Once frozen, transfer those dough orbs to a heavy-duty freezer bag. When the craving hits, you can bake them straight from frozen—just add an extra two or three minutes to the cooking time. This ensures you always have a batch of Perfectly Baked Cookies on demand. If you need something savory after all that sugar, my recipe for soft dinner rolls is perfect!
Frequently Asked Questions About Making Chocolate Chip Cookies
I always get a ton of questions once people start trying this recipe out, which is wonderful! It just goes to show how many of us are on the hunt for truly amazing chocolate chip cookies. Here are some of the most common things folks ask me when they are aiming for that gourmet result. If I didn’t cover your burning question, drop a note below, and I’ll get back to you!
Can I use melted butter instead of softened butter in this chocolate chip cookies recipe?
Oh, honey, please don’t! If you want those beautiful, Thick Chocolate Chip Cookies, you need that softened butter. Melted butter just doesn’t whip up and incorporate the air needed to give your cookie structure. Using melted butter is the fast track to cookies that spread way too thin and end up flat and one-note crispy. You want structure, so stick to softened!
What is the best way to get that slightly crispy edge on my chocolate chip cookies?
That beautiful, slightly uneven edge comes down to two things that we intentionally build into this recipe. First, pull them out of the oven when the centers still look a touch jiggly—that slight underbaking is key! Second, generously sprinkle a pinch of flaky sea salt right on top as soon as they come out. That salt crystalizes slightly as the cookie cools on the hot pan, giving you the perfect textural contrast for your Crispy Edge Cookies.
What makes this the ‘Best Ever Chocolate Chip Cookie’?
It’s about the harmony of texture and flavor, honestly. We nailed the ratio of brown sugar to white sugar, which ensures that deep, delightful chewiness without sacrificing the buttery flavor. Combine that with our no-fail technique for ensuring a gooey center, and you’ve got a winner. I think that perfect balance truly makes this the Best Ever Chocolate Chip Cookie you’ll ever whip up at home. If you’re looking for other decadent baked goods, you might love my recipe for cheesy bread dip.
Estimated Nutritional Data for Classic Chocolate Chip Recipe
I always feel a little guilty posting this part, because honestly, who wants to think about numbers when you have warm cookies staring you down? But for those who track things, here is the estimated snapshot for one of our Classic Chocolate Chip Recipe cookies. Just remember, these numbers are rough estimates based on standard store-bought ingredients and that large 3-tablespoon scoop size we use. If you use extra dark chocolate or more chips, of course, those numbers shift!
- Serving Size: 1 cookie
- Calories: 250
- Sugar: 18g
- Fat: 14g
Share Your Bakery Style Chocolate Chip Cookies Creations
I truly cannot wait for you to pull that first warm, gooey batch out of your oven! Once you’ve tried these, I want to know what you think. Please come back and leave this recipe five stars if you loved it! It helps other bakers find this ultimate recipe, and your comments, especially pictures of your beautiful Bakery Style Chocolate Chip Cookies, absolutely make my day. Happy baking, and don’t forget to check out my recipe for fudgy chocolate crinkle cookies next!
PrintThe Ultimate Bakery Style Chocolate Chip Cookies: Thick and Chewy
Create the best chocolate chip cookies you have ever tasted. This recipe delivers thick, bakery-style cookies with perfectly gooey centers and slightly crispy edges, made simply from scratch.
- Prep Time: 15 min
- Cook Time: 12 min
- Total Time: 27 min
- Yield: 18 large cookies 1x
- Category: Dessert
- Method: Baking
- Cuisine: American
- Diet: Vegetarian
Ingredients
- 1 cup (2 sticks) unsalted butter, softened
- 1 cup packed light brown sugar
- 3/4 cup granulated sugar
- 2 large eggs, room temperature
- 1 tablespoon vanilla extract
- 2 1/4 cups all-purpose flour
- 1 teaspoon baking soda
- 1/2 teaspoon salt
- 2 cups semi-sweet chocolate chips (or a mix of chips and chunks)
- Flaky sea salt, for topping (optional)
Instructions
- Preheat your oven to 375°F (190°C). Line baking sheets with parchment paper.
- In a large bowl, beat the softened butter, brown sugar, and granulated sugar with an electric mixer until the mixture is light and fluffy, about 3 minutes.
- Beat in the eggs one at a time, mixing well after each addition. Stir in the vanilla extract.
- In a separate medium bowl, whisk together the flour, baking soda, and salt.
- Gradually add the dry ingredients to the wet ingredients, mixing on low speed until just combined. Do not overmix the dough.
- Fold in the chocolate chips using a spatula.
- Scoop the dough into large balls (about 3 tablespoons each) and place them 2 inches apart on the prepared baking sheets. For extra thick cookies, chill the dough for 30 minutes before baking.
- Bake for 10 to 13 minutes. The edges should be golden brown, but the centers should still look slightly underbaked and soft.
- Remove the sheets from the oven. Immediately sprinkle the tops of the cookies with flaky sea salt, if using.
- Let the cookies cool on the baking sheet for 5 minutes before transferring them to a wire rack to cool completely. The centers will set as they cool, giving you that perfect chewy texture.
Notes
- Use room temperature eggs; they incorporate better into the batter for a smoother texture.
- For the best flavor, chill the dough for at least 1 hour, or up to 24 hours, before baking. This prevents spreading and deepens the flavor.
- If you want extra gooey centers, slightly underbake them; they will continue to cook on the hot pan after removal from the oven.
Nutrition
- Serving Size: 1 cookie
- Calories: 250
- Sugar: 18
- Sodium: 150
- Fat: 14
- Saturated Fat: 8
- Unsaturated Fat: 6
- Trans Fat: 0
- Carbohydrates: 30
- Fiber: 1
- Protein: 3
- Cholesterol: 40