
If you’ve ever walked past one of those iconic Hawaiian food trucks steaming away on the North Shore, you know that sweet, garlicky aroma hits you long before you see the line! I remember feeling like I needed that flavor when I first got back into cooking regularly. It’s the taste of vacation, but it’s also surprisingly simple. Trust me, making authentic **hawaiian garlic shrimp** that captures that incredible, buttery, garlicky essence is an incredibly quick win for your dinner plate. This recipe is about reclaiming that delicious, soulful flavor without the fuss.
When I was deep in my design career, quick, flavor-packed meals were my lifeline. This shrimp is exactly that—a burst of sunshine that comes together faster than most takeout. You can find more of my go-to recipes perfect for busy weeknights when you need something bright and satisfying here: quick easy weeknight dinners.
- Why This Hawaiian Garlic Shrimp Recipe Tastes Like the Food Trucks
- Gathering Ingredients for Hawaiian Garlic Shrimp
- Step-by-Step Guide: **How to Make Hawaiian Shrimp**
- Serving Your Authentic Hawaiian Shrimp
- Tips for the Best Garlic Butter Shrimp Success
- Storage and Reheating Instructions for Leftover **Hawaiian Garlic Shrimp**
- Frequently Asked Questions about Hawaiian Garlic Shrimp Recipe
- Estimated Nutritional Breakdown for Garlic Butter Seafood
- Share Your Hawaiian Garlic Shrimp Creations
Why This Hawaiian Garlic Shrimp Recipe Tastes Like the Food Trucks
What makes this dish so famous isn’t just the shrimp; it’s what you swim the shrimp in! The flavor profile that screams ‘food truck’ comes from a very generous ratio of pure fat—butter, mostly—infused deeply with garlic. We aren’t being shy here. This recipe is built on creating that rich, heavy coating that sticks to every piece. It’s the signature taste of **Shrimp Truck Style Shrimp**, and it’s totally addictive.
As you read more about my journey here at DelishCraze, you’ll see I value recipes that deliver big flavor without endless complexity. This **Authentic Hawaiian Shrimp** delivers every single time. If you want to know more about my philosophy on cooking and creating flavor, check out my About Page!
The Secret to the Buttery Garlic Sauce Shrimp
You absolutely must use both olive oil and plenty of unsalted butter. The oil raises the smoking point so we don’t burn the butter immediately, and the butter brings that essential richness. The timing for the garlic is crucial, too. We only cook it for about 60 seconds until it’s fragrant—you want it mellow and sweet, not toasted and bitter. If it starts to brown, dump it out and start over! That perfect, heavy **Buttery Garlic Sauce Shrimp** is what we are aiming for.
Gathering Ingredients for Hawaiian Garlic Shrimp
Okay, let’s talk about what you need to pull off this amazing Hawaiian Garlic Shrimp. Since this is such a simple recipe, every single ingredient really shines through, which means quality matters! We need one pound of large shrimp—seriously, go for the big ones, peeled and deveined. They hold up better to all that glorious sauce and they look nicer on the plate.
For the sauce foundation, you’ll need a full half-cup (that’s one stick!) of unsalted butter, paired with a quarter-cup of olive oil. Then, we load up on flavor: six cloves of garlic minced super fine, a teaspoon of paprika, pepper, salt, and just a little bit of that optional red pepper flake kick. Don’t forget two tablespoons of fresh lemon juice for brightness!
Ingredient Notes and Substitutions for Island Flavors Shrimp
That lemon juice absolutely has to be fresh, guys. Those little bottled lemon juices just don’t have the zing we need to balance the richness of the butter. Also, since there are so few main components, try to use the best quality butter you can find—it makes a huge difference in the finish of that sauce.
If you want that signature island spice, the red pepper flakes are your best friend! Start with a quarter teaspoon, see how you like it, and remember you can always add more later. This dish is all about customizable heat against that rich, buttery garlic base.
Step-by-Step Guide: **How to Make Hawaiian Shrimp**
Alright, let’s get cooking because this **Quick Garlic Shrimp Skillet** moves fast! Remember, once you start, you’re only about ten minutes away from eating, so have everything ready to go—this is not the time for a mid-sauce scramble.
First things first: we have to deal with the shrimp. Take your peeled and deveined shrimp and pat them absolutely bone dry with paper towels. I mean it! Every bit of moisture has to go. We are sautéing here, not steaming, and wet shrimp equals rubbery results. This simple prep step is maybe the most important part of getting that great texture.
Next, in a big skillet over medium heat, melt your butter right along with the olive oil. You want a nice pool of fat shimmering slightly. Now, toss in that finely minced garlic. You’re going to cook this for just about one minute until that heavenly smell fills your kitchen. Be vigilant! We’re aiming for aromatic, not brown and bitter. If you burn this garlic, you’ve ruined the sauce base, so keep that heat moderate.
Once the garlic is singing, throw those dried shrimp into the pan. Try to get them in a single layer so they have room to sear instead of steam. Let them cook for two to three minutes on the first side until they turn pink, then flip them and cook for just another two or three minutes. Shrimp cooks so fast, and overcooking it is a tragedy I want you to avoid! You’ll know they’re done when they are opaque and curled up nicely.
When the shrimp are looking perfect, immediately drop the heat down low. This stops them from overcooking while we finish the sauce. Stir in your lemon juice, paprika, pepper, salt, and those optional red pepper flakes for that island zing. Toss everything quickly until every piece of shrimp is utterly coated in that rich, garlicky butter. Remove the skillet from the heat right away so the residual warmth finishes bathing the shrimp in sauce.
For more super speedy meals I’ve perfected, check out my guide on quick easy 10-minute pizza bagels when you need something carb-heavy!
Achieving Perfect Searing in Your **Quick Shrimp Dinner**
The main focus for searing success is humidity control. If your shrimp are wet, they steam. Steaming cooks them gently, but it won’t give you that slightly browned, savory exterior we love from the food trucks. So really work those paper towels!
The second crucial point is timing the garlic, just like I mentioned before. You are looking for the fat to simply carry the flavor of the garlic forward, not transform its color. If the garlic goes past light gold, its flavor profile shifts entirely. Remember, we want that **Best Garlic Butter Shrimp** flavor, which means timing is everything in those initial few minutes on the stove.
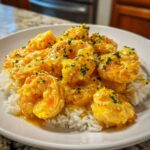
Serving Your Authentic Hawaiian Shrimp
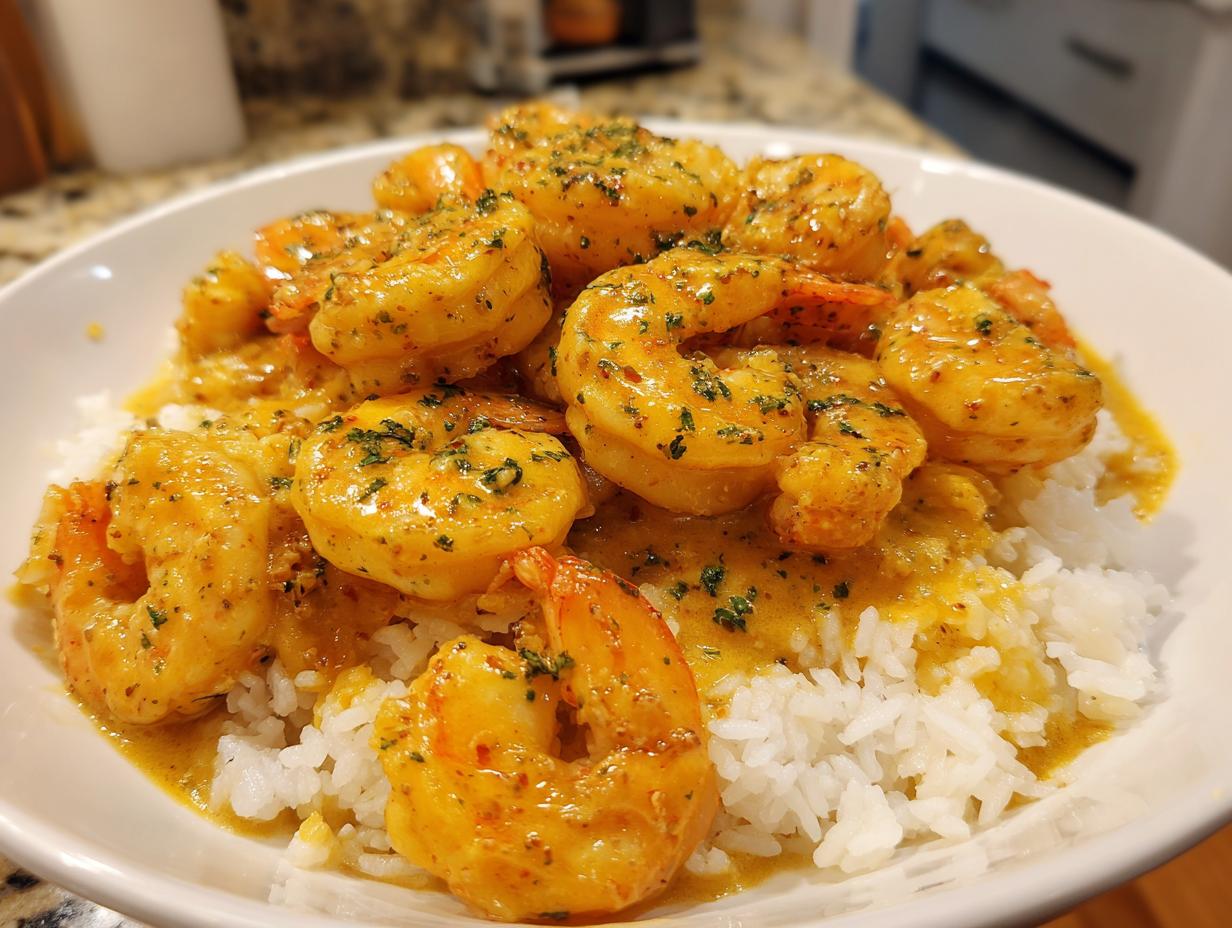
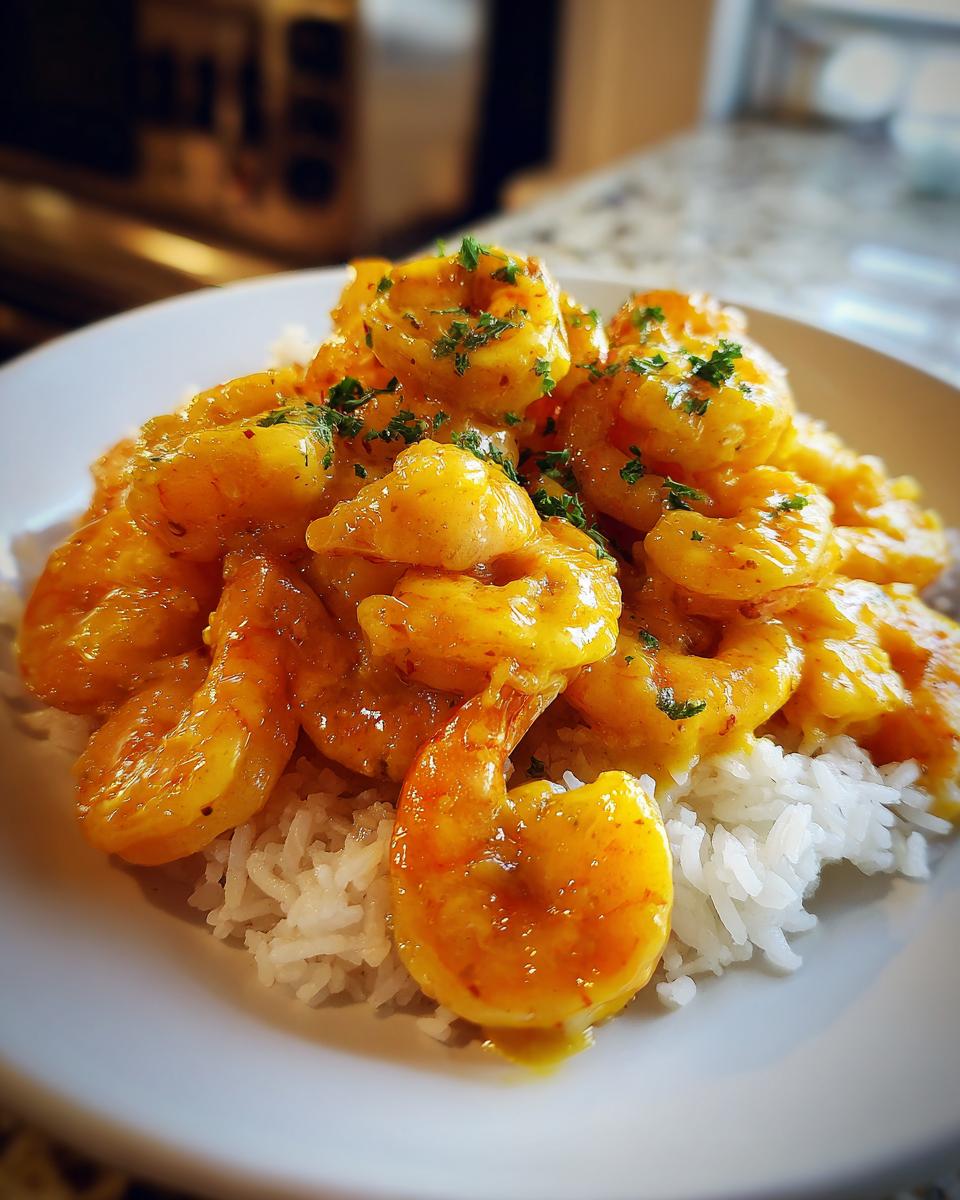
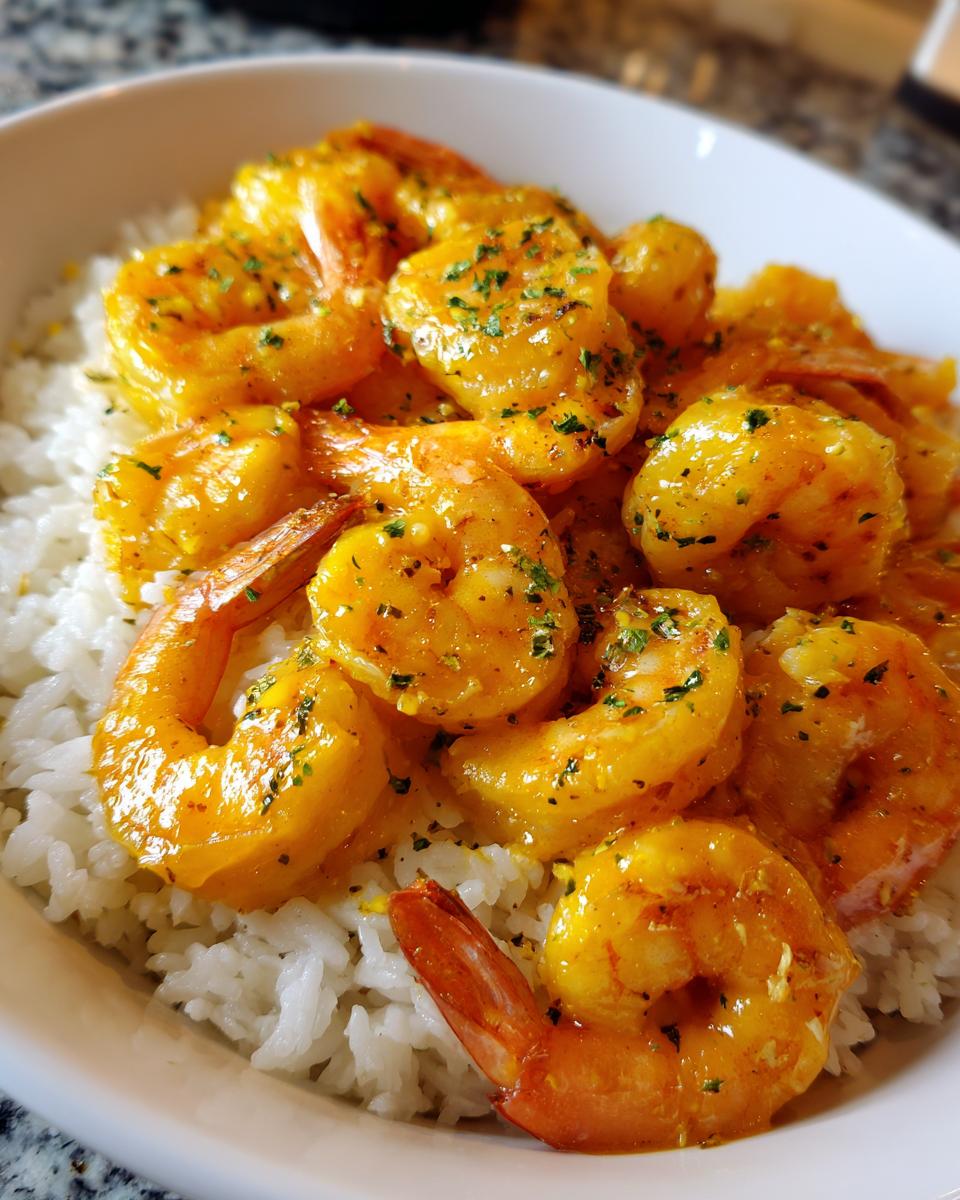
You’ve made the magic, now don’t let it sit around! Just like at the food trucks, this **Hawaiian Garlic Shrimp** needs to be served immediately while it’s sizzling hot. This is non-negotiable, my friends. The whole point of this dish is to drench something else in that epic garlic butter sauce.
The essential pairing is, of course, a mountain of fluffy white rice. The rice is the perfect vehicle; it soaks up every rich, buttery, garlicky drop left in the pan. Don’t skimp on spooning that sauce right over the top of the rice mound! Trust me, this is where the vacation truly happens.
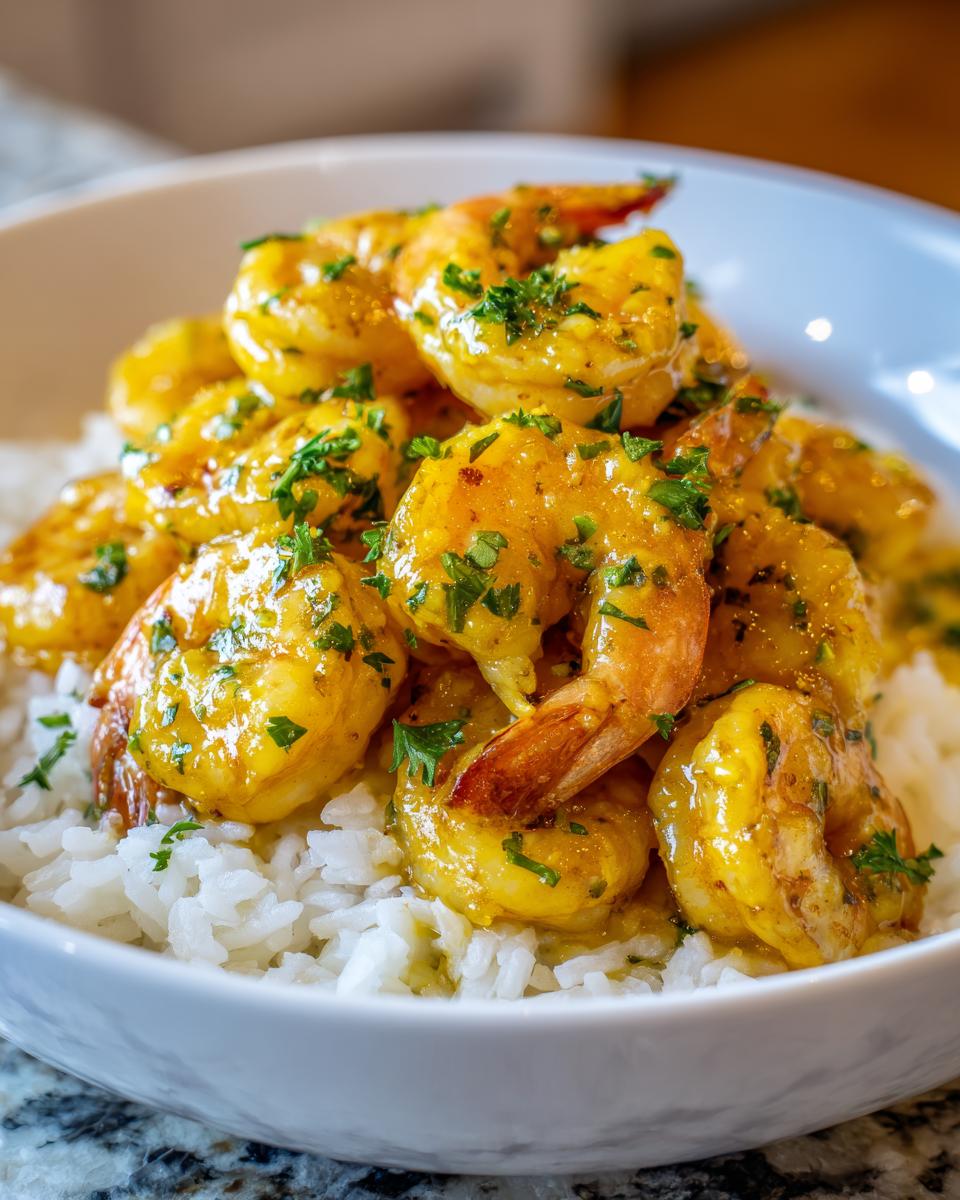
Before you bring it to the table, grab some fresh parsley—a couple of tablespoons, chopped up—and sprinkle it right over everything for a pop of color and freshness. It just brightens up the whole plate! If you’re looking to take your rice game up a notch while you’re at it, I have a fantastic garlic butter rice recipe that pairs beautifully.
Tips for the Best Garlic Butter Shrimp Success
We’ve nailed the flavor profile, now let’s talk texture and timing so you get the absolute **Best Garlic Butter Shrimp** experience possible. The most important thing, which I mentioned briefly, is serving this immediately. If you let this beautiful sauce sit around too long, the shrimp will keep cooking in the residual heat and get chewy. Nobody wants that!
But here’s a great trick if you want a little more surface texture, almost like a tiny crisp coating on the shrimp before you toss it in the sauce: dust your dried shrimp lightly with about one tablespoon of cornstarch before they hit the hot pan. This little extra step grabs onto the butter beautifully and makes your **Quick Garlic Shrimp Skillet** feel extra decadent.

If you’re curious about other ways to use this amazing sauce combination, I have a fantastic air fryer shrimp garlic butter recipe you might enjoy too. Seriously, work fast once you toss in that lemon juice, and enjoy these tropical flavors!
Storage and Reheating Instructions for Leftover **Hawaiian Garlic Shrimp**
Even though this **Hawaiian Garlic Shrimp** demands to be eaten immediately, sometimes we just can’t finish it all. If you have leftovers, don’t you dare just throw them out! Store them in an airtight container in the fridge; they’ll be perfectly good for up to two days.
The trickiest part is reheating seafood, right? If you blast shrimp on high heat, you’ll end up with little rubber balls, and we absolutely cannot let that happen to this beautiful shrimp. Next time you want some, put the shrimp and any leftover sauce in a small skillet over very low heat. Just warm it through gently until it’s heated all the way. If you need more sauce, just melt a tiny pat of butter in there while it warms up. It keeps the shrimp tender and delicious!
Frequently Asked Questions about Hawaiian Garlic Shrimp Recipe
I always get the best questions after people try this recipe for the first time! It means you’re really paying attention to the details, which I love. Here are a few common things folks ask me about making the **Hawaiian Garlic Shrimp Recipe** perfectly.
Can I use frozen shrimp for this Garlicky Shrimp Dinner Ideas?
Yes, you absolutely can, especially if you’re grabbing them last minute, but you have to treat them right first! If you are using frozen shrimp, make sure they are completely thawed. Once they are thawed, you need to treat them exactly the same way you would fresh shrimp: pat them until they are completely dry using paper towels. Any residual ice crystals or water means you’re going to steam the shrimp instead of searing them slightly in that glorious butter.
What kind of rice works best with Seafood Recipes with Rice?
This is an easy one! For this particular dish where the sauce is the star—and trust me, you want to sop up every drop—you want a rice that’s a little sticky and plump. I lean hard toward medium-grain white rice, like Calrose, or even Jasmine rice. Those shorter grains hold onto the buttery sauce much better than long-grain varieties like Basmati. You need that fluffy texture to make the perfect base for your **Seafood Recipes with Rice** meal.
How do I make the Famous Hawaiian Shrimp Recipe spicier?
That island kick comes from heat, and we totally control that! If you want things hotter than the quarter teaspoon of red pepper flakes I suggested, play around with the cayenne pepper. Add just a tiny pinch of cayenne right along with the paprika during the sauce finishing step. You can also just double the red pepper flakes! Just taste your sauce mixture before you pull it off the heat and adjust until it gives you that warm tingle you’re looking for in the **Famous Hawaiian Shrimp Recipe**.
If you’re experimenting with other seafood and vegetable pairings, I have a wonderful creamy Seafood Salad Recipe that might inspire you next!
Estimated Nutritional Breakdown for Garlic Butter Seafood
Now, I know some of you lovely cooks are watching your macros or just curious about what’s in your delicious dinner! It’s important to remember that the nutritional information I provide here for this **Garlic Butter Seafood** is just an estimate, a guideline based on standard product measurements.
Because we’re using real butter and olive oil generously to get that authentic taste, the fat content is certainly satisfying! But remember, exact figures can change quite a bit depending on the brand of shrimp you buy, exactly how much butter melts into your rice underneath, and if you skipped the optional paprika. Just use these numbers as a rough guide for budgeting your day!
Share Your Hawaiian Garlic Shrimp Creations
Now that you’ve mastered the **Hawaiian Garlic Shrimp** and hopefully soaked up every last bit of that sauce with perfect white rice, I really want to see what you came up with! Home cooking is all about sharing the joy, and your experience helps the next person cooking this dish feel more confident.
When you make this, please take a quick second to hop back here and give the recipe a rating—I’m aiming for five stars all around, of course! If you managed to try that cornstarch trick for extra crispiness, or maybe you went wild with the red pepper flakes to really bring that spice, tell me all about it in the comments below. Details matter!
Did you follow the instructions perfectly, or did you tweak the garlic amount? I love hearing about your personal touch on these classics. If you’re sharing photos online, please tag me so I can cheer you on!
If you have any feedback that isn’t recipe-specific or want to chat about other food ideas, you can always reach out directly via my contact page. Happy cooking, and mahalo for trying out this taste of the islands!
PrintAuthentic Hawaiian Food Truck Garlic Shrimp: Buttery, Garlicky, and Ready in 20 Minutes
Make the famous Hawaiian Garlic Shrimp right at home. This recipe delivers juicy shrimp coated in a rich, bold, buttery garlic sauce, capturing the essence of the island food trucks. Serve over rice to soak up every drop of the sauce.
- Prep Time: 10 min
- Cook Time: 10 min
- Total Time: 20 min
- Yield: 2 servings 1x
- Category: Dinner
- Method: Skillet Cooking
- Cuisine: Hawaiian
- Diet: Low Fat
Ingredients
- 1 pound large shrimp, peeled and deveined
- 1/2 cup (1 stick) unsalted butter
- 6 cloves garlic, minced finely
- 1/4 cup olive oil
- 2 tablespoons fresh lemon juice
- 1 teaspoon paprika
- 1/2 teaspoon black pepper
- 1/4 teaspoon salt
- 1/4 teaspoon red pepper flakes (optional, for island kick)
- 2 tablespoons fresh parsley, chopped (for garnish)
- Cooked white rice, for serving
Instructions
- Pat the shrimp completely dry using paper towels. This helps them sear better.
- In a large skillet over medium heat, melt the butter with the olive oil.
- Add the minced garlic to the skillet. Cook for about 1 minute until fragrant, being careful not to burn the garlic.
- Add the dried shrimp to the skillet in a single layer if possible. Cook for 2 to 3 minutes per side until pink and opaque. Do not overcook.
- Reduce the heat to low. Stir in the lemon juice, paprika, black pepper, salt, and red pepper flakes, if using. Toss the shrimp until they are fully coated in the buttery garlic sauce.
- Remove the skillet from the heat immediately.
- Serve the **Best Garlic Butter Shrimp** immediately over hot, cooked white rice. Spoon extra garlic butter sauce over the rice.
- Garnish with fresh chopped parsley.
Notes
- For the most authentic flavor, use high-quality butter.
- Serving this **Garlic Shrimp Skillet** over rice is essential; the rice soaks up the rich sauce.
- If you want crispier shrimp, dust them lightly with 1 tablespoon of cornstarch before adding them to the pan.
Nutrition
- Serving Size: 1 serving (approx. 8 oz shrimp)
- Calories: 450
- Sugar: 1
- Sodium: 450
- Fat: 30
- Saturated Fat: 15
- Unsaturated Fat: 15
- Trans Fat: 0
- Carbohydrates: 5
- Fiber: 0
- Protein: 38
- Cholesterol: 350