
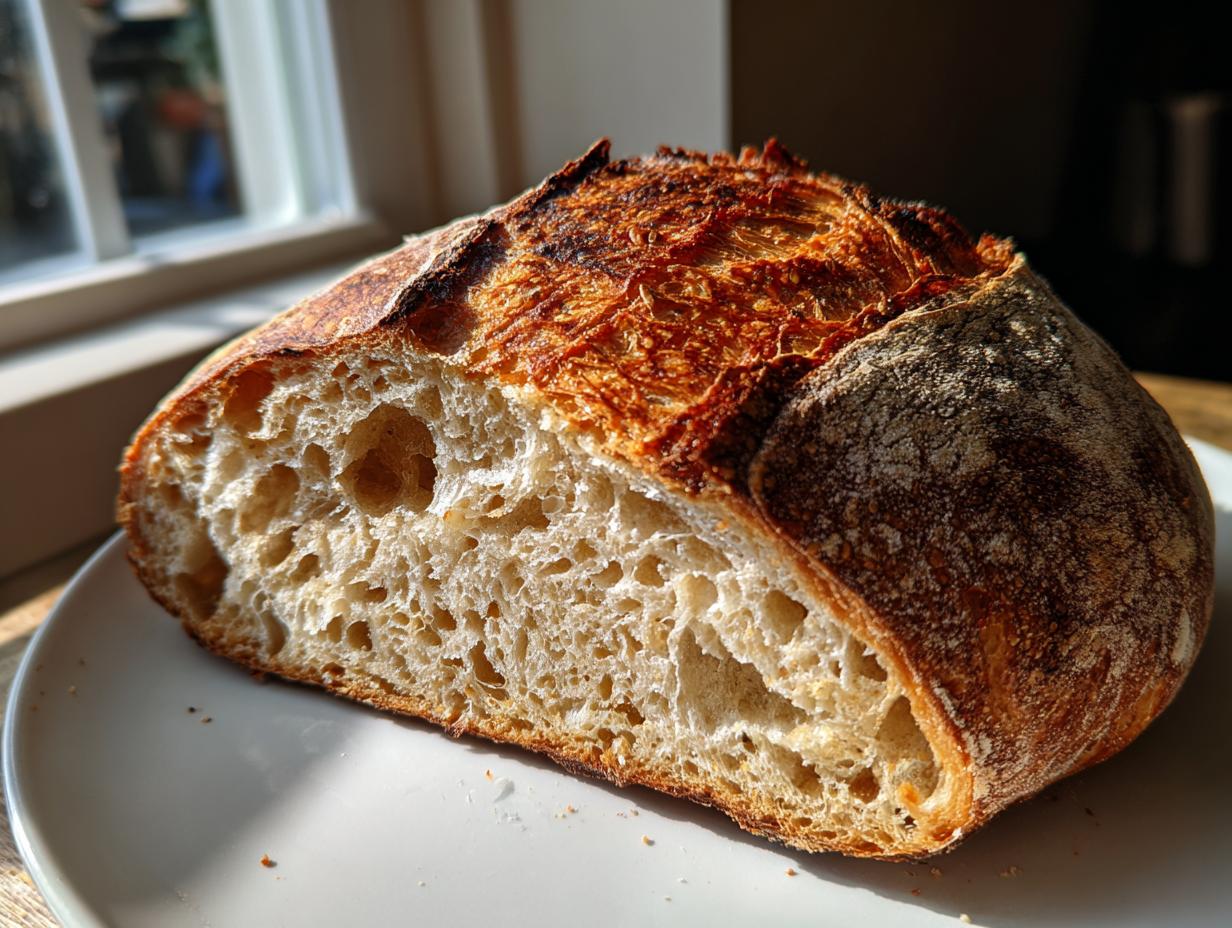
There is truly nothing that signals comfort and home quite like the crackle of a fresh, crusty loaf pulled straight from the oven. If you’ve been intimidated by making bakery-style bread at home, I’m here to tell you to put those worries aside! This no-knead artisan bread recipe is my absolute favorite way to reconnect with the kitchen; it’s impossibly easy, requires only four ingredients, and guarantees that perfect contrast: a wonderfully crispy crust hugging a soft, airy inside. For me, reclaiming the simple joy of baking this wonderful homemade bread has been part of reclaiming my own pace. Trust me, you’ve got this!
- Why This No-Knead Artisan Bread Recipe is Your New Favorite Bread
- Essential Ingredients for Your Simple Loaf Recipe
- How to Prepare Your No Knead Artisan Bread
- Tips for Success When Baking This Bread
- Storing and Refreshing Your Fresh Baked Bread
- Serving Suggestions for This Versatile Bread Loaf
- Frequently Asked Questions About Making Artisan Bread
- Nutritional Estimates for Your Homemade Bread
- Share Your Experience Baking This Amazing Bread
Why This No-Knead Artisan Bread Recipe is Your New Favorite Bread
I know what you’re thinking: a long rest time means it’s complicated, but honestly, that’s the beauty of this method! The very slow, long fermentation is what replaces all that heavy kneading you see in other homemade bread recipes. It builds incredible, deep flavor into the dough structure without you even having to break a sweat. This recipe transforms just four basic things into something truly special. If you’re looking for reliable results every time, this is the one to screenshot. Maybe try making my fantastic homemade lasagna next week to use up that great dough-making confidence!
- It works perfectly for a beginner bread recipe—seriously!
- You save time since you aren’t actively working the dough.
- The flavor is complex, like bread you’d buy at a specialty shop.
Minimal Effort for Maximum Flavor in Your Bread
The magic really happens while you’re watching TV or sleeping! Since we use instant yeast and cool water, the yeast works slowly over 12 to 18 hours. This long rest is crucial because that’s when all the complex, wonderfully acidic flavor notes develop. It’s the secret to making this easy bread baking feel totally gourmet. We let time do the hard work instead of our hands!
The Perfect Crusty Bread Recipe Texture
Everyone deserves that audible crunch when they cut into their loaf, right? That’s where the heavy Dutch oven comes in. By baking the dough inside that preheated, covered pot, you trap all the steam released from the dough. This steam prevents the crust from setting too fast, allowing the loaf to spring up beautifully. When you remove the lid for those last 15 minutes, you get that glorious, deeply colored, crusty bread recipe finish we all dream about.
Essential Ingredients for Your Simple Loaf Recipe
When you realize this incredible bakery-style loaf only uses four things, you start appreciating the power of simplicity! Getting these components right is key to nailing the texture. This is where we build the foundation for your new favorite simple loaf recipe. Don’t go rummaging for specialty items; look for these basics!
- 3 cups All-Purpose Flour
- 1 1/2 teaspoons Salt
- 1/4 teaspoon Instant Yeast
- 1 1/2 cups Water (must be cool!)
Ingredient Notes and Substitutions for Better Bread
You asked if you can swap things out, and while this recipe thrives on simplicity, I have a few pointers. We are using Instant Yeast here, which is fabulous because it doesn’t require blooming—you just toss it right in with the dry ingredients. The cool water is important; it slows down the yeast so our long rest period actually develops flavor instead of just making the dough explode too fast.
I stick to All-Purpose Flour because it gives that perfect tender crumb, but if you want something slightly chewier, go ahead and swap out one cup for bread flour. That’s the only substitution I usually recommend for this particular loaf.
How to Prepare Your No Knead Artisan Bread
Okay, deep breaths! This is where the magic happens, but I promise you, it’s mostly waiting. Since we aren’t doing any real work here, this is truly the best method for anyone interested in no knead bread. Just follow the timing, and you’re golden. Remember that feeling you get when you know something great is coming? That’s the next 18 hours! You know what else tastes amazing with this bread? My homemade lasagna.
Mixing and the Long Rest for Perfect Bread Dough Recipe Easy
First things first: you just mix. Combine your flour, salt, and yeast in a big bowl. Then pour in that cool water and mix it with a wooden spoon until it looks shaggy and sticky. Stop mixing there! Don’t try to knead it; that’s the point! Cover that bowl tightly with plastic wrap. Now, tuck it away somewhere at room temperature for 12 to 18 hours. Seriously, that long. This slow fermentation is what makes this a fantastic dough recipe easy to master, even though the clock is doing the work.
Shaping and Preheating for Your Artisan Bread from Scratch
When that dough has rested its long rest, gently scrape it out onto a lightly floured surface. You aren’t kneading here either; we just want to gently fold it over on itself a couple of times to make a rough ball. It’ll feel a little floppy, and that’s fine! Place that dough ball seam-side down on a piece of parchment paper, cover it loosely, and let it sit for just 30 minutes. While it rests, put your Dutch oven—lid and all—into the cold oven and set your oven to 450°F (232°C) to get roaring hot. Planning ahead is the real secret to this artisan bread from scratch!
Baking Instructions for a Bakery Style Bread at Home
Safety first! When the oven is ready, carefully pull out that blazing hot Dutch oven. You’ll lift your dough using the parchment paper handles like a sling and gently lower the whole package right into the pot. Put the lid back on right away. Bake covered for 30 minutes. This traps the steam we need for that crackly exterior. After 30 minutes, take the lid off. Keep baking for another 10 to 15 minutes until you see that deep, satisfying golden-brown shell develop. It should look exactly like the loaves you see in fancy bakeries!

Tips for Success When Baking This Bread
Even the easiest recipes have little tricks that turn a good bake into a spectacular one. Since we’re dealing with a high-hydration, relaxed dough, we need to respect the temperature and steam! These little pointers are things I learned over my first few attempts at baking with yeast that really made a difference in getting that perfect artisan result. If you’re aiming for the best crust possible, pay close attention here!
Managing Dough Texture and Water Temperature for Ideal Bread
Listen, I need you to trust me on the texture: your dough *should* look sticky. If you’re used to kneading bread until it’s smooth and tight, this super-wet texture might freak you out, but don’t add more flour! That high hydration level is what creates those huge, airy holes inside. If your kitchen is super warm, go ahead and use water that’s even slightly colder than room temperature. That ensures fermentation stays slow and controlled throughout the whole long rest.
Alternative Baking Methods for Your Homemade Bread Recipes
Okay, so maybe you don’t have a heavy Dutch oven. Don’t panic! You can absolutely still make fantastic homemade bread recipes without one. If you have a baking stone or even just a heavy baking sheet, use that! The key here is steam—it’s what gives us that shatteringly crisp crust. Set a shallow, oven-safe pan on the bottom rack while the oven preheats. Once you put your loaf in (on the stone/sheet), carefully pour about a cup of boiling water into that hot pan below and quickly close the door behind it. That steam injection is vital!
If you want an easy dip for that crusty bread, you simply must try my easy chocolate dip recipe—it’s great for breakfast!
Storing and Refreshing Your Fresh Baked Bread
I know you’re dying to slice into this masterpiece the moment it comes out, but please, please let it cool completely on a wire rack first! This is Step 10, and it’s non-negotiable. If you cut into this fresh baked bread while it’s still warm, all that gorgeous steam trapped inside escapes, and your airy interior turns gummy. Don’t let your hard work go to waste for a few warm slices!
Once cooled, store it cut-side down on a wooden cutting board, or wrap it loosely in a clean kitchen towel. If it gets a little soft the next day—which happens to the best loaves—don’t toss it! Just spritz the crust lightly with water and pop it back into a 350°F oven for about five minutes. That blast of dry heat wakes the crust right back up. It’s perfect for dipping into my homemade brown gravy recipe!
Serving Suggestions for This Versatile Bread Loaf
This bread is so much more than just something to slather butter on—though, please, do that too! Because it has that fantastic crust and airy middle, it’s an absolute champion for dipping. I love tearing off hunks and soaking up the broth from a hearty soup or simmering stew. If you’re feeling fancy, slice it thin, toast it lightly, and top it with some diced tomatoes, basil, and garlic for a super quick bruschetta base. And, if you happen to have any leftover from dinner, it makes the world’s best base for French toast, or dip it in my amazing creamy horseradish sauce if you’re feeling savory!
Frequently Asked Questions About Making Artisan Bread
I always get a ton of questions once people get this recipe, which is totally fine! Baking bread for the first time can feel intimidating, even when I say it’s easy. People want to know exactly what magic is happening during that long rest, or if they can cheat the system a little bit. Don’t worry; I’ve covered the most common concerns below to help you get that perfect loaf on your first try!
Can I use Active Dry Yeast instead of Instant Yeast for this bread?
Yes, you absolutely can! But since Active Dry Yeast needs a little wake-up call, you have to bloom it first. Mix that yeast with about half a cup of lukewarm—not hot!—water and a tiny pinch of sugar. Let it sit for about 10 minutes until it gets foamy. Then, use that mixture in place of the cool water measurement. It will still work beautifully for your homemade bread recipes!
Why does this bread recipe require such a long resting time?
This is the secret sauce, honestly! That 12-to-18-hour rest isn’t just about rising; it’s about flavor development. That slow fermentation breaks down the starches and develops the complex, slightly tangy flavor profile you find in true artisan bread from scratch. It also builds the gluten structure so beautifully that we don’t need to knead at all! It’s worth the wait, truly.
Once you get the hang of it, you’ll be making this all the time! If you need a savory dipping sauce for your next loaf, check out my recipe for creamy horseradish sauce; it’s surprisingly great with crusty bread!
Nutritional Estimates for Your Homemade Bread
I know some of you are counting macros or just curious about what’s in this beautiful loaf, so here are the numbers! Remember these are just estimates based on the standard ingredients we used when testing this recipe. Baking for ourselves at home means we get to control exactly what goes in, which is part of why I love it so much. This recipe is wonderfully low in fat and has zero cholesterol, which is a win!
Here’s a general breakdown per slice (which is based on yielding 1 standard loaf):
- Serving Size: 1 slice
- Calories: 220
- Sugar: 0.5g
- Sodium: 300mg
- Fat: 0.5g
- Saturated Fat: 0.1g
- Carbohydrates: 46g
- Protein: 7g
- Cholesterol: 0mg
A little disclaimer from me: Because home baking can vary based on different brands of flour or if you use slightly different water amounts, these figures are a guideline, not a hard rule. But hey, it’s homemade bread—it’s going to be better for you than anything plastic-wrapped at the store, no matter what!
Share Your Experience Baking This Amazing Bread
Now that you’ve made this truly spectacular loaf, I desperately want to hear about it! Did that crust crackle just right? Did you manage to wait until it cooled before slicing? Please leave a star rating below so other home cooks know this is the real deal. If you snapped a picture of your golden creation, tag me on social media. I love seeing your successes, and you can always learn more about my philosophy over on the About page!
PrintEasiest Homemade Artisan Bread with Crispy Crust
Create a bakery-style loaf at home with this simple, no-knead artisan bread recipe. You achieve a wonderfully crispy crust and a soft, airy interior using only four basic pantry ingredients.
- Prep Time: 5 min
- Cook Time: 45 min
- Total Time: 13 hours 50 min
- Yield: 1 loaf 1x
- Category: Baking
- Method: No-Knead Baking
- Cuisine: American Home Cooking
- Diet: Vegetarian
Ingredients
- 3 cups All-Purpose Flour
- 1 1/2 teaspoons Salt
- 1/4 teaspoon Instant Yeast
- 1 1/2 cups Water (cool)
Instructions
- In a large bowl, mix the flour, salt, and instant yeast together.
- Pour in the cool water and mix with a wooden spoon until just combined. The dough will be shaggy and sticky; do not knead it.
- Cover the bowl tightly with plastic wrap and let the dough rest at room temperature for 12 to 18 hours. This long, slow rise develops flavor.
- After the long rest, gently scrape the dough out onto a lightly floured surface. Fold the dough over itself a few times to form a rough ball. Do not overwork it.
- Place the dough ball seam-side down into a piece of parchment paper. Cover the dough loosely with a clean kitchen towel and let it rest for 30 minutes.
- About 30 minutes before the second rest ends, place a Dutch oven (with the lid on) into your oven and preheat to 450°F (232°C).
- Carefully remove the hot Dutch oven from the oven. Lift the dough using the parchment paper handles and gently lower it into the hot pot.
- Cover the Dutch oven with the lid and bake for 30 minutes.
- Remove the lid and continue baking for another 10 to 15 minutes, or until the crust is deep golden brown.
- Carefully remove the bread from the Dutch oven and let it cool completely on a wire rack before slicing.
Notes
- Using cool water and instant yeast allows for the long, slow fermentation that creates the best artisan flavor and texture.
- If you do not have a Dutch oven, you can bake this on a baking stone or sheet pan, but place a shallow pan of water on the bottom rack to create steam for the first 20 minutes of baking.
- This recipe is excellent for beginners learning about baking with yeast.
Nutrition
- Serving Size: 1 slice
- Calories: 220
- Sugar: 0.5
- Sodium: 300
- Fat: 0.5
- Saturated Fat: 0.1
- Unsaturated Fat: 0.4
- Trans Fat: 0
- Carbohydrates: 46
- Fiber: 1.5
- Protein: 7
- Cholesterol: 0