
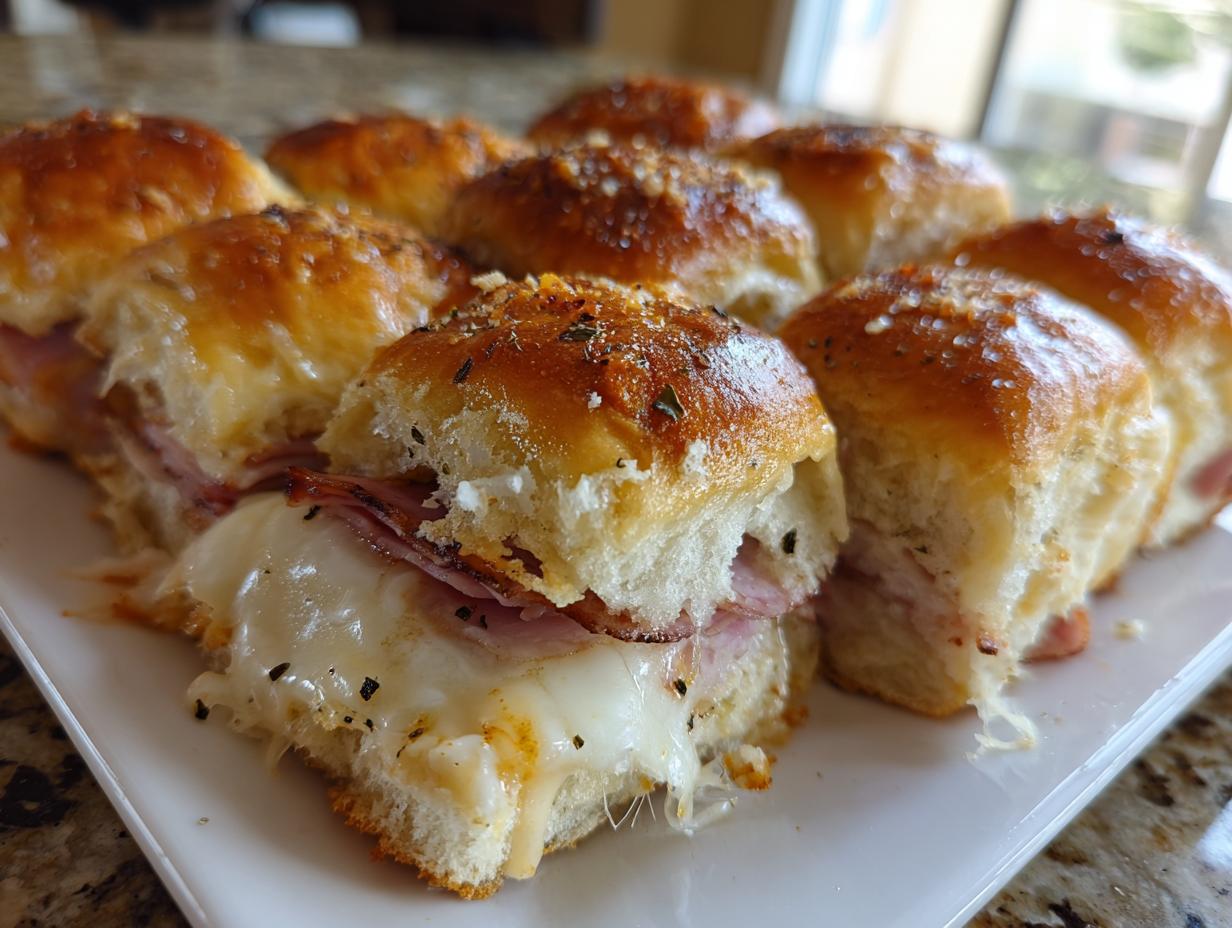
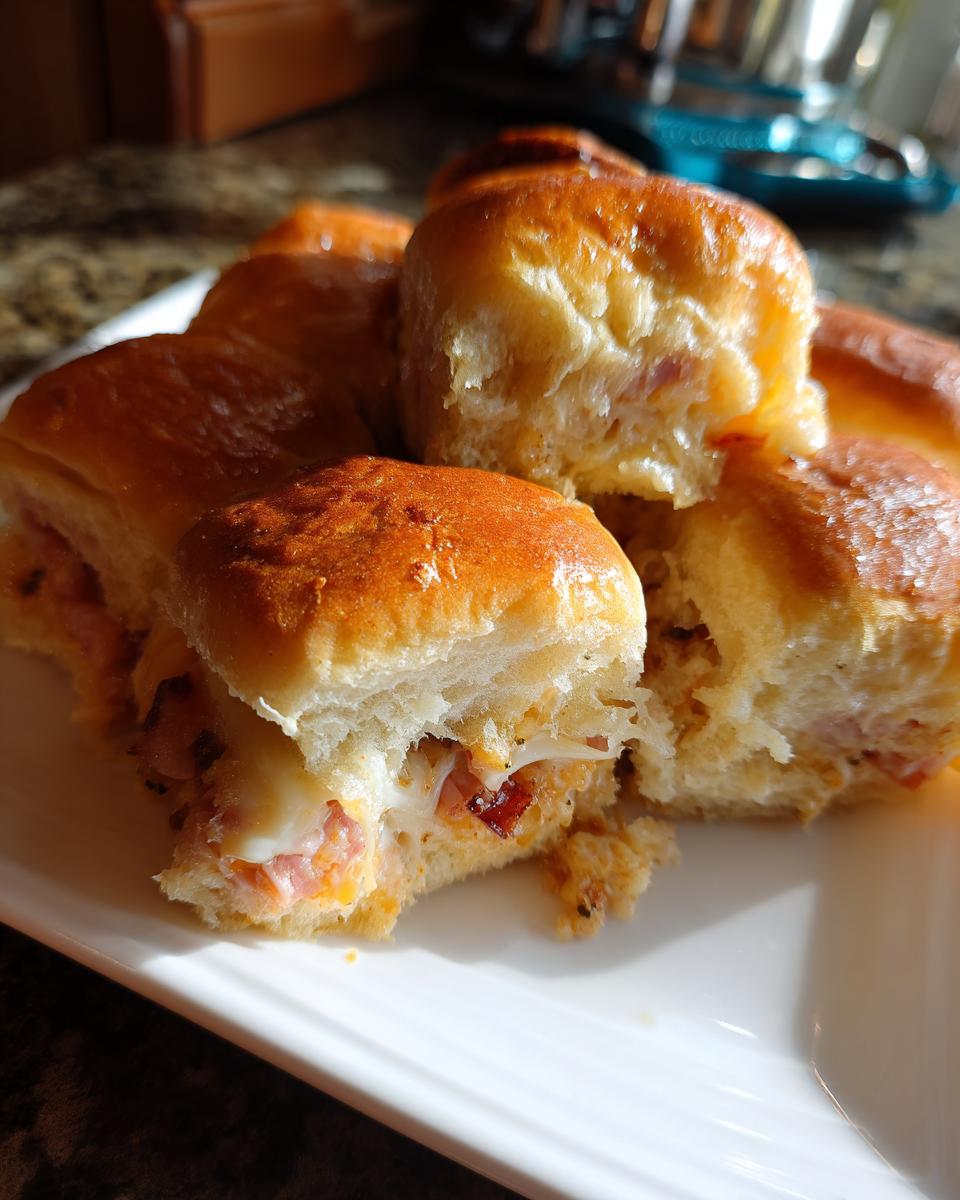
Honestly, if you’re looking for the easiest, most crowd-pleasing appetizer ever, you’ve landed in the right spot! These Ham and Cheese Sliders are my absolute go-to for *any* get-together. They’re like little bites of heaven baked on soft Hawaiian rolls, all smothered in this incredible buttery mustard glaze. Trust me, you’ll be asked for this recipe over and over! Whether it’s a chaotic potluck, a nail-biting game day, or just a cozy holiday party, these little sandwiches just *work*. I remember making them for the first time for a neighborhood barbecue and watching them disappear in minutes – pure magic! It’s moments like those, seeing people connect over good food, that make me so happy I started DelishCraze.
- Why You'll Love These Ham and Cheese Sliders
- Ingredients for Perfect Ham and Cheese Sliders
- Essential Equipment for Baked Sliders
- How to Make Ham and Cheese Sliders: Step-by-Step
- Tips for Perfect Ham and Cheese Sliders Every Time
- Make-Ahead and Storage for Party Sandwiches
- Variations for Your Ham and Cheese Sliders
- Serving Suggestions for Tailgate Food
- Frequently Asked Questions About Ham and Cheese Sliders
- Estimated Nutritional Information
Why You’ll Love These Ham and Cheese Sliders
Seriously, these ham and cheese sliders are a game-changer. You’re going to absolutely adore them because:
- They’re ridiculously easy! Seriously, you just layer, glaze, and bake. It’s almost too simple to be true.
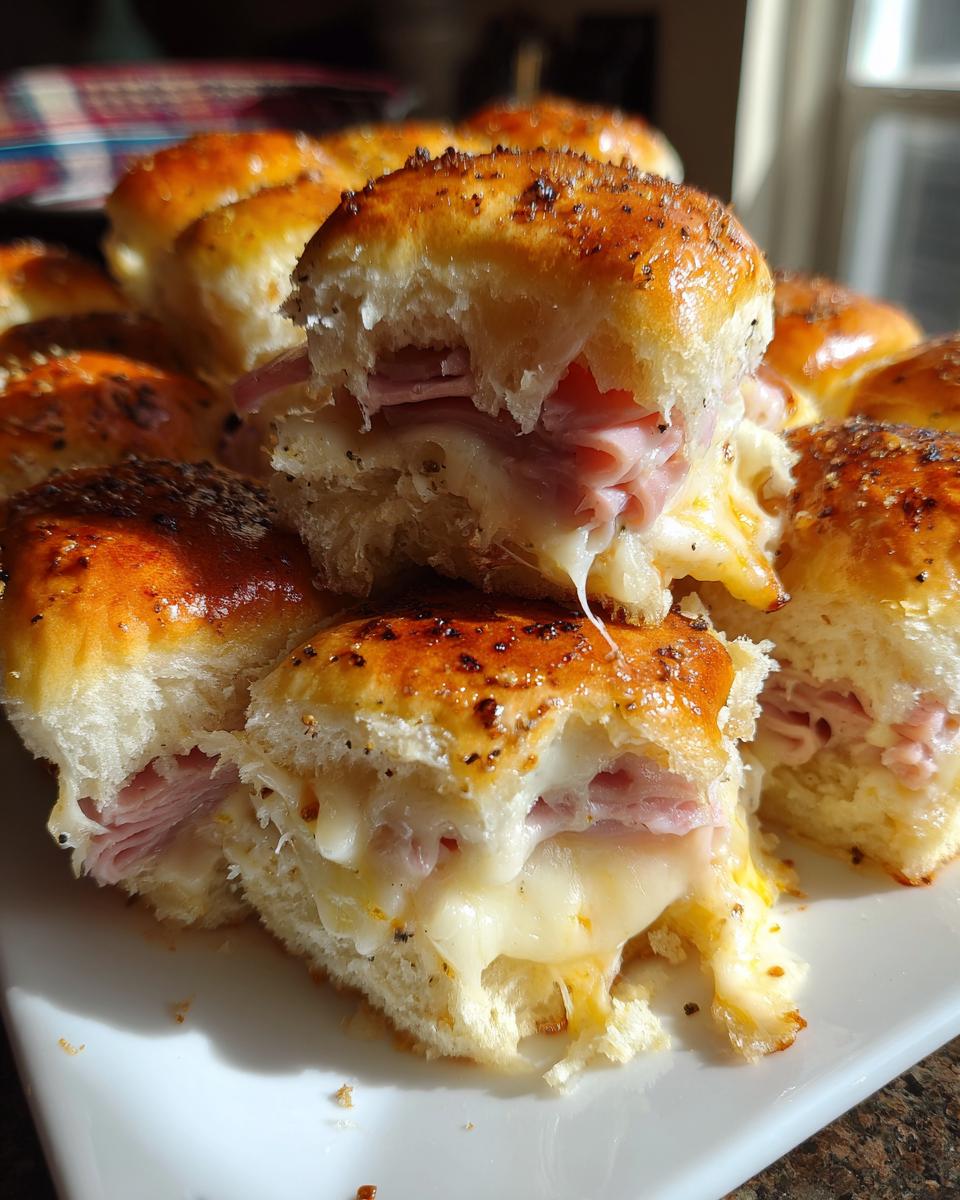
- The flavour is out of this world! That sweet Hawaiian roll, savory ham, melty Swiss, and the tangy, buttery mustard glaze? Perfection!
- They’re the ultimate party food. Whether it’s game day, a potluck, or a big holiday bash, these party sandwiches disappear fast.
- Make-ahead magic! You can literally assemble them the day before and just pop them in the oven when you’re ready. Talk about stress-free hosting!
Ingredients for Perfect Ham and Cheese Sliders
Now, let’s talk about what you’ll need to make these little wonders! The beauty of ham and cheese sliders is that they use super common ingredients. You’ll need:
- 24 Hawaiian sweet rolls – the soft sweetness is totally key here!
- 1/2 cup butter, just make sure it’s all melted
- 1 tablespoon Dijon mustard – for that little zing!
- 1 teaspoon Worcestershire sauce – gives it a lovely depth
- 1 teaspoon poppy seeds – they add such a fun little texture!
- 1/4 teaspoon garlic powder
- 1/4 teaspoon onion powder
- 12 slices of your favorite deli ham – I like to get it sliced a little thicker
- 12 slices of Swiss cheese – it melts like a dream with the ham!
Essential Equipment for Baked Sliders
Okay, so you don’t need a whole fancy kitchen arsenal for these baked sliders, but a few key players will make your life *so* much easier. You’ll definitely want a good-sized baking sheet – big enough to hold all 24 sliders snugly. A small mixing bowl is perfect for whipping up that glorious buttery mustard glaze. And don’t forget aluminum foil! It’s your best friend for getting those babies perfectly steamy and melty before getting that golden crust. That’s pretty much it, believe it or not!
How to Make Ham and Cheese Sliders: Step-by-Step
Alright, let’s get down to business and make these amazing ham and cheese sliders! It really is as simple as it sounds, and watching them bake up into golden, cheesy perfection is so satisfying. Don’t worry if you’ve never made anything like this before – follow along, and you’ll be a slider pro in no time!
Preparing the Hawaiian Roll Sliders
First things first, let’s get our base ready. You’ll want to preheat your oven to a nice 350°F (that’s 175°C). Now, grab your package of Hawaiian rolls and a serrated knife. Carefully slice all the rolls in half horizontally, just like you’re making a giant sandwich! Set the top halves aside for a moment. In a small bowl, it’s time to whip up that magical glaze. Just whisk together the melted butter, Dijon mustard, a splash of Worcestershire sauce, those fun poppy seeds, garlic powder, and onion powder until it’s all combined. Easy peasy!
Assembling and Baking Your Ham and Cheese Sliders
Okay, now for the fun part: assembly! Lay out the bottom halves of your Hawaiian rolls on a good-sized baking sheet. This is where the magic layers happen! Arrange 6 slices of ham evenly across the rolls, then layer 6 slices of Swiss cheese right on top. Add the remaining 6 slices of ham over the cheese. Now, gently place the top halves of the rolls back onto the cheesy ham. Take your buttery mustard mixture and brush it generously all over the tops of the rolls. Make sure every little nook and cranny gets coated! Cover the whole baking sheet tightly with aluminum foil. Pop it into your preheated oven for about 15 minutes. This step steams them up and melts the cheese beautifully. After 15 minutes, carefully remove the foil and let them bake for another 5 to 10 minutes. You’re looking for those gorgeous golden-brown tops and bubbly, melted cheese. When they look perfectly baked, take them out and let them rest for just a few minutes before you slice them apart and serve. Enjoy that incredible pull-apart action!

Tips for Perfect Ham and Cheese Sliders Every Time
You know, making these ham and cheese sliders isn’t just about following steps; it’s about a few little tricks that make them *extra* special. First off, don’t skimp on the quality of your ham and cheese! Since they’re the star, choosing good deli ham and Swiss makes a huge difference. Also, when you’re slathering on that buttery mustard glaze, be generous! It really toasts up those rolls and makes them irresistible. My personal little secret, something I learned from my mom, is to make sure your butter is just melted, not piping hot, when you mix it with the mustard and other goodies. This way, it doesn’t break the Dijon and really lets all those flavors meld beautifully. And absolutely try the poppy seeds – they’re tiny but they add *so* much character!
Make-Ahead and Storage for Party Sandwiches
Oh, the best part about these party sandwiches? They’re totally make-ahead friendly! Seriously, you can assemble the whole batch of ham and cheese sliders earlier in the day, or even the night before. Just arrange them on your baking sheet, cover them up really well with plastic wrap, and pop them in the fridge. When you’re ready to bake, you might need to add just a few extra minutes to that covered baking time to make sure they heat through properly. And if you happen to have any leftovers (which I highly doubt!), they’re still pretty tasty the next day! Just store them in an airtight container at room temperature for a day or two – they’re great for a quick snack!
Variations for Your Ham and Cheese Sliders
While these Swiss and ham sliders are pretty darn perfect as is, I just *love* playing around in the kitchen! You can totally make them your own. Want to swap out the Swiss cheese? Try a nice sharp cheddar or even some provolone; they melt beautifully! If you’re feeling adventurous, you could even add a thin slice of turkey or some crispy bacon alongside the ham. Some folks like to sneak in a little thinly sliced pickle or even some caramelized onions right before you top them with the roll. It’s all about making them your own little masterpiece!
Serving Suggestions for Tailgate Food
These ham and cheese sliders are fantastic on their own, but they really shine when served with a few classic favorites! They make a great addition to any spread of tailgate food. Think about pairing them with a big bowl of crunchy coleslaw, some zesty potato salad, or even a lighter Greek pasta salad. A simple side of kettle chips or some veggie sticks with a creamy dip also rounds out the meal perfectly. Everything just comes together so nicely for such a fun party spread!
Frequently Asked Questions About Ham and Cheese Sliders
Got a burning question about these irresistible ham and cheese sliders? You’re not alone! Here are some common queries I get, along with my best answers:
Can I use a different type of bread for these sliders?
Absolutely! While Hawaiian rolls give these party sandwiches that signature touch of sweetness and softness, you can totally use other small rolls. Slider buns, dinner rolls, or even King’s Hawaiian sub rolls will work. Just make sure they’re roughly the same size so they bake evenly. If you use a less sweet roll, you might find the flavors a bit more savory.
How do I make sure my sliders don’t get soggy?
Ah, the dreaded soggy slider! The trick with these baked sliders is all about that buttery mustard glaze and the baking process. Brushing the glaze generously on top helps toast the rolls. Baking them covered for the first 15 minutes steams them perfectly without letting them get soggy, and then uncovering them lets that beautiful golden crust form. If you’re making them ahead, assemble them right before baking if you can, or make sure they’re well-covered in the fridge to keep moisture out until baking time.
Can I freeze ham and cheese sliders?
That’s a great question for planning parties! While I haven’t personally frozen the *baked* sliders (they disappear too fast!), you absolutely can freeze the *unbaked* assembled sliders. Just assemble them on your baking sheet, cover them *really* well with plastic wrap, then add a layer of foil, and freeze. When you’re ready to bake, thaw them overnight in the fridge and then proceed with the recipe, adding a little extra time to the covered baking stage. It’s a lifesaver for big events!
What kind of ham and cheese work best?
For these Swiss and ham sliders, I really love using a good quality deli ham – something like Black Forest or honey ham works wonderfully. And Swiss cheese is classic for a reason; its nutty flavor is delicious! But don’t be afraid to experiment! Provolone, cheddar, Monterey Jack, or even a mix of cheeses can be fantastic. The key is a cheese that melts well. For the ham, just aim for slices that aren’t paper-thin so they hold up during baking.

Estimated Nutritional Information
Alright, so you’re probably wondering about the nitty-gritty details! While every batch can vary a little depending on the exact brands you use for your ham and cheese sliders, here’s a general idea of what you’re looking at per slider (and remember, these are just estimates!):
- Serving Size: One slider
- Calories: Around 250
- Fat: About 12g
- Protein: Roughly 10g
- Carbohydrates: Approximately 28g
- Sodium: Comes in around 600mg (this can vary a lot with deli meats and cheeses!)
It’s always good to keep in mind that these numbers are estimates, but they give you a nice ballpark figure!
PrintHam and Cheese Sliders

Easy ham and cheese sliders baked on Hawaiian rolls with a buttery mustard glaze. Perfect for parties, these make-ahead appetizers are a crowd-pleaser.
- Prep Time: 15 min
- Cook Time: 25 min
- Total Time: 40 min
- Yield: 24 sliders 1x
- Category: Appetizer
- Method: Baking
- Cuisine: American
- Diet: Vegetarian
Ingredients
- 24 Hawaiian sweet rolls
- 1/2 cup butter, melted
- 1 tablespoon Dijon mustard
- 1 teaspoon Worcestershire sauce
- 1 teaspoon poppy seeds
- 1/4 teaspoon garlic powder
- 1/4 teaspoon onion powder
- 12 slices deli ham
- 12 slices Swiss cheese
Instructions
- Preheat your oven to 350°F (175°C).
- Slice the Hawaiian rolls in half horizontally.
- In a small bowl, whisk together the melted butter, Dijon mustard, Worcestershire sauce, poppy seeds, garlic powder, and onion powder.
- Place the bottom halves of the rolls on a baking sheet.
- Layer 6 slices of ham and 6 slices of Swiss cheese on top of the bottom halves.
- Top with the remaining 6 slices of ham.
- Place the top halves of the rolls over the ham and cheese.
- Brush the butter mixture evenly over the tops of the rolls.
- Cover the baking sheet tightly with aluminum foil.
- Bake for 15 minutes.
- Remove the foil and bake for another 5-10 minutes, or until the tops are golden brown and the cheese is melted.
- Let the sliders cool slightly before slicing them apart and serving.
Notes
- For make-ahead convenience, assemble the sliders and store them covered in the refrigerator for up to 24 hours before baking. Add a few extra minutes to the covered baking time if baking from chilled.
- You can substitute cheddar cheese or provolone for Swiss cheese if desired.
- Add a pinch of cayenne pepper to the butter mixture for a little heat.
Nutrition
- Serving Size: 1 slider
- Calories: 250
- Sugar: 6g
- Sodium: 600mg
- Fat: 12g
- Saturated Fat: 6g
- Unsaturated Fat: 6g
- Trans Fat: 0g
- Carbohydrates: 28g
- Fiber: 1g
- Protein: 10g
- Cholesterol: 30mg