
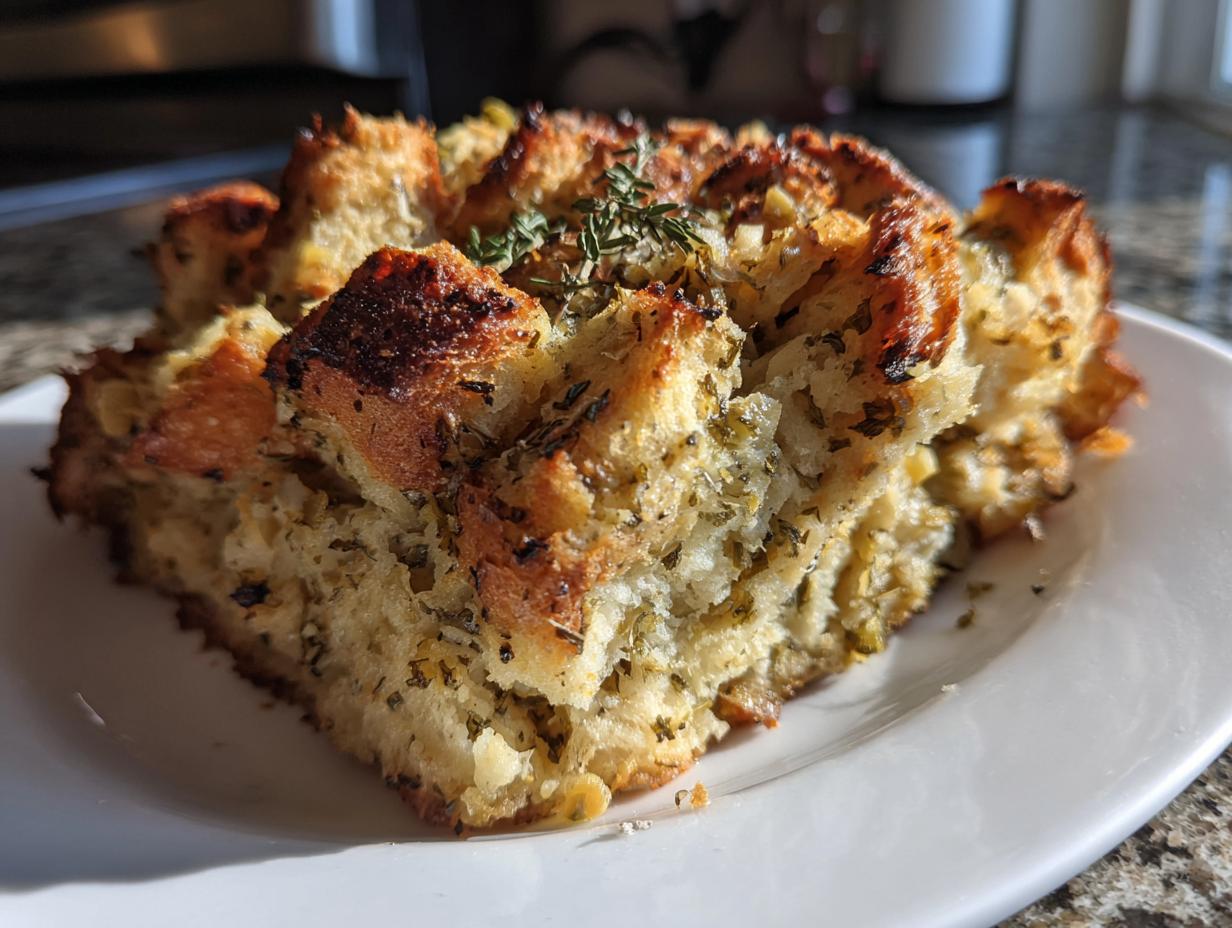
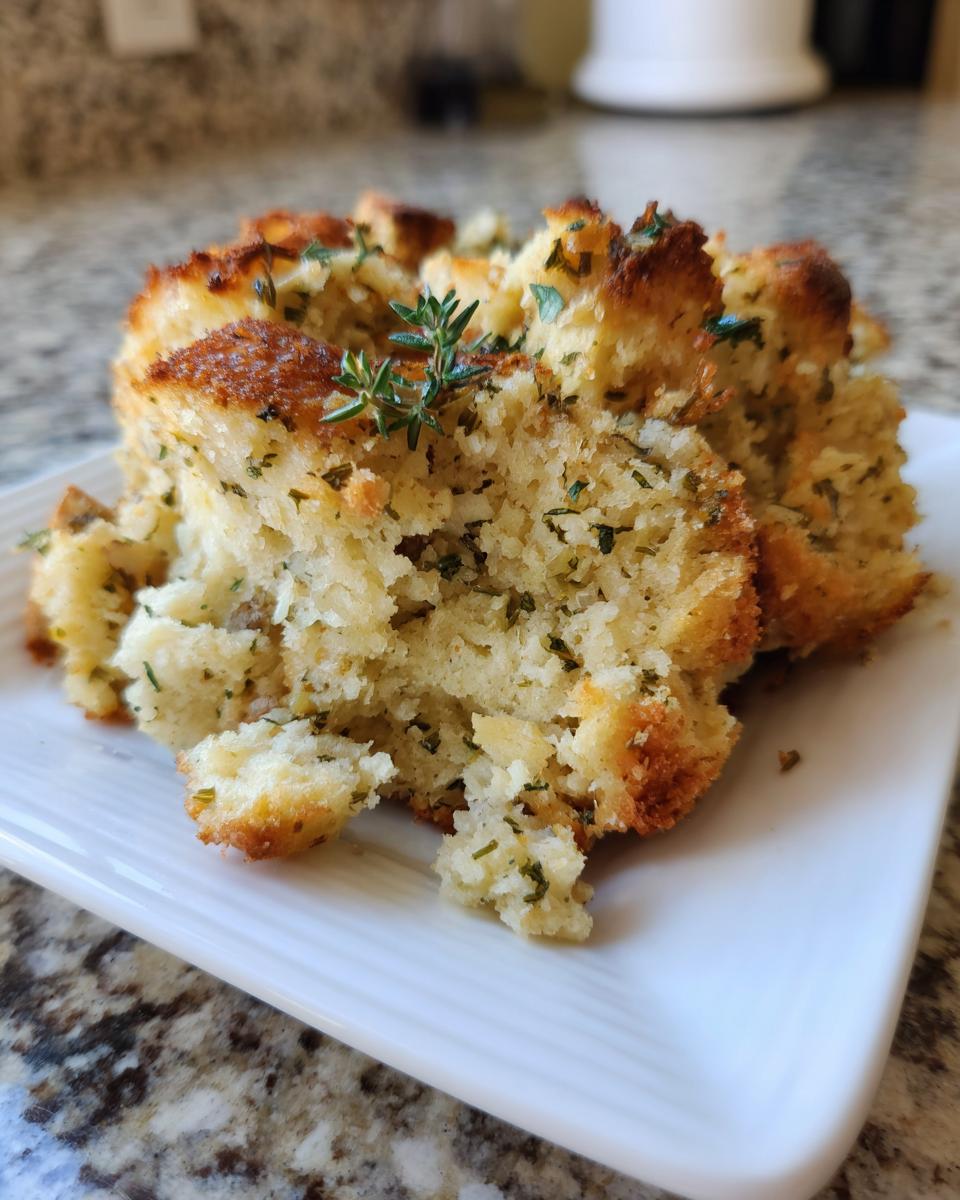
Oh, the smells! Nothing quite transports me back to my childhood holidays like the aroma of fresh sage and thyme baking away. If you’re chasing that perfect holiday side dish memory, stop scrolling right now. We’re talking about the kind of stuffing that makes people forget the turkey! My goal, something Olivia Rosewood is passionate about, is keeping American classics simple but flawless. This recipe for the Best Classic Homemade Herb Stuffing Recipe nails that texture everyone chases—it’s wonderfully dense and moist down in the middle, yet you get those addictive crispy, butter-soaked edges on top. Trust me on this; it’s our go-to, and you’ll see why it quickly becomes yours! I know you’re going to love this easy approach to amazing Thanksgiving flavor.
- Why This Classic Homemade Stuffing Recipe Works
- Ingredients for The Best Classic Homemade Herb Stuffing
- How to Prepare This Buttery Stuffing Recipe
- Tips for the Ultimate Traditional Dressing Recipe
- Variations: Sausage and Herb Stuffing
- Serving Suggestions for Your Classic Thanksgiving Stuffing
- Storage and Reheating Best Practices for Homemade Stuffing
- Frequently Asked Questions About Making Stuffing
- Nutritional Estimate for This Savory Bread Pudding Side
- Share Your Experience Making This Classic Stuffing
Why This Classic Homemade Stuffing Recipe Works
It’s not just luck that this Homemade Stuffing Recipe turns out perfectly every time; it’s all about setting up the right foundation. We focus on simple steps that guarantee a fantastic end result, especially that holiday-worthy texture. This recipe shines because we respect the bread and we respect the butter!
- It uses day-old sourdough or French bread cubes, which are sturdy enough to hold texture but soft enough to absorb flavor.
- We incorporate fresh, high-impact aromatics instead of relying on dried powders.
- The broth-to-bread ratio is carefully calibrated—we under-moisten slightly on purpose!
Achieving Moist and Crispy Stuffing Texture
This is the big secret to Moist and Crispy Stuffing, seriously! Because we dry out the bread cubes a little first—either by letting them sit out or giving them a quick toast—they can absorb the buttery broth without turning completely mushy. Then, by pressing it into the dish and baking it uncovered (after an initial cover if you like it really moist), the top layer gets wonderfully crunchy while the inside stays tender. It’s the best of both worlds!
The Flavor Profile of Our Easy Herb Stuffing
Forget those packets, okay? The flavor here comes straight from the pan. We build our base with melted butter sautéed with sweet onion and celery. Then we introduce the dynamic trio: earthy sage, bright rosemary, and fragrant thyme. This is what transforms simple bread into an Easy Herb Stuffing that tastes like it took all day to make. That garlic butter just wraps everything up so perfectly!
Ingredients for The Best Classic Homemade Herb Stuffing
Okay, let’s get down to what makes this stuffing sing! You need about a pound of bread cubes—I’m really partial to slightly stale sourdough or a crusty French loaf for the best structure. We are melting a whole cup of unsalted butter to cook down two chopped onions and four celery stalks until they are perfectly tender. Next, you’ll need four minced garlic cloves and the freshest herbs possible: sage, rosemary, and thyme. Don’t forget your salt and pepper, two lightly beaten eggs for binding, and about two cups of chicken broth ready to go. If you want that extra savory kick, have a half-pound of crumbled breakfast sausage ready too! It’s all about using fresh components, which is why I love making my own garlic butter sometimes.
Bread Choice and Preparation for Perfect Stuffing
This is non-negotiable for great texture! If your bread isn’t already a day old—meaning it’s dried out, but not rock hard—you absolutely must dry it out yourself first. Don’t skip this step; it’s the insurance policy for crispy edges. Just cut your sourdough or French loaf into one-inch cubes and spread them on a baking sheet. Pop them into the 350°F oven for about ten to fifteen minutes until they feel nice and dry to the touch. They just need to lose enough moisture so they don’t turn to complete soup when the liquid hits later. Seriously, take the time to dry your bread for killer stuffing!
How to Prepare This Buttery Stuffing Recipe
Alright, now that we have our perfectly toasted bread cubes ready, we move onto creating that incredible flavor base for our Buttery Stuffing Recipe. Remember, everything needs to be warm and flavorful before it touches the bread. First things first: get your oven preheated up to 350°F (175°C) and grease up that 9×13 baking dish—you want this to release beautifully later!
Sautéing Aromatics for Your Stuffing
Take that big skillet and melt down all your butter over medium heat. Toss in the chopped onions and celery first. You want these to soften up and get sweet, which takes about eight or nine minutes. Don’t rush this part; those soft veggies are the backbone of the flavor! Once they’re tender, clear a little space in the pan and add your minced garlic. Let that cook for just about sixty seconds until you can really smell it—don’t let it burn! Then, toss in all your fresh sage, thyme, and rosemary. If you decided to use bulk breakfast sausage, this is the moment to add it in. Cook everything together until those herbs are fragrant and the sausage (if using) is browned up nicely.
Combining Wet and Dry Ingredients for the Stuffing
Time to bring it all together! Pour that entire savory, buttery mixture right over your dry bread cubes in the big bowl and give it a gentle toss to coat everything. Season it up with salt and pepper. Now, in a separate little bowl, grab your two eggs and whisk them lightly with the chicken broth. Here’s the most crucial action you’ll take: slowly pour that liquid mix over the bread. You need to toss carefully, just until the bread is moist. If you mix too hard or add too much liquid, you will end up with a soggy side dish, not the perfect stuffing, so stop stirring the second it looks mostly coated. A few dry spots are okay; they turn into those amazing crispy bits! Pop it into your prepared dish and bake for about 35 to 45 minutes. You can check out some other methods, like using a slow cooker, but this easy oven method is my favorite. For more ideas, check out this great easy stuffing recipe I saw.
Tips for the Ultimate Traditional Dressing Recipe
You know, holidays can be hectic, and anything that lets me get ahead of the game is a total win in my book. This Traditional Dressing Recipe is fantastic because it’s an absolute dream for making ahead! You can totally mix up everything right through sautéing the aromatics and combining them with the bread cubes—that’s steps one through five. Just cover the whole mixture up and pop it into the fridge. It keeps beautifully!
The trick here, and this is important for keeping your stuffing tasting fresh, is that you don’t add the eggs and the broth until about an hour before you plan to bake it the next day. That keeps the eggs from getting weird and makes sure the bread absorbs the liquid nicely right before it hits the oven. A little extra moisture control goes a long way for that perfect flavor structure. If you’re looking for other make-ahead holiday helpers, I always have my crescent ring recipes ready to go!
Make Ahead Stuffing Instructions
When you are ready to bake the next day, just let that refrigerated mixture sit on the counter for about 30 minutes while your oven preheats. Then, mix up your broth and eggs and gently toss everything together, pressing it into the pan. You might need to add just a tiny splash more broth if the bread seems overly dry from the fridge, but usually, the standard amount works great since the bread is already coated in buttery goodness. It’s such a time saver!
Variations: Sausage and Herb Stuffing
I know, I know, not everyone wants a strictly vegetarian dressing! While the fresh herbs and garlic butter make this version absolutely incredible all on its own, sometimes you just need that extra savory depth that only sausage brings. If you are looking to make the Sausage and Herb Stuffing version, this variation is super simple!
The key is cooking the sausage first, just like we do the onions and celery. You’ll want about a half-pound of bulk breakfast sausage for this. Brown it up completely in that same skillet you are using for your vegetables. You want to drain off most of the excess grease—we only want the flavor, not a swimming pool of fat in our final product!
Once the sausage is cooked and crumbled, you just toss it right in with the onions, celery, garlic, and herbs when you combine everything in the skillet (that’s step four in the main instructions). It cooks down beautifully during the baking process and adds such a wonderful hearty quality to the stuffing. My brother insists this is the only way to make it, and honestly, it pairs so well with the sage. If you’ve tried making soup with sausage, you know how much flavor bulk sausage brings!
If you want to see another fantastic way folks swap things up, I saw this great sausage and herb stuffing recipe floating around. But honestly, just adding that cooked sausage right here makes ours special enough for even the biggest holiday eaters!
Serving Suggestions for Your Classic Thanksgiving Stuffing
Honestly, this savory side dish is so good you could eat it plain! But since we’re making a full feast, this stuffing needs its supporting actors. It’s the ultimate comfort food side dish, so it pairs perfectly with anything rich and roasted. I usually serve it right alongside some juicy roasted turkey, of course, but it’s equally amazing with a simple slow-cooked pot roast or even pork tenderloin in the off-season.
If you’re making a big spread, think about balancing the richness. I love pairing this buttery dish with something a little brighter, like my roasted sweet potato and kale salad. That little bit of green and acid cuts through the richness of the stuffing beautifully. It’s all about creating balance on that plate!
Storage and Reheating Best Practices for Homemade Stuffing
I always make way too much because leftovers are honestly half the fun! Storing your flavorful Stuffing from Scratch is easy, but reheating is where you need a specific trick to keep that texture we worked so hard for. Once cooled completely, tuck any leftovers you have into an airtight container. It keeps wonderfully in the fridge for up to three or four days—perfect for a quick lunch!
When you are ready to bring it back to life, don’t just microwave the whole thing, or you’ll lose all your crispy bits! For the best results, spread the cold stuffing back out onto a baking sheet. Add a tiny splash of extra chicken broth—maybe a tablespoon or two—just to hit any dry spots. Stick it back in a 350°F oven for about fifteen minutes until it’s heated through. This little trick warms the inside while crisping up those gorgeous buttery edges again. You can check out how others handle their traditional Thanksgiving stuffing leftovers too, but trust me, the oven is your best friend here!
Frequently Asked Questions About Making Stuffing
I know when I dive into a new holiday recipe, I always have a million little questions buzzing around! It’s totally normal, especially when you are messing with something as sacred as the Thanksgiving stuffing. Here are a few things I hear all the time from folks trying this recipe for the first time. Hopefully, this helps you feel totally confident walking into the kitchen!
Can I use dried store-bought bread cubes for this stuffing recipe?
Oh yes, you absolutely can! I prefer drying my own cubes from fresh bread because I can control the density and the texture better, but life happens! If you are using those pre-packaged dry cubes, you just need to be a little more cautious with your broth. Store-bought cubes tend to be thirstier than homemade ones, so start by adding only about three-quarters of the recommended broth amount and then toss. You want it moist, but avoid soaking them dry. You can always add a splash more liquid, but you can’t take it out once it’s soaked in!
What is the difference between dressing and stuffing?
This is a fun topic because you’ll hear people use the words interchangeably, but there’s one key difference in tradition! Most folks consider it stuffing when you bake the bread mixture *inside* the cavity of the bird—it absorbs all those turkey drippings, which is delicious, but it can also slow down the cooking time of the turkey. When you bake the exact same mixture separately in a casserole dish, that’s what we call dressing. We bake ours in a dish, so technically, this recipe is dressing, but I’ll always call it stuffing because that’s what sounds cozier, right?
How do I ensure my stuffing stays moist?
Moisture is the name of the game! If you only take away one thing, remember this: follow the broth measurement closely and stop tossing when the bread is *just* coated. Overmixing or adding too much liquid guarantees mushy stuffing. Another trick that really helps is when you bake it, cover the dish tightly with foil for the first 25 minutes. This traps the steam and keeps that middle layer super moist. Peel the foil off for the last 10 or 20 minutes so the top gets that perfect golden crust we love! That combination of covering and then uncovering is my secret to perfect texture every single time.
Nutritional Estimate for This Savory Bread Pudding Side
I always get questions about what exactly is in a serving of this delicious goodness, so here’s a snapshot based on standard measurements. Remember, since we are making this completely from scratch—using fresh butter and sausage—these numbers are just estimates! If you skip the sausage or use lower fat butter, your totals will change, of course. But for a standard serving, expect about 350 calories.
- Calories: 350
- Fat: 22g
- Carbohydrates: 30g
- Protein: 8g
It’s a rich, satisfying side dish, which is why we call it a true Savory Bread Pudding Side! Enjoy it responsibly, because honestly, a holiday plate is never complete without a hearty scoop!
Share Your Experience Making This Classic Stuffing
Now that you have all my secrets for getting the perfect balance of herbs, butter, and texture, I truly can’t wait for you to try this! Making this Classic Stuffing isn’t just about following steps; it’s about creating new holiday memories in your own kitchen. I really hope that amazing aroma fills your house the way it does mine!
When you pull that golden pan out of the oven, please, please come back and drop a comment below! Tell me how it went—did you go for the sausage variation, or did you keep it strictly herby? I love hearing about what works for your family table. If you snap a picture of your beautiful spread, tag me! Seeing your successes truly makes my day.
If you found this recipe reliable and delicious, I would be so grateful if you could share the love by clicking those little stars to rate it right at the top of the post. And hey, if you’re always looking for more easy-to-love, deeply comforting recipes, check out my collection of easy sweet snacks to round out your holiday table. I promise, just like this amazing stuffing, they’re made for real life. Happy cooking, and don’t forget to check out this homemade stuffing recipe inspiration I mentioned!
PrintThe Best Classic Homemade Herb Stuffing (Dressing)
Make the ultimate holiday side dish with this classic homemade stuffing recipe. You achieve a moist interior and crispy edges using fresh herbs and garlic butter.
- Prep Time: 20 min
- Cook Time: 45 min
- Total Time: 65 min
- Yield: 8 servings 1x
- Category: Side Dish
- Method: Baking
- Cuisine: American
- Diet: Vegetarian
Ingredients
- 1 pound day-old bread (sourdough or French loaf recommended), cut into 1-inch cubes
- 1 cup unsalted butter
- 2 large yellow onions, chopped
- 4 celery stalks, chopped
- 4 cloves garlic, minced
- 1 tablespoon fresh sage, chopped
- 1 teaspoon fresh rosemary, chopped
- 1 teaspoon fresh thyme leaves
- 1 teaspoon salt
- 1/2 teaspoon black pepper
- 2 cups low-sodium chicken broth (or vegetable broth)
- 2 large eggs, lightly beaten
- Optional: 1/2 pound bulk breakfast sausage, cooked and crumbled
Instructions
- Preheat your oven to 350°F (175°C). Lightly grease a 9×13 inch baking dish.
- If your bread is not stale, spread the cubes on a baking sheet and bake for 10-15 minutes until lightly dried out. Set aside.
- Melt the butter in a large skillet over medium heat. Add the chopped onions and celery. Cook until softened, about 8-10 minutes.
- Add the minced garlic, fresh sage, rosemary, and thyme to the skillet. Cook for 1 minute until fragrant. If using sausage, add the cooked sausage now.
- Remove the skillet from the heat. Pour the butter and vegetable mixture over the dried bread cubes in a large bowl. Toss gently to coat. Season with salt and pepper.
- In a separate bowl, whisk together the chicken broth and the lightly beaten eggs.
- Pour the broth mixture over the bread mixture. Toss carefully until the bread is just moistened. Do not overmix; you want some dry spots for crispiness.
- Transfer the stuffing mixture to the prepared baking dish. Press down lightly.
- Bake for 35-45 minutes, or until the top is golden brown and the center is heated through.
- Let the stuffing rest for 10 minutes before serving.
Notes
- For a crispier top, bake uncovered. For a moister result, cover the dish with foil for the first 25 minutes of baking, then remove the foil for the last 10-20 minutes.
- You can prepare the entire mixture (steps 1-5) a day ahead. Cover and refrigerate. Add the broth and eggs just before baking.
- If you prefer to stuff a turkey, reduce the broth by 1/2 cup and bake inside the bird according to safe food handling guidelines.
Nutrition
- Serving Size: 1 cup
- Calories: 350
- Sugar: 3
- Sodium: 450
- Fat: 22
- Saturated Fat: 12
- Unsaturated Fat: 10
- Trans Fat: 0.5
- Carbohydrates: 30
- Fiber: 2
- Protein: 8
- Cholesterol: 65