
That afternoon slump hits hard, doesn’t it? You know the one—where you just absolutely *need* something sweet, but you don’t have time to bake that elaborate layered cake you saw online. Trust me, I live that life managing my schedule over here at DelishCraze, which is exactly why I put this collection together!
I’ve gathered up some of the best, most visually-tempting **sweet snacks** recipes possible. We’re talking bars, easy cookies, and some dreamy no-bake treats perfect for snapping a quick picture and saving right away to your dessert ideas board. These aren’t fussy recipes; these are the reliable, home-cook-tested ideas that actually fit into your busy life. That’s my whole philosophy—making sure delicious is always within reach, just like Olivia always intended!
- Why These Sweet Snacks Recipes Are Your New Go-To
- Essential Ingredients for Your Sweet Snacks Collection
- Mastering No Bake Sweet Treats: The Energy Bites
- Baking Instructions for Perfect Cookies and Bars: Easy Sweet Snack Ideas
- Serving Suggestions for Your Sweet Snacks
- Storing and Reheating Your Sweet Snacks
- Frequently Asked Questions About These Sweet Snacks
- Estimated Nutritional Data for These Sweet Snacks
- Share Your Favorite Sweet Snacks Creations
Why These Sweet Snacks Recipes Are Your New Go-To
I know your time is precious, so I filtered out anything that needs a three-day lead time! These sweet snacks recipes are designed specifically for when you need a satisfying treat without turning your kitchen into a disaster zone. We’re talking about making something special happen in under an hour, perfect for sneaking into a lunchbox or setting out when unexpected guests drop by.
- They are lightning fast—seriously! Prep time is minimal, meaning you can satisfy that sweet tooth almost instantly.
- Super versatile: perfect for an after-school treat or packed away as dessert finger foods later.
- Reliable results every single time, no weird techniques required.
If you are nervous about baking, don’t be! You can check out my basics guide here before diving in, but seriously, these recipes are foolproof. Learning the basics goes a long way!
Quick Dessert Snacks for Immediate Cravings
When that craving strikes at 3 PM, you need action, not waiting. These options—especially the cookies—come together so fast. The total time commitment for our baked goods is barely 40 minutes from start to plate! These quick dessert snacks ensure you aren’t reaching for that dusty old box of crackers instead. They truly scratch that sweet itch right when you need it.
Easy Baking Recipes for Beginners
If you’re new to the kitchen, these are your best friends. We skip complicated steps and use simple creaming methods. My goal is for you to feel confident every time you step up to the counter. These foolproof formulas mean even your first batch of energy bites will look Pinterest-worthy, making them fantastic easy baking recipes for beginners!
Essential Ingredients for Your Sweet Snacks Collection
Okay, let’s talk about what you need to keep stocked! The best part about this entire collection is that I kept the core ingredient list super straightforward. You won’t need any specialty flours or ingredients that require a trip to a weird gourmet store. These are staples, meaning you likely have half of this list already sitting in your pantry right now!
For our baked treats (cookies and bars), you’ll need the basics:
- 1 cup all-purpose flour
- 1/2 cup granulated sugar
- 1/4 teaspoon baking soda and 1/4 teaspoon salt
- 1/2 cup unsalted butter, softened (make sure it’s soft, not melted!)
- 1/4 cup packed brown sugar
- 1 large egg
- 1 teaspoon vanilla extract
- 1/2 cup chocolate chips (the stars of the show, obviously)
Then, for the no-bake energy bites, you just add three more powerhouse items:
- 1/2 cup rolled oats
- 1/2 cup peanut butter
- 1/4 cup honey
See? Totally accessible. This ensures you can whip up either recipe whenever that sweet tooth flares up unexpectedly.
Ingredient Notes and Substitutions for Sweet Snacks
I always get asked about swaps, and I love that people are adapting things! If you need to go gluten-free, just grab one of those 1-to-1 baking blends—it works like a dream. Also, don’t be afraid to toss in some shredded coconut or chopped nuts into those bars or bites if you want extra crunch. It really boosts the texture!
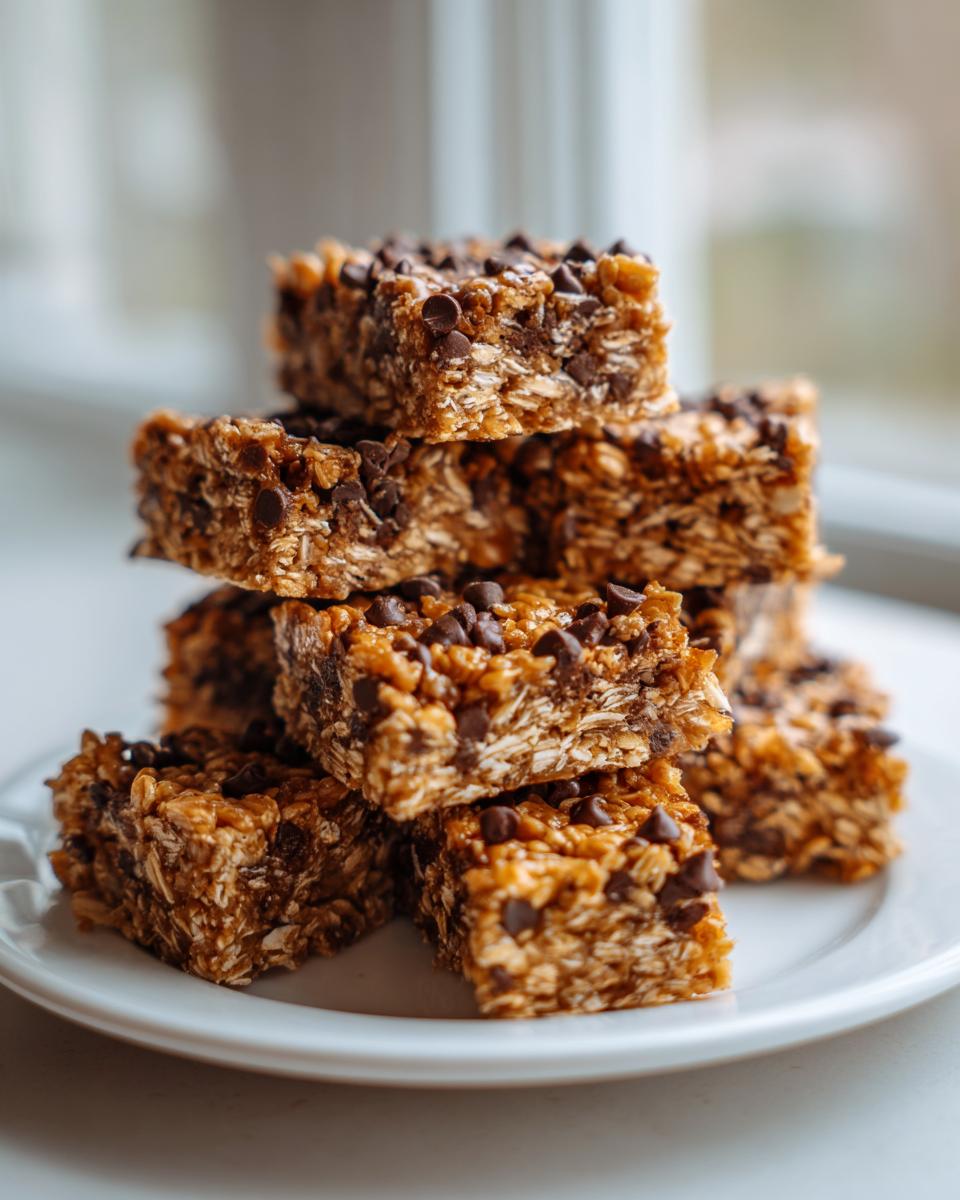
Mastering No Bake Sweet Treats: The Energy Bites
If you truly need something immediate, or maybe your oven is currently making a fancy pie and can’t handle cookies, you absolutely have to try these no-bake energy bites. They are the ultimate answer for satisfying your craving without even turning on the heat! These are hands-down some of my favorite no bake sweet treats because they are packed with energy but taste like dessert.
The process for these is so simple it barely qualifies as a recipe—it’s more like mixing things in a bowl. You take your rolled oats, your creamy peanut butter, and that gorgeous, thick honey. You mix it all up until it forms one unified dough.
Here’s my personal tip, and this is what I always tell people when they ask me how to get them perfect: the ratio of peanut butter to honey is everything! If your mixture seems too crumbly, chances are you need another tiny drizzle of honey or maybe just a spoonful more peanut butter. If it’s too sticky to roll, add a few more oats. You need that perfect balance for good texture.
Once you’ve got the right consistency—it should feel dense and slightly tacky—you just roll them between your palms into little balls. Make them whatever size you like, big or tiny! Then, pop them in the fridge to chill for at least 30 minutes. Don’t skip that chill time! It firms them up so they hold their shape beautifully. I have a whole guide on other great no-bake additions if you want more ideas, you can look over here!
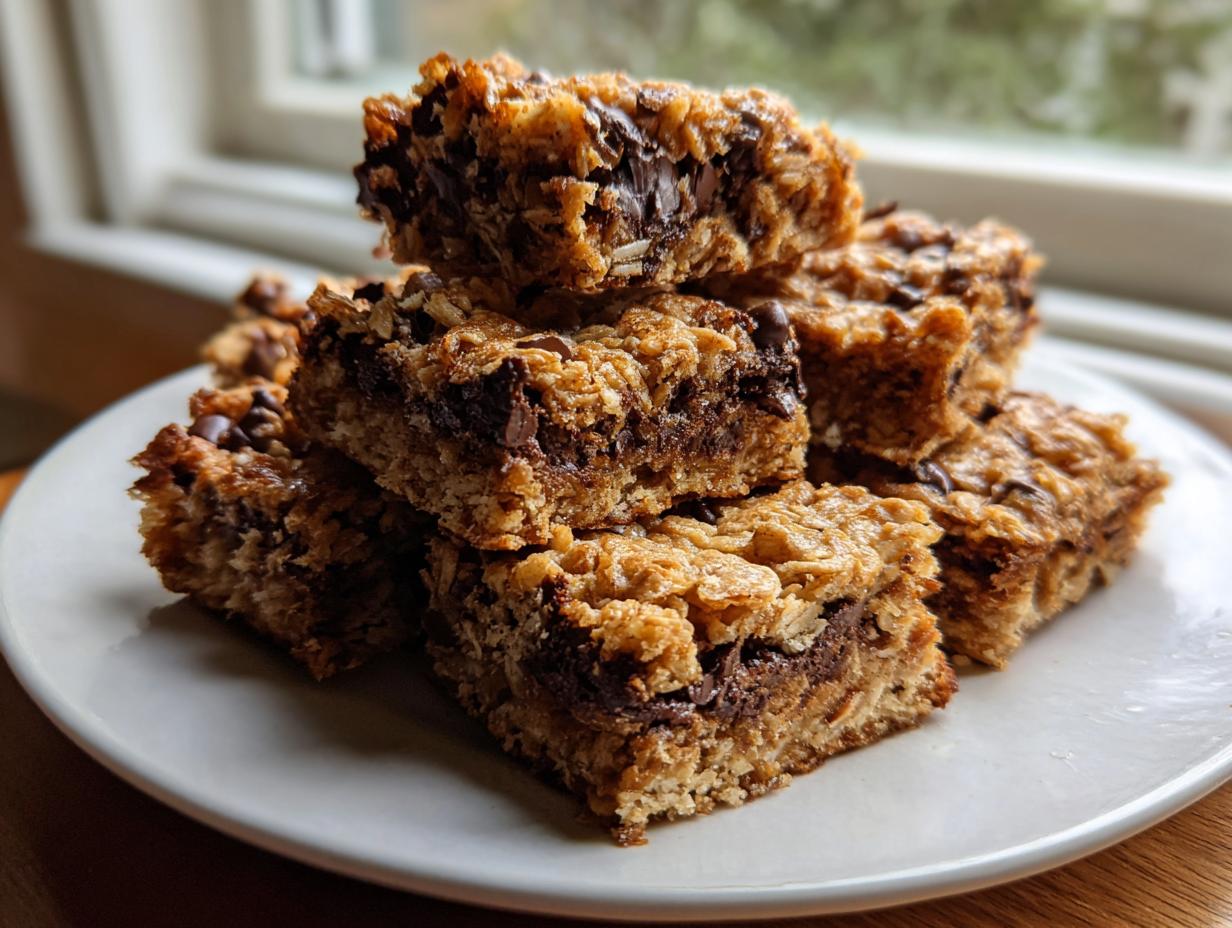
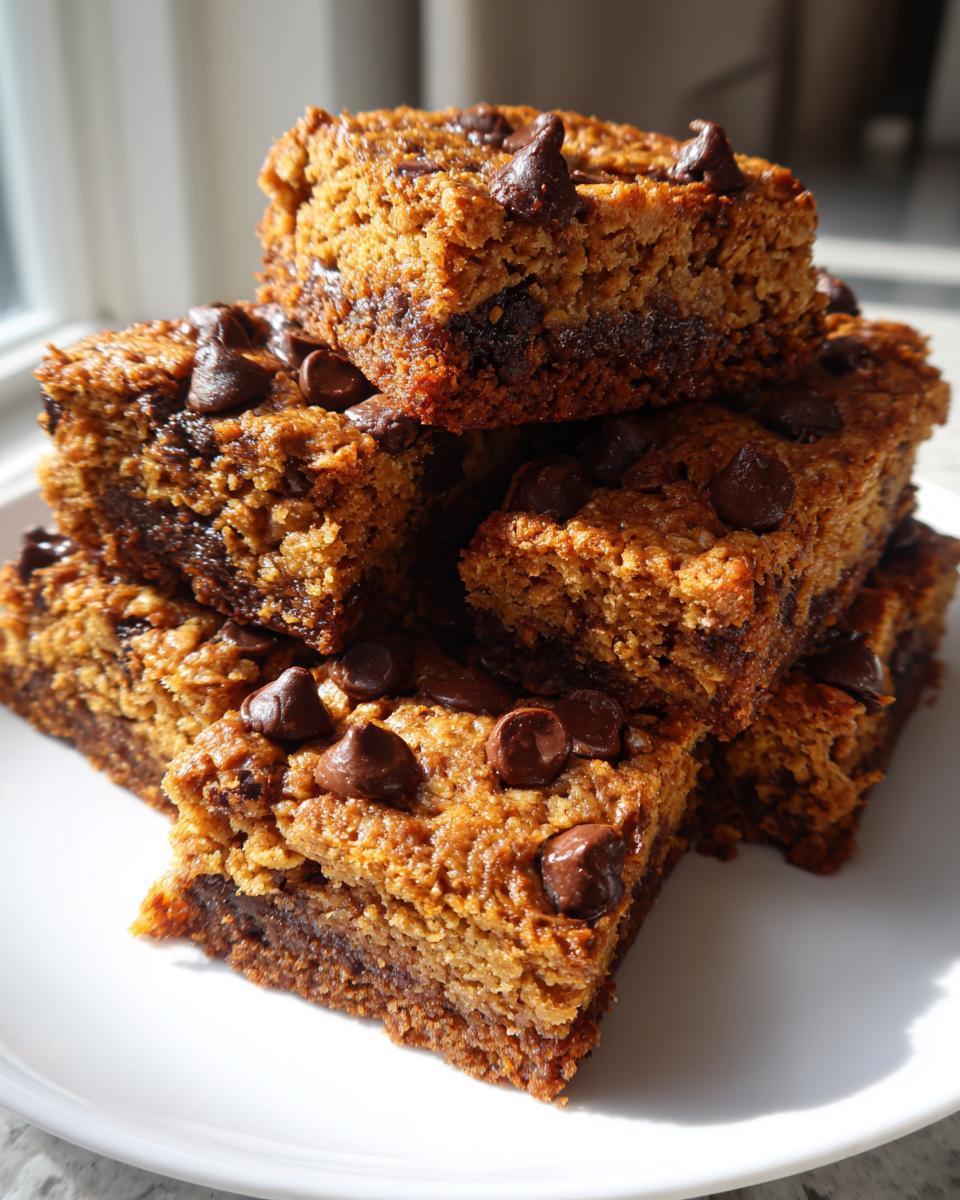
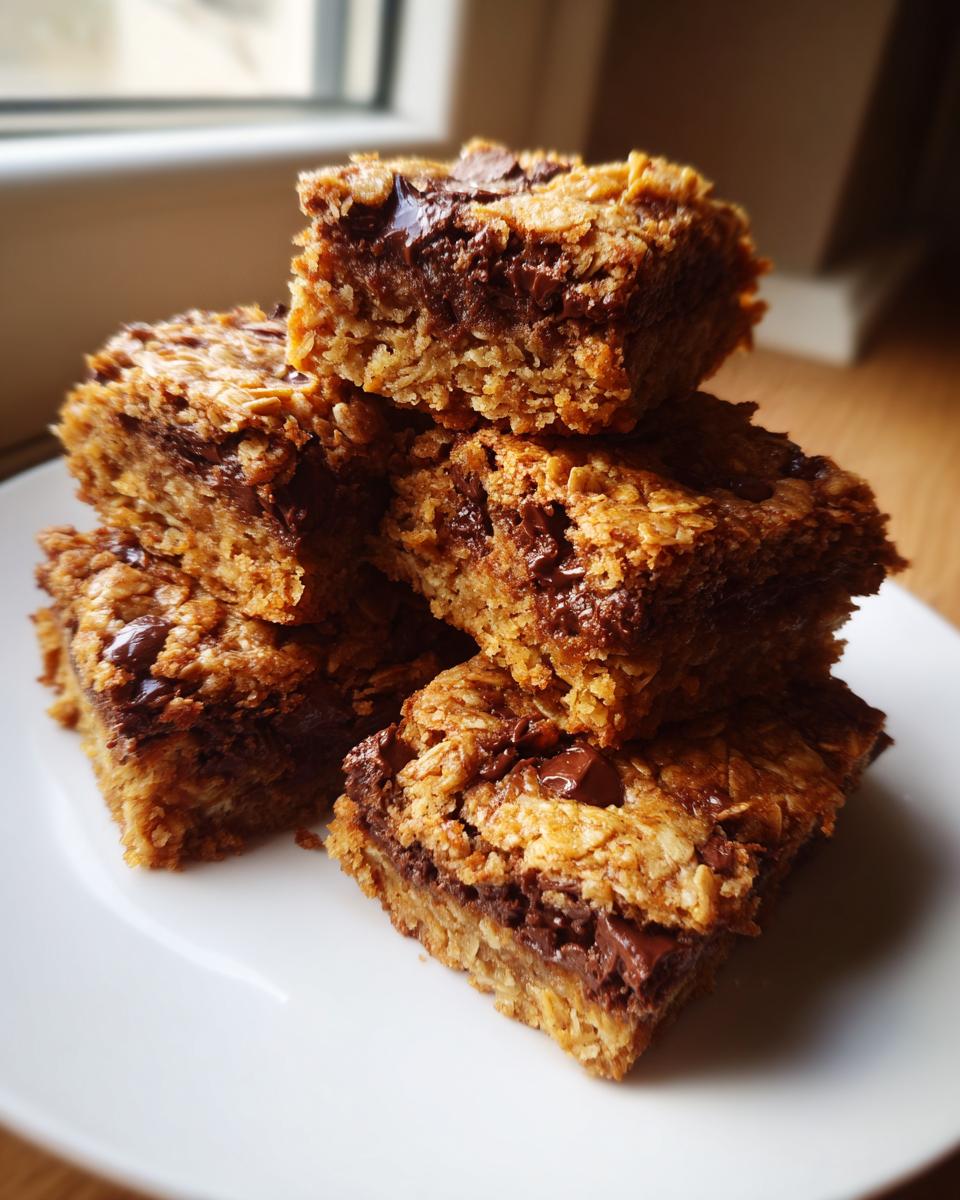
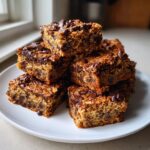
Baking Instructions for Perfect Cookies and Bars: Easy Sweet Snack Ideas
Now that we have our ingredients ready, let’s actually bake! If you are making the cookies or the bars, the very first thing—before you even touch the flour—is getting that oven hot. We preheat everything to 350°F (175°C).
For these easy sweet snack ideas, we start by whisking the dry stuff: flour, baking soda, and salt, just in a small bowl to keep things tidy. Then, in the big bowl, we cream that softened butter with both the granulated and brown sugars until it gets light and fluffy. That creaming step is crucial for getting that wonderful texture!
Once that’s looking dreamy, beat in your egg and vanilla. When you finally add your dry mix to the wet mix, this is important: only mix until it’s *just* combined. Seriously, stop when the streaks disappear! Overmixing cookie dough is the fastest way to end up with flat, tough cookies that nobody wants at movie night.
For cookies, stir in those chocolate chips right at the end. For bars, you’ll press that dough right into your lined pan. Then, pop them into that preheated oven. Cookies take about 10 to 12 minutes, and the bars will need 20 to 25 minutes until those edges look beautifully golden brown.
Tips for Success When Making These Sweet Snacks
Listen, a good recipe gets you 90% of the way there, but these little extra tips get you the other 10% of perfection. If you are making the cookies, I highly recommend setting the dough in the fridge for about 30 minutes before baking. It keeps them from spreading out into thin pancakes, which is always a major win for that perfect cookie height. You can learn all my in-depth secrets over at my cookie baking tips guide!

When checking for doneness, don’t just rely on the toothpick test alone. You want to see those edges slightly pulling away from the side of the pan if you’re doing bars, or just gently set on top if it’s cookies. Remember: we are aiming for soft, not rock hard! Don’t forget that note about using that gluten-free blend if you need it—it swaps perfectly!
Serving Suggestions for Your Sweet Snacks
Now that you have this gorgeous array of quick sweet snacks ready, the fun part is deciding how and when to serve them! These recipes are so versatile; they swing easily from an afternoon pick-me-up to something special you put out for company. Presentation makes everything feel a little more intentional, even when it’s something super easy.
For your next casual get-together or just when the grandkids pop over, these baked bars and cookies make fantastic dessert finger foods. Set them out on a pretty platter—maybe line them up alternating colors if you made both bars and cookies—and watch them disappear instantly. They are perfect for a crowd because there’s no cutting or fuss involved!
If you’re planning a low-key party or watching the big game, these fit right into your line-up of party snack dessert recipes. I always suggest serving the baked bars alongside a tall glass of cold milk—the classic combo never fails! For something slightly healthier, those energy bites are the perfect companion to a strong cup of coffee or tea mid-morning.
It’s amazing how a simple presentation can elevate these everyday treats. If you’re looking for more ideas on how to set up a stunning, yet easy, snack spread for your home entertaining needs, I cover my decorating tricks over in my entertaining guide!
Storing and Reheating Your Sweet Snacks
We bake these quick treats because we want to enjoy them over a few days, right? So making sure they store well is just as important as making them taste amazing in the first place! Luckily, both the baked goods and those no-bake energy bites hang out really well, giving you some ready-made goodies for when those cravings strike again.
For the cookies and the bars—the ones you baked—storage is simple, but you have to keep air out. If you leave them on the counter uncovered, they’ll go hard fast. You need to pop them into a truly airtight container. They should stay perfectly soft and delicious at room temperature for about four to five days. If you manage to have any leftovers past that day five mark—which I rarely do!—you can freeze them. Wrap them tightly in plastic wrap first, then foil, and they’ll be great for up to two months.
Now, the no-bake energy bites are a little different because of the peanut butter and honey base. They really thrive when they are kept cool. Always store your energy bites in an airtight container in the refrigerator. They firm up nicely in the cold, and honestly, I think they taste even better slightly chilled!
They last super well in the fridge, usually a good week or maybe even ten days if you’re diligent about keeping them covered. If you’re making a huge batch, these also freeze like a dream! Just place them on a baking sheet to freeze solid for an hour before transferring them all into a freezer bag. You can grab one straight from the freezer for an instant chilled snack!
Frequently Asked Questions About These Sweet Snacks
I figured you might have some lingering questions, especially when you’re trying to fit these quick bites into your daily routine. It’s my job here to make sure you feel totally prepared before you even start mixing! Here are a few things readers often ask about grabbing these sweet snacks.
Can I make these recipes vegan?
That is such a great question! Since we rely on butter and eggs in the baked goods, those are the trickiest parts to sub out. For the baked cookies and bars, you’d need to swap the egg for flax eggs (one tablespoon of ground flaxseed mixed with three tablespoons of water per egg) and swap the butter for a solid vegan butter stick substitute. For the energy bites, it’s much easier! Just make sure you use a vegan-friendly peanut butter and check that your honey is actually maple syrup or agave nectar if you need them totally vegan. It’s totally doable!
How long do the energy bites last if I keep them stored properly?
Since the energy bites are no-bake and don’t rely on flour, they have a slightly different shelf life. As I mentioned before, in an airtight container in the fridge, they are fantastic for a solid week, maybe even ten days. They stay wonderfully soft and chewy—perfect for those daily cravings!
What is the best way to store the bars to keep them from getting dry?
This ties back to storage, but it’s so important for the bars! The key to keeping these easy sweet snack ideas moist is sealing out the air. You want to cool them completely, cut them into servings, and then stack them, but put a small square of wax paper or parchment paper between each layer before putting them into an airtight container. This prevents them from sticking together *and* keeps the moisture locked in. They are best eaten within five days!
Are these considered good movie night snack ideas?
Absolutely! They are wonderfully self-contained, which means less mess while you’re watching a thriller. The chocolate chip cookies are classic, but sometimes I’ll make a batch of the bars and cut them into smaller squares—perfect for little dessert finger foods you can nibble on without juggling a plate. If you have any food safety concerns about leaving foods out, you can always read up on best practices here!
Estimated Nutritional Data for These Sweet Snacks
Okay, I know you might be sneaking these under the radar, but sometimes you just want to peek at the numbers, right? I always include this section because while these are homemade, it helps to have a ballpark idea of what you’re giving the kids after school or what you’re having as that little reward treat after dinner. Please remember, this is just an estimate!
This rundown is based on dividing the total recipe yield (about 12 servings) across one standard bar or one energy bite. Since we are mixing cookies and energy bites, the actual numbers for your specific treat will vary slightly, especially depending on how generously you loaded up on chocolate chips versus how many you eat plain!
Here’s what the numbers look like based on the main ingredients list:
- Serving Size: 1 bar (or standard energy bite)
- Calories: Around 180 calories – a perfect little boost!
- Fat: About 10g total fat
- Carbohydrates: We’re looking at 22g of carbs
- Protein: A nice little boost of about 3g of protein, especially if you used peanut butter in the bites!
- Sugar: Roughly 15g of sugar (mostly from the natural sugars in the honey/peanut butter and the chocolate chips)
I always try to offer options, whether it’s using the energy bites for a quick energy refill or the cookies for pure comfort. Honestly, for an easy, homemade treat that satisfies that deep craving for sweet snacks, I think those numbers are pretty great. It’s all about balance, and these recipes keep that balance easily achievable!
Share Your Favorite Sweet Snacks Creations
That’s it, friends! You now have everything you need to conquer afternoon cravings one delicious, easy batch at a time. You’ve got the no-bake magic of those energy bites and the simple perfection of the baked bars and cookies. Now it’s your turn to bring these sweet snacks into your own kitchen!
I truly love hearing from you all. When you make a batch of these—whether they’re for movie night or just because—please come back and tell me how they turned out! Did you add cinnamon to the energy bites? Did you use different chips in the cookies? Drop a rating right here on the page, or leave a comment telling me how these easy sweet snack ideas worked for you.
And hey, if you snap a picture of your beautiful spread of dessert finger foods, please tag us on social media! Seeing your creations popping up is the best part of running DelishCraze. It reminds me that we’re all in this together, making delicious, simple things for the people we love. Happy snacking!
PrintQuick and Easy Sweet Snack Collection
A collection of simple recipes for sweet snacks, including bars, cookies, and no-bake treats, perfect for satisfying afternoon cravings.
- Prep Time: 15 min
- Cook Time: 25 min
- Total Time: 40 min
- Yield: 12 servings 1x
- Category: Snack
- Method: Baking/No-Bake
- Cuisine: American
- Diet: Vegetarian
Ingredients
- 1 cup all-purpose flour
- 1/2 cup granulated sugar
- 1/4 teaspoon baking soda
- 1/4 teaspoon salt
- 1/2 cup unsalted butter, softened
- 1/4 cup packed brown sugar
- 1 large egg
- 1 teaspoon vanilla extract
- 1/2 cup chocolate chips
- 1/2 cup rolled oats (for energy bites)
- 1/2 cup peanut butter (for energy bites)
- 1/4 cup honey (for energy bites)
Instructions
- Preheat your oven to 350°F (175°C) for bar or cookie recipes.
- Whisk together flour, baking soda, and salt in a small bowl.
- In a separate large bowl, cream together softened butter and sugars until light and fluffy.
- Beat in the egg and vanilla extract.
- Gradually add the dry ingredients to the wet ingredients, mixing until just combined.
- Stir in chocolate chips for cookies or press mixture into a lined 8×8 inch pan for bars.
- Bake cookies for 10-12 minutes or bars for 20-25 minutes, or until edges are golden brown.
- For no-bake energy bites, mix oats, peanut butter, and honey until uniform.
- Roll the energy bite mixture into small balls and chill for at least 30 minutes before serving.
Notes
- For a gluten-free option, substitute regular flour with a 1-to-1 gluten-free baking blend.
- You can add shredded coconut or chopped nuts to any of the bar or bite recipes for extra texture.
- Chill cookie dough for 30 minutes before baking to prevent spreading.
Nutrition
- Serving Size: 1 bar
- Calories: 180
- Sugar: 15g
- Sodium: 100mg
- Fat: 10g
- Saturated Fat: 6g
- Unsaturated Fat: 4g
- Trans Fat: 0g
- Carbohydrates: 22g
- Fiber: 1g
- Protein: 3g
- Cholesterol: 25mg