
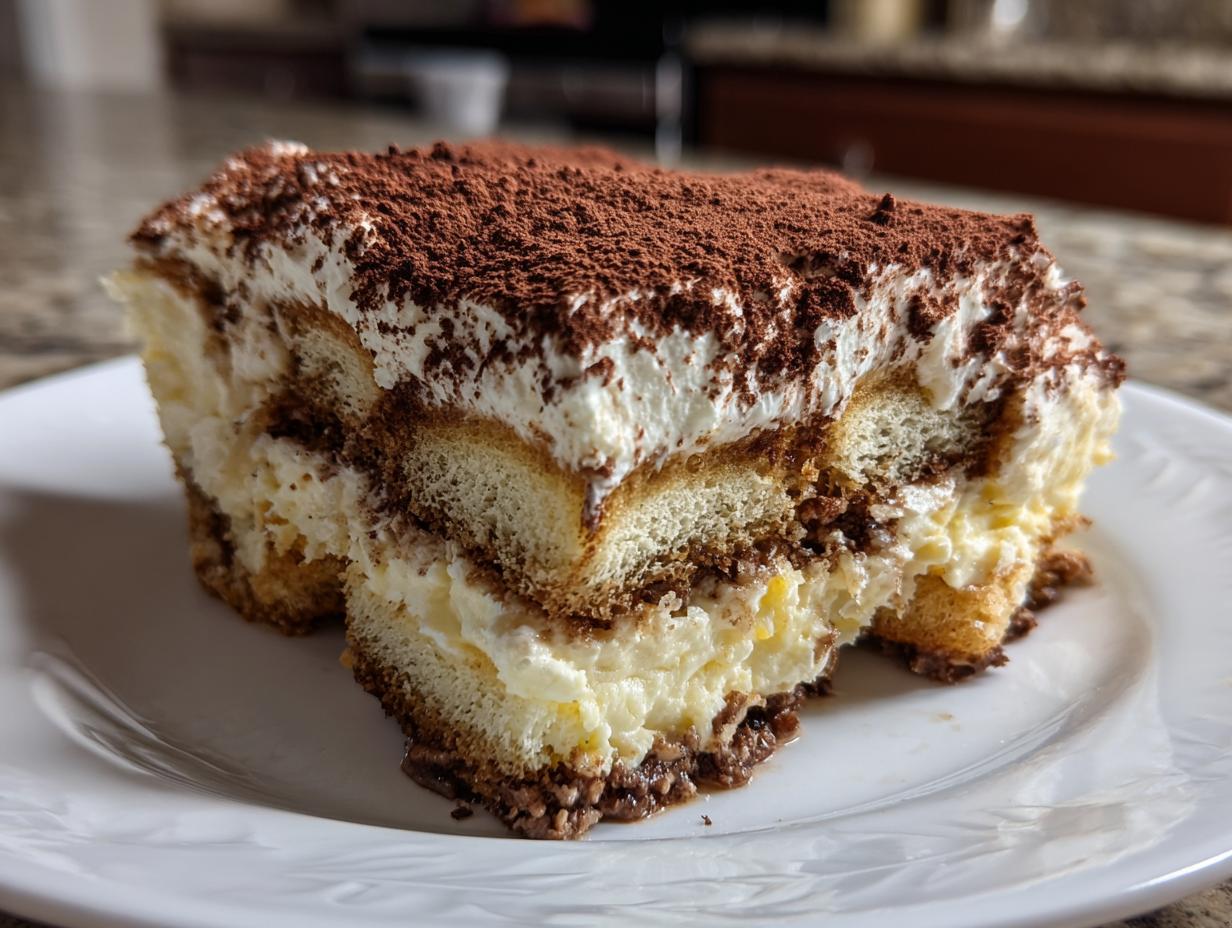
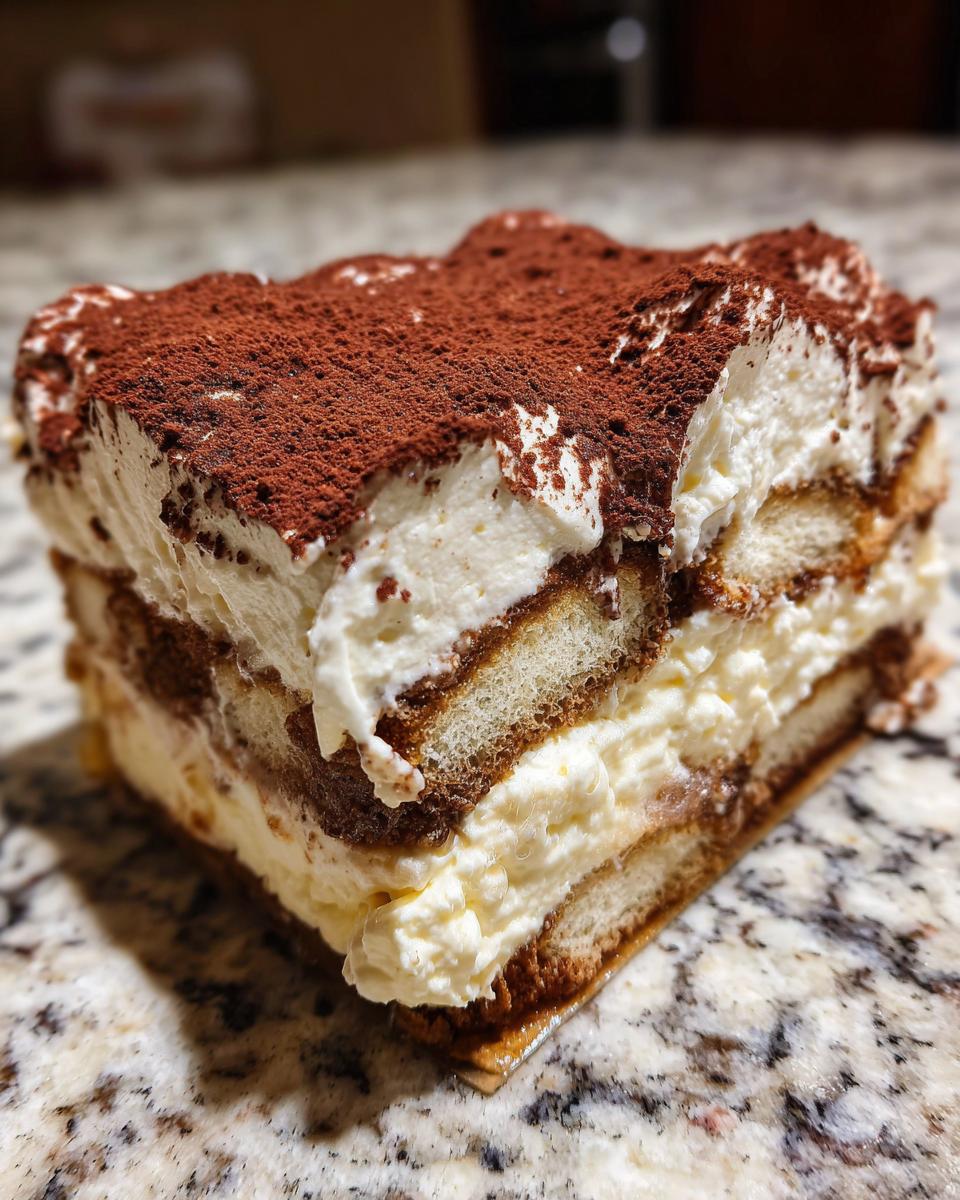
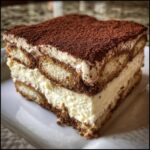
Oh my goodness, hold onto your forks, everyone, because I finally cracked the code on the dessert of my dreams! You know how much I love taking two absolute classics—the rich comfort of cheesecake and the sophisticated, coffee-soaked magic of Tiramisu—and smashing them together? Well, that marriage created this stunning tiramisu cheesecake experience you see before you. This isn’t just a dessert; it’s a show-stopper that somehow manages to be both incredibly creamy and deeply flavorful all at once. When I started DelishCraze years ago, I wanted recipes that felt special enough for big celebrations but simple enough that they connected us back to the joy of home cooking, just like Mom used to make. This fusion dessert does exactly that, turning a simple gathering into a truly memorable occasion. You can read more about that philosophy on our About Us page. Trust me, you’re going to want to save this one!
- Why This Tiramisu Cheesecake Recipe Works So Well
- Ingredients for Your Decadent Tiramisu Cheesecake
- Step-by-Step Instructions for the Baked Tiramisu Cheesecake Recipe
- Tips for the Perfect Tiramisu Cheesecake
- Ingredient Notes and Variations for Your Mascarpone Dessert
- Serving Suggestions for Your Rich Holiday Dessert
- Storage and Reheating Instructions for Tiramisu Cheesecake
- Frequently Asked Questions About Tiramisu Cheesecake
- Estimated Nutrition for This Decadent Coffee Dessert
Why This Tiramisu Cheesecake Recipe Works So Well
Why mess with perfection? That’s what I always ask myself! The reason this tiramisu cheesecake is so ridiculously good is that it truly gives you two desserts in one, but better. It’s the ultimate showstopper dessert for any party, holiday, or Tuesday night when you just deserve something amazing.
I tested the ratio of mascarpone to cream cheese till my kitchen looked like a dairy farm exploded, just to make sure we hit that sweet spot. Here is what you get when you follow this recipe:
- Incredibly creamy texture that melts right in your mouth.
- Perfectly balanced coffee flavor—it tastes like a high-end espresso bar treat, not bitter coffee cake.
- A presentation that screams gourmet, making it look way harder than it actually is!
- It’s the perfect dessert for parties because everyone recognizes and loves both of the classic flavors involved.
We spent ages perfecting that balance between the bright tang of the cheesecake and the earthy richness of the tiramisu. Check out some of my other baked creations if you feel like experimenting!
Ingredients for Your Decadent Tiramisu Cheesecake
Okay, time to get down to brass tacks! You need the right supplies to build this glorious monster. Since we are creating an Italian cheesecake fusion, we need ingredients that play nice together—creamy mascarpone mingling with that rich cheesecake tang. Don’t skip on the espresso here; the better the coffee, the better your Creamy Coffee Cheesecake will taste. Everything needs to be perfectly prepped before you even think about mixing. It makes such a difference!
For the Chocolate Wafer Crust
I love using chocolate wafers instead of standard graham crackers here. They give the base this intense, almost brownie-like depth that just screams rich dessert. It’s the perfect dark counterpoint to the creamy filling.
- 1 1/2 cups chocolate wafer crumbs (Trust me, they’re better than ‘regular’ crackers for this tiramisu cheesecake.)
- 1/4 cup granulated sugar
- 6 tablespoons unsalted butter, melted
For the Velvety Mascarpone Filling
This is the heart of the beauty! The secret to that perfect ribbon-like texture is making sure every single dairy item—the cream cheese and the mascarpone—is perfectly softened. Cold ingredients equal curdled filling, and we absolutely cannot have that. Room temperature is key for achieving that gorgeous, Velvety Mascarpone Filling.
- 3 (8 ounce) packages cream cheese, softened
- 1 1/2 cups granulated sugar
- 1/4 cup all-purpose flour
- 1 teaspoon vanilla extract
- 1/4 teaspoon salt
- 1 cup sour cream
- 8 ounces mascarpone cheese, softened
- 4 large eggs
For the Espresso Soak and Layering
This layer delivers the signature Tiramisu punch! You have to use strong coffee or espresso; weak coffee just won’t cut it for a decadent coffee dessert like this one. And here’s my main warning for this part: when you dip those ladyfingers, you need speed! We want them flavored, not soggy rocks.
- 1/2 cup strong brewed espresso, cooled (make it strong!)
- 1/4 cup coffee liqueur (like Kahlúa, this is optional but highly recommended!)
- 1 package ladyfingers
Step-by-Step Instructions for the Baked Tiramisu Cheesecake Recipe
Alright, deep breaths! We are officially entering the baking phase, and this is where the magic really happens for our tiramisu cheesecake. This recipe uses the water bath method, which sounds fancy, I know! But trust me, based on all my testing, it’s non-negotiable if you want that perfect, crack-free, layered cheesecake dessert surface. It keeps the heat gentle and even. I’ll walk you through every single step, just like I do in the kitchen myself.
Remember you’ll want to start the oven preheating while you finish mixing the batter.
Preparing the Crust and Pan Setup
First things first, let’s get organized! Set your oven for 325 degrees F. Then, take your 9-inch springform pan—this is crucial!—and wrap the outside *really well* with heavy-duty aluminum foil. I usually do three layers because you do not want the water from the bath seeping in. Mix your chocolate crumbs, the quarter cup of sugar, and the melted butter until it looks damp. Press that mixture down firmly into the bottom of the pan—really pack it in there so you get a sturdy base. Bake that crust for just 10 minutes, then take it out and let it cool completely before we do anything else.
Creating the Creamy Coffee Cheesecake Batter
Now for our beautiful filling. Use your stand mixer or a handheld one and beat the softened cream cheese, all that sugar, flour, vanilla, and salt until it’s purely smooth. Scrape down the sides like crazy! Next, blend in the sour cream and the lovely mascarpone. Mix until they just nod hello to each other—don’t whip hard yet. The most important part comes now: add those four eggs one at a time. You must only mix until *just* combined after each egg. Overmixing after the eggs go in is the fastest way to introduce air bubbles, which leads to cracks! We want a smooth texture for this tiramisu cheesecake, not a fluffy one.
Layering and Baking the Tiramisu Cheesecake
Ready for the layering? Pour exactly half of your smooth batter right over that cooled crust. While that rests, quickly make your espresso soak—just the brewed espresso and the liqueur if you’re using it. Now, grab those ladyfingers and give them a super-fast dunk in the coffee. Seriously, a one-second dip on each side. If they get soggy here, your Layered Cheesecake Dessert will weep water later! Arrange those lightly soaked fingers in a single layer over the batter. Then gentle pour the rest of the batter right on top. Now, for the water bath: place your foil-wrapped pan inside a larger roasting pan. Carefully pour hot water into the roasting pan until it comes halfway up the sides of your cheesecake pan. Bake this beauty for about 60 to 75 minutes. Stop when the edges look set, but the middle still wobbles softly when you nudge the oven rack.
We have a link to some other snack inspiration if you need something quick later!
Cooling and Chilling the Final Tiramisu Cheesecake
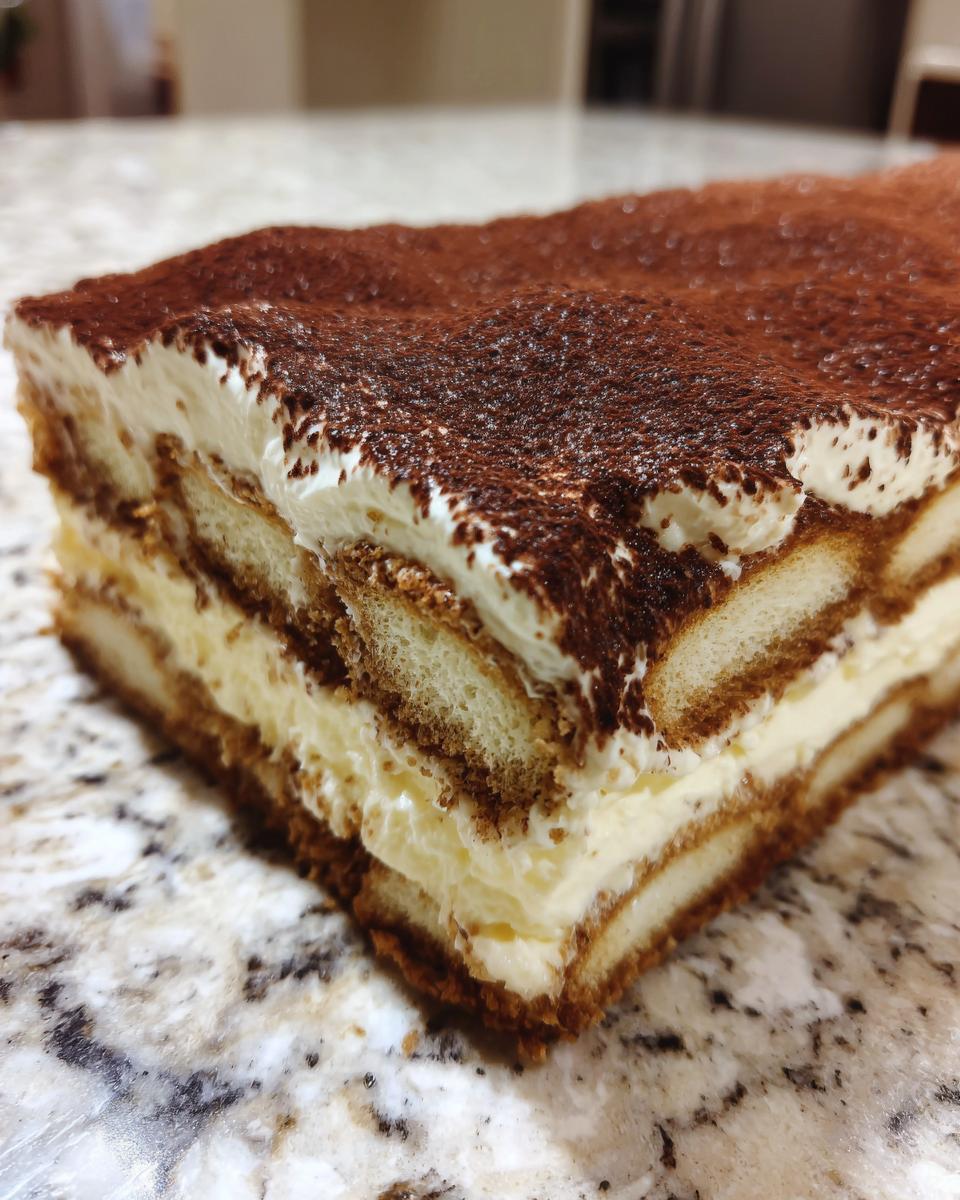
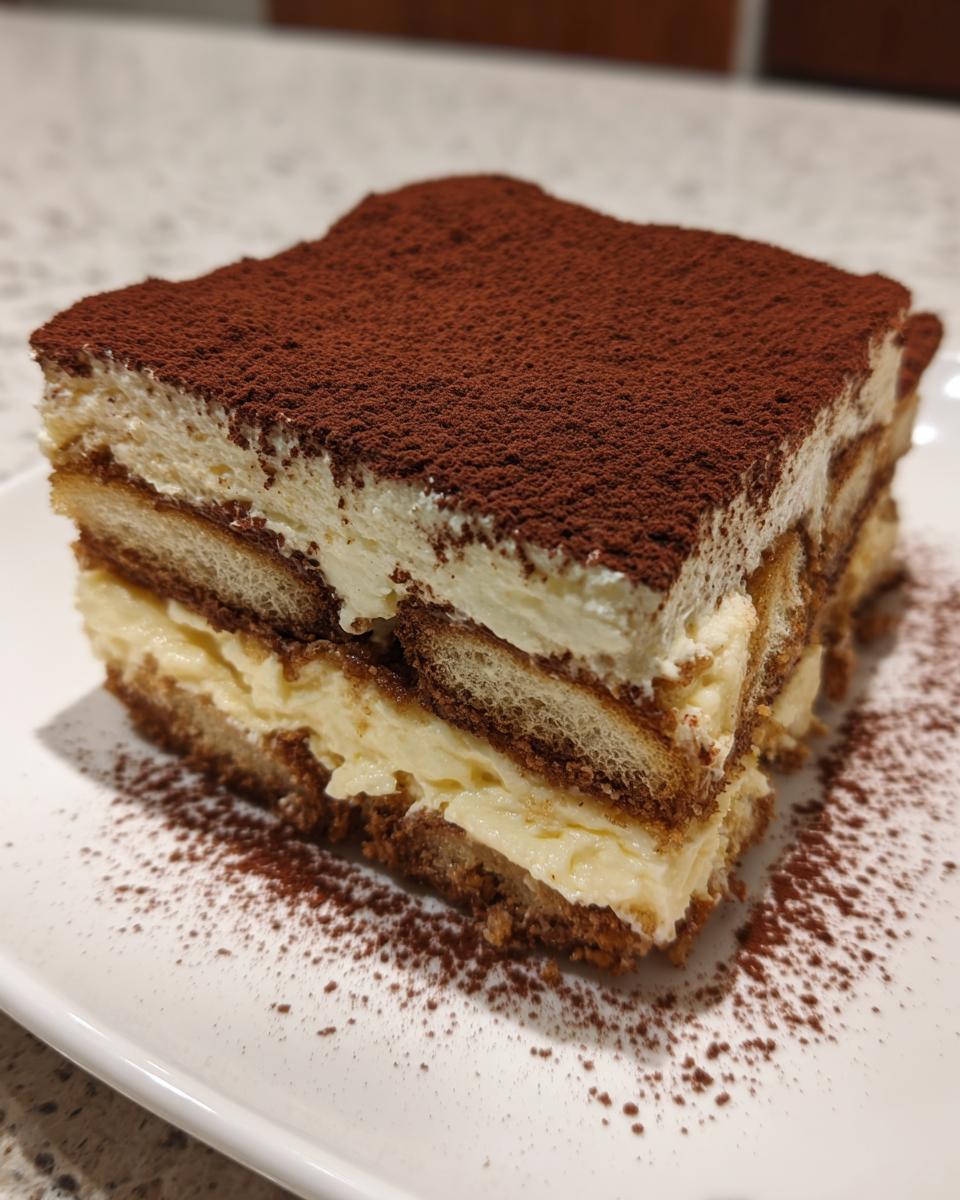
Do not, under any circumstances, take this out of the oven immediately! That temperature shock is what causes cracks. Turn the oven off, prop the door open just a crack, and let the cheesecake sit in that warm oven for a full hour—this slow cooldown is my secret testing learned over years! Once it’s room temperature, take it out of the water bath, let it finish cooling on the counter, cover it up, and then refrigerate it for a minimum of six hours, but overnight is best. That long chill time is vital because it lets the coffee soak into the cheesecake and really develops that incredible Italian Cheesecake Fusion flavor profile.
Tips for the Perfect Tiramisu Cheesecake
I know that big cheesecake bakes can feel scary, but seriously, follow these tricks and yours will be flawless. We want that luscious, smooth surface on your tiramisu cheesecake—no ugly cracks allowed!
The water bath is your best friend for preventing cracks, so please do not skip wrapping that pan tightly. Also, when you’re mixing the batter, stop as soon as the eggs disappear. Over-agitating that creamy filling introduces air that expands and busts the top later on. For the best espresso cheesecake recipe results, make sure your cooled espresso is super concentrated.
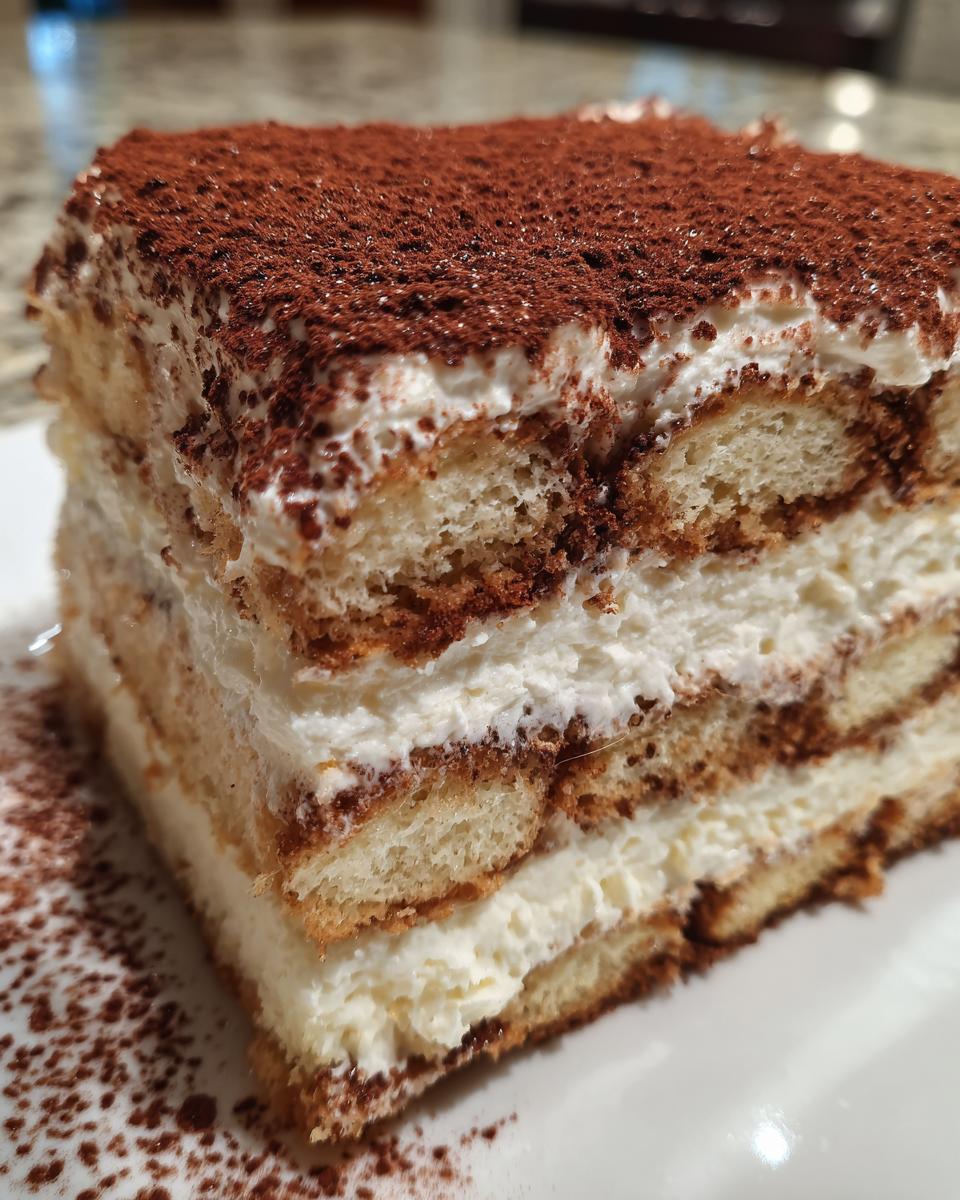
And about that final cocoa dust? Do it right before serving! If you dust it too early, the moisture from the fridge will make the cocoa look patchy. A generous dusting creates that beautiful visual contrast that makes people gasp when you bring out this Gourmet Cheesecake. You can see some other tips in my deep dive on the best cheesecake recipes!
Ingredient Notes and Variations for Your Mascarpone Dessert
Let’s talk about flexibility! While I stand by this recipe exactly as written for the ultimate Baked Tiramisu Cheesecake experience, I know kitchens are meant to be adaptable. Sometimes you’re missing something, or maybe you just want a lighter option. I have a whole post on no-bake fun if you’re short on oven time!
If you’re out of chocolate wafers for the base, don’t panic. You can totally switch to vanilla wafers or even crushed shortbread cookies. They won’t give that deep cocoa note, but they work just fine structurally! Just use the same measurements and butter.
Now, for the big question: what about making this a no-bake treat? It’s completely doable, although the texture will definitely shift away from a true cheesecake toward something more mousse-like, but it’s still delicious!
- To make a No Bake Tiramisu Cheesecake, leave out the eggs, flour, and the entire water bath/baking process, obviously!
- For the no-bake filling, you’re going to whip the cream cheese, sugar, sour cream, and mascarpone together until it’s light, then gently fold in the cooled espresso mixture.
- The key here is chilling. You need to layer your soaked ladyfingers with the filling and then chill it, covered tightly, for at least eight hours—I say overnight! It takes much longer to set up without the eggs bonding everything together in the oven.
Also, if you absolutely cannot source coffee liqueur, just dissolve a teaspoon of good quality instant coffee into that hot water before mixing it with your cooled espresso. It still packs that coffee wallop we need for that mascarpone dessert!
Serving Suggestions for Your Rich Holiday Dessert
This spectacular tiramisu cheesecake deserves a grand entrance, doesn’t it? It’s certainly a rich holiday dessert that deserves to be shown off! When it comes to presentation, that dusting of cocoa powder we added must be the very last thing you do. If you dust it too soon, the moisture from the fridge makes the cocoa look sad and clumpy. A fresh, deep cloud of cocoa right before serving makes this look like a true Gourmet Cheesecake.
For pairings, keep it simple so the cheesecake shines. If you’re serving after dinner, I love pairing a slice with an extra hot, strong espresso—just a tiny cup to cut through the richness. If you’re leaning towards something boozier, a slightly sweet glass of Prosecco works wonders to cleanse the palate between rich bites. Or, if you’re feeling adventurous for a party setting, try whipping up one of my Cranberry Pomegranate Margaritas for a tart contrast!
Storage and Reheating Instructions for Tiramisu Cheesecake
This amazing tiramisu cheesecake is actually even better the next day, which is such a luxury when you are cooking for a crowd! Since this is loaded with dairy—all that cream cheese and mascarpone—we have to treat it right so it stays safe and tastes fresh. The absolute golden rule is airtight storage. You need to cover the cheesecake really well before it goes into the fridge. I usually use plastic wrap directly against the top surface, followed by foil covering the whole springform pan, or just put it into a large, dedicated cake carrier.
It keeps beautifully for about three to four days in the refrigerator. You might start to notice the cocoa powder dusting getting a little damp after day two—that’s normal due to the fridge humidity. If that happens, just scrape off the old cocoa and dust on a fresh layer right before you slice into it again!
Now, can you freeze it? Yes, you absolutely can manage freezing this Layered Cheesecake Dessert, but you have to be careful with the ladyfingers. Make sure it is completely chilled first. Wrap the pan tightly in plastic wrap, then a layer of foil, and pop it in the freezer for up to a month. When thawing, let it sit in the fridge overnight. Do not try to rush it on the counter! Once it’s thawed and in the fridge, wait until you are ready to serve to apply that beautiful final cocoa dusting.
Frequently Asked Questions About Tiramisu Cheesecake
I always get questions when people see how decadent this tiramisu cheesecake looks! It’s funny how combining two classics makes everyone wonder about the details. Here are the things I hear most often from bakers diving into this recipe for the first time.
Can I skip the water bath for this cheesecake?
Oh, I wish I could tell you yes, but if you want that beautifully smooth, crack-free top on your final Layered Cheesecake Dessert, the answer is a firm no. That water bath, or Bain-Marie, is what keeps the heat gentle and humid inside the oven. Skipping it means the edges bake way faster than the middle, and BAM—you get cracks! My goal is always a perfect, elegant presentation, and the water bath is the only way to guarantee that creamy center without any surface drama.
Can I use instant coffee instead of brewing espresso?
Yes, you absolutely can, and this is a great tip for when you’re in a rush! If you can’t find strong brewed espresso, just use a good quality instant coffee. The trick is the concentration. For the espresso soak, dissolve about one heaping teaspoon of instant coffee into just one tablespoon of hot water until it’s completely dissolved, then let that concentrate cool down before mixing it with your liqueur or plain water. This ensures you still get that necessary punch for your Creamy Coffee Cheesecake without watering down the flavor.
What’s the real difference between this and a regular cheesecake?
That’s a fun one! On the surface, it’s just flavor, but structurally, it’s the infusion! A regular cheesecake is just that rich, tangy cream cheese base. With my Tiramisu Cheesecake Recipe, we are adding two key things: first, the addition of the mascarpone cheese softens the classic cream cheese bite just slightly, making it smoother. Second, and most importantly, we layer it with espresso-soaked ladyfingers. Those coffee-soaked layers are what make it a true Italian Cheesecake Fusion and pull it firmly into Tiramisu territory. It’s like a cheesecake met a sophisticated Italian cake on a coffee break!
Is this too rich for a regular birthday dessert?
It is certainly rich—it’s meant to be! That’s why I love it for landmark celebrations or holidays because it feels like such an indulgence. It’s definitely heavier than a sponge cake. If you’re worried about it being “too much,” I highly recommend serving smaller slices alongside something light, like fresh berries, or make sure you follow my advice to dust it with good quality cocoa powder right before serving to balance that intensity. It makes this the ultimate Rich Holiday Dessert!
If you need other ideas for quick bites, I have a recipe for an easy garlic butter spread that is surprisingly popular!
Estimated Nutrition for This Decadent Coffee Dessert
Now we come to the part where I tell you to enjoy this tiramisu cheesecake responsibly! Look, this recipe is deep, it’s creamy, and it utilizes mascarpone, so we know it’s not exactly low-calorie, but wow, is it worth every single bite. Seeing the numbers sometimes helps me decide when I can justify serving such a magnificent showstopper dessert.
Below are the estimated nutritional facts for just one generous slice. Remember, this is based on the ingredients I used, including the coffee liqueur, so if you skip that or use an alternative, things might shift a little bit. That’s just part of home baking, right?
- Serving Size: 1 slice
- Calories: 450
- Sugar: 35g
- Sodium: 250mg
- Fat: 30g
- Saturated Fat: 18g
- Unsaturated Fat: 12g
- Trans Fat: 0.5g
- Carbohydrates: 40g
- Fiber: 1g
- Protein: 8g
- Cholesterol: 120mg
I want to be super transparent here, which is important for trust, so please know that these figures are just an estimate for this specific espresso cheesecake recipe. If you make substitutions—like swapping dark chocolate wafers for regular ones, or using full-fat sour cream versus reduced-fat—those numbers will change. But honestly, when a dessert is this good, I try not to dwell on the details too much. Life is too short to regret eating a perfect slice of creamy coffee cheesecake, I always say!
PrintDecadent Tiramisu Cheesecake
This recipe merges the creamy texture of cheesecake with the classic coffee and mascarpone flavors of tiramisu. It creates a rich, show-stopping dessert perfect for special occasions.
- Prep Time: 30 min
- Cook Time: 75 min
- Total Time: 125 min
- Yield: 12 servings 1x
- Category: Dessert
- Method: Baking
- Cuisine: Italian Fusion
- Diet: Vegetarian
Ingredients
- 1 1/2 cups chocolate wafer crumbs
- 1/4 cup granulated sugar (for crust)
- 6 tablespoons unsalted butter, melted
- 3 (8 ounce) packages cream cheese, softened
- 1 1/2 cups granulated sugar (for filling)
- 1/4 cup all-purpose flour
- 1 teaspoon vanilla extract
- 1/4 teaspoon salt
- 1 cup sour cream
- 8 ounces mascarpone cheese, softened
- 4 large eggs
- 1/2 cup strong brewed espresso, cooled
- 1/4 cup coffee liqueur (optional)
- 1 package ladyfingers
- Unsweetened cocoa powder, for dusting
Instructions
- Preheat your oven to 325 degrees F. Wrap the outside of a 9-inch springform pan with heavy-duty aluminum foil.
- Prepare the crust: Mix chocolate wafer crumbs, 1/4 cup sugar, and melted butter. Press the mixture firmly into the bottom of the prepared springform pan. Bake for 10 minutes. Cool completely.
- Prepare the cheesecake filling: In a large bowl, beat the softened cream cheese, 1 1/2 cups sugar, flour, vanilla extract, and salt until smooth. Beat in the sour cream and mascarpone cheese until just combined.
- Beat in the eggs one at a time, mixing only until each egg is incorporated. Do not overmix.
- Pour half of the cheesecake batter over the cooled crust.
- Prepare the coffee soak: In a small bowl, mix the cooled espresso and coffee liqueur, if using.
- Quickly dip both sides of the ladyfingers into the espresso mixture (do not soak them too long). Arrange a single layer of soaked ladyfingers over the first layer of batter.
- Pour the remaining cheesecake batter over the ladyfingers.
- Place the springform pan into a larger roasting pan. Carefully pour hot water into the roasting pan until the water reaches halfway up the sides of the springform pan to create a water bath.
- Bake for 60 to 75 minutes, or until the edges are set but the center still jiggles slightly.
- Turn off the oven, crack the door open, and let the cheesecake cool inside the oven for 1 hour.
- Remove the cheesecake from the water bath and let it cool completely on a wire rack.
- Once cooled, cover and refrigerate for at least 6 hours, or preferably overnight.
- Before serving, carefully remove the sides of the springform pan and dust the top generously with unsweetened cocoa powder.
Notes
- For a no-bake version, skip the water bath and oven steps. Chill the filling until firm. Layer with soaked ladyfingers and chill for 8 hours.
- Use high-quality espresso for the best coffee flavor in this Italian cheesecake fusion.
- If you skip the coffee liqueur, add 1 tablespoon of strong instant coffee dissolved in 1 tablespoon of hot water to the espresso soak.
Nutrition
- Serving Size: 1 slice
- Calories: 450
- Sugar: 35g
- Sodium: 250mg
- Fat: 30g
- Saturated Fat: 18g
- Unsaturated Fat: 12g
- Trans Fat: 0.5g
- Carbohydrates: 40g
- Fiber: 1g
- Protein: 8g
- Cholesterol: 120mg