
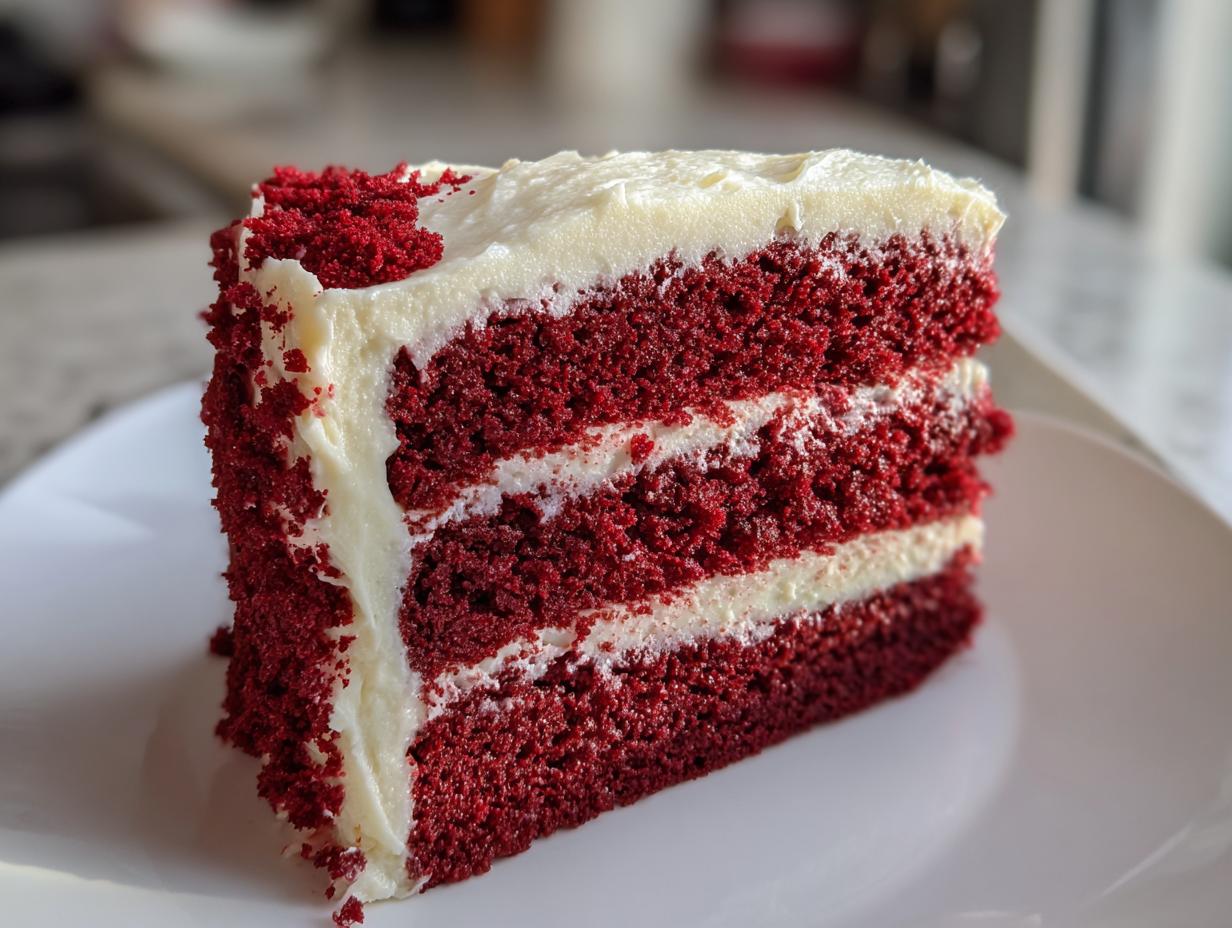
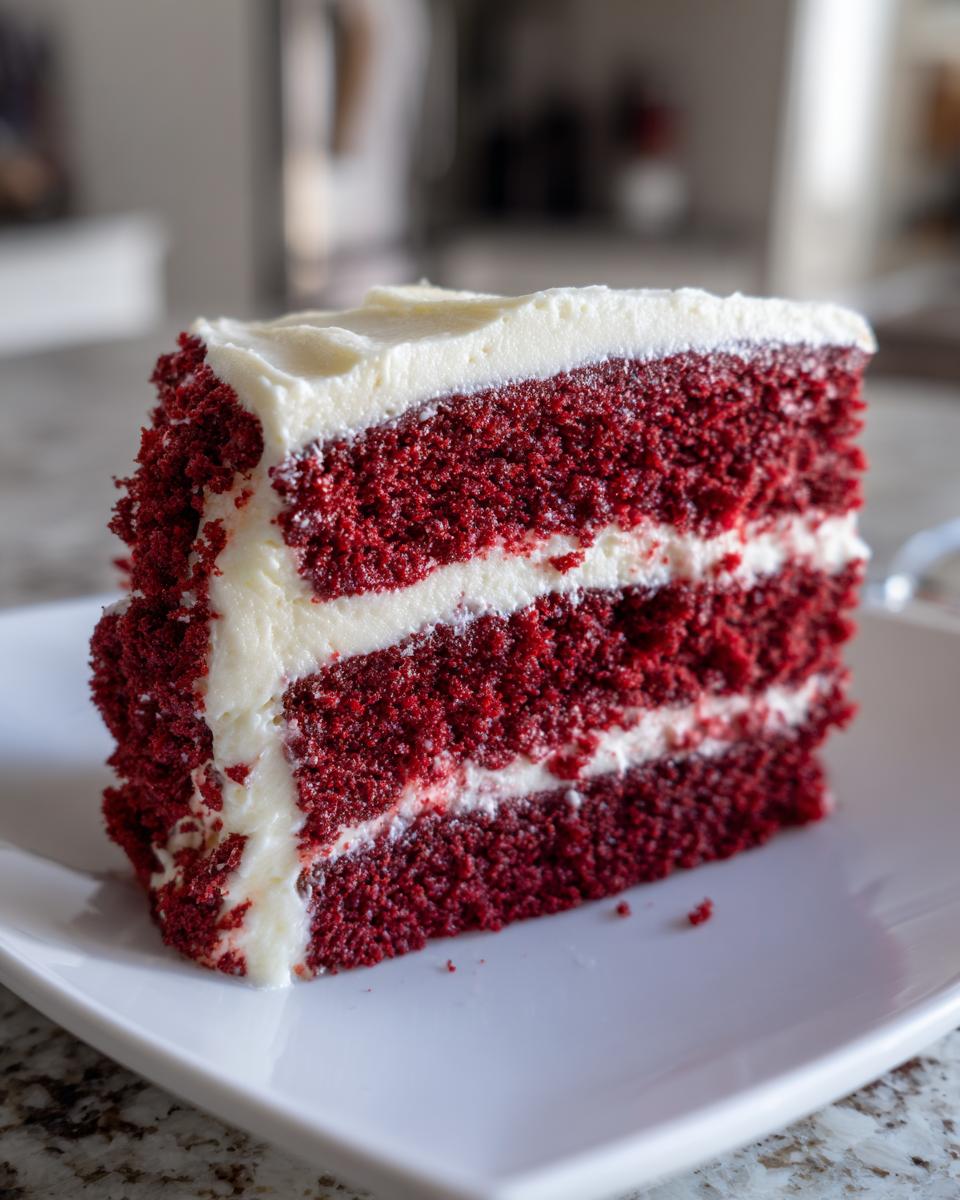
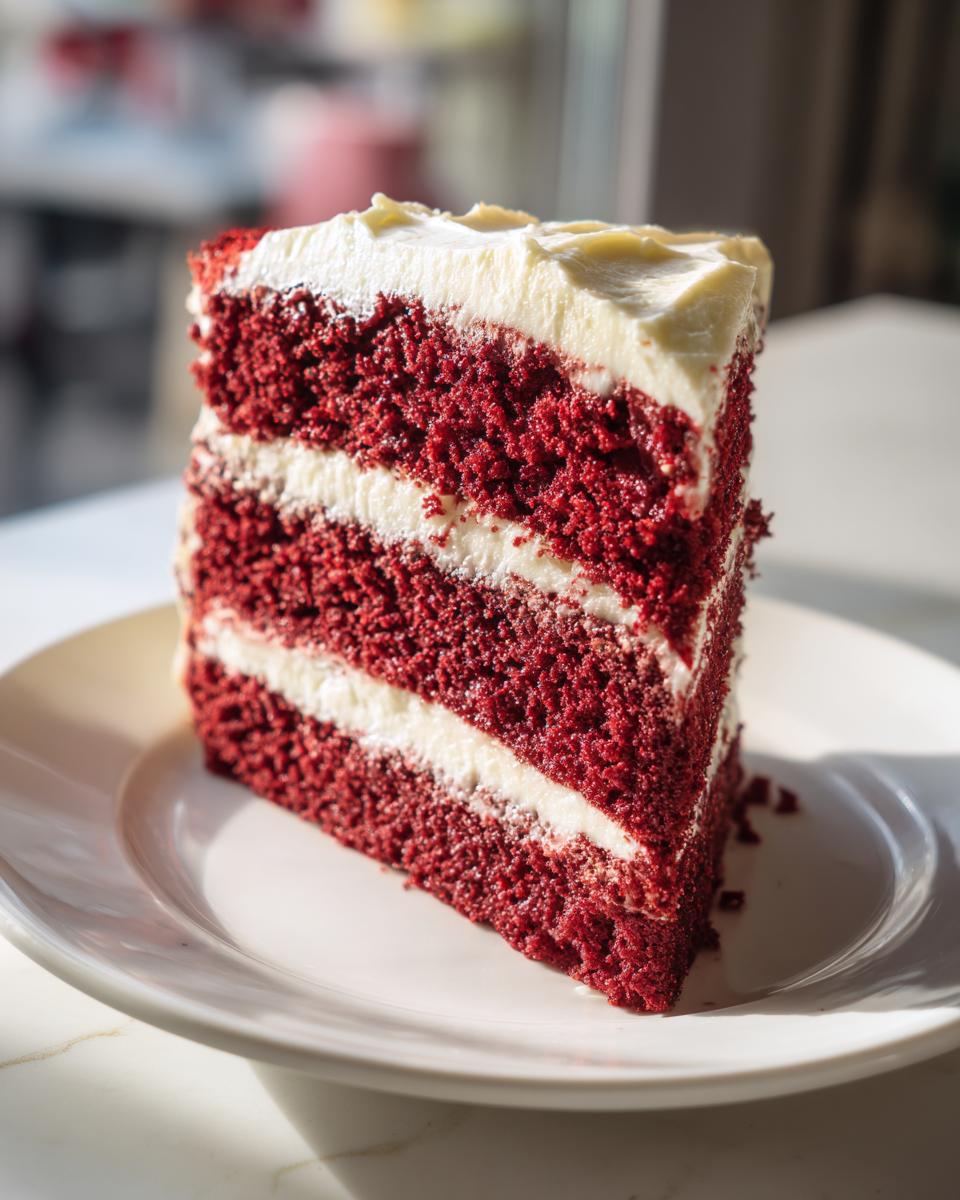
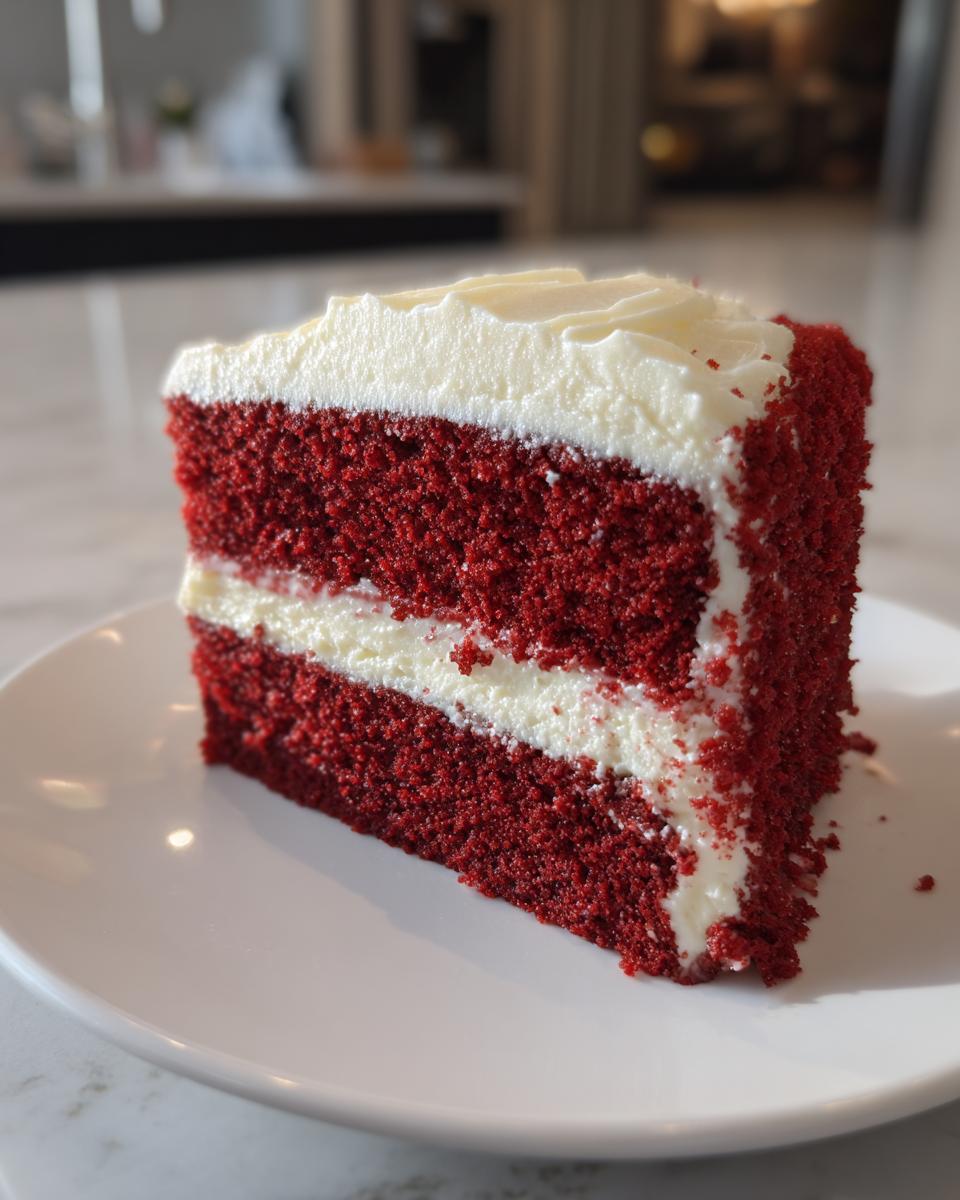
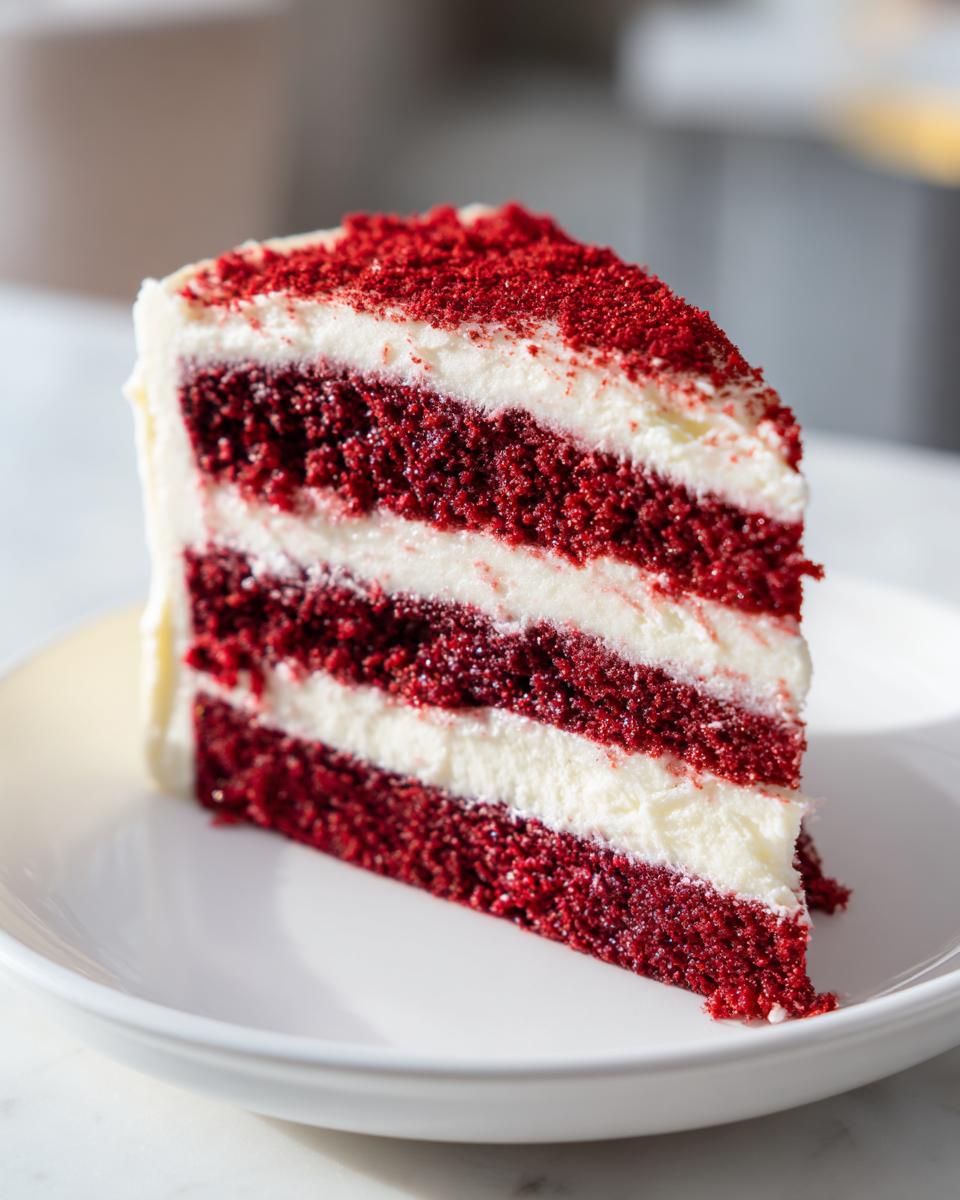
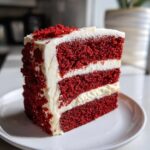
When we talk about American desserts that truly stop traffic, you have to talk about red velvet cake. It’s not just cake; it’s tradition, it’s drama, and it’s always the star of the party. Here at DelishCraze, we put so much energy into perfecting that look and that unbeatable flavor profile—the rich crimson hue paired with that tangy, thick cream cheese frosting you just crave. This isn’t some flimsy imitation; this is our take on the classic Southern red velvet cake that’s famous for being incredibly moist. I’m talking about the kind of recipe Olivia Rosewood spent months testing to make sure it delivers pure, velvety perfection every single time you bake it. Trust me, this is the showstopper you’ve been searching for.
- Why This is the Ultimate Moist Southern Red Velvet Cake Recipe
- Essential Ingredients for Your Classic Red Velvet Cake
- Step-by-Step Instructions for the Best Homemade Red Velvet Cake
- Tips for an Old Fashioned Red Velvet Recipe Success
- Make-Ahead and Storage for Your Decadent Red Velvet Dessert
- Variations on the Classic Red Velvet Cake
- Frequently Asked Questions About This Red Velvet Cake Recipe
- Estimated Nutritional Information for This Red Velvet Cake
- Share Your Ultimate Red Velvet Recipe Experience
Why This is the Ultimate Moist Southern Red Velvet Cake Recipe
I swear, I drove my family nuts testing this cake! When you aim for the best homemade red velvet cake, you can’t just throw food coloring into a standard vanilla base. The secret to that deep, rich flavor profile, the very thing that makes it a proper moist red velvet cake recipe, is chemical magic. The buttermilk is essential here; it reacts beautifully with the small bit of cocoa powder and the vinegar we add later. That specific combination is what gives you that stunning, slightly tangy background note and feeds the baking soda to create a truly tender crumb cake.
When I was developing this recipe, I realized that most failures came from overmixing. Once that flour hits the liquid, you stop stirring almost immediately. Don’t worry if you see a few tiny streaks of flour—they’ll disappear when you bake it! That fussiness is what guarantees a melt-in-your-mouth experience. If you want the most authentic Southern result, you have to respect the process. You can see how others approach this deep flavor over at this testing site, but I think my method locks in moisture better, especially when you’re aiming for those tall layers. It’s a cake that truly deserves to be saved for a special occasion, just like my recipe for Christmas Toffee Crunch Cake is for the holidays.
Achieving That Perfect Velvety Cake Texture Tips
That velvety feel isn’t an accident! It relies heavily on the buttermilk reacting with the white vinegar right before it hits the baking soda. That mild acid tenderizes the flour proteins so they don’t develop too much gluten, which keeps the cake soft instead of dense or chewy. We mix this into the wet ingredients first to make sure that beautiful reaction gets going before it even gets near the oven. It’s all about keeping that crumb delicate!
Essential Ingredients for Your Classic Red Velvet Cake
Okay, once you nail the technique, the next thing that establishes this as a true, authentic red velvet cake is sticking to the ingredient list. Don’t go swapping things out here, trust me! The buttermilk and the food coloring are non-negotiable, but the magic really happens when you make sure your fats are perfectly softened. Having all your components ready to go before you even turn on the mixer makes the whole process feel so much less rushed, which is key for a beautiful cake.
Cake Batter Ingredients for the Red Velvet Cake
Here is exactly what you need for those two gorgeous layers. Remember, your butter needs to be soft—like, you can gently press a finger in but it shouldn’t feel greasy or melted. And that buttermilk? Make sure it’s room temperature so it blends nicely with the butter and eggs. For the color, I always recommend gel food coloring if you can grab it, but 1/4 cup of liquid works fine too!
- 2 1/2 cups all-purpose flour
- 1 teaspoon baking soda
- 1 teaspoon salt
- 1 tablespoon unsweetened cocoa powder
- 1 cup unsalted butter, softened
- 1 1/2 cups granulated sugar
- 2 large eggs
- 1 cup buttermilk
- 1 teaspoon white vinegar
- 1 teaspoon vanilla extract
- 1/4 cup red food coloring (liquid or gel)
Cream Cheese Frosting Ingredients for the Red Velvet Cake with Cream Cheese Frosting
The frosting is half the reason we are even here, right? It needs to be smooth, tangy, and utterly decadent. You absolutely cannot cheat on the temperature here—the cream cheese and butter need to be softened, but they *must not* be warm or melted, or you’ll end up with soup instead of that fabulous frosting. Also, please sift that powdered sugar; those little lumps will ruin your smooth finish!
- 8 ounces cream cheese, softened
- 1/2 cup unsalted butter, softened
- 4 cups powdered sugar, sifted
- 1 teaspoon vanilla extract
Step-by-Step Instructions for the Best Homemade Red Velvet Cake
I know getting through all those ingredients can feel like a marathon, but honestly, the mixing part happens faster than you think once you’re organized! This is where we turn those perfect components into the best homemade red velvet cake you’ve ever made. Remember, the goal is that smooth, tender texture, so keep your speed gentle once we start combining everything. If you love easy baking guides, you can check out my general collection of baking dessert recipes for more inspiration!
Mixing the Red Velvet Cake Batter
First things first, get that oven hot—we need 350°F (175°C). Grease and flour your two 9-inch pans really well, that helps stop sticking later! In one bowl, whisk together all your dry stuff: flour, baking soda, salt, and that tiny bit of cocoa. Set that aside. Now, in your big mixer bowl, cream that soft butter and sugar until it’s light and fluffy, which usually takes a few minutes. Add those two eggs one at a time, making sure each one is blended in smooth before adding the next. In a separate little cup, mix your buttermilk, vinegar, vanilla, and all that gorgeous red coloring until it’s one even, bright color.
Now, pay close attention here: we mix in stages. You alternate the dry mix and the liquid mix, starting and ending with the dry stuff. So, a third of the flour mix, then half the buttermilk mix, another third of the flour, the rest of the buttermilk, and finish with the last bit of flour. Mix only until everything just disappears. Seriously, stop the second you don’t see a white streak anymore! Too much mixing here is what ruins that velvet crumb.
Baking and Cooling the Red Velvet Layer Cake Tutorial
Once the batter looks right—that deep, lovely red—divide it evenly between those two prepared pans. Pop them into your preheated oven for about 30 to 35 minutes. You’ll know they are ready when a little wooden pick stabbed right into the center comes out clean. Mine usually hit that mark right around thirty-two minutes! Don’t test it too early, or you might mess up the lift.
This part is important for a clean release: let the cakes cool right there in the pan for just 10 minutes. Not more, not less, unless you want them sticking! After those ten minutes are up, gently flip them onto a wire rack to cool all the way. If you try to frost them warm, that lovely cream cheese frosting will slide right off. For the best results, I usually wait until they are totally cold, which is perfect timing to whip up that frosting while you wait, like they suggest over at Julie Marie Eats!
Assembling the Red Velvet Cake with Cream Cheese Frosting
While those layers are chilling out, whip up the frosting—that’s just beating the cream cheese and softened butter until they are light, then slowly mixing in the sifted powdered sugar and vanilla until it’s that perfect, spreadable texture. Place your first layer down on your serving plate. Use about a third of that amazing frosting and spread it evenly across the top. Gently set the second layer right on top.
This is where you make it a true showpiece! Use the remaining frosting to cover the top and then smooth it quickly around the sides. Because this is such a rich cake, you don’t need a thick layer of frosting; a nice, even coat does the trick beautifully and lets that deep red peek through. I skip the crumb coat because this cake is so moist it really shouldn’t crumble much, making the whole process that much easier!
Tips for an Old Fashioned Red Velvet Recipe Success
So, you want to nail that authentic, old fashioned red velvet recipe? I’ve got a couple of non-negotiable pointers that took me forever to figure out. First, that buttermilk. Don’t ever skip it or try to substitute with milk—it’s the magic ingredient that reacts with the cocoa to give you that subtle tang, which is what distinguishes it from just being a weirdly colored chocolate cake. If you don’t have buttermilk, you can quickly make your own by adding one teaspoon of vinegar to regular milk, just like we do in the main recipe! That reaction is everything.
Second thing: food coloring control. If your cake looks pale pink, you’ve messed with the delicate balance of the tang and the cocoa. For that traditional deep red, you might need a tiny bit more coloring than you think, but always add it slowly. I love seeing how other bakers handle the color depth, especially when trying to achieve that true Southern look; you can peek at some great examples over at this farmhouse site. Remember, for a truly stunning red velvet cake, it’s about honoring those classic chemical reactions. If you master this, you’ll never go back, just like I feel about my Apple Crumb Cake.
Make-Ahead and Storage for Your Decadent Red Velvet Dessert
I get this question all the time, especially when people are planning big parties: “Can I make this glorious decadent red velvet dessert ahead of time?” Yes, you totally can! But because we are using that heavenly, tangy cream cheese frosting, we absolutely need to be smart about storage. Once the cake is frosted, it really should be housed in the refrigerator. I like to put it in a cake carrier or cover it loosely with plastic wrap—don’t press the plastic right onto the frosting!
If you frost it the day before, that’s perfect. It gives the flavors time to settle in! When you take it out of the fridge, let it sit on the counter for about 30 minutes before slicing. This lets the butter in the frosting warm up just enough so it’s not hard and waxy when you eat it. Honestly, this cake is best eaten within three days, but if you’ve got leftovers longer than that, wrap individual slices tightly in plastic and freeze them. They freeze like a charm!
For reheating, you don’t really reheat cake, but if you were just freezing an unfrosted layer, you can warm that layer slightly in a 300°F oven for about 8 minutes before you frost it. But mostly, this wonderful cake is meant to be enjoyed cool and creamy. If you’re stocking up on other favorites, don’t forget to plan storage for my Chocolate Dream Bars too!
Variations on the Classic Red Velvet Cake
While I truly believe that the dual-layer, deeply colored red velvet cake with that signature tang is the best way to enjoy this dessert, I totally get that sometimes you need to tweak things for your gathering or just for fun! Don’t feel locked into just one way to do things; cooking is all about making things your own, especially when it comes to awesome celebration cake ideas.
I’ve got a couple of simple changes you can make that keep the heart of the recipe but adapt it for your needs. If you’re looking for a slightly simpler presentation, or maybe you just don’t want to deal with stacking two layers, try this!
- The Single-Layer Option: If you want an easy red velvet cake that’s less fuss, you can surely bake this batter in a single 9×13 inch pan instead of two rounds. You’ll need to increase that baking time quite a bit, maybe closer to 40 or 45 minutes, so keep checking it with your wooden pick. You can then just spread the frosting right over the top for a truly rustic, delicious sheet cake, perfect for cutting into squares.
- Boosting the Cocoa Depth: This is my little secret for when I feel like the cake needs a richer, darker base that still tastes tangy. Right when you mix in your cocoa powder with the dry ingredients, add about half a teaspoon of instant espresso powder. You won’t taste coffee, promise! All it does is help deepen that dark cocoa flavor, making the red color pop even more intensely against the subtle chocolate background.
- A Tangier Frosting Kick: If you want your cream cheese frosting to have a sharper bite that really cuts through the sweetness of the cake, try adding the zest of half a lemon to the frosting when you add the vanilla. It just brightens everything up beautifully and makes the whole red velvet cake taste fresher!
No matter which direction you take these ideas, remember to keep testing for doneness. These little tweaks are fun, but that classic moist texture must stay the priority! If you want to explore some other fun cookie recipes later on, check out my guide to Cinnamon Roll Cookies!
Frequently Asked Questions About This Red Velvet Cake Recipe
I know you might still have a few little worries before you dive into making this red velvet cake. It’s totally normal! When you’re aiming for that perfect, fluffy, classic result, you want to make sure you cover all your bases. Don’t stress; I’ve rounded up the questions I get asked the most about achieving that ultimate moist red velvet cake recipe right at home!
Can I skip the buttermilk? I don’t have any!
Oh, I wish I could say yes, but please don’t skip the buttermilk if you want that authentic, tangy flavor and velvety cake texture! Buttermilk is acidic, and that acid is what interacts with the leavening agents to keep the crumb incredibly soft and tender. If you are truly stuck and can’t run to the store, you can easily make a quick substitute: measure out one cup of regular milk and stir in exactly one tablespoon of white vinegar or lemon juice. Let it sit on the counter for about five minutes until it curdles slightly—that works in a pinch for this classic red velvet cake!
Why isn’t my red velvet cake as red as yours?
That deep, dramatic red color takes a bit of convincing, doesn’t it? Often, if the color isn’t vibrant, it’s one of two things. First, the natural acid in the cocoa powder actually dulls the red dye slightly, so you might need a bit more coloring than you think to get that show-stopping look. Second, make sure you are adding the coloring to your buttermilk mixture *before* you combine the wet and dry ingredients. It needs to be fully incorporated into the liquid component. If you’re looking for more background on the history of the color, check out this neat guide here!
Can I use whipped topping instead of the cream cheese frosting?
Listen, I love whipped topping for an easy dessert, but for the ultimate red velvet recipe, you have to stick to the cream cheese frosting. The tanginess of real cream cheese is completely necessary to balance the richness of the cake layers. Whipped topping is too light and sweet; it won’t give you that traditional, decadent flavor we are aiming for! Plus, real buttercream or cream cheese frosting holds up much better on a towering red velvet layer cake tutorial structure.
Do I have to use both baking soda AND white vinegar?
Yes, you absolutely do! They work together as your leavening team. The vinegar, combined with the buttermilk, starts that tenderizing reaction early, and the baking soda is the quick lift it needs when it hits the heat. They are essential for that fine, velvety cake texture. Don’t skip either one if you want the best result for this Southern red velvet cake!
I hope these answers give you the confidence boost you need to start baking! If you found this guide helpful for your easy sweet snacks planning, let me know in the comments!
Estimated Nutritional Information for This Red Velvet Cake
Okay, let’s talk numbers for a second. I always feel a little weird posting the nutrition facts because honestly, when we make a red velvet cake, we aren’t doing it for the kale content! This is a celebration cake, meant to be enjoyed fully. It’s rich, it’s sweet, and it’s absolutely worth every single bite. That said, I know some of you like tracking things, so I ran the numbers for a standard slice based on everything going into the cake and the frosting.
Please remember, these figures are just an estimate based on generic ingredient breakdowns since every stick of butter and cup of sugar has slight variations. Also, since this is a huge, gorgeous layer cake, your portion size matters! If you cut a massive slice, well, the numbers go up just a tad. Treat this as baking inspiration and a rough guide, not rigid science!
- Serving Size: 1 slice
- Calories: 450 (Wow, that frosting adds up!)
- Sugar: 55g
- Fat: 24g (Mostly from that lovely butter and cream cheese)
- Carbohydrates: 58g
- Protein: 5g
- Cholesterol: 85mg
- Sodium: 350mg
See? Totally decadent! But seriously, when one of these amazing slices of Southern red velvet cake hits your plate, that 450 comes with a full serving of happiness. Don’t count the calories; count the smiles!
Share Your Ultimate Red Velvet Recipe Experience
Now listen, I’ve dumped all my secrets on you—from the buttermilk trick to why we absolutely have to sift that powdered sugar. But the real joy of baking comes when you try it out yourself and tell me how it went! I want to see your beautiful layers and that amazing red hue in action.
As soon as you finish your red velvet cake, please come back here! If you loved how moist it turned out, if you pulled off that perfect velvety cake texture, or if you decided to try the Southern style modification, please leave a rating. Five stars if you think it deserves it, or tell me honestly what you’d tweak next time.
Don’t just keep the glory to yourself! Snap a picture of your finished masterpiece—especially if that cream cheese frosting looks just perfect—and tag me on social media! Seeing your successful bakes truly makes my day and keeps me inspired to create more classic American recipes like this one. If you have any last-minute questions that I didn’t cover, you can always reach out through my contact page!
PrintThe Ultimate Moist Southern Red Velvet Cake with Classic Cream Cheese Frosting
Bake the best homemade red velvet cake, featuring a perfectly moist and velvety crumb and topped with rich cream cheese frosting. This classic Southern recipe is ideal for celebrations.
- Prep Time: 25 min
- Cook Time: 35 min
- Total Time: 60 min
- Yield: 12 servings 1x
- Category: Dessert
- Method: Baking
- Cuisine: American
- Diet: Vegetarian
Ingredients
- 2 1/2 cups all-purpose flour
- 1 teaspoon baking soda
- 1 teaspoon salt
- 1 tablespoon unsweetened cocoa powder
- 1 cup unsalted butter, softened
- 1 1/2 cups granulated sugar
- 2 large eggs
- 1 cup buttermilk
- 1 teaspoon white vinegar
- 1 teaspoon vanilla extract
- 1/4 cup red food coloring (liquid or gel)
- 8 ounces cream cheese, softened
- 1/2 cup unsalted butter, softened
- 4 cups powdered sugar, sifted
- 1 teaspoon vanilla extract
Instructions
- Preheat your oven to 350°F (175°C). Grease and flour two 9-inch round cake pans.
- In a medium bowl, whisk together the flour, baking soda, salt, and cocoa powder. Set aside.
- In a large bowl, beat the softened butter and granulated sugar with an electric mixer until light and fluffy. Beat in the eggs one at a time, mixing well after each addition.
- In a small bowl, mix the buttermilk, vinegar, vanilla extract, and red food coloring until the color is uniform.
- Gradually add the dry ingredients to the wet ingredients, alternating with the buttermilk mixture, beginning and ending with the dry ingredients. Mix only until just combined; do not overmix to keep the crumb tender.
- Divide the batter evenly between the prepared cake pans.
- Bake for 30 to 35 minutes, or until a wooden pick inserted into the center comes out clean.
- Let the cakes cool in the pans for 10 minutes before inverting them onto a wire rack to cool completely.
- Prepare the frosting: Beat the softened cream cheese and butter together until smooth. Gradually add the powdered sugar, mixing until combined. Beat in the vanilla extract until the frosting is light and creamy.
- Once the cakes are completely cool, place one layer on a serving plate. Spread about one-third of the frosting evenly over the top. Place the second layer on top and frost the top and sides of the entire cake.
Notes
- For a deeper red color, use gel food coloring or increase the amount slightly.
- Buttermilk reacts with the cocoa and baking soda to create the classic subtle tang and tender texture.
- Do not overmix the batter once the flour is added; this prevents a tough cake and helps achieve a velvety crumb.
Nutrition
- Serving Size: 1 slice
- Calories: 450
- Sugar: 55g
- Sodium: 350mg
- Fat: 24g
- Saturated Fat: 14g
- Unsaturated Fat: 10g
- Trans Fat: 0.5g
- Carbohydrates: 58g
- Fiber: 1g
- Protein: 5g
- Cholesterol: 85mg