

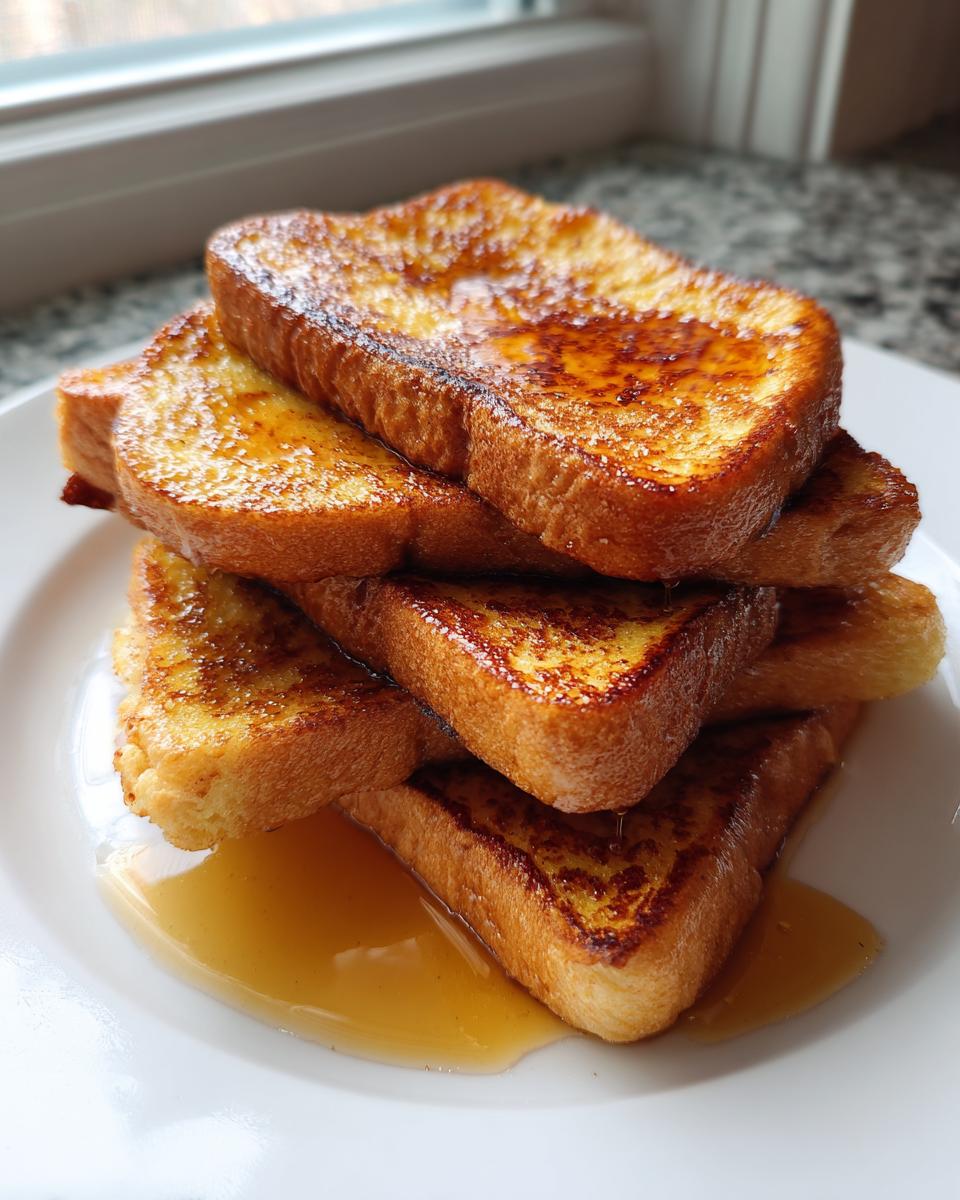
If you’ve ever bitten into fantastic French toast that was somehow perfectly golden brown on the outside but still gloriously soft and creamy inside, you know that texture is everything. Stop searching for recipes, because I’ve perfected this one. This is truly the recipe for the ultimate fluffy French toast, yielding those coveted crispy edges and a total custardy center in every single bite. Here at DelishCraze, following Olivia Rosewood’s simple philosophy, we believe classics should never be complicated. I hammered out the exact ratios so you get that comforting, rich flavor without any fuss—perfect for elevating your next morning meal! For more on our approach to accessible home cooking, check out the story behind DelishCraze.
- Why This Is The Best French Toast Ever
- Ingredients for Ultimate Fluffy French Toast
- How to Make French Toast Perfect: Step-by-Step Instructions
- French Toast Tips and Tricks for Success
- Serving Suggestions for Your French Toast
- Storage and Reheating Instructions for Classic French Toast
- Making French Toast for Weekend Brunch Recipes
- Frequently Asked Questions About French Toast
- Nutritional Estimate for Your French Toast Serving
Why This Is The Best French Toast Ever
Look, I’ve made a lot of breakfasts, but this recipe really nails that balance everyone chases. We aren’t messing around here; this truly is the Best French Toast Ever. It’s all about texture. So many recipes give you mushy bread or dry toast, but we’re aiming for that sweet spot: fluffy on the inside, perfectly golden outside, and rich enough to be called Ultimate Breakfast Comfort Food. We use a few tricks to make sure it’s better than anything else on the griddle. Check out how we approach other favorites like protein french toast if you need more morning fuel!
Achieving the Custardy French Toast Center
The secret sauce for that center? Heavy cream! Honestly, you need that extra fat to slow down the cooking and create that decadent, almost pudding-like texture inside the bread. Also, don’t rush the soak. Don’t just dunk it and flip it! You need to let that thick bread—Brioche is usually my favorite—really drink up the custard for a good 30 seconds on each side. That’s the ticket to creamy insides.
Tips for Crispy French Toast Edges
If you want those beautiful Crispy French Toast Edges, your heat management has to be spot on. Don’t crank the burner to high! We use medium heat. This allows the moisture hidden inside the bread to turn into steam and puff up the interior, while the butter on the griddle slowly caramelizes the exterior. A little extra butter between each round doesn’t hurt, trust me. It keeps the surface sizzling just right for that perfect crunch.
Ingredients for Ultimate Fluffy French Toast
Okay, gathering your supplies is the easiest part, but the quality of what you use here will make or break your breakfast experience. You need to be precise here so you don’t end up with thin, soggy bread, which nobody wants. For this recipe, we are aiming for rich flavor and structure, so having everything measured out first makes the process so much smoother. You’ll be amazed at how few things you actually need for French toast this good!
Bread Selection for Perfect French Toast
This is non-negotiable if you want that custardy French toast center. Skip the squishy, thin sandwich bread. We need something sturdy! I always reach for thick-cut Brioche or Challah if I can find it. These breads are rich with eggs and butter already, so they handle the soak beautifully without falling apart. A pro French Toast Tip: day-old bread is actually better! It’s slightly stale, which means it absorbs the custard instead of just soaking through immediately. It’s the perfect structure for getting those crispy French toast edges.
For the wet custard mix that turns the slices golden brown, you need a few essentials. Gather these six core things:
- Six large eggs—freshness matters here!
- Half a cup of whole milk because we need that smooth base.
- A quarter cup of heavy cream—this is for the richness, don’t skip it!
- One teaspoon of good vanilla extract—I use my fancy pure stuff for this.
- One teaspoon of ground cinnamon for that classic warming spice note.
- Just a pinch of salt and a quarter teaspoon of nutmeg to round out the flavor.
And for the actual cooking? You can’t beat butter. Grab about two tablespoons of unsalted butter, divided up for cooking in batches. That’s it! With these ingredients, you are setting yourself up for the Best French Toast Ever.
How to Make French Toast Perfect: Step-by-Step Instructions
Now that we have our glorious custard mixture and our thick-cut bread ready, let’s talk about the actual cooking part. Learning How to Make French Toast Perfect comes down to timing and gentle heat management. If you follow this sequence, you’ll have that gorgeous, perfectly cooked breakfast on your plate in under 15 minutes total. Remember, we are going for that dreamy interior without burning the exterior! This is where you build true breakfast magic.
Creating the Cinnamon Vanilla French Toast Custard
First things first: we need to make sure those flavors are truly married in our custard base. Grab a shallow dish—something wide enough to easily dip the bread without spilling everywhere. You’re going to whisk those six eggs until they look light and happy. Then slowly pour in the milk and heavy cream while continuing to whisk. Once that’s mixed, add in that heavenly teaspoon of vanilla extract, your teaspoon of ground cinnamon, the nutmeg, and that tiny bit of salt. You have to whisk until you see no white streaks of egg white remaining! A fully incorporated Cinnamon Vanilla French Toast custard means every single bite is perfectly seasoned and flavorful.
Griddling for Golden Brown French Toast
Next up, heat your griddle or large non-stick skillet over medium heat. Seriously, medium. Don’t get impatient! Before the first batch of bread goes down, drop in about a teaspoon of butter. You want it to melt and foam slightly but not smoke. Now, take your soaked slice and place it right on that hot, buttery surface. Cook it for about three to four minutes per side. This gentle cooking is exactly what helps you achieve those gorgeous Crispy French Toast Edges while the center sets up nice and fluffy. Keep adding a little more butter before each new set of slices!
The instructions are clear from there—cook them until they are beautifully brown and toasted. If you’re interested in a different breakfast idea that uses similar techniques to get a light, fluffy texture, you should check out my tips on making the best scrambled eggs!
French Toast Tips and Tricks for Success
Once you master the basic method, it’s fun to tweak things! These little tweaks are my favorite French Toast Tips and Tricks because they let you customize the dish exactly how you like it. Remember what I said about using day-old bread versus super fresh bread? That’s expertise talking! Using bread that’s already a bit dry is key to avoiding a soggy mess. If you want to try a fun variation, I have an amazing recipe for stuffed French toast that incorporates cream cheese!
Custard Ratio Adjustments for Your French Toast
So, you like it extremely rich, almost like it’s bread pudding? You need to adjust that French Toast Custard Ratio! If you want a deeper soak and a really luxurious center, try swapping out half the milk for more heavy cream, or even adding an extra yolk to the egg mix. That extra fat really slows down the cooking on the griddle, giving you the creamiest possible center, though it might take an extra minute on the heat. Conversely, if you are just using regular white bread and need a lighter soak because you don’t want it too heavy, just use all milk and skip the heavy cream entirely. It’s totally flexible!
Also, don’t forget my little secret note: if you’re craving extra richness on a chilly morning and you have some on hand, swap out a quarter cup of that regular milk for coffee creamer. Wow! It sends the flavor right over the top. Who knew something so simple could make such a massive difference?
Serving Suggestions for Your French Toast
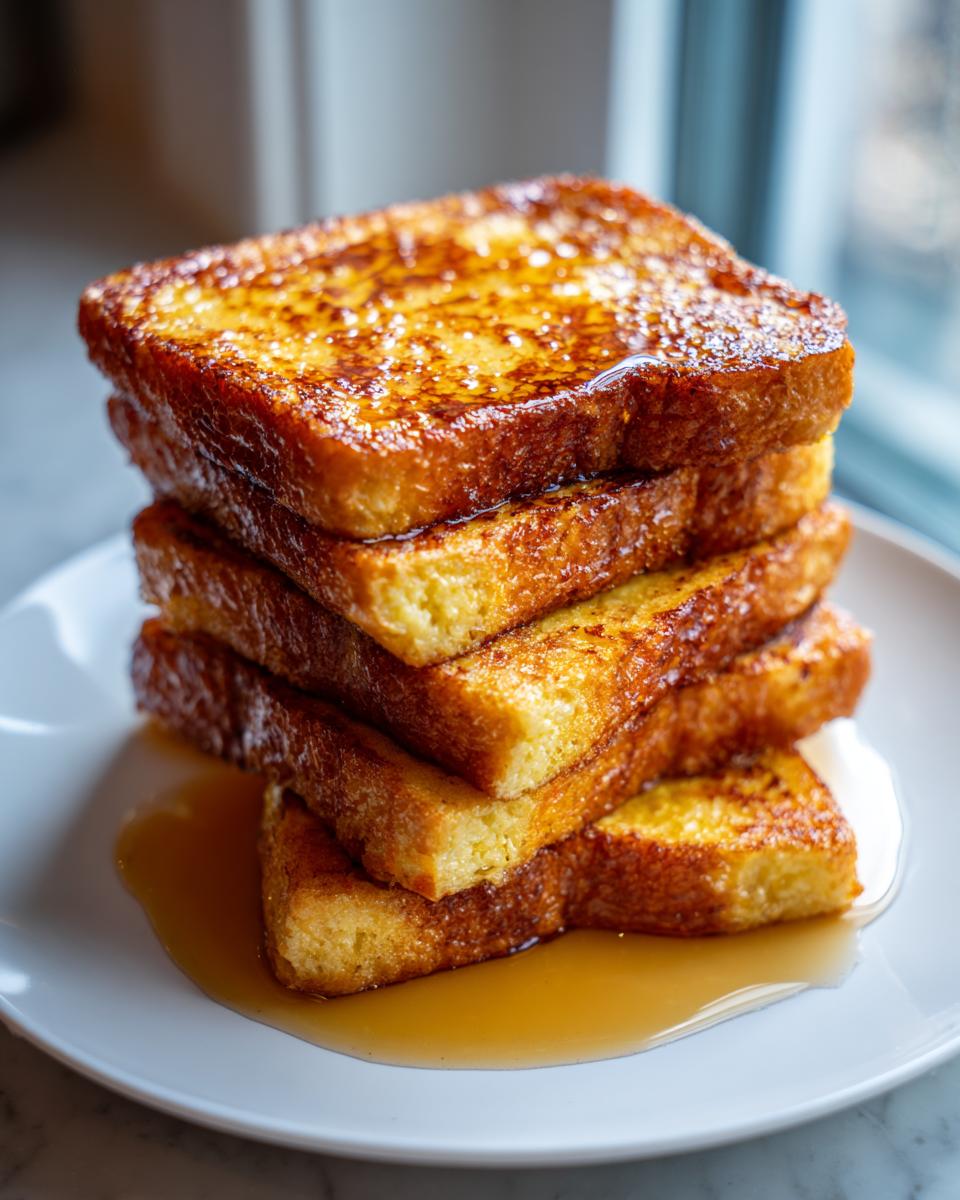
Okay, you’ve done the hard work. You have the perfectly golden, fluffy french toast sitting hot off the griddle, and now for the fun part: dressing it up! This dish is begging for toppings because it’s such a wonderful canvas. While pure maple syrup is always a required classic, there are so many ways to make this weekend brunch centerpiece even more memorable without making it too fussy.
First, you absolutely have to have fresh fruit! Berries work perfectly because their tartness slices right through the richness of the egg custard. Strawberries, blueberries, raspberries—toss them right on top while the toast is still piping hot. Dusting everything lightly with powdered sugar is simple but looks so professional, giving you that café feel at home.

If you want something richer, think about adding some homemade whipped cream. It melts slightly into the warm toast and it’s just pure decadence. For something a little different and fun, you could even try one of my favorite simple dips. I love making a quick yogurt-based dip, but if you’re feeling ambitious and need something truly wonderful for your brunch spread, I have this incredible recipe for easy homemade pretzel bites that are surprisingly perfect for dipping into leftover maple syrup glaze! It sounds wild, but trust me on these easy brunch spreads!
Don’t forget texture! A little sprinkle of toasted pecans or walnuts on top gives you an extra crunch that complements the crispy edges perfectly. It’s all about building those layers of flavor and feel.
Storage and Reheating Instructions for Classic French Toast
Even the Best French Toast Ever sometimes results in leftovers, especially if you’re planning a big weekend brunch! The biggest concern when saving your beautiful Classic French Toast is keeping that gorgeous texture we worked so hard for—we definitely don’t want sad, soggy squares the next day. Thankfully, a little planning keeps leftovers tasting nearly as good as fresh.
The key to storing them is cooling them completely before air hits them. Once totally cool, lay the slices in a single layer on a baking sheet lined with parchment paper. Pop that sheet into the freezer for an hour or two until they are frozen solid. Then, you can transfer those frozen slices into a heavy-duty freezer bag. Stored this way, they’ll last for about a month. This method ensures the slices don’t stick together weirdly when you go to reheat them later, keeping them mostly independent pieces of deliciousness.

When you’re ready to reheat, avoid the microwave at all costs! The microwave is the natural enemy of crispy edges. If you’re in a hurry, the toaster oven is your best friend for one or two slices; just watch them closely so they don’t burn. But if you’re reheating a bigger batch, the oven is the way to go. Lay the frozen or thawed slices on a wire rack set inside a baking sheet. Pop them into a preheated oven at about 350°F (175°C). Give them about 8 to 10 minutes, flipping halfway through. This method gently warms the inside while setting a bit of crisp back onto the exterior. It’s a trick I learned when making make ahead breakfast spreads for busy weeks!
If you’re making a big batch ahead of time for planned brunches, you can even assemble the toast right up to the cooking step—dip the bread, but don’t cook it! Just keep the dipped slices separated by wax paper in an airtight container in the fridge for up to 24 hours. When ready to cook, add an extra minute or two to the cooking time since they are starting out cold. It’s totally doable!
Making French Toast for Weekend Brunch Recipes
When you’re planning a big spread for your next weekend brunch, you might worry that something like this easy French toast will become a total time sink. Don’t stress! The beauty of this recipe is how easily you can scale it up for a crowd. Since we are only using six eggs for a manageable four servings, multiplying everything by two or three times means you’ll need a much bigger batch of that liquid custard base.
My best advice for timing is this: don’t let all the bread soak at once, or you’ll end up with a giant, heavy, soggy pile! Work in manageable batches that fit comfortably on your griddle. Keep the finished, golden slices warm in a single layer on a wire rack inside an oven set at the lowest setting—around 200°F is perfect—while you finish the rest. This keeps them toasty without continuing to cook them dry. It’s how I manage big morning spreads, even when I’m baking something extra, like my famous sour cream coffee cake!
If you need a great pairing for that big brunch, you absolutely have to try this coffee cake with sour cream and streusel. It’s the perfect sweet anchor for your table while the French toast is cooking in shifts!
Frequently Asked Questions About French Toast
I totally get it—when you’re trying to nail a recipe, especially when the family is hungry and waiting, you always have a few last-minute questions bubbling up! I’ve answered the most common ones I hear about turning this simple recipe into the absolute Best French Toast Ever. Hopefully, this helps you feel confident making this Easy French Toast Recipe!
Can I use regular sandwich bread for this french toast?
You absolutely *can*, but it changes the final texture, so you need to adjust! Remember how we talked about needing thick-cut bread like Brioche to support that deep, custardy French toast center? Well, standard thinly sliced white bread just can’t soak up that much liquid and retain its shape. If you have to use it, you must reduce the soaking time dramatically—maybe only 10 to 15 seconds per side! If you let it sit too long, it turns to sweet mush. The thick bread is what lets us achieve that perfect fluffy interior.
How do I make this a Quick Breakfast Idea?
Even though this recipe is already pretty fast, I understand that sometimes you need to shave off every single minute, right? This is where prep work shines for making it a true Quick Breakfast Idea. My favorite move is to mix the entire egg custard up the night before, pour it into a sealed container, and stick it in the fridge. Then, in the morning, all you have to do is slice the bread, heat the butter, and dip! If you have a very large family, using the biggest griddle you own—or even two skillets side-by-side—will cut down on your cooking time significantly, letting you serve everyone hot all at once.
What is the best way to keep my french toast warm?
This is a classic brunch problem! Don’t just stack it on a plate—that traps steam and ruins the crispy edges we worked hard to create. The best trick, which I use when I’m making big batches for holiday mornings, is to set up a warming station. Get a baking sheet, lay a wire rack on top, and set your oven to a very low temperature, around 200°F. As each batch comes off the griddle, place it on that wire rack inside the low oven. The wire rack lets air circulate all around the toast, keeping the top and edges dry and warm while the inside stays fluffy until you are ready to serve everything together. This is a fantastic tip if you’re looking up quick, easy weeknight dinners because a low oven works well for holding other cooked items warm, too!
Nutritional Estimate for Your French Toast Serving
I always try hard to keep things realistic here on the blog because we’re cooking for real life, not a science lab! While this is comfort food in its purest form, sometimes folks want to know what they are digging into health-wise. So, based on the ingredients listed for two slices (that’s one serving size!), here is the general nutritional estimate for this recipe. Remember, this is just a guide!
The exact values can change wildly depending on what kind of bread you pick up—using Brioche is definitely richer than using standard white bread, just like using full-fat cream makes a difference. We always recommend using whole ingredients when you can, but just know that these numbers are ballpark figures based on our testing.
- Serving Size: 2 slices
- Calories: About 350 per serving
- Sugar: Around 18 grams
- Fat: Roughly 18 grams (that’s the butter and cream doing their work!)
- Protein: We get about 15 grams, thanks to those lovely eggs!
- Carbohydrates: Approximately 35 grams
- Sodium: Around 350 mg
We strive for transparency because we want you to feel good about what you’re creating in your own kitchen. For other options that fit into a balanced start to your day, you should take a peek at my list of healthy breakfast ideas. Enjoying this fluffy french toast occasionally is absolutely part of a well-loved home cooking routine!
PrintThe Ultimate Fluffy French Toast with Crispy Edges

Make the best French toast with this simple recipe that results in a custardy center and golden, crisp edges. This classic comfort food is perfect for weekend brunch or quick weekday mornings.
- Prep Time: 10 min
- Cook Time: 15 min
- Total Time: 25 min
- Yield: 4 servings 1x
- Category: Breakfast
- Method: Griddling
- Cuisine: American
- Diet: Vegetarian
Ingredients
- 6 large eggs
- 1/2 cup whole milk
- 1/4 cup heavy cream
- 1 teaspoon vanilla extract
- 1 teaspoon ground cinnamon
- 1/4 teaspoon ground nutmeg
- 1/4 teaspoon salt
- 8 slices thick-cut bread (Brioche or Challah recommended)
- 2 tablespoons unsalted butter, divided
- Maple syrup, for serving
Instructions
- In a shallow dish, whisk together the eggs, milk, heavy cream, vanilla extract, cinnamon, nutmeg, and salt until fully combined. This creates your custard base.
- Place one slice of bread into the custard mixture, letting it soak for 20 to 30 seconds per side. For thicker bread like Brioche, soak slightly longer to ensure the center becomes custardy.
- Heat a large griddle or non-stick skillet over medium heat. Add 1 teaspoon of butter to the hot surface.
- Place the soaked bread slices onto the hot griddle, ensuring they do not touch. Cook for 3 to 4 minutes per side, until the exterior is golden brown and crisp.
- Add more butter as needed between batches.
- Serve the French toast immediately with maple syrup and your choice of toppings.
Notes
- Use slightly stale or day-old bread for the best texture; fresh bread can become too soggy.
- For extra richness, substitute 1/4 cup of the milk with coffee creamer in the custard mixture.
- To achieve crispy edges, cook the slices over medium heat, not high heat, allowing the outside to brown slowly while the inside sets.
Nutrition
- Serving Size: 2 slices
- Calories: 350
- Sugar: 18
- Sodium: 350
- Fat: 18
- Saturated Fat: 8
- Unsaturated Fat: 10
- Trans Fat: 0.5
- Carbohydrates: 35
- Fiber: 2
- Protein: 15
- Cholesterol: 250