
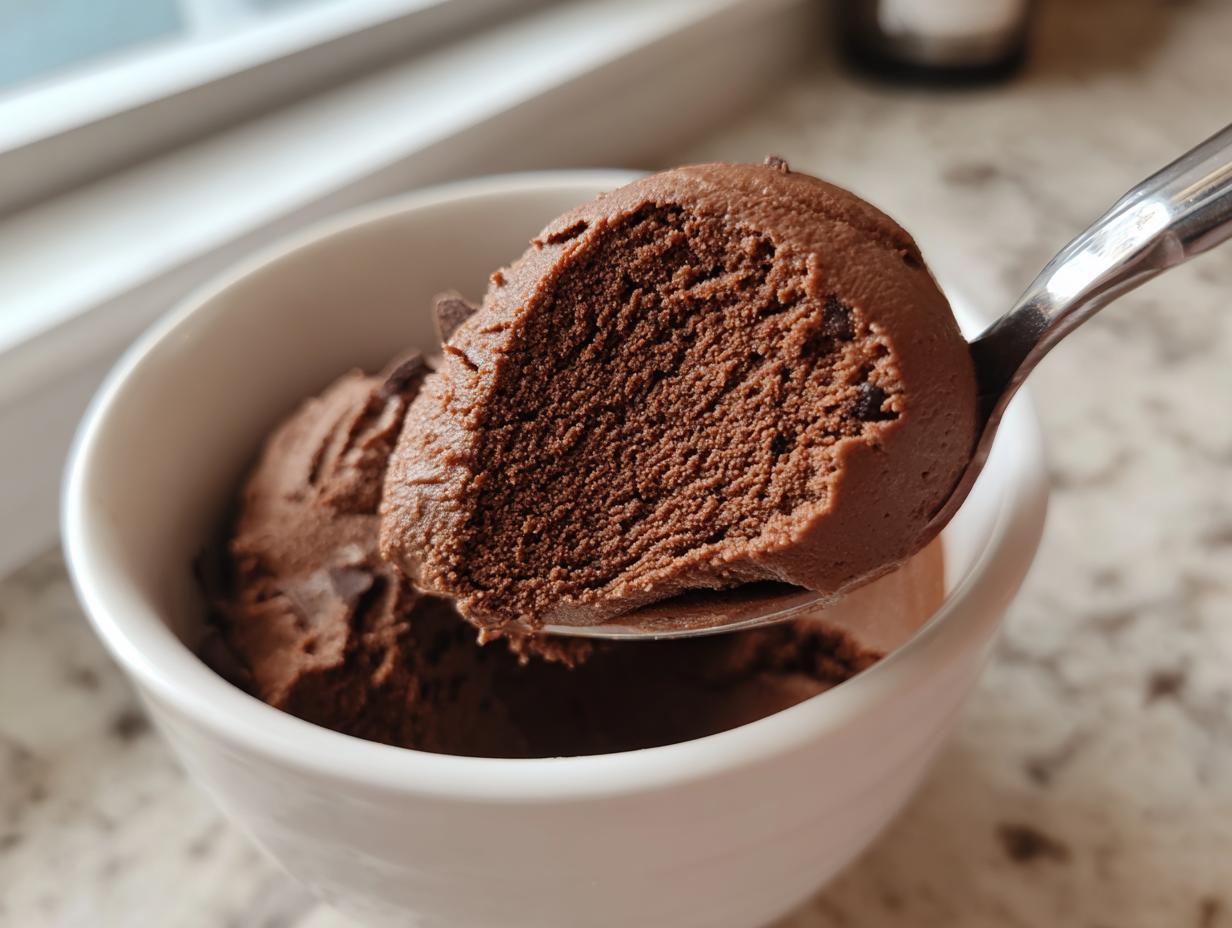
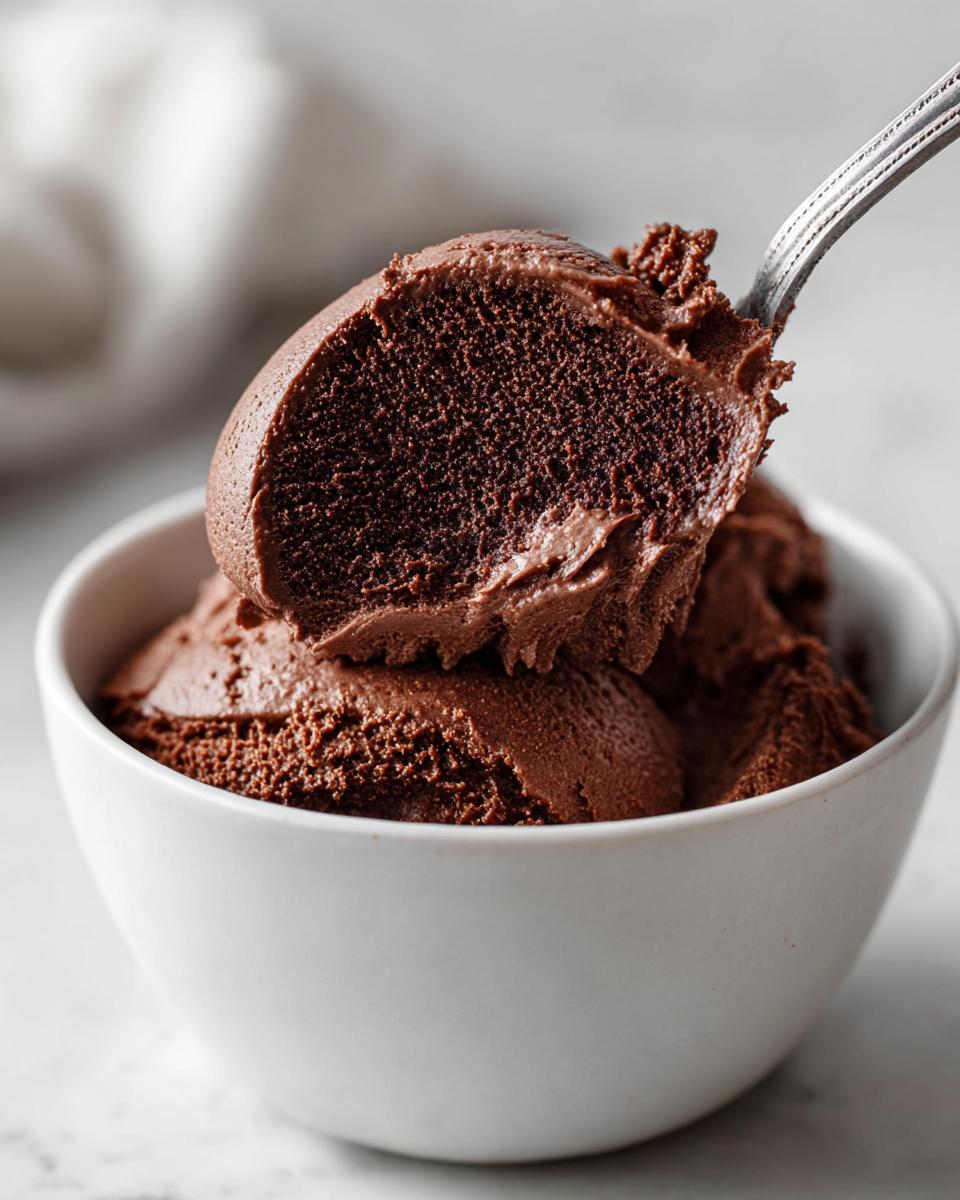
Oh, you know that feeling? When you open the fridge and see a little container of store-bought pudding that just… isn’t cutting it? Forget that grainy, overly sweet stuff! There’s nothing like digging into a bowl of deeply flavorful, perfectly thick homemade chocolate pudding that tastes like pure comfort. That’s exactly what we’re making today. This isn’t just any recipe; this is my go-to stovetop method for achieving the ultimate creamy chocolate pudding that blows any box mix out of the water. Like so many of the classic American comfort foods I feature here on DelishCraze, this recipe is about harnessing simple ingredients to create something truly special. It’s rich, it’s quick, and I promise you’ll be making it again and again! If you want to learn more about my journey bringing these comforting classics into modern kitchens, you can always check out the story on our About Us page.
- Why This Is the Best Homemade Chocolate Pudding Recipe From Scratch
- Ingredients for Your Creamy Homemade Chocolate Pudding
- Step-by-Step Instructions for Easy Stovetop Pudding
- Tips for the Ultimate Homemade Chocolate Pudding Success
- Serving Suggestions for Your Rich Chocolate Dessert
- Storage and Reheating Instructions for Homemade Chocolate Pudding
- Frequently Asked Questions About Chocolate Pudding Recipe From Scratch
- Estimated Nutritional Data for Homemade Chocolate Pudding
- Share Your Silky Smooth Pudding Creation
Why This Is the Best Homemade Chocolate Pudding Recipe From Scratch
Honestly, if you’re still reaching for that little box, stop right now! This best homemade chocolate pudding is what dessert dreams are made of. We’re talking about a texture that is unbelievably velvety, like silk coating your spoon. It’s truly the rich chocolate dessert you crave, deep in flavor thanks to the secret blend of cocoa and just the right amount of sugar.
I spent years tweaking this stovetop method to make sure it was reliable every single time—I’ve even got a link to some of my favorite chocolate cookie pairings if you want a side treat right here. Knowing exactly when to pull it off the heat is vital because that’s how we guarantee that perfectly smooth consistency, skipping that weird, gelatinous texture you get from mixes.
Quick Homemade Dessert Ready in Under 30 Minutes
The magic here is the speed! Seriously, from dirtying the whisk to having the pans ready for the fridge, this is an easy chocolate pudding that comes together in less than 30 minutes total cook time. You don’t need to save this comfort food dessert for a big occasion; it’s perfect for a Tuesday night craving when you need something fast and satisfying.
Achieving Velvety Chocolate Pudding Texture
The secret weapon for that silky smooth pudding feel is twofold: cornstarch and careful tempering. Cornstarch gives us that classic, clean thickness you can’t quite get with just flour. Then, tempering those egg yolks just right—slowly introducing the heat—ensures we cook them through perfectly without scrambling. That careful step is what separates a good pudding from an incredible one.
Ingredients for Your Creamy Homemade Chocolate Pudding
Okay, let’s talk about what goes into this amazing homemade chocolate pudding. Since this is such a simple dessert recipe, every single ingredient truly matters. We aren’t hiding behind artificial flavors or stabilizers here; we’re relying on real pantry staples to do the heavy lifting!
When you look at the list below, make sure you grab quality stuff. If you can find Dutch-process cocoa powder, please use that! It gives the pudding that beautifully deep, almost dark chocolate color and a smoother, less acidic flavor profile than regular cocoa. It really pushes this across the line into a truly decadent chocolate treat. As I built DelishCraze, I learned that knowing where your ingredients come from—even simple things like milk or butter—makes a difference to the final taste. Trust your palate; good ingredients shine through!
If you’re looking for other ways to use up those basics sitting in your cabinet, I have a fantastic list of other pantry staple desserts you might want to bookmark. For now, gather these items:
- 2 cups whole milk
- 1/2 cup granulated sugar
- 1/4 cup unsweetened cocoa powder (use Dutch cocoa for deeper flavor)
- 2 tablespoons cornstarch
- 1/4 teaspoon salt
- 2 large egg yolks
- 2 tablespoons unsalted butter
- 1 teaspoon vanilla extract
Step-by-Step Instructions for Easy Stovetop Pudding
Alright, this is where the magic truly happens! We’re making this homemade chocolate pudding on the stovetop, and honestly, it’s unbelievably straightforward once you know the tricks. Follow these steps closely, because precision with heat and eggs is what separates a great dessert from a mediocre one. Pay attention especially around the boiling and tempering stages—that knowledge is my top technique for achieving that luscious texture.
Don’t be intimidated by the word ‘temper’; it’s just a fancy way of saying we’re gently introducing two things of different temperatures so they don’t freak out! Once you master this, you can use this method for almost any custard-based filling. If you need a basic refresher on stovetop techniques, I have some general tips saved up here.
Combining Dry Ingredients and Milk for Homemade Chocolate Pudding
First things first, grab your medium saucepan. This is where you mix all your dry stuff: sugar, cocoa, cornstarch, and salt. You absolutely must whisk these together thoroughly *before* adding any liquid. Why? Because if you dump the milk in now, you’ll end up with stubborn little cocoa and starch pebbles in your finished product. Once they look perfectly combined, slowly pour in the milk while whisking constantly until everything is smooth and there are zero lumps. That’s the key to a beautiful chocolate pudding recipe from scratch!
Tempering Egg Yolks for Silky Smooth Pudding
Now for the crucial, trust-building step for this creamy chocolate pudding recipe! Take those two egg yolks into a separate small bowl and just whisk them lightly. We need to warm them up slowly so they don’t curdle when they hit the hot pan. Take at least half a cup of that hot milk mixture from the saucepan—slowly, I mean *drip by drip* at first—and whisk it vigorously into the yolks. This is tempering. You are essentially tricking the yolks into thinking they’ve been slightly warmed up already. Once you’ve added about half a cup that way, you can pour the yolk mixture right back into the main saucepan. Don’t rush this part or you get scrambled eggs, not silky smooth pudding!
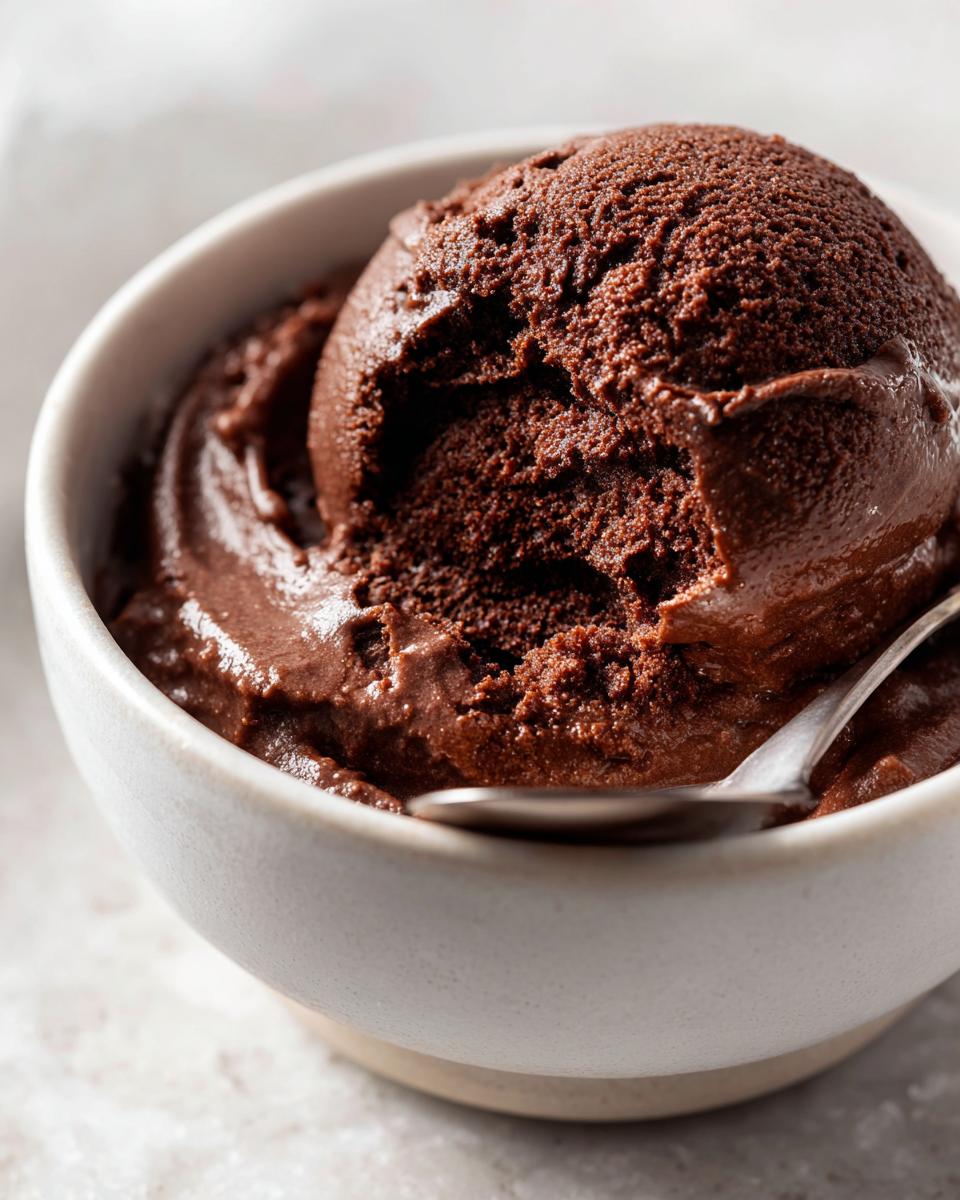
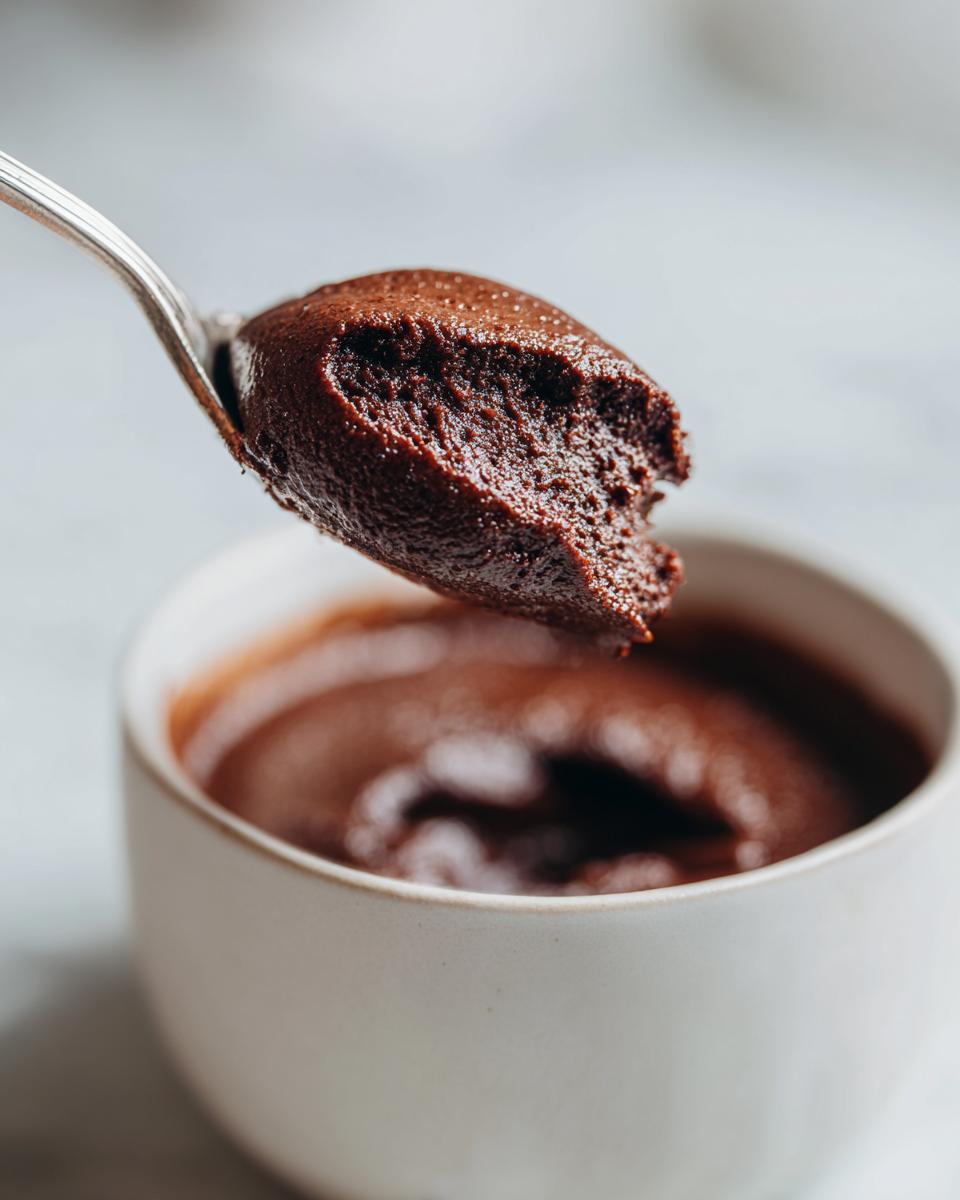
Final Thickening and Chilling the Decadent Chocolate Treat
Return the saucepan to low heat after adding the yolks back in. Cook it gently for just one or two minutes, stirring constantly. You’re looking for the pudding to become thick enough to coat the back of a testing spoon—it shouldn’t pour off smoothly immediately. Once it coats the spoon, yank it off the heat immediately! Stir in the butter and vanilla until they melt in beautifully. Pour your decadent chocolate treat into individual bowls or one big serving dish. Then, you *have* to press a piece of plastic wrap *directly* onto the surface of the pudding. If you leave a gap, you’ll get that rubbery skin we all hate. Then, pop it in the fridge for at least two hours to chill until it sets up perfectly.
Tips for the Ultimate Homemade Chocolate Pudding Success
Making this homemade chocolate pudding from scratch requires just a little bit more know-how than opening a plastic tub, but the payoff is huge. I always tell people that if you nail these tiny technical details, you get the best results in the end, cementing its place as your favorite old fashioned chocolate pudding.
If you follow the directions, you won’t have issues, but if you’re ever worried about that deep cocoa flavor missing the mark, I have a little trick up my sleeve you can try next time!
Ingredient Swaps for Your Homemade Chocolate Pudding
For those times when you just want to tip the scales toward pure indulgence, don’t be afraid to mix this up a little. You can transform this into an even more decadent chocolate treat by grabbing one ounce of good quality bittersweet chocolate—say, 70% cacao—and tossing it in with the butter at the very end. Just make sure it’s very finely chopped so it melts smoothly! Also, don’t worry if you’re out of whole milk; using creamy, plain oat milk works really nicely as a substitute. It keeps the consistency lovely and thick without changing the chocolate profile too much.
Serving Suggestions for Your Rich Chocolate Dessert
When that pudding is perfectly chilled and jiggly in the bowl, it’s time to celebrate! This rich chocolate dessert is fantastic completely naked, perhaps just with a sprinkle of flaky sea salt on top if you like that sweet/salty kick. Of course, nothing screams classic chocolate pudding like a massive dollop of freshly whipped cream. My favorite move for a weekend treat is adding a swirl of cream and sprinkling on some shaved dark chocolate.
If you want something fruity to balance the richness, a few fresh raspberries or a sliced strawberry on the side cuts through that deep chocolate flavor beautifully. It’s a surprisingly easy way to elevate this simple dessert instantly. You might even try pairing it with some of my chocolate desserts, like these Hot Chocolate Cupcakes!
Storage and Reheating Instructions for Homemade Chocolate Pudding
Since we used real milk in this recipe, it doesn’t last quite as long as the shelf-stable stuff, which is fine—it never lasts long in my house anyway! Store any leftovers in an airtight container in the fridge. Remember that vital step: plastic wrap pressed directly onto the surface? Keep that wrap on, and your pudding should stay fresh and smooth for about 4 to 5 days. If any skin *does* manage to form on the top, just scrape it off before serving. And please, don’t try to reheat this! Once cooled and set, pudding is meant to be eaten cold. Reheating will just turn it soupy again.
Frequently Asked Questions About Chocolate Pudding Recipe From Scratch
Can I make this an easy no bake chocolate pudding?
Oh, I wish I could tell you yes, but unfortunately, no! Because this is a true chocolate pudding recipe from scratch using cornstarch and egg yolks as thickeners, it needs that direct heat on the stovetop to activate those agents and create that thick, safe texture. It isn’t an ‘no bake chocolate pudding’ recipe; it’s a stovetop recipe that chills wonderfully!
How do I fix lumpy homemade chocolate pudding?
Oops! If you ended up with lumps, don’t panic; it happens, usually because the dry ingredients weren’t whisked well enough upfront. Before you chill your pudding, carefully pour the entire mixture through a fine-mesh sieve right into a clean bowl. That will catch any little cooked bits or undissolved lumps. If it’s still just a little uneven, sometimes pulsing the mixture just once or twice in a blender helps too, but be careful not to overdo it.
Can I use less sugar in this rich chocolate dessert?
You can try, but you have to be careful! Sugar isn’t just for sweetness here; it plays a structural role, especially when working with cornstarch. Cutting back too much can prevent the pudding from achieving that perfect thick set. I usually recommend sticking close to the amount listed. If you want a less sweet result, try adding a slightly more bitter cocoa powder or incorporating that bittersweet chocolate mentioned earlier, which will deepen the flavor without relying only on the sugar.
Estimated Nutritional Data for Homemade Chocolate Pudding
Just so you have an idea of what’s in this delicious bowl, here’s the breakdown. Keep in mind that the values below are estimations for one serving of this glorious comfort food dessert, based on the recipe as written. Actual nutritional values can vary based on your exact ingredients, like the brand of cocoa or milk fat content.
- Serving Size: 1 serving
- Calories: 280
- Sugar: 30g
- Sodium: 150mg
- Fat: 13g
- Saturated Fat: 7g
- Carbohydrates: 35g
- Protein: 7g
Share Your Silky Smooth Pudding Creation
I poured my heart into making sure this classic chocolate pudding delivers on richness and texture, and now it’s your turn to shine in the kitchen! I absolutely love hearing from you when you make one of my recipes. Did it come out perfectly silky smooth? Did you add any fun toppings?
Please rate this recipe using the stars when you have a chance, and don’t be shy—drop a comment below telling me what you thought or if you have any new secret tips to share! If you snapped a picture of your beautiful bowls, I’d love to see it over on social media! Feel free to reach out via my contact page if you run into any snags or just want to chat about chocolate!
Tips for the Ultimate Homemade Chocolate Pudding Success
Making this homemade chocolate pudding from scratch requires just a little bit more know-how than opening a plastic tub, but the payoff is huge. I always tell people that if you nail these tiny technical details, you get the best results in the end, cementing its place as your favorite old fashioned chocolate pudding.
If you follow the directions, you won’t have issues, but if you’re ever worried about that deep cocoa flavor missing the mark, I have a little trick up my sleeve you can try next time! For other great classic ways to use simple ingredients, you can look at my notes on homemade eggnog for inspiration.
Ingredient Swaps for Your Homemade Chocolate Pudding
For those times when you just want to tip the scales toward pure indulgence, don’t be afraid to mix this up a little. You can transform this into an even more decadent chocolate treat by grabbing one ounce of good quality bittersweet chocolate—say, 70% cacao—and tossing it in with the butter at the very end. Just make sure it’s very finely chopped so it melts smoothly! Also, don’t worry if you’re out of whole milk; using creamy, plain oat milk works really nicely as a substitute. It keeps the consistency lovely and thick without changing the chocolate profile too much.
Serving Suggestions for Your Rich Chocolate Dessert
When that pudding is perfectly chilled and jiggly in the bowl, it’s time to celebrate! This rich chocolate dessert is fantastic completely naked, perhaps just with a sprinkle of flaky sea salt on top if you like that sweet/salty kick. Of course, nothing screams classic chocolate pudding like a massive dollop of freshly whipped cream. My favorite move for a weekend treat is adding a swirl of cream and sprinkling on some shaved dark chocolate.

If you want something fruity to balance the richness, a few fresh raspberries or a sliced strawberry on the side cuts through that deep chocolate flavor beautifully. It’s a surprisingly easy way to elevate this simple dessert instantly. You might even try pairing it with some of my chocolate desserts, like these Hot Chocolate Cupcakes!
Storage and Reheating Instructions for Homemade Chocolate Pudding
Since we used real milk in this recipe, it doesn’t last quite as long as the shelf-stable stuff, which is fine—it never lasts long in my house anyway! Store any leftovers in an airtight container in the fridge. Remember that vital step: plastic wrap pressed directly onto the surface? Keep that wrap on, and your pudding should stay fresh and smooth for about 4 to 5 days. If any skin *does* manage to form on the top, just scrape it off before serving. And please, don’t try to reheat this! Once cooled and set, pudding is meant to be eaten cold. Reheating will just turn it soupy again.
Frequently Asked Questions About Chocolate Pudding Recipe From Scratch
Whenever I share this super simple dessert recipe, folks always have the same few things pop into their heads about making homemade chocolate pudding. It’s totally normal! When you’re ditching the box, you need reassurance that your stovetop efforts will pay off with a beautiful, velvety chocolate pudding. Here are the questions I get asked the most about this chocolate pudding recipe from scratch.
Can I make this an easy no bake chocolate pudding?
Oh, I wish I could tell you yes, but unfortunately, no! Because this is a true chocolate pudding recipe from scratch using cornstarch and egg yolks as thickeners, it needs that direct heat on the stovetop to activate those agents and create that thick, safe texture. It isn’t an ‘no bake chocolate pudding’ recipe; it’s a stovetop recipe that chills wonderfully! You have to cook the starch and the eggs to get that classic set, but like I mentioned, it’s super fast!
How do I fix lumpy homemade chocolate pudding?
Oops! If you ended up with lumps, don’t panic; it happens, usually because the dry ingredients weren’t whisked well enough upfront or you added the milk too fast. Before you chill your pudding, carefully pour the entire mixture through a fine-mesh sieve right into a clean bowl. That will catch any little cooked bits or undissolved lumps. If it’s still just a little uneven, sometimes pulsing the mixture just once or twice in a blender helps too, but be careful not to overdo it—we’re aiming for creamy chocolate pudding recipe, not a milkshake!
Can I use less sugar in this rich chocolate dessert?
You can try, but you have to be careful! Sugar isn’t just for sweetness here; it plays a structural role, especially when working with cornstarch. Cutting back too much can prevent the pudding from achieving that perfect thick set that makes it such a satisfying rich chocolate dessert. I usually recommend sticking close to the amount listed because the sugar helps the starch molecules perform correctly. If you want a less sweet result, try adding a slightly more bitter cocoa powder or incorporating that bittersweet chocolate I mentioned earlier; that will deepen the flavor without relying only on the sugar.
If you’re looking for more helpful kitchen tips, check out my thoughts on quick, easy weeknight dinners when you’re not feeling up to making dessert!
Estimated Nutritional Data for Homemade Chocolate Pudding
I know some of you are busy folks, and you like to know the facts! While this is definitely a decadent chocolate treat, it truly is made from simple, whole ingredients, which is why I love it so much. Because this is such a classic, old-fashioned recipe, the numbers are pretty straightforward. Remember, these are just estimates for one serving of this amazing comfort food dessert, based on standard ingredient measurements—your actual numbers might shift a tiny bit depending on what brand of milk or butter you grab!
But seriously, look at that protein for a pudding! Not bad for something that tastes this much like heaven.
- Serving Size: 1 serving
- Calories: 280
- Sugar: 30g
- Sodium: 150mg
- Fat: 13g
- Saturated Fat: 7g
- Carbohydrates: 35g
- Protein: 7g
Share Your Silky Smooth Pudding Creation
I poured my heart into making sure this classic chocolate pudding delivers on richness and texture, and now it’s your turn to shine in the kitchen! I absolutely love hearing from you when you make one of my recipes. Did it come out perfectly silky smooth? Did you add any fun toppings?
Please rate this recipe using the stars when you have a chance, and don’t be shy—drop a comment below telling me what you thought or if you have any new secret tips to share! If you snapped a picture of your beautiful bowls, I’d love to see it over on social media! Feel free to reach out via my contact page if you run into any snags or just want to chat about chocolate!
PrintThe Ultimate Creamy Homemade Chocolate Pudding From Scratch: Rich, Quick, and Better Than Boxed

Make the best homemade chocolate pudding from scratch. This recipe yields a rich, velvety, and silky smooth dessert that surpasses any store-bought mix. It is an easy stovetop pudding perfect for a quick, decadent comfort food treat.
- Prep Time: 10 min
- Cook Time: 15 min
- Total Time: 25 min
- Yield: 4 servings 1x
- Category: Dessert
- Method: Stovetop
- Cuisine: American
- Diet: Vegetarian
Ingredients
- 2 cups whole milk
- 1/2 cup granulated sugar
- 1/4 cup unsweetened cocoa powder (use Dutch cocoa for deeper flavor)
- 2 tablespoons cornstarch
- 1/4 teaspoon salt
- 2 large egg yolks
- 2 tablespoons unsalted butter
- 1 teaspoon vanilla extract
Instructions
- In a medium saucepan, whisk together the sugar, cocoa powder, cornstarch, and salt until combined.
- Gradually whisk in the milk until the mixture is smooth and no lumps remain.
- Place the saucepan over medium heat. Cook, stirring constantly with a whisk, until the mixture thickens and begins to bubble gently. This usually takes 6 to 8 minutes.
- Once boiling, continue to cook for 1 minute while stirring. Remove the pan from the heat.
- In a small bowl, whisk the egg yolks lightly. Temper the yolks by slowly whisking about 1/2 cup of the hot pudding mixture into the yolks.
- Pour the tempered yolk mixture back into the saucepan with the remaining pudding. Return the pan to low heat.
- Cook gently for 1 to 2 minutes, stirring constantly, until the pudding is thick enough to coat the back of a spoon. Do not let it boil after adding the yolks.
- Remove from heat. Stir in the butter and vanilla extract until the butter is fully melted and incorporated.
- Pour the creamy chocolate pudding into individual serving dishes or a single bowl.
- Press plastic wrap directly onto the surface of the pudding to prevent a skin from forming.
- Chill in the refrigerator for at least 2 hours, or until completely cold and set.
Notes
- For an extra rich, decadent chocolate treat, substitute 1 ounce of finely chopped bittersweet chocolate for 1 tablespoon of the cocoa powder.
- If you prefer a low-lactose option, substitute the whole milk with a creamy, unsweetened non-dairy milk like oat milk.
- To achieve a silky smooth pudding, whisk vigorously when combining dry ingredients and temper the egg yolks carefully.
Nutrition
- Serving Size: 1 serving
- Calories: 280
- Sugar: 30
- Sodium: 150
- Fat: 13
- Saturated Fat: 7
- Unsaturated Fat: 6
- Trans Fat: 0
- Carbohydrates: 35
- Fiber: 2
- Protein: 7
- Cholesterol: 75