
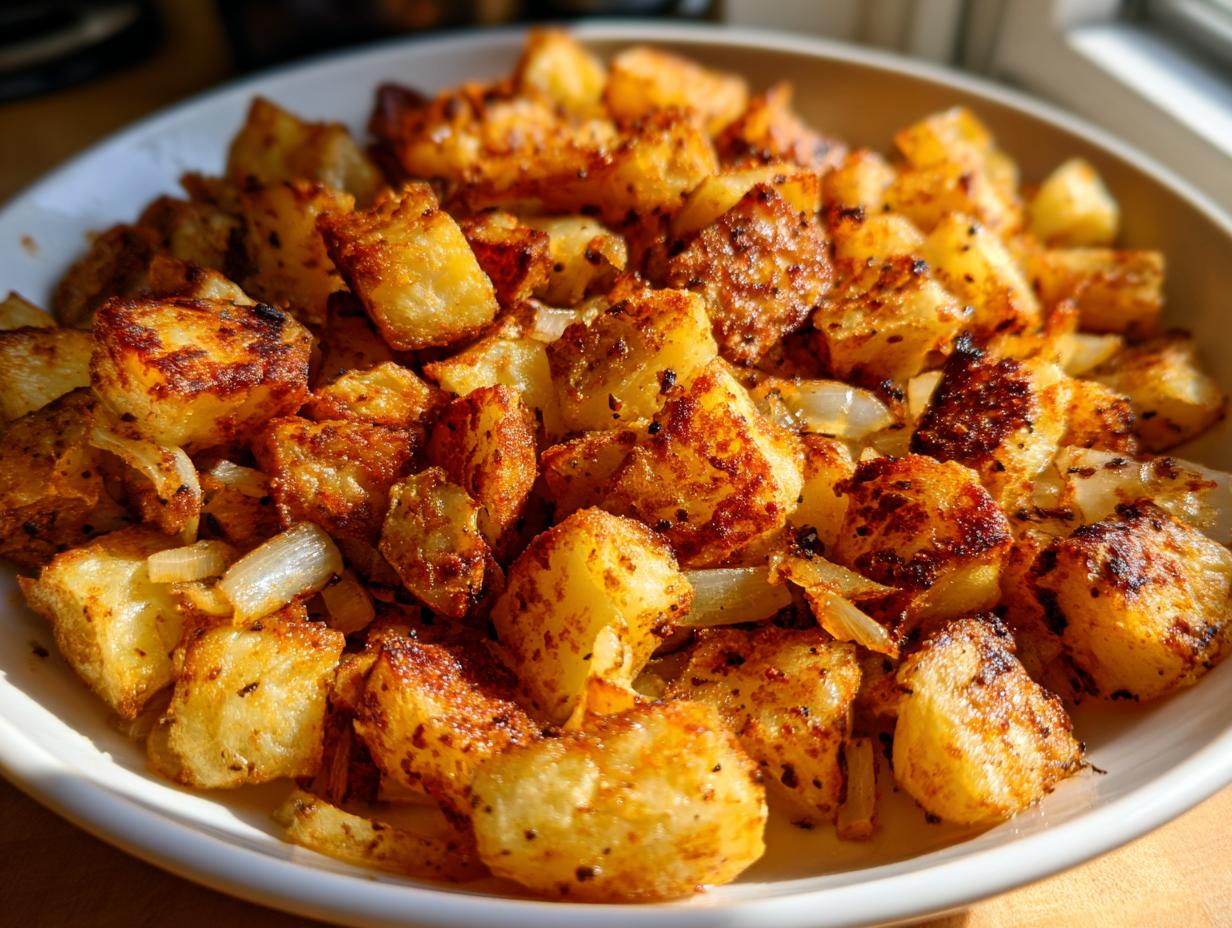
Oh, how I know that morning desperation! You dream of a plate piled high with potatoes—golden, crunchy, and perfectly seasoned—but what you often get is a sad, steamed, slightly floppy pile. That’s just not how mornings should begin, is it? I spent too many years settling for mediocre sides when I was trying to recreate that classic American breakfast feel. That stops now! This guide isn’t just another recipe; it’s my promise to you that you’ll master the art of making genuinely Crispy Breakfast Potatoes. Whether you pull out your favorite cast iron skillet or swear by the oven, I’m sharing the tried-and-true techniques that guarantee that delicious, satisfying crunch every single time. If you’re looking for more ways to kickstart your day the right way, check out my thoughts on healthy breakfast ideas too! Now, let’s bring that joy back to your kitchen table.
- The Ultimate Guide to Crispy Breakfast Potatoes: Why Texture Matters
- Ingredients for Flavorful Breakfast Potatoes
- How to Make Breakfast Potatoes: Skillet vs. Oven Techniques
- Tips for Perfect Crispy Breakfast Potatoes Every Time
- Variations: Making Loaded Breakfast Potatoes
- Serving Suggestions for Your Savory Potato Breakfast
- Storage and Reheating Instructions for Breakfast Potatoes
- Frequently Asked Questions About Breakfast Potatoes
- Nutritional Estimates for Your Morning Side Dish
- Share Your Perfect Savory Potato Breakfast
The Ultimate Guide to Crispy Breakfast Potatoes: Why Texture Matters
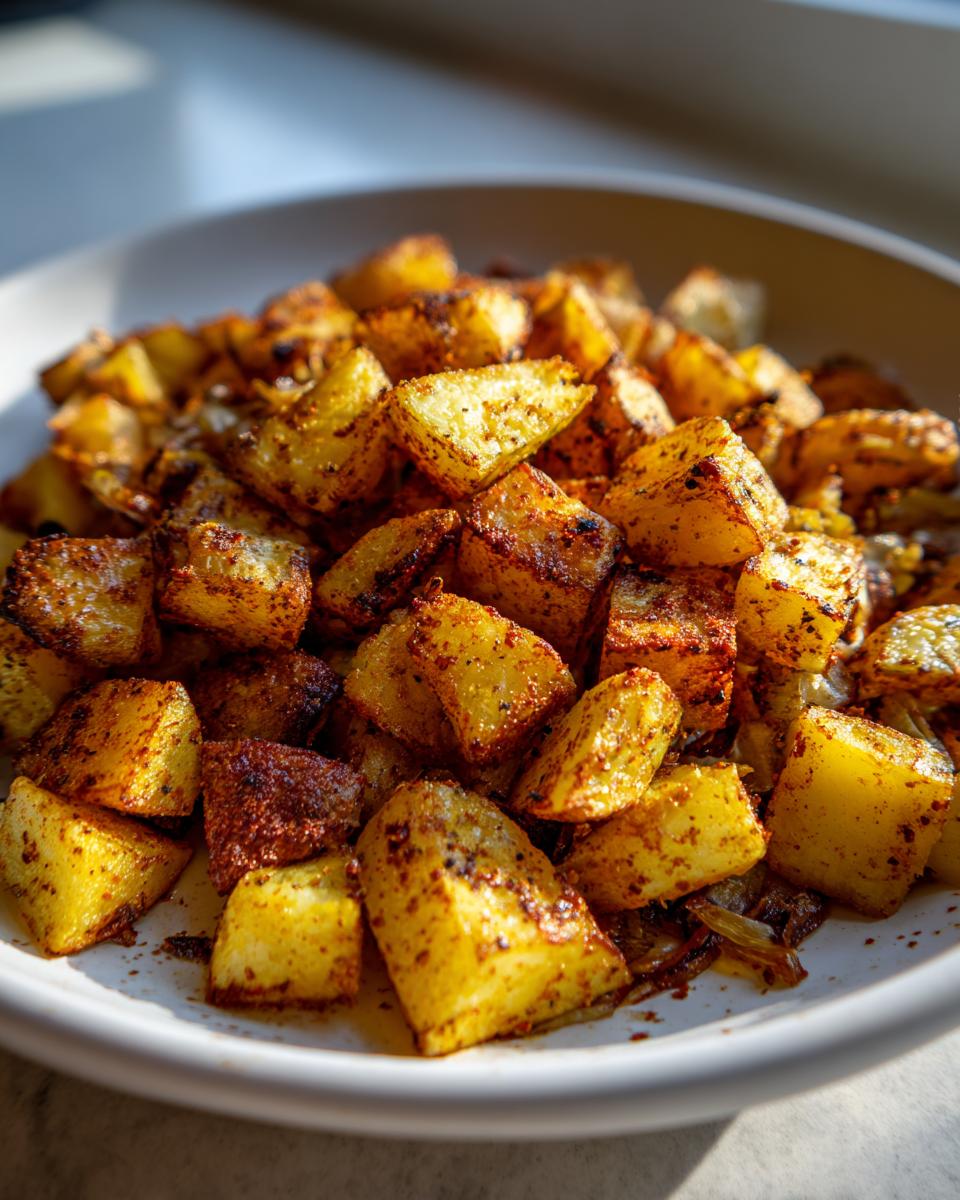
Let’s be totally honest: the difference between great breakfast potatoes and ones destined for the compost bin is all about moisture control. Soggy potatoes ruin a whole plate, don’t they? We’re aiming for that magical contrast—you know, where the exterior shatters slightly when you bite into it, giving way to a fluffy, almost creamy center. That’s the holy grail: Tender on Inside Crispy Outside. Mastering your breakfast potatoes means respecting the starch, and that’s exactly what the next steps unlock for you. Seriously, once you nail this simple technique, you’ll stop accepting anything less!
If you need other surprisingly simple recipes that transform humble ingredients, take a peek at my guide on quick and easy weeknight dinners. It’s all about reliable results!
Potato Selection for Perfect Breakfast Potatoes
Choosing the right potato is step one for success. I highly recommend Russets because they are super starchy, which means they dry out beautifully when cooked, giving you that fantastic, craggy crispiness we crave. Yukon Golds are my second choice if you want something a little creamier but still capable of crisping up nicely. Skip waxy potatoes like red skins; they just hold too much moisture for this job!
Ingredients for Flavorful Breakfast Potatoes
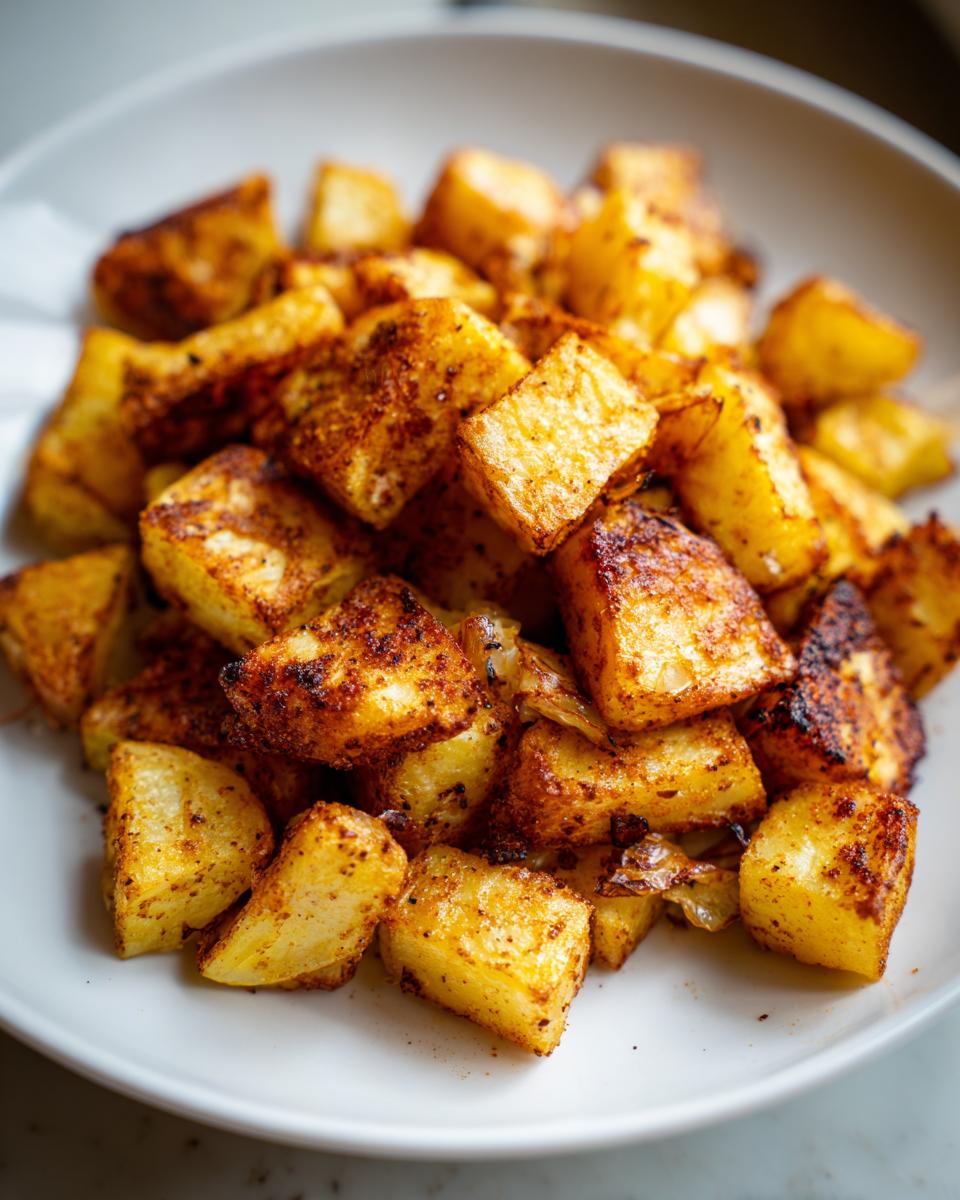
Here are the components you’ll need to pull together these delicious, savory sides. Remember, we’re dicing these potatoes to about a half-inch cube—this size helps them get crunchy on the outside while staying tender inside!
- 2 lbs Russet or Yukon Gold potatoes, scrubbed and diced into 1/2-inch cubes
- 3 tablespoons avocado oil or preferred cooking oil
- 1/2 cup yellow onion, diced
- 1 teaspoon garlic powder
- 1 teaspoon smoked paprika
- 1/2 teaspoon dried rosemary
- 1/2 teaspoon salt
- 1/4 teaspoon black pepper
- Optional: 2 tablespoons butter (for skillet method)
How to Make Breakfast Potatoes: Skillet vs. Oven Techniques
Okay, this is where the magic happens—how we turn simple diced potatoes into the star of your plate! We have two absolutely reliable roads to crispness here: the fast and furious skillet method, or the wonderfully hands-off oven method. Both follow one key rule: you have to get rid of surface moisture so the high heat can focus on making a beautiful crust, not steaming the potato!
For the skillet method, you absolutely must par-boil those cubes for about 5 to 7 minutes until they are just soft on the edges. Then, drain them and let them steam dry for a good five minutes—don’t skip that drying time! We’re making our breakfast potatoes oven-ready, metaphorically speaking.
The Quick Skillet Fried Potatoes Recipe Method
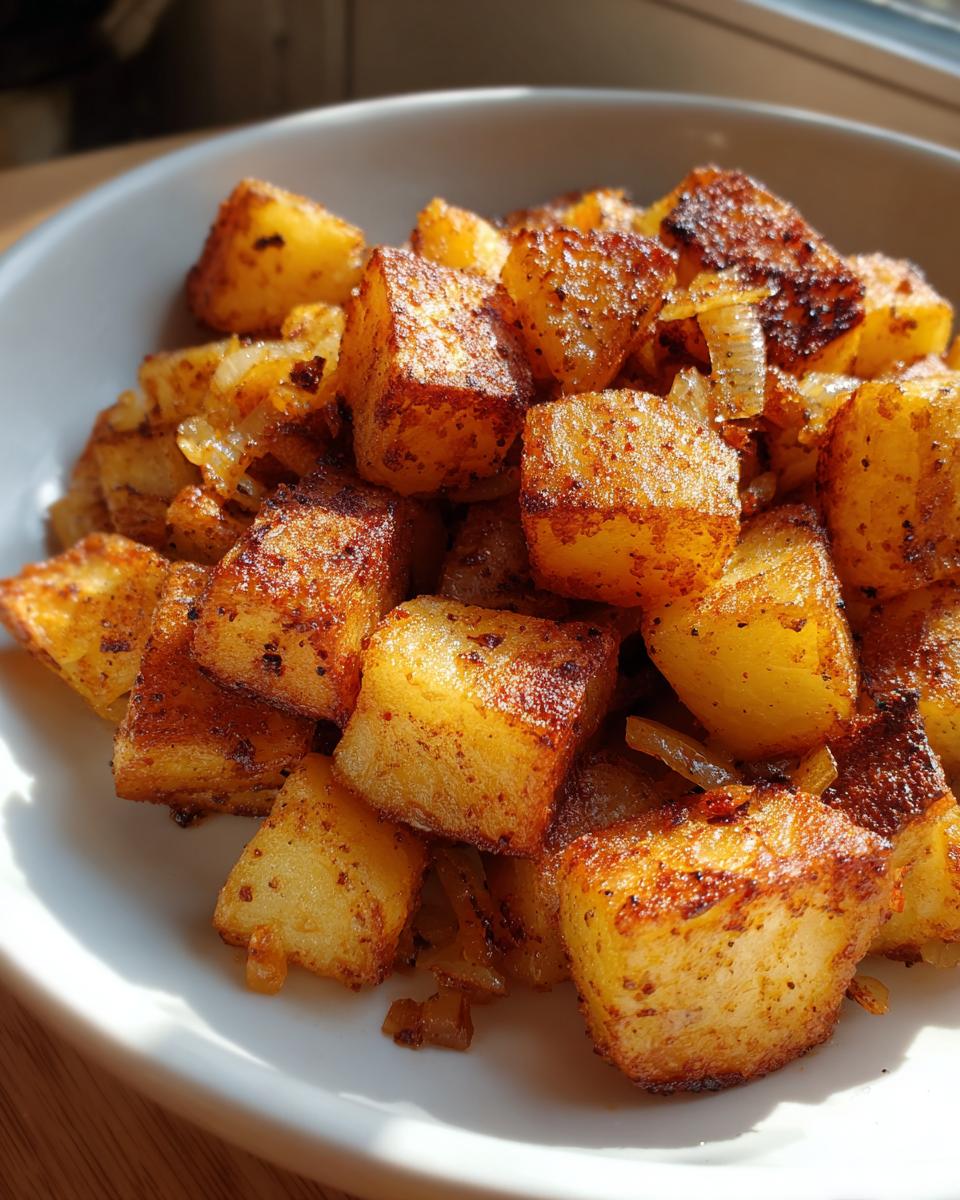
If you’re rushed, the skillet is your best friend, especially if you have a heavy cast iron pan. Get that pan smoking hot over medium-high heat, add your oil, wait until it shimmers—seriously, wait for the shimmer—then lay those seasoned potatoes down. Here’s my biggest piece of advice for a Skillet Fried Potatoes Recipe: Don’t touch them! Let them sit untouched for a full 8 to 10 minutes. That’s how you build that deep, golden-brown crust. Once they release easily, flip them and cook until done. Adding your onions near the end keeps them sweet, and throwing in that optional butter right at the very end gives you amazing flavor.
Easy Oven Roasted Potatoes for Breakfast Success
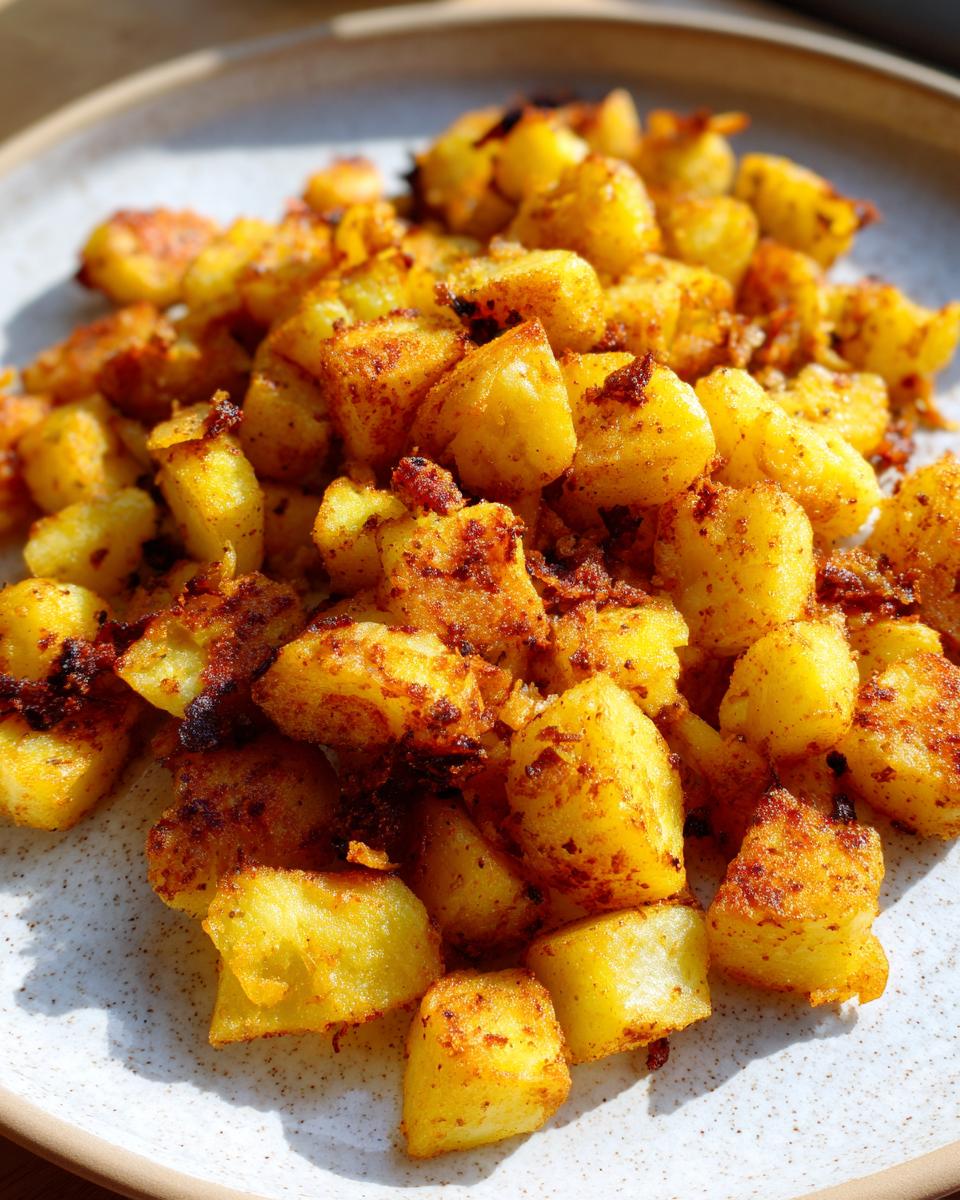
If brunch is more relaxed, I love tossing these into the oven. Preheat that oven high, like 425°F, because we want heat! Toss your seasoned potatoes with the oil and spread them onto a baking sheet. And I mean spread them—no piling them up! If they are crowded, they steam. We want single-layer perfection for Oven Roasted Potatoes for Breakfast. Roast for 20 minutes, flip them gently, and roast another 15 to 20 minutes. They come out smelling incredible and completely uniform. If you want to see another great way to use the oven for tubers, check out my oven-roasted potatoes recipe variation!
Tips for Perfect Crispy Breakfast Potatoes Every Time
You’ve done the hard work—you’ve boiled or you’ve scattered them on the tray—now we talk about the finesse! If you go for the skillet method, please promise me you won’t stir them too early. I know it’s tempting to check that bottom side, but you have to let them sit undisturbed until they develop that beautiful, deep-brown crust. When you stir too soon, you break that crust we worked so hard to build, and suddenly, you’re back in soggy territory. Trust me, patience is the secret seasoning here!
Also, remember these store well! If you’re making these ahead, they are fantastic for meal prep. But the reheating tip is crucial for maintaining that crispy exterior, especially for your leftover breakfast potatoes. You don’t want to microwave them; that just steams them again! Instead, reheat any leftovers in a dry skillet over medium heat, or pop them in a toaster oven. This simple trick will crisp them right back up and make them taste freshly made. Speaking of leftovers, if you ever have too many potatoes, don’t forget to check out my crispy leftover potato cakes—they are divine!
Variations: Making Loaded Breakfast Potatoes
Now that you have the perfect canvas—those wonderfully crispy potatoes—why stop at just a side dish? This recipe is so versatile! If you’re making these for a weekend brunch or having friends over, you absolutely have to try turning them into Loaded Breakfast Potatoes. It takes them from a supporting role straight to the main event, honestly.
It’s so easy to dress these up! After they come out of the skillet or the oven, just shower them heavily with some shredded cheddar cheese. Then, toss on some crispy bacon bits—because everything is better with bacon, right? A dollop of sour cream or maybe some good thick Greek yogurt on top brings the cooling balance you need after all that savory goodness. If you like soup, you might also adore my classic recipe for loaded baked potato soup, which uses some of the same cozy flavors!
Serving Suggestions for Your Savory Potato Breakfast
Honestly, a plate of perfectly seasoned, crispy potatoes is the best base you can ask for. They are so much more than just a side dish; they are the glue that holds a great American breakfast together. I usually serve these alongside two perfectly fried eggs—runny yolks are mandatory for dipping, of course! If I’m feeling extra hearty, a side of crisp, savory sausage links or some quick-cooked bacon makes it a complete feast.
But let’s talk about avocado toast, my favorite light pairing. A scattering of these Savory Potato Breakfast cubes right on top of creamy avocado makes the whole thing feel elevated and substantial. You deserve a breakfast that feels special every day, not just Sundays. If you need more inspiration for that avocado component, you have to see my 12 ways to create the ultimate avocado toast!
Storage and Reheating Instructions for Breakfast Potatoes
I absolutely adore making these potatoes ahead of time! They are fantastic Make Ahead Breakfast Sides. Once cooled completely, store your crispy delights in an airtight container in the fridge. They should keep beautifully for three or four days. Now, here’s the most important part—when you reheat them, do not use the microwave! That just undoes all the crispiness we fought for. For the best result, toss them back into a dry, hot cast iron skillet over medium heat for a few minutes until you hear them start to sizzle again. That quick, dry heat brings back all that glorious crunch!
Frequently Asked Questions About Breakfast Potatoes
We all have those quick questions when we’re trying to get out the door, so I wanted to gather a few of the things folks ask me most often about making these potatoes perfect for breakfast. If you’re looking for other speedy ideas after you finish that plate, feel free to browse my simple lunch recipes!
Can I make these breakfast potatoes in under 20 minutes?
You absolutely can start approaching that 20-minute mark if you use the skillet method! That’s because the stovetop cooks much faster than the oven. The biggest time saver is the pre-boil step: make sure you get those potatoes boiling right as you’re dicing them. The quicker you get them boiling and then steam-dried, the faster you can get them sizzling in that hot oil to reach that golden finish we’re looking for. They cook much faster once that moisture is gone!
Are these breakfast potatoes gluten-free?
Yes, good news for everyone avoiding gluten! The base recipe—potatoes, oil, and spices—is entirely naturally gluten-free. Since we don’t rely on any flour or binding agents here, these are a fantastic, hearty, gluten-free side dish. Just make absolutely sure that any smoked paprika or seasoning blends you happen to use are certified gluten-free if you have a severe sensitivity, just because cross-contamination happens, you know?
What is the best way to get Crispy Breakfast Potatoes?
If I had to pick just one secret for achieving true, stunning crispiness every single time, it’s this: You must manage the moisture before the fat hits the potato. You either need to par-boil and thoroughly steam-dry them for the skillet, or you need to spread them into a single, uncrowded layer for the oven. Think of high heat and dry surfaces—that’s the formula for getting those beautifully crunchy exteriors and avoiding sad, soggy breakfast potatoes!
Nutritional Estimates for Your Morning Side Dish
I always try to keep things easy when it comes to counting, but knowing roughly what’s in your plate helps, right? These numbers are just guides based on the recipe using the standard oil and not the optional butter. Keep in mind that this is for one serving (about a quarter of the total recipe).
- Calories: Around 280
- Fat: About 14 grams
- Carbohydrates: Roughly 35 grams (with 4 grams of fiber!)
- Protein: A solid 4 grams
Since we are using whole potatoes and simple spices, these are wonderfully straightforward. But remember, seasoning amounts and the exact type of potato you use can change things slightly!
Share Your Perfect Savory Potato Breakfast
I truly hope these techniques take the guesswork out of your mornings! Making these **breakfast potatoes** is my way of feeling connected to home, and I hope they become that wonderful, dependable classic for you, too. If you try the skillet method or the oven roast, please come back and let me know how crispy they got! Five stars for these potatoes means the world to me, and for more cozy ideas for gatherings, check out my list of appetizers and party snacks!
PrintThe Crispiest Breakfast Potatoes: Simple Skillet and Oven Techniques

Learn the methods to achieve perfectly golden, crispy breakfast potatoes with a tender inside every time. This guide covers both quick skillet frying and easy oven roasting for your perfect morning side dish.
- Prep Time: 10 min
- Cook Time: 25 min
- Total Time: 35 min
- Yield: 4 servings 1x
- Category: Breakfast
- Method: Skillet Frying or Baking
- Cuisine: American
- Diet: Vegetarian
Ingredients
- 2 lbs Russet or Yukon Gold potatoes, scrubbed and diced into 1/2-inch cubes
- 3 tablespoons avocado oil or preferred cooking oil
- 1/2 cup yellow onion, diced
- 1 teaspoon garlic powder
- 1 teaspoon smoked paprika
- 1/2 teaspoon dried rosemary
- 1/2 teaspoon salt
- 1/4 teaspoon black pepper
- Optional: 2 tablespoons butter (for skillet method)
Instructions
- Prepare the potatoes: If using the skillet method for maximum crispiness, place the diced potatoes in a medium pot, cover with cold water, and add 1 teaspoon of salt. Bring to a boil and cook for 5-7 minutes until the edges are slightly soft but the center is still firm. Drain completely and let them steam dry for 5 minutes. (Skip this step for the oven method, but ensure potatoes are very dry.)
- Season: In a large bowl, toss the dried potatoes with garlic powder, smoked paprika, rosemary, salt, and pepper until evenly coated.
- Skillet Method (Quickest): Heat 2 tablespoons of oil in a large, heavy-bottomed skillet (cast iron works best) over medium-high heat until shimmering. Add the potatoes in a single layer, avoiding overcrowding. Cook undisturbed for 8-10 minutes until the bottom is deep golden brown and crisp. Flip the potatoes and cook for another 5-7 minutes. Add the diced onion during the last 5 minutes of cooking. Stir in the butter during the final minute for extra flavor.
- Oven Roasted Method (Hands-Off Crisp): Preheat your oven to 425°F (220°C). Toss the seasoned potatoes with 3 tablespoons of oil on a large baking sheet. Spread them into a single layer. Roast for 20 minutes, flip them, and roast for another 15-20 minutes until golden brown and crisp. Add diced onion halfway through roasting if desired.
- Serve immediately alongside eggs, sausage, or avocado toast.
Notes
- For the best results in the skillet, do not stir the potatoes until the first side is fully browned. This builds the crust you want.
- If you want loaded breakfast potatoes, top the finished potatoes with shredded cheddar cheese, cooked bacon bits, and a dollop of sour cream or Greek yogurt.
- These potatoes are excellent for meal prep; reheat them in a dry skillet or toaster oven to restore crispness.
Nutrition
- Serving Size: 1/4 of recipe
- Calories: 280
- Sugar: 1
- Sodium: 350
- Fat: 14
- Saturated Fat: 2
- Unsaturated Fat: 12
- Trans Fat: 0
- Carbohydrates: 35
- Fiber: 4
- Protein: 4
- Cholesterol: 0