
Oh, I totally get it. Planning a gathering can send anyone into a tailspin! You want to wow everyone, but you definitely don’t want to spend the whole day chained to the stove when you should be mingling. That’s where my favorite little trick comes in: the classic cheese ball recipe. Seriously, this simple, savory spread will save your party every single time. Here at DelishCraze, my philosophy, inspired by my own kitchen journey, is all about keeping things accessible and delicious—we focus on those core American classics that truly make an event feel special. Forget complicated recipes for your next big event! This is the secret weapon you need for effortlessly spectacular Holiday Party Food.
- Why This Classic Cheese Ball Recipe is Your New Favorite Crowd Pleaser Appetizer
- Gathering Ingredients for Your Best Cheese Ball Recipe
- Step-by-Step Instructions for the Perfect Cheese Ball Recipe
- Flavor Variations for Your Cheese Ball Recipe
- Tips for Success with Your Classic Appetizer Ideas
- Serving and Storing Your Cheese Ball Recipe
- Frequently Asked Questions About the Cheese Ball Recipe
- Estimated Nutritional Data for the Cheese Ball Recipe
- Share Your Perfect Cheese Ball Recipe Experience
Why This Classic Cheese Ball Recipe is Your New Favorite Crowd Pleaser Appetizer
If you’re anything like me, you want appetizers that look amazing but take almost no effort. This classic cheese ball recipe is that dream come true! It’s dependable, and honestly, people go nuts for it every time. It embodies everything I believe in: delicious food that doesn’t hijack your entire afternoon.
- It looks incredibly festive and impressive on any platter.
- It uses basic, reliable ingredients—no fancy sourcing required!
- It stands up perfectly; it’s not a runny dip!
Truly, this is the ultimate Crowd Pleaser Appetizer.
Simple Party Recipes: Ready in Minutes
Don’t let the beautiful finished look fool you. Active prep time is genuinely just about fifteen minutes. Since this is a fantastic No Bake Cheese Ball, you don’t have to worry about oven space, which is a game-changer if your oven is packed with casseroles or desserts waiting for their moment. It fits perfectly into my philosophy that good food should be simple!
Make Ahead Appetizers for Stress-Free Hosting
This is perhaps its best feature for me, Olivia! You can whip up the base, shape it, and wrap it tight up to three days before your big event. The chilling period isn’t just optional; it’s necessary because that resting time is what firms everything up so it holds that perfect ball shape. You just coat it right before the guests arrive, and voilà—stress averted!
Gathering Ingredients for Your Best Cheese Ball Recipe
The beauty of the cheese ball recipe is that it relies on stuff most of us already have stashed away. We aren’t chasing down obscure ingredients here! It’s all about quality staples—sharp cheddar for bite, creamy cheese base for structure, and those lovely savory herbs coming together. Trust me, using good quality sharp cheddar makes a huge difference in the overall zing of this appetizer.
Essential Components for the Creamy Cheese Ball Dip
You absolutely need your cream cheese to be truly softened. I mean, leave it out on the counter for a couple of hours softened—not microwaved soft, which can mess with its texture. You need that smooth foundation. We use sharp cheddar because you want that flavor to shine through the richness. Don’t skip the Worcestershire sauce; it adds that mysterious, dark savory layer. And if you’re feeling bold, toss in some blue cheese! If that’s too much for your crowd, simply leave it out.
- 8 ounces cream cheese (must be soft!)
- 8 ounces sharp cheddar cheese, freshly shredded by you!
- 1/2 cup crumbled blue cheese (if you dare!)
- Plus your Worcestershire sauce, parsley, garlic powder, onion powder, salt, and pepper.
Coating and Serving Suggestions for the Cheese Ball Recipe
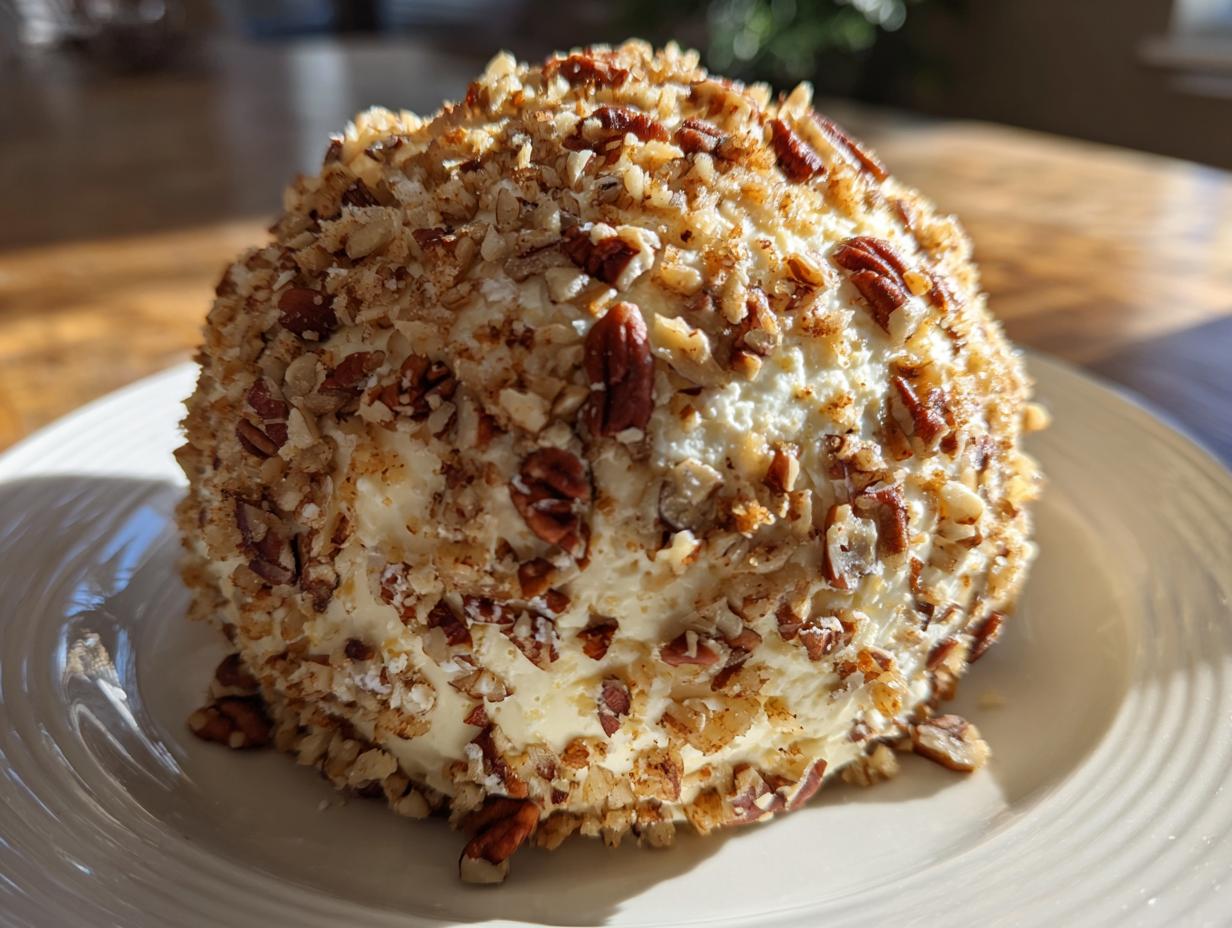
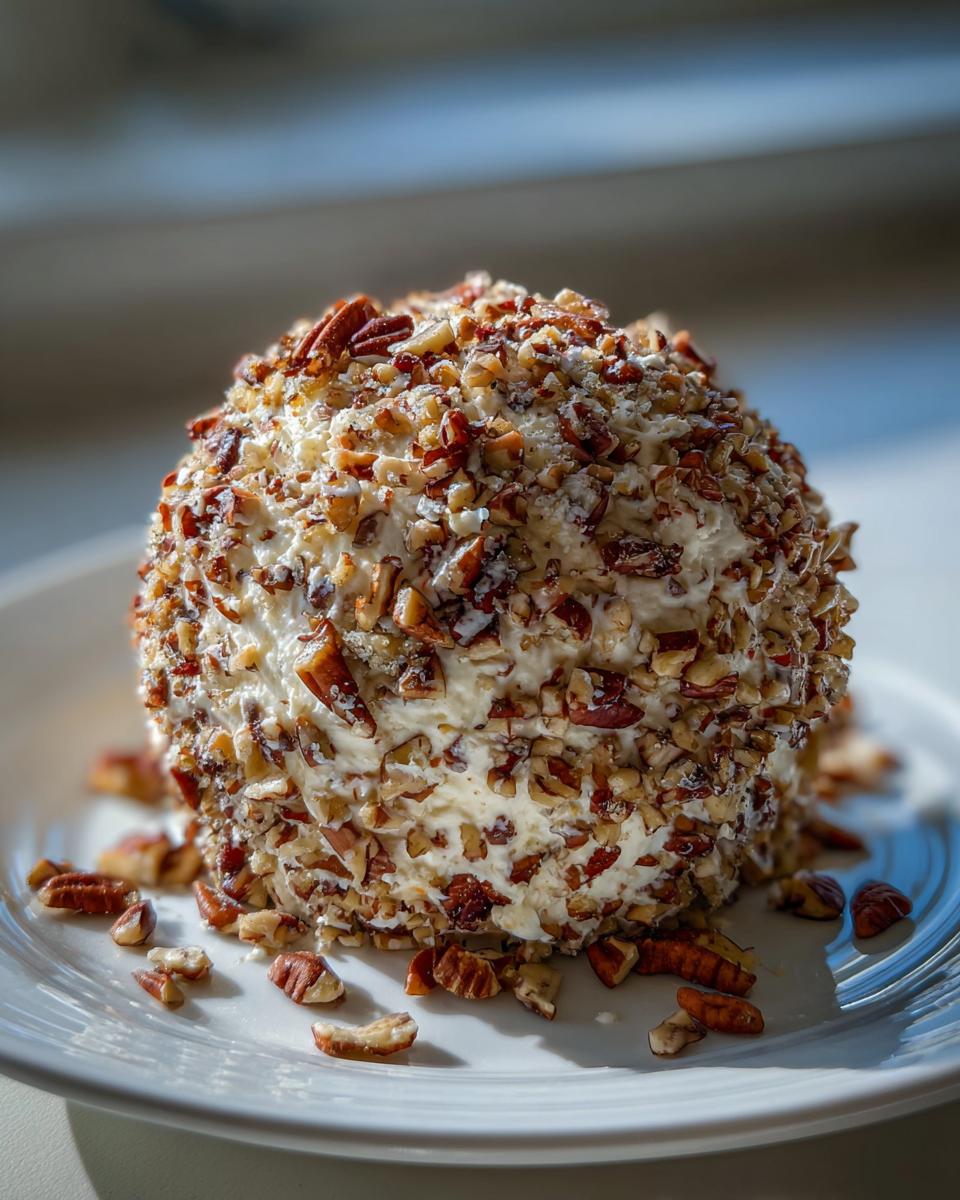
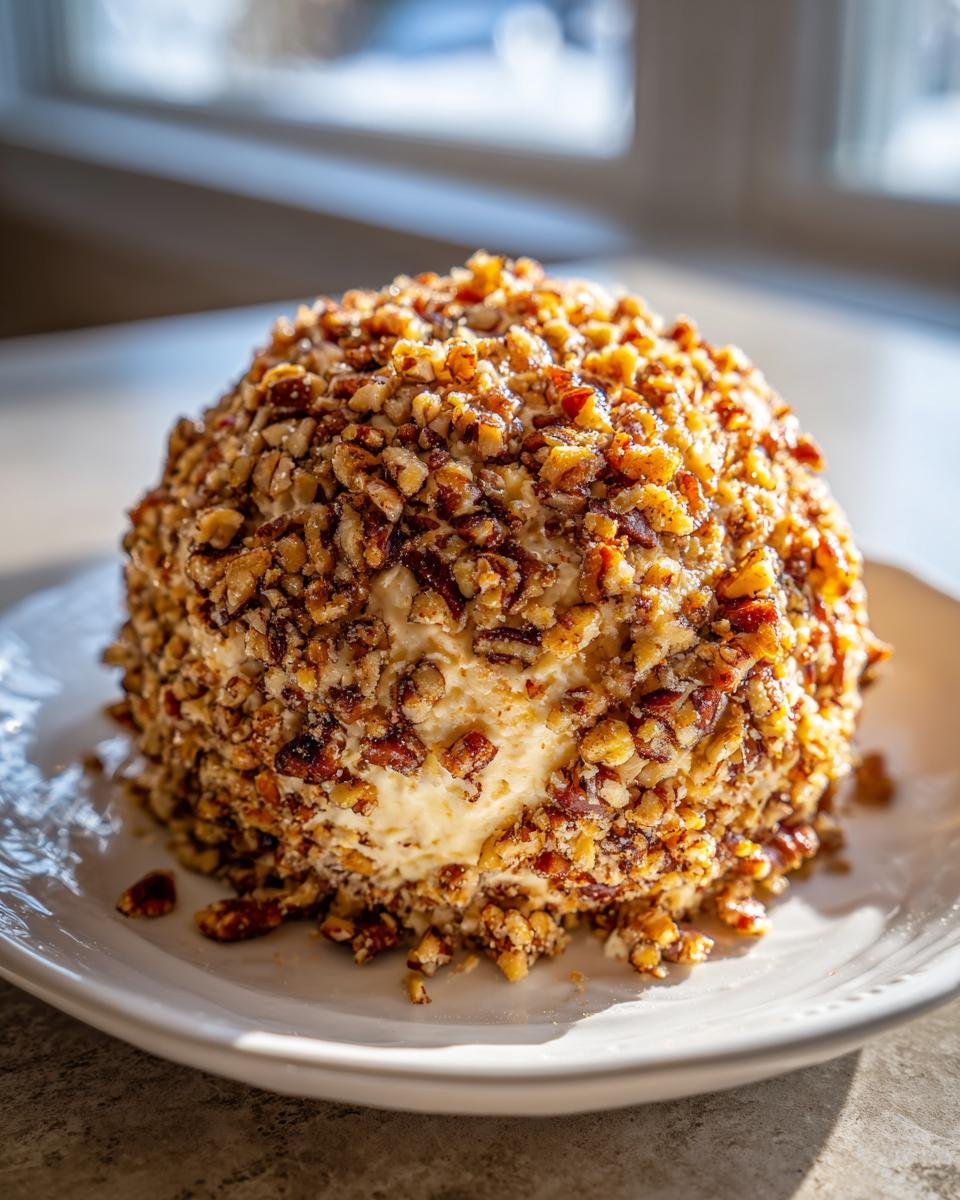
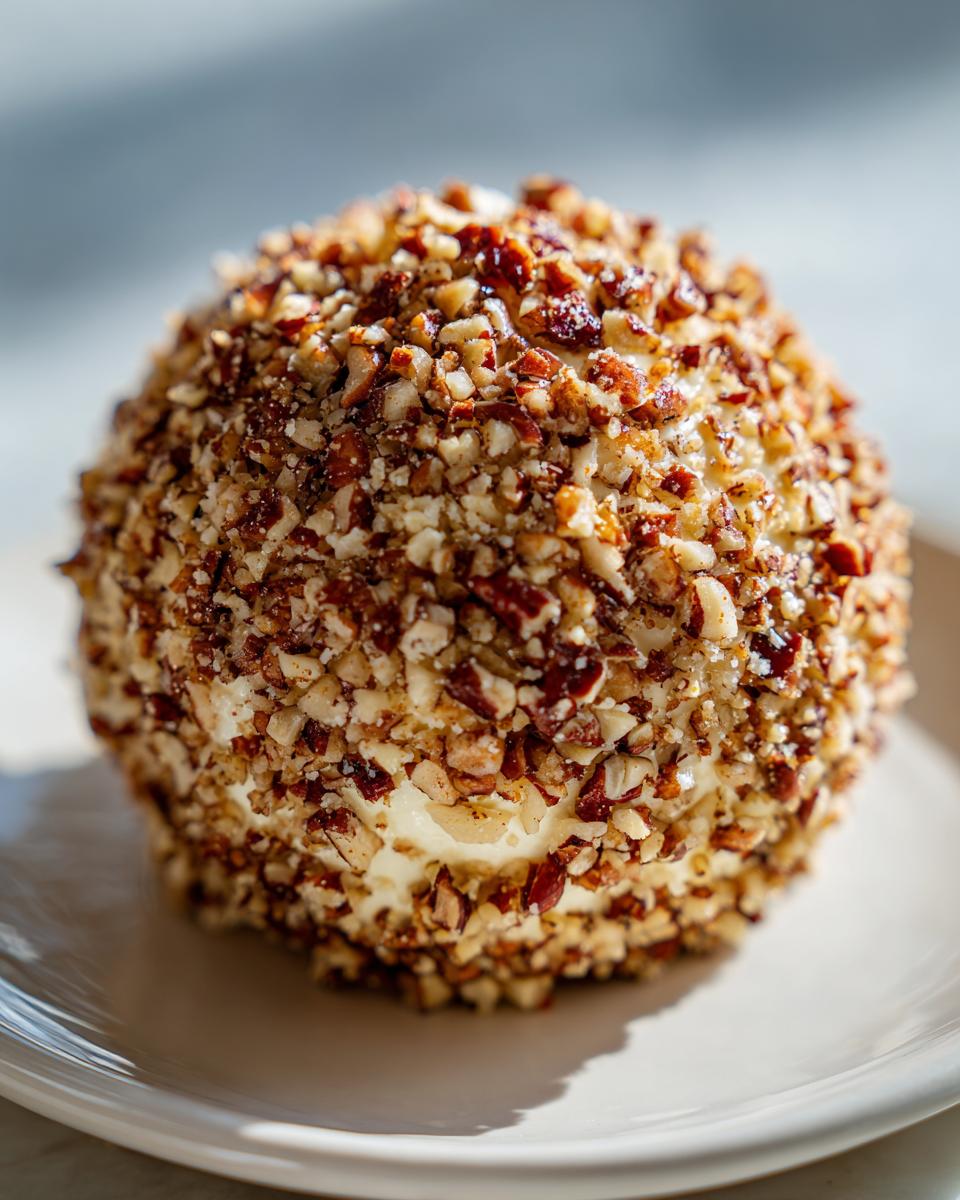
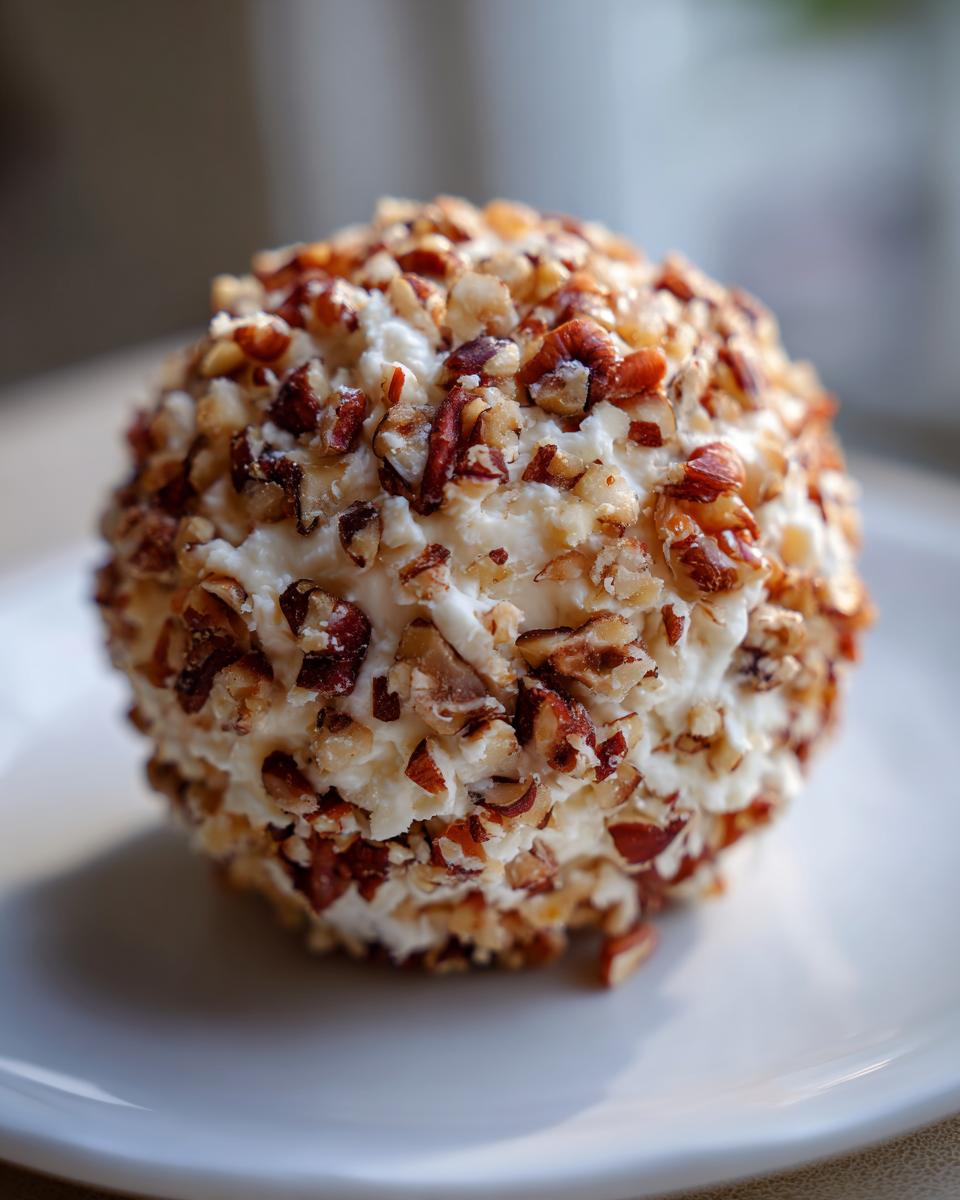
The outside coating is crucial for texture and presentation. I prefer pecans, they toast up nicely, but walnuts work just as well. Make sure you chop those nuts finely enough so they stick well but still give you a nice crunch. Remember, this whole thing needs something to scoop onto! Always make sure you have plenty of sturdy crackers—maybe a nice whole-wheat or rye cracker. If you prefer veggies for a lighter option, crisp celery sticks or mild bell pepper slices are perfect for dipping into this amazing spread.
Step-by-Step Instructions for the Perfect Cheese Ball Recipe
Alright, let’s get down to the fun part: making this happen! Creating your own DIY Cheese Ball should never feel intimidating. It’s actually quite straightforward, but timing those chilling steps is where the magic happens for flawless presentation. When you follow these steps for your cheese ball recipe, you are guaranteed success.
Mixing the Savory Cheese Spreads Base
First things first: we combine all the flavor builders! Get that softened cream cheese into a good, sturdy bowl. Toss in your shredded cheddar, the optional blue cheese, the quarter cup of nuts, and all your seasonings—Worcestershire, parsley, garlic powder, onion powder, salt, and pepper. Now, you can certainly use a strong wooden spoon and a good arm, but I confess, when things are this thick, I cheat slightly! I use my hand mixer on the absolute lowest speed just until everything is incorporated and uniform. You want it blended nicely, not whipped to oblivion!
Shaping and Chilling the Cheese Ball Recipe
Once it’s fully mixed, scrape the whole glorious mound onto a large sheet of plastic wrap. This is crucial for the next step! Wrap it up tightly, squeezing out any extra air. Now, use that plastic wrap to physically mold and shape the mixture into a nice, tight, compact ball. Don’t skimp on the chill time here; you need at least two hours in the fridge. This firming-up time is what sets the shape so beautifully before we coat it. Patience pays off!
Coating and Final Set for Serving
While that’s chilling, spread out your remaining cup of finely chopped nuts on a shallow plate—make sure they cover the entire bottom surface. Once the cheese mixture is solid, unwrap it carefully. Roll the chilled ball gently over the nuts, pressing lightly with your palms to make sure every single bit of cream cheese surface is covered. Don’t roll it around forever, just enough for a good, thick layer! Then, pop it back into the fridge for one *last* quick chill, maybe 30 minutes, to let that coating set firmly before serving it with crackers. If you want to see how others dress up this classic, check out this great cheese ball recipe idea!
Flavor Variations for Your Cheese Ball Recipe
You know I love a good classic, but sometimes you need to shake things up depending on the crowd! Serving the same thing every single time can get boring, right? The beauty of this cheese ball recipe base is how easily it morphs into something totally new. Whether you’re catering to spice lovers or dipping into that classic ranch flavor profile, switching this up is so fun and simple. It makes this recipe feel fresh for every holiday!
Creating a Ranch Cheese Ball Variations
If you love that herby, tangy flavor profile that practically screams party time, you have to try this small adjustment. For a super easy Ranch Cheese Ball Variations, all you do is mix in one standard packet of dry ranch seasoning mix right along with your cream cheese and cheddar in the first step. Seriously, that’s it! It amps up the savory factor significantly and makes for an absolutely amazing Creamy Cheese Ball Dip experience.
Spicy Kick: The Jalapeno Cheese Ball Recipe
For game day spreads or when you know your guests love a little heat, we jump right into the Jalapeno Cheese Ball Recipe territory. After you’ve mixed the cheeses, gently fold in about two tablespoons of finely minced pickled jalapenos. Make sure you drain them really, really well first—we want flavor, not extra liquid that will soften our ball too much! It gives you that perfect little warmth without blowing anyone’s head off.
Adding Depth with Bacon Appetizer Recipes Flavor
Who doesn’t love bacon? If you want to turn this into one of those decadent Bacon Appetizer Recipes, it’s quick! Just cook up about a half-cup of bacon until crispy, let it cool completely, and crumble it small. You mix this smoked, salty goodness right into the cheese mixture before the first chill. The bacon fat melts slightly into the cheese, giving the whole ball a deep, rich foundation that is just heavenly.
Tips for Success with Your Classic Appetizer Ideas
When serving up one of these tried-and-true Classic Appetizer Ideas, a little attention to detail makes all the difference between good and spectacular. The number one thing I learned is that temperature control is everything! If your cream cheese is too cold, your mixture will be lumpy, no matter how powerful your mixer is. If it’s too warm, you’ll never get that sharp shape you need.
Also, don’t rush that nut coating! After you roll the ball in those glorious chopped pecans, give it that final, short chill. This stops the nuts from shedding everywhere when people start diving in with their crackers. A well-chilled, perfectly coated ball always makes a better impression at the party. For more simple twists on classics, check out this guide on cheese ball recipes!
Serving and Storing Your Cheese Ball Recipe
Okay, the hard part is done—it’s shaped, coated, and ready to shine! Now we talk real-life party scenarios. Whether you’re hosting a massive New Year’s Eve bash or just setting out snacks for Game Day Snacks, presentation and storage matter. You want this incredible cheese ball recipe to look just as good when the last person leaves as it did when you first set it out.
Presentation Tips for Festive Appetizer Spreads
Presentation is everything when you’re aiming for those impressive Festive Appetizer Spreads! I always choose a round, dark wooden board or a bright white platter—something that contrasts nicely with the tan nuts. Don’t just plunk the ball down and throw crackers nearby! Arrange your accompaniments artfully around the base. Fan out your favorite crackers in a circle, like spokes on a wheel, or create little colorful mounds of carrot sticks, celery, and maybe some sliced cucumber.
If you happen to use one of the spicier variations, like the Jalapeno one, I like to place a tiny sprig of fresh cilantro on top right before serving for a pop of color. It immediately signals that there’s something special going on beneath the nuts!
Storage Guidelines for Make Ahead Appetizers
Remember how important that chilling was earlier? When you’re storing leftovers from your amazing spread, you need to lock in that freshness. If you have leftovers (which is rare, trust me!), wrap the cheese ball *very* tightly in plastic wrap again. Don’t leave any air exposure, or the cheese can start to dry out or absorb fridge odors.
This is one of the best Make Ahead Appetizers because it keeps so beautifully! I store mine in the back of the fridge for up to a week, though honestly, it rarely makes it past day three in my house. If you decide to save it, just let it sit on the counter for about 20 minutes before serving again so it softens up just enough to scoop.
Frequently Asked Questions About the Cheese Ball Recipe
It’s natural to have questions when you’re aiming to create the perfect centerpiece for your party spread! People often ask me about substitutions and timing, especially when planning a big spread of Festive Appetizer Spreads. Here are the biggest things I hear about this dependable recipe.
Can I use different cheeses in this cheese ball recipe?
Absolutely, you can play around with the cheese! The blue cheese is listed as optional because, well, not everyone loves that funky flavor, sadly! If you want to skip it but still want a bit more complexity than just cheddar and cream cheese, try swapping it out. Monterey Jack melts beautifully and adds a lovely creaminess, or a nice sharp Parmesan can give you a salty bite. Just make sure whatever you add is grated or crumbled finely so it blends smoothly in that base.
What is the best way to keep the cheese ball cold while serving?
This is a great question for those long holiday buffets! Since this is a fabulous No Bake Cheese Ball, it can soften up if the room gets too warm. If you’re serving it outdoors or at a crowded party, I swear by a little trick: take a wider decorative platter, place a layer of crushed ice or ice packs on it, and then set your serving plate on top of that. It keeps the platter cool subtly under the radar. Alternately, if you have a huge batch, keep half of it wrapped tightly in the fridge and swap it out when the first ball starts looking sad!
Can I freeze this No Bake Cheese Ball?
Yes, you totally can! This freezer-friendliness is another reason I love this recipe for huge entertaining efforts. For the absolute best result, I highly recommend freezing the cheese ball *before* you roll it in the external coating of nuts. Just shape it tightly in plastic wrap, maybe wrap it in foil too, and tuck it into a freezer bag for up to a month. When you’re ready to use it, thaw it overnight in the fridge, then coat it with the nuts and give it that final 30-minute chill before serving. That way, your coating stays perfectly crisp!
Estimated Nutritional Data for the Cheese Ball Recipe
Now, I know some of us are thinking about what goes into making our party spreads, and while this is definitely an indulgence, I like knowing the basics! Keep in mind that this data is just an estimate, based on the standard ingredients we used—especially if you skip the optional blue cheese or use turkey bacon instead of regular bacon in my flavor variation ideas. We calculated this based on an average serving size of about 1/12th of the entire cheese ball recipe.
- Serving Size: 1/12 of recipe
- Calories: Approximately 150
- Total Fat: 14g (with 8g saturated fat)
- Carbohydrates & Sugar: Very low, about 2g carbs and 1g sugar
- Protein: A decent contribution at 7g per serving
- Sodium: Around 250mg
It’s rich, yes, because it’s packed with cheese! But because it’s a rich appetizer that gets sliced up and shared, that amount per person keeps it firmly in the ‘perfect party food’ category. Enjoy it with your favorite crackers!
Share Your Perfect Cheese Ball Recipe Experience
And that’s it, my friends! You now have the blueprint for what I truly believe is the ultimate, can’t-fail party starter. I’ve shared all my secrets for making this classic work every single time, from making sure your cream cheese is perfectly soft to knowing exactly how long to chill before coating.
I honestly can’t wait for you to try this cheese ball recipe at your next dinner party or casual get-together. Did you stick to the classic profile, or did you go wild with the bacon or jalapeno version? Tell me everything!
Please take a moment to leave a rating below—a quick star rating helps others find their new favorite appetizer! And drop a comment telling me which occasion you served your beautiful holiday appetizer spread for. Happy snacking!
PrintThe Best Classic Cheese Ball Recipe
Make this easy, classic cheese ball for your next party or holiday gathering. It is a simple, crowd-pleasing appetizer that you can prepare ahead of time.
- Prep Time: 15 min
- Cook Time: 0 min
- Total Time: 2 hours 15 min
- Yield: 1 large cheese ball (about 12 servings) 1x
- Category: Appetizer
- Method: No Bake
- Cuisine: American
- Diet: Vegetarian
Ingredients
- 8 ounces cream cheese, softened
- 8 ounces sharp cheddar cheese, shredded
- 1/2 cup crumbled blue cheese (optional)
- 1/4 cup finely chopped pecans or walnuts
- 1 tablespoon Worcestershire sauce
- 1 teaspoon dried parsley
- 1/2 teaspoon garlic powder
- 1/4 teaspoon onion powder
- 1/4 teaspoon salt
- 1/4 teaspoon black pepper
- 1 cup finely chopped pecans or walnuts (for coating)
- Crackers or vegetable sticks for serving
Instructions
- In a medium bowl, combine the softened cream cheese, shredded cheddar cheese, blue cheese (if using), 1/4 cup chopped nuts, Worcestershire sauce, parsley, garlic powder, onion powder, salt, and pepper.
- Mix all ingredients thoroughly until they are completely blended and uniform. You can use a hand mixer on low speed or a sturdy spoon.
- Place the cheese mixture onto a sheet of plastic wrap. Shape the mixture into a compact ball.
- Wrap the cheese ball tightly in the plastic wrap. Chill in the refrigerator for at least 2 hours, or until firm enough to handle. This step is important for make-ahead preparation.
- In a shallow dish, spread the remaining 1 cup of chopped nuts evenly.
- Remove the chilled cheese ball from the plastic wrap. Roll the cheese ball in the chopped nuts, pressing gently so the nuts adhere to the entire surface.
- Return the coated cheese ball to the refrigerator for at least 30 minutes before serving to allow the coating to set.
- Serve your classic appetizer with your favorite crackers or fresh vegetables.
Notes
- For a Ranch Cheese Ball Variation, add 1 packet of dry ranch seasoning mix to the cheese mixture.
- For a Jalapeno Cheese Ball Recipe, add 2 tablespoons of finely minced pickled jalapenos (drained) to the mixture.
- For a Bacon Appetizer Recipe flavor, mix in 1/2 cup of cooked, crumbled bacon before chilling.
- You can prepare this make-ahead appetizer up to 3 days in advance. Keep it tightly wrapped in the refrigerator.
Nutrition
- Serving Size: 1/12 of recipe
- Calories: 150
- Sugar: 1
- Sodium: 250
- Fat: 14
- Saturated Fat: 8
- Unsaturated Fat: 6
- Trans Fat: 0
- Carbohydrates: 2
- Fiber: 0
- Protein: 7
- Cholesterol: 40