
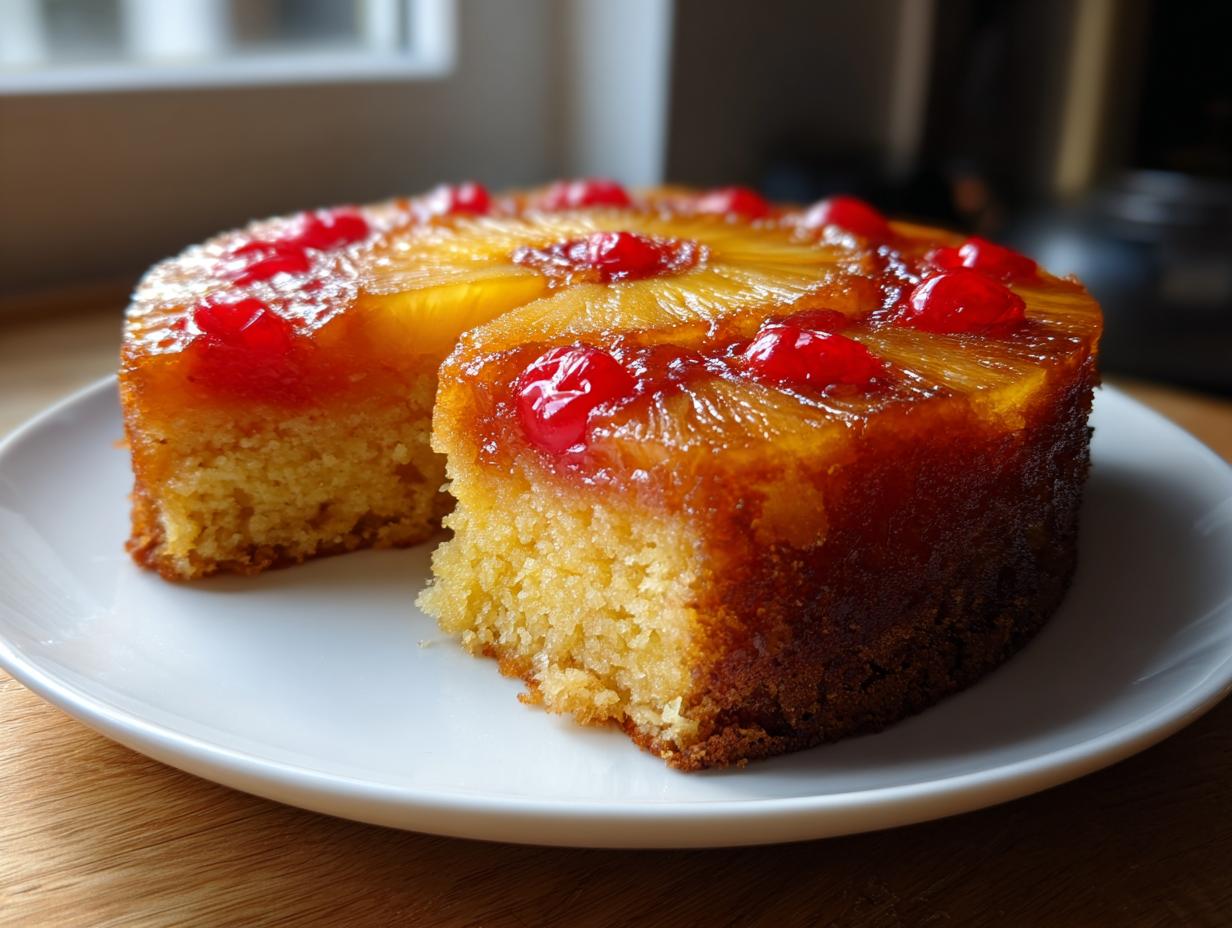
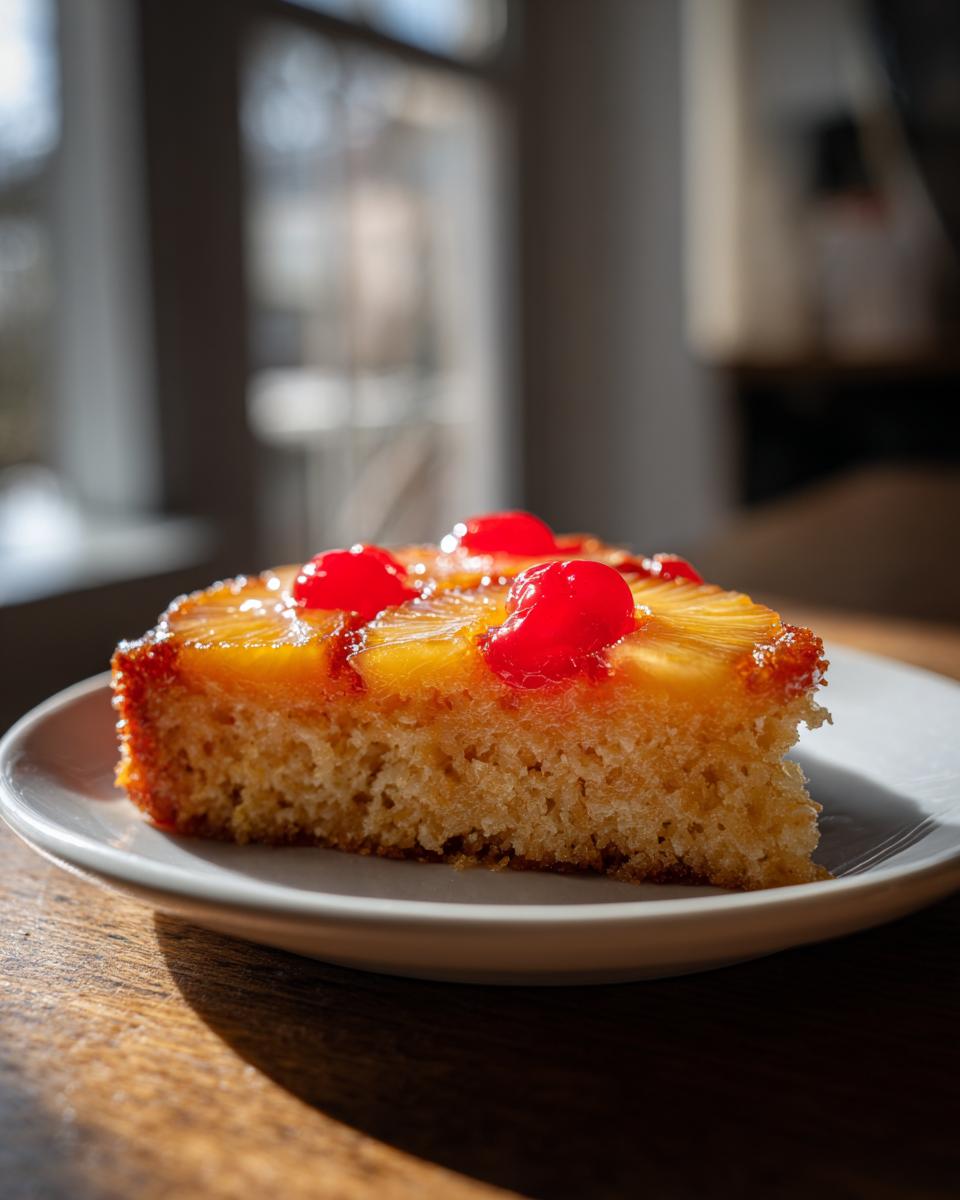
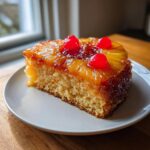
Sometimes, you just need a dessert that takes you right back to a simpler time, right? For me, that’s the ultimate trip down memory lane, and nothing screams classic American comfort quite like the showstopper: the pineapple upside down cake. I’m Olivia Rosewood, and here at DelishCraze, we focus on those deeply satisfying, reliable recipes that feel special but aren’t fussy. Forget those dry imitations; this recipe is all about creating a truly moist, buttery, from-scratch pineapple upside down cake that caramelizes perfectly every single time you bake it. You can read more about my philosophy on accessible home cooking over at our About page!
- Why This Classic Pineapple Upside Down Cake Recipe Works (E-E-A-T)
- Ingredients for Your From Scratch Pineapple Cake
- How to Prepare the Ultimate Pineapple Upside Down Cake
- Tips for the Easiest Pineapple Upside Down Cake Variations
- Flavor Enhancements for Your Pineapple Upside Down Cake
- Storage and Serving Suggestions for Pineapple Upside Down Cake
- Frequently Asked Questions About Pineapple Upside Down Cake
- Estimated Nutritional Profile for This Pineapple Upside Down Cake
- Share Your Perfect Pineapple Upside Down Cake Creation
Why This Classic Pineapple Upside Down Cake Recipe Works (E-E-A-T)
The reason this recipe keeps showing up on my family’s rotation, honestly, is because it’s just reliable. We’re aiming for the best homemade pineapple cake here, and that requires a few old-school tricks. When you bake it from scratch, you get a depth of flavor you just can’t match with shortcuts. This is how you guarantee a genuinely moist pineapple upside down cake every time!
- The ratio of softened butter to granulated sugar gives the cake body without being dense.
- We use pineapple slices packed in juice, not heavy syrup—that reserved juice is key for moisture in the batter later on.
- The cake comes out incredibly tender because we mix the batter just until the flour disappears, avoiding any tough gluten development.
I still remember my first attempt. I waited way too long to flip it, and half the pineapple stuck to the bottom of the pan! Don’t worry if you’ve had that happen. Now, I know the trick is that ten-minute grace period—no longer. That perfect flip is what separates a good dessert from a showstopper.
Achieving the Perfect Caramelized Pineapple Dessert
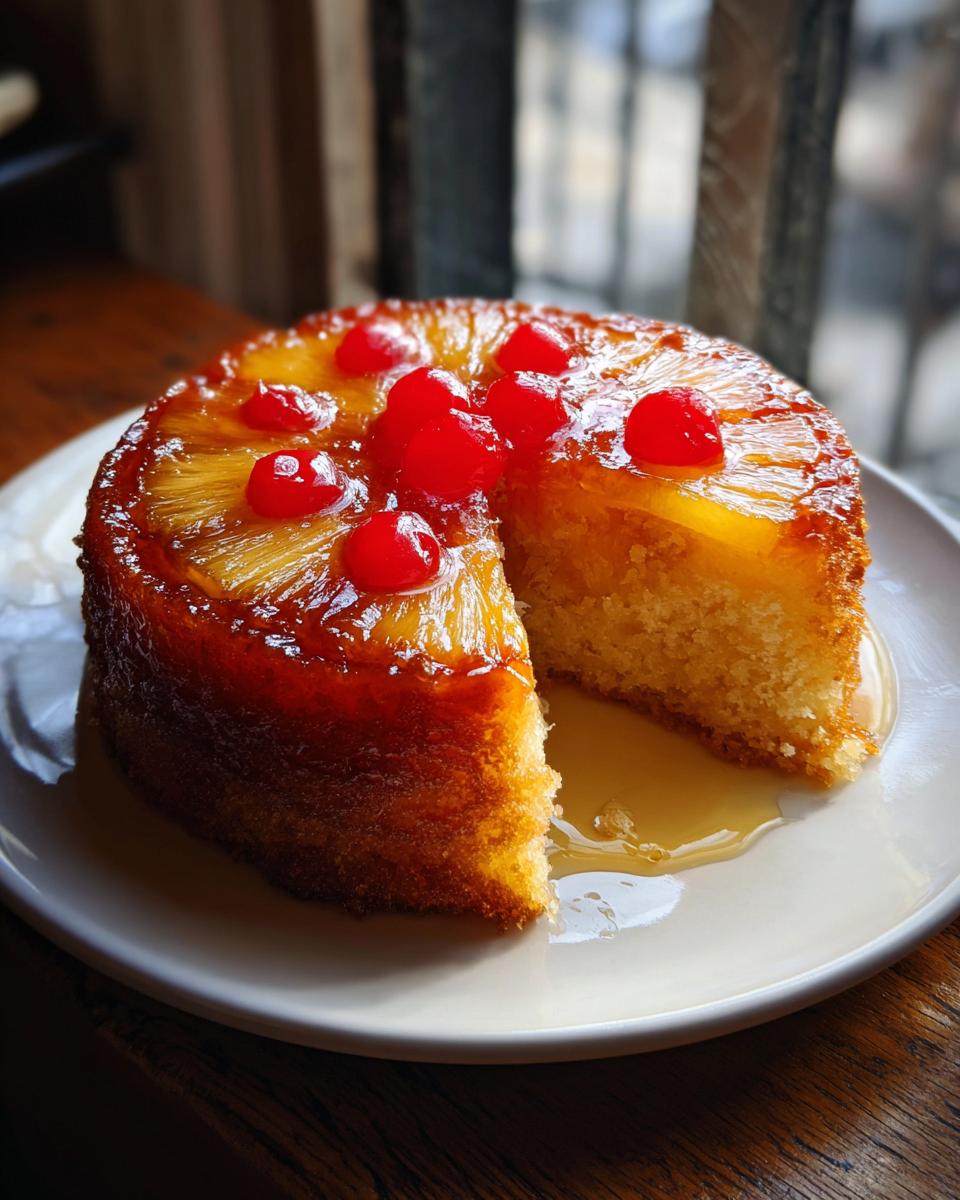
That gorgeous, gooey topping is what everyone swoons over, right? It starts with creating a simple, buttery sauce right in the bottom of your pan. You melt that first half-cup of butter along with the packed light brown sugar. When the heat hits that mixture, it transforms into this incredible, rich caramel. It bubbles up around the fruit as it bakes, penetrating just slightly into the top layer of the batter.
Pro Tip: Make sure you use canned pineapple slices that are packed in juice, not heavy syrup. The juice has a cleaner, slightly tart flavor that contrasts the sweetness of the caramel perfectly. If you were looking for a fancier twist, a homemade simple caramel topping poured on could work, but honestly, the saucepan trick is lightning fast and delivers exactly the classic flavor we want.
Ingredients for Your From Scratch Pineapple Cake
Gathering your ingredients is half the battle won! For this 9-inch Classic Pineapple Upside Down Cake Recipe, precision really matters since we’re baking this beauty from scratch. Make sure your butter for the cake batter is softened, not melty, but that first half-cup for the topping needs to be fully melted right in the pan.
Oh, and please remember this: drain those lovely pineapple slices, but *save* that juice! We use it to boost the flavor in the actual batter. If you wanted to try something even richer later on beyond just caramelizing the fruit, I have a fantastic guide on making a simple caramel topping recipe that you might want to play around with sometime!
- 1/2 cup unsalted butter, melted (for the topping)
- 3/4 cup packed light brown sugar
- 1 (20 ounce) can pineapple slices in juice, drained completely (reserve the juice!)
- 14 maraschino cherries
- 1 1/2 cups all-purpose flour
- 1 1/2 teaspoons baking powder
- 1/4 teaspoon salt
- 1/2 cup granulated sugar
- 1/2 cup (1 stick) unsalted butter, softened to room temperature
- 2 large eggs, room temperature is best!
- 1 teaspoon vanilla extract
- 1/2 cup milk
- 1/4 cup reserved pineapple juice
How to Prepare the Ultimate Pineapple Upside Down Cake
Alright, let’s get into the hands-on part of making this Classic Pineapple Upside Down Cake Recipe. The magic starts before you even mix the batter! First things first, get your oven warming up to 350 degrees F, and make sure that 9-inch round aluminum cake pan is ready to go. It’s going to be the vessel for our beautiful sticky top layer.
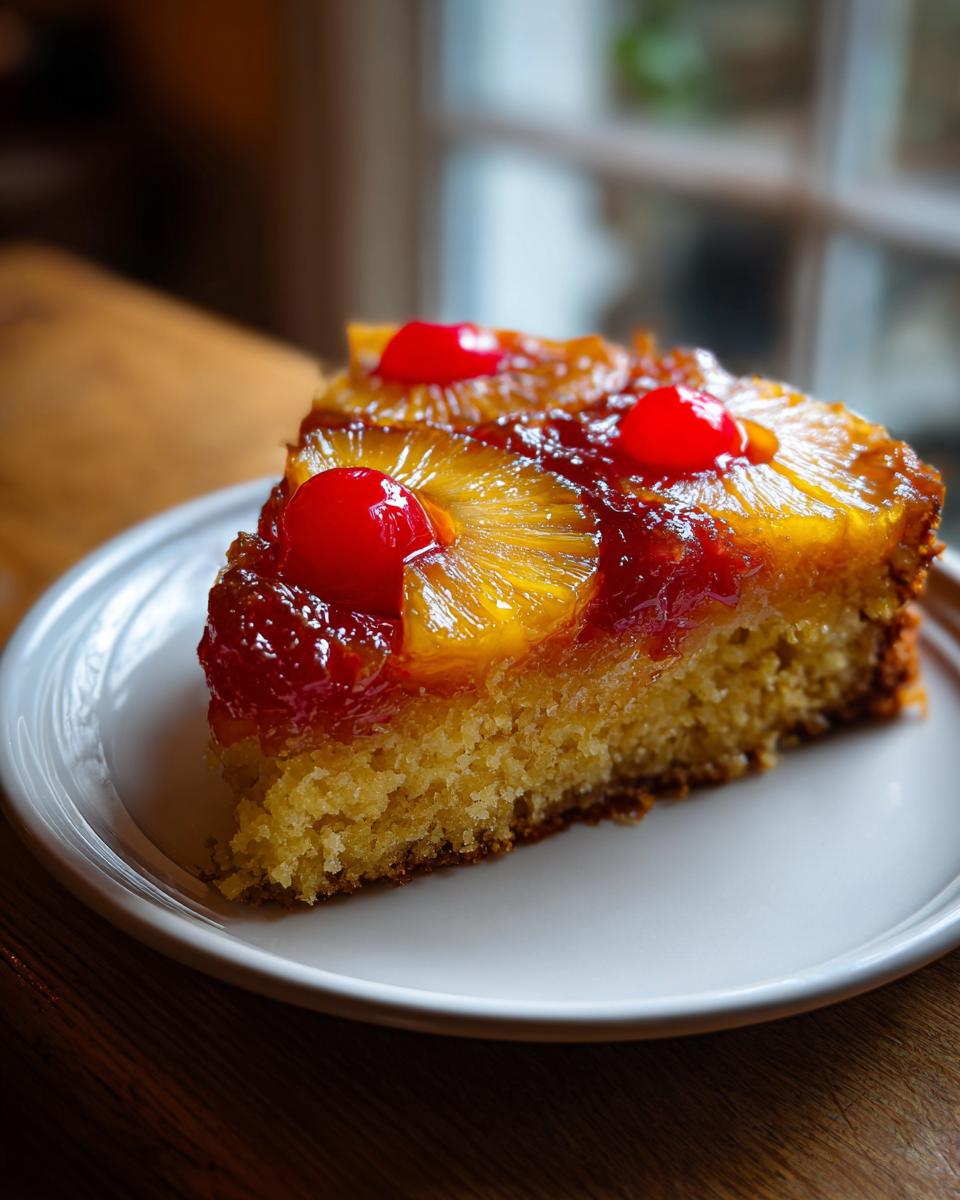
We start by making that gorgeous topping right in the pan. You can carefully melt that half-cup of butter right on the stovetop or just stick the pan into the warming oven for a few minutes until it melts nicely. Once it’s liquid, sprinkle that brown sugar evenly over the top, and then artfully arrange your drained pineapple slices and dot those cherries into the centers. It should look like a tropical stained-glass window—just beautiful!
Now for the cake batter itself. Whisk your dry ingredients—flour, baking powder, salt—and set them aside. In a big bowl, you’ll cream the softened butter and granulated sugar until it looks pale and fluffy. That means you’ve incorporated air, which is absolutely essential for a tender crumb! Beat in the eggs one at a time, then your vanilla. Remember how I mentioned using that reserved pineapple juice? Mix that juice with your milk, and then, here is the E-E-A-T tip: alternate adding your dry mix and this liquid mix to the creamed butter, starting and ending with the flour. Mix it only until it *just* comes together. Seriously, stop mixing when you see a few flour streaks left—overmixing is the enemy of a moist pineapple upside down cake. When you’re gentle here, it makes all the difference, much like when you’re folding ingredients into a delicate pancake batter—you can check out my fluffy pancake recipe for more on gentleness!
Pour that batter gently over your fruit design. Total bake time is about 35 to 40 minutes until a wooden pick comes out clean in the center. Then, the most crucial part: let it cool in the pan on a wire rack for exactly 10 minutes. Not five, not fifteen. Ten minutes is the sweet spot!
Mastering the Inversion of Your Pineapple Upside Down Cake
This moment gives everyone the jitters, but trust me, you’ve got this! After those ten minutes are up, put on your oven mitts—that pan is still scorching hot—and place your serving plate upside down directly over the cake pan. You need a firm grip on both the plate and the pan, and then flip the whole thing over in one decisive, confident motion. Set it down carefully on your counter.
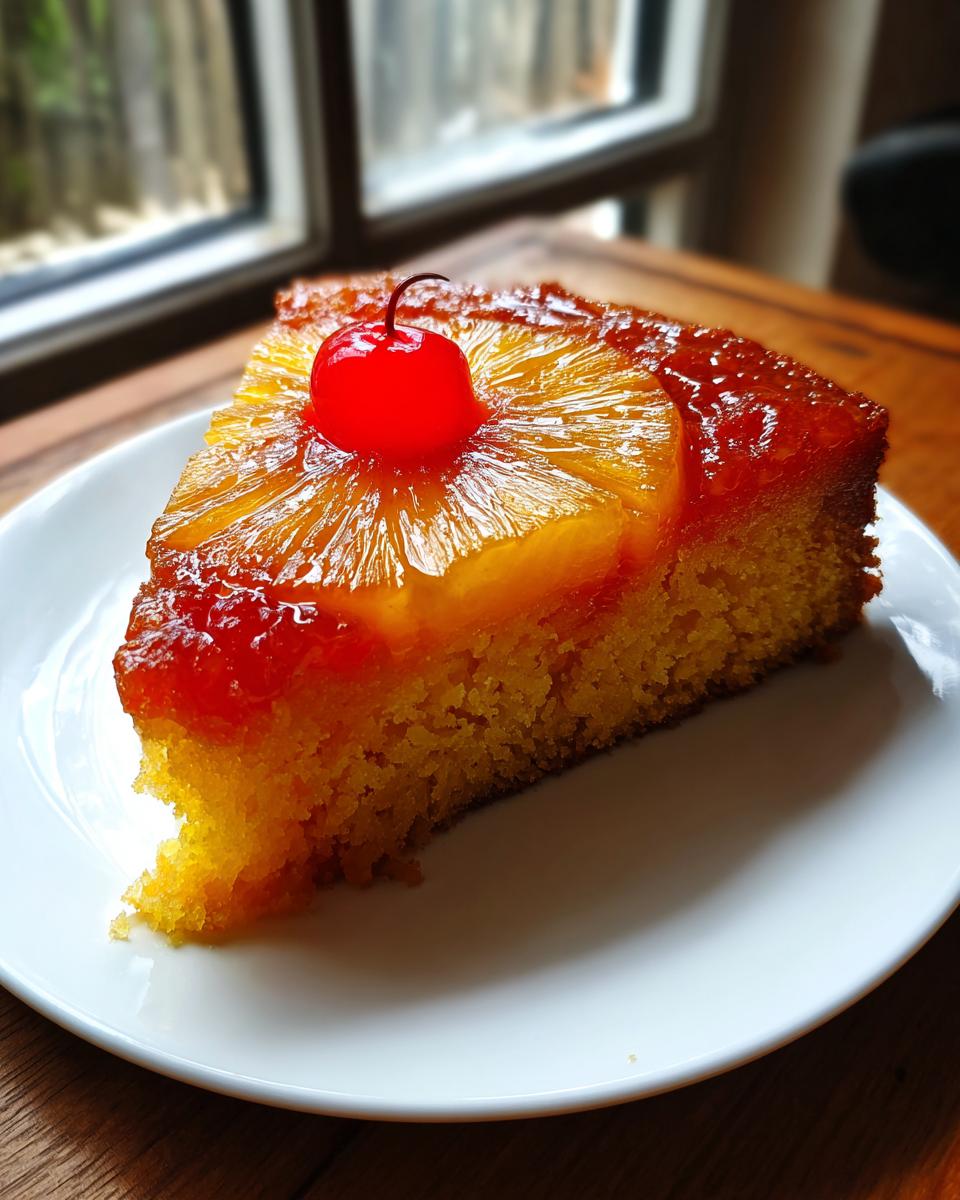
Now for the moment of truth: the slow lift. Slowly lift the pan away. If you see a stray piece of pineapple or a cherry that decided to stay behind—and listen, it happens to the best of us!—don’t panic or pout. Just use a thin rubber spatula or clean tongs to gently nudge that wayward fruit right back where it belongs on top. It sets fast, so this is your moment to polish up that beautiful, buttery fruit cake recipe look before serving warm.
Tips for the Easiest Pineapple Upside Down Cake Variations
I totally get it; sometimes you need a tropical treat on a night when you don’t have time to cream butter and sugar from scratch! That’s where smart substitutions come in. If you are in a pinch, you can absolutely make an Cake Mix Pineapple Upside Down Cake. The trick is to use the reserved pineapple juice instead of the water the box calls for—that’s your secret flavor booster right there! If you look at the recipe notes, I give you the full rundown on how to swap out the dry ingredients.
We also love making Mini Pineapple Upside Down Cakes for gatherings. They look so elegant on a dessert platter, and you don’t have to worry about that scary inversion moment with a giant cake! Just pour the batter into a greased 12-cup muffin tin. You’ll need to adjust the baking time, dropping it down to about 20 to only 25 minutes. For a little inspiration on those cute little treats, check out these ideas for individual mini pineapple upside down cakes!
Making a Pineapple Upside Down Bundt Cake
If you want maximum structural drama, moving this recipe into a Bundt pan is a fantastic way to go. Because the Bundt pan is much deeper than the standard 9-inch round, you absolutely have to be extra vigilant with your greasing and flouring. I mean, really slather it on, paying attention to every single little curve and crevice. You might even consider using some cake goop if you have some on hand!
The main thing you need to watch out for is baking time. It will definitely take longer to cook through, probably needing an extra 10 to 15 minutes in the oven. Start checking it around the 50-minute mark with that wooden pick. Since it’s a larger volume, the center needs more time to set up properly before you risk the flip. If you’ve ever baked a different Bundt cake, you know the rule: trust the pick, not just the clock!
Flavor Enhancements for Your Pineapple Upside Down Cake
This buttery fruit cake recipe is already a total winner, but if you’re anything like me, you love tweaking things just a tiny bit to make a classic recipe your own! The notes mention a wonderful little secret for boosting that tropical richness: rum. Seriously, it takes the whole thing up a notch.
Instead of using one tablespoon of the reserved pineapple juice when you mix your milk, you can swap it out for a tablespoon of dark rum. It doesn’t make the cake taste boozy, no way! It just deepens that caramelized pineapple flavor and gives the whole finished cake a warm, complex note that is just divine. It’s a wonderful addition for a dinner party dessert.
If rum isn’t your thing, or if you’re baking this for the kids, I have another simple trick for added warmth. When you’re mixing your dry ingredients—the flour, baking powder, and salt—throw in about a quarter teaspoon of ground nutmeg. Nutmeg pairs so beautifully with the brown sugar and that sweet pineapple; it just rounds out the flavor profile without overpowering the fruit. It’s a subtle difference, but you’ll notice it!
Now, if you wanted to go the extra mile and skip the simple topping we made in the pan, you certainly could whip up a dedicated simple caramel topping recipe, but I find that what we did in Step 2 of the pan prep is so efficient and tastes just as decadent. I’ve played around with tons of flavor additions, and for this cake, less is often more so the pineapple really sings. For more ideas on using brown sugar in creative ways, take a look at my maple brown sugar cookie recipe!
Storage and Serving Suggestions for Pineapple Upside Down Cake
You absolutely have to enjoy this beauty warm the first time around, that buttery caramel is just magical when it’s fresh from the oven. Serve slices with a dollop of freshly whipped cream or a scoop of really good vanilla ice cream—it cuts through the richness perfectly. If you’re making this fantastic Retro Tropical Cake ahead of time, good news! Because of that sugar topping, it actually keeps beautifully at room temperature for about two days. Just cover it loosely so the top doesn’t get sticky in humidity.
If you need it to last longer, pop it into the fridge, but remember, things bake up firmer when cold. When you’re ready to enjoy leftovers, give it a quick zing in the microwave for about 10 to 15 seconds before serving. It brings that tropical warmth right back! Trust me, leftovers never last long in our house, especially if you’re trying to keep them from my husband who claims he needs a small dish of homemade chocolate pudding recipe from scratch alongside his slice!
Frequently Asked Questions About Pineapple Upside Down Cake
Can I use fresh pineapple instead of canned for my cake?
That’s a great question! While the canned slices packed in juice are my go-to for that classic gooey top, you can absolutely use fresh pineapple. If you use fresh, you’ll need to slice it yourself, of course. The biggest thing to watch out for is moisture content, though. Fresh pineapple sometimes releases more water during baking. If you do use a fresh ring, you might want to gently blot it with a paper towel before placing it into the brown sugar layer. Also, if you’re going for the easiest pineapple upside down cake, canned is definitely faster!
My cake stuck to the pan! How do I prevent this next time?
Oh, that sticky disaster is the absolute fear of every baker making this dessert! Usually, sticking happens because you inverted the cake too late, letting the hot caramel cool and re-harden onto the pan bottom. Remember that ten-minute window I talked about? Stick to it! If you still have issues, make sure you completely coat the pan in butter first, then sprinkle the sugar evenly over the melted butter layer. For extra insurance, some bakers swear by lining the bottom of a springform pan with parchment paper cut to fit before adding the topping mixture, though I haven’t needed it for this specific from-scratch pineapple cake recipe when I follow the timing.
Can I make this ahead of time? Is this cake okay for holiday planning?
Yes, this cake is fantastic for planning ahead! Since it’s already quite dense and buttery, it holds up really well. I often make it the day before a big gathering. Simply let it cool completely after inverting it, then cover it loosely with plastic wrap and keep it at cool room temperature—not the fridge, if you can help it, as that tends to dry out the crumb a bit. It’s a perfect nostalgic dessert idea because it tastes just as good the next day! For other make-ahead baking ideas that freeze well, you might want to check out my tips for my moist zucchini banana bread recipe.
Estimated Nutritional Profile for This Pineapple Upside Down Cake
I always feel a little nervous sharing the nutrition facts because, let’s be honest, a dessert this rich isn’t exactly ‘diet’ food! But transparency is important, right? This table gives you a general idea of what you’re serving up when you enjoy a slice of this amazing buttery fruit cake recipe.
Keep in mind, these figures are based on dividing a standard 9-inch cake into 8 generous slices using the specific ingredients listed in the recipe. If you use different brands of butter or sugar, or if you make the mini pineapple upside down cakes, the numbers will shift around a bit. Consider these estimates excellent guidelines!
- Serving Size: 1 slice
- Calories: 380
- Sugar: 35g (Yep, that’s where the caramelized goodness lives!)
- Sodium: 250mg
- Fat: 19g
- Saturated Fat: 11g
- Carbohydrates: 50g
- Protein: 4g
- Cholesterol: 75mg
If tracking macros is something you do, know that a good portion of the sugar comes directly from that beautiful, caramelized topping we created in the pan. Regardless of the numbers, this is a classic dessert meant to be enjoyed!
Share Your Perfect Pineapple Upside Down Cake Creation
Whew! We made it through the entire process, from melting butter in the pan to that hair-raising moment of sticking the plate on top. Now that you’ve created your very own retro tropical cake, I absolutely want to hear about it! Did you try the little rum trick in the batter? Or maybe you went wild and made a whole batch of mini pineapple upside down cakes for a party?
Please, don’t be shy! Drop a comment below telling me how it turned out. Did you get that perfect, clean flip? Giving the recipe a star rating—even with five stars—helps other home cooks feel confident trying this classic masterpiece. If you run into any tricky spots or have questions about adapting things for your next bake, shoot me a note through the contact page. Happy baking, friends!
PrintClassic Pineapple Upside Down Cake: A Moist, Buttery Retro Favorite
Make this classic pineapple upside down cake from scratch. You get a moist, buttery cake topped with perfectly caramelized pineapple rings and cherries. This nostalgic dessert is simple to prepare and always impresses.
- Prep Time: 15 min
- Cook Time: 40 min
- Total Time: 55 min
- Yield: 8 servings 1x
- Category: Dessert
- Method: Baking
- Cuisine: American
- Diet: Vegetarian
Ingredients
- 1/2 cup unsalted butter
- 3/4 cup packed light brown sugar
- 1 (20 ounce) can pineapple slices in juice, drained (reserve juice)
- 14 maraschino cherries
- 1 1/2 cups all-purpose flour
- 1 1/2 teaspoons baking powder
- 1/4 teaspoon salt
- 1/2 cup granulated sugar
- 1/2 cup (1 stick) unsalted butter, softened
- 2 large eggs
- 1 teaspoon vanilla extract
- 1/2 cup milk
- 1/4 cup reserved pineapple juice
Instructions
- Preheat your oven to 350 degrees F. You will need a 9-inch round cake pan.
- Melt 1/2 cup of butter in the cake pan over low heat on the stovetop, or carefully in the oven.
- Sprinkle the brown sugar evenly over the melted butter.
- Arrange the drained pineapple slices on top of the sugar and butter mixture. Place one maraschino cherry in the center of each pineapple ring.
- In a medium bowl, whisk together the flour, baking powder, and salt. Set this aside.
- In a large bowl, cream together the 1/2 cup softened butter and the granulated sugar until the mixture is light and fluffy.
- Beat in the eggs one at a time, mixing well after each addition. Stir in the vanilla extract.
- In a small bowl, whisk together the milk and the reserved pineapple juice.
- Gradually add the dry ingredients to the wet ingredients, alternating with the milk mixture, beginning and ending with the dry ingredients. Mix until just combined; do not overmix.
- Carefully pour the cake batter over the pineapple and cherry layer in the pan. Spread the batter evenly.
- Bake for 35 to 40 minutes, or until a wooden pick inserted into the center comes out clean.
- Let the cake cool in the pan on a wire rack for 10 minutes.
- Place a serving plate upside down over the cake pan. Wearing oven mitts, carefully invert the cake onto the plate. Lift the pan away slowly. If any topping sticks, gently place the fruit back onto the cake.
- Serve warm or at room temperature.
Notes
- For a richer caramel flavor, you can substitute 1 tablespoon of dark rum for 1 tablespoon of the reserved pineapple juice in the batter.
- If you prefer a simpler route, you can substitute the cake ingredients with one box of yellow cake mix prepared according to package directions, using the reserved pineapple juice for the liquid called for in the mix instructions.
- To make individual servings, prepare this recipe in a 12-cup muffin tin, reducing the baking time to about 20-25 minutes.
Nutrition
- Serving Size: 1 slice
- Calories: 380
- Sugar: 35g
- Sodium: 250mg
- Fat: 19g
- Saturated Fat: 11g
- Unsaturated Fat: 8g
- Trans Fat: 0.5g
- Carbohydrates: 50g
- Fiber: 1g
- Protein: 4g
- Cholesterol: 75mg