
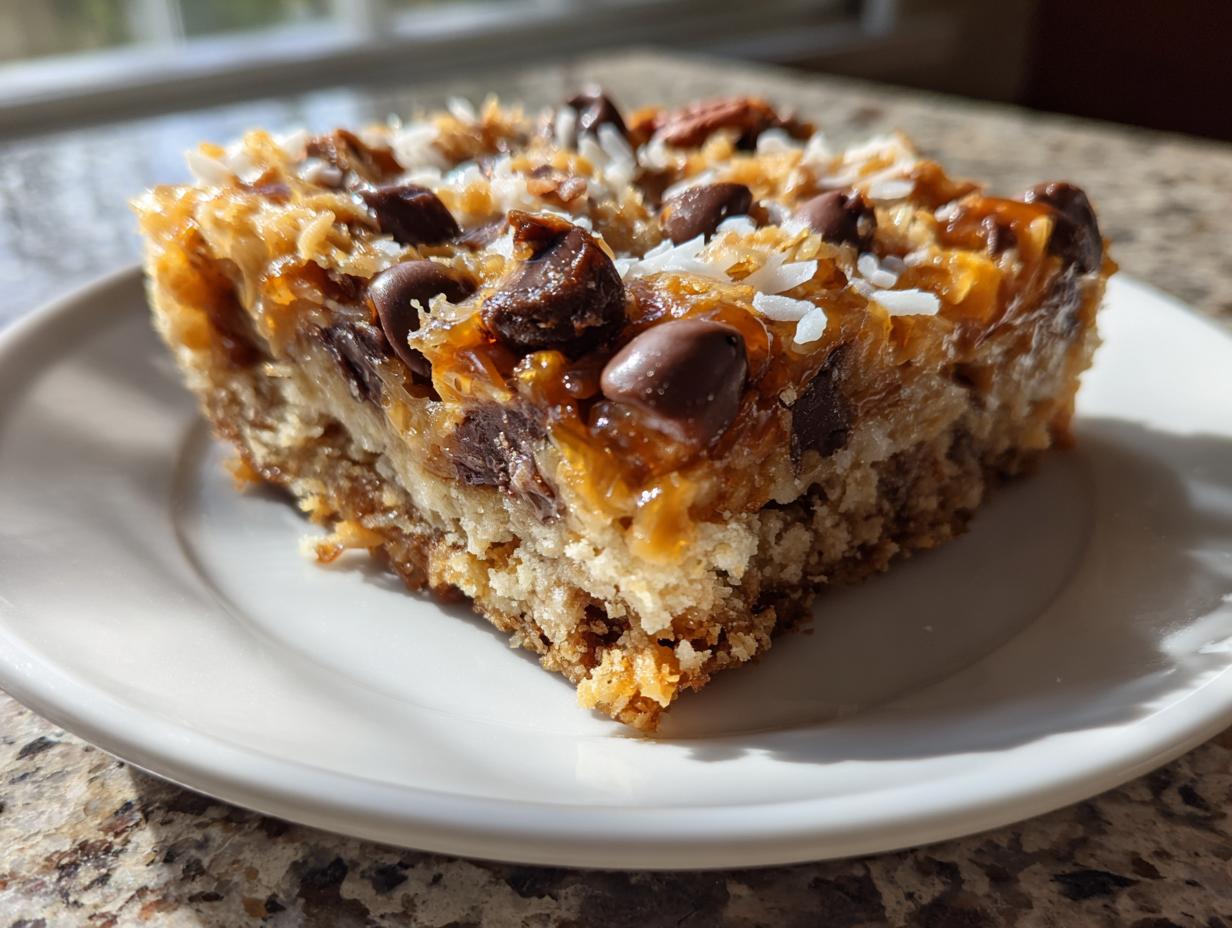
If you’re anything like me, you sometimes need a dessert that hits every single craving without demanding your entire afternoon. I remember baking so much complicated stuff when I first started DelishCraze, trying to prove myself, but honestly, some days you just need pure, uncomplicated happiness. That’s why I’m thrilled to share my tried-and-true recipe for magic cookie bars. These aren’t fussy, they aren’t tricky—they are reliable layers of pure, sweet nostalgia. When I was navigating that stressful design career, pulling these out of the oven was my reminder that simple, delicious things still existed. This recipe is practically foolproof, giving you that ultimate gooey texture we all dream about when we think of classic layered bars.

- Why This Magic Cookie Bars Recipe is a Keeper (The Best Magic Bars Recipe)
- Gather Your Ingredients for Classic Layered Bars
- Step-by-Step Instructions for Perfect Magic Cookie Bars
- Tips for Success Making Your Magic Cookie Bars
- Serving Suggestions for These Potluck Dessert Bars
- Storage and Reheating Instructions for Your Chewy Dessert Bars
- Frequently Asked Questions About Magic Cookie Bars Recipe
- Estimated Nutritional Data for Classic Magic Cookie Bars
- Share Your Ultimate Gooey Bars Experience
Why This Magic Cookie Bars Recipe is a Keeper (The Best Magic Bars Recipe)
When I say this recipe is a keeper, I mean it! It’s the one I reach for when I need a crowd-pleaser that takes minimal active time. It’s reliable, it tastes exactly like the best ones you remember, and it’s ready before you know it. You have to trust me on this one; it’s a staple in my quick baking rotation.
Unbeatable Gooey Texture
The secret sauce—yes, literally—is that can of sweetened condensed milk. It seeps down through all those delicious layers and creates those pockets of amazing chewiness. That’s what makes them the ultimate gooey bars. Seriously, the texture is just unmatched when you use the full can.
Assembly is Simple for These Easy Cookie Bars
There’s no fancy creaming or whipping here. You’re just pressing a crust and then sprinkling things on top! It moves so fast once you get organized. If you want easy cookie bars that look impressive but barely challenged your afternoon, this is your goal post.
Gather Your Ingredients for Classic Layered Bars
Okay, for these bars to come together perfectly, we need to make sure we have absolutely everything ready before we start layering. Remember, organization is key when you’re building something this rich! I always lay everything out shiny-side-up on my counter. It helps me double-check I haven’t forgotten my crucial binder, the sweetened condensed milk. If you’re focusing on reliable baking dessert recipes, preparation is everything.
Graham Cracker Crust Bars Components
First things first, let’s tackle that buttery base. You need exactly 1 1/2 cups graham cracker crumbs. Don’t eyeball that measurement; it needs to be snug! Mix those crumbs with a generous half-cup of unsalted butter that you’ve already melted down completely. Just stir until it looks like wet sand that’s ready to hold a shape.
The Seven Layers of Magic Cookie Bars
This is where the fun begins! For the main event, gather your chocolate chips (semi-sweet is my choice!), any optional butterscotch chips for extra depth, a cup of sweetened shredded coconut, nuts—I use pecans diced up—and the star: the entire can of sweetened condensed milk. I mean the whole thing! Make sure you have that 1 can (14 ounces) sweetened condensed milk sitting right there, waiting to pour.
Step-by-Step Instructions for Perfect Magic Cookie Bars
Alright, now that everything is sitting pretty on the counter, putting these together feels like stacking blocks—except way tastier! The key here is to move with purpose, but don’t rush the final cooling stages. We want them perfectly set, not wobbly messes. We’re working toward those incredible chewy dessert bars, so follow these steps exactly, and you’ll have success!
Preparing the Graham Cracker Crust Bars
First things first: get that oven going! We need it at 350 degrees F, so preheat that baby immediately. Grab your 9×13 inch pan, and for my sanity (and yours!), line it with parchment paper first. Make sure you leave an overhang on the sides; this is how we’ll lift the whole thing out later. Then, mix up your graham crumbs and melted butter until they are totally combined, press that mix down firmly into the bottom of the lined pan. You want a real, packed crust!
Layering Ingredients for Chewy Dessert Bars
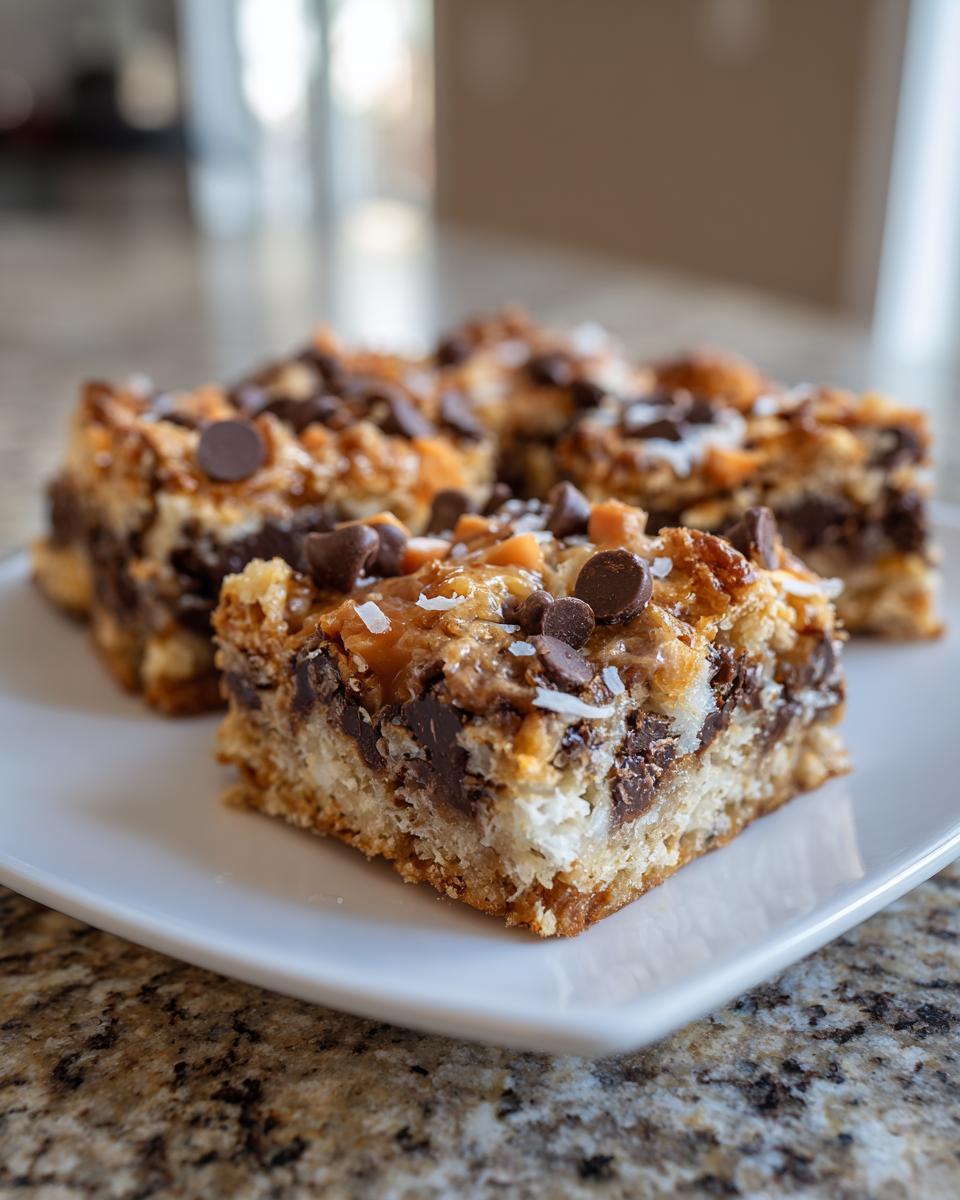
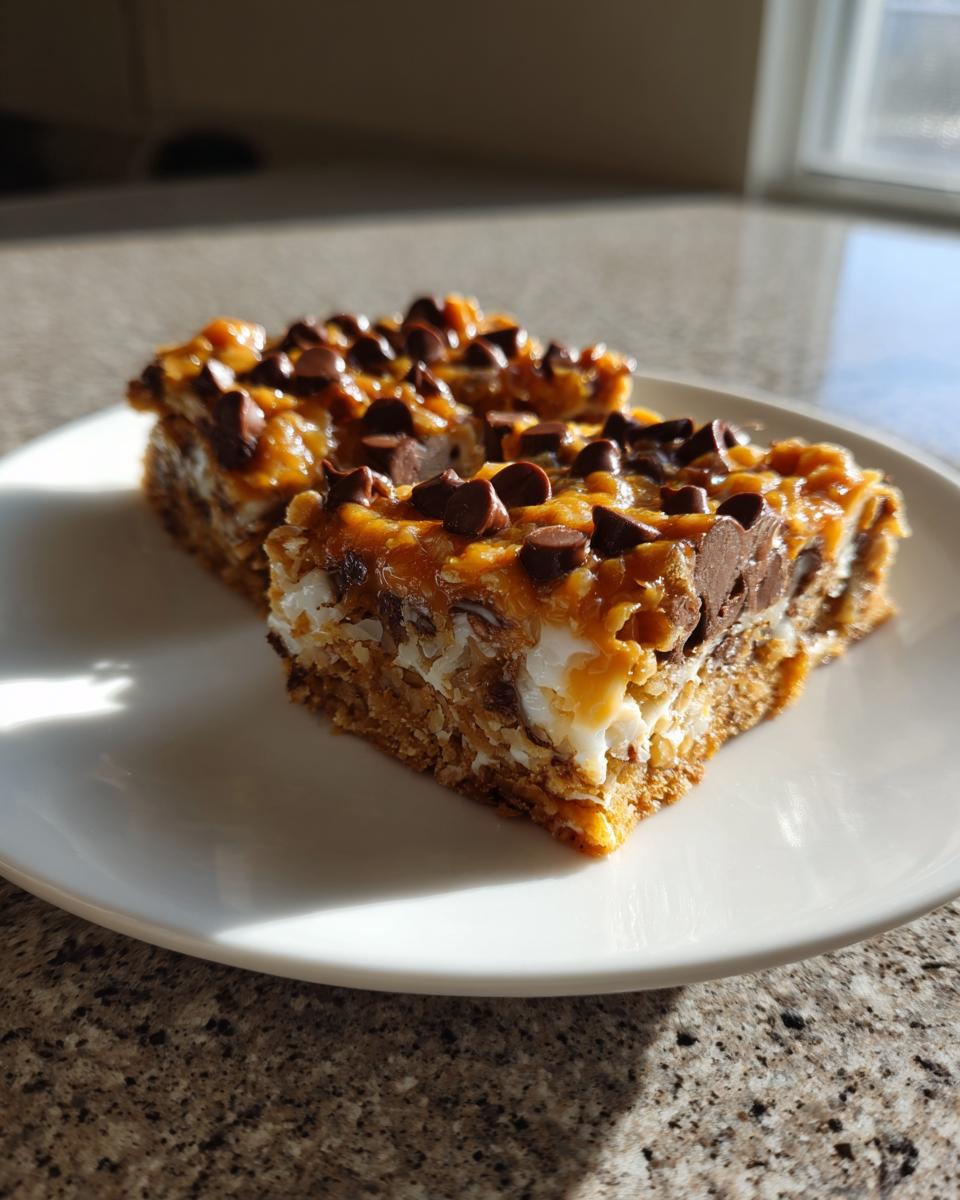
Now we build! Remember, this is about even distribution so every bite hits the right note. Start by sprinkling your chocolate chips right over that crust. If you’re adding the optional butterscotch chips, toss those on top of the chocolate. Next, you’re going to flutter the shredded coconut evenly across the surface. Finally, scatter those chopped pecans or walnuts over everything.
The Sweetened Condensed Milk Dessert Finish and Baking
Time for the magic glue! Take that can of condensed milk, and slowly, I mean slowly, start pouring it in a wide circle over all those toppings. You want to encourage it to drip down and touch every delicious layer underneath. Once it’s covered, into the oven it goes for about 25 to 30 minutes. You’re looking for the edges to get just a little bit golden brown, and the milk topping should look bubbly and set.

Cooling and Cutting Your Magic Cookie Bars
This is the hardest part, I know! But you absolutely must let these cool completely on a wire rack first. If you try to cut them warm, they just melt everywhere. For the neatest squares possible—especially for parties—I actually wrap mine up and pop them in the fridge for an hour after they cool down a bit. That chilling step, which you can check out in my tips section, lets them set up beautifully so you can lift the parchment and slice them cleanly. Don’t skip that chill time! If you ever need a no-bake refresher after this deliciousness, check out my protein balls recipe!
Tips for Success Making Your Magic Cookie Bars
Honestly, once you have the layers assembled, these bars are pretty forgiving, but I have a few little secrets I’ve picked up over the years that take them from good to truly ‘magic.’ These are the nudges that ensure you get that incredible chewiness without any sinking or mess. When you’re making something this beloved, you want to nail it every single time! If you’re ever looking for something different to bake, make sure to check out my recipe for easy, moist zucchini banana bread.
Ingredient Swaps for Coconut Pecan Bars
Don’t feel chained to the exact list! These bars are very adaptable, which is part of why I love them for making last minute. If you prefer a richer flavor, swap out half of your standard semi-sweet chocolate chips for some dark chocolate—it cuts the sweetness just perfectly. Nobody ever complains about that change! Also, if you have walnuts on hand instead of pecans, definitely use those; they have a great crunch. If you’re taking these to a potluck, always remember to label them if nuts are involved, or simply leave them off entirely if you know someone has allergies. That makes a fantastic nut-free batch of coconut pecan bars!
Achieving the Cleanest Cut on Magic Cookie Bars
I mentioned it before, but I have to stress it again: cooling is non-negotiable for clean cuts. If you try slicing into them warm, the condensed milk is too soft, and you end up with very lovely, but very messy, puddles of ingredients instead of neat squares. For the absolute best results, after they cool on the counter for an hour or so, wrap the whole slab up tightly—parchment and foil work great—and pop it into the fridge for at least 60 minutes. That time in the cold transforms the texture, making them firm enough to slice cleanly with a large, sharp knife. It’s worth the extra wait, trust me; clean edges make for prettier serving!
Serving Suggestions for These Potluck Dessert Bars
When it comes time to serve these beauties, presentation really does make a difference, especially for a big function! Since these potluck dessert bars are so rich, I usually stick to smaller squares—you get more bars that way, too. They are amazing just plain, sitting on a simple platter.
But hey, if you want to elevate them slightly, a tiny dollop of whipped cream on the side is lovely. Also, a light dusting of powdered sugar right before setting them out adds a little homemade touch. They pair wonderfully with a strong cup of coffee or a tall glass of cold milk, perfect for any casual gathering!
If you’re heading out the door, remember to pack a small container of napkins, because these are seriously messy in the best way possible. For more easy entertaining ideas, take a peek at my list of great appetizers and party snacks!
Storage and Reheating Instructions for Your Chewy Dessert Bars
These chewy dessert bars are amazing because they keep so well—which is great news when you’re baking for a crowd! Once they are completely cooled and cut (remember that crucial chilling step we talked about?), transfer them into a single layer in an airtight container. I usually layer parchment paper between any layers if I have to stack them, just to make sure nothing sticks.
They stay wonderfully fresh sitting right on the counter at room temperature for about three days. If you’re planning to keep them longer, or if your kitchen is super warm, just pop that container in the fridge! They actually firm up nice and cold, which I love. I sometimes grab one straight from the fridge for a quick snack! If you’re looking for other make-ahead items, you should definitely check out how I prepare my egg muffins.
Frequently Asked Questions About Magic Cookie Bars Recipe
I know sometimes when you read a recipe, you still have lingering questions, especially when it comes to these classic treats that everyone seems to have their own variation of! I’m happy to answer the most common things listeners ask me about making these bars perfectly every time. Don’t hesitate to look through our terms of use if you have other site questions!
What are the other names for magic cookie bars?
Oh, isn’t that the fun part? These bars wear a lot of hats! They are famously known as 7 Layer Bars because, well, there are seven distinct layers if you count the crust and the milk binder—which is technically more than seven toppings, but who’s counting? You might also hear them called Hello Dolly Bars, which is such a fun throwback name! Sometimes people just call them classic layered bars, too. Whatever you call them, they taste amazing!
Can I make magic cookie bars without nuts?
Absolutely, yes! My bars are usually loaded with pecans, but I know not everyone is a nut person, or maybe you’re packing these up for a school event. You can totally skip the pecans or walnuts specified in my recipe. If you do skip them, you’ll end up with delightful chocolate chip coconut bars. What I sometimes do if I skip the nuts is just use a few extra chocolate chips or sprinkle on a handful of mini marshmallows instead. That way, you still get that textural contrast without the nuts!
Can I skip the sweetened condensed milk in this recipe?
That’s a big, bold NO, my friend! I really, truly wish you could, because that would make this recipe much less magical, honestly. That can of sweetened condensed milk isn’t just for sweetness; it’s the actual binder or ‘glue’ that holds your entire structure together. It seeps down, cooks up into that unbelievably gooey, chewy layer, and it’s non-negotiable for achieving that signature texture that makes them “magic.” If you tried to substitute it with evaporated milk or regular milk, you’d end up with a soupy mess, not those perfect chewy dessert bars.
Estimated Nutritional Data for Classic Magic Cookie Bars
I always feel a little funny posting nutritional estimates because, let’s be real, these bars aren’t exactly celery stalks! They are a rich, satisfying treat, meant to be indulged in. But I know some of you like to keep track, and giving you a ballpark idea is just part of being thorough here at DelishCraze.
Remember, these figures are just an estimate for one serving size—one square cut from the 9×13 pan—and they can certainly change based on the specific brands of chocolate chips or nuts you decide to use in your layers. This recipe really shines because it’s all about flavor and comfort, not counting macros!
If you are looking for lighter meal ideas, I’ve put together loads of great options over on my page for healthy breakfast ideas, but for these gorgeous bars, just enjoy them guilt-free!
- Serving Size: 1 bar
- Calories: Approximately 200
- Total Fat: 12g
- Saturated Fat: 6g
- Total Carbohydrates: 22g
- Sugar: 18g
- Protein: 3g
- Cholesterol: 15mg
As always with my recipes, please take this data as a friendly guideline—it’s not from a lab, it’s just calculated based on the core ingredients listed. The real measure is how happy they make you!
Share Your Ultimate Gooey Bars Experience
Now that you’ve whipped up a batch of these irresistible magic cookie bars, I really want to hear what you think! Did they turn out gooey enough? Did you use walnuts or pecans? Please leave a rating right below this post and drop a comment telling me about your experience. Snap a picture of those gorgeous layers and tag me—I absolutely love seeing these classics come to life in your kitchens!
If you need to reach us with other baking questions, feel free to check out the contact page!
PrintUltimate Classic Magic Cookie Bars (7-Layer Bars)
Make these classic Magic Cookie Bars, also known as 7-Layer Bars, for a simple, chewy, and delicious dessert. This recipe uses sweetened condensed milk for perfect gooey results every time.
- Prep Time: 15 min
- Cook Time: 30 min
- Total Time: 45 min
- Yield: 24 bars 1x
- Category: Dessert
- Method: Baking
- Cuisine: American
- Diet: Vegetarian
Ingredients
- 1 1/2 cups graham cracker crumbs
- 1/2 cup unsalted butter, melted
- 1 cup semi-sweet chocolate chips
- 1 cup butterscotch chips (optional, for extra flavor)
- 1 cup shredded sweetened coconut
- 1 cup chopped pecans or walnuts
- 1 can (14 ounces) sweetened condensed milk
Instructions
- Preheat your oven to 350 degrees F. Line a 9×13 inch baking pan with parchment paper, leaving an overhang on the sides for easy removal.
- In a medium bowl, mix the graham cracker crumbs and melted butter until the crumbs are evenly moistened. Press this mixture firmly into the bottom of the prepared pan to form the crust.
- Sprinkle the chocolate chips evenly over the crust.
- If using, sprinkle the butterscotch chips over the chocolate chips.
- Distribute the shredded coconut evenly over the chips.
- Scatter the chopped nuts over the coconut layer.
- Slowly pour the entire can of sweetened condensed milk over all the layers, moving the can in a circular motion to cover the top evenly. This milk binds the layers together.
- Bake for 25 to 30 minutes, or until the edges are lightly golden brown and the condensed milk is bubbly.
- Let the bars cool completely in the pan on a wire rack. Cooling is important for setting the layers.
- Once cool, use the parchment paper overhang to lift the bars out of the pan. Cut into squares.
Notes
- For an extra rich flavor, substitute half of the chocolate chips with dark chocolate chips.
- If you do not have pecans, use walnuts or skip the nuts entirely for a nut-free version.
- Allow the bars to chill in the refrigerator for at least one hour after cooling to room temperature; this makes cleaner cuts.
- These bars are excellent for potlucks and travel well.
Nutrition
- Serving Size: 1 bar
- Calories: 200
- Sugar: 18
- Sodium: 80
- Fat: 12
- Saturated Fat: 6
- Unsaturated Fat: 6
- Trans Fat: 0
- Carbohydrates: 22
- Fiber: 1
- Protein: 3
- Cholesterol: 15