
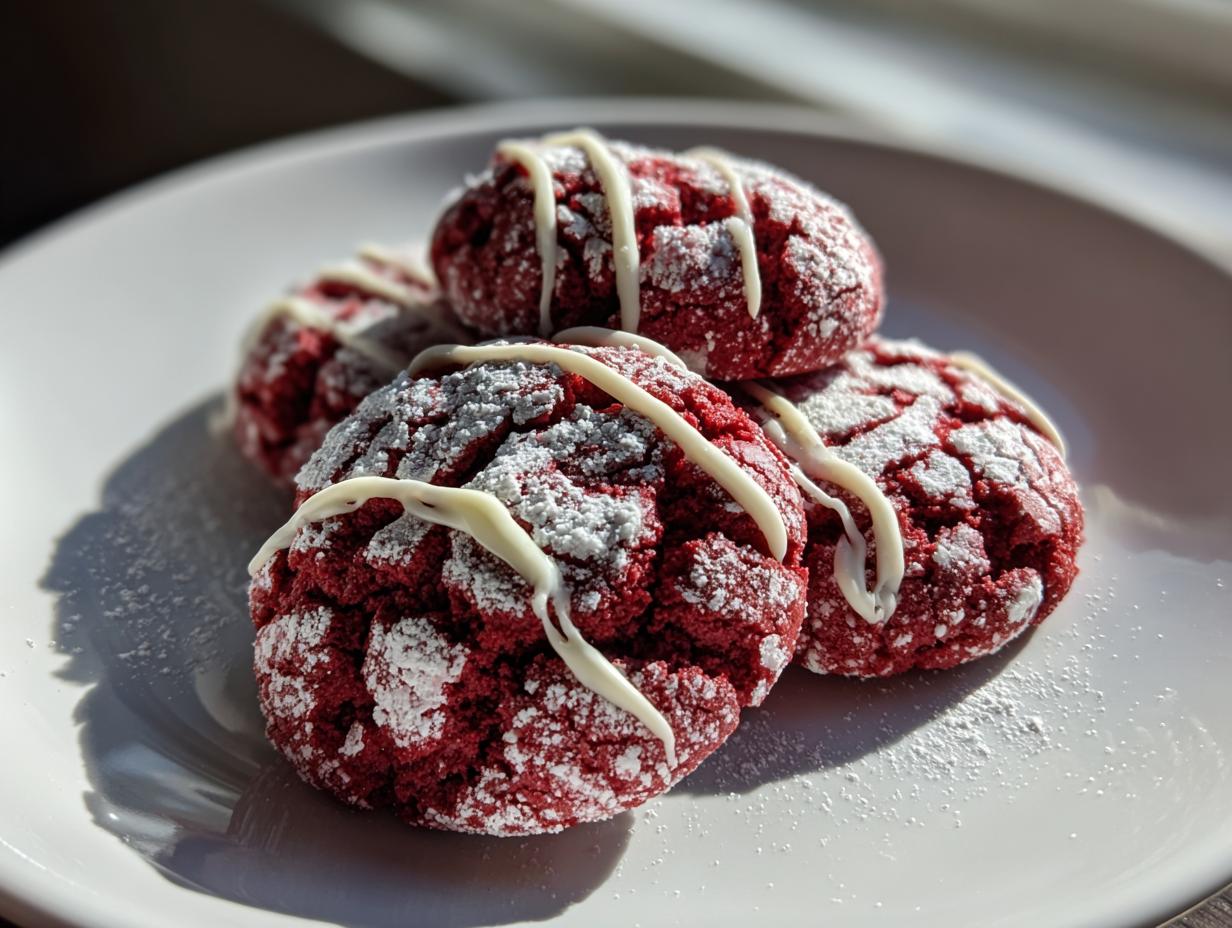
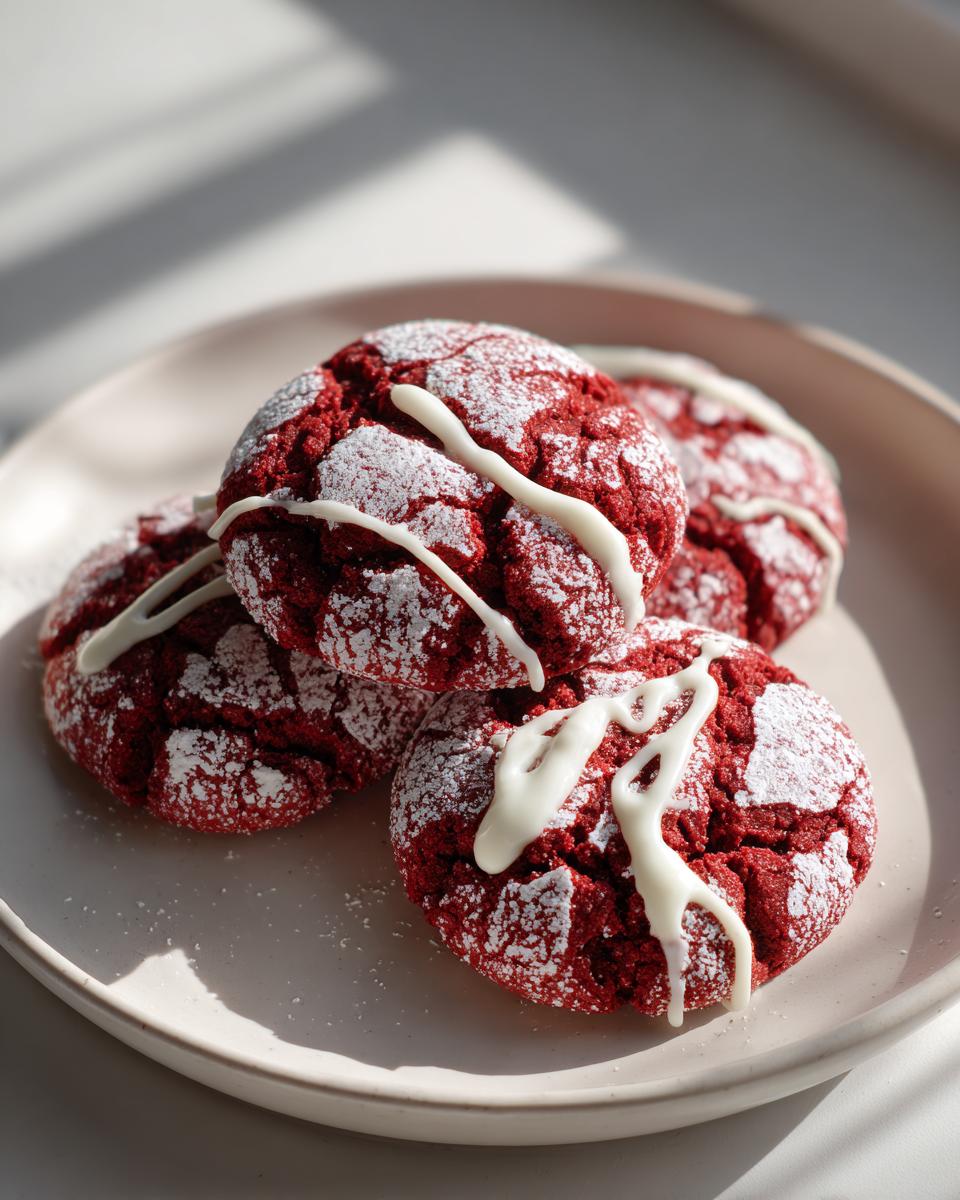
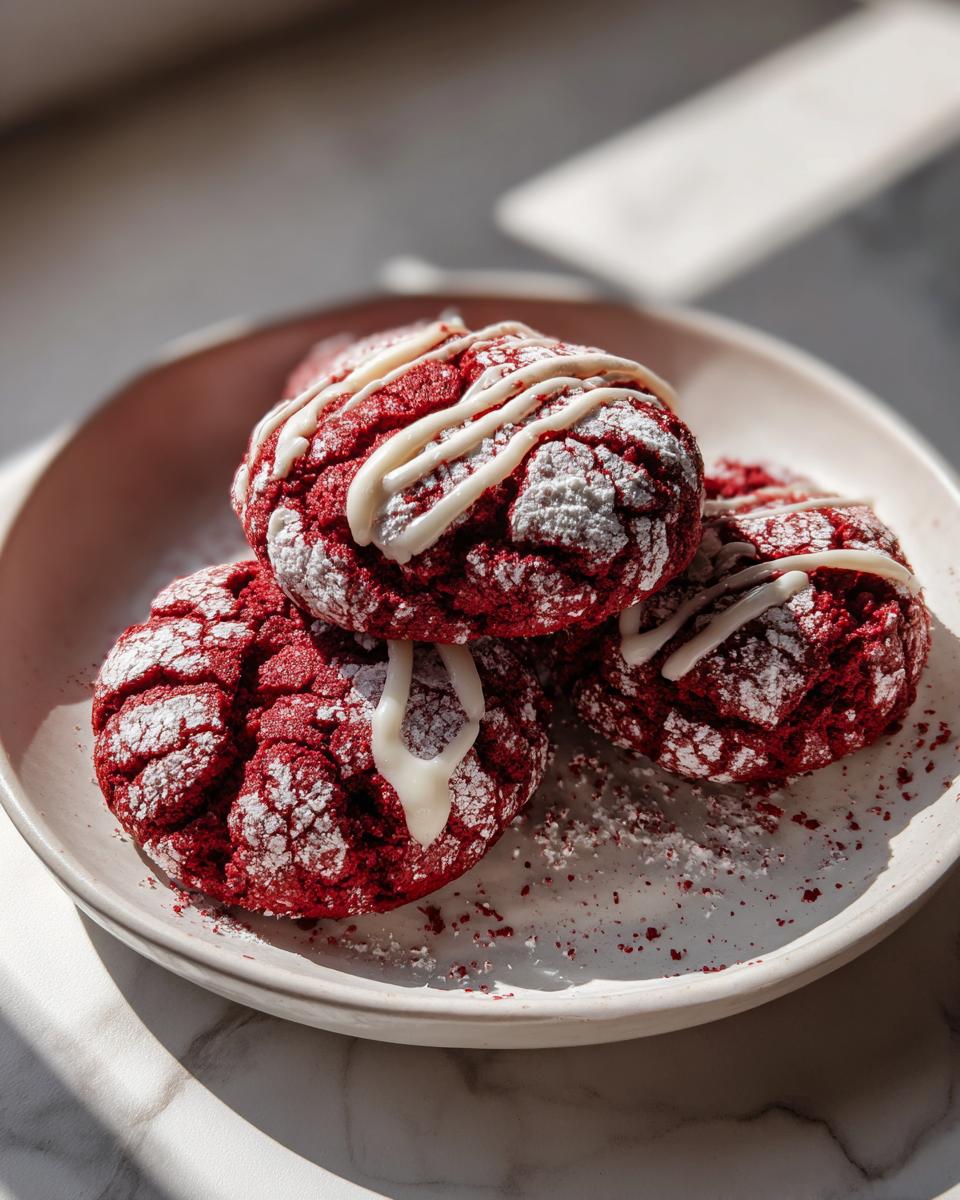
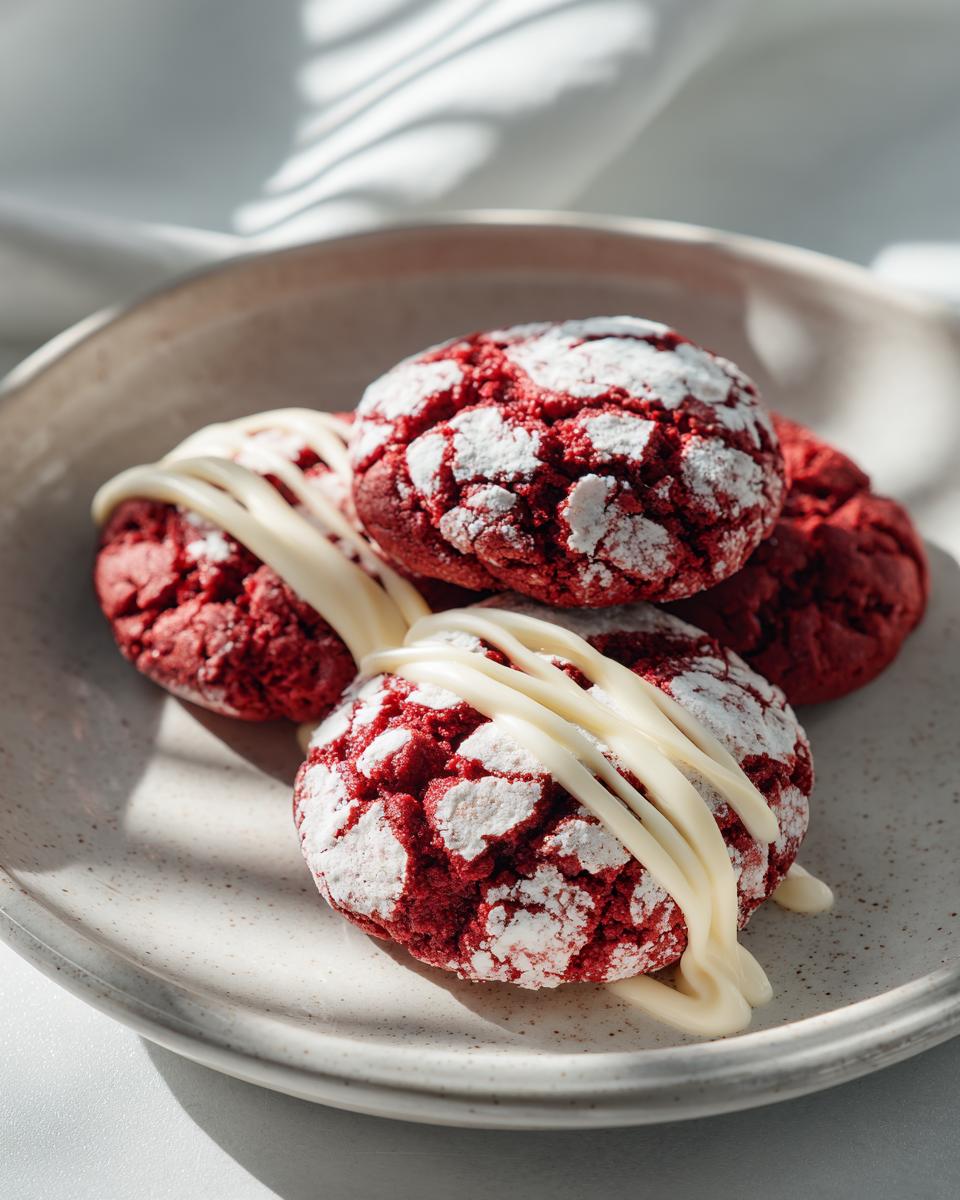
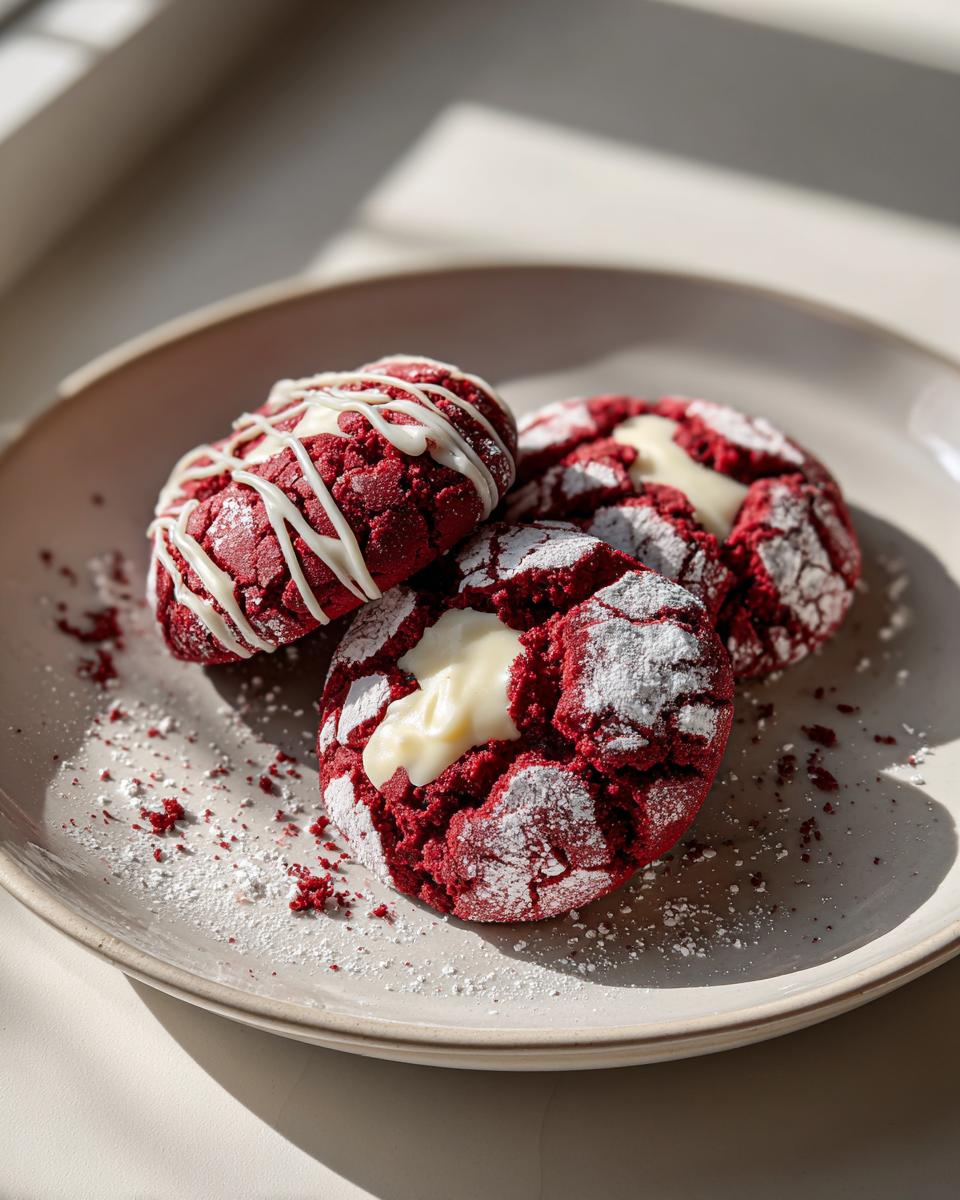
There is just something magical about the combination of deep, slightly tangy cocoa flavor and that vibrant, striking color, isn’t there? It’s why I worked so hard to create the ultimate soft & chewy red velvet cookies that taste just like a slice of perfect layer cake, but in handheld form. These are what I call a joyful shortcut back to the kitchen! When I stepped away from my busy design career, moments like whipping up these festive red velvet cookies became how I reclaimed that simple, nourishing joy. This recipe delivers exactly what you crave: a perfectly puffed cookie with that lovely crinkle finish and, of course, a rich cream cheese drizzle that ties it all together. If you love moist, deeply flavorful treats, you’ve found your new favorite recipe. For the classic cake inspiration, you can check out my tips for the ultimate moist Southern red velvet cake, too!
- Why You Will Love These Soft Red Velvet Cookies
- Ingredients for Ultimate Red Velvet Crinkle Cookies
- Tips for Perfect Red Velvet Cookies Texture
- How to Make the Best Red Velvet Cookies Recipe
- Variations for Your Red Velvet Cookies
- Storage and Make-Ahead for Red Velvet Cookies
- Frequently Asked Questions About Red Velvet Cookies
- Estimated Nutritional Data for Red Velvet Cookies
- Share Your Homemade Red Velvet Treats
Why You Will Love These Soft Red Velvet Cookies
I know you’re looking for that perfect balance, and that’s exactly what this recipe delivers. It’s so satisfying knowing you can get that bakery-quality result without the effort! Here’s why I keep coming back to this specific batch:
- They nail that perfect texture! We’re talking genuinely soft red velvet cookies that stay delightfully chewy even the next day.
- That signature, rich cocoa flavor hits just right—it reminds you of a decadent cake, but it’s all contained in one easy cookie.
- They create that stunning crinkle effect when rolled in sugar, making them incredibly visually appealing for holidays or celebrations.
- We guarantee reliable, tested results. These aren’t fussy; they are consistently the best red velvet cookie recipe I’ve ever developed!
Seriously, you need these chewy red velvet cookies in your life.
Ingredients for Ultimate Red Velvet Crinkle Cookies
Now, we get down to the good stuff—the building blocks for achieving that deep, rich flavor and incredible softness. You’ll notice I stressed using red *gel* food coloring in the recipe card. Don’t use the liquid drops if you can help it! Liquid coloring will thin out our beautiful little dough balls and make them spread too much. The gel keeps that color vibrant and the texture perfect for our red velvet cookies.
For the best structure and lift, make sure your butter is actually softened—not melted, just soft enough for your finger to leave a gentle dent. Trust me on this one; it sets up the whole cookie!
Here is what you need:
- 1 cup (2 sticks) unsalted butter, softened
- 1 1/2 cups granulated sugar
- 2 large eggs
- 1 teaspoon vanilla extract
- 1 teaspoon white vinegar
- 1 teaspoon baking soda
- 1/2 teaspoon salt
- 2 tablespoons unsweetened cocoa powder
- 2 1/4 cups all-purpose flour
- 1 to 2 teaspoons red gel food coloring (this is crucial for that vibrant festive look!)
- 1/2 cup powdered sugar (for rolling the dough balls)
- 1/2 cup white chocolate chips (I love adding these for sweetness, but you can leave them out if you prefer a plain cocoa cookie)
If you’re looking for other fantastic flavor combinations, you have to try my maple brown sugar cookies sometime – they are just as comforting!
For the Cream Cheese Drizzle
This is the final flourish, and it needs to be smooth as silk so it looks pretty when you zig-zag it over the tops. The key here is ensuring your two main components—the cream cheese and the butter—are softened to the same consistency so they incorporate easily without lumps.
- 4 ounces cream cheese, softened
- 1 cup powdered sugar
- 1 teaspoon vanilla extract
- 1-2 tablespoons milk (only add enough to get it drippy!)
Tips for Perfect Red Velvet Cookies Texture
Listen, texture is everything when it comes to these treats. We are aiming for soft red velvet cookies that melt in your mouth, not hockey pucks! The absolute biggest secret for this is chilling the dough. You must, must, *must* chill it for that full hour.
Why? Chilling solidifies the butter, so when those little balls hit the 350-degree oven, they don’t immediately melt and spread all over your pan. This keeps them tall and chewy. Also, don’t skip the vinegar! That little bit of acid reacts with the baking soda to give us lift and that classic red velvet tang when coupled with the right amount of cocoa powder.
If you want that truly vibrant, professional-looking red, always opt for the gel coloring we talked about, as it concentrates that wonderful hue without overloading the dough with liquid. Follow these steps, and your classic red velvet cookies will be perfectly soft every single time.
How to Make the Best Red Velvet Cookies Recipe
Okay, this is where we turn simple ingredients into those incredible, vibrant, bakery-style treats! Don’t worry if it looks like a lot of steps; I promise it flows really smoothly once you get going. We need patience in the first two stages—mixing and chilling—to ensure we get those amazing, slightly cracked tops on our red velvet cookies.
Mixing the Dough and Coloring
First up, grab that big mixing bowl! You want to beat that softened butter with the granulated sugar until it gets genuinely light and fluffy. It takes a minute, so give it some elbow grease. Then, toss in the eggs one by one, making sure each is fully incorporated before adding the next. Don’t forget the vanilla and that tiny splash of white vinegar!
In a separate bowl—this keeps everything neat—whisk your flour, baking soda, salt, and cocoa powder together really well. Now, add the dry stuff slowly to your wet mixture. I always keep the mixer on low here! Mix just until you don’t see any white flour streaks anymore. Stop right there; overmixing is the enemy of a soft cookie!
This is the fun part: add your red gel coloring. Keep dropping it in until you hit that stunning, deep red you’re hoping for. If you’re feeling dangerous (and delicious), mix in those optional white chocolate chips right at the very end.
Chilling and Rolling for Red Velvet Crinkle Cookies
Here’s the non-negotiable stop: we are chilling this dough! Cover that bowl and stick it in the fridge for at least an hour. If you skip this, you’ll end up with flat, greasy disks, not puffy, gorgeous cookies. Trust me; patience pays off here.
When the time is up, preheat your oven to 350°F (175°C) and line those baking sheets with parchment paper—always parchment! Put your powdered sugar for rolling into a shallow plate. Scoop out rounded tablespoons of the chilled dough. Roll each ball firmly between your palms, then roll it thoroughly in the powdered sugar until it’s completely coated. That thick sugar coat creates the beautiful crinkle effect when it bakes!
Baking and Cooling
Get those sugar-coated balls onto the prepared sheets, remembering to leave about two inches between them so they have room to breathe. Bake these gems for 10 to 12 minutes. Seriously, watch them closely! We want the edges to look set, but the *centers* should still look a little tender. As soon as they hit that 12-minute mark, pull them out! They will firm up as they cool on the baking sheet for about five minutes before you carefully move them to a wire rack. Don’t try to move them too soon, or they might fall apart.
If you want ideas for other wonderfully soft and fluffy baked goods made the easy way, check out my post on soft, fluffy dinner rolls—it’s all about technique!
Preparing the Cream Cheese Drizzle
While those beauties are cooling completely—and I mean *completely* so the drizzle doesn’t just melt away—we whip up our topping. In a clean bowl, beat that softened cream cheese until it’s super smooth, then beat in the powdered sugar and vanilla extract. You might think it’s too thick, and that’s normal!
Now, add your milk, just one tablespoon at a time. You are looking for a consistency that is thick but easily falls off a spoon in a steady stream. If you dump the milk in, you’ll have icing soup! Once you hit that perfect drizzly consistency, load it into a small piping bag or even just a zip-top bag with one tiny corner snipped off. Save this step until the cookies are totally cool, then drizzle away!
Variations for Your Red Velvet Cookies
While this recipe is my gold standard for red velvet cookies, I always love hearing how you tweak things! If you are short on time, you absolutely can turn to a boxed cake mix, though the texture won’t be *this* soft and chewy—it’s a trade-off for convenience. For those who love the massive, slightly underbaked, thick treats, aim for that Crumbl copycat red velvet cookies vibe by slightly reducing your chilling time and pulling them out one minute earlier than my suggested time.
If you want that huge, bakery-style look, you might also check out techniques like pan-banging; the gorgeous results from the bakers over at The Vanilla Bean Blog are inspiring!
Storage and Make-Ahead for Red Velvet Cookies
Part of reclaiming joy in the kitchen for me is knowing I can bake ahead sometimes! You’ll be happy to hear that these red velvet cookies hold up beautifully, which is great for holiday cookie trays or just having a treat ready for the week.
Once your cookies are completely cool and the cream cheese drizzle has set up nicely—this means letting them sit for about half an hour after drizzling—store them in a single layer or separated with wax paper inside an airtight container at room temperature. They stay perfectly soft and chewy just like this for up to four days. Don’t even think about putting them in the fridge, though! The cold air will suck the moisture right out of them and make them hard. We lose that desirable chewy quality!
If you want to get truly ahead of the game, the cookie dough freezes like a dream! Just roll your dough balls, give them a good coating in the powdered sugar (or even just roll in granulated sugar if you want the crinkle effect later), and place them on a parchment-lined baking sheet. Freeze them solid, then transfer those frozen balls to a freezer bag. When you need a fresh batch, just pull out what you need and bake from frozen! You might need to add two or three minutes to your baking time. It’s so handy, just like making my simple make-ahead egg muffins for super quick breakfasts!
Frequently Asked Questions About Red Velvet Cookies
I get so many questions about these beauties once people start baking them for the first time! It’s totally normal; everyone wants to make sure their first batch of red velvet cookies turns out just right. Here are the most common things I hear about achieving that rich flavor and perfect texture.
Why do I absolutely have to chill the dough? Can I skip that step?
Oh, please don’t skip the chilling! I know it’s tempting when you’re staring at that beautiful red dough, especially if you are aiming for Valentine’s Day cookies and need them fast. But chilling is mandatory if you want those thick, bakery-style cookies. Chilling solidifies the fat (the butter), which controls how much the dough spreads in the oven. If you bake it warm, you get thin cookies, and we want puffy and chewy red velvet cookies!
What is the absolute best food coloring to use for these?
For truly vibrant, deep color—think rich cranberry or scarlet—you must use red *gel* food coloring. Liquid drops are too watery, and you’d have to add way too much to get the color right, which messes with the dough’s consistency. The gel concentrates the pigments perfectly. When you use the right amount of gel, you get that gorgeous, signature look without sacrificing the texture of your cream cheese red velvet cookies.
Are these supposed to be cakey or chewy? I really prefer chewy!
That’s the million-dollar question! We are absolutely aiming for soft red velvet cookies that are chewy in the center. They should feel dense but soft, not crumbly like a cake. The secret to nailing that chewiness is pulling them out of the oven when they look *just* slightly underdone in the middle. They will set up completely once they hit that cooling rack. If you bake them until a toothpick comes out totally clean, you’ve gone too far and ended up with a cakey cookie.
Can I use cake mix instead of flour in this red velvet cookie recipe?
You certainly can make easy red velvet cookies using cake mix, and many people love that shortcut! However, this specific recipe uses flour, butter, and sugar to achieve that specific, rich density. Cake mix versions are often lighter and more cake-like. If you are after that deep, ultra-rich flavor that stands up to a good drizzle, sticking to the flour base here is the way to go. If you ever need a quick comparison for baking fluffy things, check out my guide to the best fluffy pancakes—it’s all about the dry-to-wet ratio!
Estimated Nutritional Data for Red Velvet Cookies
I always say, when you’re making something this special—especially a perfect batch of red velvet cookies—it’s good to have a general idea of what you’re working with. Please remember these numbers are just my best estimates based on the recipe ingredients listed above, and they can absolutely change based on your exact brand of flour or how much drizzle you pile on!
Here is a general overview for one cookie:
- Calories: 280
- Fat: 15g
- Carbohydrates: 35g
- Protein: 3g
So, while they are satisfyingly rich, they’re a perfect little treat for your next holiday gathering or just a quiet night in!
Share Your Homemade Red Velvet Treats
I truly hope you loved diving into this recipe as much as I loved developing it for you! The smell of these rich cocoa cookies baking is simply unbeatable, making them perfect for those big celebrations or even just an unexpected Tuesday treat.
I would absolutely adore hearing if you made these! Did you get that gorgeous crinkle on top? Are you planning to share these beautiful red velvet cookies as part of your spread for Christmas cookie recipes or perhaps as part of a delightful platter for someone special this year?
Please take a moment to leave a rating and a comment below. Knowing how my recipes work in *your* kitchen gives me such a boost! It helps others feel confident trying them out too. If you’ve tried them, let me know how you served them—maybe alongside hot chocolate or as part of a collection of festive red velvet desserts. You can find tons of other simple, wonderful things to bake over in my collection of easy sweet snacks!
PrintUltimate Soft & Chewy Red Velvet Crinkle Cookies with Cream Cheese Drizzle

Make soft, chewy red velvet cookies that capture the classic cake flavor. These vibrant cookies feature a rich cocoa base and are finished with a simple cream cheese drizzle for a perfect homemade treat.
- Prep Time: 25 min
- Cook Time: 12 min
- Total Time: 1 hour 37 min
- Yield: 20 cookies 1x
- Category: Dessert
- Method: Baking
- Cuisine: American
- Diet: Vegetarian
Ingredients
- 1 cup (2 sticks) unsalted butter, softened
- 1 1/2 cups granulated sugar
- 2 large eggs
- 1 teaspoon vanilla extract
- 1 teaspoon white vinegar
- 1 teaspoon baking soda
- 1/2 teaspoon salt
- 2 tablespoons unsweetened cocoa powder
- 2 1/4 cups all-purpose flour
- 1 to 2 teaspoons red gel food coloring (use gel for vibrant color)
- 1/2 cup powdered sugar (for rolling)
- 1/2 cup white chocolate chips (optional, for texture)
- For the Drizzle: 4 ounces cream cheese, softened
- 1 cup powdered sugar
- 1 teaspoon vanilla extract
- 1–2 tablespoons milk
Instructions
- In a large bowl, cream together the softened butter and 1 1/2 cups of granulated sugar until light and fluffy.
- Beat in the eggs one at a time, mixing well after each addition. Stir in the vanilla extract and white vinegar.
- In a separate bowl, whisk together the flour, baking soda, salt, and cocoa powder.
- Gradually add the dry ingredients to the wet ingredients, mixing on low speed until just combined.
- Add the red gel food coloring until you achieve a deep, vibrant red color. Mix in white chocolate chips now if you are using them.
- Cover the dough and chill for at least 1 hour. Chilling helps prevent spreading and improves texture.
- Preheat your oven to 350°F (175°C). Line baking sheets with parchment paper.
- Place the 1/2 cup of powdered sugar for rolling into a shallow dish. Scoop rounded tablespoons of dough and roll them into balls. Roll each ball thoroughly in the powdered sugar until fully coated.
- Place the coated dough balls about 2 inches apart on the prepared baking sheets.
- Bake for 10 to 12 minutes. The edges should be set, but the centers should still look slightly soft for a chewy texture. Do not overbake.
- Let the cookies cool on the baking sheet for 5 minutes before transferring them to a wire rack to cool completely.
- Prepare the drizzle: Beat the softened cream cheese, 1 cup of powdered sugar, and 1 teaspoon of vanilla extract until smooth. Add milk one tablespoon at a time until you reach a thick, drizzly consistency.
- Once cookies are completely cool, drizzle the cream cheese mixture over the tops. Allow the drizzle to set before serving.
Notes
- Use red gel food coloring instead of liquid drops for the most vibrant red velvet color without thinning the dough.
- For bakery-style cookies, slightly underbake them; they will firm up as they cool, keeping the center soft and chewy.
- If you want a crinkle effect, you can roll the chilled dough balls in granulated sugar first, then in powdered sugar before baking.
Nutrition
- Serving Size: 1 cookie
- Calories: 280
- Sugar: 30
- Sodium: 180
- Fat: 15
- Saturated Fat: 9
- Unsaturated Fat: 6
- Trans Fat: 0
- Carbohydrates: 35
- Fiber: 1
- Protein: 3
- Cholesterol: 55