
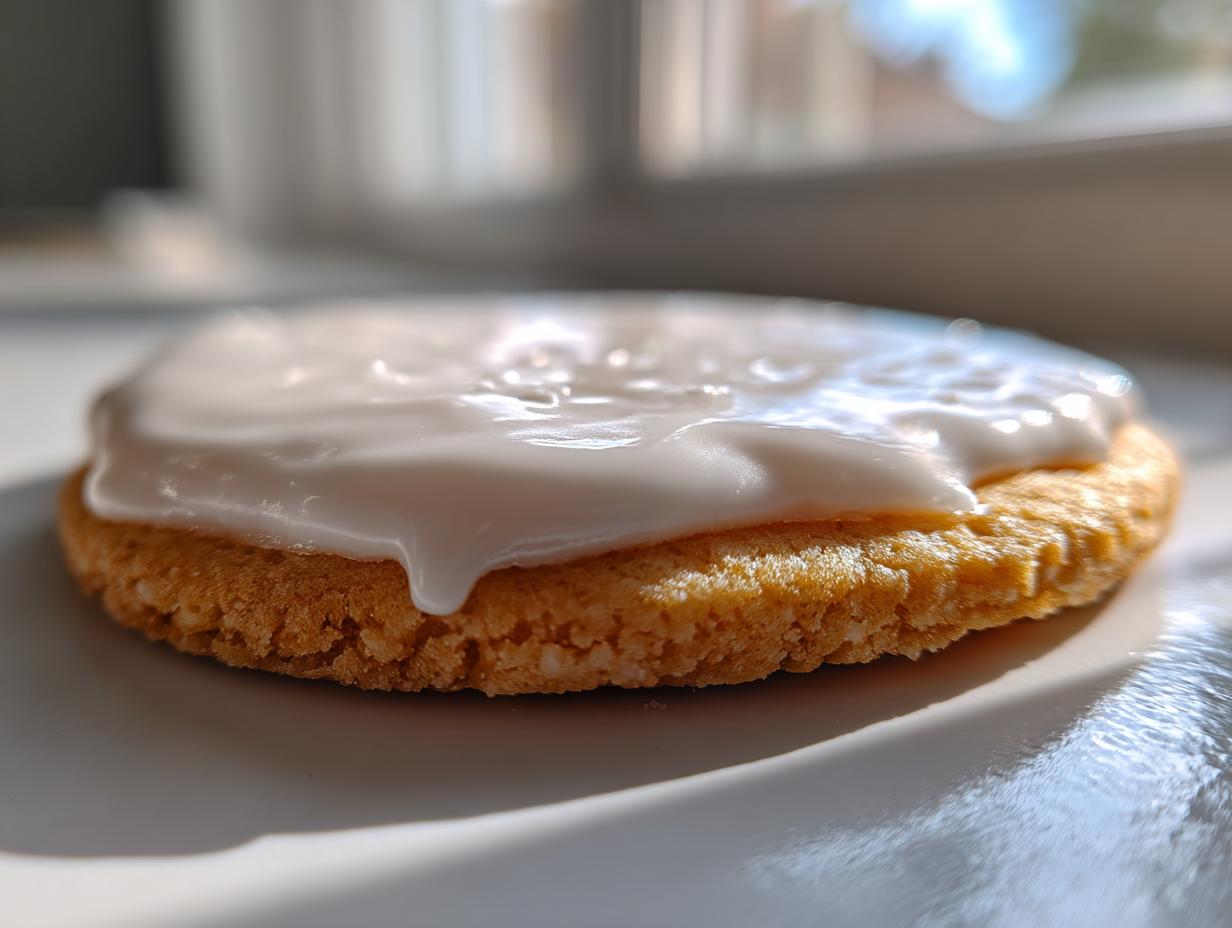
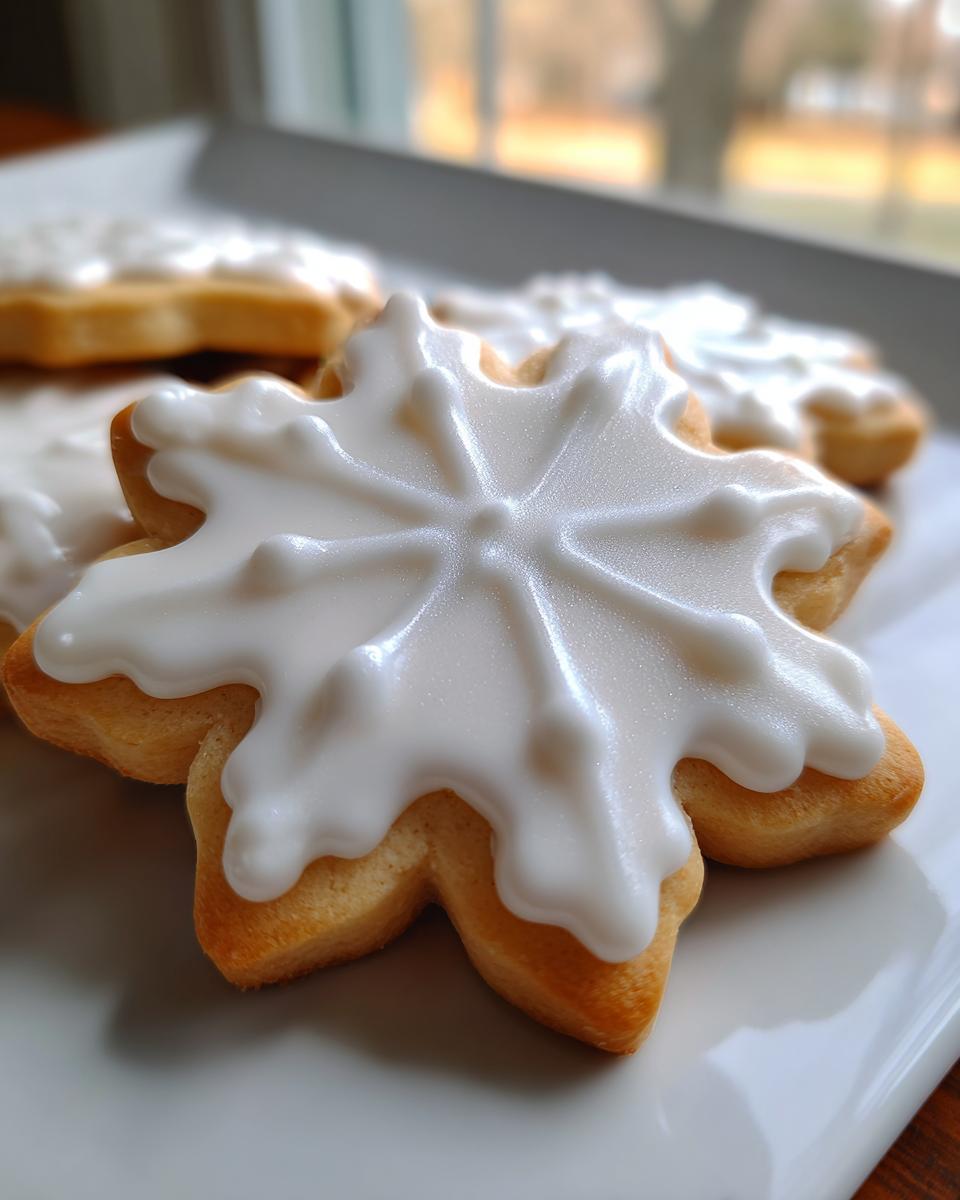
Oh, the tragedy of a beautifully shaped sugar cookie ruined by icing that just won’t behave! I swear, dealing with sticky, soft frosting that smears if you even look at it wrong used to send me straight back to my graphic design days wishing for a nice, predictable canvas. That’s why, when I started DelishCraze, making sure my go-to sugar cookie icing recipe was **foolproof** was non-negotiable. This isn’t just any glaze; it’s a hard-setting, glossy solution built on my commitment to simple, reliable home baking. Trust me when I say this formula means your decorated cookies will dry perfectly, letting you stack them high for gifting or display without any messy mishaps. It’s the secret weapon for detailed decorating!
- Why This Foolproof Sugar Cookie Icing Recipe Works So Well
- Gathering Ingredients for Your Sugar Cookie Icing Recipe
- How to Make the Perfect Hard Setting Icing Recipe
- Decorating Tips for Your Sugar Cookie Icing Recipe
- Drying and Setting Your Iced Cookies
- Storage and Reheating Instructions for Leftover Sugar Cookie Icing Recipe
- Common Troubleshooting for This Royal Icing Recipe
- Frequently Asked Questions About Making Sugar Cookie Icing
- What to Serve With Your Perfectly Iced Cookies
Why This Foolproof Sugar Cookie Icing Recipe Works So Well
So many basic recipes out there leave you with that gummy, tacky layer that refuses to set up firm, especially if you look at them funny. That’s why I preach about this method. This isn’t just a simple powdered sugar glaze; it’s engineered to solve our biggest decorating headaches. The real game-changer here is the meringue powder. It completely elevates this from a basic mixture to a true cookie icing that hardens beautifully.
When I was first learning, I wasted so much time waiting for icing that never dried! This formula, which often gets swapped out for less reliable glazes (though, if you need a great cream cheese base sometime, check out my pipeable cream cheese alternative!), relies on meringue powder to give you that professional, crisp shell.
Achieving That Hard, Stackable Finish
Meringue powder is essentially dried egg white, and when activated by water and sugar, it sets like cement—the good kind! This means once your cookie is decorated, you can safely stack it in tins for gifting without worrying about them sticking together or getting smudged in transit. It’s the key to that satisfying, non-sticky exterior.
The Secret to a Smooth Cookie Frosting Texture
Getting that stunning, glossy cookie icing look starts with slow mixing. You have to beat it long enough—that 3 to 5 minutes on high speed—to incorporate air, which creates the bright white color and velvety base. That whipping action is essential for any beginner cookie decorating icing to look professional and smooth!
Gathering Ingredients for Your Sugar Cookie Icing Recipe
Okay, let’s talk supplies! The beauty of this sugar cookie icing recipe is how few ingredients you actually need, but we have to treat them right. Remember, this whole batch is coming together in about 15 minutes, so have everything measured out and ready to go!
- 4 cups powdered sugar, and yes, you absolutely must sift it!
- 3 tablespoons meringue powder—this is our rock star ingredient.
- 1/2 teaspoon pure vanilla extract (use the real stuff, please!).
- 6 to 8 tablespoons warm water (we use this sparingly).
Ingredient Notes and Substitutions for This Sugar Cookie Icing Recipe
If you’re hunting for a no corn syrup sugar cookie icing, you’re in the right place! This recipe relies solely on the meringue powder to give you that perfect, hard-setting finish. That’s what separates it from a simple, sticky glaze. Now, meringue powder is highly recommended because it ensures that beautiful drying quality, but if you absolutely cannot find it, you can try using pasteurized egg whites, though you’ll need a bit more water and the set time might change. Honestly though, stick with the powder for the best reliability in this hard setting icing recipe.
How to Make the Perfect Hard Setting Icing Recipe
This is where the magic happens! Even though this is a simplified royal icing recipe, the steps matter immensely to get that smooth, professional look. Get your stand mixer or hand mixer ready, because we’re moving fast! If you want to see my dedicated master recipe for royal icing in general, you can check that out right here, but this specific version is tailored perfectly for cookies.
First, make absolutely sure your dry ingredients—the sifted sugar and that all-important meringue powder—are totally combined in your bowl. Then, toss in the vanilla extract and just 6 tablespoons of warm water to start. Don’t add all the water at once; you’ll regret it later! Beat this on low speed until it just comes together and looks shaggy. Remember to scrape down the sides so no dry pockets escape testing!
Now crank up that speed to medium-high. You need to beat this for a solid 3 to 5 minutes. Time is crucial here! You are watching for it to turn bright white and thick. This whipping process builds the structure we need for this cut out cookie icing recipe.
Mixing for Stiff Consistency: Outlining Your Cut Out Cookie Icing Recipe
When you stop the mixer, the icing should stand straight up when you pull the whisk away. We call these stiff peaks. If you hold the whisk up, the icing forms a sharp little spike that doesn’t flop over at all. This is the stiffness you need to trace the edges of your cookies perfectly. If the peaks droop immediately, you need another minute of whipping. Don’t even *think* about outlining until it holds that shape!
Adjusting to Flooding Consistency for Smooth Cookie Frosting
Outlining is done with stiff icing, but filling in those spaces requires something thinner—we call that flooding consistency. If you want that smooth cookie frosting look, you need to thin the leftover icing gently. Add the remaining water, maybe a teaspoon at a time, mixing slowly after each addition. You’re aiming for a consistency where if you lift a spoonful and drizzle it back into the bowl, the stream disappears back into the surface in about 10 to 15 seconds. That perfect flow lets the icing settle evenly inside your dam.
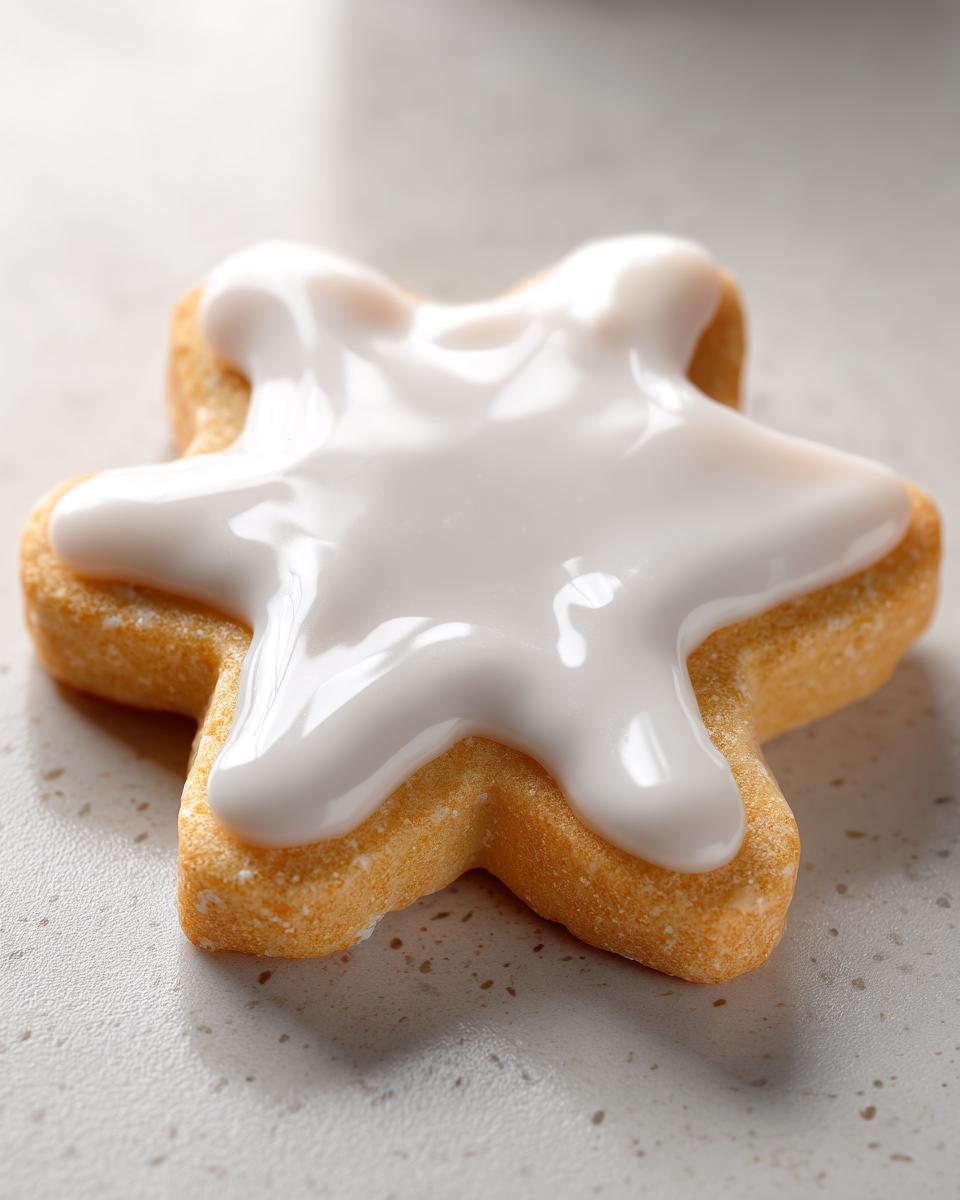
Decorating Tips for Your Sugar Cookie Icing Recipe
This is where the hard work of baking turns into pure artistry! Once you have your beautiful, smooth frosting separated into bowls for coloring, you have to be mindful of the environment. This royal icing recipe dries super fast once exposed to air, which means if you walk away to answer the phone, you might come back to a stiff mess. My absolute must-do rule is to always keep the bowls of icing I’m not actively using covered tightly with plastic wrap or a damp paper towel. Seriously, don’t skip this!
I remember one particularly hectic holiday season trying to finish fifty cookies. I got distracted by wrapping presents, and when I returned, my outline icing had crusted right over the tip of my piping bag. Total nightmare. Since then, I always keep my tools damp and my working bowls covered.
For beginner cookie decorating icing, start simple! Outline the cookie edge first using your stiff consistency mixture, let that dry for twenty minutes—this creates the dam—and *then* flood the center with the slightly thinner mixture. If you get brave with colors, use gel food coloring, never liquid, because liquid will ruin the necessary consistency. For even prettier inspiration, you can look at how I handle color and texture with my maple cookie frosting!
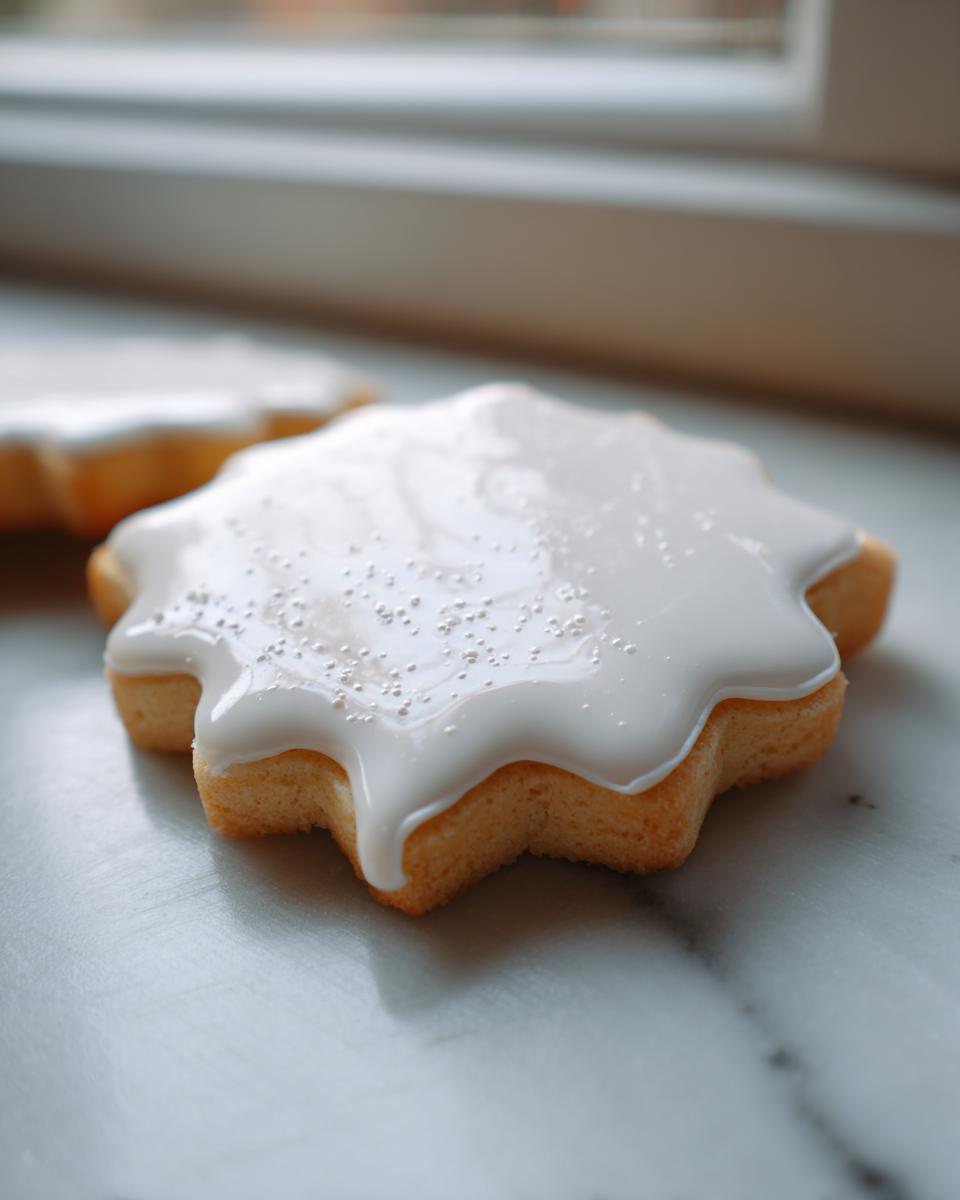
Drying and Setting Your Iced Cookies
Alright, the decorating part is finished, and wow, your cookies look incredible! But here’s the make-or-break stage: the drying time. You absolutely cannot rush this part if you want that hard, glossy finish we worked so hard for. This isn’t a quick-set frosting; it’s designed to dry completely solid, which usually means setting them aside for anywhere from four to eight hours, or honestly, just leaving them overnight is easiest.
When the icing is dry, it should feel hard to the touch and have that beautiful, slight shine. If it’s still soft or tacky when you touch it, it just hasn’t finished setting. If you’ve got a deadline, like a big party looming, I have a trick that always helps speed things up. Set the cookies up on a rack in front of a small fan running on a low setting. The gentle air circulation drastically speeds up the evaporation process without blowing the icing around.
I used the fan trick just last week when I realized I’d iced too many cookies too late! It brought the drying time down by nearly half, ensuring that every cookie was perfectly crisp and ready to stack. If you want to see an example of another recipe that sets firm, take a look at this tutorial on making icing that hardens perfectly. Seeing the results helps build confidence in this setting time!
Storage and Reheating Instructions for Leftover Sugar Cookie Icing Recipe
It’s rare, but sometimes you have extra icing! Don’t throw it out. This specific sugar cookie icing recipe keeps really well, provided you treat it right. Store any remaining frosting in a completely airtight container right there on your counter, at room temperature. It holds up beautifully for about three days—no need to chill it!
If you come back to it and it seems a little stiffer than when you first mixed it, don’t panic. That’s normal! Just add water, one tiny drop at a time, mixing by hand until it reaches that perfect, pliable consistency again. It’s almost like magic; it comes right back to life. If you’re looking for quick frosting fixes in general, check out my easy chocolate frosting recipe for quick alternatives!
Common Troubleshooting for This Royal Icing Recipe
Even with the most solid royal icing recipe, sometimes things go a little sideways—that’s just baking, right? But don’t worry; most issues are super easy to fix, and it usually comes down to water content. If your icing seems way too runny, like watercolor paint, just whisk in a tablespoon of extra sifted powdered sugar at a time until it gets thicker.
Now, if your frosting feels grainy, nine times out of ten, you haven’t mixed it long enough or your powdered sugar wasn’t sifted well enough at the start. Give it another minute or two of that high-speed beating. If you notice your icing cracking as it dries, it usually means you used too little water initially, so the surface tension was too tight!
For cracked icing, grab a clean bowl and thin the remaining batch slightly with just a teaspoon of water, then use that to smooth over the problem spots once the first layer is semi-firm. See? This recipe is so reliable, we can even fix its tiny mistakes! Make sure to check out my guide for making the perfect apple crisp if you need a non-icing baking project next!
Frequently Asked Questions About Making Sugar Cookie Icing
Can I color this sugar cookie icing recipe?
Oh, absolutely! Coloring is the fun part! The one rule, and it’s crucial for getting that hard, glossy finish, is that you must use gel food coloring. Liquid food coloring adds too much moisture, which will thin out your icing and prevent it from setting up properly for your hard setting icing recipe. Gel dyes are concentrated, so a tiny toothpick dip gives you vibrant color without messing up the consistency. Just fold the color in gently after you’ve beaten the icing to stiff consistency—don’t overmix!
How long does this icing last without cracking?
If you have any leftover icing, it stores wonderfully! Keep it in an airtight container at room temperature—like next to your flour supply—for up to three days. When you bring it out to reuse it, it might be a little stiff. If that happens, introduce moisture very slowly. Add just a drop or two of water and mix gently by hand. It should snap right back into a usable consistency, ready to be used for piping or flooding again!
Is this the best sugar cookie glaze for writing fine details?
When it comes to detail work, yes, this is fantastic because we start with that stiff consistency! Remember, the stiff mix we made first—the one that holds stiff peaks—is your tool for outlining and fine writing. The meringue powder creates a structure that holds sharp edges when piped, so lettering or intricate piping stays exactly where you put it. If you need to refine those tiny lines, I always suggest having a scribe tool handy, just like I use when I’m making my homemade sauces and need precision!
Why is the meringue powder so important compared to just an easy cookie frosting?
That’s the difference between a pretty-for-a-day glaze and something professional! A simple powdered sugar and milk glaze, or an easy cookie frosting, often stays soft or sticky. The meringue powder is what gives this recipe its structure and that beautiful, satiny shine when dry. It transforms the texture into something that mimics traditional royal icing, making it the ultimate choice when you need your cookies to be durable, giftable, and stackable.
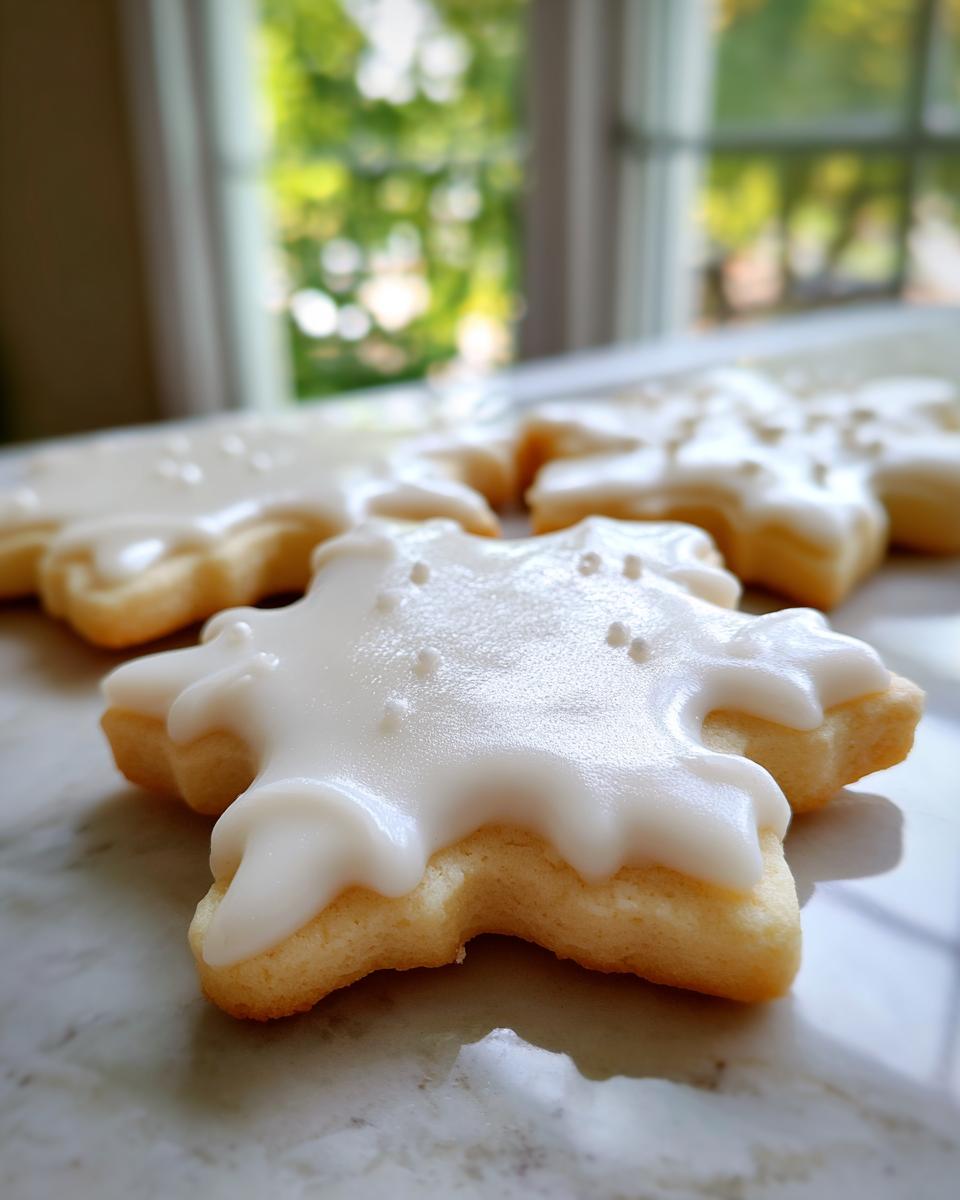
What to Serve With Your Perfectly Iced Cookies
You’ve put in the work to get that incredible, hard, glossy finish, so now it’s time to shine! These iced cookies are perfect for packaging up as homemade gifts—tie them with a pretty ribbon and watch people smile. For an afternoon treat, they pair absolutely wonderfully alongside a big, warm mug of my favorite thick, creamy hot chocolate. Or, arrange them on a tiered platter with fresh berries for a stunning dessert display that truly shows off your hard work!
PrintFoolproof Sugar Cookie Icing That Dries Hard and Glossy

Make sugar cookie icing that hardens perfectly for detailed decorating. This easy recipe provides a smooth, glossy finish, making your decorated cookies stackable and gift-ready.
- Prep Time: 15 min
- Cook Time: 0 min
- Total Time: 15 min
- Yield: Covers about 2 dozen medium cookies 1x
- Category: Dessert
- Method: Mixing
- Cuisine: American
- Diet: Vegetarian
Ingredients
- 4 cups powdered sugar, sifted
- 3 tablespoons meringue powder
- 1/2 teaspoon vanilla extract
- 6 to 8 tablespoons warm water
Instructions
- In a medium bowl, whisk together the sifted powdered sugar and meringue powder until fully combined.
- Add the vanilla extract and 6 tablespoons of warm water to the dry ingredients.
- Beat the mixture with an electric mixer on low speed until the ingredients are just combined. Scrape down the sides of the bowl.
- Increase the mixer speed to medium-high and beat for 3 to 5 minutes until the icing is smooth, bright white, and holds stiff peaks. This is the ‘stiff consistency’ needed for outlining.
- If the icing is too thick to pipe, add the remaining water, one teaspoon at a time, until you reach the desired consistency for outlining or flooding.
- For flooding consistency, add a few more teaspoons of water until the icing flows smoothly off the spatula but still holds its shape briefly on the surface (about 10-15 seconds to settle).
- Divide the icing into bowls if you plan to use multiple colors. Cover bowls with damp cloth while working to prevent drying.
- Use the stiff icing to outline your cookies. Let the outline dry for 15 to 30 minutes.
- Thin the remaining icing slightly with water to a flooding consistency. Fill in the outlined areas.
- Allow the cookies to dry completely at room temperature for at least 4 to 8 hours, or overnight, until the icing is hard to the touch and glossy.
Notes
- For a glossy finish, avoid over-beating the icing once it reaches the right consistency.
- If you need the icing to dry faster, you can place cookies in front of a small fan.
- To make this a no corn syrup sugar cookie icing, use the meringue powder base as written; it sets firmly without corn syrup.
- Store unused icing in an airtight container at room temperature for up to three days.
Nutrition
- Serving Size: 1/4 cup
- Calories: 180
- Sugar: 45
- Sodium: 5
- Fat: 0
- Saturated Fat: 0
- Unsaturated Fat: 0
- Trans Fat: 0
- Carbohydrates: 45
- Fiber: 0
- Protein: 1
- Cholesterol: 0