
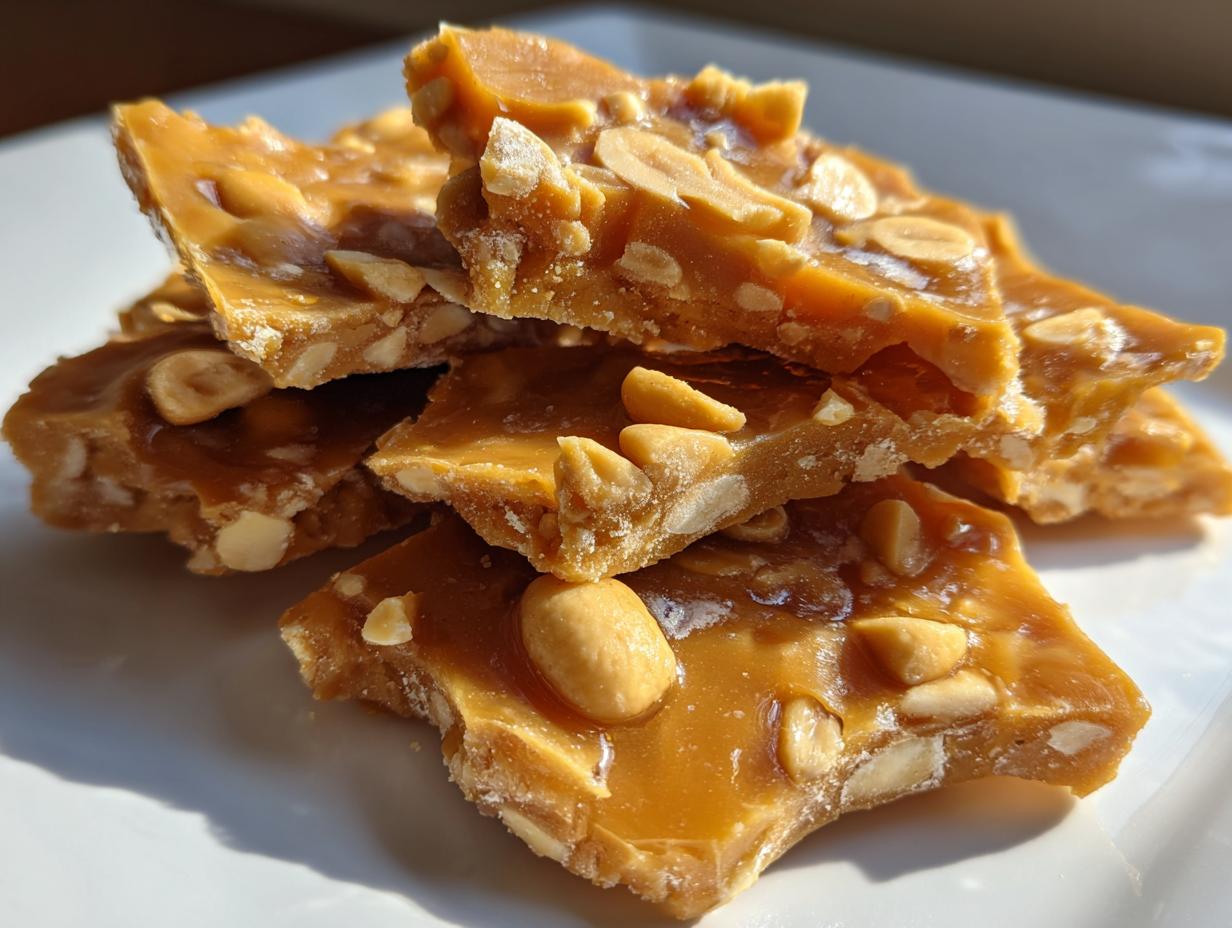
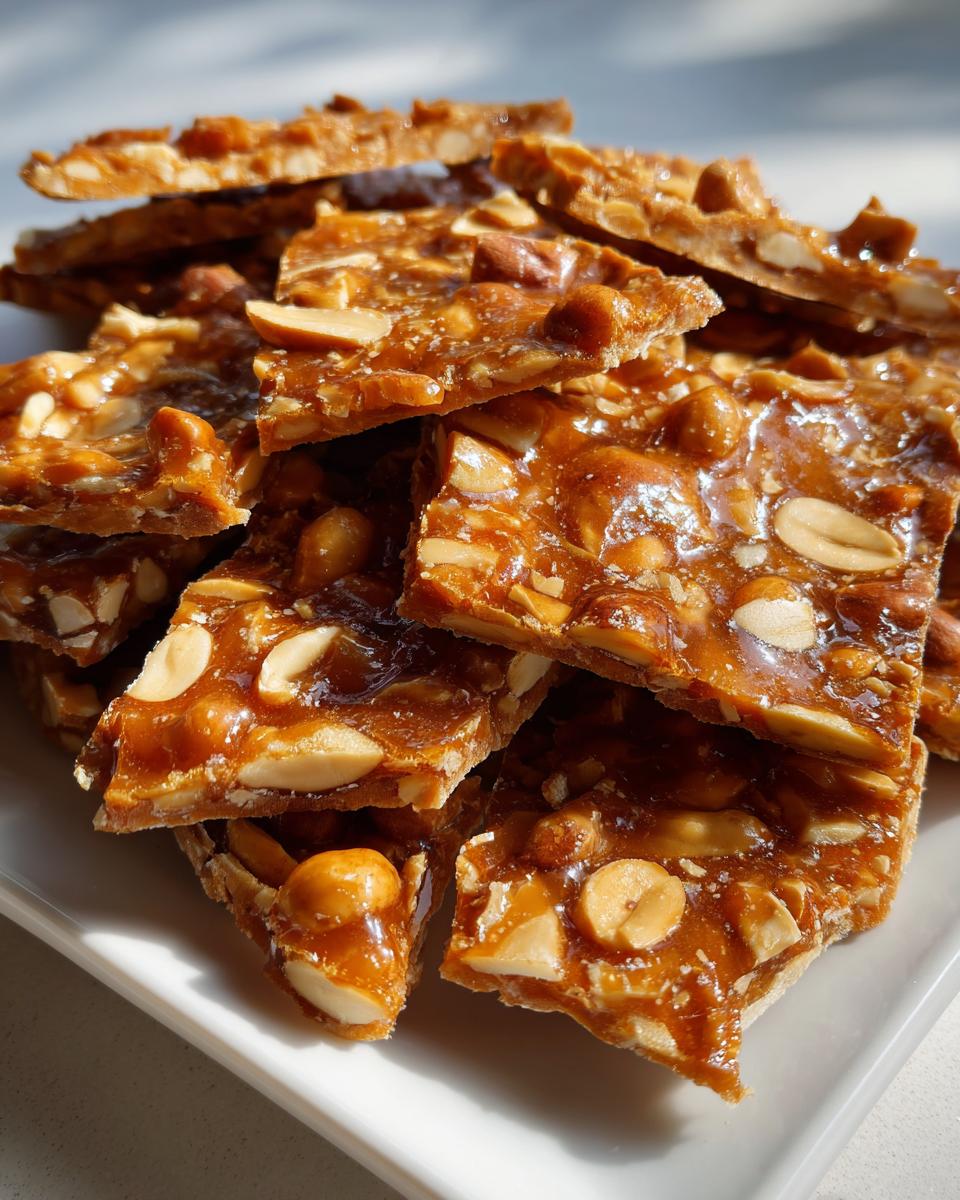
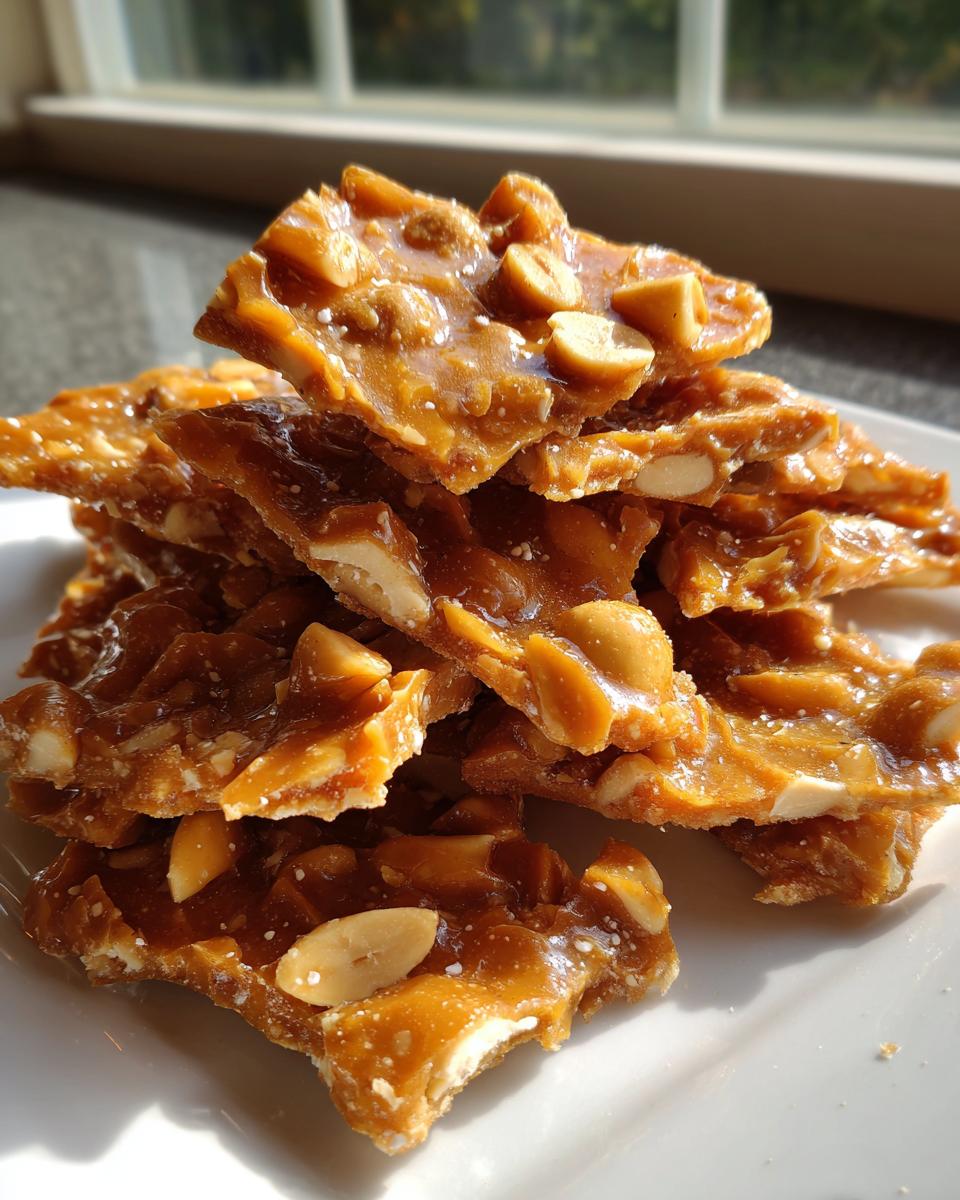
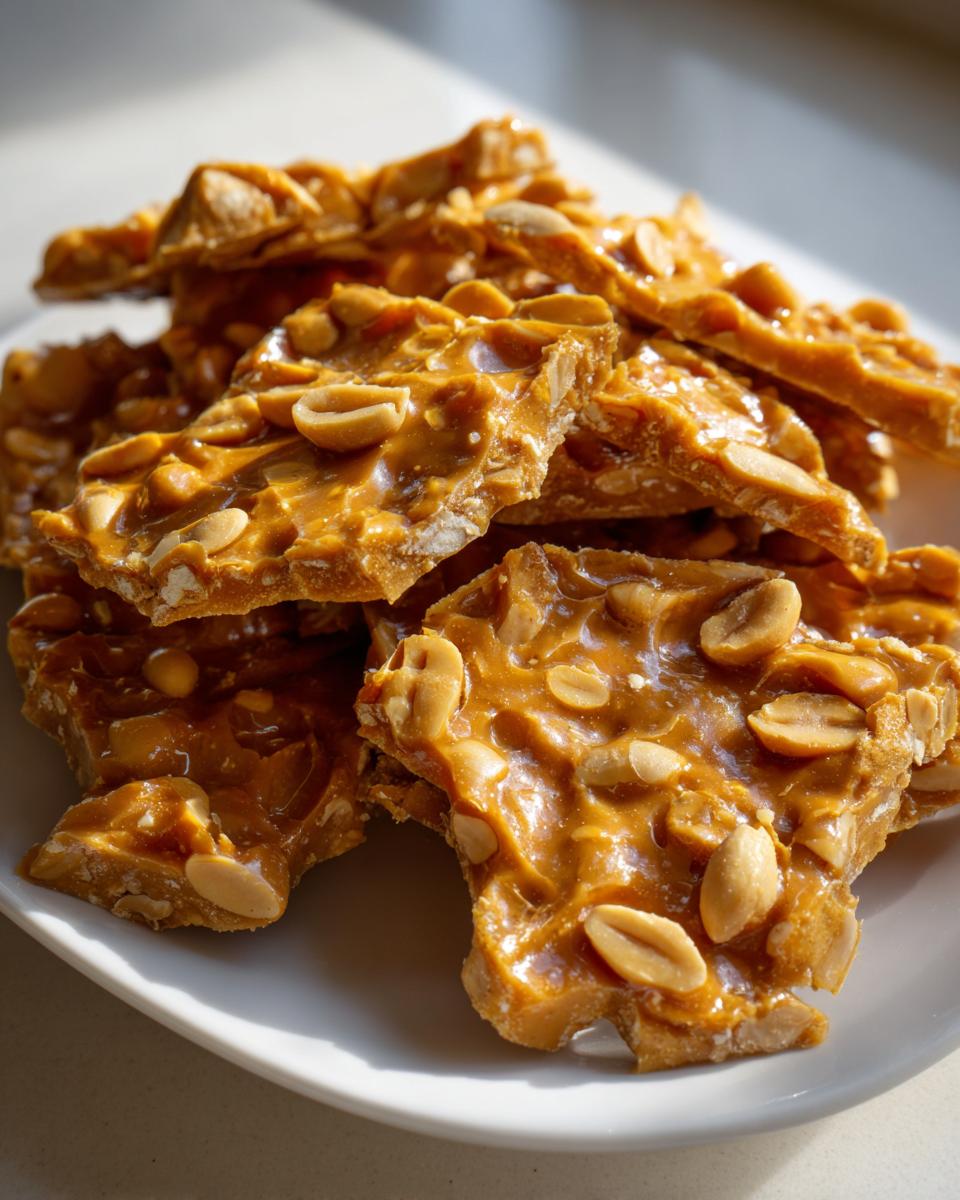
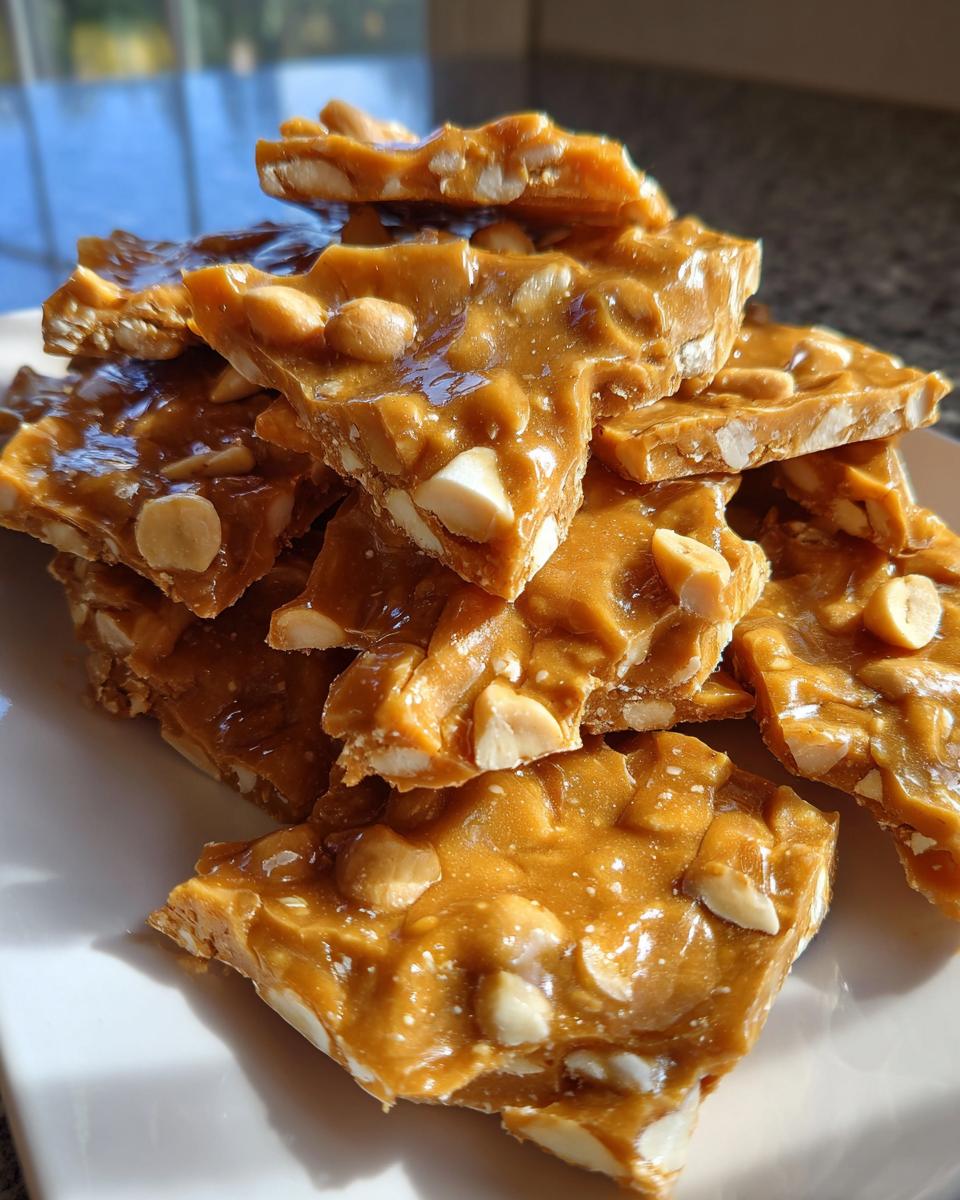
Oh, that sound! There is simply nothing better than the sharp, satisfying crack you get when you break apart a perfect piece of freshly made candy. It’s nostalgic, it’s buttery, and honestly, it tastes a million times better than anything store-bought. I’m Olivia Rosewood, and here at DelishCraze, we focus on those cherished American classics made simple. That’s why this peanut brittle recipe is going straight into your permanent collection. Forget floppy, chewy attempts of the past! This guide is all about technique, ensuring you hit that glassy, shattering texture every single time you try this peanut brittle recipe. If you love sweet and salty snacks, I also have a fantastic easy recipe for toffee pretzels that uses similar candy-making skills. Trust me, it’s easier than you think when you follow the steps carefully.
- Why This is Your Go-To Easy Peanut Brittle Recipe
- Ingredients for the Ultimate peanut brittle recipe
- Essential Equipment for Your peanut brittle recipe
- How to Make peanut brittle recipe: Achieving the Hard Crack Stage
- Tips for Success with Your Homemade Peanut Brittle
- Making peanut brittle recipe for Gifting and Holidays
- Storage and Keeping Your Crunchy Peanut Brittle Fresh
- Frequently Asked Questions about this peanut brittle recipe
- Estimated Nutritional Data for Classic Peanut Candy
Why This is Your Go-To Easy Peanut Brittle Recipe
I know candy making sounds scary—all that bubbling sugar business—but I promise this version is built for success. This isn’t just any brittle; this is the standard-bearer for any future holiday candy tray, and I’ve made sure it’s the best Easy Peanut Brittle Recipe you’ll ever use. It’s designed to be a true Beginner Brittle Recipe that delivers maximum payoff.
- It creates the most delightfully Crunchy Peanut Brittle imaginable.
- The process moves fast once you hit the heat, meaning less waiting around.
- It results in that classic, buttery flavor everyone remembers from growing up.
Guaranteed Perfect Snap Every Time
Chewy brittle is the worst, right? It sticks to your teeth and just feels wrong! The reason this recipe avoids that completely is all thanks to precision. We nail the 300-degree mark—the hard crack stage. I walk you through exactly how to check that temperature so you get that perfect, satisfying shatter.
Simple Ingredients for Old Fashioned Candy Recipe
You don’t need any fancy European syrup or rare ingredients here. This is a true Old Fashioned Candy Recipe that relies on sugar, corn syrup, and peanuts. If you have a well-stocked pantry, you already have everything needed to start making this nostalgic treat today.
If you’re looking for other quick, no-fuss favorites, you might want to check out my no-bake cookies, too!
Ingredients for the Ultimate peanut brittle recipe
When it comes to this Buttery Peanut Brittle, the components are straightforward, which is part of what makes it such a reliable peanut brittle recipe. We need two full cups of granulated sugar, which is tempered perfectly by one cup of light corn syrup—don’t skip that syrup, it’s key to a smooth melt and preventing a grainy outcome!
For the nuts, you’ll want two cups of roasted, unsalted peanuts; roasting them beforehand really deepens that nutty flavor before they even hit the heat. We also incorporate two tablespoons of unsalted butter for richness, a teaspoon of vanilla extract for warmth, and the absolute secret weapon: one tablespoon of baking soda. That baking soda is tested and proven to give our brittle that distinct, airy crunch. You can see my favorite sweet and salty snacks roundup where I pair this brittle with other favorites!
Essential Equipment for Your peanut brittle recipe
Before you even turn on the stove for this peanut brittle recipe, we need to talk tools. Having the right setup prevents panic when that sugar gets screaming hot, which is crucial for a No Fail Brittle Recipe. First and foremost, you absolutely must have a sturdy, heavy-bottomed saucepan. This helps distribute the heat evenly so your sugar doesn’t scorch on the bottom!
But here’s the real star for any Candy Thermometer Tips guide: your candy thermometer. You simply cannot guess your way to the hard crack stage; it has to be exact. Clip that thermometer safely onto the side of the pot before you start. You’ll also need a large, light-colored baking sheet prepared, ready to catch the hot mixture instantly. Preparation is everything when it comes to Simple Candy Making!
How to Make peanut brittle recipe: Achieving the Hard Crack Stage
Alright, this is where the magic—and the responsibility—happens! Mastering this technique is really the secret to knowing How to Make Peanut Brittle that shatters perfectly. We are tracking two critical temperatures: 250°F, which is the soft ball stage, and 300°F, the all-important Hard Crack Stage Candy marker. Remember what I said about preparation? You need that baking sheet ready right beside the stove, because once we hit that final temperature, things happen in seconds!
This whole process takes focus, but trust me, seeing that cloudy, foamy brittle spread out is an absolute joy. Keep your butter, vanilla, and baking soda measured and waiting because you need to move fast to incorporate them correctly before the sugar solidifies on you.
Syrup Preparation and Initial Heating
First, get your sugar, corn syrup, and water into that heavy pot. Heat it over medium heat, and stir, stir, stir until you see every single sugar crystal dissolve. Once it starts boiling, you absolutely stop stirring! If you keep stirring now, you risk causing crystallization, and that’s the number one killer of a crisp No Fail Brittle Recipe. Just let it bubble away quietly until that thermometer nudges past 250°F.
Reaching 300°F: The Critical Hard Crack Stage Candy Moment
After the peanuts go in (at 250°F), keep stirring gently—just enough so the peanuts don’t stick to the bottom and burn. You’ll watch the thermometer climb steadily through the 270s. Keep an eye on it, because once you hit 300°F, you whisk everything else in immediately. I mean *immediately*! When that thermometer reads 300°F, yank that pot off the heat source. When I’m working on my hard crack stage candy, I always turn my back to the burner right when I see it hit 295°F, just so I’m ready to pull it away the second I see 300°F. Then, quickly stir in the butter, vanilla, and the baking soda—it will foam up like crazy, which is what you want for that light texture!
Next up, pour it onto your sheet immediately! Don’t scrape the pan, just let it flow in one glorious puddle. Check out my guide on general simple candy making to feel more confident with these techniques.
Tips for Success with Your Homemade Peanut Brittle
Even with the best peanut brittle recipe, a few hiccups can turn your beautiful brittle into a sticky mess. We want that satisfying snap, so let’s lock in those winning strategies now. These pointers are things I learned the hard way, so you don’t have to!
- Don’t mess with the temperature! Hitting 300°F is non-negotiable for a crisp Homemade Peanut Brittle. If you stop at 295°F, it’ll be chewy. Seriously, trust the thermometer.
- Work quickly after you add the baking soda. That foaming action is what aerates the candy and gives it the right structure, but it sets up fast! You need to pour it the second it’s mixed.
- Keep humidity out! Brittle hates moisture. Don’t make this the day before a huge rainstorm, and never try to sneak a taste while it’s still warm—that warmth transfers humidity right into the candy.
- If you are making a huge batch, consider dividing the mixture and cooking it in separate, smaller pots rather than overcrowding one big pan. Overcrowding can lead to uneven heating.
For more great flavor combinations after you nail this, check out my favorite sweet and salty snacks for inspiration!
Making peanut brittle recipe for Gifting and Holidays
This incredible peanut brittle recipe truly shines when it’s shared, which is why it’s one of my absolute favorite Christmas Candy Recipes to make. Nothing beats the look on someone’s face when they receive a tin of your homemade candy! For Peanut Brittle for Gifting, you want to make sure it looks as good as it tastes, of course.
Once the brittle is completely cool and shattered into those perfect shards, I like to arrange them nicely in small, decorative tins lined with parchment paper. You can even tie a simple ribbon around the tin; it’s so personal. Because this brittle is so shatteringly crisp, it travels wonderfully and holds up well, making it a perfect, impressive homemade dessert to bring to any holiday gathering or neighbor’s house this season. We also have a fun easy holiday dessert if you need another showstopper!
Storage and Keeping Your Crunchy Peanut Brittle Fresh
You did it! You made the perfect shatteringly crisp Homemade Peanut Brittle. Now, we have to protect that glorious crunch, because humidity is the absolute enemy around here. Once the brittle is completely cooled—and I mean rock hard—you need to wrap it up tight.
Don’t just toss it in a plastic bag! If you have space, the best place for your brittle is in a single layer inside a truly airtight container. If you’re storing it for a long time, you can even layer the pieces with small squares of wax paper to prevent them from sticking together. Keep that container in a cool, dry pantry. Never store it in the fridge, because condensation will ruin that beautiful snap almost instantly!
Frequently Asked Questions about this peanut brittle recipe
I get so many sweet messages about people trying this peanut brittle recipe, and usually, the questions circle back to temperature and texture—which makes total sense when you’re dealing with hot sugar! I’m happy to clear up anything that might be tripping you up so you can focus on enjoying your batch of Old Fashioned Candy Recipe.
Can I make this peanut brittle recipe without a candy thermometer?
Look, I love a good rustic recipe, but when it comes to candy, you really need to rely on your thermometer. If you don’t hit that 300°F hard crack stage exactly, your brittle will turn into what I call ‘peanut toffee,’ all sticky and soft. It’ll still taste good, I guess, but it certainly won’t snap! For the best results and to follow my Candy Thermometer Tips, please use one. It’s the key to the whole process.
How do I prevent my brittle from becoming sticky or chewy?
This is the big one! There are two main culprits, and both relate directly to that crucial moment when the sugar is boiling. First, stop stirring the liquid sugar as soon as it boils; stirring pulls sugar crystals into the syrup, preventing that glass-like texture. Second, you absolutely must let it reach 300°F. If you pull it off the heat too soon, it won’t set hard. If you follow those steps, you won’t have to worry about sticky, chewy results again!
For comparison, if you’re looking for something purposely soft, you should definitely check out my recipe for soft and chewy homemade caramels—but for brittle, we want hard and snappy!
Estimated Nutritional Data for Classic Peanut Candy
Because we care about transparency here at DelishCraze, I’ve pulled together the estimated nutrition facts for this wonderful sweet and salty snack. Keep in mind, since this is an Old Fashioned Candy Recipe made from scratch, these numbers are based on standard ingredient calculations and serving sizes (about one ounce per piece).
- Serving Size: 1 ounce
- Calories: Approximately 145
- Fat: 7g
- Carbohydrates: 20g
- Protein: 4g
- Sugar: 18g
A little note from me, Olivia: Every cook knows these numbers are just a guide! Home measurements can vary, so treat these as a helpful baseline for your Classic Peanut Candy.
PrintThe Ultimate Easy Old Fashioned Peanut Brittle Recipe: Perfect Snap Every Time

Make classic homemade peanut brittle with a satisfying, buttery crunch. This easy recipe focuses on clear candy thermometer guidance to achieve the hard crack stage, guaranteeing a shatteringly crisp texture perfect for holiday treats or gifting.
- Prep Time: 10 min
- Cook Time: 25 min
- Total Time: 55 min
- Yield: About 1 pound 1x
- Category: Dessert
- Method: Stovetop Cooking
- Cuisine: American
- Diet: Vegetarian
Ingredients
- 2 cups granulated sugar
- 1 cup light corn syrup
- 1 cup water
- 2 cups roasted, unsalted peanuts
- 2 tablespoons unsalted butter
- 1 tablespoon baking soda
- 1 teaspoon vanilla extract
Instructions
- Prepare your baking surface by lightly greasing a large baking sheet or lining it with a silicone mat. Set aside.
- In a heavy-bottomed saucepan, combine the sugar, corn syrup, and water. Stir gently over medium heat until the sugar dissolves completely.
- Insert a candy thermometer into the mixture, avoiding the bottom of the pan. Stop stirring once the mixture boils.
- Continue to cook the syrup without stirring until the temperature reaches 250 degrees Fahrenheit (Soft Ball Stage).
- Add the roasted peanuts to the syrup mixture. Stir gently to coat them evenly.
- Continue cooking, stirring occasionally to prevent scorching, until the mixture reaches 300 degrees Fahrenheit (Hard Crack Stage). Watch closely, as the temperature rises quickly at this point.
- Immediately remove the pan from the heat. Quickly stir in the butter, vanilla extract, and baking soda. The mixture will foam up rapidly. Stir just until combined.
- Pour the hot mixture onto the prepared baking sheet. Do not spread or scrape the sides of the pan; let it flow naturally.
- Allow the brittle to cool completely and harden, about 30 minutes. Do not touch or attempt to break it while warm.
- Once completely cool and hard, break the peanut brittle into irregular pieces. Store in an airtight container.
Notes
- Use a candy thermometer for accuracy; hitting the hard crack stage (300°F) is essential for a crisp snap.
- Do not stir the sugar mixture once it boils until you add the peanuts; stirring can cause crystallization, leading to chewy brittle.
- The baking soda creates air bubbles, which contribute to the brittle’s light texture. Work quickly after adding it.
- This brittle is excellent for homemade holiday candy gifts.
Nutrition
- Serving Size: 1 ounce
- Calories: 145
- Sugar: 18g
- Sodium: 35mg
- Fat: 7g
- Saturated Fat: 1.5g
- Unsaturated Fat: 5.5g
- Trans Fat: 0g
- Carbohydrates: 20g
- Fiber: 1g
- Protein: 4g
- Cholesterol: 3mg