
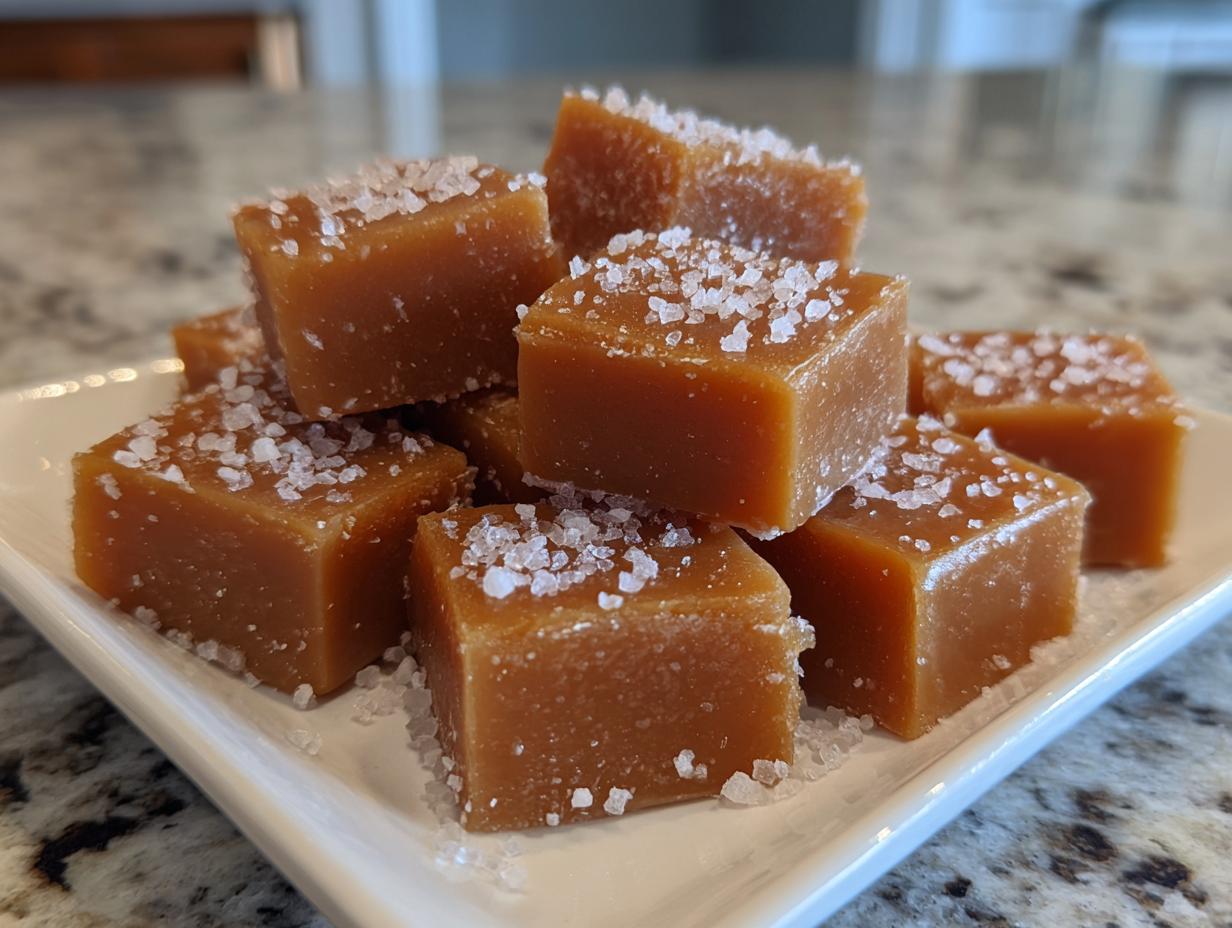
Oh, let’s talk about candy! There is nothing in this world that reminds me more of cozy holiday evenings than the smell of sugar and butter bubbling away on the stove. I remember my grandmother always made a huge batch of homemade caramels for neighbor gifts, and they were always the first thing to disappear. That’s why I put so much energy into perfecting this recipe for you. Forget those hard, waxy things you buy in bulk; these are the Best Soft, Chewy Homemade Salted Caramels you will ever taste. Seriously, they practically melt on your tongue! If you love that chewy texture, you should definitely check out my guide for the best soft, chewy snickerdoodles too!
For me, mastering caramels from scratch is such an important milestone for any dedicated home cook. It feels old-fashioned, a little bit magical, and totally worth the effort when you get that perfect, pliable texture. I wanted to give you a guide that feels both classic and totally dependable, so you can create that same moment of cozy indulgence right in your own kitchen. Trust me, once you nail this, you’ll never look back!
- Why This is the Best Soft Chewy Caramels Recipe
- Ingredients for Your Buttery Homemade Treats
- Step-by-Step Instructions for Old Fashioned Caramels
- Tips for Success When Making Homemade Caramels
- Storage and Reheating Instructions for Your Soft Caramels
- Variations on Classic Vanilla Cream Caramels
- Serving Suggestions for Melt in Your Mouth Candy
- Frequently Asked Questions About Making Caramels
- Nutritional Estimate for These Salted Caramel Candy Pieces
Why This is the Best Soft Chewy Caramels Recipe
I know there are a million ways to make caramel—and yes, I’ve tried the 6-minute microwave versions! But if you want that truly divine, melt-in-your-mouth experience, you need this tried-and-true stovetop method. We rely on precise temperature because that’s how we guarantee our soft chewy caramels don’t turn into jawbreakers!
What makes this recipe the absolute winner? It’s all about control:
- We use a mix of brown sugar and corn syrup to stop the crystallization that makes candy grainy.
- The combination of butter and heavy cream gives an incredible richness—they are seriously buttery homemade treats!
- We stick to the classic candy thermometer method for reliability. For more great slow-cooking ideas, check out my melt-in-your-mouth butter cookies recipe.
Achieving Perfect Soft Chewy Caramels Texture
This is non-negotiable, folks: you must hit 248 degrees Fahrenheit, no more, no less! That’s the sweet spot for that fantastic, gentle chewiness. If you miss it and let it climb past 250°F, you’ve made taffy or a hard candy. Keeping a close eye on that thermometer is the real secret ingredient here.
Ideal for Gifting Candy Ideas
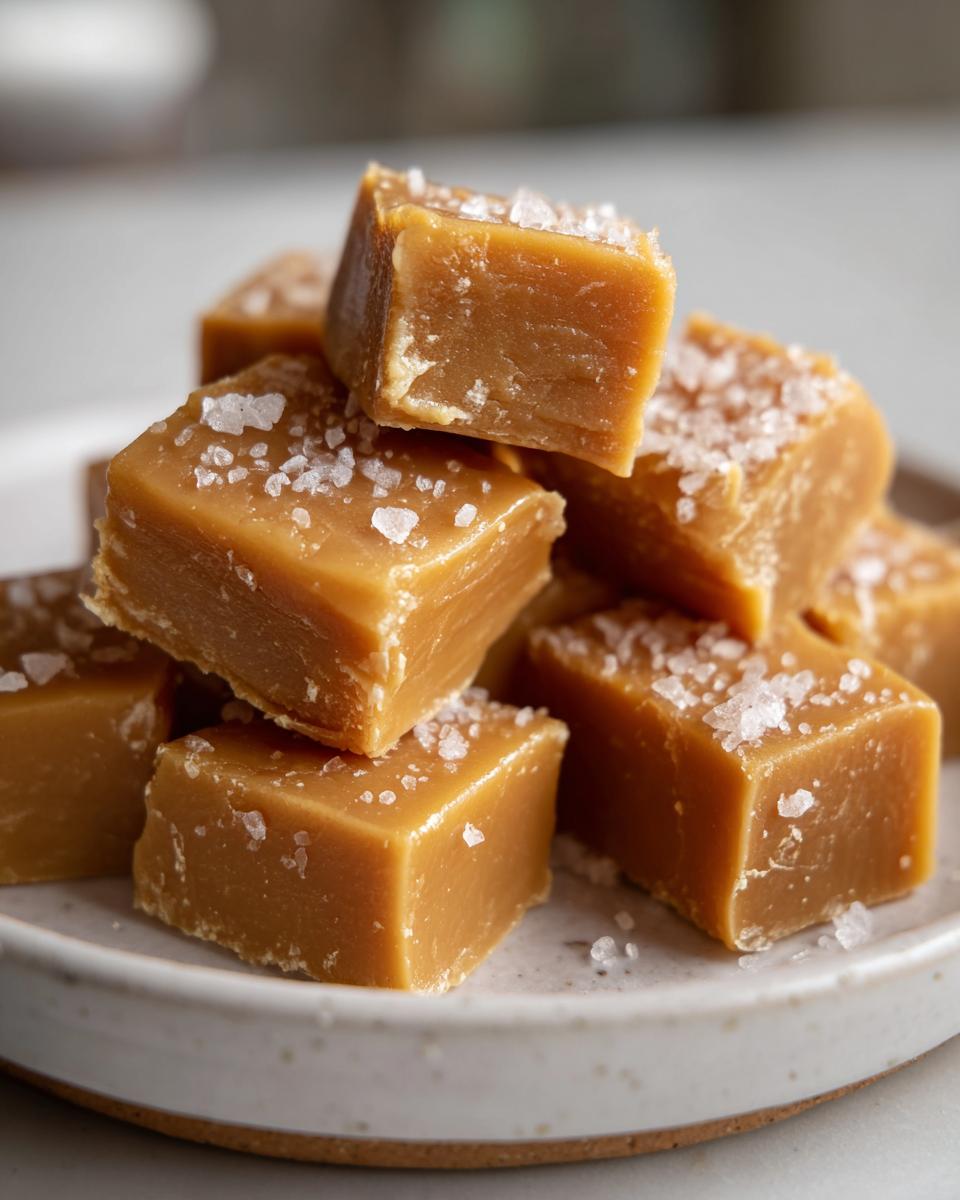
Because these caramels cut so cleanly and hold their shape beautifully once cooled, they are simply the best for handing out during the holidays or any special event. They look stunning wrapped up individually. If you’re searching for more gifting candy ideas, these are always a huge hit!

Ingredients for Your Buttery Homemade Treats
When you’re making candy from scratch, quality matters, but don’t panic! We’re using pantry staples to create these luxurious buttery homemade treats. You’ll need exactly one cup each of granulated sugar, light corn syrup, and heavy cream, plus one cup packed of light brown sugar. Don’t forget the full cup of unsalted butter, one teaspoon of pure vanilla extract, and half a teaspoon of sea salt for that perfect salty kick.
For excellent results, remember that you absolutely must use heavy cream here—milk just doesn’t have the fat content to handle the heat needed for these chewy candies. If you’re looking to play around, you can easily create a wonderful maple flavored candy by swapping one tablespoon of that cream for pure maple syrup in the instructions.
Ingredient Notes and Flavor Variations for Caramels
I’m very strict about the butter; anything less than real unsalted butter is just asking for trouble when you’re dealing with this much sugar! Also, while we are making salted caramels today, if you want to try something new, I find adding just a tiny splash of almond extract along with the vanilla makes for amazing vanilla cream caramels.
Step-by-Step Instructions for Old Fashioned Caramels
Making these old fashioned caramels might seem intimidating because candy making is serious business, but I promise if you follow my temperature guide, you’ll be fine! The first thing you absolutely need to do is prep your pan. Grease an 8×8 inch dish well and line it with parchment paper, making sure you leave those paper flaps hanging over the sides—that’s your secret lift-out handle later on. For cooking, *always* use a heavy-bottomed saucepan; thin pans create hot spots, and melted sugar burns fast! This careful prep also helps ensure they cut cleanly, just like a perfect English muffin.
Preparing the Pan and Initial Cooking of Caramels
Get all your sugar, corn syrup, brown sugar, and butter into that heavy pan. Heat it over medium heat, stirring constantly until everything melts smoothly. Once it starts boiling, stop stirring! Attach your candy thermometer now, making sure the tip is dipped nicely in the mixture. You must cook this without touching it until that thermometer reads exactly 245 degrees Fahrenheit. This sets us up for success!
Reaching Soft-Ball Stage for Chewy Caramels
This next part is exciting, but you have to be careful! Once you hit 245°F, take the pan off the heat and slowly pour in your heavy cream. Trust me, it will bubble up like crazy; stand back! Whisk gently just until it smooths out, then put it back on medium-low heat. Keep stirring constantly until you hit the magic number: 248°F. That higher temperature is what gives you the perfect result in this chewy candy tutorial. As soon as you see 248°F, pull it off the heat immediately! Stir in your vanilla and salt, pour it into the prepared pan, and let it set up undisturbed for three hours. You can find a great guide on these exact steps here, but mine focuses more on that crucial 248°F mark!
Tips for Success When Making Homemade Caramels
I’ve messed up enough batches to tell you exactly what *not* to do, so you can get perfect, melt in your mouth candy every single time. The biggest tip I can share is to trust your thermometer more than your eyes during the cooking stages. If you start stirring after the boil, you risk creating sugar crystals, which leads to a grainy texture—and nobody wants grainy homemade caramels!
When cooling, resist the urge to speed things up in the fridge. Cold temperatures mess with the crystallization and can make your caramels weep or get weirdly firm. Just let them sit peacefully on the counter for at least three hours. For a heavenly treat afterward, don’t forget to try my easy whipped hot chocolate!
Troubleshooting Common Caramel Issues
So, what if things go sideways? If your temperature stalls around 240°F and won’t budge, don’t panic and crank the heat! Just gently stir the mixture, scrape the sides, and let it work. If you accidentally go past 248°F, you have a decision: either move on and accept you now have a firmer, chewy-to-hard candy—still tasty, just not the soft goal we set—or start over. It happens to everyone!
Storage and Reheating Instructions for Your Soft Caramels
Okay, you’ve got your beautiful squares! Resist the urge to put these straight into the fridge to set faster—please don’t! Refrigeration is the enemy of perfect texture here. You need them to cool slowly at room temperature for about three hours until they are completely firm before you cut them. Once you do cut them, wrap each of your homemade caramels individually in wax paper or cellophane squares. This keeps them from sticking together.
Kept airtight at room temperature, these beauties will stay perfectly soft and chewy for about two weeks. If you have any leftovers (which I doubt you will!), you can easily melt a few down to make a divine sauce for ice cream! I have a fantastic easy caramel sauce recipe if you want to try that next.
Variations on Classic Vanilla Cream Caramels
Once you master the basic salted caramel, you realize it’s just a starting point! Making these candy squares is honestly so fun because you can customize them endlessly. I love that this recipe provides such a wonderful base for my favorite vanilla cream caramels, but we can easily get creative before hitting that 248°F mark.
For a grown-up twist, try adding a quarter teaspoon of dark rum or a tiny splash of instant espresso powder right alongside the vanilla. It gives the caramel this deep, mysterious background note that is just divine. You could even steep a couple of star anise pods in the heavy cream while it’s warming up, then strain them out before adding to the sugar mixture. It just shows you how flexible these vanilla cream caramels can be!
If you need a festive flavor boost, check out my homemade pumpkin spice latte recipe for inspiration—you can often substitute extracts to create similar warmth in candy form!
Serving Suggestions for Melt in Your Mouth Candy
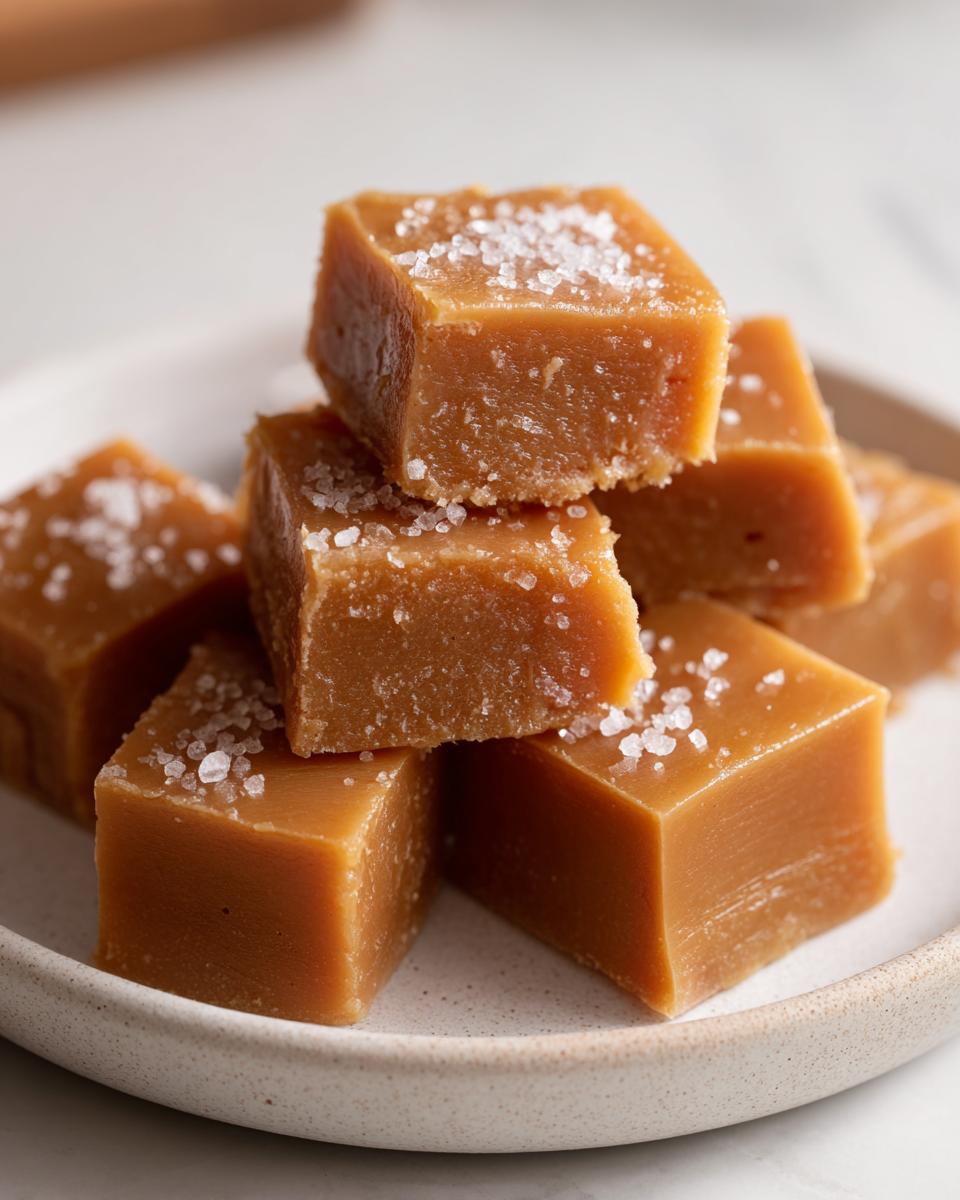
Now that you have sixty-four little squares of heaven, what do you do with them? Honestly, just unwrapping one and tossing it in my mouth is perfection, but these melt in your mouth candies upgrade everything they touch! They are fantastic softened for about 10 seconds in the microwave and drizzled straight over vanilla ice cream.

My favorite fall treat is dipping them halfway into melted dark chocolate and then setting them on wax paper to set again. They are also amazing served alongside tart apple slices—you know I have a recipe for an amazing apple cake if you want a baked counterpart! Seriously, find a way to use these treasures!
Frequently Asked Questions About Making Caramels
I get so many questions about candy making, and honestly, I love it! It shows you’re all getting brave enough to try these classic sweets. Since we want everyone to succeed with their homemade caramels, I’ve pulled together the most common things people ask me about texture and speed when tackling this recipe.
Can I use the Quick Microwave Caramels Method?
You certainly can find recipes out there for quick microwave caramels, and yes, I even mentioned it briefly in my notes! Microwave candy making is fast, which I totally appreciate on a busy weeknight. However, if you are aiming for that ultimate, deeply flavored, perfectly melt-in-your-mouth treat—the absolute best soft caramel recipe—you simply cannot beat the stovetop method for density, color, and texture development. The stovetop gives the sugars time to mature their flavor properly!
Why are my homemade caramels hard instead of soft chewy caramels?
This is the million-dollar question for every candy maker! The culprit is almost always temperature. If your candy went past 248°F, even by a degree or two, you pushed it past the soft-ball stage and into hard-ball territory. This turns your wonderful intended soft chewy caramels into something you almost need a hammer to bite through! Remember, when you’re making candy, the thermometer is your best friend; treat those temperature stages like sacred rules.
If you’re looking for other easy, reliable stovetop recipes that rely less on precision temps, you might enjoy my guide to easy stovetop chicken and gravy—sometimes simple simmering is the key!
Nutritional Estimate for These Salted Caramel Candy Pieces
As much as I love decadent treats, I think it’s smart to have a general idea of what’s in the goodies we make at home. Since these Salted Caramel Candy pieces are made with real butter, cream, and sugar, they are certainly a treat, not an everyday staple! I pulled together the estimates below based on the serving size of one piece.
Keep in mind these numbers are just an approximation. They change based on the exact brand of butter or corn syrup you decide to use. But hey, at least it’s homemade, right? If you’re looking for something a bit lighter but still comforting, you might want to check out my recipe for the creamiest southern cheese grits!
- Serving Size: 1 piece
- Calories: 105
- Sugar: 15g
- Sodium: 35mg
- Fat: 4.5g (Saturated Fat: 2.8g)
- Carbohydrates: 16g
- Protein: 0.5g
Best Soft, Chewy Homemade Salted Caramels
Make rich, buttery, melt-in-your-mouth soft chewy caramels from scratch. This recipe provides a reliable method for classic candy perfect for gifting or enjoying as a sweet treat.
- Prep Time: 15 min
- Cook Time: 25 min
- Total Time: 3 hours 40 min
- Yield: About 64 pieces 1x
- Category: Dessert
- Method: Stovetop Cooking
- Cuisine: American
- Diet: Vegetarian
Ingredients
- 1 cup granulated sugar
- 1 cup light corn syrup
- 1 cup heavy cream
- 1 cup packed light brown sugar
- 1 cup (2 sticks) unsalted butter
- 1 teaspoon pure vanilla extract
- 1/2 teaspoon sea salt, plus more for topping
Instructions
- Lightly grease an 8×8 inch baking pan and line it with parchment paper, leaving an overhang on two sides for easy removal. Set aside.
- In a heavy-bottomed saucepan, combine the granulated sugar, corn syrup, brown sugar, and butter.
- Heat the mixture over medium heat, stirring constantly until the butter melts and the sugar dissolves. Stop stirring once it boils.
- Attach a candy thermometer to the side of the pan, making sure the tip is submerged but not touching the bottom.
- Cook the mixture without stirring until it reaches 245 degrees Fahrenheit (soft-ball stage). This usually takes 15 to 20 minutes. Watch the temperature closely.
- Remove the pan from the heat. Carefully and slowly pour in the heavy cream. The mixture will bubble up significantly. Whisk gently until smooth.
- Return the pan to medium-low heat. Continue to cook, stirring constantly, until the mixture reaches 248 degrees Fahrenheit. This step is key for chewy texture.
- Remove from heat immediately. Stir in the vanilla extract and 1/2 teaspoon of sea salt.
- Pour the hot caramel mixture into the prepared baking pan. Sprinkle the top lightly with extra sea salt.
- Let the caramel cool completely at room temperature for at least 3 hours, or until firm. Do not refrigerate.
- Once firm, use the parchment overhang to lift the block of caramel out of the pan. Cut into 1-inch squares.
- Wrap each square individually in wax paper or cellophane for gifting or storage.
Notes
- For the softest texture, do not let the caramel exceed 248 degrees Fahrenheit. Higher temperatures result in firmer, harder candies.
- If you want maple flavored candy, substitute 1 tablespoon of the heavy cream with 1 tablespoon of pure maple syrup.
- You can use this recipe for a quick microwave caramel variation by combining the sugars, corn syrup, and butter in a microwave-safe bowl and heating in short bursts, stirring between each, until melted, then adding cream and heating until it reaches the correct temperature.
Nutrition
- Serving Size: 1 piece
- Calories: 105
- Sugar: 15
- Sodium: 35
- Fat: 4.5
- Saturated Fat: 2.8
- Unsaturated Fat: 1.7
- Trans Fat: 0.1
- Carbohydrates: 16
- Fiber: 0
- Protein: 0.5
- Cholesterol: 15