
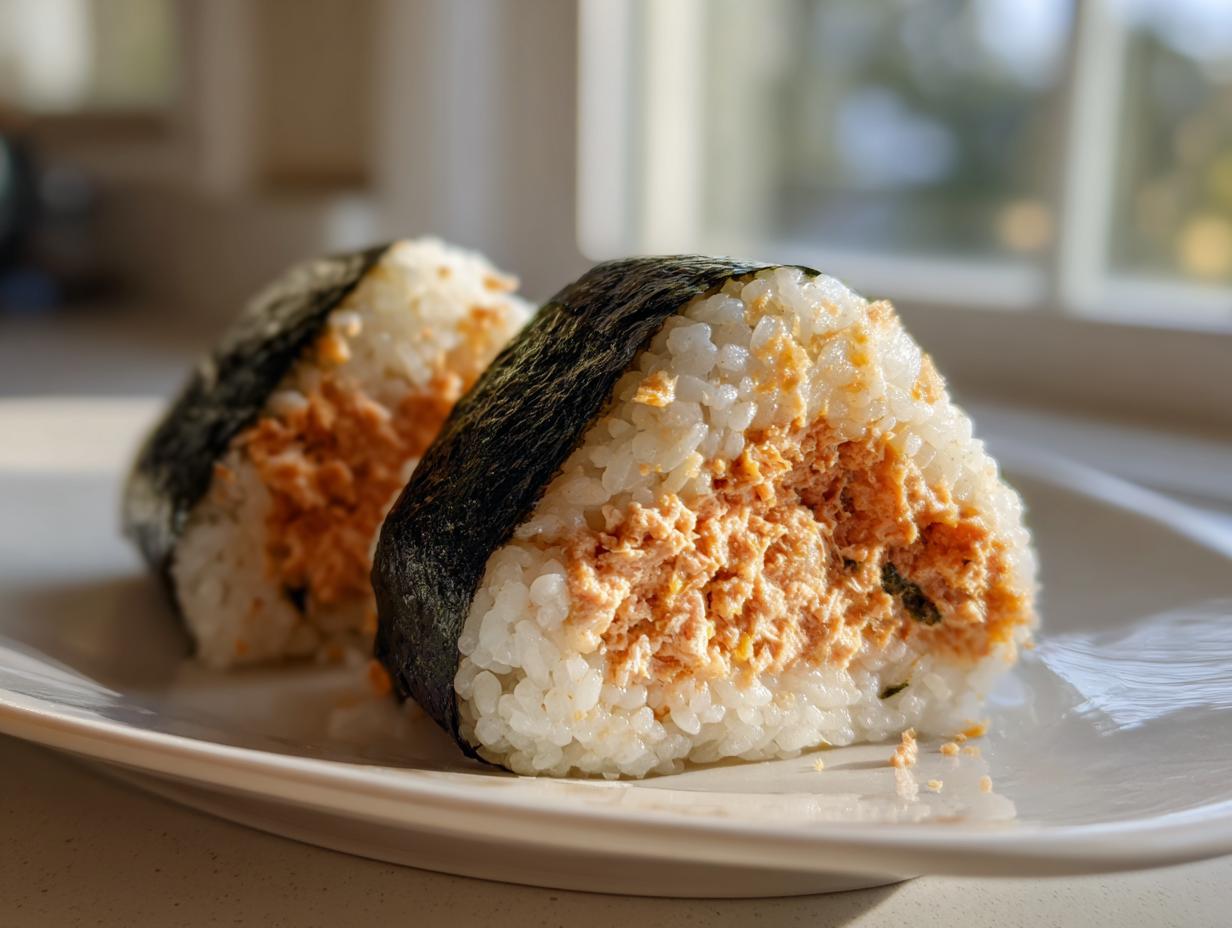
When life speeds up and those afternoon hunger pangs hit, convenience often wins out over connection. But I truly believe that delicious, soul-satisfying food doesn’t need hours of work. That’s why I always turn to my favorite quick, portable answer: incredibly flavorful tuna rice balls. These little bites capture the spirit of Japanese Onigiri but with a creamy, spicy kick that feels perfectly Americanized. Inspired by my quest for the ultimate handheld snack—something you can pack in about fifteen minutes—this Spicy Tuna Mayo version is truly a weeknight hero. It’s the kind of joyful, simple cooking I try to bring to every recipe here at DelishCraze. For more inspiration on dishes you can whip up in a flash, always check out my list of simple lunch recipes!
- Why These Spicy Tuna Rice Balls Are Your New Favorite Quick Asian Snack
- Gathering Ingredients for Easy Tuna Rice Balls
- How to Prepare Tuna Rice Balls: Step-by-Step Instructions
- Tips for Success When Making Tuna Rice Balls
- Storage and Make-Ahead Tips for Meal Prep Rice Balls
- Serving Suggestions for Your Savory Rice Bites
- Frequently Asked Questions About Tuna Rice Balls
- Nutritional Estimates for Tuna Rice Balls
- Share Your Homemade Tuna Rice Balls
Why These Spicy Tuna Rice Balls Are Your New Favorite Quick Asian Snack
Seriously, these tuna rice balls are my secret weapon when I need something satisfying for lunch without turning on the stove for more than two seconds. They check every box: fast, flavorful, and perfectly contained. When I was juggling my design career and starting a family, recipes like this made all the difference in keeping things joyful instead of hectic. They fit right into that category of a superb, healthy breakfast ideas that you can eat later!

Speed and Simplicity: Making Tuna Rice Balls Fast
The best part? The total time is only about 15 minutes! And guess what? There is zero cooking involved for the filling. We are using canned tuna here, which means we skip all the fuss. This recipe is built for busy people who still want that homemade taste, which is my core philosophy here at DelishCraze. It’s pure expertise in efficiency!
Perfect for Portable Lunch Ideas and Picnics
Because they hold their shape so beautifully, these are the ultimate **portable lunch ideas**. They don’t get messy like a sandwich, and they pack up perfectly for those last-minute picnics or into the kids’ bento boxes. They provide a great, savory little boost that makes packing lunch feel special again. They’re a real **quick asian snack** that delivers on being a **protein packed lunch**!
Gathering Ingredients for Easy Tuna Rice Balls
When you’re keeping things quick, knowing exactly what to pull out of the pantry is half the battle won. Building these tuna rice balls relies on just a few simple, staple items, which really cuts down on cleanup! This reliability is what makes a recipe trustworthy in my book. Before you get started on shaping, you’ll want to make sure you have everything measured out. We’re keeping it straightforward, but precision matters, especially with the rice. You can find some of my other go-to recipes for quick bites in my appetizer section right here.
Rice and Seasoning for Your Tuna Rice Balls
First up is the rice, and trust me, don’t substitute this! You absolutely need about three cups of cooked short-grain Japanese rice; this is what we call the **best rice for onigiri** because of that wonderful stickiness. While that rice is still warm, you’ll mix in just one teaspoon of salt to season it beautifully from the inside out. That simple seasoning makes a huge difference!
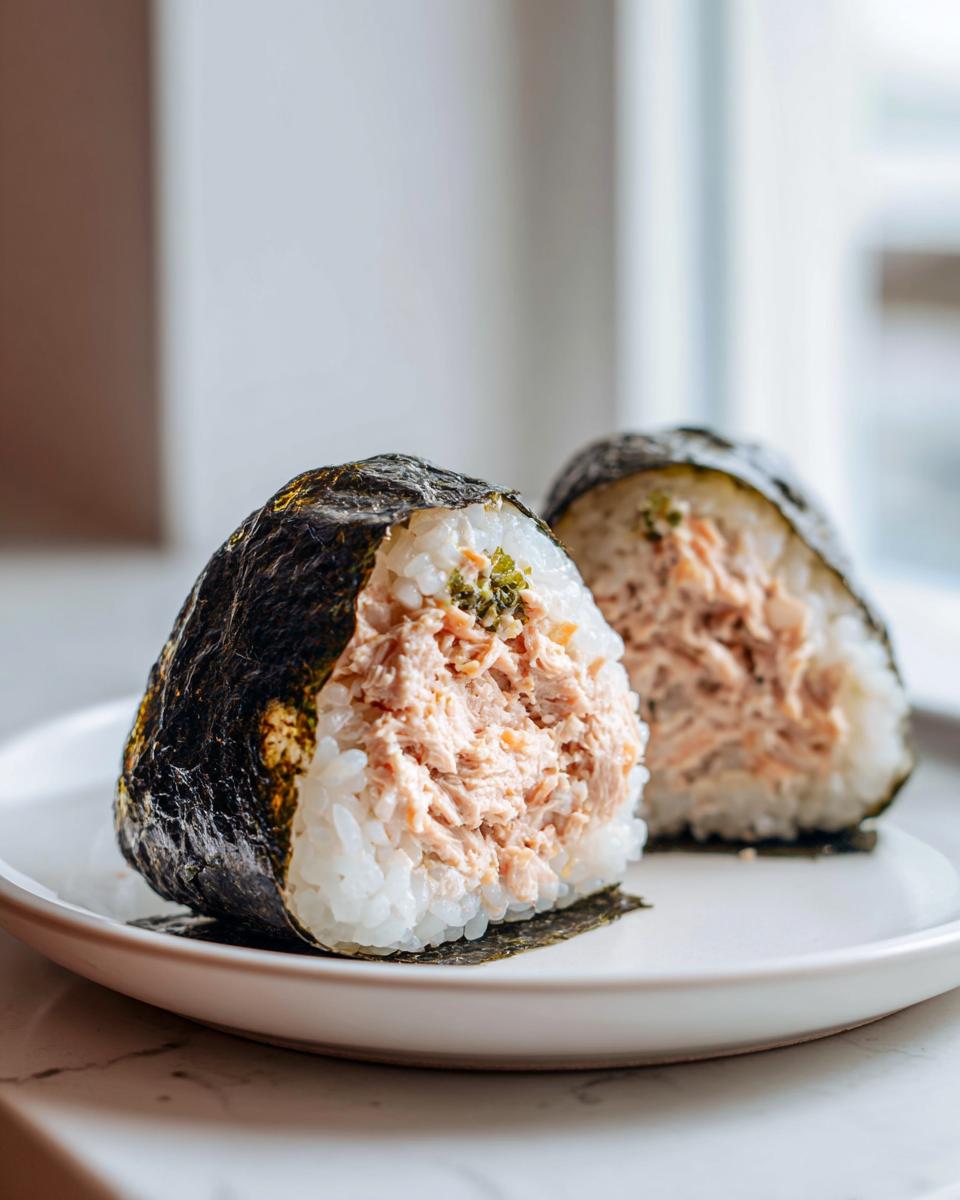
Crafting the Spicy Tuna Mayo Filling
Next, let’s talk about that flavor powerhouse center. This is a completely **no cook tuna filling**. You need one five-ounce can of tuna, make sure it’s drained incredibly well—we don’t want soggy rice balls! To that, toss in three tablespoons of mayonnaise; I always recommend Kewpie if you have it because that little bit of extra zing is fantastic. Then, add one to two teaspoons of Sriracha for the kick, and a tiny splash—one teaspoon—of soy sauce. Mix it all up until it looks creamy and vibrant. Easy peasy!
How to Prepare Tuna Rice Balls: Step-by-Step Instructions
Okay, this is where the magic happens! Even though this is one of my go-to recipes for **quick easy weeknight dinners**, the shaping requires a little touch. Don’t worry, it’s so much fun once you get the hang of it. Remember, these are best made while the rice is still warm enough to handle, but cool enough that you won’t burn your fingers trying to make your **tuna rice balls**. For more straightforward weeknight inspiration, don’t forget you can always check out my quick easy weeknight dinners section!
Mixing the Filling and Seasoning the Rice
First things first, while your short-grain rice is still warm, mix in that teaspoon of salt evenly until it’s incorporated. Then, tackle the filling. Take that well-drained tuna—and I mean *drained*, you don’t want any excess water making things messy—and smash it together in a bowl with the mayonnaise, Sriracha, and soy sauce. Keep mixing until it’s perfectly swirled into that creamy, spicy dynamite we need for the center. Mix it until it’s fully combined; this is our wonderful **no cook tuna filling**.
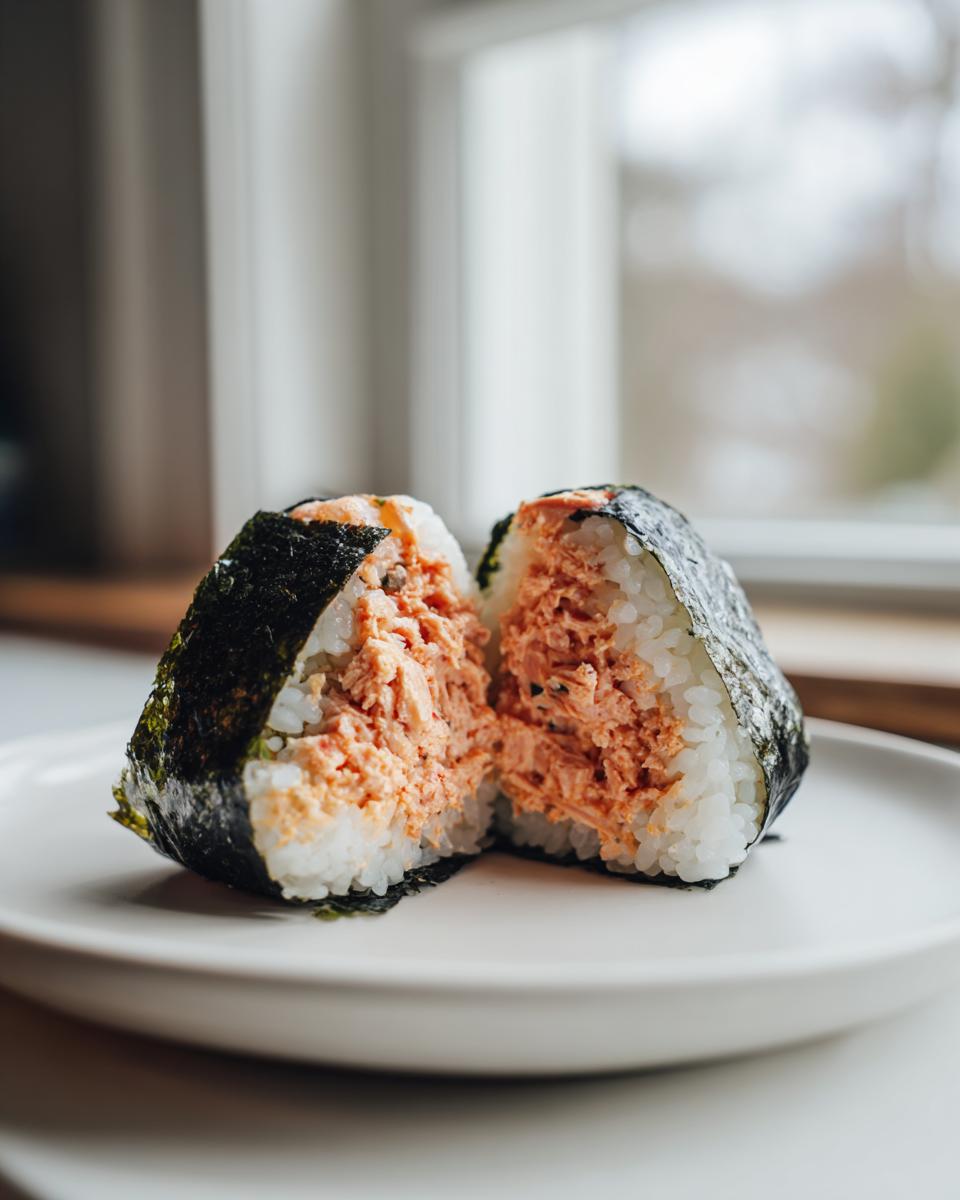
The Art of Rice Ball Shaping Tutorial
Now for the technique! This is the crucial **rice ball shaping tutorial**. First, wet your hands lightly with water and sprinkle a tiny bit of salt onto your palms; this stops the sticky rice from clinging to you. Take about half a cup of that seasoned rice and flatten it into a rough disk right there in your hand. Make a little indentation in the middle and plop in a tablespoon of that spicy tuna filling. Gently fold the rice edges up over the filling, sealing it in. Shape it into a gentle triangle or a smoother round ball. The secret here for authentic **japanese rice balls** is to press *lightly*—you want it shaped, not compacted into a brick! Don’t forget that final step of wrapping a strip of nori around the bottom for a little handle!
Tips for Success When Making Tuna Rice Balls
I always say that knowing the ‘why’ behind a step is just as important as the ‘how.’ Building these **tuna rice balls** relies on a few core principles that ensure you get that perfect, hold-together texture every time. Since we are relying on the natural stickiness of the rice, temperature and grain type are major players here. If you’re looking for more quick cooking triumphs, you can always check out my cheatsheet for easy 30-minute chicken marsala recipe!
Choosing the Best Rice for Onigiri
I already mentioned this in the ingredient chat, but I have to stress it again: short-grain Japanese rice is your best friend for any **how to make onigiri** project. Why? It has a higher starch content than long-grain rice, like Basmati or Jasmine. That starch is what releases when it’s cooked and cooled slightly, giving the rice that necessary, gentle glue. If you try to use regular long-grain rice, your balls will crumble apart the second you try to pack them for your **portable lunch ideas**. It’s worth buying the right bag!
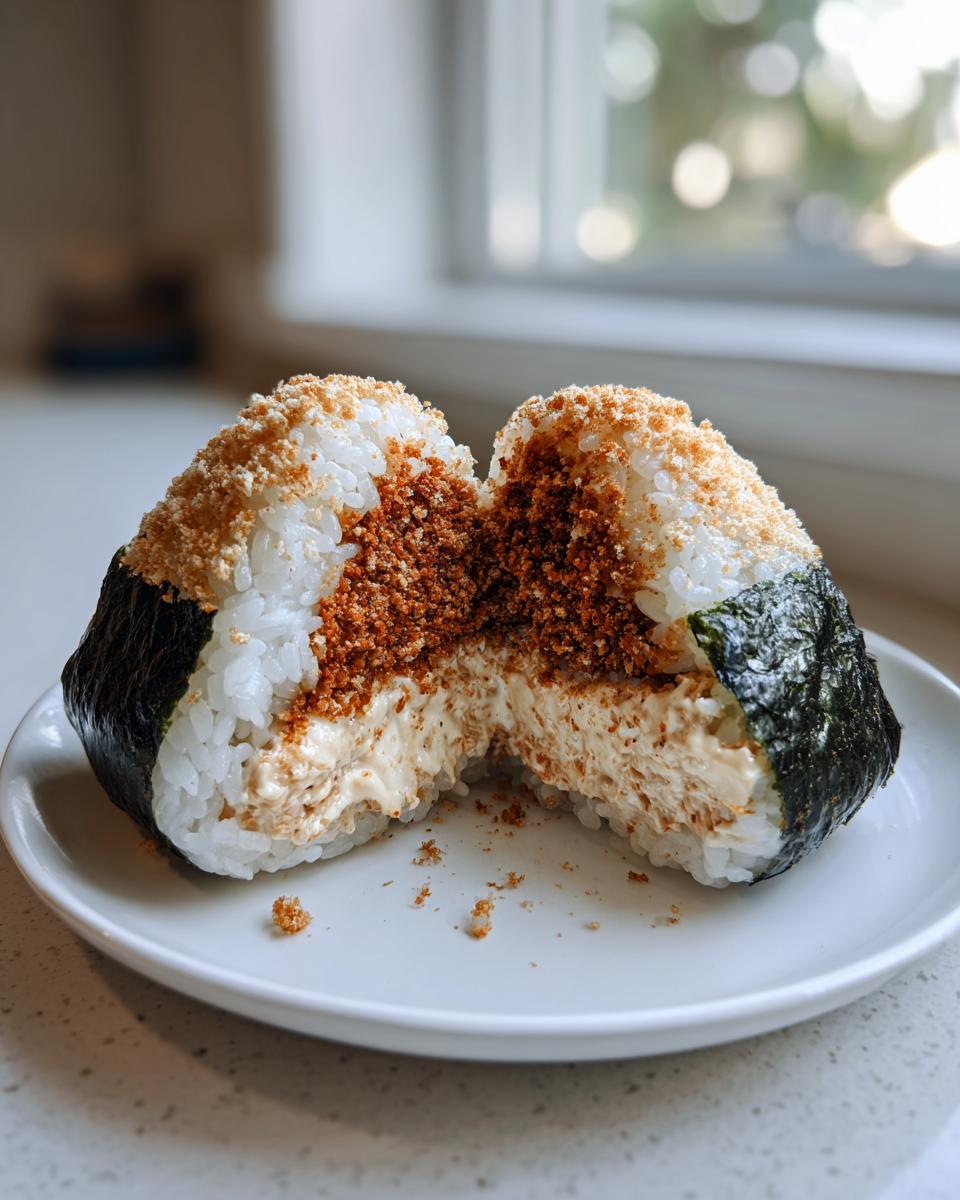
Variation: Making Yaki Onigiri Recipe
When you have leftovers—or if you just want a warm, savory treat—you can easily transform these into **yaki onigiri recipe** style rice balls! After you’ve shaped your **tuna rice balls**, grab a small bowl with a little extra soy sauce, maybe thinned down with a drop of water. Lightly brush the outside of the rice ball with that mixture. Then, heat a non-stick pan over medium heat and place the rice balls in. Let them sear for about 3 to 5 minutes per side until they develop a lovely golden-brown crust. It adds this incredible, slightly salty crunch that is just heaven. It turns a simple snack into a wonderfully savory rice bite!
Storage and Make-Ahead Tips for Meal Prep Rice Balls
While the best bite of a **tuna rice ball** is always when it’s just been shaped and the rice still has a little warmth, I totally get it—we all need food ready to go! These are fantastic for **meal prep rice balls** because the filling is already cooked (or rather, no-cook!), so they are quick to assemble on a Sunday afternoon. However, just like with sushi, the texture of the rice changes once it cools drastically and sits too long.
Here’s my advice from trial and error: you can certainly make these ahead. Pop the finished, nori-wrapped **tuna rice balls** into an airtight container. They’ll keep perfectly well in the refrigerator for up to two days. Just try not to press them tightly against each other in the container, or they might stick and lose their shape!
Now, if you’re planning a big batch, remember this: the nori seaweed gets soft pretty fast once it touches the moist rice. If you need them to last three days, or if you’re packing them fresh for a late lunch, you might want to keep the nori strips separate and wrap the rice balls right before you eat them. It takes literally 30 seconds and keeps that seaweed nice and crisp. For more tips on planning ahead for busy weeks, check out my guide on easy slow cooker meal prep!
If you find the rice a tiny bit hard straight from the fridge the next day—which happens with all onigiri—just leave them out on the counter for about 10 to 15 minutes before you plan to eat them. That slight warming up usually brings back just enough flexibility to the rice so they are wonderfully soft again.
Serving Suggestions for Your Savory Rice Bites
So, you’ve mastered the shaping, you’ve done the mixing, and now you have this beautiful little pile of handheld goodness! While these **tuna rice balls** are absolutely stellar all on their own—especially when you need a quick refuel—sometimes it’s fun to build them into a little meal moment. They transition so easily from a grab-and-go snack to a centerpiece for a lovely, light lunch plate.
The beauty of these **savory rice bites** is their compact nature. They don’t try to steal the show from anything else on your plate; they just offer that perfect savory, salty, umami core. They go wonderfully into a bento box layout. Think about pairing them with bright, fresh colors to balance out that creamy tuna filling. A little side of crisp, slightly pickled ginger, or perhaps some crisp steamed edamame tossed lightly in sea salt, really makes the whole presentation pop.
If you are serving these immediately at home and want something simple alongside them, I always lean toward something fresh and zesty. I love making a quick, simple salad to cut through the richness of the mayonnaise. My easy Mediterranean bean salad is a fantastic companion because the beans add extra protein and fiber, turning your quick snack into a really rounded meal without adding any extra cooking time!
Also, if you’re making these for the kids, a few slices of crisp cucumber drizzled with a tiny bit of sesame oil make for a super refreshing side. It keeps the whole affair feeling light, healthy, and delightfully Asian-inspired. See? Even the quickest meals can feel thoughtful and special!
Frequently Asked Questions About Tuna Rice Balls
It’s totally normal to have questions when you try a new international snack, even one as simple as these delicious **tuna rice balls**! Because I want you to feel totally confident in your kitchen, I put together answers to the questions I get asked most often about making perfect onigiri. If you tried the recipe and want to troubleshoot, or if you’re just planning ahead, these tips should help you out! For more recipe confidence boosters, take a peek at my easy chicken chili recipe—another favorite quick meal!
Can I use long-grain rice instead of short-grain for these tuna rice balls?
Oh, I really, really advise against using long-grain rice, even if you’re desperate! The stickiness is everything when you are shaping **japanese rice balls**. Long-grain rice, like Jasmine or Basmati, tends to cook up fluffy and separate, meaning it just won’t hold that lovely triangle shape you worked so hard to form. Short-grain Japanese rice (or even medium-grain sushi rice) releases the right amount of starch during cooking. That starch acts like the natural glue that holds your tuna filling securely inside without you having to mash the rice into a paste.
What are some other onigiri filling ideas besides spicy tuna mayo?
That’s the fun part about **onigiri filling ideas**—the possibilities are endless! While the spicy tuna mayo is addictive, you absolutely can switch it up when you make your next batch of **tuna rice balls**. Two classic, delicious alternatives are salted salmon flakes (shake, don’t stir, when mixing!) or even a tiny bit of pickled plum (umeboshi). For a savory twist, try combining some finely chopped shiitake mushrooms sautéed lightly in soy sauce. All of these fillings work beautifully wrapped in seasoned rice!
How do I make these tuna rice balls healthier?
That’s a great question if you’re looking for **healthy tuna snacks**! Because this recipe uses so few components, we only have a couple of places to tweak things to make them lighter. First, if you drain your canned tuna extra well—like, really press out every drop of water—you can substitute half of the mayonnaise with plain Greek yogurt. It keeps the creaminess but cuts down on fat significantly. Secondly, try using tuna packed in water instead of oil, which is naturally lower in fat overall. It’s simple, effective, and keeps that satisfying texture!
Nutritional Estimates for Tuna Rice Balls
Now, I always want to be super clear about nutrition labels—they can change depending on the brand of mayo you use or if you choose tuna packed in oil versus water. So, please keep in mind that the numbers I’m sharing here are just estimates based on the standard ingredients listed in the recipe. This gives you a good baseline, especially if you’re tracking things like carbs or protein for your week!
For one of these lovely **tuna rice balls**, here is what you can generally expect from a nutritional standpoint:
- Calories: Around 210 per ball. They are surprisingly filling for the calorie count, which is why I recommend them for a great daytime energy boost!
- Protein: Approximately 6 grams. That comes nicely from the tuna, making them a solid, savory snack.
- Fat: About 6 grams total fat. Most of this is coming from the mayonnaise, naturally.
- Carbohydrates: Roughly 34 grams. This is mostly from the rice, which is your main fuel source for energy.
- Sugar and Fiber: We kept the sugar very low—usually just 1 gram—and there’s about 1 gram of fiber too.
I always look at this and think, wow, for such a quick **quick asian snack**, that’s a really balanced profile! Remember, if you end up making the **yaki onigiri recipe** version and brush them with extra soy sauce, the sodium content will increase slightly. I always lean toward fresh, simple ingredients, which generally keeps these humble **savory rice bites** feeling clean and satisfying!
Share Your Homemade Tuna Rice Balls
Now that you have the simple secrets to making perfect **tuna rice balls**, the last step is the best part: sharing your success! In my kitchen, sharing food is how we show love, and I’d be thrilled if you experienced that joy making these **easy tuna rice balls**.
Please don’t keep that deliciousness to yourself! When you try this recipe, I really want to know how it went. Did you go for the spicy kick, or did you stick to simple **tuna mayo rice balls**? Did you shape them into perfect triangles or stick to the classic round shape? Drop a rating below—five stars if they made your day a little easier!—and leave a quick comment telling me about your experience.
If you snapped a picture of your beautiful **japanese rice balls**, please share it! Tag me on social media. Seeing your **portable lunch ideas** out in the wild is truly the highlight of my week and confirms that simple, homemade food really does fit into everyone’s busy life. For any lingering questions about ingredients or techniques, you can always reach out to me through my contact page!
Happy shaping, everyone!
PrintEasy Spicy Tuna Mayo Onigiri (Tuna Rice Balls)
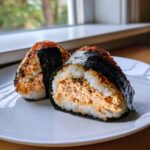
Make these easy tuna rice balls, inspired by Japanese onigiri, for a quick, protein-packed snack or portable lunch. This recipe uses a simple, flavorful spicy tuna mayo filling.
- Prep Time: 15 min
- Cook Time: 0 min
- Total Time: 15 min
- Yield: 6 servings 1x
- Category: Snack
- Method: Hand Forming
- Cuisine: Japanese
- Diet: Vegetarian
Ingredients
- 3 cups cooked short-grain Japanese rice (best rice for onigiri)
- 1 teaspoon salt (for seasoning rice)
- 1 (5 ounce) can tuna in water, drained well
- 3 tablespoons mayonnaise (Kewpie preferred)
- 1 to 2 teaspoons Sriracha (adjust for spice level)
- 1 teaspoon soy sauce
- 4 sheets nori seaweed, cut into strips
- 1 tablespoon toasted sesame seeds (optional topping)
Instructions
- Prepare the rice: While the rice is still warm, mix in 1 teaspoon of salt. Let it cool slightly so you can handle it comfortably.
- Make the spicy tuna filling: In a small bowl, combine the drained tuna, mayonnaise, Sriracha, and soy sauce. Mix until fully combined. This is your no cook tuna filling.
- Shape the rice: Wet your hands lightly with water and sprinkle a little salt on your palms to prevent sticking. Take about 1/2 cup of seasoned rice and flatten it into a disk in your palm.
- Fill the rice ball: Place about 1 tablespoon of the spicy tuna filling in the center of the rice disk.
- Close the rice ball: Gently fold the edges of the rice up and around the filling, pressing lightly to seal the filling inside. Shape the rice into a triangle or round ball (onigiri shaping tutorial). Do not press too hard, or the rice will become dense.
- Wrap with nori: Wrap a strip of nori seaweed around the bottom or middle of the rice ball to act as a handle.
- Serve or store: Sprinkle with sesame seeds if desired. These tuna rice balls are ready to eat immediately or pack for portable lunch ideas.
Notes
- For best results, use freshly cooked, warm Japanese short-grain rice. This rice has the necessary stickiness for shaping.
- If you prefer a less spicy flavor, reduce the Sriracha or omit it entirely for simple tuna mayo rice balls.
- These are excellent for meal prep rice balls; store them in an airtight container in the refrigerator for up to two days.
- To make Yaki Onigiri (pan-seared), brush the outside of the shaped rice balls lightly with soy sauce before pan-frying until golden brown.
Nutrition
- Serving Size: 1 rice ball
- Calories: 210
- Sugar: 1
- Sodium: 350
- Fat: 6
- Saturated Fat: 1
- Unsaturated Fat: 5
- Trans Fat: 0
- Carbohydrates: 34
- Fiber: 1
- Protein: 6
- Cholesterol: 15