
If you are looking for the absolute peak of chocolate decadence, stop right here, because we’ve found it. The **french silk pie** isn’t just a dessert; it’s an experience. It’s that showstopper you bring out when you really want to impress everyone at the table, and frankly, it deserves the hype.
My goal here at DelishCraze, and something I spend a lot of time perfecting, is making these seemingly complicated classics simple for you to create at home. We are focusing entirely on achieving that signature silky, mousse-like texture that makes this pie legendary. By focusing on quality foundations, just like in my flourless chocolate torte, you unlock true flavor. Trust me, when you nail this, you’ll never look back. This is true home-cooked luxury.
- Why This Classic French Silk Pie Recipe Delivers Decadent Chocolate Pie Recipe Results
- Ingredients for the Ultimate French Silk Pie
- How to Prepare the Silky Smooth Dessert: Step-by-Step French Silk Pie Instructions
- Tips for Success When Making French Silk Pie
- Garnishing Your Elegant Homemade Pie: Homemade Whipped Cream Topping
- Storage and Make-Ahead Tips for Your French Silk Pie
- Variations on the Classic French Silk Pie
- Frequently Asked Questions About Making French Silk Pie
- Estimated Nutritional Information
Why This Classic French Silk Pie Recipe Delivers Decadent Chocolate Pie Recipe Results
It can be tough figuring out which recipe to trust when you want that perfect slice. But I promise you, this classic approach is the one that truly shines. We aren’t aiming for ‘good enough’ here; we are aiming for the best chocolate cream pie you’ve ever made. My testing made it clear what really makes the difference between a good pie and a show-stopping one. We get those rich, incredible results because we respect the process.
- The filling achieves an unbelievable lightness that feels like a rich mousse, which is so much better than a dense pudding texture.
- We use high-quality baker’s chocolate—none of that wimpy milk chocolate, ever! That’s why you get that deep, satisfying chocolate hit.
- This recipe is developed to be tried and true, meaning less guesswork for you and more confidence stepping into the kitchen. You can even check out how I nail similar flavors in my chocolate brownie cookies!
Achieving That Velvety Chocolate Dessert Texture
Texture is everything here. If you’ve ever had a grainy or heavy silk pie, you know what I mean. We skip the scary raw egg issue by gently cooking our yolks with the sugar and butter base. This step is crucial. It pasteurizes everything beautifully while still giving us the structure needed to whip up into that rich and airy filling. It’s the secret handshake to getting that true, melt-in-your-mouth quality.
The Importance of Quality Chocolate for Your French Silk Pie
Please, for the love of all things delicious, don’t skimp on the chocolate here. This pie relies on that deep, dark flavor to balance out all that glorious butter and cream. I always look for bittersweet or dark chocolate—we want 60% cacao or higher. When you use good ingredients, you naturally end up with a truly sensational chocolate flavor that defines a great dessert.
Ingredients for the Ultimate French Silk Pie
When you’re making something as indulgent as the best chocolate cream pie, you have to start with ingredients you trust. Since this pie is all about that pure, unadulterated chocolate flavor, the quality of every item really shines through. Don’t worry about tracking down anything too exotic; we’re sticking to pantry staples, but we’re using them correctly!
Gather these items up—you’ll need them all ready before we start whipping. I always lay everything out on the counter first; it keeps the process smooth and stops me from realizing halfway through that I’m out of salt!
- 1 (9-inch) unbaked, flaky pie crust (needs to be baked first, by the way!)
- 8 ounces bittersweet or dark chocolate, chopped (Don’t use chips if you can help it; chopped bars melt much better.)
- 1 cup (2 sticks) unsalted butter, softened (Make sure this is truly soft, not melty.)
- 1 cup granulated sugar
- 4 large egg yolks (These are going into our warm base, so they are safe!)
- 1 teaspoon vanilla extract
- 1/2 teaspoon almond extract (Trust me on the almond; it makes the chocolate richer!)
- 1/4 teaspoon salt
- 1 cup heavy cream, cold (This is for folding into the filling, keep it chilly!)
- 2 tablespoons powdered sugar (For the topping, nothing else works as well.)
- Chocolate shavings, for garnish (This makes it look so elegant!)
If you need a fantastic dip to test your chocolate quality before it goes in the pie, check out my easy chocolate dip recipe while you wait for your butter to soften!
Pie Crust Ideas for Your French Silk Pie
The filling is the star here, but the crust sets the stage! Traditionally, this pie shines in a classic, flaky, buttery crust. That slightly crisp, tender shell is the perfect counterpoint to the velvety filling. Make sure you blind-bake that crust until it’s just barely golden and let it cool completely. If you skip the cooling step, you’ll melt the beautiful filling later—oops!
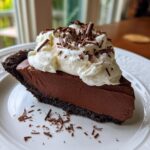
However, I totally understand the appeal of an easier route for a holiday rush. If you’re looking for something different, an Oreo crust is amazing. You just crush up about 24 Oreos—the whole cookie, filling and all—mix them with about 6 tablespoons of melted butter, press it firmly into the plate, and chill it for 30 minutes instead of baking. It gives you a slightly different texture for your *french silk pie*, but it’s equally decadent. It’s a great option when you’re short on oven time!
How to Prepare the Silky Smooth Dessert: Step-by-Step French Silk Pie Instructions
Okay, this is where the magic truly happens! Making this velvety chocolate dessert from scratch is so rewarding, and I’m going to walk you through every little step to ensure we get that perfect, melt-in-your-mouth result. Remember, quick movements and fresh, cool ingredients are our best friends for this specific *french silk pie* recipe.
First things first: that pie shell needs to be fully baked and completely, totally cool. If it’s even slightly warm, we’re going to have soup, not pie. Patience during the cooling stage pays off huge dividends later!
Preparing the Chocolate Base for Your French Silk Pie
Let’s start by getting that chocolate melted down. Use a double boiler—that’s just a heatproof bowl sitting over simmering (not boiling!) water. Melt your chopped dark chocolate until it’s smooth as silk. Take it off the heat and let it cool down just a bit enquanto we get to the creamy part.
In your biggest mixing bowl, it’s time to cream the butter and the granulated sugar. You need that electric mixer here, folks! Beat them together for a good three to five minutes until the mix looks genuinely light and fluffy, almost pale in color. This is critical for a **decadent chocolate pie recipe** foundation. Next, add your four egg yolks, one at a time, making sure each one is fully incorporated before dropping in the next. Finally, drizzle in your vanilla, almond extract, and a tiny pinch of salt. Now, slowly pour that slightly cooled, melted chocolate into the creamy base. Mix on low speed until they are just married together. Scrape down those sides!
Creating the Rich and Airy Filling: Folding Technique for French Silk Pie
Now we introduce lightness! In a separate, super cold bowl, whip that heavy cream until you reach stiff peaks. Hard peaks—you want them standing straight up when you lift the whisk. This gives us the structure for that unbelievable *mousse-like pie filling*.
Here’s the most important part for texture: folding! Take about one-third of your whipped cream and stir it right into the heavy chocolate base—this is called ‘sacrificing’ the cream; it lightens your heavy base so it can accept the rest. Then, gently, gently fold the remaining whipped cream in using a spatula. Cut down the middle, sweep up the side, turn the bowl—repeat. Stop as soon as you stop seeing white streaks. Overmixing here equals heavy pie, and we don’t want that! Pour this amazing blend into your cooled crust. If you want to see how I make a similar technique work for my chocolate caramel toffee crunch cake, check out that recipe!
Once it’s smoothed out, cover it loosely (no touching the surface!) and get it into the fridge for at least six hours, but honestly, overnight is best for that truly set, **silky smooth dessert**. You can find another great meringue-style filling approach over at Joy Food Sunshine if you’re curious about alternatives!
Tips for Success When Making French Silk Pie
Look, even with a tried-and-true recipe like this one, baking always has a few little hiccups. But that’s okay! Cooking is all about troubleshooting, and I want you to feel totally confident tackling this so you get the absolute best chocolate cream pie experience.
The biggest difference I noticed between my early attempts and my final recipe was paying attention to the temperature of the ingredients. If you focus on these three things, you will guarantee success.
- Butter Soft vs. Butter Melted: This is crucial. Your 1 cup of unsalted butter needs to be soft—like, it easily leaves an indent when you press it gently—but it should NOT look greasy or shiny. If it’s too warm, you’ll have a soup when you add the chocolate instead of a thick, creamy base. Set it out an hour before starting, but don’t walk away too long!
- Chopped Chocolate is Better Than Chips: Seriously, try this next time you bake anything! Chocolate chips have stabilizers in them so they hold their shape when baked. We need them to melt smoothly and incorporate flawlessly into the butter mix to achieve that *velvety chocolate dessert* texture. Chopping a good quality bar yields a much more luxurious melt. If you enjoy making your own chocolate creations, you have to try my chocolate chip cookies recipe next!
- Don’t Rush the Chill Time: I know, I know, an entire 6 hours (or overnight!) of waiting feels like forever when this thing smells this good. But the texture of the filling depends on that long, slow chill. It needs time to firm up evenly so that when you slice it, it holds that perfect, soft, yet defined shape. Rushing this step means you might lose the structure of your perfect *french silk pie*.
If you follow these little secrets, you’ll have everyone asking for the recipe for your amazing pie!
Garnishing Your Elegant Homemade Pie: Homemade Whipped Cream Topping
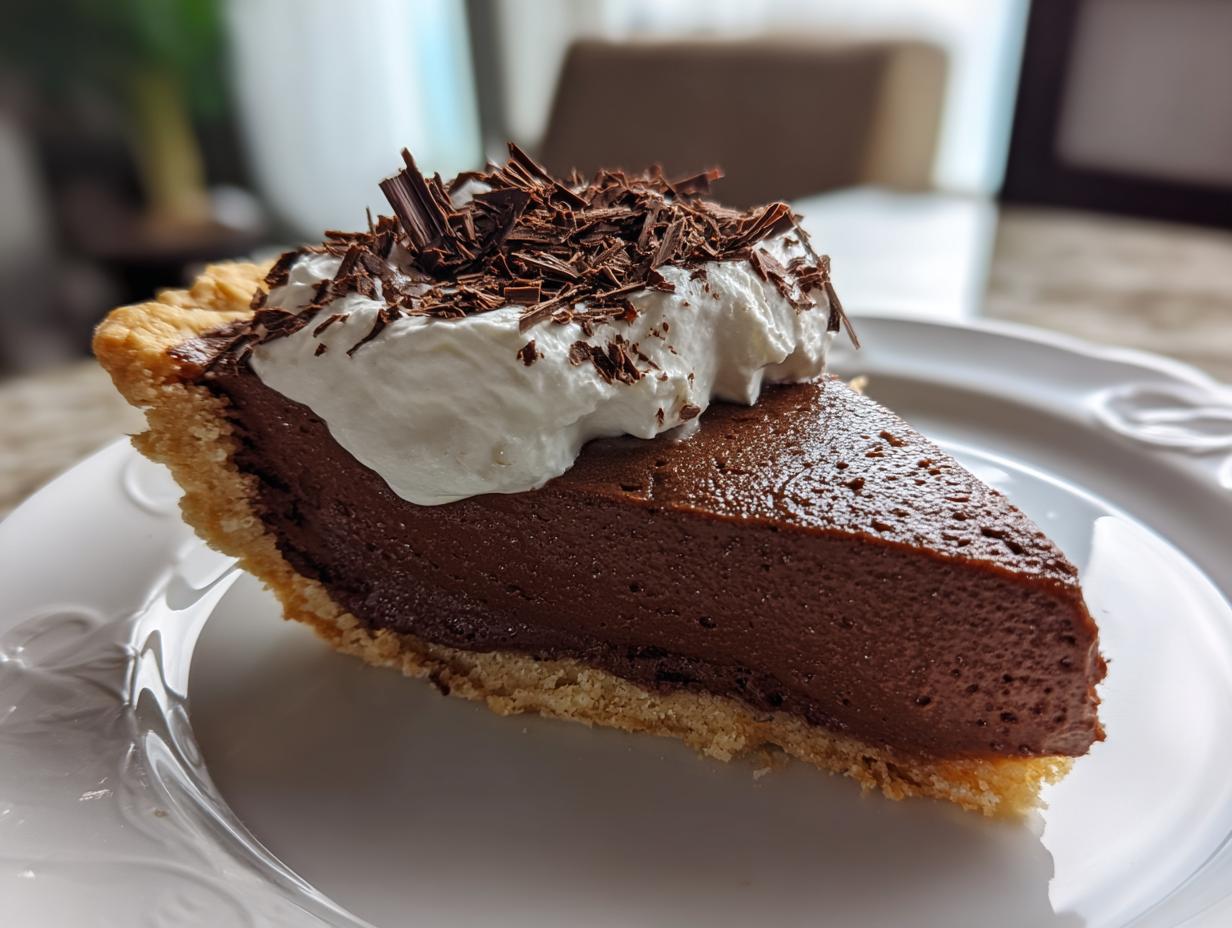
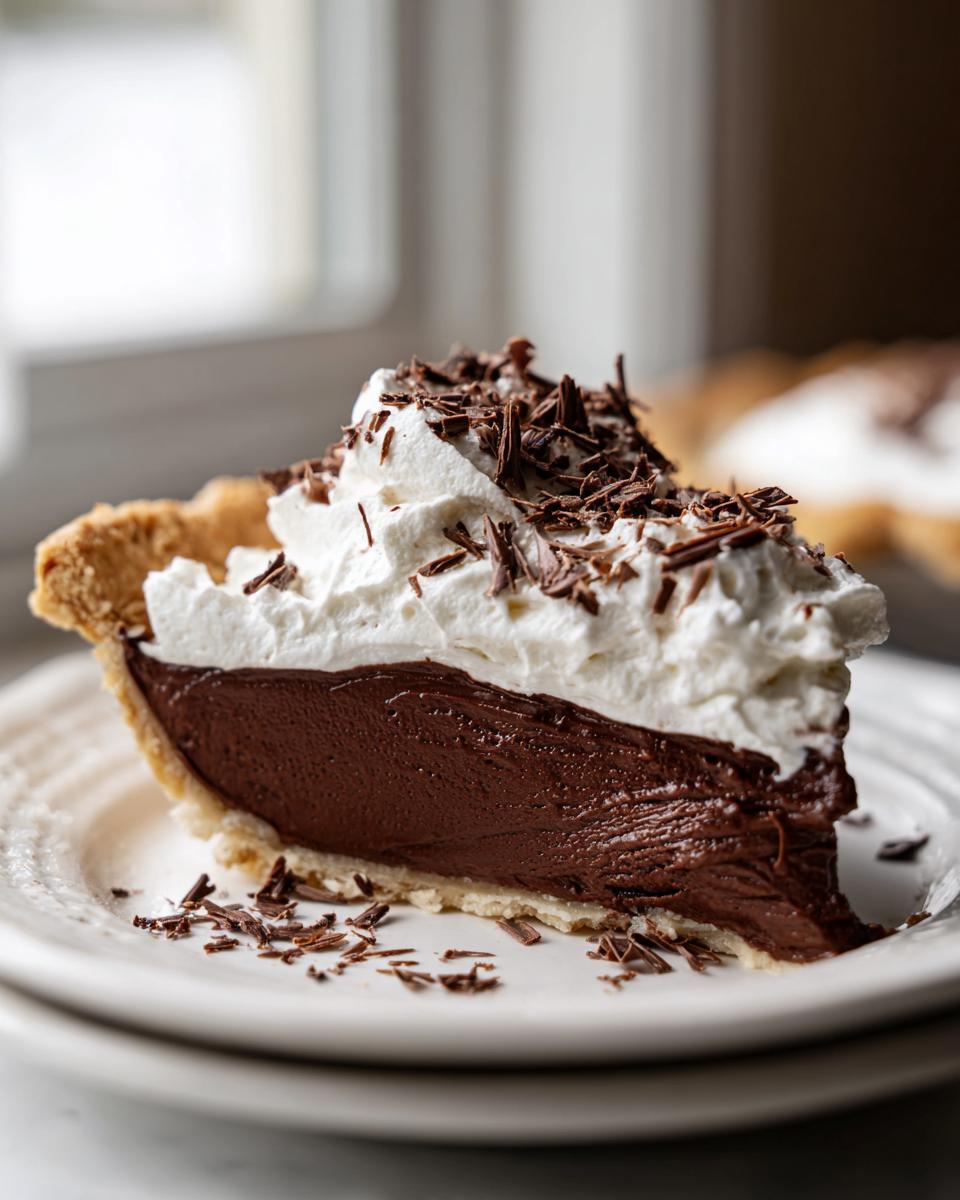
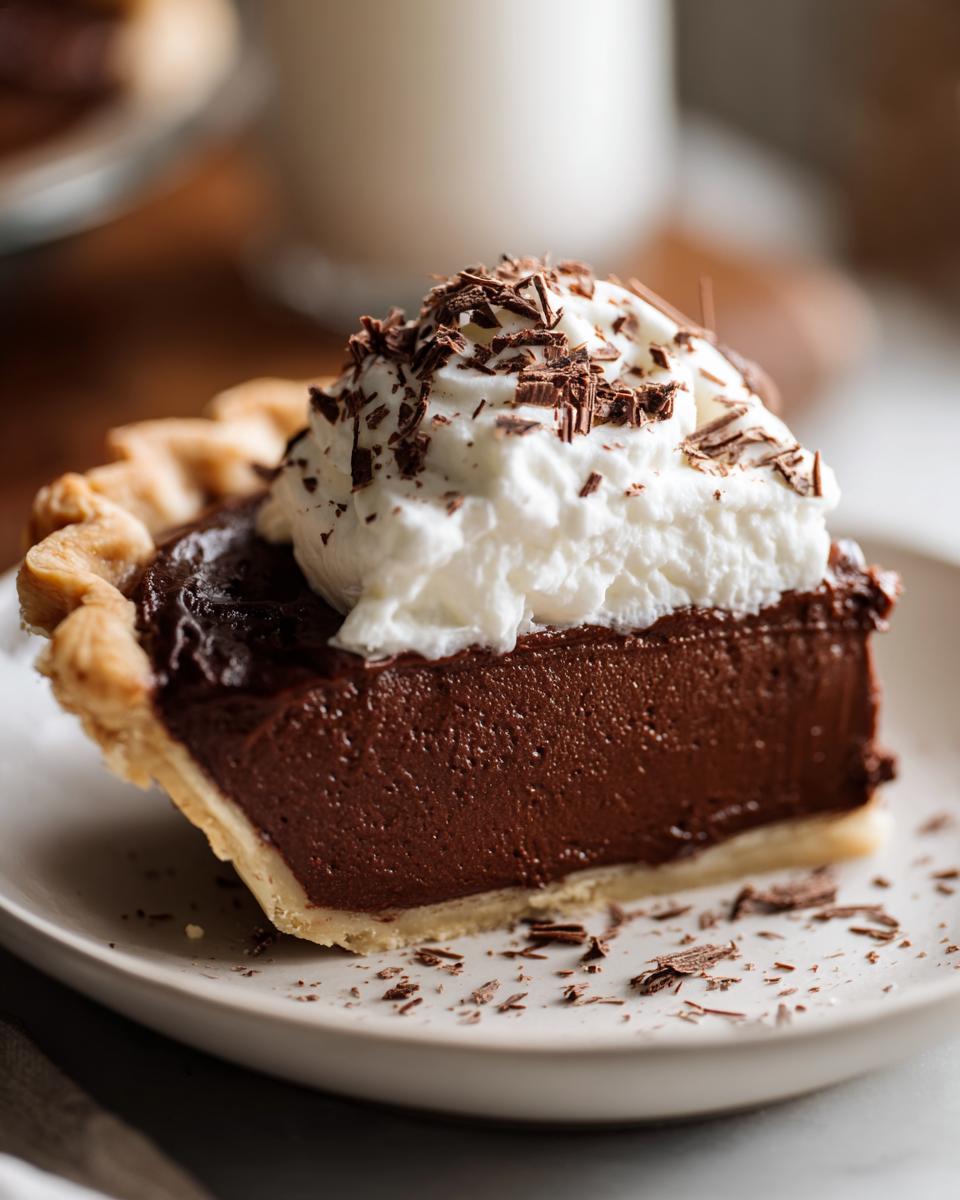
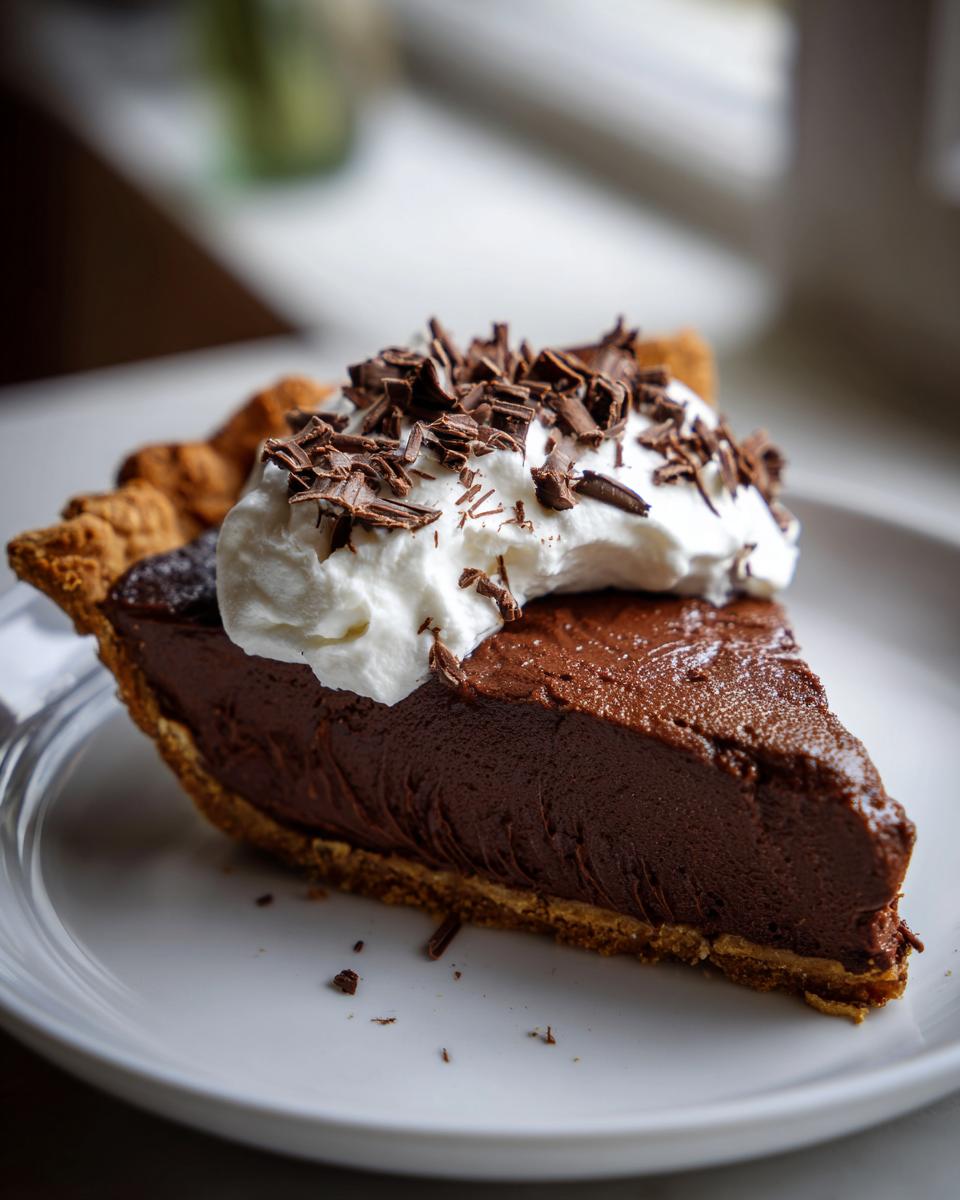
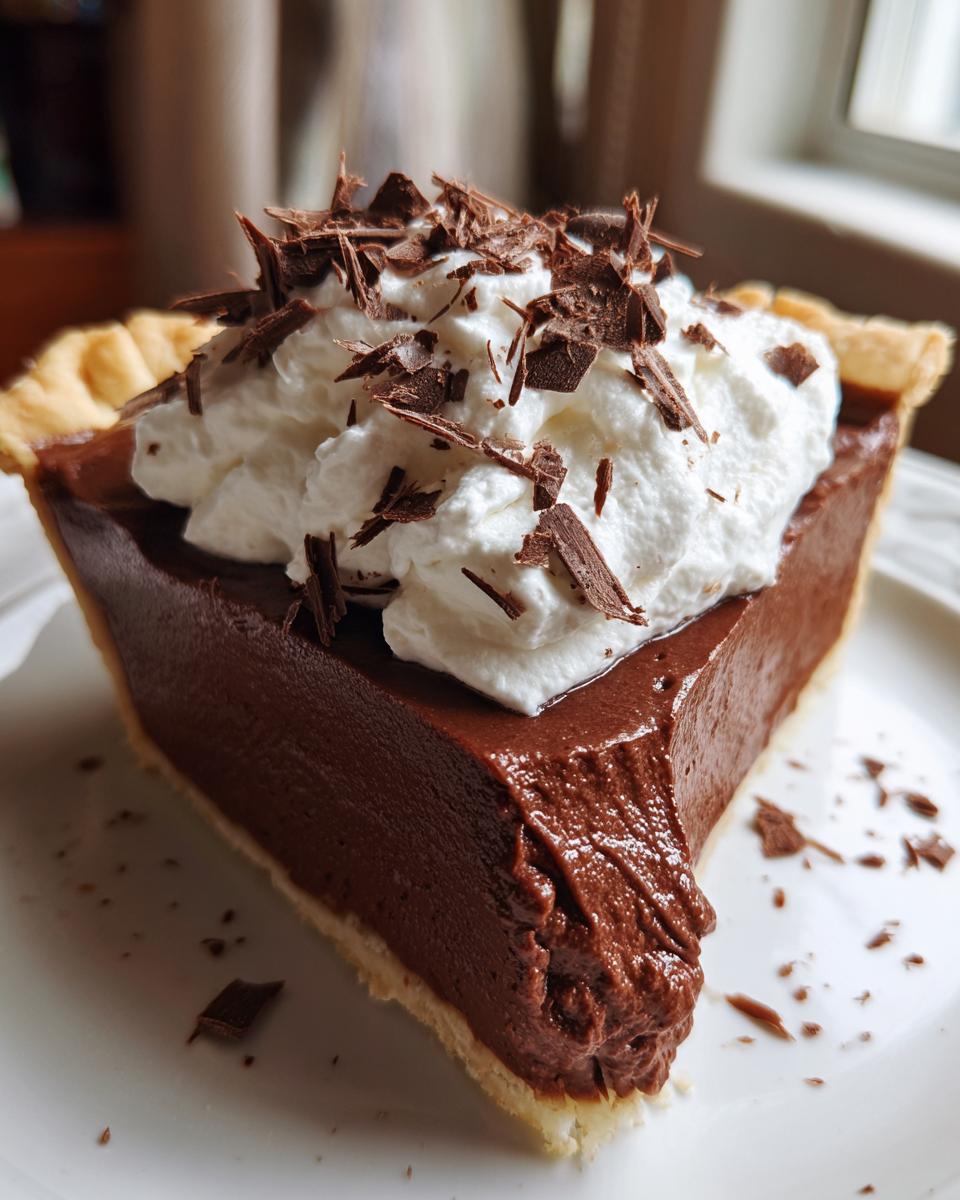
This is the part where your *french silk pie* officially goes from “delicious homemade dessert” to “show-stopping centerpiece.” We’ve put the hard work into that gorgeous, dark, silky-smooth filling, so the topping has to match that level of elegance!
You absolutely need a homemade topping for this. Nothing from a can—not in this house! The beauty of the required homemade whipped cream topping is that it uses the remaining heavy cream we already whipped for the filling, just enhanced slightly. Since we only used a portion of the heavy cream in step 7 of the main instructions, we’ll use the rest here for maximum fluffiness!
Take that remaining cold heavy cream and whip it again until soft peaks form. We only add a touch of powdered sugar (those 2 tablespoons reserved from the ingredient list) to give it just the right gentle sweetness. I love piping this on using a large star tip, giving it height and texture all around the edge. If you’re not into piping, just spreading it on with an offset spatula in lovely swoops works just as well. It’s a *velvety chocolate dessert* that deserves a creamy crown!
Creating the Perfect Chocolate Curl Garnish
This part is pure theatre, but it makes the final presentation so incredibly **elegant homemade pie**. We need chocolate shavings or curls! Don’t worry, it’s easier than it looks. You can use a vegetable peeler on a room-temperature (not warm, not cold) block of good dark chocolate. Just run the peeler down the side of the block and catch the curls as they fall onto a piece of parchment paper.
If you’re feeling extra fancy, you can use a cheese grater for finer shavings. Sprinkle those beautiful dark curls right over the top of your pale whipped cream. The contrast between the dark chocolate and the white cream is stunning. Serve it quickly after garnishing, or pop it back in the fridge for 15 minutes to firm up the topping before slicing. If you’re ever looking for a great frosting recipe to practice your decorative skills on cakes, you should check out my easy 5-minute chocolate frosting!
Storage and Make-Ahead Tips for Your French Silk Pie
One of the best things about this particular **french silk pie** recipe is that it’s actually designed to be made ahead of time, which is a lifesaver when you’re cooking for holidays or big gatherings. You can’t serve this pie warm, so chilling isn’t just recommended; it’s mandatory for that signature texture!
Remember how much effort we put into folding that filling to make it airy and light? If you try to cut it too soon, you risk deflating all that gorgeous air we incorporated. So, we need time for everything to settle into that perfectly firm, yet yielding state. Think of the refrigerator as the final crafting step for this **decadent chocolate pie recipe**.
The All-Important Chill Time
When the pie comes out of the mixing bowl and into the crust, you need to cover it loosely with plastic wrap. Make absolutely sure that wrap isn’t actually touching the top of the whipped cream mixture. We don’t want any condensation marks from where the plastic sat! Then, it goes straight into the cold fridge.
The minimum acceptable chilling time is about six hours. I know, it feels like an eternity when you have a delicious chocolate dessert cooling on the counter. However, if you want that truly spectacular, sliceable, dreamy texture, you really need to aim for overnight chilling. When it’s fully chilled, the butter and chocolate set up just right, ensuring you get that clean slice you’re aiming for.
Storing Leftovers and Freezing Potential
Once this stunning **silky smooth dessert** is set and already topped with its fresh whipped cream, it keeps beautifully in the refrigerator for up to three or maybe even four days. It actually tastes even more intense the second day, which is just a bonus! Keep it covered well in the fridge to stop it from picking up any weird fridge smells.
Now, about freezing: Generally, I don’t recommend freezing the French silk pie once it has the whipped cream topping. Whipped cream doesn’t always thaw well; it can get weepy or slightly grainy. If you MUST freeze it, I suggest freezing the pie *before* you add the final whipped topping. Once thawed overnight in the fridge, then you can whip up a fresh batch of homemade whipped cream topping right before serving. If you’re interested in other make-ahead treats, you might enjoy my recipe for easy Twix cookies, which are perfect for prepping days in advance!
Variations on the Classic French Silk Pie
While I absolutely adore the traditional approach—the one with the flaky crust and the gently cooked egg base—I know that life doesn’t always allow for that level of commitment, especially when you need an impressive dessert fast. As I was digging through what people are searching for, I noticed a couple of popular twists that deserve a mention for when you need maximum flavor with minimum fuss.
This pie is surprisingly adaptable, which is part of why it remains a family favorite for holidays and parties. You can tweak the foundation or change the texture slightly, and it still delivers that deep, rich chocolate flavor everyone craves. Plus, if you hear whispers about Joanna Gaines’ version, know that often those rely on that cookie crust we talked about earlier—a great change for texture!
The biggest alternative people often ask about is how to skip the cooking steps entirely and end up with a lovely, **chocolate lovers dream dessert**. If you’re looking for some easy, totally stress-free options, check out my recipe for no-bake cookies while we discuss how to make this pie simpler!
The Easy Route: No-Bake Chocolate Pie Options
If you want to skip baking the crust entirely, you can absolutely lean into no-bake options. This is a great way to make a lighter, almost chilled mousse pie, especially in the summer months! For a proper **french silk pie** experience in a no-bake format, you generally need to swap out the method for setting the filling.
Instead of relying on the gentle heat treatment for the yolks, you usually rely more heavily on the chocolate and butter combination to set properly in the fridge. Sometimes people incorporate instant pudding mix or use a higher ratio of melted chocolate fortified with gelatin to make sure it firms up enough to slice cleanly. While my preferred method uses the eggs for the silky texture, a dedicated no-bake version is fantastic when you need a true crowd-pleaser with zero oven time. It still offers that rich, decadent feeling, just without the same cooking process.
Crust Swaps: The Cookie Crust Craze
As I mentioned before, using a cookie crust instead of a standard flaky pastry is a huge variation that adds texture and flavor complexity. While the flaky crust offers that beautiful, traditional contrast, a rich cookie crust provides something different—a dense, almost brownie-like base that really hugs that creamy filling.
People love using Oreos, as we discussed, but graham crackers or even shortbread cookies work beautifully too! If you look up the Joanna Gaines version, you’ll often see they lean into that cookie crust style. Using a pre-made crust, or simply crushing up your favorite cookies and mixing them with melted butter, saves a whopping 10 minutes of prep time and eliminates the need to blind-bake. It’s an instant upgrade for making this an **easy yet impressive dessert**!
For more inspiration on making simple swaps that really elevate a classic dessert, I always suggest looking at other tried-and-true recipes, like the ones shared by others who focus on quality home cooking. You can see a great example of a highly-rated pie alternative here!
Frequently Asked Questions About Making French Silk Pie
It’s totally normal to have a few questions when tackling a classic like this, especially when texture is such a huge part of the final result! When people talk about the best **french silk pie**, they are usually worried about two things: the texture and the eggs. Don’t worry a bit! We’ve covered all the bases here to make sure you end up with that fantastic, rich, sliceable pie without any headaches.
Is it safe to use raw eggs in a french silk pie?
That’s a fantastic question, and it’s the main reason why many store-bought or speedy recipes worry folks! In traditional French Silk Pie, the yolks are often incorporated raw. But here at DelishCraze, we skip the raw egg concern entirely! In this recipe, we address that head-on by cooking the egg yolks gently with the sugar and butter base. This step pasteurizes the yolks beautifully, ensuring they are safe while still contributing the necessary richness and body needed for that legendary, **silky smooth dessert** texture. We get all the luxurious creaminess without any of the worry!
Can I make a no-bake chocolate pie version?
Oh yes, you absolutely can adapt this recipe for **no-bake chocolate pie options**! The beauty of the chocolate and butter base is that it firms up nicely in the fridge all on its own. If you are leaning toward a no-bake approach, you’ll want to use a pre-made crust or a crumb crust (like the Oreo one we discussed). The only major difference is that your final chilled filling might not be quite as airy as the one made with the gently cooked yolks, but it will still be incredibly rich and satisfying!
Just make sure that glorious chocolate and butter mixture cools down slightly before you fold in your whipped cream. That way, the fat solidifies properly during that long chill time, giving you a clean slice when it’s time to serve the pie. It turns into a fantastic, rich chocolate cream pie!
Estimated Nutritional Information
When you’re baking something this incredibly rich and wonderful, you know the numbers are going to lean toward indulgence, right? And they should! This is special occasion food, after all. I always like to include a little breakdown of what you’re getting in each slice of this spectacular **french silk pie** recipe, just so you know what you’re diving into.
Please remember that these numbers are just estimates based on the ingredients list I provided, using standard measurements. If you use extra dark chocolate or a sweeter cookie crust, those numbers will shift a bit. Think of this as a helpful guideline rather than exact science. But I think you’ll agree, it’s worth every bit for a dessert this good!
- Serving Size: 1 slice
- Calories: 450
- Fat: 32g (A good amount of that is the wonderful butter and dark chocolate!)
- Saturated Fat: 18g
- Carbohydrates: 38g
- Sugar: 35g
- Protein: 6g
- Cholesterol: 110mg
- Sodium: 150mg
If you are tracking things closely, know that this flavor profile is what makes the best chocolate cream pie—pure, decadent satisfaction! If you happen to be looking for something a little lighter after a big meal, maybe check out my recipe for creamy horseradish sauce—it’s zesty, not sweet!
PrintThe Ultimate Classic French Silk Pie: Silky Smooth Filling with a Buttery Crust
Create a truly decadent dessert with this recipe for classic French Silk Pie. It features an ultra-chocolatey, velvety, mousse-like filling set in a flaky crust, topped with homemade whipped cream.
- Prep Time: 30 min
- Cook Time: 10 min
- Total Time: 300 min
- Yield: 8 servings 1x
- Category: Dessert
- Method: Chilling
- Cuisine: American/French Inspired
- Diet: Vegetarian
Ingredients
- 1 (9-inch) unbaked, flaky pie crust
- 8 ounces bittersweet or dark chocolate, chopped
- 1 cup (2 sticks) unsalted butter, softened
- 1 cup granulated sugar
- 4 large egg yolks
- 1 teaspoon vanilla extract
- 1/2 teaspoon almond extract
- 1/4 teaspoon salt
- 1 cup heavy cream, cold
- 2 tablespoons powdered sugar (for topping)
- Chocolate shavings, for garnish
Instructions
- Prepare your pie crust. If using a store-bought crust, follow package directions for blind baking until lightly golden. Let the crust cool completely.
- Melt the chopped dark chocolate in a heatproof bowl set over a saucepan of simmering water (a double boiler). Stir until smooth. Remove from heat and let cool slightly.
- In a large bowl, beat the softened butter and granulated sugar together with an electric mixer until the mixture is light and fluffy, about 3 to 5 minutes.
- Add the egg yolks one at a time, beating well after each addition until fully incorporated.
- Beat in the vanilla extract, almond extract, and salt.
- Slowly pour the slightly cooled, melted chocolate into the butter mixture while mixing on low speed until just combined. Scrape down the sides of the bowl.
- In a separate, chilled bowl, whip the cold heavy cream until stiff peaks form.
- Gently fold about one-third of the whipped cream into the chocolate mixture to lighten it. Then, gently fold in the remaining whipped cream until no white streaks remain. Be careful not to overmix to keep the filling airy.
- Spoon the silky chocolate filling evenly into the cooled pie crust. Smooth the top with a spatula.
- Cover the pie loosely with plastic wrap, making sure the wrap does not touch the surface of the filling. Chill in the refrigerator for at least 6 hours, or preferably overnight, until the filling is firm.
- Before serving, whip the remaining heavy cream with the powdered sugar until soft peaks form. Spread or pipe the whipped cream over the chilled pie.
- Garnish the top with chocolate shavings or curls. Slice and serve cold.
Notes
- For a richer flavor, use high-quality dark chocolate (60% cacao or higher).
- If you prefer an Oreo cookie crust, combine 24 crushed Oreo cookies with 6 tablespoons of melted butter and press into the pie plate. Chill for 30 minutes instead of baking.
- To achieve the best silky texture, ensure your butter is truly softened but not melted, and fold the whipped cream in gently.
Nutrition
- Serving Size: 1 slice
- Calories: 450
- Sugar: 35g
- Sodium: 150mg
- Fat: 32g
- Saturated Fat: 18g
- Unsaturated Fat: 14g
- Trans Fat: 0.5g
- Carbohydrates: 38g
- Fiber: 3g
- Protein: 6g
- Cholesterol: 110mg