
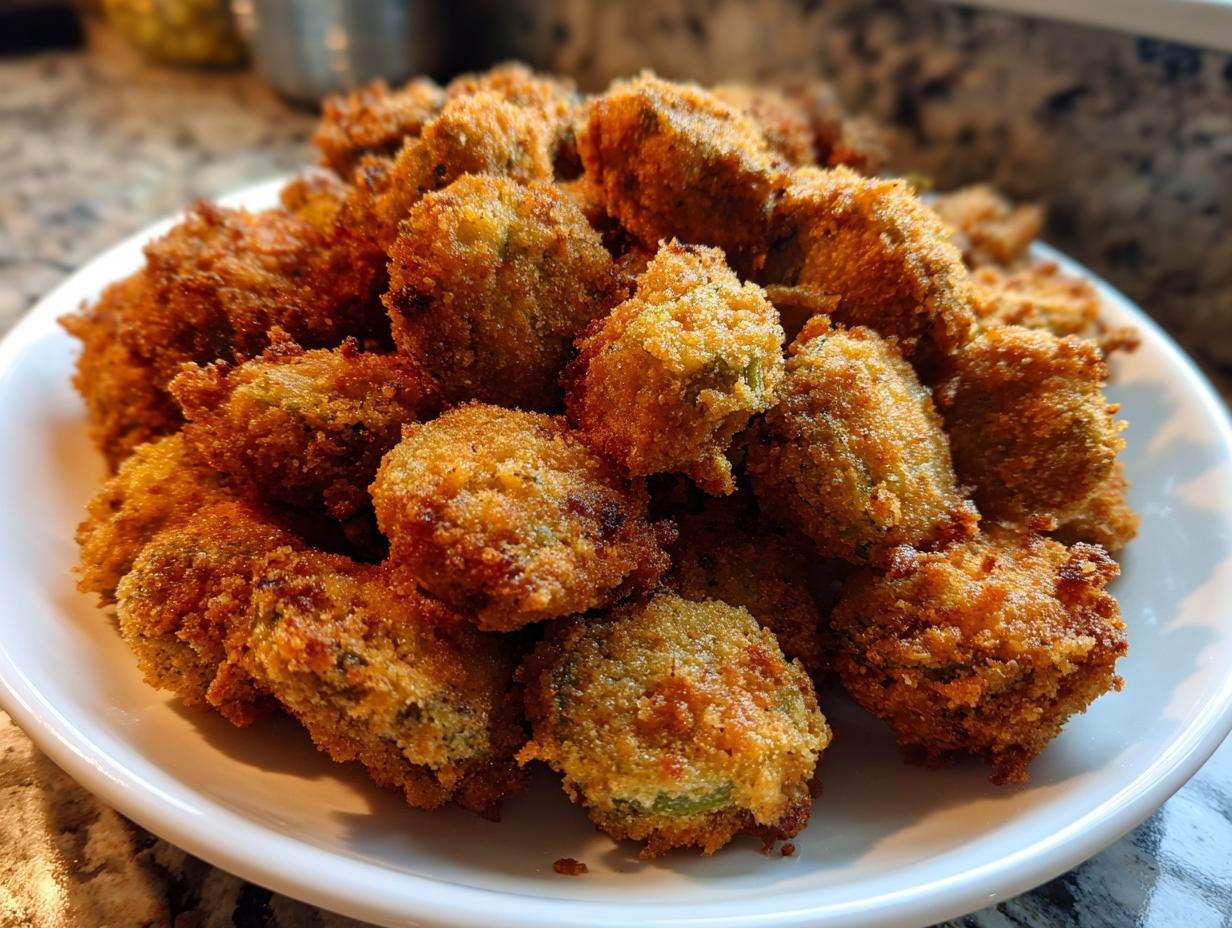
When that craving hits for true Southern comfort food, sometimes nothing beats a perfectly golden, crunchy vegetable side dish. But let’s be honest: mushy, slimy okra is a tragedy! That’s why I worked hard to nail down this absolute best way to make fried okra. My goal here at DelishCraze is to keep that amazing home-cooked magic accessible, not stressful. So, forget the messy, complicated methods. This recipe focuses intensely on achieving maximum crispiness and completely banishing the slime ghost using just a classic buttermilk soak and seasoned cornmeal dredge. You’ll have that crunchy, irresistible side dish ready faster than you think! If you love these Southern flavors, you absolutely have to check out my recipe for fried cornbread hoecakes next.
- Why This is the Ultimate Crispy Fried Okra Recipe
- Ingredients for Perfect Southern Fried Okra
- How to Make Crispy Fried Okra: Step-by-Step Instructions
- Tips for Success: Mastering the Art of Fried Okra
- Ingredient Notes and Easy Fried Okra Substitutions
- Storage and Reheating Instructions for Leftover Fried Okra
- Serving Suggestions for Your Crunchy Vegetable Side
- Frequently Asked Questions About Making Fried Okra
- Estimated Nutritional Information for Crispy Fried Okra
Why This is the Ultimate Crispy Fried Okra Recipe
I’ve tried every trick in the book, and this technique delivers every single time. This isn’t just any fried okra; this is the one that stays crispy even after sitting out for a little while. Trust me on these two non-negotiable steps:
- The Buttermilk Soak: This is your secret weapon against sliminess. The acid in the buttermilk tenderizes the okra beautifully before it even hits the oil.
- The Cornmeal Dredge: We use a hearty blend of cornmeal and flour to create a substantial, golden crust that locks in the crunch.
The best part? We keep the total time under 30 minutes! It’s ready faster than ordering takeout, and honestly, so much better. If you love crispy coatings, you’ll want to save my recipe for soft, fluffy dinner rolls too; they’re heavenly alongside this side dish.
Ingredients for Perfect Southern Fried Okra
Gathering your ingredients is half the battle won! We’re keeping this super simple so that the natural flavor of the okra shines through that gorgeous crust. Since you’re using buttermilk soon, you should definitely check out how I boost flavor in my buttermilk cornbread recipe before you start!
For one pound of okra, here’s what you’ll need:
- 1 pound fresh okra—make sure it’s washed and sliced into neat 1/2-inch rounds.
- 1 cup buttermilk—this is key for the soak, so measure it out!
- 1 cup yellow cornmeal—this gives us that classic Southern texture.
- 1/2 cup all-purpose flour.
- 1 teaspoon salt, 1/2 teaspoon black pepper, and 1/2 teaspoon garlic powder for our seasoning blend.
- A tiny pinch of cayenne pepper if you like a little kick (optional, but I always add it!).
- Plenty of vegetable oil for frying—about 1 to 1.5 inches deep in your skillet.
How to Make Crispy Fried Okra: Step-by-Step Instructions
Okay, this is where the real magic happens! Getting the technique right is what transforms a good vegetable side into a truly great one. Follow these steps closely, and you’ll be amazed at how easy it is to get that perfect crunch on your crispy fried shrimp texture but with savory okra.
Preparing the Okra and Buttermilk Soak
First things first: moisture is the enemy of crispiness, except when it comes to the soak! Wash your okra pods really well, and then you absolutely must pat them bone dry with paper towels. Once they’re dry, slice them into beautiful 1/2-inch rounds. Now, toss those rounds right into the buttermilk. Let them hang out there for at least 15 minutes. This soak is your secret weapon for achieving that wonderful, lovely no slime fried okra.
Creating the Seasoned Cornmeal Coating for Fried Okra
While the okra is chilling out, mix up your dry dredge: that cornmeal, flour, salt, pepper, garlic powder, and optional cayenne. Whisk it all until it’s perfectly blended. Next, take the okra out of the buttermilk—let the extra drip off—and toss it right into that seasoned cornmeal. Don’t just stir it! You need to press that coating onto every single piece. Get rough with it; really work that cornmeal in there so it makes a sturdy crust.
Frying Technique for Crunchy Fried Okra
Heat up about an inch to an inch-and-a-half of vegetable oil in a heavy skillet until it hits 375 degrees Fahrenheit. If you don’t have a thermometer, drop a tiny pinch of coating in; if it sizzles instantly, you’re good. Carefully drop the okra in batches—do NOT overcrowd the pan or the temperature drops! Fry for just about 3 to 5 minutes, turning them until they are that perfect deep golden color. Scoop them out with a slotted spoon and put them straight onto a wire rack to drain. That rack keeps the bottom from getting soggy—we want crunchy bits all around!
Tips for Success: Mastering the Art of Fried Okra
Getting **fried okra** perfectly crisp is about more than just the ingredients; it’s about managing the environment! Once you’ve got your coating on, you need serious heat to seal that crunchy shell quickly. My biggest advice: if you own a cast iron skillet, pull it out! It holds heat so much better than thinner pans, which keeps the oil temperature stable when you add the cold okra. If you want more excellent crispy recipes, have a look at my homemade potato chips recipe.
Also, don’t just dump them onto paper towels to drain—that traps steam and softens the coating immediately! You want to use a wire rack set over a sheet pan. This allows air to circulate underneath. If you’re cooking a big batch, keep the finished okra on that rack inside a very low oven (like 200 degrees) while you finish the rest. They stay perfectly warm and crunchy until everyone is ready to dig in. It’s these little details that turn good frying into great frying!
Ingredient Notes and Easy Fried Okra Substitutions
I know sometimes we don’t always have every single item sitting in the pantry, and that’s perfectly fine! That’s part of my whole philosophy here—making sure cooking stays joyful, not frustrating. If you’re missing that specific ingredient for this great fried okra, don’t panic. We can absolutely make smart swaps that keep that crispy texture intact.
Let’s talk about the buttermilk first, since that soak is so important. If your fridge is empty of buttermilk, you can whip up a quick substitute right at home! Just take one cup of regular milk—whole milk is best if you have it—and stir in about a tablespoon of white vinegar or lemon juice. Let that sit on the counter for about five minutes until it looks slightly curdled. That acidity acts just like buttermilk, and trust me, it does the heavy lifting to keep things slimy later.
Now, for the coating, which determines your crunch factor. The 1 cup cornmeal to 1/2 cup flour blend I suggest gives you that authentic, slightly toothy Southern crust. If you prefer something a little lighter and less rustic, you can gently shift that ratio. Maybe try 3/4 cup cornmeal to 3/4 cup flour. But be careful not to ditch the cornmeal entirely! That’s what delivers the necessary texture and that beautiful golden crunch. Keep butter or margarine out of the dredge, though; it doesn’t crisp up nearly as well as the cornmeal does.
If you’re looking for something phenomenal to dip that crunchy side into, you absolutely must try my recipe for easy homemade BBQ sauce. It’s the perfect tangy complement to savory fried goodness!
Storage and Reheating Instructions for Leftover Fried Okra
I hope you have some leftovers because this stuff is addicting! But we all know that fried food rarely tastes as good the next day unless you handle it right. My biggest piece of advice is to avoid the microwave at all costs—it instantly turns that beautiful, crunchy cornmeal coating into sad, steamy mush. We worked so hard for that texture!
For storage, you want to keep things dry. If you have cooled okra remaining, place it in an airtight container. If you plan to eat the leftovers within a day, room temperature is often fine, but for longer storage (up to three days), pop it in the fridge. Don’t leave it sitting out for hours waiting for leftovers; we want to keep our comfort food safe.
The real trick is reheating to bring back that crispness. You have two fantastic options that work miracles. Your best bet is to use the oven or an air fryer. Toss the cold okra onto a baking sheet—don’t pile it high, or it won’t crisp evenly—and heat it at about 375 degrees Fahrenheit for about 8 to 10 minutes. If you use the air fryer, you only need about 5 minutes at 350 degrees.
This quick blast of dry heat reminds the coating what it felt like when it was fresh out of the oil. It’s almost as good as the first batch! If you’re looking for a fantastic main dish to serve alongside your perfectly reheated side, I highly suggest my easy 30-minute Chicken Marsala recipe. It’s quick enough that you can reheat that okra while the chicken simmers!
Serving Suggestions for Your Crunchy Vegetable Side
Now that you have this golden, perfectly crunchy side dish ready to go, you might be wondering, “What am I going to eat this with?” That’s the fun part! Southern **fried okra** is so versatile; it can handle heavy BBQ or stand up next to something bright and fresh. It really shines next to my favorite comfort classics.
For a true, hearty Southern dinner plate, you just can’t beat piling this right next to some smoky, slow-cooked pulled pork or tangy, grilled BBQ chicken. The crispy texture contrasts beautifully with the tender, saucy meat. It’s the quintessential plate-filler!
But don’t save it just for cookouts! This is also the perfect crispy counterpoint to something rich. One of my family’s favorite pairings is serving it alongside a big, steaming bowl of chili. Speaking of which, if you need a great hearty bowl to balance out that crunch, you have to try my easy 30-minute black bean chili recipe. The heat from the chili and the savory crunch of the okra? perfection.
And honestly? Sometimes I just make a big batch for myself and eat it straight off the cooling rack dipped in ranch dressing or a spicy dipping sauce. Don’t judge me! It makes a fantastic appetizer for game day too.
Frequently Asked Questions About Making Fried Okra
I know sometimes we have little questions pop up when we’re deep into a recipe. Fried okra can seem intimidating, but once you know the secrets, it’s totally straightforward. Here are some of the things people ask me most often when they try to make those perfect, crunchy little rounds.
How do I stop my okra from being slimy when frying?
Oh, the dreaded slime! This is the number one question about okra, period. The slime—which is a totally natural mucilage—is managed by two things we did in the recipe: first, you have to wash and pat the okra completely dry before it goes into the buttermilk. Second, the buttermilk soak itself is key. The acid in the buttermilk breaks down that slimy texture before the heat can set it. If you follow that soak time (15 minutes minimum!), you should have beautiful, firm okra.
Can I use an Air Fryer or bake this fried okra recipe?
You absolutely can, and lots of folks prefer it for a lighter side dish! Baking or air frying will give you a crispy coating, but it won’t achieve that deep, all-over golden crunch you get from pan-frying in hot oil. If you use an appliance, make sure you spray the coated okra with a little bit of cooking spray, even if you’re air frying. And definitely skip the paper towels underneath and use a basket or wire rack so air can circulate all around your okra.
What oil is best for frying okra?
For that classic, clean taste, you want a neutral oil with a high smoke point. Vegetable oil is what I listed, and it works perfectly and keeps the cost down. Canola oil is a great alternative. You want an oil that can hold steady around 375 degrees Fahrenheit without smoking too much. Avoid olive oil or butter for deep frying, as they burn too easily and don’t get hot enough without breaking down.
Is it necessary to use both cornmeal and flour in the coating?
For the best fried okra, yes, I highly recommend using both! The flour helps keep the coating light and prevents it from falling off when it hits the oil. The cornmeal is what gives you that gorgeous, authentic Southern texture and that deep, satisfying crunch we are looking for. If you cut the flour out, you might find the crust a bit too hard or heavy.
Can this recipe be made ahead of time?
You can prep the ingredients—slice the okra, mix the dredge—ahead of time, but you shouldn’t coat the okra until just before you’re ready to fry it. The coating sticks best when it’s fresh. If you want to make the whole batch early, see my tips in the previous section about storing them and reheating them in the oven to keep them crisp!
If you’re looking for another quick-prep comfort meal to serve this with, you should check out my recipes for easy one-pot cheesy pizza pasta bake; it’s ridiculously easy!
Estimated Nutritional Information for Crispy Fried Okra
Now, I always say that cooking should be about joy, not about counting every single grain, but I know some of you like seeing the numbers! Since this is a fried food, naturally, it has a bit more fat than a steamed veggie, but it packs a decent amount of fiber too, which is great.
Below are the estimated values for one serving of this crispy fried okra recipe. Remember, these figures are just a ballpark estimate. We’re counting on using standard grocery store ingredients here, and your exact sodium or fat content will shift a bit depending on how much salt you sprinkle on at the end, or the precise brand of cornmeal you use. If you’re looking for something lighter overall, you should check out my easy Mediterranean bean salad recipe for a fresh option!
Here’s the breakdown:
- Serving Size: 1 serving
- Calories: 280
- Fat: 18g (Be sure to drain well!)
- Carbohydrates: 28g
- Protein: 5g
We keep the sugar relatively low here, around 4g, which proves that you don’t need a lot of sugar to make a savory side dish absolutely pop! Enjoy it responsibly, and know that you made it yourself with whole ingredients!
PrintUltimate Crispy Southern Fried Okra (Buttermilk & Cornmeal Dredge)

Make classic Southern fried okra that is perfectly crispy and golden brown. This easy recipe uses a buttermilk soak and seasoned cornmeal coating to achieve a satisfying crunch without the slime.
- Prep Time: 15 min
- Cook Time: 15 min
- Total Time: 30 min
- Yield: 4 servings 1x
- Category: Side Dish
- Method: Pan Frying
- Cuisine: Southern American
- Diet: Vegetarian
Ingredients
- 1 pound fresh okra, washed and sliced into 1/2-inch rounds
- 1 cup buttermilk
- 1 cup yellow cornmeal
- 1/2 cup all-purpose flour
- 1 teaspoon salt
- 1/2 teaspoon black pepper
- 1/2 teaspoon garlic powder
- 1/4 teaspoon cayenne pepper (optional)
- Vegetable oil, for frying
Instructions
- Prepare the okra: Wash the okra pods thoroughly and pat them completely dry with paper towels. Slice the okra into 1/2-inch rounds.
- Soak the okra: Place the sliced okra in a medium bowl and cover it completely with buttermilk. Let it soak for at least 15 minutes. This step helps prevent sliminess.
- Prepare the dredge: In a separate shallow dish, whisk together the cornmeal, flour, salt, pepper, garlic powder, and cayenne pepper.
- Coat the okra: Working in batches, remove the okra from the buttermilk, allowing excess to drip off slightly. Toss the okra pieces thoroughly in the cornmeal mixture until every piece is evenly coated. Press the coating onto the okra gently.
- Heat the oil: Pour about 1 to 1.5 inches of vegetable oil into a large, heavy-bottomed skillet (cast iron works best) until it reaches about 1/2 inch deep. Heat the oil over medium-high heat until it reaches 375 degrees Fahrenheit.
- Fry the okra: Carefully add the coated okra to the hot oil in a single layer, ensuring you do not overcrowd the pan. Fry for 3 to 5 minutes, turning occasionally, until the coating is deep golden brown and crispy.
- Drain: Use a slotted spoon to remove the fried okra from the oil. Place the okra on a wire rack set over a baking sheet or on a plate lined with paper towels to drain excess oil.
- Season and serve: Sprinkle immediately with a little extra salt if desired. Serve your crispy fried okra hot as a side dish or appetizer.
Notes
- For the best results and to prevent sliminess, make sure your okra is completely dry before soaking it in the buttermilk.
- If you do not have a thermometer, the oil is ready when a pinch of the cornmeal mixture sizzles immediately when dropped in.
- To keep the okra crispy while you finish frying the remaining batches, place the cooked okra on a wire rack in a 200 degree Fahrenheit oven.
Nutrition
- Serving Size: 1 serving
- Calories: 280
- Sugar: 4
- Sodium: 450
- Fat: 18
- Saturated Fat: 3
- Unsaturated Fat: 15
- Trans Fat: 0
- Carbohydrates: 28
- Fiber: 6
- Protein: 5
- Cholesterol: 15