
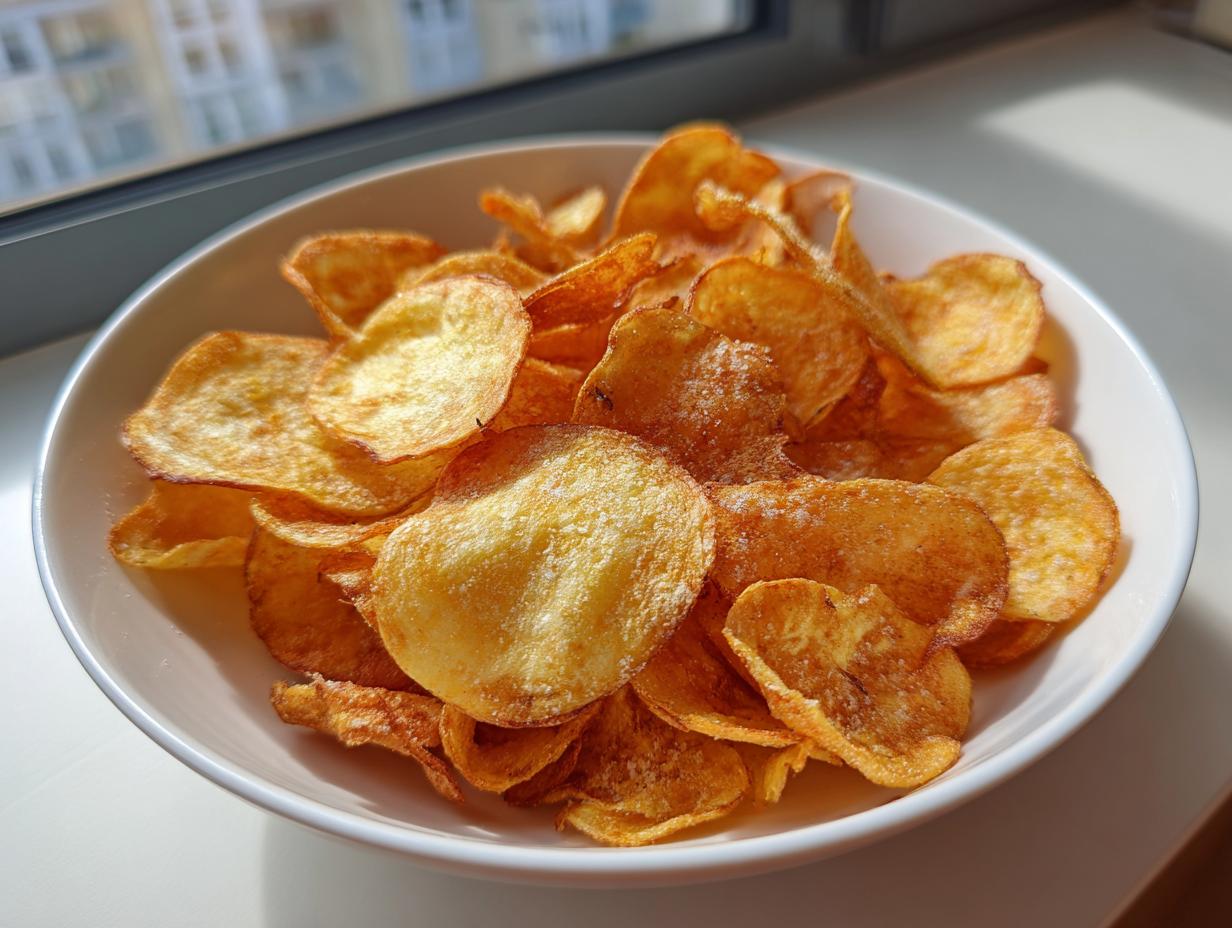
Oh, that craving! It hits you right when you’re settling in for a movie or when the kitchen needs that perfect little salty something. We all know the deal—store-bought bags just don’t hit the spot like they used to. That’s why I’m so excited to share my go-to formula for the ultimate crispy homemade potato chips. Seriously, tossing those thinly sliced potatoes in the air fryer or oven gives you that satisfying crunch without any of the guilt!
When I first started DelishCraze, I wanted to focus on turning those complicated, fussy recipes into something anyone could manage on a busy weeknight. I’m Olivia Rosewood, and my goal is always to make your kitchen feel like a place of connection, not stress. Making your own potato chips from scratch falls right into that wheelhouse—it’s simple, it’s rewarding, and it tastes miles better than anything you can grab off the shelf. Trust me, once you master this technique, you’ll never look back. It’s about creating comfort classics that fit right into your modern life.
- Why You Will Love These Crispy Potato Chips Recipe
- Essential Ingredients for Perfect Potato Chips
- Expert Tips for Achieving Maximum Crispiness in Potato Chips
- How to Make Crispy Air Fryer Potato Chips Recipe
- Alternative Method: Baking Potato Chips in the Oven
- Flavor Variations for Your Homemade Potato Chips
- Serving Suggestions for Your Crunchy Potato Chips
- Storage and Reheating Instructions for Homemade Potato Chips
- Frequently Asked Questions About Making Potato Chips
Why You Will Love These Crispy Potato Chips Recipe
I want you to ditch the dread that comes with worrying about what’s actually *in* your favorite snack. When you make these yourself, you’re in complete control, and honestly, the payoff is huge. Making your own potato chips is surprisingly fun!
- Maximum Crunch, Zero Guilt: We’re talking shatteringly crispy potato chips cooked in the air fryer or oven, not submerged in buckets of oil. They are brilliant for feeling like you’re treating yourself without overdoing it.
- Incredibly Easy Potato Chip Recipe: The main work is slicing! Once you get past the soaking step—which is totally worth it—the cooking process is hands-off. Seriously, this is one of the best homemade snacks you can whip up quickly.
- Perfectly Salted Every Time: Say goodbye to that one chip that’s way too salty and the next one that tastes like nothing. You control the seasoning blend, making sure every batch is seasoned just the way your family likes it.
- The Ultimate Party Snack Recipes Staple: These don’t last long! They are far more exciting than a store-bought bag, making them a huge hit for game day, movie nights, or whenever you need snack attack ideas.
- Amazing Texture Consistency: By focusing on removing the starch and drying thoroughly, we guarantee that fantastic, classic potato chips texture that snaps instead of bends.
- Fast Prep for Instant Gratification: While the soaking takes a little time (which you can use to clean up!), the hands-on prep is minimal, getting you to those crunchy perfection points faster than you think.
If you’re looking for other great nibbles for your next gathering, make sure you check out my list of favorite appetizers and party snacks for serving alongside these beauties!
Essential Ingredients for Perfect Potato Chips
When we are trying to achieve that truly satisfying, shatteringly crisp result with our homemade potato chips, the quality and specific type of ingredient matters a whole lot. I’ve learned over the years that skimping here is the fastest way to end up with limp snacks instead of our goal: the best crunchy snacks!
Here is exactly what you need to pull together your batch of classic potato chips. Don’t worry, these are simple pantry staples, but pay close attention to the potato choice!
- Large Russet Potatoes (2): This is my non-negotiable potato choice! Russets are high in starch, and that starch is what converts into that perfect, non-soggy exterior when we cook them. You need big ones because they yield the biggest slices.
- Olive Oil (1 tablespoon): I use a standard olive oil here, just enough to lightly coat everything. We’re not deep-frying, so a little goes a long way to help our seasonings stick and promote that golden color.
- Fine Sea Salt (1 teaspoon): Fine salt is better than coarse salt for seasoning thin slices because it distributes evenly. You can always add more at the end, but you can’t take it away!
- Garlic Powder (1/2 teaspoon): This adds a background depth of flavor that makes them taste almost instantly better than basic salted potato chips.
- Black Pepper (1/4 teaspoon): Just a touch of freshly ground pepper to round out the flavor profile. If you prefer something milder, you can skip this.
See? Nothing scary! The magic of these healthy chip recipes isn’t in complicated spice rubs; it’s in how we treat the primary ingredient: the potato itself. Once you have these items ready to go, we can move on to making sure they come out perfectly thin.
Expert Tips for Achieving Maximum Crispiness in Potato Chips
If you want to move past the soggy, disappointing pile of spuds and achieve that truly satisfying, classic potato chips crunch, you need to treat the potato right *before* it even sees the oil or the air fryer basket. Forget about just throwing everything in and hoping for the best; my best homemade snacks always rely on solid technique. Getting these **thinly sliced potatoes snack** just perfect is where all the expertise comes in handy.
I learned from years of trial and error that the two biggest enemies of a crispy chip are starch and water. If you skip these preparation steps, the end result will tell on you, trust me!
The Critical Role of Starch Removal for Crispy Potato Chips
Okay, this is step one, and people skip it constantly! When you slice those potatoes, they release starch—that white, sticky residue. If that starch stays on the surface while cooking, it essentially glues the slice together or burns unevenly, leading to that chewy, limp texture we hate.
That cold water bath? It’s non-negotiable. Soaking the slices for 30 minutes or more forces that excess starch out into the water. I always drain the cloudy water and rinse them again until the water runs perfectly clear. Think of it as giving your potatoes a relaxing spa bath before they face the heat. This single step is the difference between a sad, soft chip and the ultimate crunchy snack.
Uniform Slicing: The Secret to Evenly Cooked Potato Chips
You can soak your potatoes for hours, but if you slice them unevenly, you’re still going to have problems. If one slice is thick and another is paper-thin, the thick one will still be soft when the thin one has already turned dark brown or, worse, burned! We need consistency for delicious, homemade potato chips.
My absolute favorite tool for this is a mandoline slicer. It makes quick work of this step, and you can set the thickness exactly where you need it—I aim for about 1/16 of an inch. If you don’t have one, use your sharpest knife and take your time. Watch how they cook up evenly! Also, remember the final step before seasoning: drying them completely. I mean *completely*. Use a thick towel and press down hard. If there’s any surface moisture left, it steams instead of crisps. Then you can toss them with your seasonings and get ready for some amazing easy stovetop chicken and gravy side dish!
How to Make Crispy Air Fryer Potato Chips Recipe
Alright, now that we’ve mastered the slicing and the de-starching—which, hint, hint, is 80% of the battle—it’s time to get these into the air fryer! This is where those almost impossibly thin slices transform into the best crunchy snacks you’ve ever had. We need precision here, especially with the temperature, so your potato chips get golden instead of burnt plastic tasting.

Preparation Steps for Homemade Potato Chips
First things first: make sure those potatoes are spotless. Wash them up well, but don’t bother peeling them! I love the rustic look the skins give the final snack. After slicing them super thin—remember the mandoline or your sharpest knife—get them straight into that cold water bath we talked about. Soak them for at least 30 minutes, drain it, and rinse until the water is totally clear.
Here’s the critical part again: you have to pat them bone dry. I lay them out on towels and just press, press, press. Any water left will fight against the heating element and steam your chips. Once they look dry, they’re ready for the flavor!
Seasoning and Air Frying Your Potato Chips
Toss those dry slices gently with your olive oil and seasonings—that salt, pepper, and garlic powder blend is perfection. Now, preheat your air fryer to 350°F (175°C). This is important for getting that blast of heat right away. Don’t overcrowd the basket, please! Work in single layers, even if it means doing several small batches. Crowding leads to steamy, sad chips. Air fry for about 10 to 15 minutes total. You absolutely must shake the basket every five minutes. They cook fast, so watch them closely after the 10-minute mark until they are beautifully golden brown and crisp. Immediately pull them out and let them cool on a wire rack; they crisp up even more on their own!
If you’re looking for another simple, satisfying air fryer win, check out my tips for achieving perfect crispy air fryer chicken tenders while you wait for these to cool!
Alternative Method: Baking Potato Chips in the Oven
Now, I know not everyone has jumped on the air fryer bandwagon yet, and that’s totally fine! My grandmother never owned one, and she made the best classic potato chips on a baking sheet for years. So, if your oven is your best friend, this method is just as reliable for getting those truly satisfying, healthy chip recipes results.
This way is fantastic because you can usually cook a larger batch at once, which is great for big movie nights or party snack recipes. You just need to pay a little more attention to make sure they bake evenly.
Get your oven cranked up to 400°F (200°C). The higher heat helps dehydrate those thinly sliced potatoes quickly, which is what we need for crunch!
Line your baking sheets with parchment paper—don’t skip this! It prevents sticking, and honestly, it makes cleanup a breeze when you’re done enjoying your crispy breakfast potatoes skillet or these chips. Spread your seasoned potato chips out in a single layer. Again, single layer is the magic word! If they overlap, they steam, and we are trying to avoid soggy vibes here.
Bake these for about 15 to 20 minutes total. The trick is to flip them gently halfway through—around the 8 or 10-minute mark. This ensures both sides get beautifully golden. Keep an eye on them because ovens can vary wildly. You want them browned and crisp at the edges! Once they look perfect, pull them out immediately and transfer them to a cooling rack just like we did for the air fryer version. They firm right up as they settle. For more air fryer inspiration, sometimes I check out tips like those on this site, but honestly, this oven method delivers that perfect crunch too!
Flavor Variations for Your Homemade Potato Chips
Once you nail the basic technique for getting those wonderfully crispy potato chips, the flavor possibilities are honestly endless! This is where you can really make these snacks your own. The beauty of making your chips from scratch is that you can mimic your favorite store-bought seasoning, or even invent a brand-new flavor profile! This keeps things exciting for movie night snacks and ensures you always have the best homemade snacks ready.
Remember I mentioned adding garlic powder and pepper earlier? That’s just the starting line! If you want to branch out and explore more potato chip variations, here are a few of my absolute favorite seasoning blends that pair unbelievably well with the crispy texture:
- Smoky Paprika Dust: If you have smoked paprika sitting in your cabinet, pull it out! Add about 1/2 teaspoon of smoked paprika along with your salt and garlic powder. It gives the chips a gorgeous color and a deep, savory flavor that feels really cozy.
- Onion Powerhouse: Mix in about 1/2 teaspoon of onion powder with the rest of your seasonings. I find that onion powder, unlike fresh onion, toasts up beautifully in the air fryer without burning, giving a wonderful all-around savory flavor.
- Tangy Vinegar Kick: This one is tricky but amazing. You can’t just dump regular vinegar on them, or they’ll get soggy, right? Instead, I buy malt vinegar powder (or you can crush up some plain salt and vinegar chips that you aren’t planning to eat for the powder!). A tiny pinch mixed with the salt makes these taste like gourmet chips.
- DIY BBQ Flavor: If you want that sweet and tangy profile, skip the liquid BBQ sauce (too wet!) and instead mix your salt with a little bit of brown sugar and your favorite BBQ seasoning mix. It creates an awesome dusty coating. Check out my recipe for easy homemade BBQ sauce if you want to use that flavor in something else, but for chips, keep it dry!
The trick for all these potato chip variations is applying the dry spices right after you toss the slices in oil, but before they go into the basket or oven. The oil acts as the perfect sticky glue to hold onto all that amazing flavor while they cook up into perfect, crunchy circles.
Serving Suggestions for Your Crunchy Potato Chips
Okay, the moment of truth! You’ve pulled these golden, crispy potato chips out of the air fryer or oven, and they are screaming to be eaten. Honestly, a handful eaten straight off the cooling rack is perfection—they are the best homemade snacks, after all. But if you’re serving these up for a crowd, for a party snack recipes theme, or just upgrading your movie night snacks, you need some incredible partners for that crunch!
This is where we take our homemade potato chips from a simple side to the star of the show. Forget laying them out plain; we dress them up with the perfect dips! Since our chips are perfectly salted and seasoned, you need creamy textures or bright, fresh flavors to balance them out.
- The Ultimate Creamy Partner: You just cannot go wrong pairing salty, crunchy potato chips with something rich. I always whip up a batch of my favorite jalapeño popper dip when anticipating a snack attack. The mild spice and creamy, cheesy texture cling perfectly to every chip.
- Fresh Salsa or Guacamole: If you want something a little brighter, a simple homemade pico de gallo or a fresh, chunky guacamole is fantastic. The slight acidity cuts through the oil and salt, making them feel a little less indulgent (even though we know they already are a guilt-free snack option!).
- French Onion Dip Classic: Sometimes you just need tradition. A simple, creamy French Onion dip made with sour cream, a packet of onion soup mix, and a few dashes of Worcestershire sauce is the undisputed king for any classic potato chip experience.
And hey, don’t forget they make a fantastic texture booster too! You can crush a few of these salty beauties over a bowl of chili instead of serving crackers, or even use them as a crunchy topping instead of croutons on a summer salad. They add that unexpected “oomph.” Just make sure you make enough, because once people know you made them from scratch, they disappear fast!
Storage and Reheating Instructions for Homemade Potato Chips
Here’s the sad truth about making snacks from scratch: they never last as long as the store-bought versions, mostly because we use real ingredients and skip all those weird preservatives! But that’s okay, because that means they are fresher, right? The goal here is maximum crunch, and storage is everything for achieving that crunchy perfection.
When these perfect potato chips come off the rack, you need to get them into the right housing fast. And I mean fast! As they cool, they need to stay dry. My number one rule? Never, ever put homemade potato chips in the refrigerator. The fridge is full of moisture, and moisture is the enemy of crispiness. It will turn your beautiful, crunchy snack into chewy flakes by morning. Yuck!
Instead, grab your very best airtight containers. I love the ones with the silicone seal gasket because they really lock that air out. If you don’t have those, even a heavy-duty zip-top bag where you physically squeeze out every last bit of air will work in a pinch. Store them in a cool, dry pantry shelf.
Now, what if you made a huge batch (because who doesn’t?) and they somehow sit out overnight or you notice they’ve gone a little soft the next day? Don’t toss them! We can revive them. If they’ve gone stale, they just need a quick blast of heat to drive that lingering moisture out again.
Reviving Stale Potato Chips (It Works!)
If your crispy potato chips have lost their snap, don’t despair. This is a super simple fix. Spread the chips back out in a single layer on your baking sheet—yes, the same one you used for baking! Preheat your oven to a low 300°F (150°C). You aren’t cooking them; you are just drying them out again, so keep the temperature low.
Slide them in for just about 5 to 8 minutes. Keep an eye glued to them, though! You don’t want them to brown any further, just crisp up. Pull them out, let them cool completely on the counter or rack, and they should snap right back into their crunchy glory. Trust me, this method rescues so many snack sessions!
How Long Do Homemade Potato Chips Last?
Realistically, if you store them sealed tight, your homemade potato chips should hold their superior crunch for about two to three days at room temperature. Seriously, if you are planning a big party, making them the day before is fine, but I always try to make them the afternoon of the event. They are at their absolute peak texture within about six hours of cooling.
If you are trying different potato chip variations, like sweet potato chips, they sometimes hold up a little better because of the natural sugars, but even those deserve the airtight container treatment to keep them at their best. Enjoy them quick, because they are too good to last long!
Frequently Asked Questions About Making Potato Chips
It’s totally normal to have questions when you’re moving from store-bought bags to making your own perfectly crisp potato chips from scratch! I get asked a lot about why my chips come out crunchier than my attempts at home, or what happens if I use a different kind of vegetable. Here are the top things folks ask me about achieving crispy potato chips!
What is the best potato for crispy potato chips?
I’m firmly in the Russet camp, and I really think you should be too, especially if you’re aiming for those classic, salty potato chips. Russets have the highest starch content, and when we soak them, which is essential for this easy potato chip recipe, that starch releases perfectly. This starch allows the exterior to get incredibly brittle and golden brown when cooked. While Yukon Golds are creamier for mashing, they don’t crisp up quite the same way when we are going for thin slices!
Can I use sweet potatoes for this potato chip variations recipe?
Yes, you absolutely can make sweet potato chips, and they are delicious! However, you have to adjust your expectations just a bit. Because sweet potatoes have natural sugars, they caramelize much faster than regular potatoes. I recommend reducing the temperature slightly—maybe drop the air fryer to 330°F, or the oven to 380°F—and watch them religiously. They might not hit the exact same hard ‘snap’ as a Russet chip, but they offer a fantastic, slightly sweeter, guilt-free snack alternative!
My chips are bending instead of snapping. What went wrong?
Oh, I’ve done this a million times! If your homemade potato chips are bending, it almost always comes down to one of two things: either you didn’t soak them long enough to remove enough surface starch, OR—and this is the big one—they weren’t completely dry before you oiled and seasoned them. That lingering moisture turns into steam and prevents that wonderful crisping process. Next time, use a thick kitchen towel and press down with real force to get all the drops off!
How can I get the seasoning to stick better to my thinly sliced potatoes snack?
If your salt and spices are falling off into the air fryer basket or pooling on the bottom of your baking sheet, it means you’re missing the glue! The oil is the glue, and you need just enough to lightly coat every single slice. If the potatoes look shiny but not wet, you’re good. Toss them gently in a bowl so everything gets touched by the oil before you add your seasonings. This ensures you get perfectly seasoned potato chips every time instead of having to shake more salt on them after they cook.
PrintThe Ultimate Crispy Air Fryer Potato Chips (Oven Option Included)

Make satisfying, crunchy homemade potato chips using your air fryer or oven. This easy recipe delivers a guilt-free snack that rivals store-bought versions.
- Prep Time: 15 min
- Cook Time: 20 min
- Total Time: 55 min
- Yield: 4 servings 1x
- Category: Snack
- Method: Air Frying / Baking
- Cuisine: American
- Diet: Vegetarian
Ingredients
- 2 large Russet potatoes
- 1 tablespoon olive oil
- 1 teaspoon fine sea salt
- 1/2 teaspoon garlic powder
- 1/4 teaspoon black pepper
Instructions
- Wash and dry the potatoes completely. Do not peel them for a rustic texture.
- Using a mandoline slicer or a very sharp knife, slice the potatoes as thinly as possible, aiming for uniform thickness (about 1/16 inch).
- Place the potato slices in a large bowl of cold water. Soak for at least 30 minutes to remove excess starch. This step is key for crispiness.
- Drain the water and rinse the slices under cold running water until the water runs clear.
- Spread the slices in a single layer on clean kitchen towels or paper towels. Pat them completely dry. Moisture prevents crisping.
- In a clean bowl, toss the dry slices with olive oil, salt, garlic powder, and pepper until lightly coated.
- For Air Fryer: Preheat your air fryer to 350°F (175°C). Place the seasoned slices in a single layer in the basket. Work in batches to avoid overcrowding. Air fry for 10 to 15 minutes, shaking the basket every 5 minutes, until golden brown and crisp.
- For Oven Baking: Preheat your oven to 400°F (200°C). Arrange the slices in a single layer on one or two baking sheets lined with parchment paper. Bake for 15 to 20 minutes, flipping halfway through, until edges are brown and chips are crisp.
- Remove the potato chips from the air fryer or oven immediately. Let them cool completely on a wire rack; they will crisp up further as they cool.
- Serve your homemade potato chips right away for the best crunch.
Notes
- For extra flavor, add 1/4 teaspoon of smoked paprika or onion powder with the other seasonings.
- If you prefer a classic fried texture without deep frying, you can shallow fry them in 1/2 inch of neutral oil at 350°F until golden, then drain well and season immediately.
- Uniform slicing is the most important factor for achieving consistent, crispy potato chips.
Nutrition
- Serving Size: 1 serving (about 1 cup)
- Calories: 180
- Sugar: 1
- Sodium: 350
- Fat: 8
- Saturated Fat: 1
- Unsaturated Fat: 7
- Trans Fat: 0
- Carbohydrates: 25
- Fiber: 3
- Protein: 3
- Cholesterol: 0