
Oh, let’s talk about scones for a minute. Have you ever been so excited for a warm, buttery treat only to bite into something dry and crumbly? It’s the worst! I completely understand that feeling. For years, I thought that sad, crumbly texture was just how all scones were supposed to be—until I finally cracked the code. I’m so excited to share my absolute favorite, the one that brings bakery-style quality right into your kitchen: **The Ultimate Flaky Buttermilk Scones Recipe**.
When I first started baking seriously after leaving my hectic design job, making the perfect scone was a huge goal. I wanted that incredible balance: crispy on the edges, but wonderfully tender and moist inside. It took a lot of cold butter and testing, but now I’ve got the technique down pat. This recipe guarantees those tall, flaky layers every single time, and trust me, they are nothing like those disappointing ones you might have tried before. You’re going to love how easy these simple homemade scones truly are!
- Why This is the Best Scone Recipe You Will Ever Make
- Essential Ingredients for Perfect Buttermilk Scones
- How to Make Easy Homemade Scones: Step-by-Step Instructions
- Flavor Variations for Your Scones Recipe
- Troubleshooting Common Scones Issues
- Storage and Reheating Instructions for Scones
- Serving Suggestions for Your Tender Scones Tips
- Frequently Asked Questions About Making Scones
- Estimated Nutritional Information for Scones
- Share Your Ultimate Flaky Buttermilk Scones Success
Why This is the Best Scone Recipe You Will Ever Make
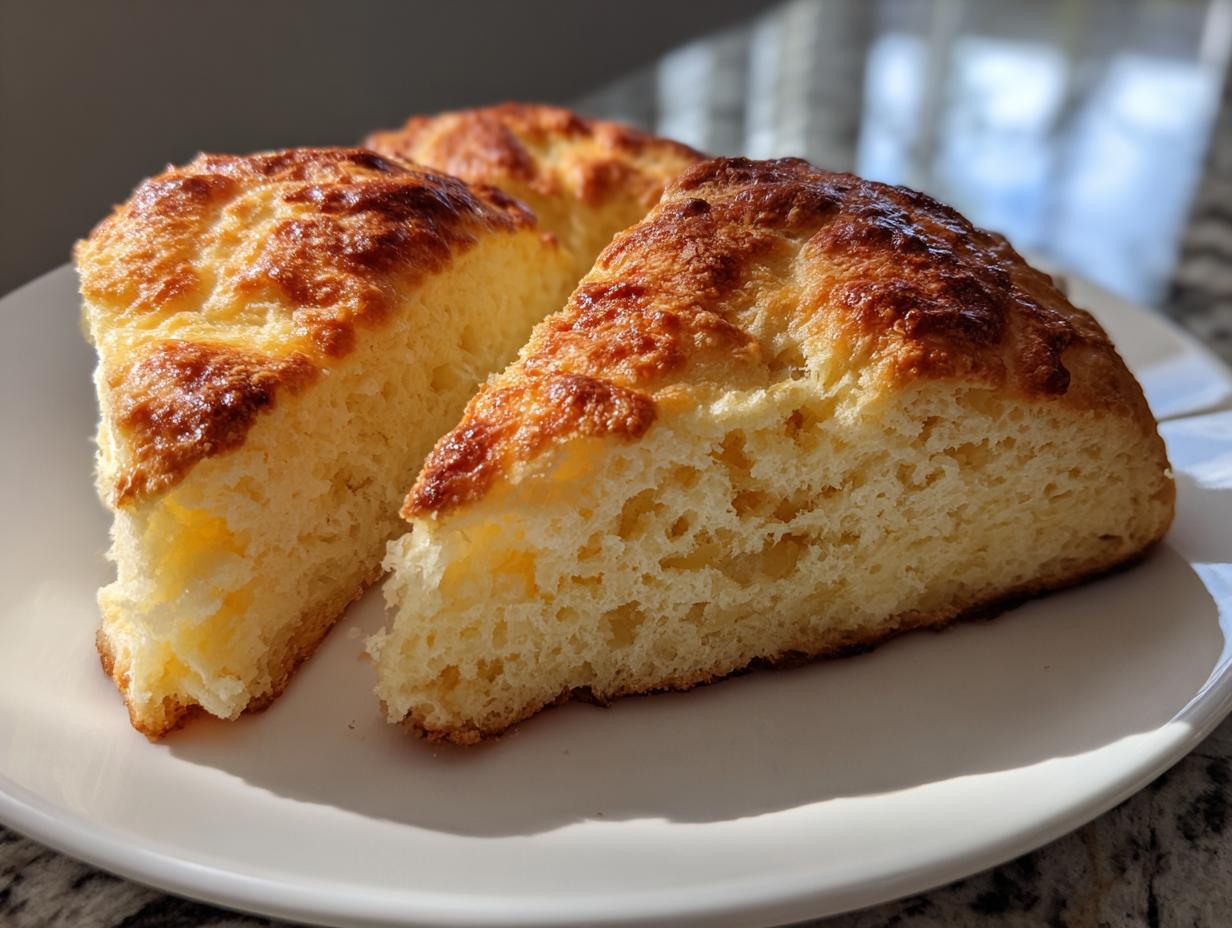
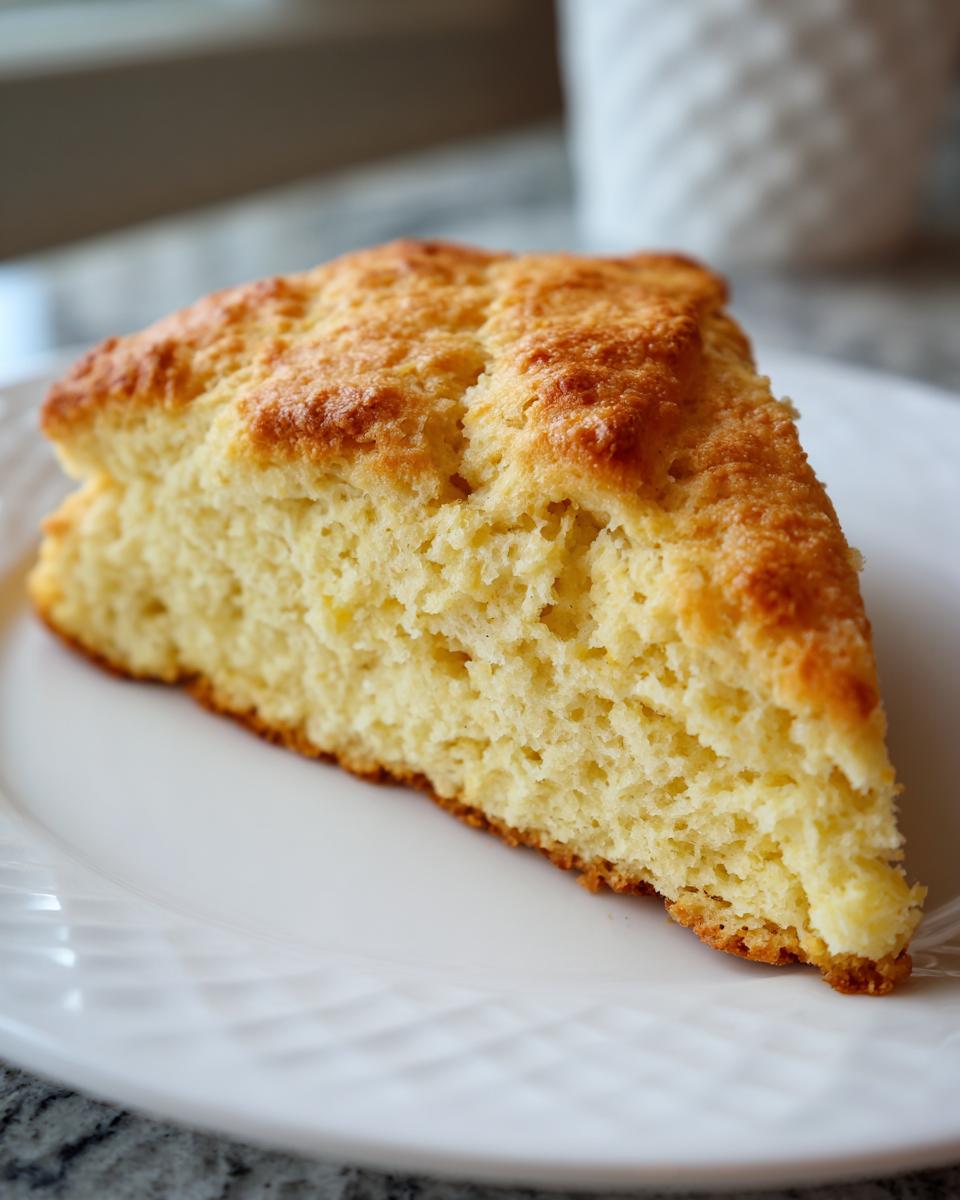
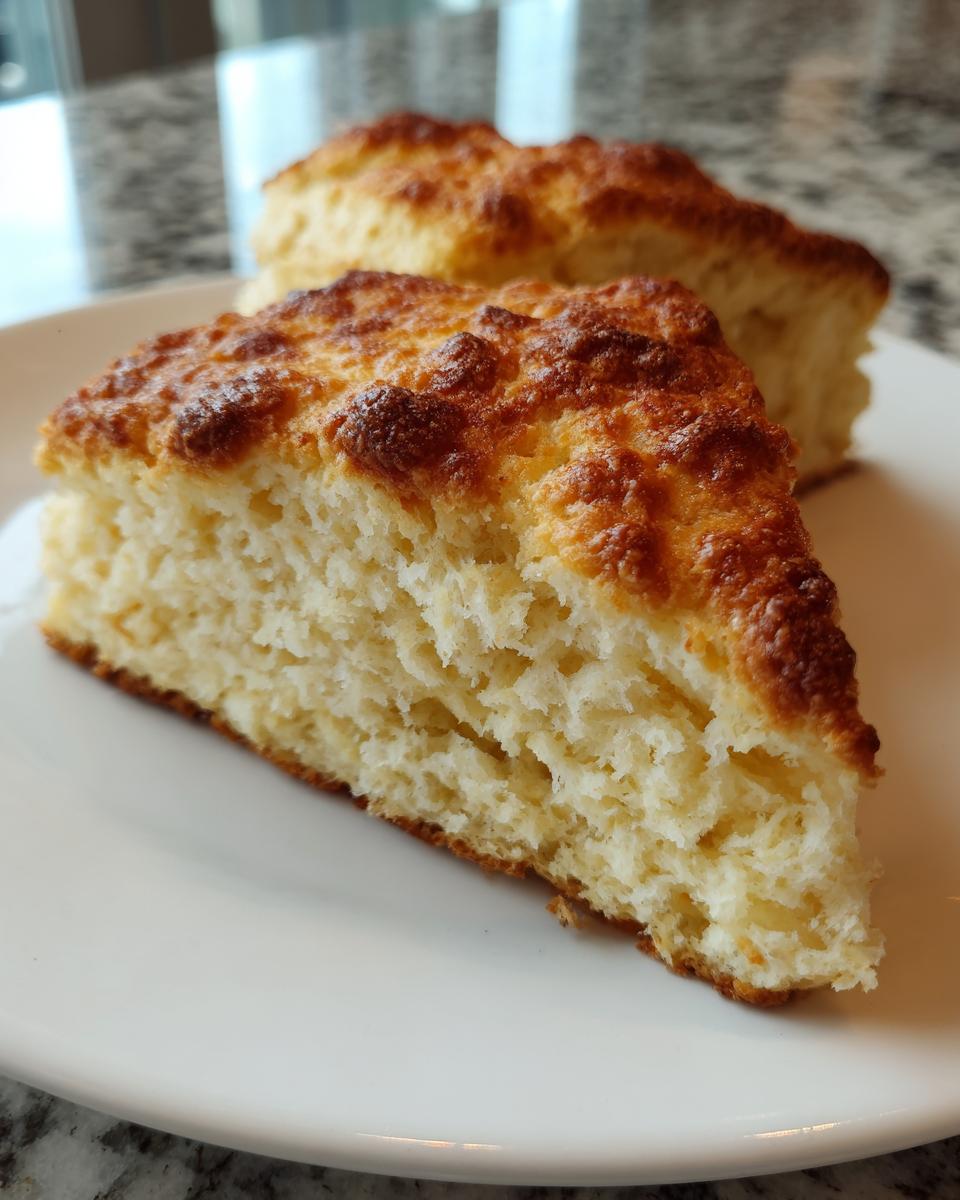
I’m not exaggerating when I call this the Best Scone Recipe I’ve ever made—and trust me, I’ve tested nearly every variation out there just to make sure. If you are looking for that perfect Bakery Style Scone at Home, this is it. Forget everything you think you know about dry, tough baked goods. These scones manage stability and height while still being incredibly tender on the inside. It’s the kind of breakfast bake that makes you stop what you’re doing just to enjoy the moment.
We spent ages perfecting the ratios to make sure they pop up tall and keep that wonderful contrast: crispy on the edges, but soft and moist inside. This isn’t luck; it’s about careful technique that I guarantee will work every time you bake them. You don’t need fancy equipment either; just standard mixing bowls and a focus on keeping things cold!

Achieving Flaky Layers in Your Scones
The absolute secret wallop of flavor and texture comes down to how we treat the butter. For flaky layers, you must use butter that is ice cold—I mean, straight from the freezer for about ten minutes cold. We aren’t trying to melt it into the flour; we are coating small chunks of it in flour.
When those cold butter bits hit the hot oven, they create steam, and that steam pushes the layers of dough apart. That is literally how you get those beautiful, distinct layers. The other huge factor is minimal handling. As soon as that buttermilk goes in, stop mixing! The shaggier the dough looks before you pat it down, the flakier those finished scones will be. If you fool around with the dough too much, you’re just melting that gorgeous butter before it can do its job.
Essential Ingredients for Perfect Buttermilk Scones
Okay, the magic of these buttermilk scones is that they rely on very simple things, but timing and temperature are everything! We’re talking standard pantry staples here, but only if you treat them right. Remember that motto: cold, cold, cold! The temperature of your butter and your milk is what separates a good scone from a great one. Don’t skimp or substitute the basics, especially when you’re starting out.
For this classic batch that makes 8 beautiful, tall wedges, you’ll need:
- 2 cups all-purpose flour – that’s your base structure!
- 1/4 cup granulated sugar – just enough sweetness.
- 1 tablespoon baking powder – for that lift!
- 1/2 teaspoon salt – always balance the butter, always.
- 1/2 cup (1 stick) unsalted butter, cut into small pieces – keep this frozen or extremely cold!
- 3/4 cup cold buttermilk – this is the secret ingredient for tang and tenderness.
- 1 large egg, beaten (for egg wash) – this is what makes them shiny and golden.
- 1 tablespoon milk or cream (for egg wash) – helps thin the egg wash.
- Optional add-ins: 1/2 cup blueberries, chocolate chips, or dried cranberries.
Ingredient Notes and Substitutions for Scones
Let’s get into why we choose what we choose here. First, buttermilk. You absolutely need the acidity from the buttermilk. It activates the baking powder beautifully and tenderizes the gluten in the flour, which prevents those tough, chewy scones we hate. If you’re stuck and don’t have buttermilk? Mix 3/4 cup of whole milk with 1/2 teaspoon of white vinegar or lemon juice right now. Let it sit for 5 minutes until it looks slightly curdled. That’s your emergency buttermilk substitute!
Now, about the butter. If you cave and use melted butter, I’m warning you now—you will get a dense, heavy cookie, not a light, flaky scone. Melted butter mixes right into the flour, and you lose all those precious steam pockets. You must cut the cold butter into those pea-sized pieces. If your kitchen is warm, just pop the bowl of flour and butter mixture into the freezer for 10 minutes before you add the buttermilk. That little time out makes a huge difference, I promise!
How to Make Easy Homemade Scones: Step-by-Step Instructions
Alright, let’s get baking! This is where the magic happens, and I promise these Easy Homemade Scones come together shockingly fast, especially once you master the mixing. The total prep time is barely fifteen minutes, so you can have these ready for breakfast without waking up at dawn!
- First things first: Crank up that oven! We need it hot—preheat to 400°F (200°C). Get your baking sheet ready and line it with parchment paper.
- In your biggest mixing bowl, give a quick whisk to the dry stuff: flour, sugar, baking powder, and salt. Make sure it’s all settled nicely.
- Now, bring in that ice-cold butter we cubed earlier. Use your fingers or a pastry blender and work it into the flour until you have coarse crumbs. You’re looking for pieces that look like little peas, definitely don’t blend it completely smooth!
- If you decided to add blueberries or chocolate chips, gently toss those in now so they get a light coating of flour.
- Pour in all that cold buttermilk at once. Don’t hesitate! Use a fork to gently mix everything until it *just* comes together. Seriously, stop mixing when you see the flour disappear. It should look shaggy, maybe a little messy—that’s perfect.
- Time to turn it out onto a lightly floured counter. This is crucial: handle it quickly! You only want to gently knead the dough maybe 3 or 4 times, just enough to gather it into one lump. Overworking it makes them tough, so be gentle!
- Pat that dough into a circle that’s about ¾ inch thick. It won’t be perfectly smooth, and that’s fine. Use a sharp knife or bench scraper to cut that circle into 8 nice, even wedges, like cutting a pizza.
- Place those wedges onto your prepared baking sheet, making sure there’s about an inch of space between each one.
- In a little dish, whisk up your egg and that tablespoon of milk or cream for the wash. Brush the tops of all your scones lightly with this coating.
- Bake them for 15 to 18 minutes. You’ll know they are done when the tops look deeply golden brown and they smell incredible, like a coffee shop exploded in your oven!
Serve them warm! These are amazing plain, but I always save the glaze ideas for later. If you want some extra tips on how to get your homemade scones to stand up tall, check out the next section. Practice makes perfect, but this method is already 99% there!
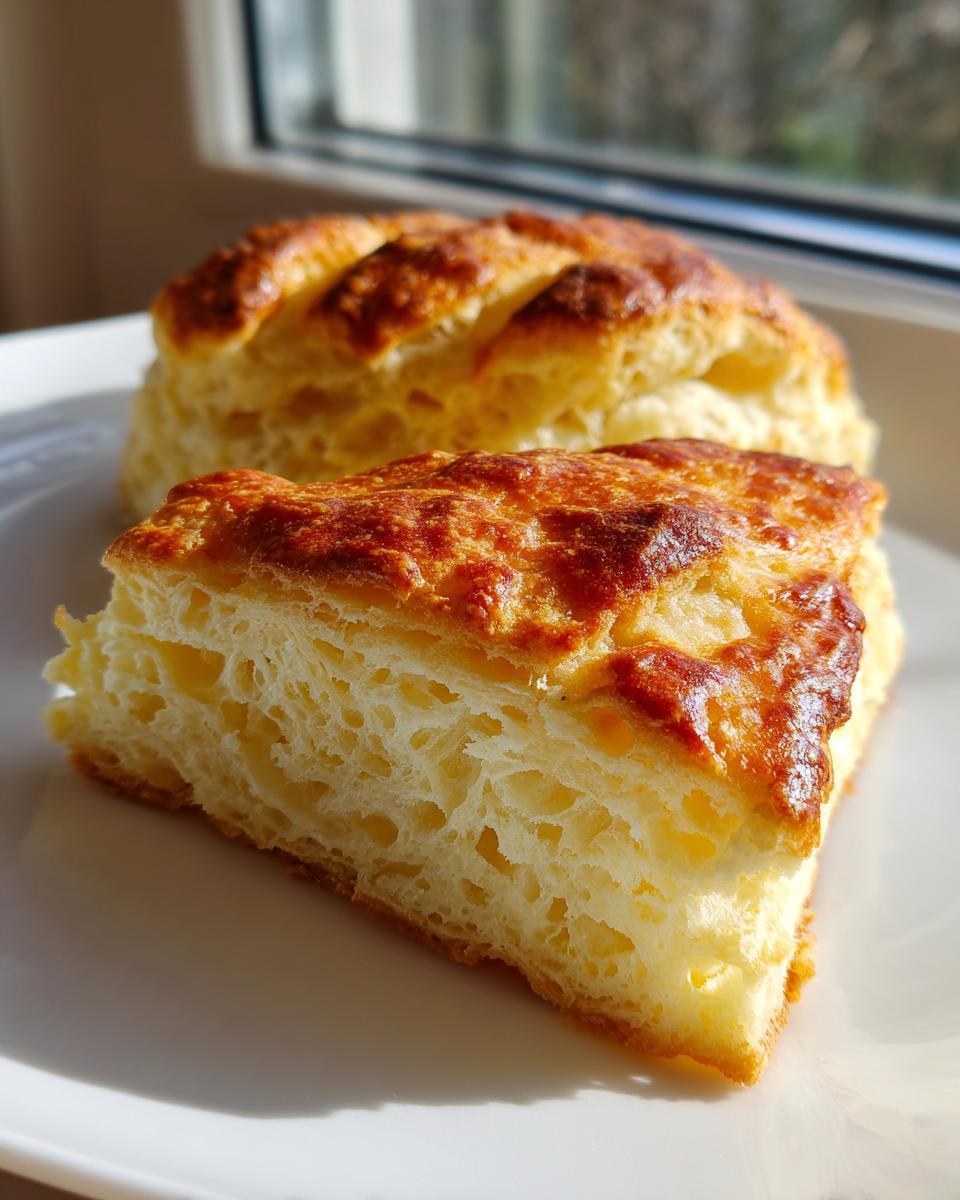
Tips for Cutting and Shaping Your Scones
When you cut the circle into wedges, remember that you are trying to build height. Don’t just pull them apart! While I told you to knead minimally, when you cut them, you want to make sure those cut edges are as clean as possible. If the edges look messy or frayed, that dough will spread out instead of up when it bakes.
Here is my favorite pro trick for extra height: Once you have your 8 wedges cut, gently press them back together just slightly in the center, creating that ‘pie’ shape again. Then, gently nudge them apart about half an inch before they go into the oven. When they bake, your small nudge prevents them from melting into one giant scone blob on the pan. This small step helps those fluffy scones tutorial results you are looking for!
Flavor Variations for Your Scones Recipe
The beauty of this basic scones recipe is that it’s the perfect blank canvas! We’ve got the ideal fluffy structure now, so we can dress them up however we like. If you want something bright and zesty, a great Blueberry Scones Recipe is just what you need. You toss those berries into the mix right before you add the buttermilk. Be gentle, though! We don’t want purple streaks all over the batter, just the berries distributed nicely.
For fall or holiday mornings, try making Cranberry Orange Scones by swapping out a little orange zest for the buttermilk. You can also add cinnamon spice or even swap entirely for chocolate chips to make decadent Chocolate Chip Scones. Whichever you choose, the process is the same: add your extras immediately after cutting the butter into the flour, and mix them in just a tiny bit before pouring in the liquid.
Creating Lemon Scones with Glaze
If you are going for those gorgeous, bakery-style fruit scones, you absolutely need a little something sweet on top. For the Lemon Scones with Glaze, it’s super easy! Just whisk up about 1 cup of powdered sugar with 1 tablespoon of fresh lemon juice. Watch it closely! You want it thick enough to drizzle but thin enough to spread a little.
If it looks too thin, add more sugar, a teaspoon at a time. If it’s too thick, dribble in a few drops of lemon juice. I like to wait until the scones have cooled for about ten minutes before drizzling, so the glaze sets nicely instead of melting completely into the crust. It adds that perfect zing!
Troubleshooting Common Scones Issues
Even with the best recipe in the world, sometimes things go a little sideways in the oven. Don’t panic! Usually, a problem with your baked goods comes down to one or two simple things, and once you know the culprit, it’s easy to fix next time. I’ve learned this the hard way over a few batches, so let me save you the heartache.
If you’re battling tough or dry pastries, the number one reason is almost always overworking the dough. Remember what I said about kneading only 3 or 4 times? If you mix it until everything looks perfectly smooth and elastic, you are developing too much gluten, and that results in a chewy, tough bite. You want shaggy dough, not pancake dough!
What if they didn’t rise? That usually points to your leavening agent. If your baking powder is old, it loses its power, and your beautiful, butter-filled dough just sits there flat on the pan. Try tossing your baking powder if it’s been sitting in the cabinet for over six months. Also, make sure your oven is actually hot! If you preheat it for only five minutes, it might not be up to 400°F yet, and the butter melts before the lift can happen.
If they end up being dry on the inside, check your liquids. Did you use cold buttermilk? Using room temperature or warm buttermilk means the cold butter melts instantly when it hits the liquid. If the butter isn’t in distinct cold pieces, you lose the steam effect, and bam—dry baked goods. Keep those ingredients chilled, even if that means taking a quick break to cool your hands down!
Storage and Reheating Instructions for Scones
Now, the hardest part about baking these amazing scones is stopping yourself from eating them all in one sitting! But don’t worry, they store beautifully, though nothing beats them fresh from the oven. If you manage to have leftovers, just pop them into an airtight container once they are completely cool.
At room temperature, they will stay genuinely fresh—meaning tender, chewy, and delicious—for about two days. Seriously, thanks to that buttermilk, they really hold up! After that, they start to dry out a bit, but don’t toss them! They are still salvageable, which brings me to reheating.
If you want to bring back that fresh-baked magic, the microwave just doesn’t cut it; it turns them rubbery fast. The oven is your best friend here. Wrap your leftover scones loosely in foil and warm them at 350°F (175°C) for about 8 to 10 minutes. The foil keeps the inside soft while the outside gets that perfect little crispness back on the edges. Wow, it’s like magic!
If you think you won’t get to them within two days, freeze them! You can freeze the baked scones, or even better, freeze the dough. If freezing the dough, cut them into wedges, lay them out on a tray until solid, and then transfer them to a freezer bag. You can bake them straight from frozen; just add 5 to 7 minutes onto the baking time. No need to thaw them first!
Serving Suggestions for Your Tender Scones Tips
Now that you’ve mastered the flake, let’s talk about how to serve these glorious Tender Scones Tips! You’ve done the hard work, so make the serving special. While they are incredible all by themselves—truly, a warm scone needs nothing else—I love pairing them with the classics for true afternoon tea vibe.
Of course, good quality butter is a must, but for a real treat, grab some good jam. Strawberry or raspberry goes perfectly with the slight tang the buttermilk gives the dough. If you’re feeling fancy, a little pot of thick clotted cream makes everyone feel like royalty. These are honestly the best breakfast bakes when served warm alongside a strong cup of coffee!
Frequently Asked Questions About Making Scones
I know you might still have a few little questions bouncing around after seeing all that butter and buttermilk! That’s totally fair. Baking should feel fun, not intimidating. Here are the answers to the most common things people ask me about making really fantastic scones based on what other bakers have told me.
Can I use regular milk instead of buttermilk?
Short answer? You can, but I really, really advise against it if you want perfect results! Like I mentioned before, buttermilk is key because its acidity reacts with the baking powder to give you that big, tender rise. If you use regular milk, you won’t get that necessary reaction. You’ll end up with a scone that’s flatter and a bit tougher because the gluten tightens up too much.
If you’re truly out, use the quick substitution tip: add a teaspoon of white vinegar or lemon juice to regular milk and let it sit for five minutes. That acidity tricks the recipe into working! It’s not quite as good as the real thing, but it definitely works in a pinch for these easy homemade scones.
How do I get that tall rise I see in bakery scones?
This is the million-dollar question! It boils down to two non-negotiable things: super cold ingredients and minimal mixing. You need that contrast between the frozen cold butter and the hot oven. When the butter melts rapidly, it creates steam pockets, and those steam pockets push your dough upward, making it tall and flaky. If your dough is warm when it hits the oven, the butter just smears out, and you end up with flat rounds.
Also, remember to cut those wedges cleanly and press them slightly back together before spacing them on the sheet. That keeps the dough structure vertical rather than letting it spread horizontally. It’s all about keeping that structure tight and cold!
Can I make savory scones ideas instead of sweet ones?
Oh, absolutely! That basic combination of flour, butter, and buttermilk is a wonderful foundation for savory baking, too. This recipe leans sweet because of the tablespoon of sugar, but you can easily pivot. For savory scones ideas, just omit the granulated sugar completely, or swap it for just one teaspoon if you like a hint of balance.
Then, fold in things like sharp cheddar cheese, chopped fresh chives, maybe some cracked black pepper, or even a little cooked, crumbled bacon. Brush the tops with an egg wash mixed with a sprinkle of coarse salt instead of sugar before baking those! They are amazing served alongside soup instead of bread.
Why do my scones always turn out dry?
I feel like I’ve said this a hundred times, but if your scones are dry, it’s usually one of two things: old baking powder or too much handling. If your baking powder is past its prime, your scones won’t rise, and they bake up dense and dry. You can test it by dropping a teaspoon of it into hot water—if it doesn’t fizz aggressively, toss it out! (I keep mine in the freezer to prolong its life.)
The other culprit is overmixing. Once that buttermilk goes in, you just mix until there are no streaks of dry flour left. That dough should look ragged and lumpy because every time you stir it more than necessary, you’re forcing the moisture out and developing gluten. A little shagginess equals maximum tenderness for your tender scones tips!
Estimated Nutritional Information for Scones
Okay, so I know when we’re baking comfort food like this, we aren’t usually counting calories, but I always like to give you a rough idea of what’s in that deliciousness. This data is based on making 8 standard wedges using the exact ingredients listed above—no extra glaze here!
Keep in mind that because we use real butter and buttermilk, these aren’t the ‘lightest’ things on the planet, but they are baked, not fried, and they are packed with that wonderful, satisfying richness!
- Serving Size: 1 scone
- Calories: 280
- Fat: 15g
- Saturated Fat: 9g
- Carbohydrates: 32g
- Protein: 5g
- Sugar: 6g
Now, I have to give you the standard disclaimer, because I’m not a registered dietitian—I’m just a cook who loves butter! These numbers are estimates based on the recipe cards. If you swap out white sugar for coconut sugar, or use skim milk instead of buttermilk, those numbers are going to shift around. Use this information as a general guide for what you’re putting out on the table for your family. Honestly, the satisfaction of pulling those golden beauties out of the oven outweighs any number on this list for me!
Share Your Ultimate Flaky Buttermilk Scones Success
Wow, we made it! You’ve got the secrets now—the cold butter method, the gentle handling, and the buttermilk magic. I really, genuinely hope you’re pulling a batch of these tall, beautiful scones out of your oven right now!
I put my heart into making this the simplest, most reliable recipe possible, and now I want to hear all about your success! When you bake them up, please come back here and leave a star rating. It helps other bakers know they can trust this method for amazing scones.
Did you go classic and simple? Or did you try the blueberry lemon version I mentioned? I am obsessed with seeing what everyone creates. If you snap a picture of your gorgeous, flaky rounds, tag me on Instagram! I love swooning over golden-brown breakfast bakes. Seriously, tag me—I want to celebrate your perfect batch with you!
Happy baking, and enjoy every single tender bite of that bakery-style perfection you just made at home!
PrintThe Ultimate Flaky Buttermilk Scones Recipe (Bakery Secret Revealed)

Make tall, buttery, flaky scones that are crispy on the edges and perfectly tender in the middle. This easy recipe uses buttermilk and simple techniques to create bakery-style scones at home.
- Prep Time: 15 min
- Cook Time: 18 min
- Total Time: 33 min
- Yield: 8 servings 1x
- Category: Breakfast
- Method: Baking
- Cuisine: American
- Diet: Vegetarian
Ingredients
- 2 cups all-purpose flour
- 1/4 cup granulated sugar
- 1 tablespoon baking powder
- 1/2 teaspoon salt
- 1/2 cup (1 stick) cold unsalted butter, cut into small pieces
- 3/4 cup cold buttermilk
- 1 large egg, beaten (for egg wash)
- 1 tablespoon milk or cream (for egg wash)
- Optional add-ins: 1/2 cup blueberries, chocolate chips, or dried cranberries
Instructions
- Preheat your oven to 400°F (200°C). Line a baking sheet with parchment paper.
- In a large bowl, whisk together the flour, sugar, baking powder, and salt.
- Add the cold, cubed butter to the dry ingredients. Use a pastry blender or your fingertips to cut the butter into the flour until the mixture resembles coarse crumbs with some pea-sized pieces of butter remaining.
- If using add-ins, gently stir them in now.
- Pour in the cold buttermilk all at once. Use a fork to mix until just combined. Do not overmix; the dough will look shaggy.
- Turn the dough out onto a lightly floured surface. Gently knead it 3 or 4 times until it comes together.
- Pat the dough into a circle about 3/4 inch thick. Cut the circle into 8 equal wedges, like a pizza.
- Place the wedges onto the prepared baking sheet, leaving about 1 inch between them. For taller scones, gently press the wedges together before separating them slightly.
- In a small bowl, whisk the egg and milk/cream together for the egg wash. Brush the tops of the scones lightly with the wash.
- Bake for 15 to 18 minutes, or until the tops are golden brown and the centers are cooked through.
- Let the scones cool slightly on the baking sheet before transferring them to a wire rack. Serve warm.
Notes
- Keep all ingredients, especially the butter and buttermilk, very cold for the flakiest texture.
- Do not overwork the dough; minimal handling creates tender scones.
- For a coffee shop copycat look, brush the tops with melted butter halfway through baking.
- Adapt this basic recipe with lemon zest, cinnamon spice, or maple pecan for flavor variations.
Nutrition
- Serving Size: 1 scone
- Calories: 280
- Sugar: 6
- Sodium: 250
- Fat: 15
- Saturated Fat: 9
- Unsaturated Fat: 6
- Trans Fat: 0
- Carbohydrates: 32
- Fiber: 1
- Protein: 5
- Cholesterol: 55