
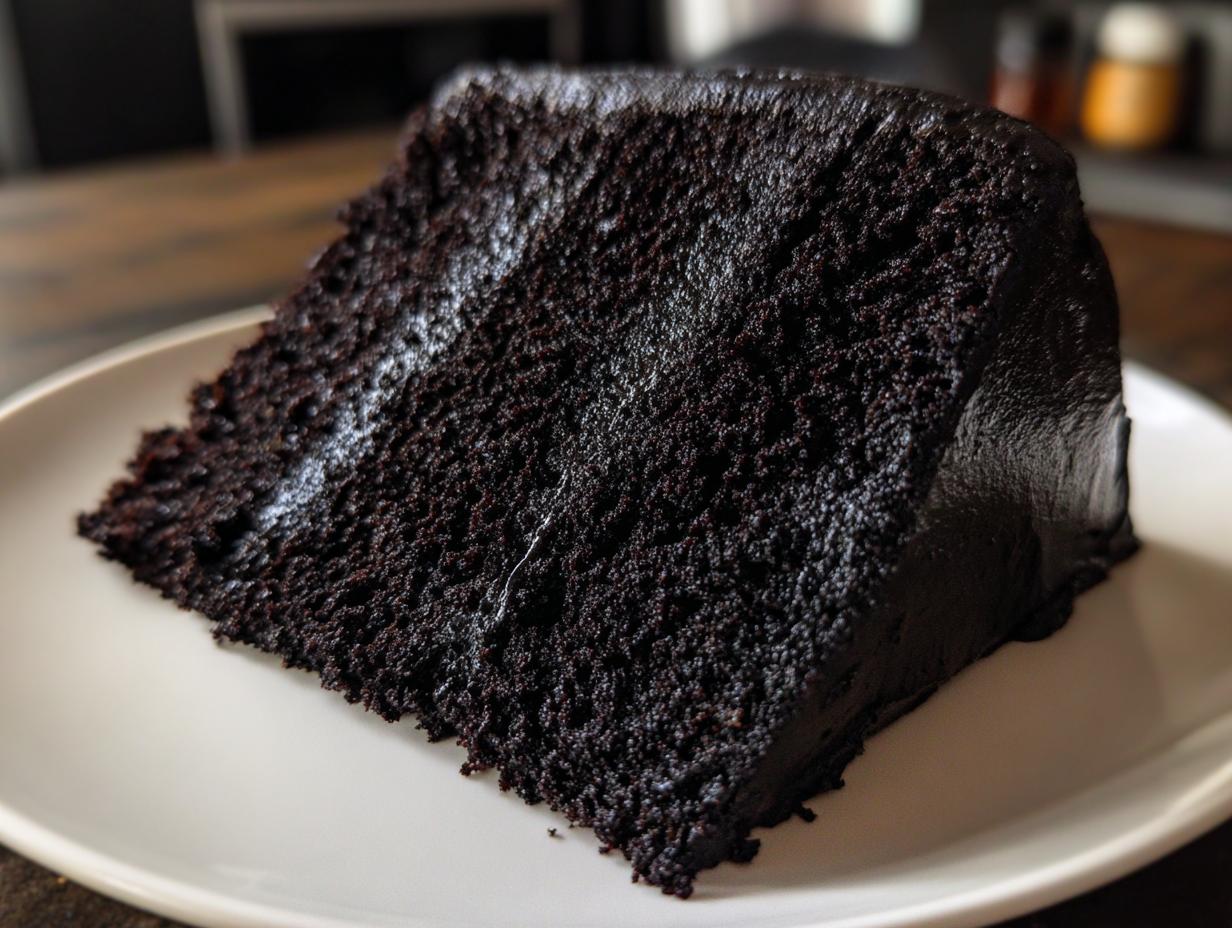
Forget the pale pumpkins and pastel ghosts! When Halloween rolls around, I want my desserts to bring the drama. That’s why nothing beats the impact of a stunning, jet-black cake, and I’m sharing my absolute favorite: the black velvet halloween cake. Trust me, this isn’t just any chocolate cake; this is the showstopper party centerpiece you need. We aren’t aiming for dark brown; we’re going for deep, moody black while keeping that signature ‘velvet’ crumb incredibly moist. Even though this cake looks incredibly fancy, it follows the same philosophy Olivia Rosewood champions here at DelishCraze. You can read more about our commitment to simple yet special home baking over on our About Us page. We’re keeping it classic, accessible, and spectacularly dark!
- Why This Black Velvet Halloween Cake is Your Ultimate Spooky Party Dessert
- Essential Ingredients for a Moist Black Cocoa Cake
- Preparing the Black Velvet Halloween Cake Layers
- Crafting the Perfect Black Frosting for Your Showstopper Cake
- Serving Suggestions for Your Spooky Party Dessert
- Storage and Reheating Instructions for Black Velvet Halloween Cake
- Frequently Asked Questions About Black Velvet Halloween Cake
- Nutritional Estimates for This Layer Cake Recipe
- Share Your Goth Cake Creations
Why This Black Velvet Halloween Cake is Your Ultimate Spooky Party Dessert
When you need a dessert that stops everyone dead in their tracks, this is the one. Forget cute cupcakes for one night—this black velvet halloween cake demands attention. It’s rich, it’s deep, and honestly, it tastes even better than it looks.
What makes it the perfect spooky party dessert? It hits all the high notes:
- It delivers that incredibly moist chocolate cake texture we all crave.
- It’s a certified showstopper cake that looks like it took days!
- It sets the perfect tone for any Halloween gathering.
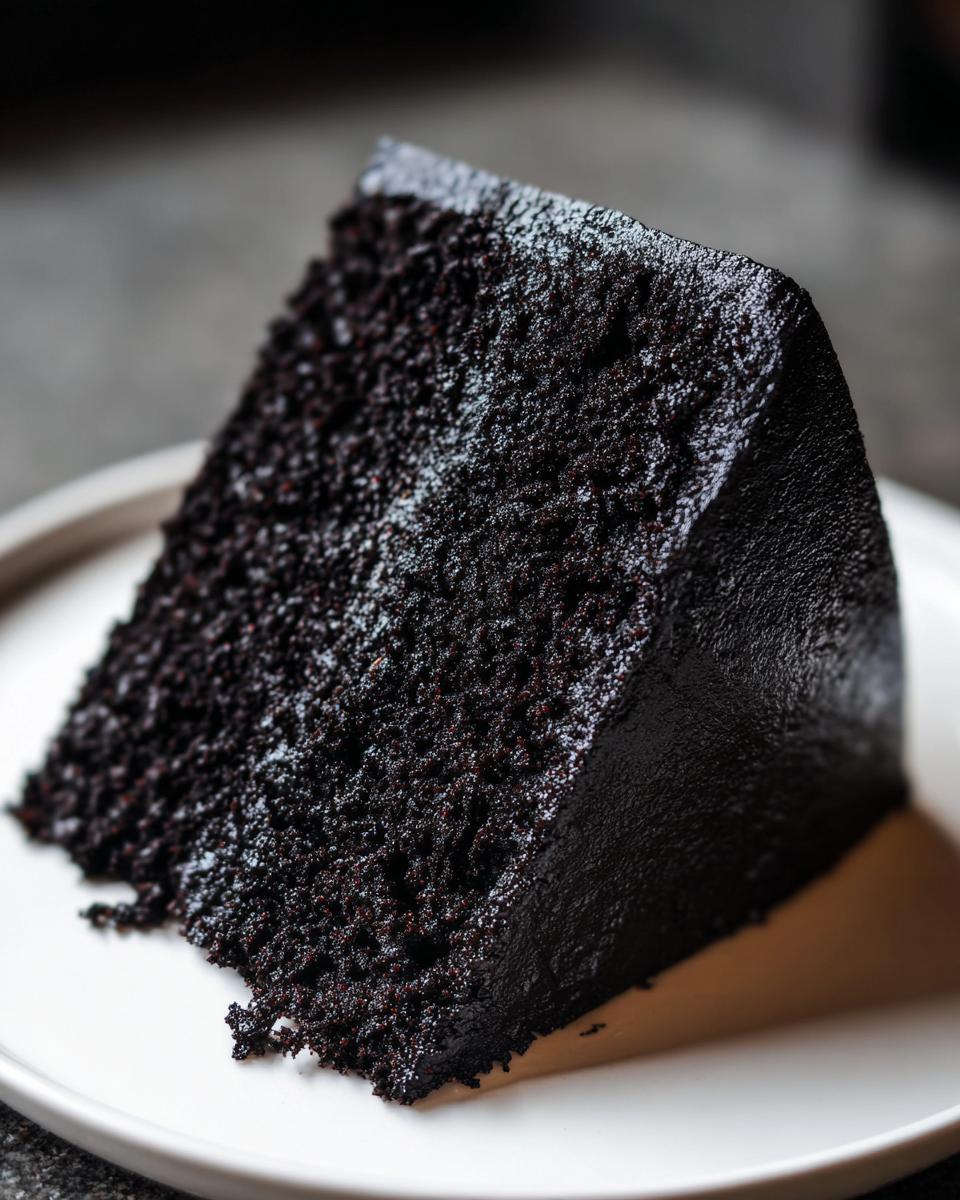
Achieving the Perfect Goth Cake Aesthetic
The visual payoff here is everything. That deep, almost ink-like black color—that’s your canvas for dark aesthetic baking. You aren’t just making a dessert; you’re creating a moody focal point for the snack table. Once you have that rich, velvety black base, you can go wild with decorations. Think silver sprinkles that look like moonlight, edible spiders, deep jewel-toned berries, or even just let that intense black stand on its own for a truly chic, goth cake vibe. People will be talking about this centerpiece long after the last slice is gone!
Essential Ingredients for a Moist Black Cocoa Cake
Okay, let’s talk about what makes this black velvet halloween cake go from being just *a* chocolate cake to being the incredibly moist one everyone asks for. The ingredients list is pretty standard for a great cake, except for one superstar player: the cocoa!
You absolutely need our specific measurements here because this recipe is engineered for moisture:
- 2 cups all-purpose flour and 2 cups granulated sugar—the structure foundation.
- 1 1/2 cups vegetable oil—yes, oil keeps it moist longer than butter does!
- 1 cup buttermilk right at room temperature—this reacts perfectly with the leavening agents.
- 2 large eggs, also at room temperature for better blending.
- 1 cup hot water or hot coffee—don’t skip the coffee, seriously!
- The rest are leaveners, salt, vinegar, and vanilla.
But the star—the ingredient that delivers that dramatic depth for our spooky party dessert—is that specialized cocoa powder.
Ingredient Notes and Substitutions for Black Velvet Halloween Cake
Here is your most important homework for this recipe: you HAVE to use black cocoa powder. If you just use regular unsweetened cocoa, you’ll end up with a lovely dark brown cake, but it won’t be the true, dramatic color we need for a goth cake centerpiece. High-quality black cocoa is key because it’s been more heavily alkalized, which changes its chemical profile and, more importantly, its color!
Now, what if you ran out of buttermilk? Don’t panic! You can easily fake it, just like I do sometimes. For one cup of buttermilk, just take one cup of regular whole milk and stir in one tablespoon of white vinegar or fresh lemon juice. Let it sit on the counter for about five minutes until it looks slightly curdled. That acidity is what we need to interact with the baking soda, so make sure you use that substitute right away!
Preparing the Black Velvet Halloween Cake Layers
Alright, let’s get this spooky masterpiece baking! First things first: fire up that oven to 350°F (175°C). Don’t try to sneak this in early; temperature is everything for a perfectly even bake. While it heats, make sure your two 9-inch round pans are buttered, floured, and have that crucial parchment circle on the bottom. That parchment is your insurance policy against sticking!
When you start mixing, remember it’s kind of like making a muffin batter, which is why I always tell people to check out my muffin guide when they need reliable mixing techniques. You’re bringing the dry stuff (flour, sugar, and your dark cocoa powder blend) together, and then mixing the wet stuff (eggs, oil, buttermilk, vinegar). Only combine them gently until just mixed. Overmixing just wakes up the gluten, and we want a tender, velvet crumb, not a tough brick!
The real magic only happens at the very end. Once the batter is *almost* there, you slowly pour in that hot water or hot coffee. Why last? Keep reading.
Tips for Success When Baking Your Black Cocoa Cake
That final splash of hot liquid is essential for two reasons. First, it thins out the somewhat thick batter so you get that signature liquid consistency mentioned in the instructions. Second, and more important for the color, that heat helps to essentially “bloom” the black cocoa powder. Blooming opens up the flavor compounds and really deepens that incredible black hue we are aiming for. It’s what pushes this from dark brown to truly black velvet! Trust me, adding it last ensures you aren’t developing gluten while the cocoa needs that final hydration boost.
Once it’s smooth—and I mean *smooth*—get it into those pans fast. Divide it evenly, and then pop those beauties into the oven for about 30 to 35 minutes. You want that clean pick test, not wet batter, remember? Patience while cooling is needed before we can even think about frosting!
Crafting the Perfect Black Frosting for Your Showstopper Cake
Now that our layers are cooled—and aren’t they the most stunning deep black you’ve ever seen?—it’s time for the black frosting! Since the recipe focuses on the cake, I want to give you my go-to strategy for making that buttercream look as dramatically dark as the cake itself. If you are relying on standard cocoa powder in your frosting, you’re going to end up with a sad-looking grayish-brown mess. It’s just not the same depth as our black velvet halloween cake requires.
My preferred method is to start with a standard American buttercream recipe, but I skip the cocoa powder entirely. Instead, I use a high-quality concentrated black gel food coloring. It takes a lot to get that true, inky black, so don’t be shy! Stir it in slowly until you reach that perfect shade that screams ‘goth cake.’ If you absolutely must use cocoa, you need that expensive black cocoa powder in the frosting base, too, but be prepared to use more of it, which can change the texture.
Crumb Coating and Finalizing the Black Velvet Halloween Cake
This step is non-negotiable if you want a professionally finished showstopper cake that shows off your dark aesthetic baking skills. Once the layers are stacked and frosted with a thin layer all over—that’s your crumb coat—you *must* pop the whole thing into the fridge. I let mine chill for at least 20 minutes, sometimes longer if my kitchen is warm.
Why? Because that chilled layer traps all those tiny, loose crumbs. When you take it out and apply your final, beautiful layer of black frosting, it glides on smoothly. You’ll get those super sharp edges that make this black velvet halloween cake look like it came from a fancy bakery. No crumbs ruining your moody masterpiece! That final layer gives you the perfect canvas for whatever spooky decorations you decide on.
Serving Suggestions for Your Spooky Party Dessert
Now that you have this magnificent, deep, incredibly moist black velvet halloween cake frosted to perfection, it’s time to make it the ultimate party centerpiece! This cake simply begs for dramatic styling—it’s too gorgeous to just set on a plate with a little whipped cream, right?
Since the cake itself is so intensely dark, almost every garnish looks phenomenal against it, but I have a few specific ideas that totally lean into that dark aesthetic baking vibe. You want things that pop with color or finish with a sophisticated, moody sheen.
For toppings, think about deep jewel tones. Fresh blackberries or raspberries look incredible scattered across the top. Or, if you want something really rich and complementary to the deep chocolate flavor, try drizzling it with a thick, dark ganache or even some salted caramel sauce. It looks so decadent!
If you’re serving it on a chilly evening, maybe you want a pairing that echoes those warm, rich notes. Sometimes I serve my slices alongside a mug of something truly special, like a glass of rich hot cocoa, especially around the holidays when the weather starts turning. The contrast between the cold, sharp cake and the warm, comforting drink is just heavenly. This layer cake recipe is designed to impress, so treat the presentation like the star it is!
Storage and Reheating Instructions for Black Velvet Halloween Cake
We’ve put all this work into creating the ultimate black velvet halloween cake, so keeping it fresh is my top priority! Since this recipe uses oil instead of butter as its primary fat, it naturally stays moister for longer, which is fantastic. But you still need a good storage plan, especially if you’re making this spooky party dessert a couple of days ahead of time for the celebrations.
If your cake is fully frosted with that black cocoa buttercream, the best thing you can do is keep it sealed tight at cool room temperature for up to three days. Why room temperature and not the fridge? Because cold air is the enemy of a moist chocolate cake! A few hours in the fridge is fine, especially if your kitchen is hot, but if you leave it too long, the cake layers can start to firm up and taste dry later on.
If you need to store slices individually, wrap each slice tightly in plastic wrap first—this locks in all that moisture. Then, you can keep those wrapped slices in an airtight container in the fridge for almost a week. If you do have to refrigerate the whole thing, just remember to let it sit out on the counter for at least an hour before serving. This lets that velvet texture fully soften up again before everyone digs in!
If, heaven forbid, you have leftovers after Halloween and you need to keep them longer than a week, freezing is your only real friend. Wrap the unfrosted **black velvet halloween cake** layers incredibly well—think a layer of plastic wrap followed by a layer of foil—and they’ll be great for up to three months. Thaw them overnight in the fridge before frosting. You want that moist chocolate cake texture preserved, so never rush the thawing!
Frequently Asked Questions About Black Velvet Halloween Cake
I always get so many questions when this black velvet halloween cake pops up on my feed every fall! It’s a dramatic bake, and I totally get that you want to make sure every step goes perfectly for your spooky party dessert. Here are some things I’ve learned over the years making this recipe, and feel free to leave your own questions below!
Can I use regular cocoa powder instead of black cocoa for this black velvet halloween cake?
Oh, honey, I truly wish you could, but no! If you use standard unsweetened cocoa powder, you are going to end up with a lovely, dark, moist chocolate cake, but it will be a deep brown, maybe a dark mahogany color. It will taste great, but it won’t achieve that intense, inky, true black color that makes this cake so spectacular and worthy of being a centerpiece. For that velvet black look, you truly need that specialized, heavily alkalized black cocoa powder.
How do I prevent my black cocoa cake from tasting bitter?
That’s a really smart question! Because black cocoa has been treated differently (it’s been alkalized, remember?), it has a much lower acidity than natural cocoa powder. If you don’t balance that out, the finish can sometimes lean a little bitter or metallic, which ruins our delicious goth cake vibe. That’s why this recipe relies heavily on the acid coming from the buttermilk AND the teaspoon of white vinegar we add. Make sure you don’t skip the vinegar! The acid helps neutralize the heavy alkalinity, resulting in a smoother, richer, slightly sweeter chocolate flavor that complements the sugar perfectly. If you need more inspiration for rich flavors, check out my guide on classic chocolate chip cookies—balance is key in baking!
Is this recipe hard to adapt into cupcakes?
It’s actually really easy! Since the batter is slightly thinner than a standard cake, the cupcakes come out incredibly tender. Just fill your cupcake liners about two-thirds full, and watch them closely—they usually bake faster, maybe around 18 to 22 minutes at 350°F. They make the cutest little individual spooky treats!
Can I use cake flour instead of all-purpose flour?
You absolutely can, and it will make the crumb even finer and more delicate, pushing it even further into that ‘velvet’ category. If you substitute, replace the 2 cups of all-purpose flour with 2 cups of cake flour. If you don’t keep cake flour stocked (and honestly, who does all the time?), you can make your own by swapping out 4 tablespoons of the all-purpose flour for 4 tablespoons of cornstarch for every cup you measure out. It works like a charm for a delicate texture!
Nutritional Estimates for This Layer Cake Recipe
I know, I know, when you’re diving into a dramatic black velvet halloween cake, nutrition isn’t usually the first thing on your mind! But for those of you who like to keep track or just want the full picture of what’s in this amazing holiday dessert, I tracked down the general estimates for the cake layers alone. Remember, this is just a guide, not a guarantee!
I want to stress that these numbers are based on the cake batter recipe provided—before we pile on the rich black cocoa buttercream frosting. Once you frost this showstopper cake, those numbers, especially sugar and fat, are going to climb quickly, so keep that in mind when you’re slicing!
Here’s what the estimates look like for one slice, assuming 12 servings:
- Calories: Around 450—pretty standard for a serious slice of cake.
- Sugar: About 45g. That dark brown sugar gives a lot of depth, and the sugar balances the cocoa beautifully!
- Fat: Roughly 25g total fat. That comes mostly from the vegetable oil, which keeps this a truly moist chocolate cake.
- Carbohydrates: Coming in around 55g.
- Protein: About 5 reliable grams per slice.
Just one quick disclaimer because I’m not a dietitian: these are purely estimates based on standard ingredient brands. If you substitute the oil for something else, or if you go crazy with the frosting (which I totally encourage for a goth cake look!), the actual counts will change. So take these numbers as a fun guideline for your spooky party dessert planning!
Share Your Goth Cake Creations
Okay, now that you’ve successfully baked and frosted the most dramatic black velvet halloween cake imaginable, I have two requests for you! First, I really, really want to know how it went. Did you manage to get that perfect inky black? Did your guests freak out over how dark and moist it was? Please leave a rating and a comment below letting me know your favorite part of making this spooky party dessert.
Your feedback is gold to me; it lets me know that the recipes I develop here—like this showstopper cake—are working for real home cooks like you! As Olivia always says, we want food that connects us, and sharing your baking triumphs does exactly that.
Second, and this is where you shine, I want to see those gorgeous creations! Tag us on social media! Seeing how you all interpret these dark aesthetic baking projects truly inspires my next recipe!
If you enjoyed diving into such a deep chocolate flavor, you might also want to check out some other fun, rich recipes like my guide to cardamom shortbread cookies for a little contrast later this season. Happy baking, and I can’t wait to see your terrifyingly delicious results!
PrintJet Black Velvet Halloween Cake
A dramatic, moist layer cake colored deep black using black cocoa powder, perfect for a spooky party centerpiece.
- Prep Time: 25 min
- Cook Time: 35 min
- Total Time: 60 min
- Yield: 12 servings 1x
- Category: Dessert
- Method: Baking
- Cuisine: American
- Diet: Vegetarian
Ingredients
- 2 cups all-purpose flour
- 2 cups granulated sugar
- 1 1/2 cups vegetable oil
- 1 cup buttermilk, room temperature
- 1 cup hot water or coffee
- 3/4 cup black cocoa powder
- 2 teaspoons baking soda
- 1 teaspoon salt
- 1 teaspoon white vinegar
- 2 large eggs, room temperature
- 1 teaspoon vanilla extract
- Black cocoa buttercream frosting ingredients (not listed)
Instructions
- Preheat your oven to 350°F (175°C). Grease and flour two 9-inch round cake pans. Line the bottoms with parchment paper.
- In a large bowl, whisk together the flour and sugar.
- In a separate bowl, whisk together the black cocoa powder, baking soda, and salt.
- In a medium bowl, whisk the eggs, buttermilk, oil, vinegar, and vanilla extract until combined.
- Gradually add the dry ingredients to the wet ingredients, mixing on low speed until just combined. Do not overmix.
- Carefully pour the hot water or coffee into the batter and mix until smooth. The batter will be thin.
- Divide the batter evenly between the prepared cake pans.
- Bake for 30 to 35 minutes, or until a wooden pick inserted into the center comes out clean.
- Let the cakes cool in the pans for 10 minutes before inverting them onto a wire rack to cool completely.
- Once cooled, level the cake layers if necessary. Frost the cake with your black cocoa buttercream.
Notes
- For the deepest black color, use high-quality black cocoa powder. Standard cocoa powder will result in a dark brown cake.
- To achieve a very dark, natural color without excessive food dye, increase the black cocoa powder slightly, but watch the texture.
- Apply a thin crumb coat of frosting first and chill the cake for 20 minutes before applying the final layer of frosting.
Nutrition
- Serving Size: 1 slice
- Calories: 450
- Sugar: 45g
- Sodium: 300mg
- Fat: 25g
- Saturated Fat: 5g
- Unsaturated Fat: 20g
- Trans Fat: 0g
- Carbohydrates: 55g
- Fiber: 2g
- Protein: 5g
- Cholesterol: 50mg