

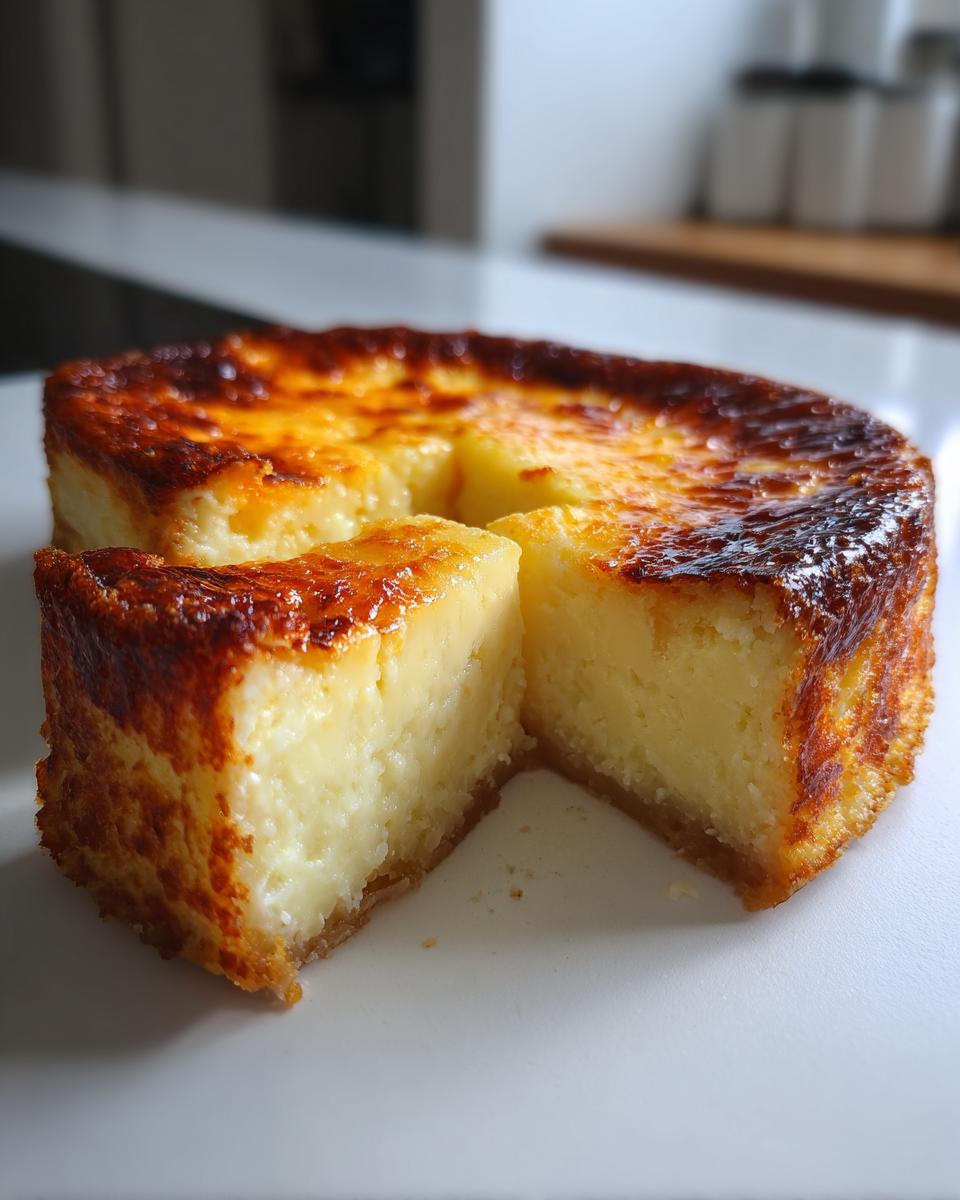
When the craving hits for something that feels both exotic and utterly comforting, you know you need a truly classic dessert. Forget those stiff, complicated cakes! I’m talking about something wonderfully chewy, deeply satisfying, and perfectly tropical. That’s where my obsession with the cassava cake comes in. This isn’t just any pudding; it’s a beloved Filipino Classic Dessert, built right on that wonderful tropical root crop base.
When I started DelishCraze, the goal was always to take those incredible, traditional flavors and make them work for a busy cook. Trust me, this recipe for cassava cake is proof that authenticity doesn’t have to mean complexity. We pull together simple ingredients to create that signature moistness and delightful chewiness. It’s a recipe Olivia Rosewood developed to feel reliable, right down to the glossy coconut custard topping you’re about to master!
- Why This Filipino Cassava Cake Recipe Stands Out
- Ingredients for Authentic Cassava Cake with Creamy Coconut Custard Dessert
- How to Make Cassava Cake: Step-by-Step Baking Instructions
- Tips for Perfect Cassava Cake Texture and Golden Top
- Cassava Cake Variations: Macapuno and Cheese Topping Ideas
- Storing Your Homemade Cassava Cake
- Ingredient Notes and Substitutions for Cassava Cake
- Frequently Asked Questions About Cassava Cake
- Serving Suggestions for This Filipino Classic Dessert
Why This Filipino Cassava Cake Recipe Stands Out
So, why am I so passionate about sharing *this* version of cassava cake? Because it’s honestly foolproof, even if you’ve never baked with cassava before! It takes that traditional Filipino comfort food and packages it into what I consider the easiest Easy Cassava Cake Baking method you’ll ever try.
Here’s the beauty of what we’re making today:
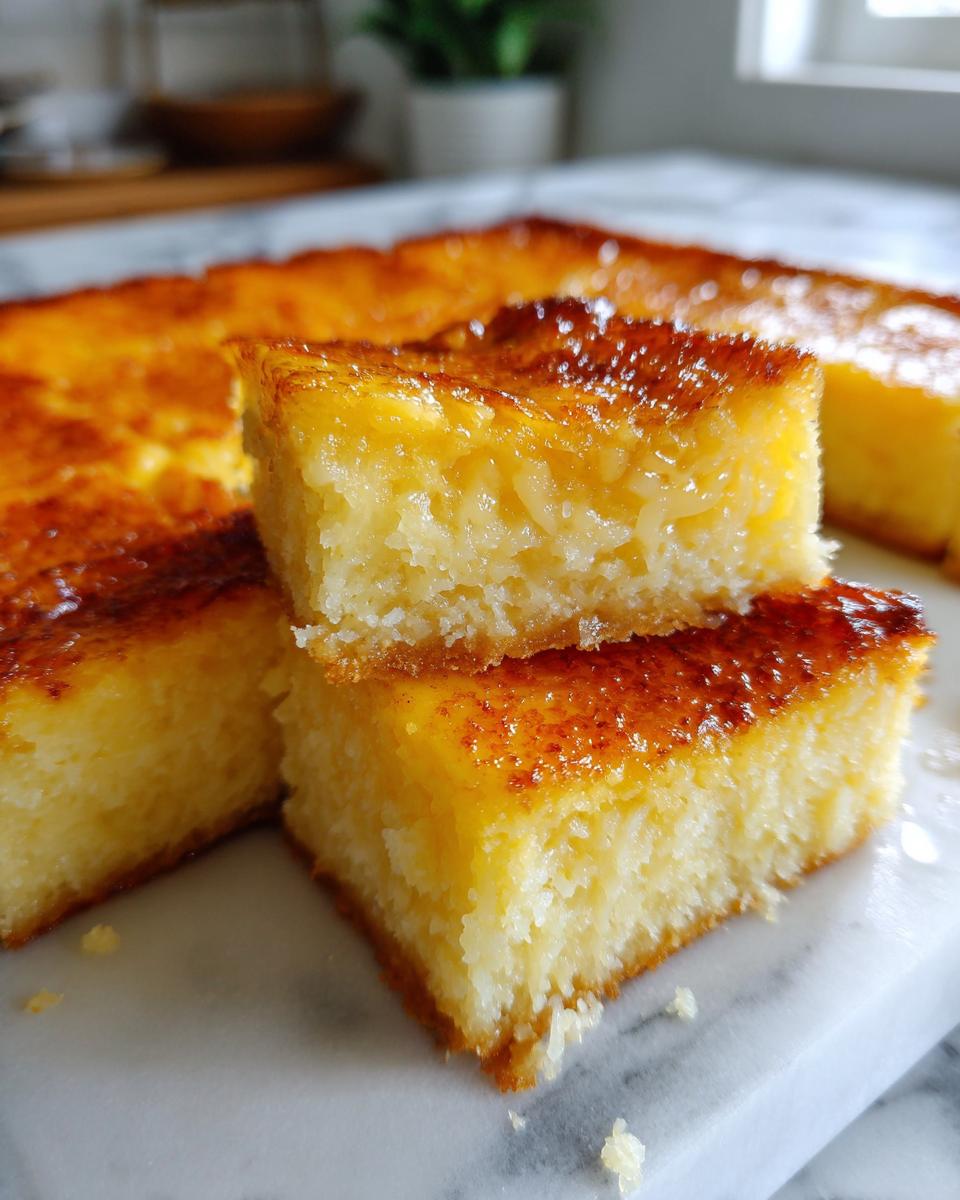
- You get that perfect, satisfyingly chewy Filipino Dessert consistency in the base—no dry ruins here!
- The top layer isn’t just sweet; we create a decadent, Creamy Coconut Custard Dessert that sets beautifully.
- It honors its roots as an Authentic Cassava Bibingka while remaining incredibly accessible for the everyday cook.
It’s the balance of those textures and flavors that makes this Filipino classic dessert a guaranteed crowd-pleaser every single time I bring it to a gathering.
Ingredients for Authentic Cassava Cake with Creamy Coconut Custard Dessert
The secret to this being a truly authentic cassava cake lies in using great quality rich ingredients. Don’t skimp on the coconut milk—we need that full fat for richness! I’ve broken down the shopping list so it’s easy to gather everything you need for this fantastic tropical root crop dessert.
For the Cassava Base:
- 3 cups grated cassava (I use thawed frozen most often, but fresh is wonderful too!)
- 1 can (13.5 oz) full-fat coconut milk
- 1 can (14 oz) sweetened condensed milk
- 1/2 cup granulated sugar
- 1/4 cup melted unsalted butter
- 2 large eggs
- 1 teaspoon vanilla extract
- 1/2 cup shredded mature coconut (optional, for that little extra chew!)
- 1/2 cup macapuno strings (if you’re feeling fancy, definitely worth it!)
For the Creamy Coconut Custard Topping:
- 1/4 cup heavy cream
- 2 egg yolks
- 1/4 cup coconut milk
- 2 tablespoons sugar
- 1/2 cup grated cheese (trust me on this—it balances the sweetness!)
How to Make Cassava Cake: Step-by-Step Baking Instructions
Making this cassava cake is a two-part adventure: first the base, then that incredible, creamy crown! Getting the timing right is key here, but don’t stress—it’s very straightforward. Remember what I always say about baking delicate things: temperature control is everything. Make sure your oven is preheated properly before you even start mixing!
Preparing the Cassava Base for Your Cassava Cake
First things first, get your oven humming at 350°F (175°C). You’ll want a 9×13 inch pan ready to go, lightly greased and lined with parchment paper. This cake loves to stick, so lining it well saves so much headache later! In a big bowl, whisk together all those base ingredients: the grated cassava, coconut milk, condensed milk, sugar, butter, eggs, and vanilla. If you added the optional coconut or macapuno, mix those in now, too.
Here is Olivia’s big tip: You only want to mix until everything is *just* combined. If you overmix the cassava, you can end up with a rubbery texture instead of the moist cassava recipe we are aiming for! Pour that beautiful batter into your ready pan and make sure it’s spread completely evenly across the bottom.
Baking the Base and Crafting the Creamy Coconut Custard Dessert
Send the base layer into the oven for about 40 to 50 minutes. We aren’t looking for it to be fully done, just set around the edges and lightly golden. While that’s happening, work on your topping. In a small saucepan, gently whisk the heavy cream, egg yolks, the small amount of coconut milk, and the topping sugar. Heat this mixture over medium-low heat until it starts to thicken enough to coat the back of a spoon. Seriously, *do not let this boil*. We are just warming it up to thicken, not scrambling those rich yolks!
When the base is ready, pull it out carefully. Pour that warm, Creamy Coconut Custard Dessert right over the top, spreading it gently. This is also the moment to sprinkle on your grated cheese if you are using one of our cheesy variations!
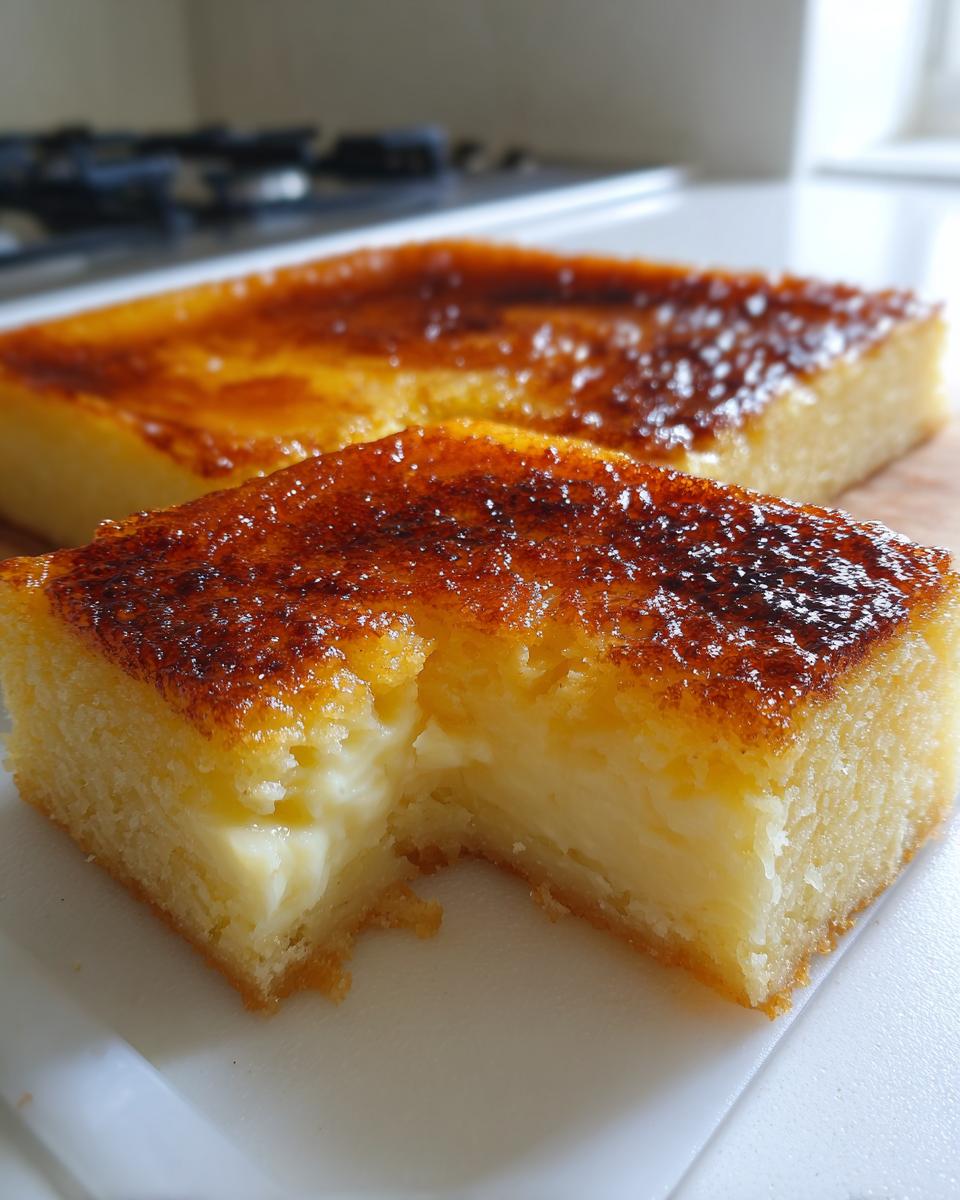
Final Bake and Cooling for the Perfect Chewy Filipino Dessert
Now that the custard is settled on top, pop the pan back into the heat for another 15 to 20 minutes. You want that topping to look gloriously set and develop a beautiful golden brown color. Resist the urge to slice it right away! The final, crucial step for achieving that signature Chewy Filipino Dessert texture is cooling. You absolutely must let the entire cassava cake cool down completely on a wire rack before attempting to slice it. Patience pays off here, I promise!
Tips for Perfect Cassava Cake Texture and Golden Top
Achieving that perfect sweet spot—chewy underneath that creamy custard—takes a little know-how. It’s all about technique, not complicated steps.
First, if you’re using fresh cassava, grating it yourself delivers the best results. Aim for a medium grate; too fine and it dissolves, too coarse and it stays unpleasantly hard. When you mix the base, remember what I said about overmixing—we want the grated cassava to hold its shape just slightly so it gives you that wonderful chew later on! This is part of our Easy Cassava Cake Baking philosophy.
For that gorgeous golden top, watch the time carefully during the final bake. If your custard is set but hasn’t browned enough, switch your oven to the broiler for just 60 seconds. Keep your eyes glued to it—cassava cake goes from golden to burnt in the blink of an eye!

Cassava Cake Variations: Macapuno and Cheese Topping Ideas
While the creamy coconut custard topping is what makes this cassava cake absolutely shine on its own, one of the best things about this Filipino classic is how wonderfully it accepts additions! If you look around, you’ll see folks adding things right into the base batter. Don’t be shy about mixing in extra texture!
For that sweet, tender texture many people crave, you’ll want to look for macapuno. Macapuno strings are unique—they are young coconut sport that is naturally gelatinous. If you managed to find some wonderful Cassava Cake with Macapuno ingredients, just fold about half a cup of those strings right into your base mixture before you pour it into the pan. It adds a lovely, slightly stringy, rich coconut mouthfeel that pairs beautifully with the cassava.
And then, of course, there’s the cheese. I know, I know—cheese on a sweet dessert sounds strange if you aren’t used to it, but it’s a total game-changer! If you want that popular Cassava Cake with Cheese Topping, you simply use the recipe as written for the base and the custard. The magic happens right at the end. Once you pour that custard layer onto the partially baked base, that’s when you grab your grated sharp cheddar (or whatever you like!) and sprinkle it evenly over the wet custard. It melts down during that final bake and gives you this incredible salty-sweet pop. It truly elevates the whole experience!
Storing Your Homemade Cassava Cake
Now, I really hope you don’t have leftovers because I know how fast this cassava cake disappears! But if you do manage to save some of this glorious Tropical Root Crop Dessert, storage is simple. Since we have that beautiful, rich custard layer on top, you absolutely must cover it tightly before putting it in the fridge. Plastic wrap pressed right against the surface helps keep that topping from sweating.
It stays perfectly moist and delicious for about three to four days when chilled.
If you plan on having slices later in the week, I actually recommend letting it sit on the counter for about 20 minutes before serving to take the chill off. That just wakes up the flavors and brings that dense, chewy texture right back to life!
Ingredient Notes and Substitutions for Cassava Cake
I always get questions about the ingredients in this cassava cake, and that’s totally fair! When you’re working with a traditional recipe like this one, the quality and type of ingredients really make a difference between “good” and “OMG what is this amazing thing?” I want every single person who tries my recipe to have fantastic results, so let’s talk specifics.
When it comes to the cassava itself, you have options! If you can find fresh cassava root, grate it yourself—it has the best flavor profile. But honestly, I rely on the frozen, pre-grated kind most weeks because life gets busy! Just make sure you let it thaw completely and drain off any excess water before mixing it in. You want it moist, not waterlogged. For a really deep dive into why this works so well, check out this great resource by Rasa Malaysia, too, who also loves this Cassava Cake style.
For the custard topping, if you’re out of heavy cream or just prefer to stick strictly to coconut products, you can absolutely substitute the heavy cream with an equal amount of the thickest part of canned coconut cream. Just scoop that rich layer off the top of the can before shaking it! It packs just as much richness into that beautiful topping.
And here’s a quick bonus point that always makes people happy: because this Filipino Cassava Cake Recipe relies entirely on the root crop—no flour needed!—it’s naturally a wonderful Gluten Free Cassava Cake. It’s just another reason this tropical root crop dessert is so special.
Frequently Asked Questions About Cassava Cake
Why does my cassava cake seem too soft or watery after baking?
Oh, that’s the most common snag with this Moist Cassava Recipe! Usually, it means one of two things. Either you didn’t drain enough liquid from your grated cassava before mixing, or—and this is crucial—you didn’t let it cool completely! This cassava cake relies on chilling time to finish setting up that chewy structure. Don’t slice it while it’s warm, even if the top looks perfectly set. Give it a few hours! Trust me, waiting is the hardest part of making a perfect Chewy Filipino Dessert.
Can I make this recipe faster? Is this a Quick Cassava Cake?
That’s a great goal! While this recipe gives you that amazing two-layer depth—that base bake plus the custard top—it does take a bit of time in the oven. We estimate about 70 minutes of cooking, plus cooling. For a truly Quick Cassava Cake experience, you can skip the separate custard bake! Mix all the topping ingredients right into the base mixture before pouring it into the pan. It won’t have that distinct, separate golden layer, but you’ll still get that amazing coconut flavor and it will cut down your oven time significantly!
Why do I need to use both sweetened condensed milk AND sugar?
This is the secret heritage of the Filipino Cassava Cake Recipe! The sweetened condensed milk gives you that signature smooth, creamy texture and richness straight away, but it doesn’t have the same caramelizing power as plain sugar. We add the granulated sugar to ensure the base gets the right structure and that lovely golden-brown finish on the bottom layer. It’s a flavor and texture insurance policy, honestly!
Can I bake this Cassava Cake without the creamy custard topping?
Absolutely! My grandmother sometimes preferred a very simple finish back in the day. If you skip the custard layer entirely—meaning you skip the heavy cream, extra yolks, and topping sugar—you just bake the base until it’s fully cooked through (usually about 60-70 minutes total, check with a toothpick in the center). It will be a denser, delightfully crumbly version, much closer to a traditional Baked Cassava Pudding. It’s still wonderfully delicious, just less decadent!
How do I know if my cassava is fresh enough for the best results?
For the best flavor possible, fresh is always best, but frozen thawed works great too! If you’re grating fresh cassava root, you want to look for firm, white root with no dark spots or sliminess. It should smell earthy, like a potato, but slightly sweeter. If it smells sour or looks discolored inside, toss it. We want the best core ingredient for our Authentic Cassava Bibingka!
Serving Suggestions for This Filipino Classic Dessert
Okay, so you’ve successfully navigated the baking, waited patiently for this gorgeous Filipino Classic Dessert to cool completely, and now you’re ready to serve it! Because this cassava cake—with that rich base and that sweet, creamy coconut custard topping—is already so decadent, I find that the best pairings are things that offer a clean contrast.
If you’re serving this after dinner, skip heavy syrups or extra sauces. A tiny, plain cup of intensely brewed black coffee is my absolute favorite partner for cutting through the richness of the coconut milk and sugar. It just makes the flavors pop!
For an afternoon treat, often called *merienda* back home, a warm cup of plain, unsweetened tea works beautifully. It’s soothing and lets the tropical sweetness of the cassava be the star. If you happen to have a batch of my easy whipped hot chocolate ready, a small serving alongside the cake makes it feel like a true indulgence—but be warned, that’s a richer pairing!
If you absolutely must garnish, a sprinkle of toasted coconut flakes on top right before serving adds another layer of texture that disappears wonderfully with every bite. Enjoy every slice of this amazing cassava cake!
PrintAuthentic Filipino Cassava Cake with Creamy Coconut Custard

Make this classic Filipino Cassava Cake, a chewy and moist tropical root crop dessert, topped with a rich, creamy coconut custard layer. This recipe is simple to follow for a delicious homemade treat.
- Prep Time: 20 min
- Cook Time: 70 min
- Total Time: 90 min
- Yield: 12 servings 1x
- Category: Dessert
- Method: Baking
- Cuisine: Filipino
- Diet: Vegetarian
Ingredients
- 3 cups grated cassava (fresh or frozen, thawed)
- 1 can (13.5 oz) full-fat coconut milk
- 1 can (14 oz) sweetened condensed milk
- 1/2 cup granulated sugar
- 1/4 cup melted unsalted butter
- 2 large eggs
- 1 teaspoon vanilla extract
- 1/2 cup shredded mature coconut (optional, for texture)
- 1/2 cup macapuno strings (optional)
- 1/2 cup grated cheese (for topping, optional)
- 1/4 cup heavy cream (for custard topping)
- 2 egg yolks (for custard topping)
- 1/4 cup coconut milk (for custard topping)
- 2 tablespoons sugar (for custard topping)
Instructions
- Preheat your oven to 350°F (175°C). Grease and line a 9×13 inch baking pan with parchment paper.
- In a large bowl, combine the grated cassava, 1 can of coconut milk, condensed milk, 1/2 cup sugar, melted butter, 2 eggs, vanilla extract, and optional shredded coconut and macapuno. Mix until just combined. Do not overmix.
- Pour the cassava mixture into the prepared baking pan and spread evenly.
- Bake the base layer for 40 to 50 minutes, or until the edges are set and slightly golden.
- While the base bakes, prepare the creamy coconut custard topping. In a small saucepan, whisk together the heavy cream, 2 egg yolks, 1/4 cup coconut milk, and 2 tablespoons sugar.
- Heat the custard mixture over medium-low heat, stirring constantly, until it thickens slightly and coats the back of a spoon. Do not let it boil. Remove from heat.
- Carefully pour the custard mixture evenly over the partially baked cassava base. If using cheese, sprinkle the grated cheese over the custard layer now.
- Return the cake to the oven and bake for another 15 to 20 minutes, or until the custard topping is set and golden brown.
- Remove the cassava cake from the oven and let it cool completely on a wire rack before slicing. This helps achieve the proper chewy texture.
Notes
- For a gluten free cassava cake, this recipe naturally fits the requirement as it uses root crop instead of flour.
- If you prefer a richer topping, you can substitute the heavy cream with an extra 1/4 cup of coconut cream.
- To achieve a perfect golden brown top, you can switch the oven to broil for the last 1-2 minutes, watching closely to prevent burning.
Nutrition
- Serving Size: 1 slice
- Calories: 350
- Sugar: 35g
- Sodium: 150mg
- Fat: 18g
- Saturated Fat: 15g
- Unsaturated Fat: 3g
- Trans Fat: 0g
- Carbohydrates: 45g
- Fiber: 3g
- Protein: 5g
- Cholesterol: 45mg