
I get it—some mornings you need fuel, and you need it five minutes ago. When deadlines are looming or you’re rushing the kids out the door, convenience is king, but I refuse to let convenience mean sacrificing flavor or texture! That’s why this **Peanut Butter Banana Smoothie** is practically a family staple for me. It’s the ultimate way to get that creamy, satisfying *banana smoothie* in under five minutes. As I always say here at DelishCraze, food should fit your life, not the other way around, and this simple, utterly delicious blend proves that home-cooked nourishment is always within reach.
- Why This Peanut Butter Banana Smoothie Recipe Works So Well
- Ingredients for the Perfect Peanut Butter Banana Smoothie Recipe
- How to Prepare Your Simple Frozen Banana Smoothie
- Customizing Your Nutritious Banana Drinks: Variations
- Ingredient Notes and Substitutions for Your banana smoothie
- Tips for Success with Any Creamy Fruit Smoothie
- Make Ahead Smoothie Prep for Busy Mornings
- Storage & Reheating Instructions for Your banana smoothie
- Frequently Asked Questions About Making a banana smoothie
- Share Your Quick Breakfast Smoothie Creations
Why This Peanut Butter Banana Smoothie Recipe Works So Well
When I designed this recipe, I kept three things in mind: speed, incredible texture, and making sure it actually keeps you full until lunch. It ticks every box, which is why it’s been featured on my list of essential healthy breakfast ideas. It’s truly built to work for busy people!
- Serious Creaminess: Forget watery drinks! This blend delivers that velvety texture everyone craves in a smoothie.
- Nutrient Powerhouse: With peanut butter and optional oats, this isn’t just fruit juice; it’s actual fuel for your morning or post-workout recovery.
- Unbeatable Speed: Prep time is negligible. You’re blending, not cooking, which is exactly what we need on busy days.
Achieving the Ultimate Creamy Fruit Smoothie Texture
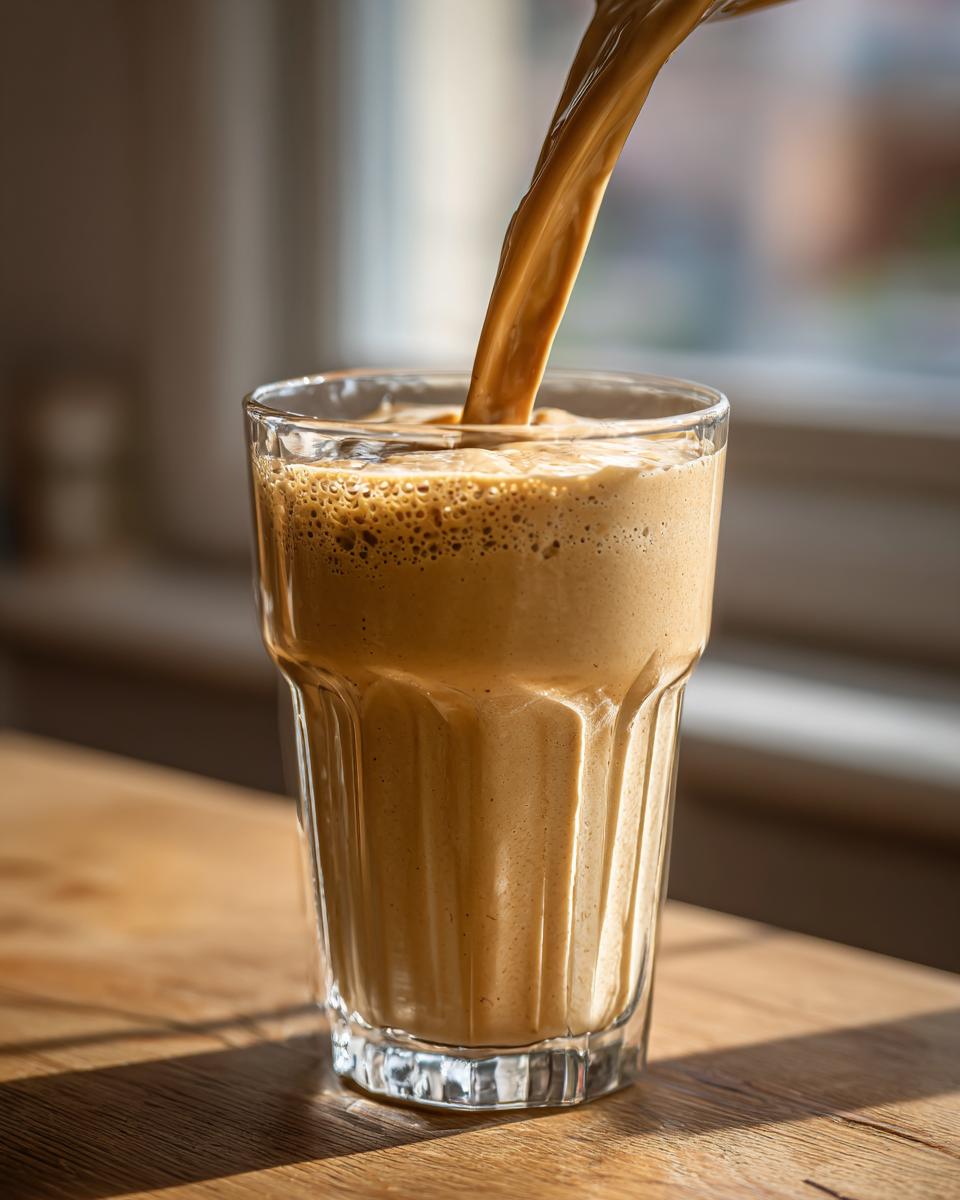
The secret to that glorious, thick smoothie recipes texture? It’s all about the bananas. You absolutely must use frozen bananas. Seriously, don’t skip this step! I let mine freeze solid for at least six hours. When they hit the blender as chunky, frosty pieces, they break down into the creamiest texture imaginable. It chills the whole drink perfectly without watering it down with too much ice.
The 5 Minute Smoothie for Your Quick Breakfast Smoothie Needs
If you want a truly great quick breakfast smoothie, you need minimal fuss. This one is consistently a 5 minute smoothie from start to finish. You grab the ingredients, toss them in, pulse, and go. That ease is what makes this particular banana smoothie a winner every single time.
Ingredients for the Perfect Peanut Butter Banana Smoothie Recipe
When you’re shooting for speed, you need ingredients that are ready to go. I keep my freezer stocked specifically for these moments! The beauty of this particular peanut butter banana smoothie is that everything goes in at once. There’s no messing around measuring precise amounts of vanilla extract or waiting for anything to soften. Everything should be measured as indicated so you get that perfect, thick consistency we talked about.
Here’s what you’ll need for one serving:
- 2 large ripe bananas, frozen in chunks (I mean truly frozen solid!)
- 1/2 cup milk—I usually grab almond milk, but regular dairy works great too
- 2 tablespoons natural peanut butter (make sure it’s the kind where the oil separates, if possible!)
- 1 scoop vanilla or unflavored protein powder (only if you’re chasing that high protein count!)
- 1/4 cup rolled oats (this is my secret weapon for extra thickness, don’t skip it if you have it)
- 4 small ice cubes (only if your bananas weren’t totally frozen and you need a chill boost)
That’s it! Simple, whole foods coming together fast. It’s a perfect example of how just a few quality components can create something truly satisfying.
How to Prepare Your Simple Frozen Banana Smoothie
Getting this done when you’re running late is honestly less stressful than making toast. Since we’ve already sourced our ingredients—especially those rock-solid frozen bananas—the actual assembly takes mere seconds. Just follow these simple steps, and you’ll have a gorgeous, thick banana smoothie ready to drink before your coffee even finishes brewing!
- First things first: get the liquids in the glass! Pour your milk into the blender carafe. This is super important for protecting your blades, trust me.
- Next, drop in the peanut butter, protein powder (if you’re using it), and oats. Put those softer things near the bottom.
- Now for the main event: dump in those lovely chunks of frozen banana and the optional ice cubes on top. They need to be near the top so the vortex pulls them down properly.
- Secure that lid tightly—you don’t want a splatter incident! Start blending on a low setting just to break things up, then immediately crank it up to high speed.
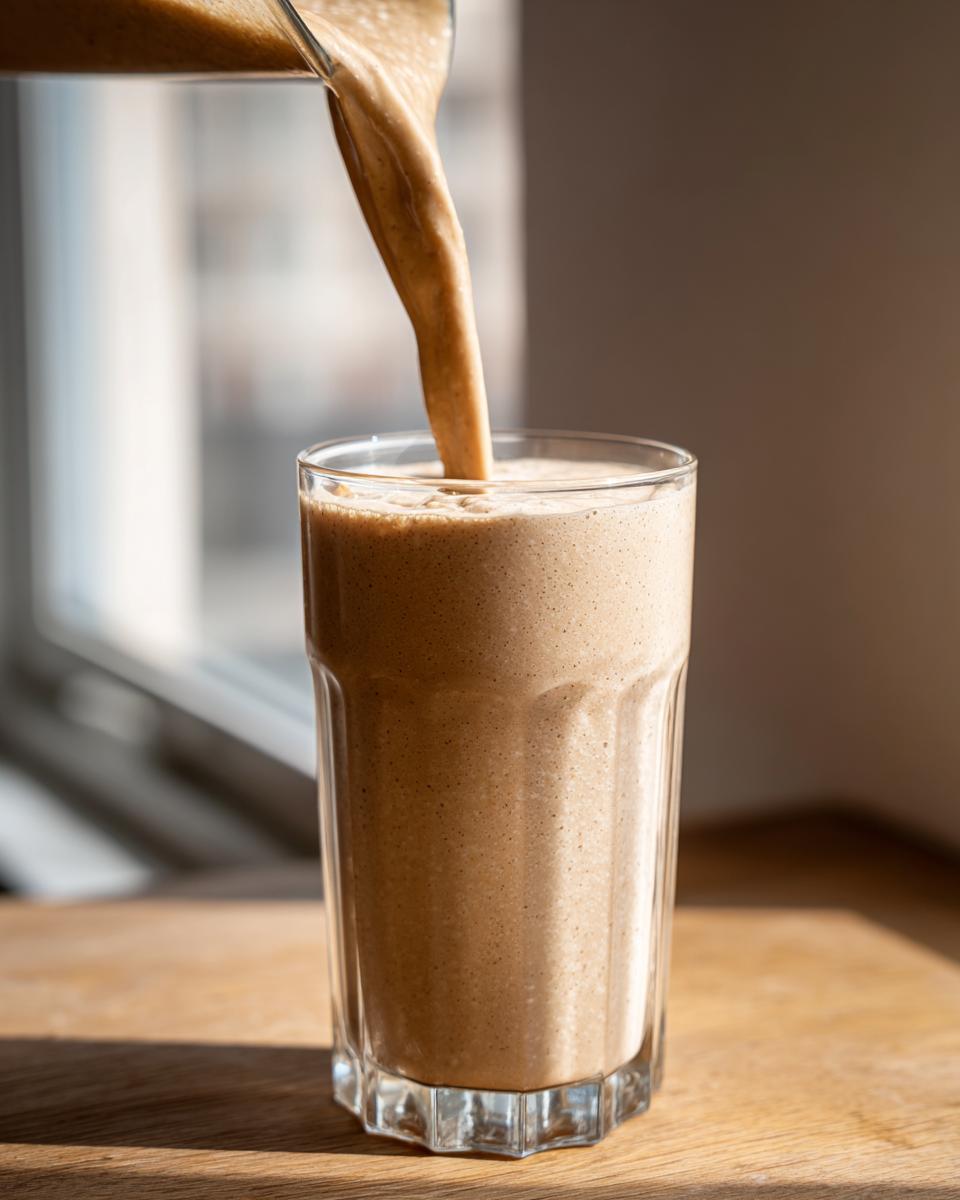
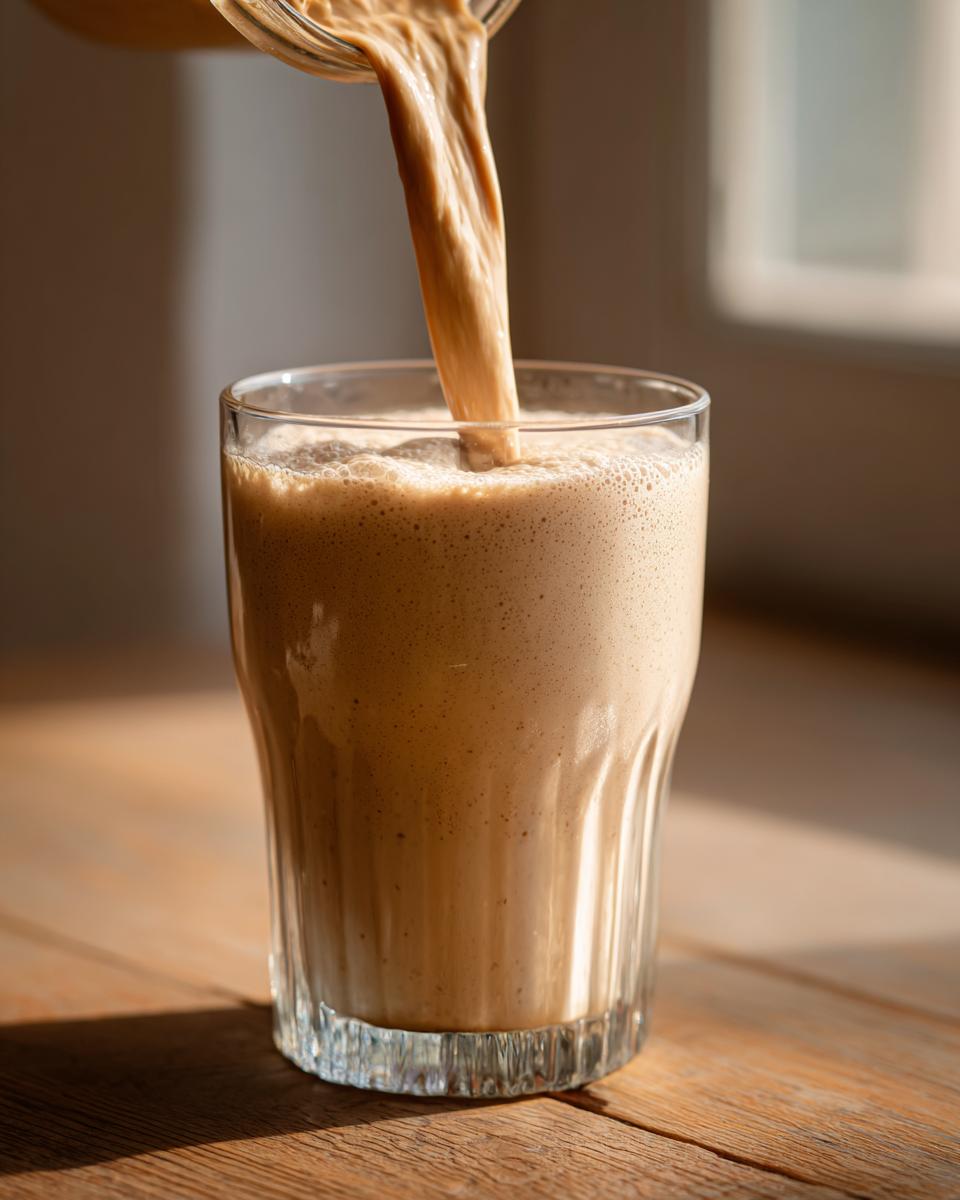
- Blend until it looks utterly smooth, like melted velvet. You might need to stop and scrape the sides once to encourage everything down, but keep going until there are no icy lumps left.
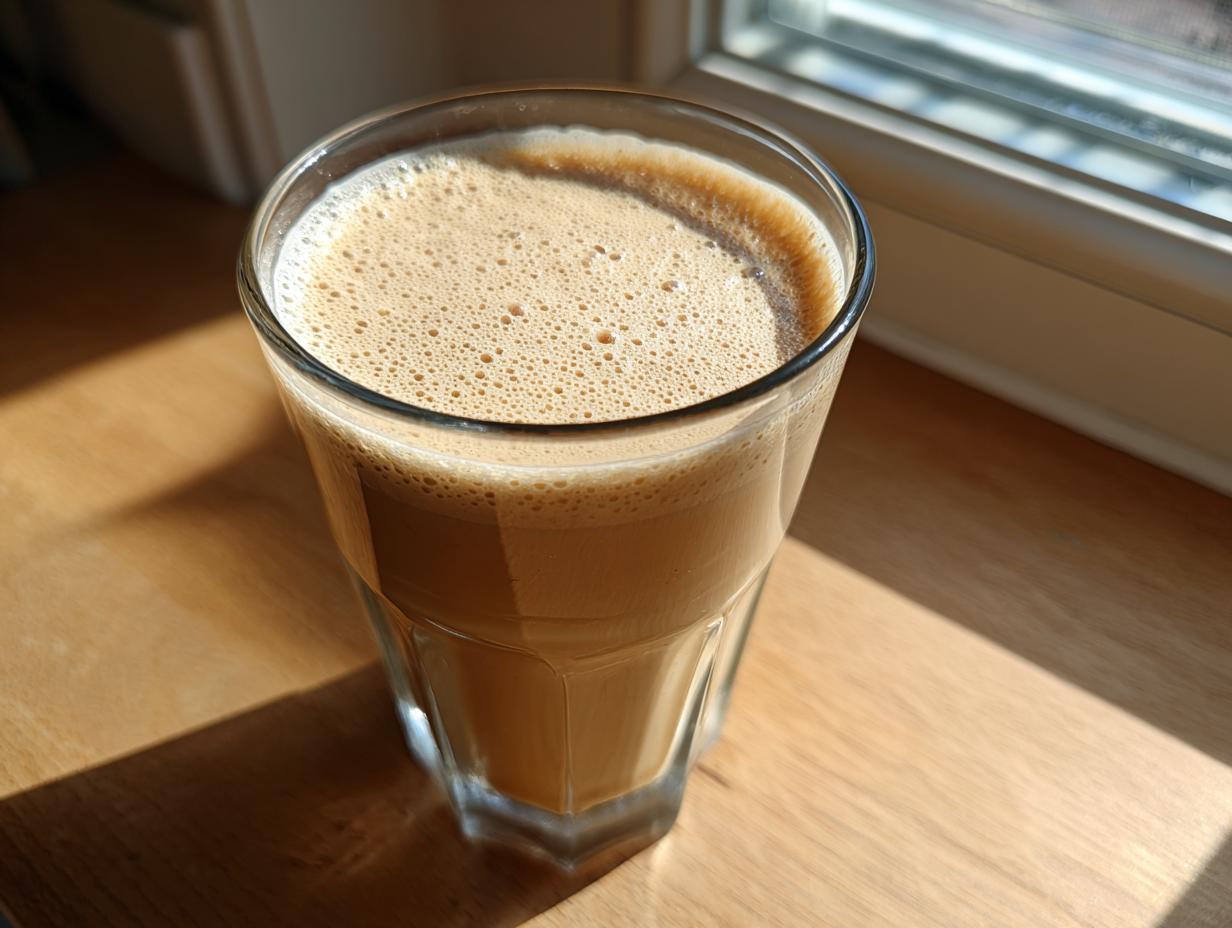
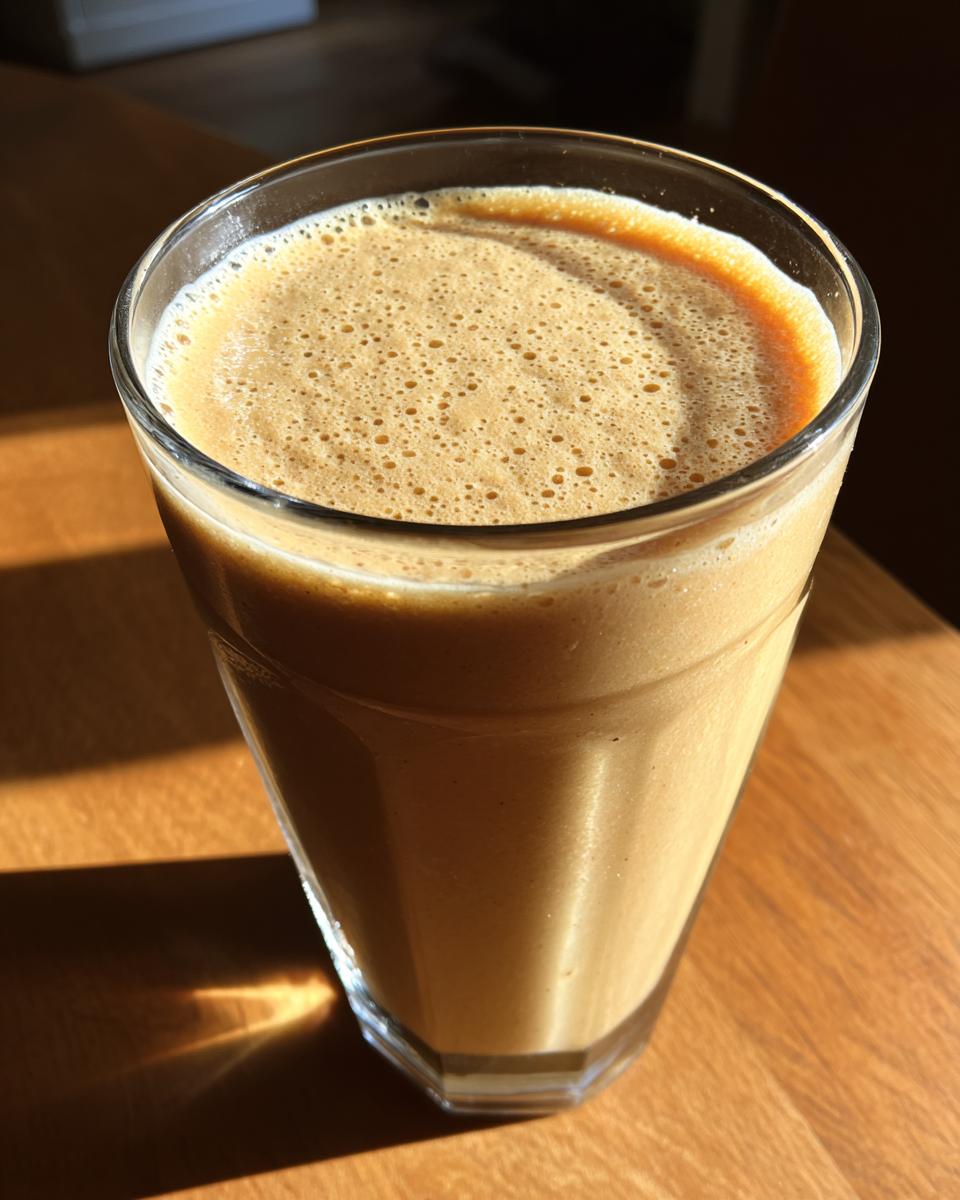
Seriously, serve this immediately! The magic of that thick, creamy texture disappears if you let it sit too long waiting for the kids to get their shoes on. We’re talking drink-it-now delicious!
Blending Tips for a Thick Smoothie
When dealing with something this thick, the order you load your blender matters a whole lot. My biggest piece of advice here, which I learned the hard way after burning out one cheap blender years ago, is always liquids first. Liquids help the blades move freely and create that signature whirlpool effect.
Once the liquid is moving, add your powders and soft ingredients (like peanut butter). Finally, pile the hardest, frozen items on top. This specific layering ensures that your blender doesn’t bog down when trying to handle the frozen banana chunks. If you see it struggling to move for a Thick Smoothie Recipes result, turn it off, use a tamper if you have one, or just give it a quick scrape down the sides before blending on high again. Patience for 10 extra seconds saves you 10 minutes of frustration later!
Customizing Your Nutritious Banana Drinks: Variations
Look, this peanut butter version is my go-to, but I know sometimes you need a little something different! That’s the joy of the base banana smoothie—it’s basically a blank, creamy canvas waiting for your favorite additions. Whether you need more staying power for a long afternoon or just want something that tastes like dessert after dinner, getting creative here is easy.
Making High Protein Banana Smoothies
If you’re using this as a post-workout refreshment or need it to hold you over until dinner, adding extra staying power is easy. The recipe already calls for protein powder, but if you forget that scoop, don’t sweat it! You can always add a tablespoon or two of hemp seeds or chia seeds right in with your other dry ingredients. They thicken the drink up nicely, too, giving you a boost of healthy fats alongside the protein.
Dessert Style Smoothies: Chocolate and Coffee Twists
This is where we turn a healthy habit into a genuine treat! If you fancy a Chocolate Banana Smoothie, just toss in one teaspoon of unsweetened cocoa powder when you add the peanut butter. It makes the whole thing taste rich and decadent, but you’re still keeping it fairly light.
For my coffee lovers out there, you know how much I love a good afternoon pick-me-up. If you have some leftover cold brew concentrate—even just a tablespoon or two—throw it in! That combination of banana, peanut butter, and coffee turns this into an incredible, almost malt-like breakfast. It’s a fantastic way to sneak some energy into your morning.
Ingredient Notes and Substitutions for Your banana smoothie
One thing I learned from testing all kinds of blends is that ingredients matter way more than complicated steps. For this amazing banana smoothie, the quality and state of your ingredients directly decide how good it tastes. We’ve talked about the frozen bananas being essential, but let’s dig into the liquid base and figure out how to make sure every version you try is successful.
Milk Choices for Milk Based Banana Smoothies
When it comes to milk, you have options, and they all change the final result a little bit. If you’re using dairy milk, especially whole milk, you’re going to get the absolute richest, silkiest texture. It just blends beautifully with the peanut butter. However, I use unsweetened almond milk most days, and it’s fantastic because it keeps the calorie count down while still giving you enough liquid to get things moving.
Don’t be afraid to try oat milk for an extra creamy effect, though it will change the flavor profile slightly more than almond or dairy. Just remember, the colder the milk, the thicker your final drink will be!
Vegan Banana Smoothie Ideas
It is so simple to make this recipe completely vegan, and honestly, you won’t miss a thing! The core of this recipe—the frozen banana and the peanut butter—is already plant-based. If you are making a Vegan Banana Smoothie Ideas version, just double-check that your protein powder is plant-based (pea or rice protein works well) instead of whey, and ensure you use a plant milk like almond, soy, or oat.
If you happen to be using a vegan protein powder that tends to absorb moisture quickly, you might need an extra splash of liquid. It’s always better to start with the minimum amount of milk recommended and add tiny amounts until the blender moves smoothly. That keeps you from ending up with a shake that’s too thin!
Tips for Success with Any Creamy Fruit Smoothie
Now that you have the recipe down, let’s talk about leveling up your smoothie game! Even the best recipes can fall flat if you miss a couple of key details when it comes to consistency and flavor guarding. I’ve learned these tricks over years of making drinks for myself, the kids, and even serving them up when friends stop by. When it comes to getting that perfect texture every time, these little notes I keep in my recipe journal really pay off. You can see more of my general kitchen know-how in my post about peanut butter rice krispie treats—it’s all about those small, confident steps!
First up: the absolute number one rule for any thick smoothie you’re making, whether it’s this peanut butter version or something else entirely, is that frozen fruit wins out over ice every time. Ice dilutes the flavor as it melts, turning your beautiful creation into slightly fruity water. Frozen bananas, as we discussed, are the gold standard. If you don’t have enough frozen fruit on hand, try adding 1/4 cup of ice, but treat it as a last resort to maintain that rich flavor you’re aiming for!
Another pro tip from my notes: if you’re adding powders, especially protein powders—which sometimes love to clump up—mix them with a tiny bit of the milk *before* adding the frozen stuff. Just swirl the powder into that small amount of liquid until it’s a smooth paste. This simple trick prevents those dry pockets of powder from getting stuck under the blades, ensuring your drink is smooth from the first sip to the last. Check out this brilliant spot on drinks for more inspiration for your next blended masterpiece: Creamy Milk Banana Smoothie Bliss.
Finally, think about your mix-ins if you’re adding things like cocoa or spices. These ingredients usually do best when they aren’t fighting against hard, frozen fruit right away. Get them mixed into your liquid base first. This ensures even distribution, so you don’t end up with one bite tasting overwhelmingly chocolatey and the next tasting like plain banana. It’s about control, and controlling the flavor means you end up with a five-star drink!
Make Ahead Smoothie Prep for Busy Mornings
This is my favorite life hack for guaranteeing a Quick Breakfast Smoothie when the alarm feels like a personal attack! We all know the struggle: you want the deliciousness of this banana smoothie, but by 7 AM, you definitely don’t want to be measuring out oats versus peanut butter. That’s where ‘Smoothie Prep Packs’ come in. This technique is what lets me breeze through the week!
The trick, which I detailed over in my guide to make ahead smoothie prep, is incredibly simple. You prepare all the dry and semi-solid ingredients ahead of time, usually on Sunday afternoon. Everything that *doesn’t* melt or get soggy—the frozen banana chunks, the protein powder, the oats, and even the spices if you’re using them—gets portioned out into individual serving sizes inside freezer-safe bags.
When Monday morning rolls around, you don’t even have to think. You just pull that little baggie of pre-measured goodness out of the freezer. All you have to do is dump it into the blender, add your milk, and maybe a dollop of peanut butter (since that’s the one moist ingredient I usually leave out for freshness). Seriously, it cuts the morning effort down to about 60 seconds flat. That’s how you win the morning battle!
Storage & Reheating Instructions for Your banana smoothie
Okay, let’s be real: the best way to enjoy this Peanut Butter Banana Smoothie is right away. Like, blending, pouring, and drinking piping hot fresh off the blender—that’s when it achieves peak creaminess. Because we are prioritizing that thick texture, leftovers, unfortunately, don’t keep well in the fridge. If you manage to have any left over from your single serving, it is going to separate and it will melt down into a much thinner, sadder liquid.
If you absolutely must store your amazing banana smoothie, your best bet is the freezer, but you have to manage your expectations. Don’t try to keep it in the glass! Pour any leftovers into an ice cube tray or small, freezer-safe container. Once frozen into cubes, you can transfer them to a zip-top bag. This is actually a fantastic trick for later!
When you want to revive those frozen cubes? Just toss them back into the blender with a tiny splash of fresh milk—start with just one tablespoon. Blend it up, and it will reactivate that creamy texture, making it almost as good as fresh. It might need just a quick blitz, but this is the only way I’ve found to rescue leftover goodness from a delicious banana smoothie.
Frequently Asked Questions About Making a banana smoothie
I know when you’re trying a new recipe, especially a quick one like this, you might have a few lingering questions. Trust me, I’ve tested this Peanut Butter Banana Smoothie hundreds of times, trying every substitution under the sun! Here are some things folks often ask me about getting the very best result for their banana smoothie.
Can I make this a Post Workout Banana Drink without protein powder?
Absolutely! If you skip the scoop of protein powder, you’re turning this into a fantastic energy-boosting option, but you might want to add a little something else to keep that staying power up. I highly recommend adding 1/3 cup of Greek yogurt—it bumps up the protein naturally and makes it even creamier! If you don’t have yogurt, throwing in a few extra rolled oats or an extra tablespoon of peanut butter works wonders to keep you feeling full after a hard workout.
What is the best natural sweetener for this smoothie?
This is a great question, because honestly, two ripe, frozen bananas provide a surprising amount of sweetness on their own! If you are still looking for a touch more sweetness to suit your taste buds, I always suggest reaching for a natural option. A single Medjool date, pitted, blends right in seamlessly and adds a lovely caramel note. If you’re not a date fan, a tiny drizzle—maybe half a teaspoon—of maple syrup is perfect. It keeps this in the realm of Natural Sweetener Smoothies without adding refined sugar!
Share Your Quick Breakfast Smoothie Creations
Now that you have the blueprint for what I think is the best, quickest, and creamiest Peanut Butter Banana Smoothie out there, I really, truly want to see what you come up with! Cooking is always more fun when we can share the results, right?
Once you blend up this Quick Breakfast Smoothie, tell me how it went! Did you stick to the recipe perfectly? Did you decide to sneak in some spinach or perhaps try a different nut butter, like almond or cashew?
- Please hop down to the comments section below and leave a star rating for this recipe. It helps other busy folks decide if they should try it next!
- Let me know your favorite addition! I love hearing about the creative ways you all customize these basic blends.
- If you snapped a photo of your beautifully thick glass, share it on Instagram and tag me! Seeing your creations makes my day and keeps me inspired here at DelishCraze. If you have any specific questions after making it, don’t hesitate to use my contact page to reach out directly!
Creamy Peanut Butter Banana Smoothie for Easy Breakfast
Make this creamy peanut butter banana smoothie in five minutes for a satisfying breakfast or post-workout boost. It uses simple ingredients and frozen bananas for a thick texture.
- Prep Time: 5 min
- Cook Time: 0 min
- Total Time: 5 min
- Yield: 1 serving 1x
- Category: Breakfast
- Method: Blending
- Cuisine: American
- Diet: Vegetarian
Ingredients
- 2 large ripe bananas, frozen
- 1/2 cup milk (dairy or almond milk works well)
- 2 tablespoons natural peanut butter
- 1 scoop vanilla or unflavored protein powder (optional, for high protein)
- 1/4 cup rolled oats (optional, for thickness)
- 4 ice cubes (optional, if bananas are not fully frozen)
Instructions
- Place the frozen banana chunks, milk, peanut butter, and any optional ingredients like protein powder or oats into your blender.
- Secure the lid and blend on low speed initially, then increase to high speed.
- Blend until the mixture is completely smooth and creamy. Stop and scrape down the sides if necessary.
- If the smoothie is too thick, add a splash more milk. If it is too thin, add a few more ice cubes or a small piece of frozen banana.
- Pour the smoothie into a glass and serve immediately for the best texture.
Notes
- Using frozen bananas is key to achieving a thick, creamy texture without needing excessive ice.
- For a dessert style smoothie, add 1 teaspoon of unsweetened cocoa powder.
- To prepare ahead, measure all dry ingredients and place them in a freezer-safe bag. When ready, just add the milk and peanut butter.
Nutrition
- Serving Size: 1 smoothie
- Calories: 380
- Sugar: 22
- Sodium: 150
- Fat: 14
- Saturated Fat: 2
- Unsaturated Fat: 12
- Trans Fat: 0
- Carbohydrates: 55
- Fiber: 8
- Protein: 18
- Cholesterol: 0