
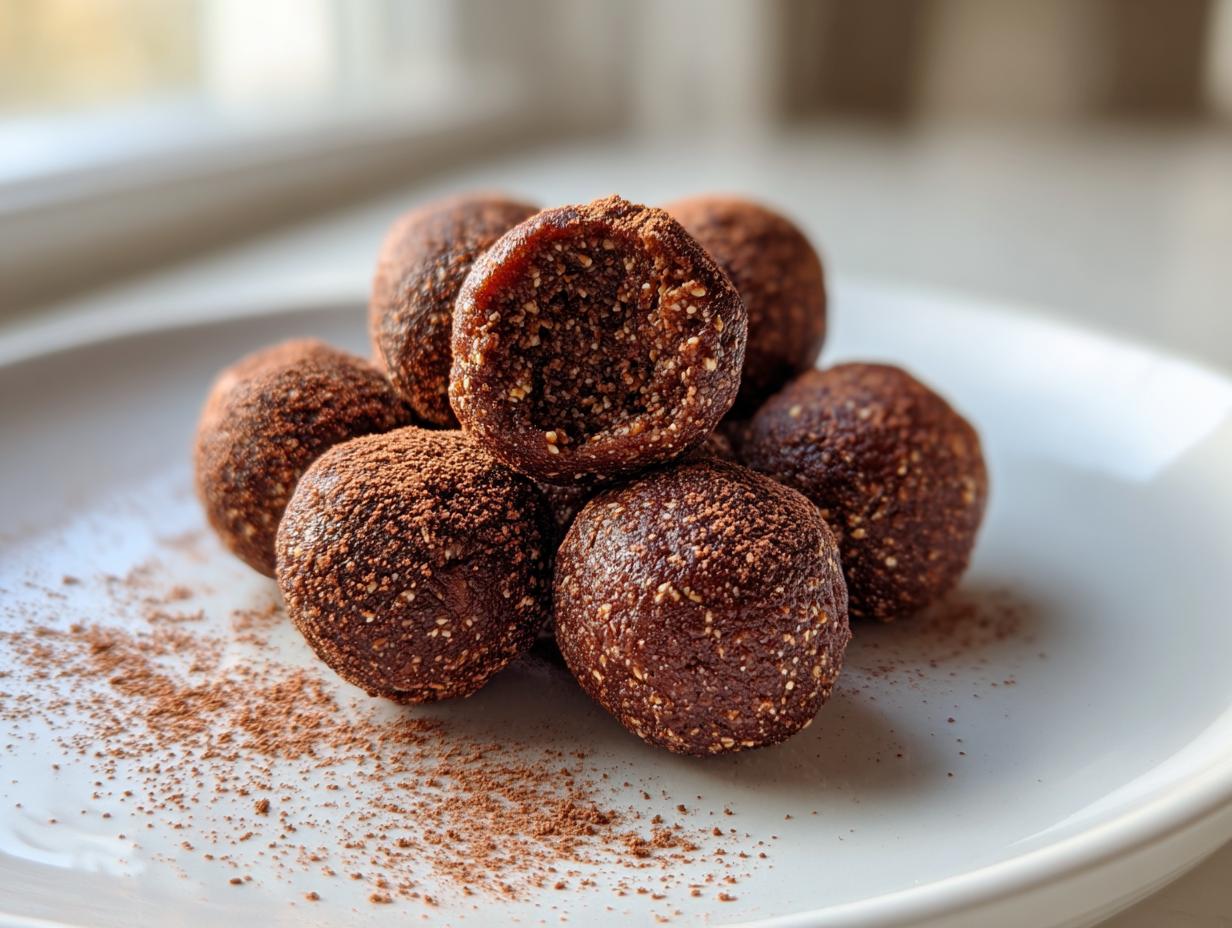
Life moves so fast, doesn’t it? Between chasing deadlines and trying to squeeze in a proper workout, finding snacks that are actually good for you—and don’t take forever—feels impossible sometimes. That’s exactly why I’m sharing my go-to recipe for **protein balls** today! Forget baking; these are the ultimate, effortless, no-bake peanut butter and oatmeal treats. They’re the secret weapon I always rely on for essential post workout fuel and keeping organized with weekly meal prep snacks. Trust me, these are the easiest, chewiest bites you’ll ever make, and they’re a staple around the DelishCraze kitchen thanks to Olivia Rosewood herself! If you’re trying to eat cleaner but still crave something satisfying after a long day, you absolutely need to bookmark this recipe right now. We’re talking wholesome ingredients that taste like dessert, perfect alongside one of our healthy breakfast ideas. Check out the quick guide to mixing up your first batch!
- Why These Are the Best Protein Balls Recipe You Will Make
- Essential Ingredients for Perfect Peanut Butter Protein Balls
- Step-by-Step Instructions for No Bake Energy Bites
- Customizing Your Protein Balls Recipe: Flavor Variations
- Tips for Success with Homemade Protein Balls
- Storage and Make-Ahead for Meal Prep Snacks
- Serving Suggestions for Your Peanut Butter Protein Bites
- Frequently Asked Questions About Protein Balls
- Nutritional Snapshot of These Protein Balls
Why These Are the Best Protein Balls Recipe You Will Make
I’m not just giving you any recipe here; these are truly the best protein balls you’ll ever have. Why? Because they nail the trifecta: speed, nutrition, and flavor. I spent ages perfecting the texture so they aren’t chalky or falling apart. If you’re looking for something that actually tastes good and keeps you full until dinner, this is it. Honestly, if I can make these between client calls, anyone can!
- They are soft, chewy, and have that perfect hint of salty-sweet peanut butter flavor.
- They require zero oven time, meaning less cleanup for you! I even link to some other quick meals if you’re short on time later!
- They pack a serious protein punch, making them perfect for recovery days.
Speed and Simplicity: 10 Minute Protein Balls
Seriously, this whole batch comes together faster than it takes to boil water. We’re talking literally 10 minutes from opening the pantry to having them ready for the fridge. If you need quick snack ideas when hunger strikes unexpectedly, you can whip these up in a flash. No chopping, no melting, just mixing!
Fueling Your Day with Healthy High Protein Snacks
These aren’t just sweet treats, folks—they are real fuel. With nearly 8 grams of protein per bite, this recipe is incredible for keeping your energy steady. They’re fantastic for mindless office snacking or as intentional post workout fuel when you need to get those nutrients in right away. They just *work*.

Essential Ingredients for Perfect Peanut Butter Protein Balls
Okay, let’s talk about the magic foundation of these incredible protein balls. The best part about this specific recipe is that you probably have 90% of this stuff sitting in your pantry right now. No fancy health food store runs required, which is exactly what I need when I’m trying to keep things simple!
This recipe relies on a simple combination of oats for chewiness, protein powder for the muscle fuel, and natural sticky binders to hold everything together. Here is exactly what you need to lay down the groundwork:
- 1 cup rolled oats (don’t use instant, we need that texture!)
- 1/2 cup vanilla or unflavored protein powder (use what you love)
- 1/2 cup natural peanut butter (stirred well first!)
- 1/3 cup honey or maple syrup
- 1 tablespoon chia seeds (they soak up moisture beautifully)
- 1 teaspoon vanilla extract
- 1/4 cup mini chocolate chips (optional, but highly recommended for happiness!)
You can find a few more creative ideas over on my protein mug cake recipe if you’re looking for more quick protein fixes.
Ingredient Notes and Substitutions for Your Protein Balls
Here’s where you can play around without messing up the structure. Since we are dealing with sticky substances, precision matters! For the protein powder, I really suggest sticking to vanilla or completely unflavored. Anything too strongly flavored, like cookies and cream, can taste weird when mixed with just peanut butter and oats.
If you need to keep these strictly vegan, just sub the honey for maple syrup—it works exactly the same way as far as binding goes. Also, if peanuts aren’t your thing, almond butter or even sunflower seed butter (for nut-free friends) are fantastic swaps for the peanut butter. Just make sure your nut butter is the natural, drippy kind, not the super oily, separated stuff. If it’s too runny, your protein balls might need a tiny extra spoonful of oats to firm up.

Step-by-Step Instructions for No Bake Energy Bites
Alright, time to bring this glorious mixture together! Since these are protein balls, the process is ridiculously straightforward. You aren’t whipping anything up for hours; we want that quick payoff! Grab your medium bowl where you just mixed the dry stuff, and now we introduce the wet ingredients. Dump in the peanut butter, the honey (or maple syrup, if you went vegan!), and that tiny splash of vanilla extract.
Now, you have a choice, and I usually opt for my hands for the first part. Stir it up really well with a sturdy spoon until it starts looking almost crumbly, but then you might need to dig in and use your fingers. You want everything totally incorporated—no dry pockets of protein powder anywhere! If you’re adding chocolate chips or anything else, toss those in right before you start rolling. This whole mixing process should take maybe two or three minutes tops.
This is where most homemade easy protein balls go wrong, so pay attention! If your dough looks too stiff—like it’s just breaking apart when you try to squeeze it—add liquid slowly, maybe a teaspoon of water or milk at a time. Too soupy? Add just a little more oat flour or a tablespoon of oats. Once it holds together nicely when you squeeze a handful, you’re golden. Then you just roll them out into little golf-ball-sized pieces. Seriously, aim for uniformity so they set evenly!
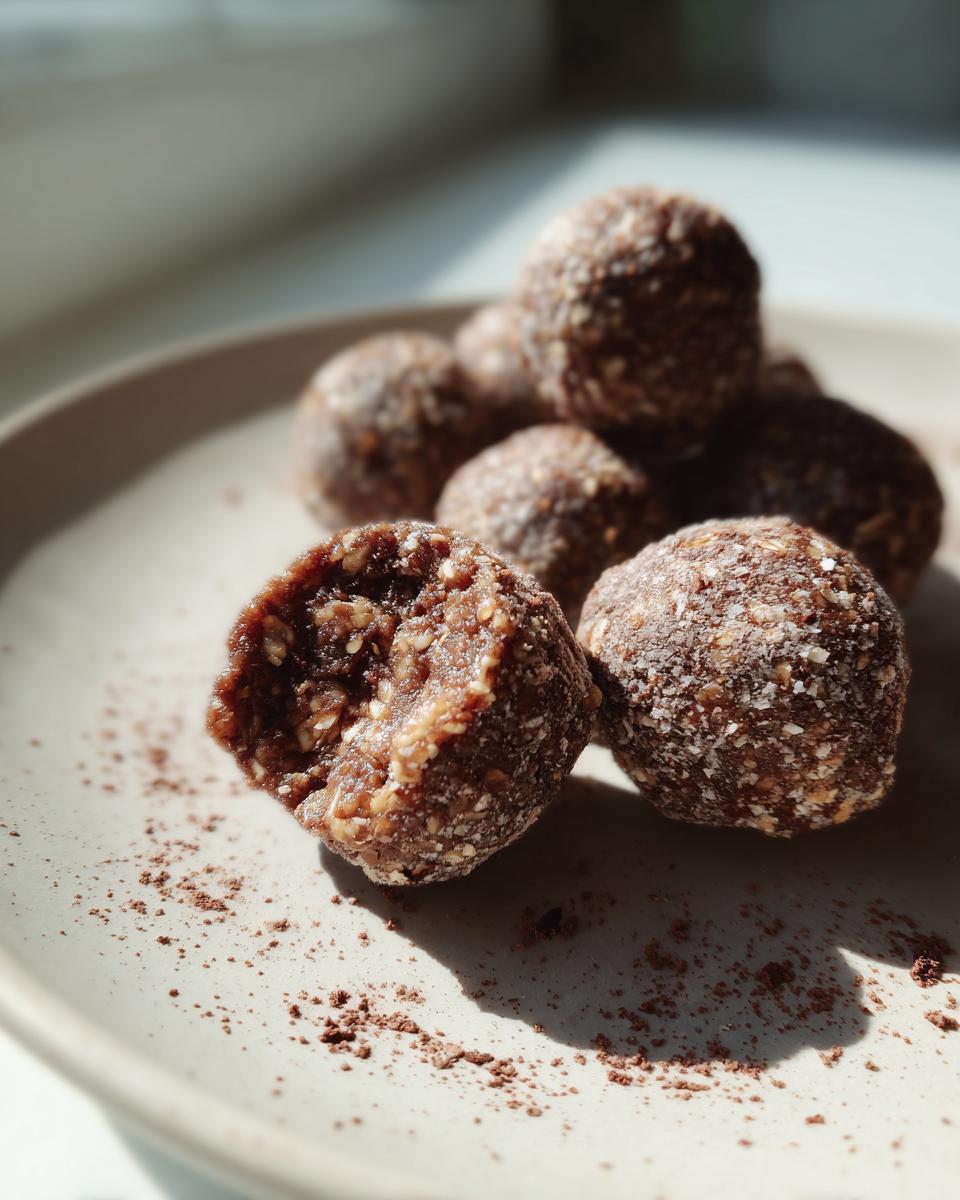
Mixing and Forming Your Chewy Energy Balls
When you go to roll them, if the dough is sticking to your hands like crazy, don’t panic! It happens, especially when your house is warm. The trick is to quickly wet your palms with cold water—just a little bead or two—and roll quickly. The water acts as a quick barrier. You want them to be about 1 inch in diameter, which really helps keep them organized for chewy energy balls.
Once they’re all rolled out, they need a chill session. This isn’t optional, trust me. Place them on parchment paper on a tray and pop them into the fridge for at least 30 minutes. This firms them up so they don’t stick together in the container! If you’re in a total rush, you can actually stick them in the freezer for about 15 minutes to speed things up. After chilling, they’re ready to eat, or you can move them to your storage containers. Head over to check out my recipe for high-protein overnight oats if you’re looking for more ways to start your morning strong!
Customizing Your Protein Balls Recipe: Flavor Variations
Now, I know some of you might be looking at this basic peanut butter setup and thinking, “That sounds great, but what about chocolate?” Don’t worry! The beauty of these protein balls is how wonderfully adaptable they are. This recipe is really just a perfect canvas for you to create your signature flavor profile. Because the base texture is so solid, you can easily adjust fats and sweeteners to make them even better suited for your goals—whether you need them fully vegan or aiming for low calorie protein balls.
If you want to lean into that sweet spot everyone loves, my recommendation for a chocolate focus is to swap out the 1/4 cup of mini chocolate chips for a full tablespoon of unsweetened cocoa powder mixed in with the dry ingredients. It deepens that peanut butter flavor wonderfully! Or, if you’re into texture, skip the chips and add 2 tablespoons of toasted, shredded coconut for a tropical twist.
When it comes to making these the absolute best protein balls recipe for your needs, play around with the add-ins. You can use flax seeds, different nuts, or dried fruit, but just remember: for every large, bulky addition you throw in, you might need a tiny bit more binder (honey/syrup) since they don’t absorb moisture like oats do. This versatility is why this recipe is a keeper!
Making Vegan Protein Balls or Low Calorie Protein Balls
Let’s talk swaps for specific dietary needs, because everyone deserves a great snack! If you’re aiming for vegan protein balls, it’s incredibly simple: just use maple syrup instead of honey. Honey is my default because it’s a bit stickier, but maple syrup works just as well in binding everything together. Just make sure you use a vegan-friendly protein powder, of course!
For those trying to keep the sugar down or aiming for those coveted low calorie protein balls, you have a couple of options. You can swap the 1/3 cup of honey for a zero or low-calorie liquid sweetener like monk fruit syrup or stevia-based syrup. Be cautious though—syrups vary wildly in viscosity! You might need to rely heavily on the oats to dry things out a bit. If you use a powdered sweetener (like erythritol blends), you’ll need to add an extra tablespoon or two of liquid (maybe almond milk) because powdered sweeteners don’t contribute to stickiness the way sugar does. It takes a tiny bit more tweaking, but it’s totally doable to get those healthy homemade snacks just right for your plan! You can explore more ideas for high-protein baking when you check out my guide on high-protein cookie dough.
Tips for Success with Homemade Protein Balls
Even though these are the simplest no bake treats you’ll ever make, there are a few little kitchen secrets I’ve picked up over the years to make sure they come out perfectly chewy every single time. My goal is always preventing that miserable crumbles-in-the-jar scenario, right? We want sturdy, satisfying bites!
The biggest thing I learned when developing this recipe is the quality of your binder. If you use peanut butter that’s been sitting on the shelf for six months and it’s totally separated, your mixture will lack the necessary emulsification needed for smooth rolling. Always give natural peanut butter a good stir until it looks creamy and uniform before measuring it out. That initial mix ensures your subsequent protein balls hold their shape beautifully after chilling.
Another key step for texture perfection is letting the mixture rest *before* you attempt to roll. I know we want these as quick snack ideas, but skipping the chilling time is a mistake. When everything is room temperature, the fats haven’t set, and rolling them just smears them around. That 30 minutes in the fridge is super important for making them less sticky and ensuring that wonderful, dense, chewy texture that everyone loves in homemade protein balls.
If you find your final batch is still a little too soft after the initial chill—this sometimes happens if your protein powder is extra absorbent—don’t stress! Just put them back in for another 15 minutes. A firmer ball is a better travel snack, after all. For more ideas on making wonderful binder-heavy snacks, check out my guide on making homemade granola!
If you are looking for more incredible, no-muss recipes similar to this, you should definitely run over and see what my friends at Flavor Nectar are doing with their version of protein balls—they always have great tips for clean eating snacks, too!
Storage and Make-Ahead for Meal Prep Snacks
The best thing about making these delicious protein balls is that they are built for make-ahead success! Honestly, I often make a double batch—one batch to devour immediately (because who can wait?), and the second batch destined for later snacking. They are truly the perfect addition to your weekly meal prep snacks lineup because they never go stale.
If you plan on eating them within the week, an airtight container in the refrigerator is your best friend. They will hold up wonderfully for about two weeks in the fridge. They might firm up just slightly after the first day, but that’s totally fine; it just makes them a bit easier to grab and go. They come out of the fridge perfectly ready to eat!
But what if you’re super organized, like I try to be? You can absolutely freeze these! Lay the rolled balls out on a sheet pan lined with parchment paper—don’t just dump them wet into a bag or container, or you’ll end up with one giant protein brick! Freeze them solid for about an hour like that. Once they are hard little nuggets, you can transfer them into a freezer-safe zip-top bag or container. They store beautifully in the freezer for up to three months.
If you pull them out frozen, just let them thaw on the counter for about ten minutes, or pop them in the fridge for an hour. It’s so nice pulling out a perfectly portioned, healthy high protein snack right when you need it! For more freezer-friendly ideas that save you time later, you should check out how I prep my egg muffins for quick breakfasts.
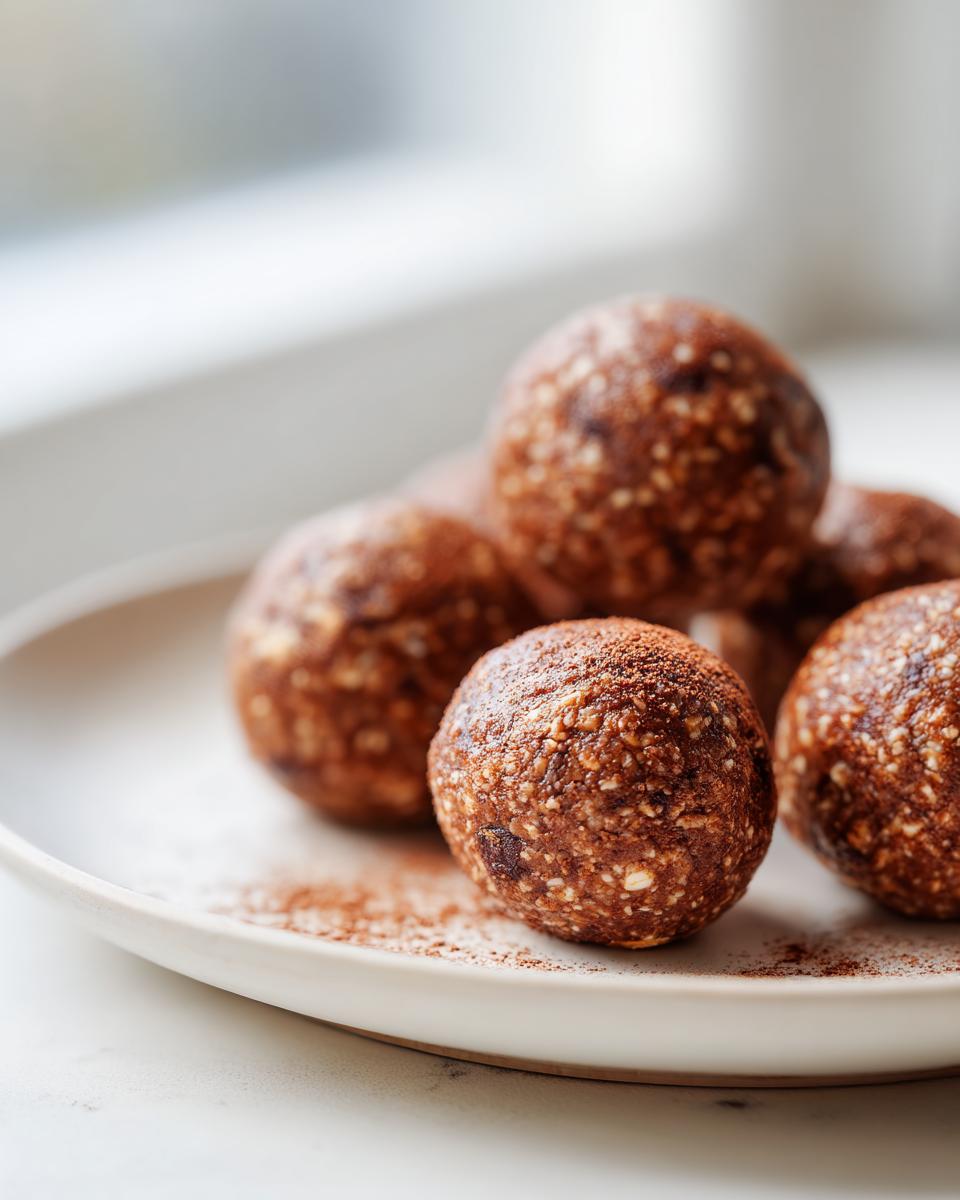
Serving Suggestions for Your Peanut Butter Protein Bites
So, you’ve got this amazing batch of no-bake peanut butter goodness chilling perfectly. Now what? While they are perfectly delicious eaten straight out of the fridge standing over the counter (don’t judge, we all do it!), I love finding ways to make these little bites feel like a true treat or part of an intentional, satisfying snack time.
Since these peanut butter protein bites have that rich, earthy flavor from the peanut butter and the deep sweetness from the honey, they pair spectacularly well with something slightly bitter or refreshing. My absolute favorite way to enjoy them is with my first cup of coffee in the morning! It’s truly the perfect combination of slow morning ritual and fast, healthy fuel.
If you’re eating them as a post workout fuel snack, try crumbling one over a small bowl of Greek yogurt. It adds that necessary texture contrast—chewy bites against creamy yogurt—and kicks up the overall protein content even more. It turns a five-minute snack into something that feels like a real, planned meal replacement!
Another thing I love doing, especially when packing lunches for the kids or for a mid-afternoon slump, is pairing them with fresh fruit. A few of these bites next to some crisp apple slices or banana chunks is just heavenly. The fruit provides that needed hydration and brightness that pulls the savoriness of the peanut butter together. And speaking of satisfying sweetness that complements these flavors, you should definitely check out how I make my quick, healthy homemade chocolate milk to wash it all down!
Ultimately, the best way to serve them is the way you’ll actually enjoy them consistently because that’s what keeps you on track with your healthy snacking goals!
Frequently Asked Questions About Protein Balls
Can I skip the oats in this protein balls recipe?
That’s a great question if you’re gluten-free or just don’t have them on hand! Honestly, the rolled oats are crucial because they give these protein balls that signature chewy texture and bulk up the snack without adding tons of calories. If you skip them, you’ll need a replacement binder. I suggest using almond flour or crushed cornflakes as a 1:1 substitute, but you might need to add a splash more honey or peanut butter to make sure the dough holds together without drying out. They won’t be quite as chewy, but they’ll still be delicious!
What protein powder works best for the best protein balls?
I’ve had luck with almost every kind, but the texture is definitely affected by the type you choose. Whey protein isolates tend to be a little drier, so if you go that route, you might end up needing that extra teaspoon of water or milk I mentioned earlier. Casein protein often makes them thicker and sometimes a bit doughier, which is great! If you use a plant-based powder, remember those can sometimes absorb moisture differently, so mix patiently!
Are these low calorie protein balls if I skip the chocolate chips?
They are definitely on the lower end for an energy bite, especially compared to pre-made bars! By sticking to the core recipe and skipping the mini chocolate chips, you get them in the low 130-calorie range per ball, which is fantastic for a healthy high protein snack. Remember, if you swap honey for a sugar-free syrup, you can push those calories down even further, targeting those low calorie protein balls you might be after!
My dough is too sticky! What simple fix can I use?
Oh, I know that feeling! That usually means your peanut butter was extra oily, or maybe your protein powder is just super thirsty today. Don’t reach for more sugar! The easiest, quickest fix is to add another tablespoon of rolled oats—just gradually—or even a teaspoon of unsweetened coconut flour if you have it. Mix it in until it just stops sticking aggressively to the sides of the bowl. A quick 15-minute chill always helps stiffen things up too. You can find a few more tips for sticking issues over at my recipe for cream cheese sausage balls, where binding is everything!
Nutritional Snapshot of These Protein Balls
People always ask me if these wholesome snacks are *actually* good for you, or if they are just disguised candy balls! While I’m not a registered dietitian, I always like to give you a snapshot of what you’re fueling your body with. This information is based on the standard recipe yielding 16 balls and using regular rolled oats and honey.
Keep in mind that if you swap things out—like using almond butter instead of peanut butter, or opting for a different kind of sweetener—these numbers are definitely going to change! This is just a guide to show you how packed these little bites are with good things.
- Serving Size: 1 Ball
- Calories: Approximately 135 per ball
- Protein: Around 8g
- Total Fat: Roughly 7g
- Total Carbohydrates: About 13g
See? That protein count is really solid for a no-bake snack that took you ten minutes to throw together. It’s a perfect balance to give you sustained energy without that sugar crash later in the day. These estimates break down to about 2g of fiber and only 7g of sugar per bite when using the standard ingredients listed in the recipe. It’s a win-win for satisfying those sweet cravings healthily!
PrintEasy No-Bake Peanut Butter Oatmeal Protein Balls
Make these simple, no-bake protein balls using pantry staples. They are quick to prepare, high in protein, and perfect for meal prep or a fast energy boost.
- Prep Time: 10 min
- Cook Time: 0 min
- Total Time: 10 min
- Yield: 16 servings 1x
- Category: Snack
- Method: No Bake
- Cuisine: American
- Diet: Vegetarian
Ingredients
- 1 cup rolled oats
- 1/2 cup vanilla or unflavored protein powder
- 1/2 cup natural peanut butter (or almond butter)
- 1/3 cup honey or maple syrup
- 1 tablespoon chia seeds
- 1 teaspoon vanilla extract
- 1/4 cup mini chocolate chips (optional mix-in)
Instructions
- Combine the rolled oats, protein powder, and chia seeds in a medium bowl. Mix them well.
- Add the peanut butter, honey (or maple syrup), and vanilla extract to the dry ingredients.
- Mix everything together using a sturdy spoon or your hands until a thick, uniform dough forms. If the mixture seems too dry, add a teaspoon of water or milk at a time until it holds together.
- Fold in the optional chocolate chips or other mix-ins.
- Roll the mixture into small, uniform balls, about 1 inch in diameter.
- Place the finished protein balls on a baking sheet lined with parchment paper.
- Refrigerate for at least 30 minutes to firm up before serving.
Notes
- For a vegan option, use maple syrup instead of honey.
- Store these **healthy high protein snacks** in an airtight container in the refrigerator for up to two weeks.
- You can substitute peanut butter with almond butter or sunflower seed butter for different flavors.
- For a lower sugar option, use a low-carb sweetener in place of honey.
Nutrition
- Serving Size: 1 ball
- Calories: 135
- Sugar: 7g
- Sodium: 65mg
- Fat: 7g
- Saturated Fat: 1.5g
- Unsaturated Fat: 5.5g
- Trans Fat: 0g
- Carbohydrates: 13g
- Fiber: 2g
- Protein: 8g
- Cholesterol: 0mg