
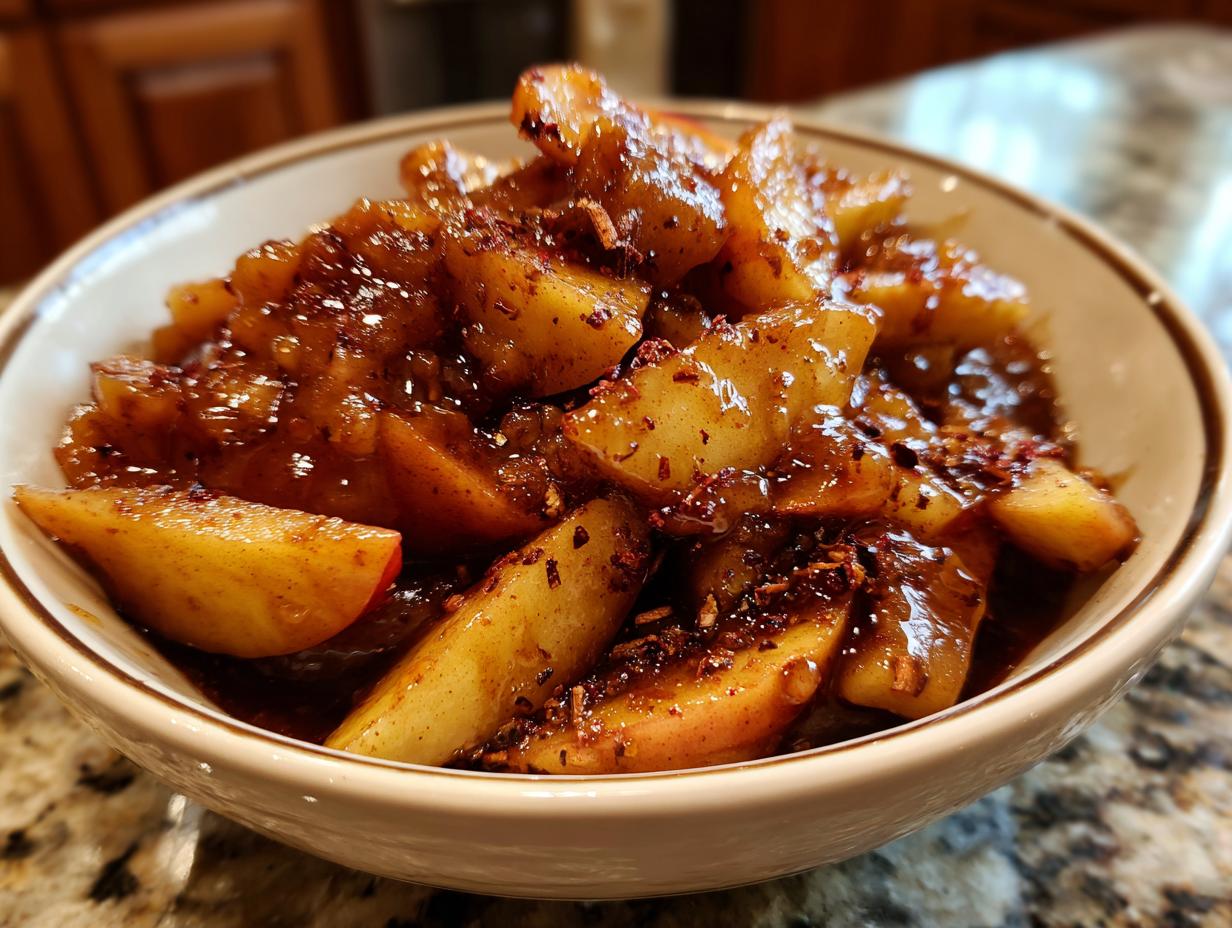
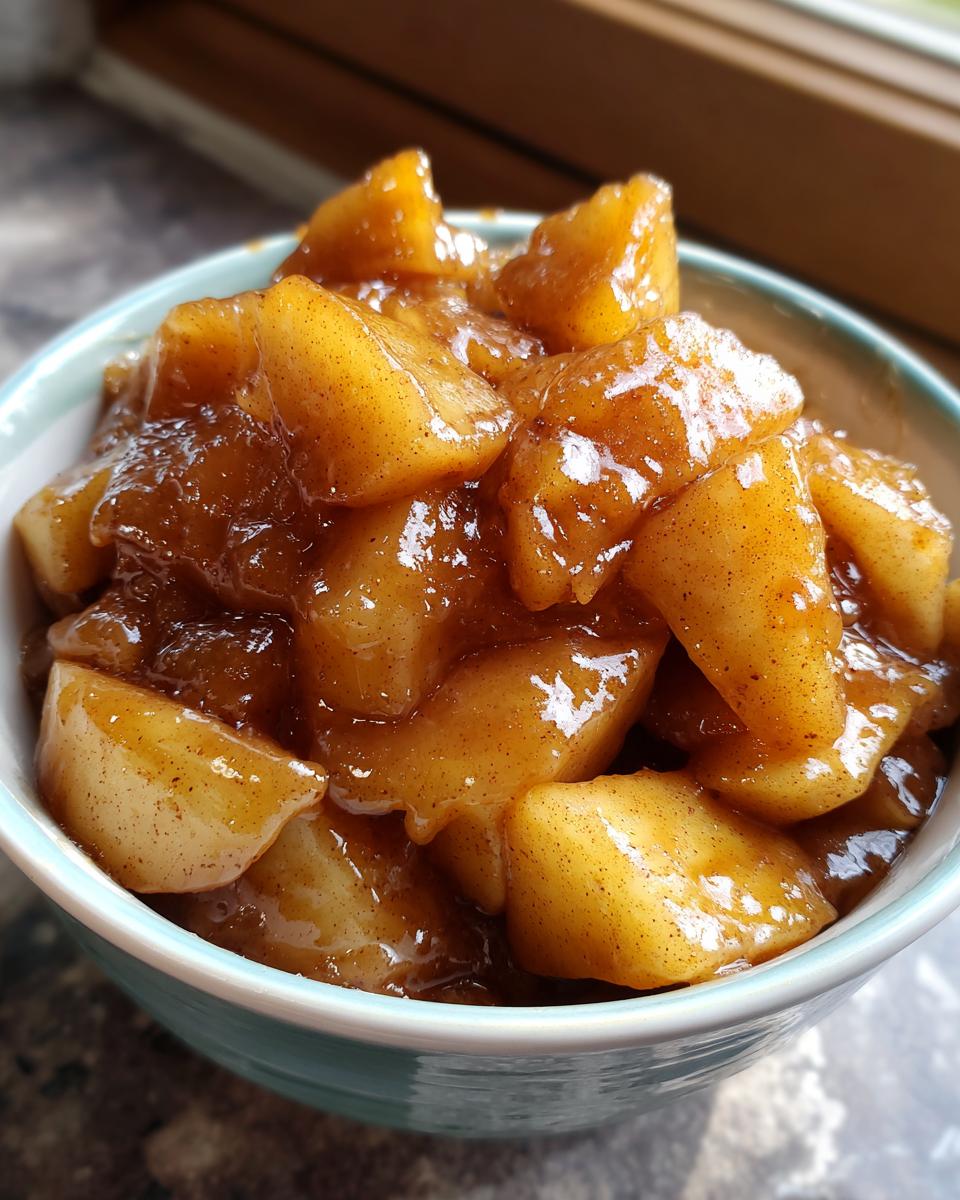
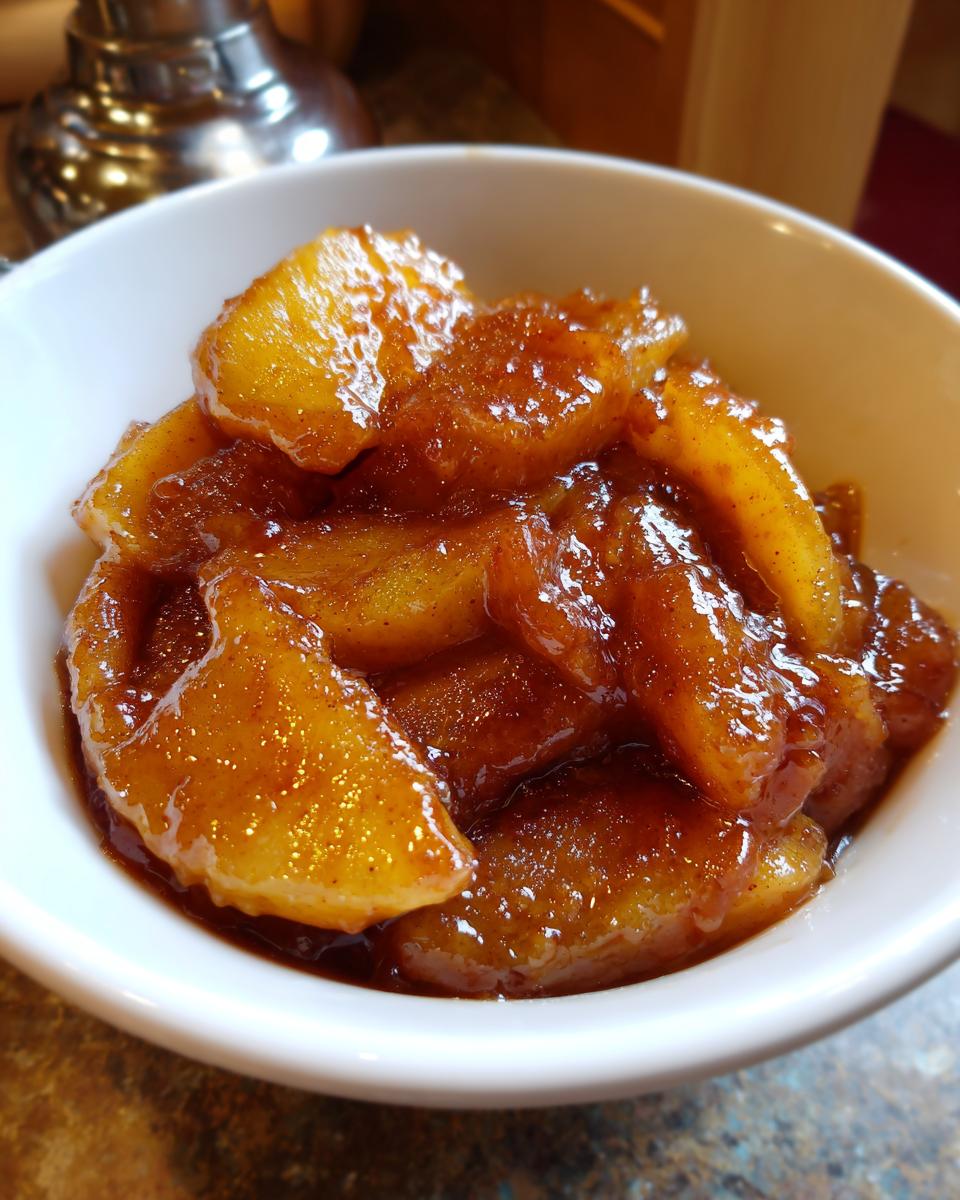
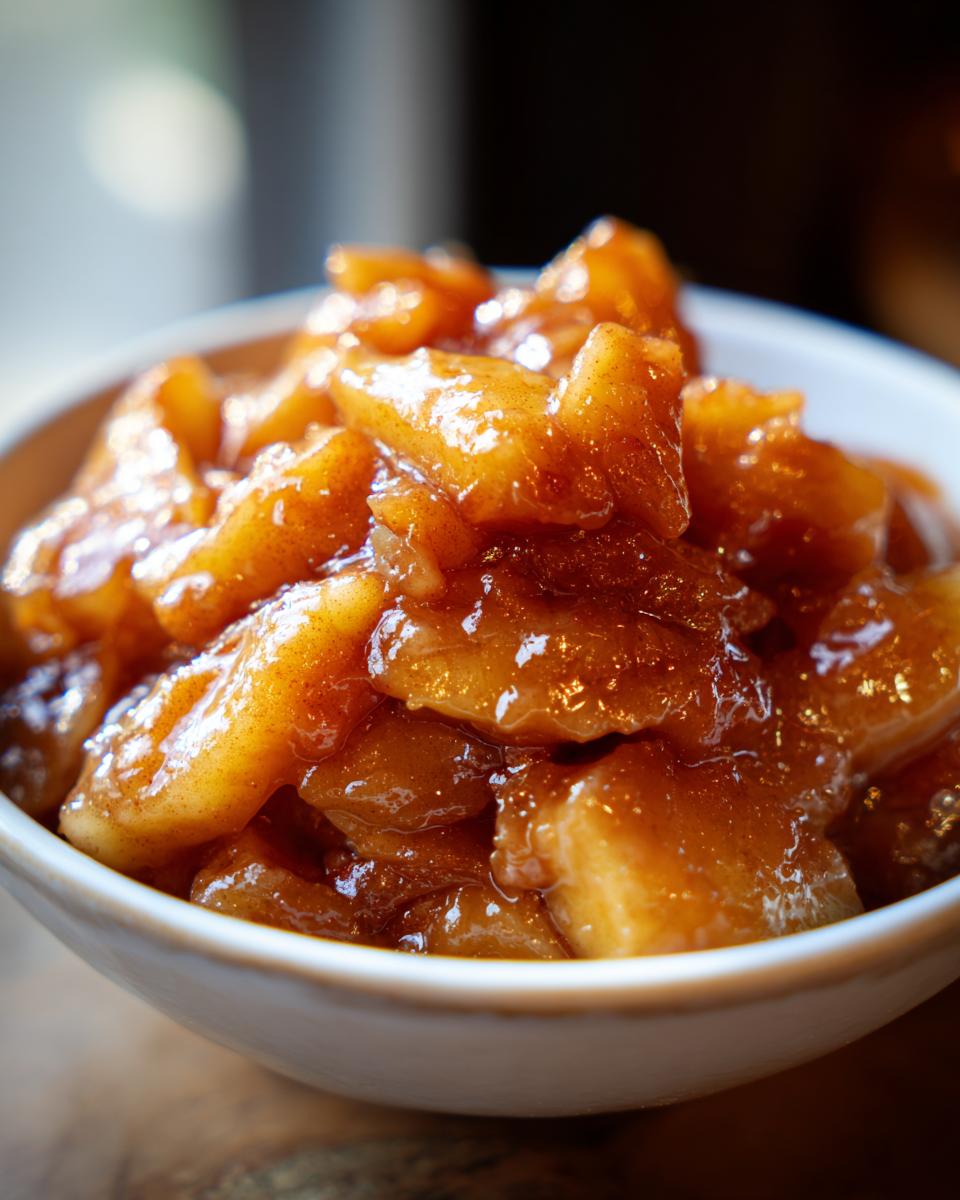
There is just nothing that says ‘home’ quite like the smell of homemade apples bubbling away on the stove. When I was figuring out how to make food fit into my hectic life again after moving away from design work, I focused solely on reliable recipes that delivered huge flavor without the fuss. Trust me when I say that perfect, thick apple pie filling is one of those foundational secrets for any home baker. This recipe for Easy Stovetop Homemade Apple Pie Filling with Brown Sugar is unbelievably quick—we’re talking 30 minutes total! I’ve personally tested this stovetop method dozens of times to ensure those apple slices soften perfectly without turning to mush, giving you the juiciest, most comforting filling possible, every single time.
- Why This Easy Stovetop Apple Pie Filling with Brown Sugar is Your New Favorite
- Gathering Ingredients for Your Apple Pie Filling from Scratch
- Step-by-Step: How to Make Easy Stovetop Apple Pie Filling
- Pro Tips for No-Fail Apple Pie Filling Success
- Creative Ways to Use Your Homemade Apple Pie Filling
- Storing Leftovers of Your Apple Pie Filling with Brown Sugar
- Frequently Asked Questions About Making Apple Pie Filling
- Estimated Nutritional Snapshot for Apple Pie Filling
- Share Your Comfort Food Apple Recipes Creations
Why This Easy Stovetop Apple Pie Filling with Brown Sugar is Your New Favorite
I know sometimes you want that deep, slow-cooked flavor of an oven-baked pie filling, but who has the time during a busy week? That’s why I developed this version. It delivers the absolute **Best Homemade Apple Pie Filling** flavor in half the time, guaranteed. You get those wonderfully tender, **Juicy Apple Pie Filling** slices without having to dirty your oven just to pre-cook the fruit. It’s truly the ultimate shortcut for fall baking!
Speed and Simplicity: The Stovetop Advantage
Honestly, this is the biggest game-changer. Most traditional recipes involve layering apples and hoping they soften evenly during the main pie bake time, which often results in either a raw spot or a soupy mess. Not here! By cooking everything right on the stovetop for just 15 minutes, you control the texture perfectly. Everything is integrated and thickened beautifully before it ever touches your pie crust, making this an incredibly **Quick Apple Pie Topping Recipe**.
Flavor Depth with Apple Pie Filling with Brown Sugar
If you use only white sugar, you’re missing out, trust me. The brown sugar isn’t just for color; it brings in those rich, molasses notes that make the flavor profile so much deeper than a standard filling. We pair that with cinnamon, nutmeg, and allspice to create that quintessential **Sweet and Spiced Apple Filling from Scratch** profile. That combination is non-negotiable for a truly classic taste!
Gathering Ingredients for Your Apple Pie Filling from Scratch
Okay, are you ready? Because gathering what you need for this recipe is where the magic starts to happen, and I’ve made sure every item is easy to source. Remember, when we’re making our **apple pie filling from scratch**, the quality of the apples really shines through! I really believe that using high-quality ingredients is what keeps our family coming back to this recipe year after year. It’s just so reliable. Before you start tossing things together, let’s make sure you have exactly what’s called for on hand, especially those spices. You can check out my favorite method for homemade applesauce if you happen to have extra apples lying around!
Apple Selection for Perfect Apple Pie Filling
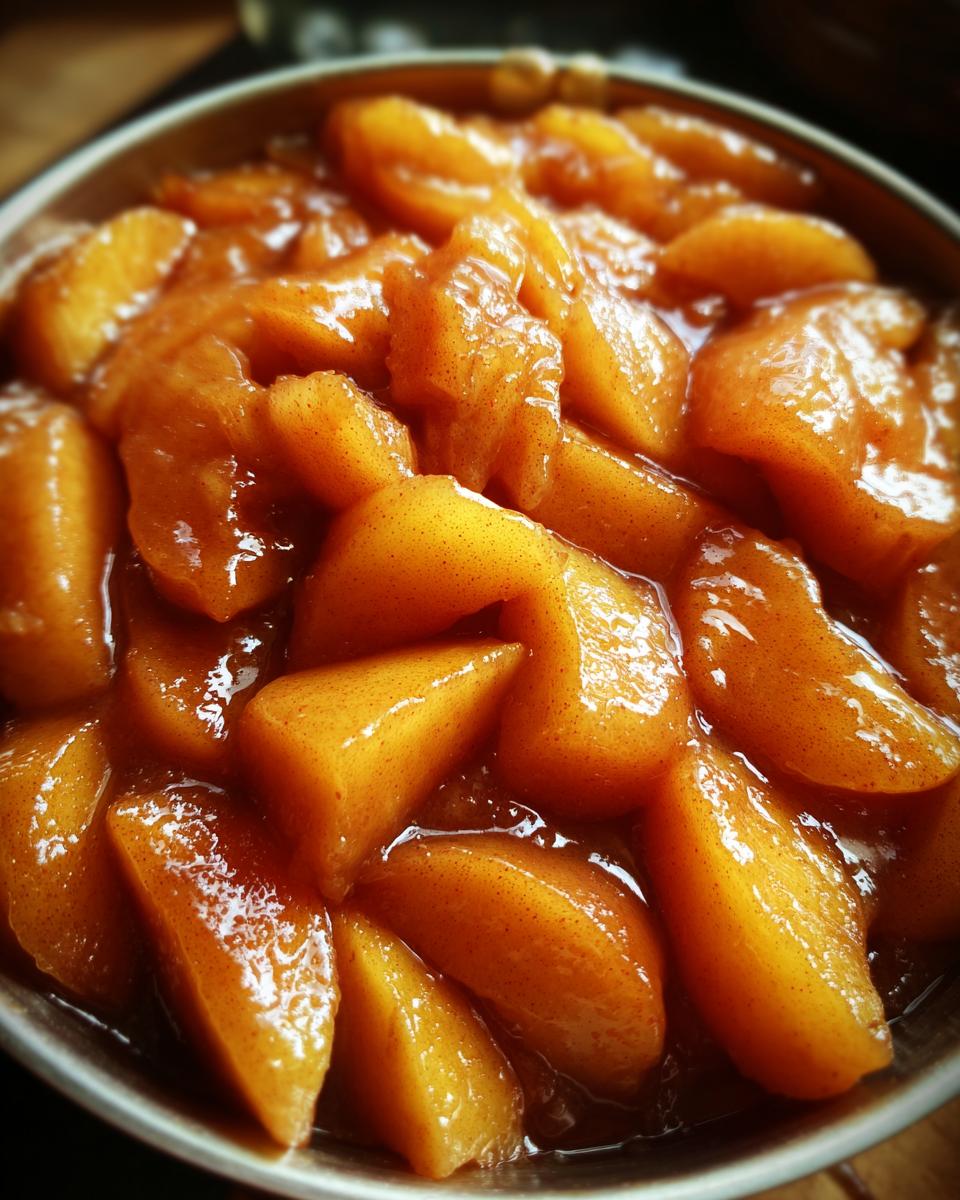
Choosing the right apple is my non-negotiable first step for the **Best Homemade Apple Pie Filling**. If you pick something too soft, we’ll end up with applesauce instead of filling! I stick with Granny Smith because they hold up beautifully and give you that nice tartness that balances the sugar, or Honeycrisp, which tastes amazing. The most important part, however, is the cut: make sure you peel, core, and slice them about 1/4 inch thick. Not too chunky, not too thin—that thickness keeps them from disappearing while simmering on the stovetop.
Spices and Sweeteners for the Best Homemade Apple Pie Filling
This is where we develop that gorgeous warm flavor profile. We really lean into the brown sugar here to get that rich color and deep molasses taste, which pairs beautifully with the cinnamon. Don’t skip the nutmeg and allspice, either—they are the backbone of that classic, cozy flavor we are aiming for. And of course, we need cornstarch! That’s our insurance policy for ensuring we get a thick, glossy glaze that clings to the apples, which is exactly what you need for a successful pie filling for baking.
- 6 medium apples (like Granny Smith or Honeycrisp), peeled, cored, and sliced 1/4 inch thick
- 3/4 cup packed brown sugar
- 1/4 cup granulated sugar
- 1/4 cup cornstarch
- 1 teaspoon ground cinnamon
- 1/4 teaspoon ground nutmeg
- 1/8 teaspoon ground allspice
- 1/4 teaspoon salt
- 1 tablespoon lemon juice
- 2 tablespoons unsalted butter
- 1/2 cup water
Step-by-Step: How to Make Easy Stovetop Apple Pie Filling
This is the part where we prove just how fast this recipe really is! Forget waiting for the oven; we are making a perfectly cooked, **Juicy Apple Pie Filling** right here on the hob in under half an hour. The key to making sure this stovetop method truly works is layering the ingredients correctly. We mix everything first to get that beautiful coating on every single apple slice, and then we use careful heat management to thicken the sauce around them. It’s so much control in such a short amount of time! If you’re looking for more quick baked goods using fruit, you might want to check out my apple fritter bread recipe.
Coating the Apples and Preparing the Base
First things first, grab a large bowl! This is where we mix our sliced apples with every single dry ingredient—both sugars, the cornstarch, the cinnamon, nutmeg, allspice, and salt, along with that splash of lemon juice. The lemon is important because it helps stop the apples from browning too much while we work. Gently toss everything together. I mean gently, because we don’t want bruised apples! You want to make sure every single slice is coated with that sweet, spiced dust. This early coating helps the cornstarch start doing its job right away.
Simmering for a Juicy Apple Pie Filling
Now you need a good, heavy saucepan or a Dutch oven—something that heats evenly! Melt your two tablespoons of butter over medium heat. Once it’s happy and foamy, pour in your coated apple mixture and the water. Everything goes in! Stir it all together nicely, and then you bring it up just to a simmer. Remember, I said stir frequently? That is your only job now. Keep stirring gently so the bottom layers don’t scorch while that sauce starts to get warm and liquidy between the apple slices.
Achieving the Perfect Thickness for Pie Filling for Baking
Once it hits a steady, gentle bubble, turn the heat down to medium-low. This is crucial! We don’t want a rolling boil. Let it bubble away gently for about 10 to 15 minutes. You’ll see the sauce transforming from watery stuff into that glossy, thick glaze that makes **apple pie filling for baking** so perfect. Keep testing the apples; they should be tender but still have a little bite—they will soften more when you actually bake the pie. Finally, you absolutely must take it off the heat and let it cool completely before you even think about putting it in a crust or jar! Seriously, impatient bakers burn fillings more often than anyone else!
Pro Tips for No-Fail Apple Pie Filling Success
I’ve been in the kitchen long enough to know that even the best recipes sometimes need a little nudge, right? Getting that **No-Fail Apple Pie Filling** texture locked in—that nice, thick, glossy coat around every apple slice—is all about consistency. It’s totally normal if your apples release a little more liquid than mine did the first time you try it. That’s why having a couple of cleanup tips ready makes all the difference in your final product!
Adjusting Thickness in Your Spiced Apple Filling from Scratch
If you pull your filling off the heat and it still seems a little too runny for your liking—maybe you like a really thick filling for your lattice top—don’t panic! We have an easy fix. Take one extra tablespoon of cornstarch and mix it with two tablespoons of actual cold water until it’s totally smooth. This is a slurry, and you whisk it right back into the simmering apple mixture during the last five minutes of cooking. It thickens things right up beautifully without giving you that weird gummy texture.
My Personal Apple Pie Filling Anecdote
The very first time I tried to make this stovetop filling, I definitely overcooked it because I got distracted answering emails. Oops! The apples were way too soft, almost mushy. Now, I set a timer for 10 minutes instead of listening to my intuition alone, and it comes out perfectly tender-crisp every time. That little bit of structural integrity in the apple is what separates a good filling from the absolute best!
Creative Ways to Use Your Homemade Apple Pie Filling
Listen, making this amazing **apple pie filling** shouldn’t be limited to just Thanksgiving dessert, right? Once you have that thick, sweet, and spiced filling resting in the fridge, you’ll realize you’ve made yourself a wonderful secret weapon! It’s more than just a **Quick Apple Pie Topping Recipe**; it’s a shortcut to so many amazing **Apple Desserts Topping Ideas** that come together in minutes. Seriously, don’t let any leftover filling just sit there—get creative!
The next morning, instead of maple syrup, spoon a generous dollop of this warm filling over my buttermilk pancakes. The tartness of the apples cuts through the richness perfectly. Or, if you have puff pastry lying around, you can make instant turnovers; just spoon some filling onto squares, fold them over, crimp the edges, and bake until golden. And don’t forget about ice cream! A warm spoonful over vanilla bean ice cream makes for an incredibly easy, comforting dessert that tastes like you worked all day on it. You can even swirl a spoonful into my pecan pie muffins batter before baking for an extra layer of fall flavor!
Storing Leftovers of Your Apple Pie Filling with Brown Sugar
We know you’re probably going to want to eat this entire batch in one go because it tastes so wonderfully addictive, but if—and I mean if—you manage to have any leftover **apple pie filling with brown sugar**, you’ll be happy to know it stores really well! Since this is a stovetop filling made with cornstarch for thickening rather than a full canning process, we need to keep it simple. Treat this like any other cooked fruit sauce or topping for short-term storage, not long-term pantry keeping.
Transfer any remaining **spiced apple filling from scratch** into a clean, airtight container. Make sure you let it cool down almost completely on the counter first before sealing the lid—putting hot food directly into the fridge can cause condensation issues! Once sealed up, it keeps beautifully in the refrigerator for about one week. That gives you plenty of time to enjoy it over different things!
When you’re ready to use it again, maybe over some leftover pancakes or ice cream, you can reheat it gently. I just scoop out what I need into a small saucepan and heat it slowly over low heat until it’s warmed through and glossy again. If it seems a touch thick after chilling, just whisk in a tiny teaspoon of water or apple juice while it warms up. See? Super practical, super easy!
Frequently Asked Questions About Making Apple Pie Filling
I know when you’re trying a new recipe, you always end up with a few niggling questions, right? I get tons of emails asking for little adjustments here and there, so I pulled out the most common ones about making your very own **apple pie filling**. Don’t worry if you need to switch things up based on what you have on hand; that’s what cooking is all about!
Can I use different types of apples for this apple pie filling?
Absolutely! While I swear by the Granny Smith/Honeycrisp combo for the best balance of tartness and structure, you can definitely play around. The secret is using at least one firm, slightly tart apple. If you use all sweet apples, like Gala or Fujis, your **apple pie filling** might turn out a little too soft or candy-sweet. If you use a mix, just try to keep all the sizes of the slices consistent so they cook evenly on the stovetop!
How do I make this a ‘Fall Baking Recipes’ favorite without nutmeg?
Oh, that’s easy! Nutmeg is lovely, but if you aren’t a fan or just didn’t grab it at the store, you can simply increase the cinnamon by another half teaspoon. That will let the cinnamon really take the lead in your **Sweet and Spiced Apple Filling from Scratch**. For a twist that screams autumn, try replacing the nutmeg and allspice with a tiny pinch of ground cloves or even a whisper of fresh ginger. That warmth really elevates any of your **Fall Baking Recipes**!
Is this recipe suitable for canning or making ‘Apple Pie Filling Jarred’?
This is such an important question for planning ahead! Because this is an **Easy Stovetop Apple Pie Filling** that relies on cornstarch for thickening and is cooked quickly, it is not formulated for long-term, shelf-stable canning. This recipe is perfect any time you want a **Quick Apple Pie Topping Recipe** to use within about a week! If you want to make something you can store for months, you need a dedicated pressure canning recipe for safety, which involves much longer processing times. For easy storage, stick to the fridge method I talked about earlier!
Estimated Nutritional Snapshot for Apple Pie Filling
Okay, let’s talk numbers! I always try to keep things real with you about what we are eating, even when it’s comfort food like this incredible **apple pie filling**. We made this recipe to be a fantastic alternative to store-bought versions, and while it’s loaded with flavor from the brown sugar and spices, it’s still based primarily on fruit. When you make this, remember that these numbers are an estimate based on using the exact measurements listed in the recipe for approximately six servings.
I really believe knowing this info helps you plan your meals better, whether this filling is going into a decadent double-crust pie or just spooned over a stack of pancakes. It keeps you in control of your kitchen, which I love!
- Serving Size: 1/2 cup
- Calories: 220
- Sugar: 38g (That’s where the deliciousness happens!)
- Fat: 3g
- Carbohydrates: 50g
- Protein: 0g
- Sodium: 150mg
Just a quick note, because I like to be totally upfront: these exact values can shift a bit depending on the size of the apples you start with and specifically which brand of brown sugar you pack into that measuring cup. But overall, this gives you a fantastic starting point for enjoying this **Cinnamon Apple Filling for Pies** guilt-free!
Share Your Comfort Food Apple Recipes Creations
Now that you’ve whipped up the **easiest stovetop apple pie filling** on the planet, I truly want to hear from you! Making food is only half the fun; the other half is watching you all enjoy it and seeing how you adapt things in your own kitchens. I spend so much time perfecting these recipes so they fit seamlessly into your busy lives, and your feedback tells me if I’ve hit the mark!
Did this recipe give you the perfect filling for your holiday baking? Did you decide to make a double batch just to use as a **Quick Apple Pie Topping Recipe** all week long? Don’t be shy! I love seeing photos of your finished pies and desserts—it makes my day! Please take a moment to leave a star rating right here on the recipe card so other bakers know this is truly a **No-Fail Apple Pie Filling** method.
And if you’ve tried any of those other creative ways to use this sweet, spiced abundance—maybe spooning it over a stack of waffles or swirling it into my brown sugar streusel muffins—snap a picture and share it on Instagram, tagging me! If you ever have questions or want to share your own twist on these **Comfort Food Apple Recipes**, you can always reach out directly through my contact page. Happy baking, friends!
PrintEasy Stovetop Homemade Apple Pie Filling with Brown Sugar
Make thick, juicy apple pie filling from scratch on the stovetop. This recipe uses brown sugar and cinnamon for a classic, comforting flavor perfect for pies or toppings.
- Prep Time: 15 min
- Cook Time: 15 min
- Total Time: 30 min
- Yield: About 6 cups 1x
- Category: Dessert Component
- Method: Stovetop Cooking
- Cuisine: American
- Diet: Vegetarian
Ingredients
- 6 medium apples (like Granny Smith or Honeycrisp), peeled, cored, and sliced 1/4 inch thick
- 3/4 cup packed brown sugar
- 1/4 cup granulated sugar
- 1/4 cup cornstarch
- 1 teaspoon ground cinnamon
- 1/4 teaspoon ground nutmeg
- 1/8 teaspoon ground allspice
- 1/4 teaspoon salt
- 1 tablespoon lemon juice
- 2 tablespoons unsalted butter
- 1/2 cup water
Instructions
- Combine the sliced apples, brown sugar, granulated sugar, cornstarch, cinnamon, nutmeg, allspice, salt, and lemon juice in a large bowl. Toss gently until the apples are evenly coated.
- Melt the butter in a large, heavy-bottomed saucepan or Dutch oven over medium heat.
- Add the coated apple mixture and the water to the saucepan. Stir to combine.
- Bring the mixture to a simmer, stirring frequently to prevent sticking.
- Once simmering, reduce the heat to medium-low. Continue to cook for 10 to 15 minutes, stirring occasionally, until the apples soften slightly and the sauce thickens to a glossy glaze. Do not overcook; the apples should still hold their shape.
- Remove the pan from the heat. Let the apple pie filling cool completely before using it in a pie crust or storing it.
Notes
- For a thicker glaze, add an extra tablespoon of cornstarch mixed with two tablespoons of cold water during the last five minutes of cooking.
- This filling works well for a double-crust pie, turnovers, or as a topping for pancakes and waffles.
- You can store this homemade apple pie filling in an airtight container in the refrigerator for up to one week.
Nutrition
- Serving Size: 1/2 cup
- Calories: 220
- Sugar: 38
- Sodium: 150
- Fat: 3
- Saturated Fat: 2
- Unsaturated Fat: 1
- Trans Fat: 0
- Carbohydrates: 50
- Fiber: 3
- Protein: 0
- Cholesterol: 8