
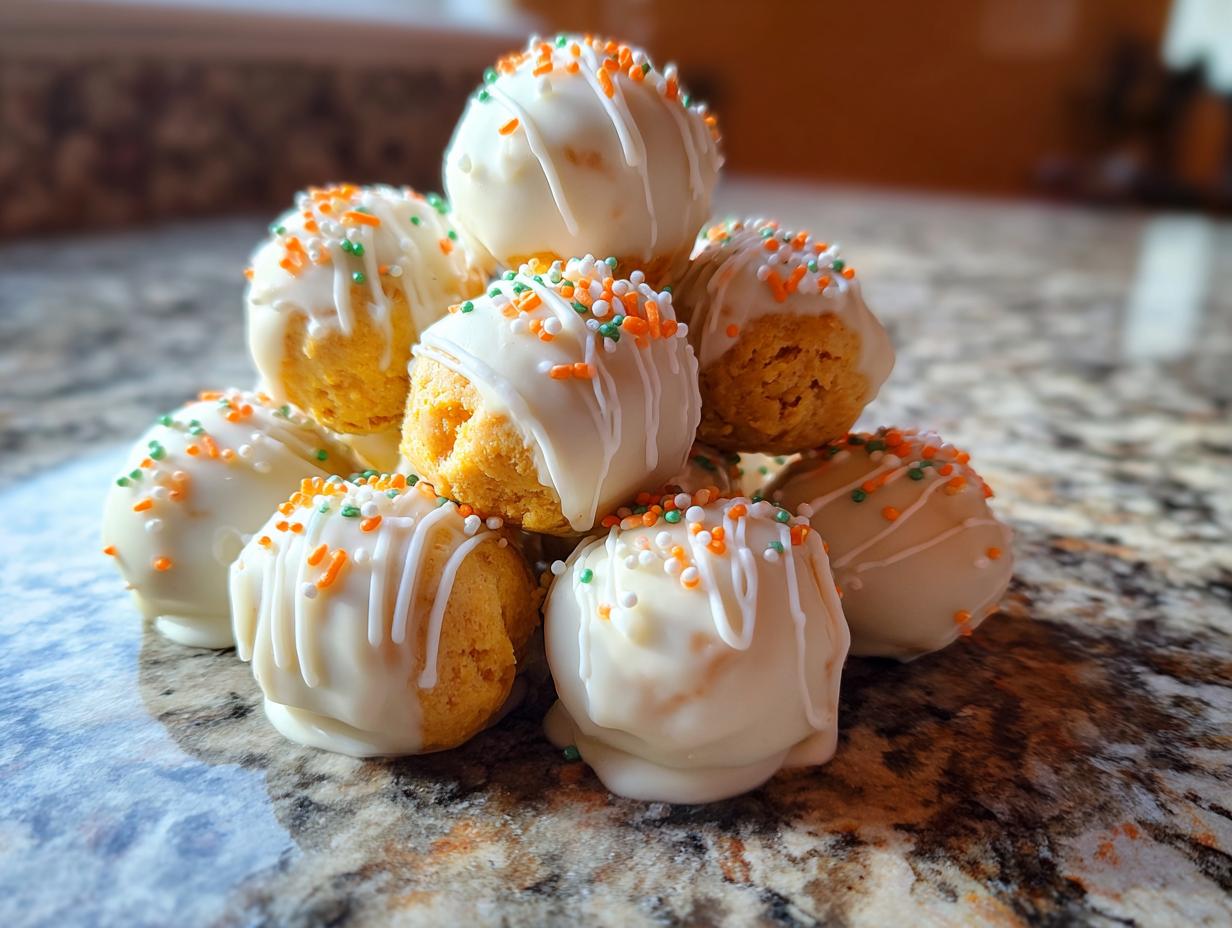
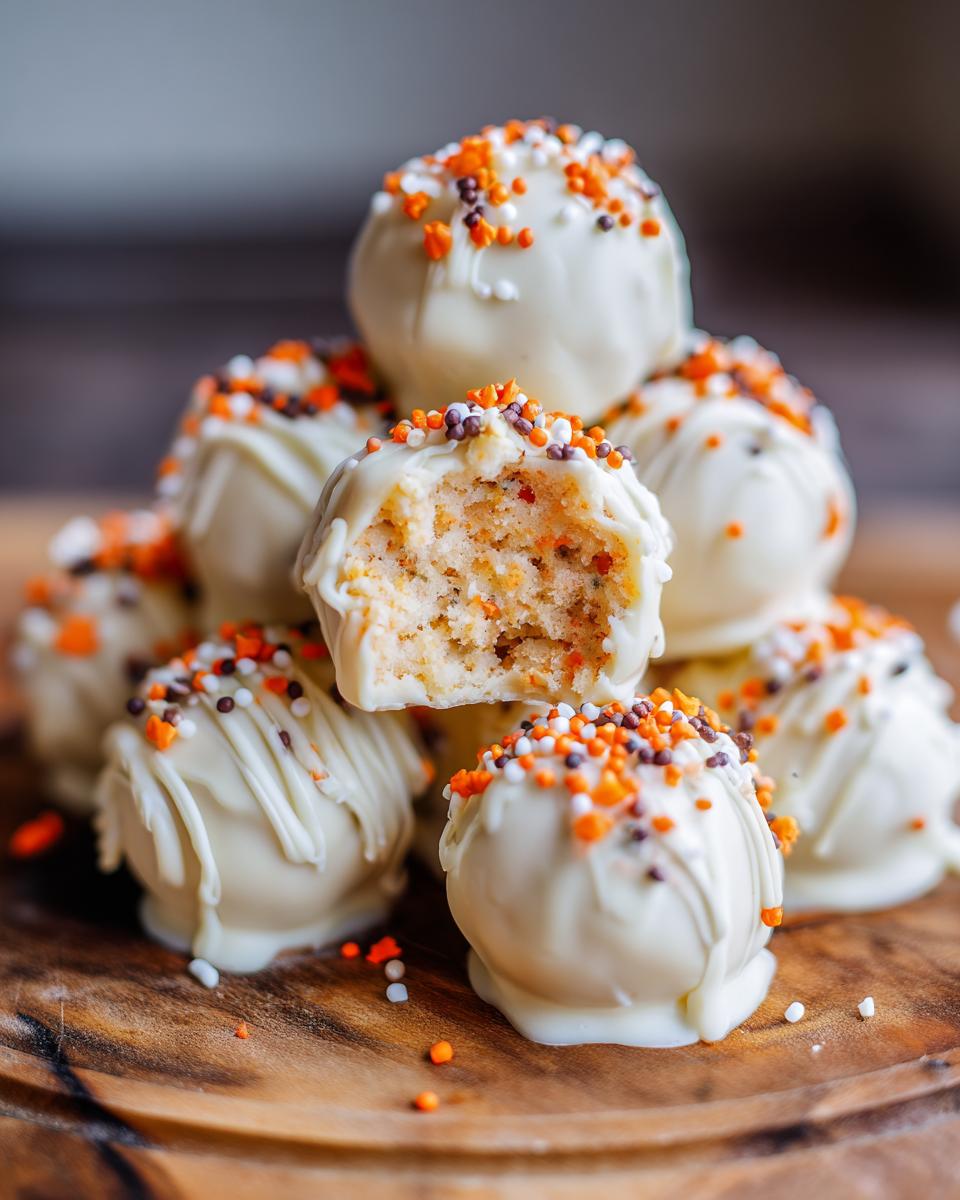
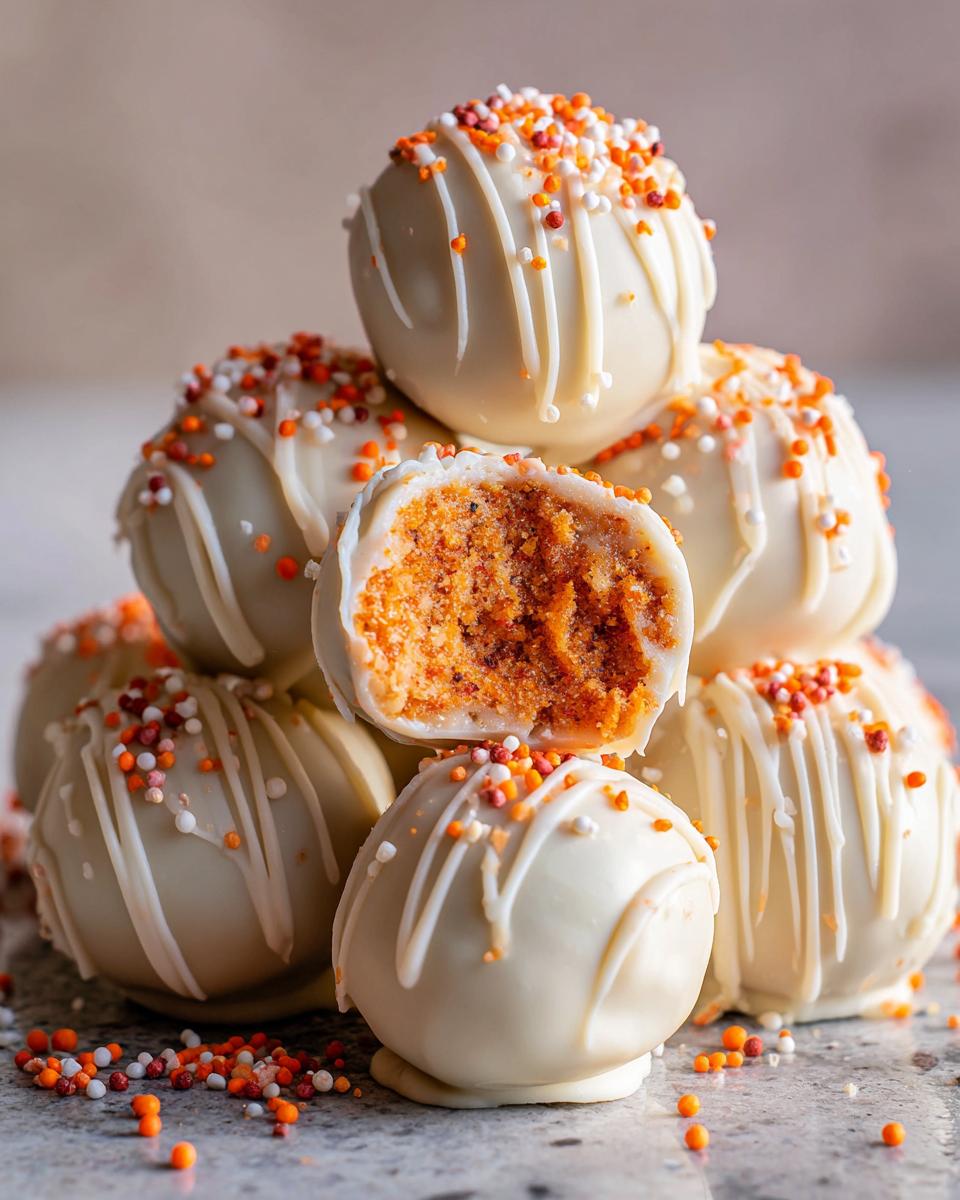
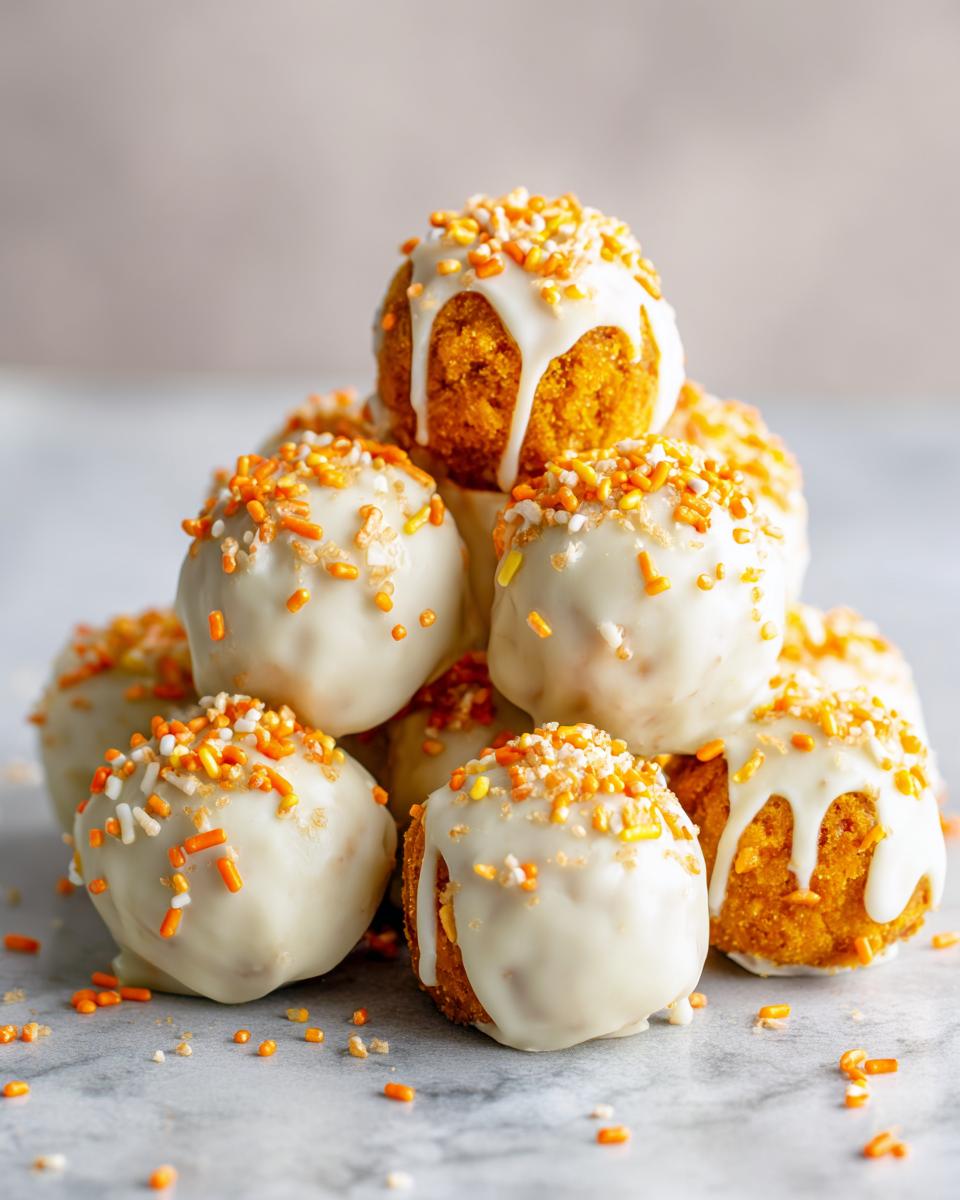
Oh, fall! The air gets crisp, the leaves start to do their magical color change, and suddenly, all you want is all the cozy, spiced goodies you can get your hands on. And let me tell you, when it comes to fall treats, there’s just something extra special about things that are no-bake. They’re just so darn easy to whip up, perfect for those spontaneous gatherings or when you just need a little pick-me-up. That’s why I’m obsessed with these adorable Pumpkin Oreo balls. They’re super simple, bursting with that lovely pumpkin spice flavor, and honestly, they disappear in a flash at any party! I remember making batches of these back when I first started DelishCraze, and the smiles they brought were just priceless. They really are the perfect little bites of autumn joy, and the best part? You don’t even need to turn on the oven! Creating these sweet, seasonal treats harks back to the very heart of why I started DelishCraze – making joyful cooking accessible for everyone.
- Why You'll Love These Pumpkin Oreo Balls
- Gather Your Ingredients for Pumpkin Oreo Balls
- Step-by-Step Guide to Making Pumpkin Oreo Balls
- Tips for Perfect Pumpkin Oreo Balls Every Time
- Ingredient Notes and Substitutions for Pumpkin Oreo Balls
- Make-Ahead and Storage for Your Pumpkin Oreo Balls
- Frequently Asked Questions About Pumpkin Oreo Balls
- Estimated Nutritional Information
- Share Your Pumpkin Oreo Ball Creations
Why You’ll Love These Pumpkin Oreo Balls
Seriously, these little guys are a lifesaver! You’re going to be obsessed for so many reasons:
- Super Easy to Make: No baking required, just mix, roll, and dip!
- Irresistible Flavor: That perfect combo of Oreo, cream cheese, and warm pumpkin spice? Heavenly!
- Perfect for Parties: They look so cute and festive, especially with cute little sprinkles. Everyone always asks me for this recipe!
- Make-Ahead Magic: You can totally whip these up a day or two before your event. Less stress on the big day!
- Kid-Friendly Fun: Rolling the balls and adding sprinkles is a great activity to do with little helpers.
- Crowd-Pleaser Guaranteed: Who can resist a decadent, chocolate-dipped treat? These gobbled up FAST!
Gather Your Ingredients for Pumpkin Oreo Balls
Alright, let’s get down to business! To make these totally addictive Pumpkin Oreo Balls, you’ll need just a handful of simple things. Grab these from your pantry or the store:
- 24 regular Oreo cookies (trust me, the regular ones work best here!)
- 1 package (8 oz) cream cheese, make sure it’s nice and soft!
- 1 teaspoon pumpkin pie spice (this is where the magic happens!)
- 1/2 teaspoon vanilla extract
- 1 cup white chocolate chips
- 1 tablespoon vegetable shortening (helps make the chocolate smooth)
- Orange or black food coloring (optional, if you want that perfect pumpkin hue)
- Sprinkles or chopped nuts for decorating (totally optional, but SO cute!)
Step-by-Step Guide to Making Pumpkin Oreo Balls
Alright, now for the fun part! Making these Pumpkin Oreo balls is honestly a breeze. Just follow these simple steps, and you’ll have some seriously cute and delicious treats in no time. Don’t worry if you’re new to this; I’ll walk you through every little bit.
Crushing the Oreos and Mixing the Dough
First things first, let’s get those Oreos nice and crumbly! You can toss them into a food processor and give them a good whirl until they’re fine crumbs. If you don’t have one, just pop them into a sturdy zip-top bag and go to town with a rolling pin until you have fine crumbs. Then, in a bowl, mix these crumbs with your softened cream cheese, that lovely pumpkin pie spice, and a splash of vanilla extract. Stir it all together until it forms a nice, uniform dough. It should feel like play-doh – perfect for shaping!
Rolling and Chilling Your Pumpkin Oreo Balls
Grab a small cookie scoop or just use your hands to roll the dough into about 1-inch balls. Try to make them all roughly the same size so they bake evenly, even though we’re not actually baking them! Pop these little guys onto a baking sheet that you’ve lined with parchment paper. Pop that whole sheet into the fridge for at least 30 minutes. This part is super important, trust me, it makes them firm enough to dip without falling apart.
Melting White Chocolate for Dipping
While your balls are chilling, let’s get that white chocolate ready. You can totally do this in the microwave! Put your white chocolate chips and shortening into a microwave-safe bowl. Heat it in 30-second bursts, stirring really well in between each one. Keep going until it’s all smooth and melty. Be patient here; white chocolate can scorch easily! If you’ve got some food coloring you want to use for a classic pumpkin orange or even a spooky black, add it now and stir until the color is totally uniform. Oh, and if you prefer, you can also melt this gently in a double boiler.

Dipping and Decorating Your Pumpkin Oreo Balls
Once your balls are nice and firm, it’s time for the magic dip! Take one chilled ball and carefully drop it into that smooth, melted white chocolate. Use a fork or a toothpick to gently roll it around until it’s totally coated. Let any extra drips fall back into the bowl – this little bit of patience makes for a cleaner finish. Carefully place the dipped ball back onto your parchment-lined baking sheet. Now for the super fun part: while the chocolate is still wet, go wild with decorations! Add cute sprinkles like these apple pie cookie sprinkles, or some chopped nuts if you like a bit of crunch. You can even melt a little extra white chocolate and use a fork to drizzle it over the top for that extra fancy touch. It’s like creating little edible works of art! Don’t forget to check out how I use drizzles for my English Toffee – same idea!
Tips for Perfect Pumpkin Oreo Balls Every Time
Okay, so pulling off these Pumpkin Oreo balls like a pro is totally doable! A few little tricks make all the difference, especially when it comes to getting that smooth chocolate coating looking super professional. First off, make sure your cream cheese is *really* soft; it makes mixing so much easier and you won’t have any lumpy bits. Also, when you’re melting that white chocolate? Go slow and steady. Scorch marks are NOT what we’re going for here! Stir constantly and be patient. If your chocolate starts to thicken up a bit while you’re dipping, just pop it back in the microwave for like, 10-15 seconds. It’s like magic! Remember, if you want those drizzles looking fancy like on my cardamom shortbread, a fork is your best friend. And don’t forget the big one from my notes: use regular Oreos, not Double Stuf. It makes the dough easier to work with and keeps that perfect texture, just like how we use good quality ingredients for my classic chocolate chip cookies!
Ingredient Notes and Substitutions for Pumpkin Oreo Balls
Let’s chat real quick about a couple of things in this recipe that really make a difference! First, about those Oreos – I always say go with the classic ones, not the Double Stuf. It’s not just for flavor, but the filling-to-cookie ratio works perfectly for getting that nice, firm dough that’s easy to roll. If you can’t find pumpkin pie spice, no worries! Just whip up your own by mixing 1 teaspoon cinnamon, 1/4 teaspoon ginger, 1/4 teaspoon nutmeg, and just a pinch of ground cloves. That’ll give you that signature cozy fall flavor, similar to how baking with fruit like in my pear preserves recipe brings out natural sweetness.
Make-Ahead and Storage for Your Pumpkin Oreo Balls
One of the best things about these Pumpkin Oreo Balls is how perfectly they hold up to being made ahead of time. You can totally get a head start on your party prep! I usually make mine a day or two before I need them. Just store them in an airtight container in the refrigerator. They stay perfectly fresh and delicious. It makes the day of the party so much less stressful knowing these little gems are already done and waiting. They’re kind of like my cranberry crumble bars and my homemade peanut butter cups – they just get better with time!
Frequently Asked Questions About Pumpkin Oreo Balls
Got questions about these cute little Pumpkin Oreo Balls? I’ve got you covered! Here are a few things people often ask:
Can I use different kinds of cookies instead of Oreos?
While Oreos are really the star here and give these little treats their signature flavor and perfect texture, you *could* experiment with other chocolate sandwich cookies. Just know that the flavor and how the dough comes together might change a bit. Regular Oreos give you that amazing no-bake pumpkin dessert vibe that’s totally addictive!
How do I get a super smooth, glossy white chocolate coating?
The trick to that beautiful, smooth coating is using the vegetable shortening along with the white chocolate chips when you melt them. It really helps make the chocolate extra fluid and creamy, so you get that nice, even dip. Also, make sure your Oreo balls are good and chilled before dipping – that warmth from your hands can melt the coating too fast. For more on tricky coatings, check out my tips for no-bake pumpkin cheesecake – similar ideas apply!
Can these Pumpkin Oreo Balls be made gluten-free?
You bet! You can easily make these easy dessert balls gluten-free by simply swapping out the regular Oreos for your favorite gluten-free chocolate sandwich cookies. Most brands work really well and get nice and crumbly just like the original. Just follow the same steps, and you’ll have a fantastic gluten-free fall treat!
How long do these stay fresh?
These Pumpkin Oreo Balls are pretty forgiving! You can store them in an airtight container in the refrigerator for up to a week. They’re great for making ahead, so don’t hesitate to whip up a big batch for your holiday parties. They tend to disappear pretty quickly though, so a week might be optimistic!
Estimated Nutritional Information
Just so you know, the nutritional info can vary a bit depending on exactly what you use, but here’s a good ballpark for these yummy Pumpkin Oreo Balls, per ball. They’re a sweet treat, so enjoy!
- Serving Size: 1 ball
- Calories: 120
- Fat: 7g
- Saturated Fat: 4g
- Sodium: 30mg
- Carbohydrates: 14g
- Sugar: 12g
- Protein: 1g
Share Your Pumpkin Oreo Ball Creations
I seriously can’t wait to hear what you think of these Pumpkin Oreo Balls! If you end up making them, please let me know how they turned out. I’d love for you to leave a quick rating or share your experience in the comments below. And hey, if you snap any photos, tag us on social media – I love seeing your gorgeous creations! Got a question or suggestion? Reach out via my contact page; I’m always happy to chat.
PrintPumpkin Oreo Balls

Easy no-bake pumpkin spice Oreo balls dipped in white chocolate. A perfect fall or Halloween party treat.
- Prep Time: 25 min
- Cook Time: 5 min
- Total Time: 30 min
- Yield: 24 balls 1x
- Category: Dessert
- Method: No-Bake
- Cuisine: American
- Diet: Vegetarian
Ingredients
- 24 Oreo cookies
- 1 package (8 oz) cream cheese, softened
- 1 teaspoon pumpkin pie spice
- 1/2 teaspoon vanilla extract
- 1 cup white chocolate chips
- 1 tablespoon vegetable shortening
- Orange or black food coloring (optional)
- Sprinkles or chopped nuts for decorating (optional)
Instructions
- Crush the Oreo cookies into fine crumbs using a food processor or by placing them in a zip-top bag and crushing with a rolling pin.
- In a medium bowl, combine the Oreo crumbs, softened cream cheese, pumpkin pie spice, and vanilla extract. Mix until well combined and a dough forms.
- Roll the mixture into 1-inch balls and place them on a baking sheet lined with parchment paper.
- Chill the balls in the refrigerator for at least 30 minutes, or until firm.
- Melt the white chocolate chips and vegetable shortening in a microwave-safe bowl in 30-second intervals, stirring in between, until smooth. Alternatively, melt using a double boiler.
- If desired, stir in food coloring to achieve your desired pumpkin shade.
- Dip each chilled Oreo ball into the melted white chocolate, ensuring it is fully coated. Use a fork or toothpick to lift the balls and allow excess chocolate to drip off.
- Place the coated balls back on the parchment-lined baking sheet.
- While the chocolate is still wet, decorate with sprinkles or chopped nuts, if using. You can also drizzle additional melted white chocolate over the balls for extra decoration.
- Refrigerate the pumpkin Oreo balls for at least 15-30 minutes, or until the white chocolate has set.
Notes
- For best results, use regular Oreo cookies, not Double Stuf.
- You can make these a day or two in advance and store them in an airtight container in the refrigerator.
- If you don’t have pumpkin pie spice, you can make your own by combining cinnamon, ginger, nutmeg, and cloves.
Nutrition
- Serving Size: 1 ball
- Calories: 120
- Sugar: 12g
- Sodium: 30mg
- Fat: 7g
- Saturated Fat: 4g
- Unsaturated Fat: 3g
- Trans Fat: 0g
- Carbohydrates: 14g
- Fiber: 0g
- Protein: 1g
- Cholesterol: 5mg