
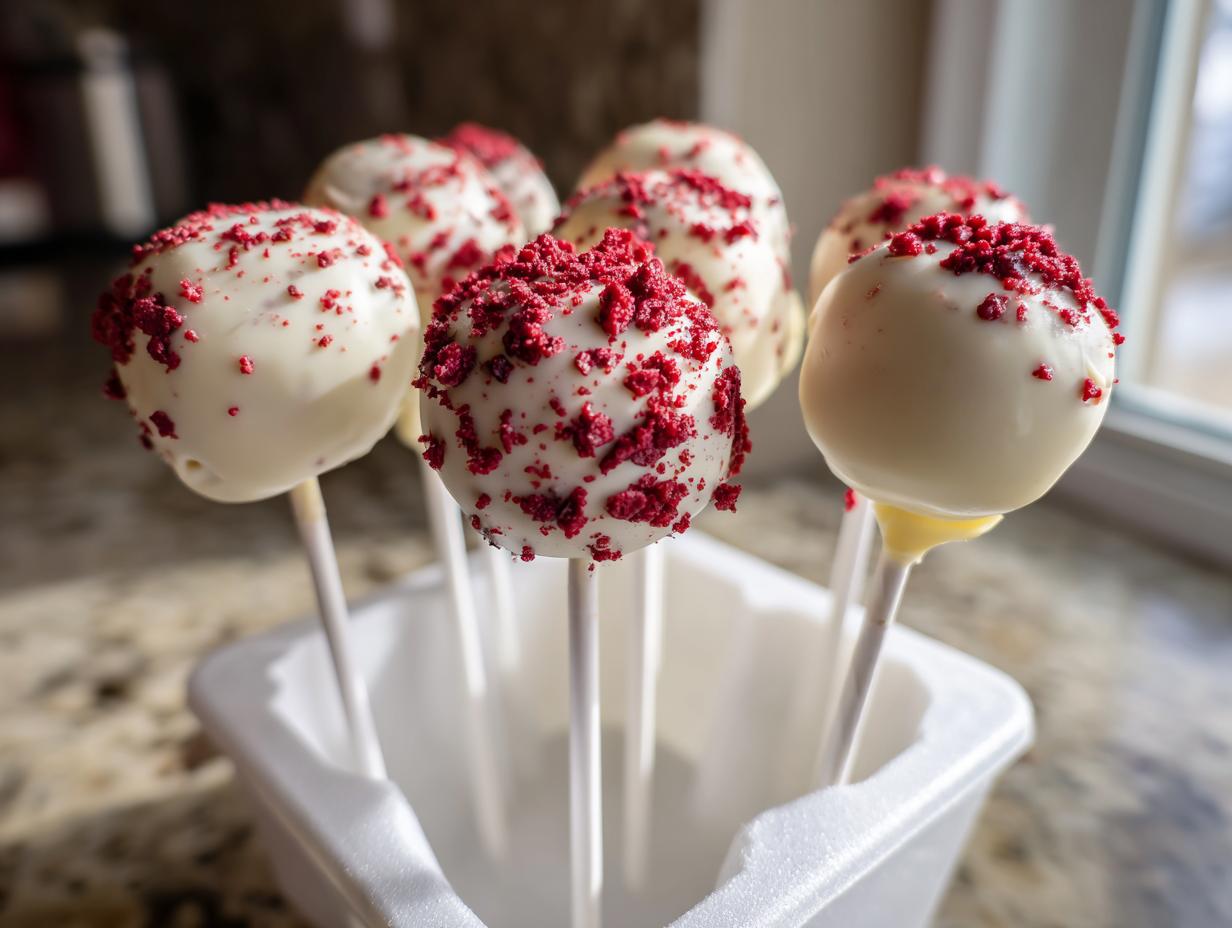
Oh my gosh, are you ready for some serious dessert magic? There is just something completely irresistible about seeing those perfectly vibrant little spheres sitting on a stick, isn’t there? I’ve tinkered with so many versions over the years, but I finally cracked the code for truly **ULTRA moist red velvet cake pops** that don’t crumble the second you look at them. Seriously, even though they look fancy, this recipe is surprisingly quick because we are using a little box mix hack! As someone who believes delicious treats should fit into your busy life, I promise these are reliable and absolutely decadent. These are the perfect bite-sized red velvet treats for any birthday bash or holiday. If you love the classic flavor, you should also check out my recipe for the ultimate moist Southern red velvet cake right here.
We keep the rich, tangy flavor signature to red velvet cakes but make the process so straightforward. Forget dry crumbs; we’re aiming for pure, smooth, melt-in-your-mouth goodness, all thanks to combining that humble cake mix with the essential cream cheese element. Trust me, once you try these, they’ll become your go-to recipe whenever you need something show-stopping but surprisingly simple!
- Why These Are the Best Red Velvet Cake Pops Recipe You Will Make
- Gathering Ingredients for Perfect Red Velvet Cake Pops
- Step-by-Step: How to Make Red Velvet Cake Pops
- Expert Tips for Perfect Red Velvet Cake Pops Decoration
- Ingredient Notes and Substitutions for Red Velvet Cake Pops
- Storage and Make-Ahead Tips for Red Velvet Cake Pops
- Frequently Asked Questions About Red Velvet Cake Pops
- Estimated Nutritional Data for Red Velvet Cake Pops
- Share Your Homemade Red Velvet Cake Pops Creations
Why These Are the Best Red Velvet Cake Pops Recipe You Will Make
I know, I know, everyone thinks their cake pop recipe is the best, but stick with me! These are different, especially if you are searching for that perfect moist red velvet cake pops recipe that actually tastes like the cake. We keep the steps super simple, which means less fuss for you and more time for decorating!
- They are inherently easy using that simple box mix trick I mentioned.
- They taste authentically red velvet thanks to that tangy frosting binder.
- They freeze beautifully, making them fantastic for party prep!
Achieving Ultra Moist Red Velvet Cake Pops Every Time
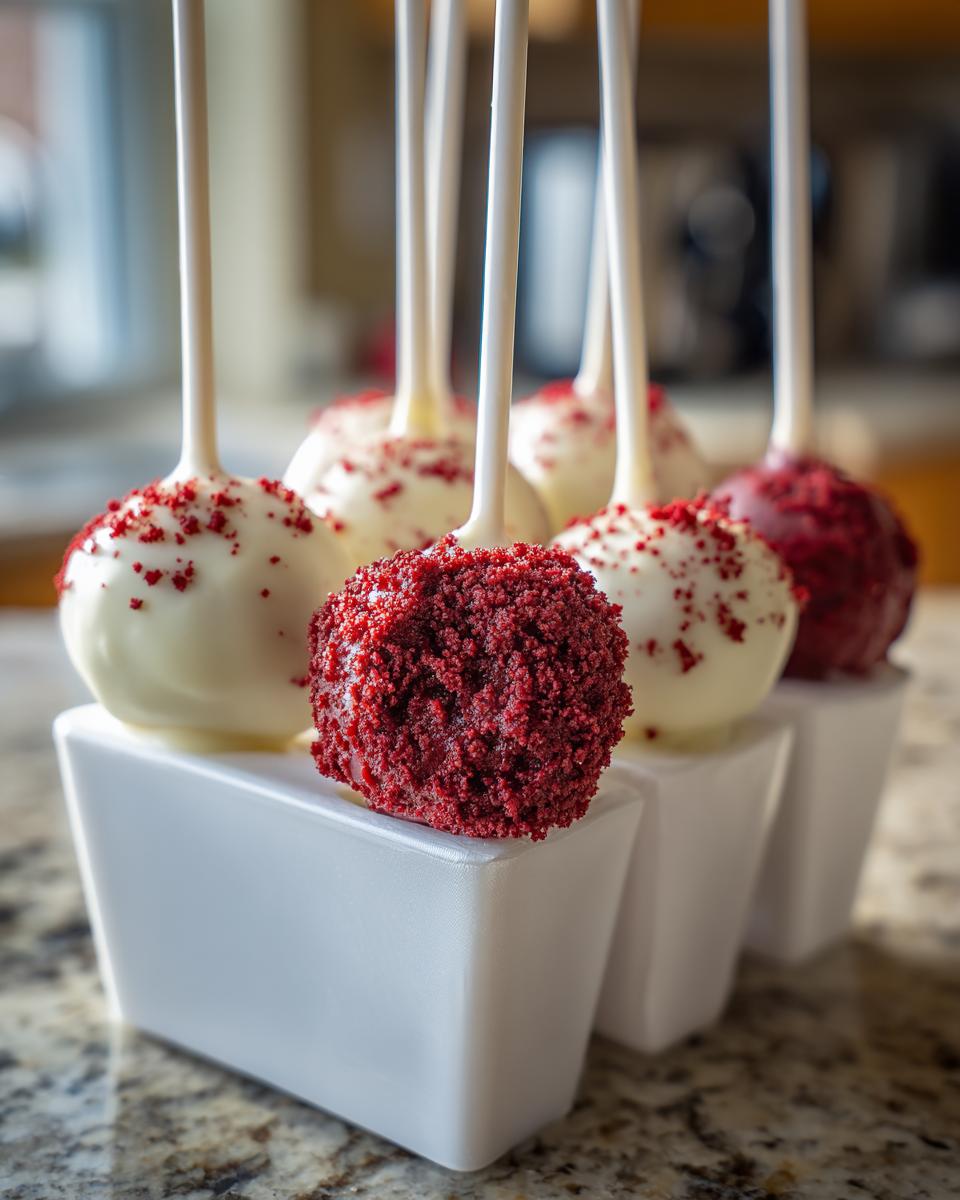
The real secret sauce here, besides the box mix, is that we are using real, store-bought cream cheese frosting to bind everything together. When the cake crumbs mix with that creamy, tangy frosting, it creates a dense, fudgy interior that locks in moisture. You simply won’t get that dry, crumbly texture you sometimes find with other recipes because the moisture is sealed right in there. That balance is what makes this the best cake pop recipe, honestly!
Gathering Ingredients for Perfect Red Velvet Cake Pops
Okay, ingredients shopping time! Because we are aiming for the very best red velvet cake pops recipe, every item counts for texture and flavor payoff. Even though we are cutting some corners for time, we can’t skimp on quality here, especially for the coating. You’ll need the right amount of cake mix, which is crucial if you want the rest of the steps to work out perfectly.
Here is what you absolutely need. I’ve put the specific box size down because that affects how much frosting you need to bind it properly to create those beautiful homemade red velvet cake balls—trust me on the size!
- One standard box of red velvet cake mix—make sure it’s the 15.25 ounce size! (Plus whatever the box calls for—usually eggs, water, and oil).
- About one cup of cream cheese frosting. Store-bought is totally fine for this easy red velvet cake pops tutorial, don’t stress about making that from scratch!
- A good quality white chocolate melting wafer bag, about 12 ounces.
- One tiny tablespoon of coconut oil or shortening, but this is optional—it just makes the dipping smoother when you’re making white chocolate coated cake pops.
- Your decorative bits, like sprinkles, for popping on right away!
- That package of little cake pop sticks!
Binding Agent: Cream Cheese Frosting for Red Velvet Cake Pops
This is where the magic happens, folks! The frosting does two massive jobs here. First, it gives you that signature, slightly tangy red velvet flavor we all adore. Second, it acts as the glue that holds your cake crumbs together. Without it, your pops would just fall apart! Because we are keeping this simple, I give you full permission to grab your favorite tub of pre-made cream cheese frosting. It mixes in beautifully and saves you a whole step!
Coating Essentials for White Chocolate Coated Cake Pops
When it comes to dipping, skip the standard chocolate chips if you can. Chips contain stabilizers that make them seize up and get super thick faster than you can swirl, which leads to messy pops. We want those smooth, professional-looking coatings, so grab some white chocolate melting wafers instead—they melt down like silk!
If you find your melted chocolate is still too thick after melting (it happens!), stir in that optional teaspoon of coconut oil or shortening. It thins out the coating just enough so your cake pops have that perfect, thin layer when you pull them out of the bowl. It’s a game-changer when you’re aiming for creamy desserts!
Step-by-Step: How to Make Red Velvet Cake Pops
Alright, this is where we turn that cake into those gorgeous little spheres! Don’t feel intimidated by dipping; it’s mostly about timing and keeping things chilled. We need to work cleanly here, but remember, these are homemade, so perfect they don’t have to be! Follow these steps exactly, and you’ll end up with the most stunning, deliciously tender treats.
Baking and Creating the Moist Red Velvet Cake Balls
First things first, bake that red velvet cake mix exactly how the box tells you to. Don’t try to tweak the baking time—we want it perfectly cooked but still moist! Once it’s totally cool, rip it apart and crumble it into a huge bowl. Get rid of any overly dark or crusty edges; we only want the soft stuff for these bite sized red velvet desserts.
Now comes the fun part: adding the frosting. Dump in that cup of cream cheese frosting and start incorporating it. You really need to knead this with your hands until it feels like playdough—you know it’s ready when you can squeeze a little bit between your fingers and it holds its shape perfectly. If it crumbles, it needs a little more frosting; if it’s greasy, pop it in the fridge for 15 minutes before rolling.
Chilling and Setting the Sticks for Your Red Velvet Cake Pops
Once you have your dough consistency right, roll those balls out. I aim for about 1 to 1.5 inches—just a nice, satisfying bite. Lay them out on parchment paper and get them into the refrigerator for at least 30 minutes. Chilled cake balls are non-negotiable for dipping!
While they’re chilling, melt your white chocolate wafers. When it’s time to assemble, take a clean cake pop stick and dip just the very tip into the warm chocolate. Use this chocolate tip like glue and insert it about halfway into your firm, chilled cake ball. Pop that sheet back into the freezer for about five minutes so the chocolate glue sets hard. This is the trick that stops the heads from falling off later!
Mastering the White Chocolate Dip for Professional Red Velvet Cake Pops
Once those sticks are set tight, it’s dipping time! Take your pop, swirl it slowly down into the melted white chocolate coating entirely. Slowly pull it straight up, and then gently tap the stick against the edge of your bowl. I do this a couple of times until I see most of the excess chocolate drip away. You want a nice, thin coat, not a thick lump of chocolate!
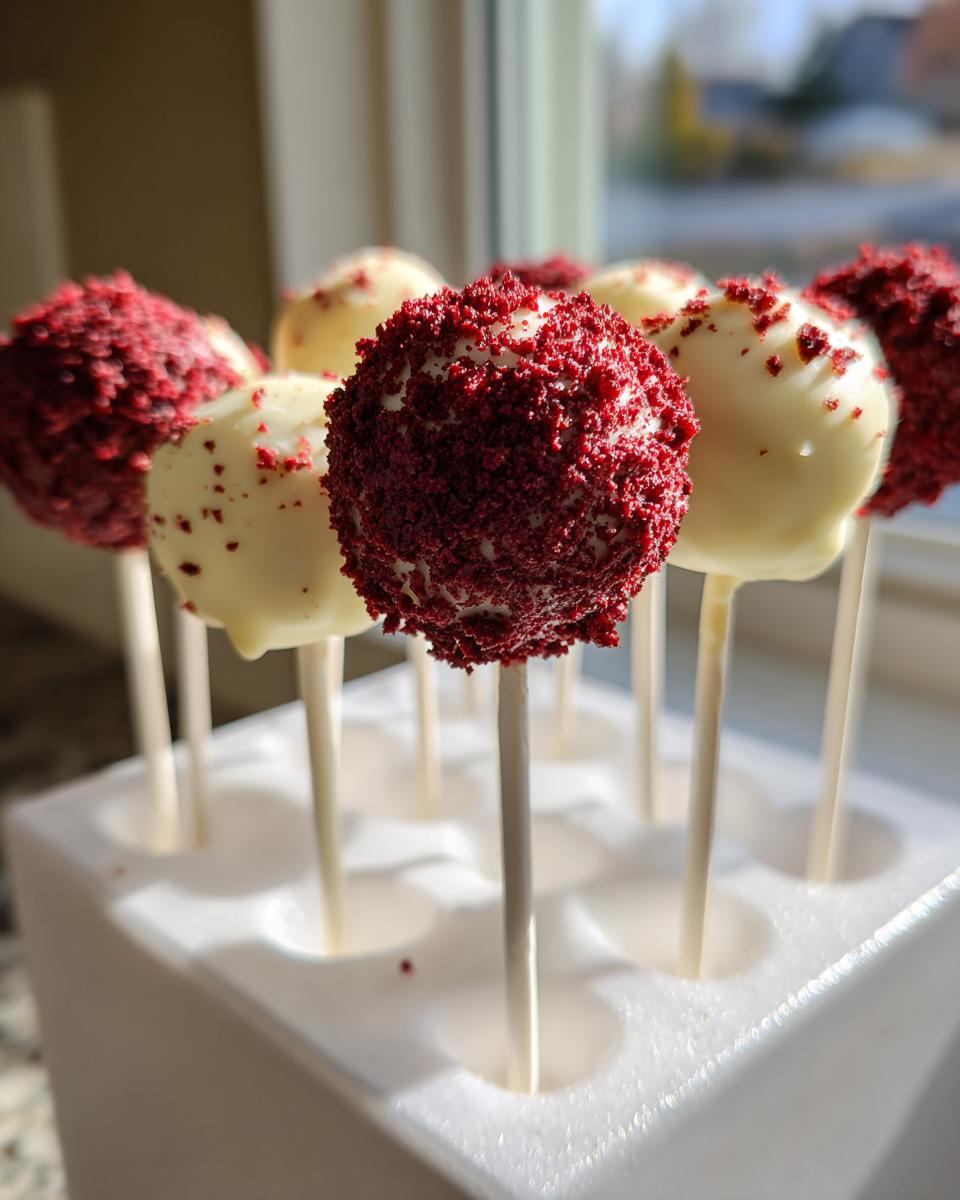
This step needs speed, so have your sprinkles or decoration ready right beside you. As soon as you pull the pop out of the chocolate, dust it immediately with your sprinkles before the chocolate hardens. Place the finished pops upright into a block of styrofoam or a dedicated cake pop stand to dry completely. Don’t lean them against anything, or you’ll get ugly flat spots!
Expert Tips for Perfect Red Velvet Cake Pops Decoration
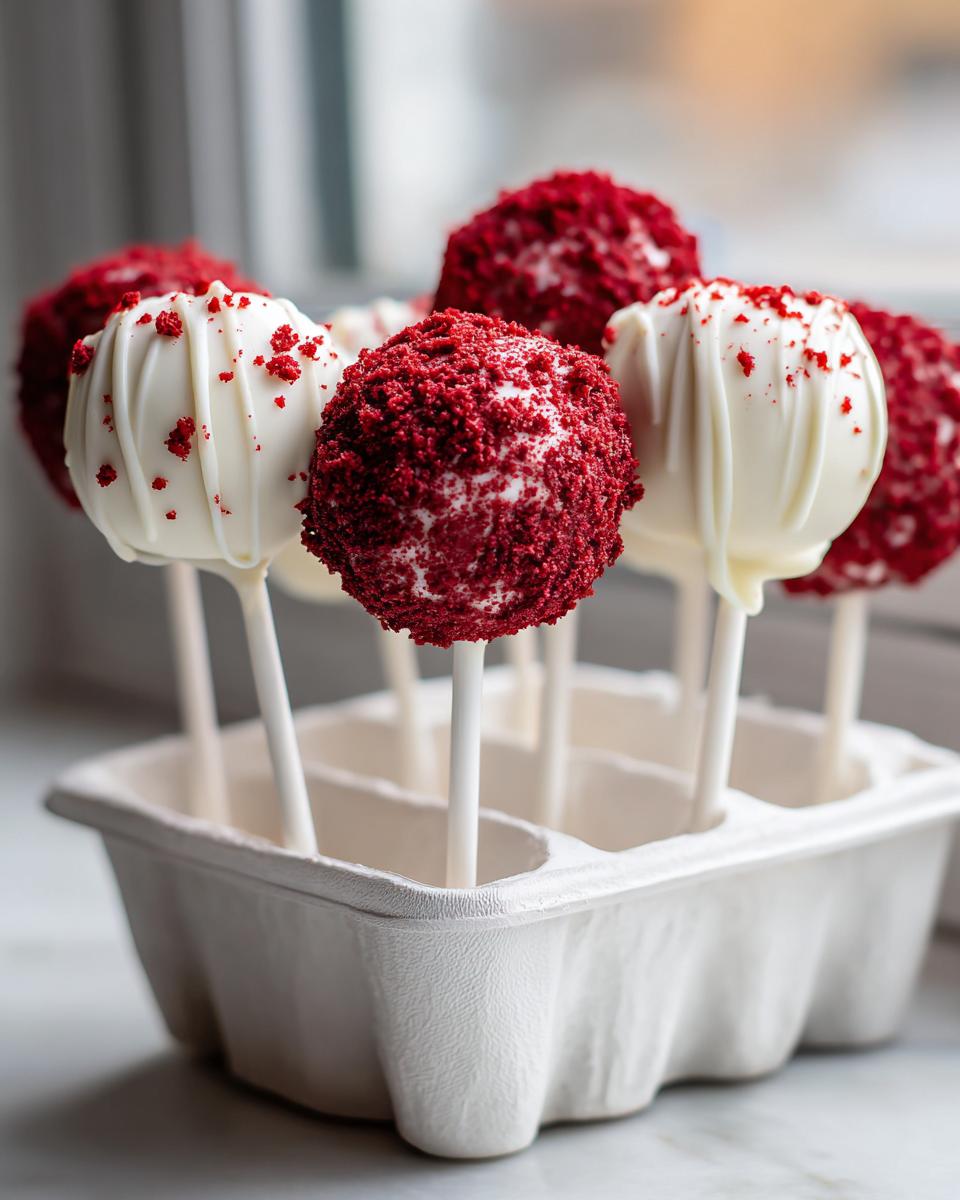
Okay, now that we have our perfectly moist centers coated in that smooth white chocolate, let’s make these red velvet holiday treats look absolutely amazing for your party! Decoration is honestly my favorite part, especially when dealing with that gorgeous rich red base color. A little contrast goes a seriously long way here.
This is where you can really make these birthday dessert sticks your own. Because the white chocolate sets fast, you have to move quickly, but don’t rush the fun part! I always keep my toppings bowl ready right next to my drying stand.
Cake Pop Decorating Ideas for Festive Red Velvet Treats
For simple elegance, just a light drizzle of melted dark chocolate over the white coating looks super sharp against the red underneath. If you are making these for Valentine’s Day cake pops, you have to go for red and white heart sprinkles right after dipping—it’s classic for a reason!
If you want something really festive for Christmas or just a birthday, try using gold or silver edible glitter dusted lightly over the top third of the pop. You can find tons of great ideas on my friend Olivia’s About Page for inspiration if you get stuck! For a great contrast, you could even dip them in milk chocolate instead of white, and then dust them with powdered sugar for a snowy effect. I love making so many different styles when I plan big batches!
Ingredient Notes and Substitutions for Red Velvet Cake Pops
I get asked all the time: “Olivia, what if I *hate* using box mix?” And I totally get it! While the mix is my go-to for speedy, reliable red velvet cake pops, you absolutely can make the cake from scratch. If you decide to go that route, just make sure you bake it slightly drier than normal, okay? Cake pops need that dense structure, so don’t overbake it, but don’t leave it super gooey either. You’ll still need to crumble that homemade cake and bind it with that same important cream cheese frosting we used here.
Also, let’s talk chocolate substitutes since I know not everyone loves white chocolate. You can totally use milk chocolate or dark chocolate! If you use those, you might not need that extra tablespoon of shortening or oil because they are usually thinner to begin with. Just melt them gently and test the consistency against the white chocolate. Dark chocolate coating on those bright red interiors looks so dramatic—perfect for grown-up parties!
If you want to get really fancy and skip the store-bought frosting, try making your own basic cream cheese frosting and just cut the sugar way back. You need that tang, but we don’t want the mixture to be too runny before we roll the balls. For some other great recipes using cream cheese, you should check out my easy homemade spice cake! It’s fantastic.
Storage and Make-Ahead Tips for Red Velvet Cake Pops
One of the best things about making red velvet cake pops is knowing you can get ahead of the game! Seriously, these are fantastic for prepping for big events, which is a lifesaver when you’re planning how to make cake pops for parties. You can basically break this down into two stages: the ball stage and the finished, dipped stage.
The cake balls (before they ever see a stick or chocolate) keep really well! You can roll them out, place them tightly on that parchment-lined tray, and pop them right into the fridge for about two days. Or, even better, the freezer! Wrap that tray tightly in plastic wrap, and they will keep for up to two months. Just let them thaw in the fridge overnight before you plan to dip them.
Storing Finished, Dipped Cake Pops
Now, once they are dipped in chocolate, things get a little trickier because we used cream cheese frosting inside. The chocolate shell is great protective gear, but because of that frosting, I always recommend keeping the finished pops in the refrigerator. They stay firm and safe in an airtight container.
If you are serving them immediately or within a day, take them out about 30 minutes before your guests arrive. Why? Because white chocolate can get a little dull and the interior gets too hard straight from the fridge. Letting them warm up just a tiny bit brings back that perfect gooey texture inside, while the shell stays beautifully crunchy.
When I make them for big events, I try to have the pops dipped no more than three days ahead of time. You can check out my recipe for chewy bars if you need another make-ahead dessert that handles storage a bit easier, but these red velvet cake pops are worth the fridge space, trust me!
Frequently Asked Questions About Red Velvet Cake Pops
When you’re whipping up something as fun as these little red wonders, questions always crop up! I’ve gathered the ones I hear most often from readers who are making their first batch of these red velvet cake pops. Don’t worry if it seems tricky; a little troubleshooting goes a long way!
Can I skip the chilling step when making red velvet cake pops?
Oh, please don’t! I know chilling feels like a waste of time when you just want to eat the finished product, but chilling is vital here. If you try to roll room-temperature cake crumbs and frosting, it’s going to feel sticky and mushy, and your balls will probably look like blobs instead of perfect spheres. Worse, if the stick doesn’t adhere to a nice, firm ball, it’s almost guaranteed to fall off in the melting chocolate or when it’s standing up to dry. Make sure those balls are firm!
What is the best chocolate substitute for dipping red velvet cake pops?
This is a great question if you aren’t a huge fan of white chocolate! You can absolutely use milk chocolate or dark chocolate instead. They look stunning contrasted against the *red velvet cake pops* interior. The main consideration is consistency. If your dark chocolate coating seems really thick after melting, you might need to add a little extra oil or shortening (like we did with the white chocolate) to make it runny enough to coat smoothly. If you are looking for a truly no bake red velvet cake pops experience (after the cake is baked, of course!), these chocolate coatings are the easiest no-fuss finish.
If you want a really easy, no-bake dessert vibe, you could even try a simple chocolate ganache, though that needs more careful setting time than the wafers. For more decadent, easy dessert ideas that skip the oven toward the end, you might want to check out my chocolate mousse pie recipe—it’s amazing!
Estimated Nutritional Data for Red Velvet Cake Pops
So you want the numbers? I totally get that! When you’re making bite-sized desserts for a party, knowing roughly what everyone is digging into is helpful, especially if you are navigating allergies or just trying to track things. Remember, because we are relying on a standard box mix and store-bought frosting, these are just estimates, okay? The final numbers can swing a little depending on the exact brand of white chocolate wafers or the specific cake mix you grab.
Based on making about 22 cake pops per batch using the ingredients listed, here is a typical breakdown. I always have to remind myself not to eat more than one, but hey, they are small!
- Serving Size: 1 pop
- Calories: Around 250 (Pretty decent for such a sweet hit!)
- Fat: About 15 grams
- Carbohydrates: Roughly 28 grams
- Sugar: That’s the big one—around 25 grams. Those melting wafers add up!
- Protein: About 3 grams
We try to keep sodium and cholesterol low, but these are essentially little treats, so don’t expect them to be health food! If you’re looking for something lighter that still hits that creamy note, you might want to check out my recipe for an easy whipped ricotta dip sometime. It’s a fantastic recipe to keep handy!
Share Your Homemade Red Velvet Cake Pops Creations
Now that you’ve mastered the simple methods for creating those gorgeous, velvety smooth cakes and mastered the tricky dipping process, I truly hope you feel proud of what you’ve made! Honestly, watching those vibrant, shiny spheres dry on the stand is one of my favorite moments in the kitchen.
I absolutely live to see what you all create! When you make these bite sized red velvet desserts, please snap a picture!
If you loved how moist and easy these turned out, I would be so grateful if you’d hop back here and leave a little rating on the recipe card. Knowing you had success makes all my late-night recipe testing worth it! And please, tag me on social media when you share your finished pops—I love seeing your creativity shine through the sprinkles you choose!
Keep that oven warm, and remember that great cooking is all about connection. If you want another easy recipe that uses cream cheese beautifully, try my creamy apple dip recipe next time you need a crowd-pleaser!
PrintULTRA Moist Red Velvet Cake Pops (Easy Mix Hack)

Make perfectly moist red velvet cake pops using a simple box mix trick and cream cheese. These bite-sized treats are coated in smooth white chocolate and are perfect for parties or holidays.
- Prep Time: 30 min
- Cook Time: 30 min
- Total Time: 90 min
- Yield: 20-24 pops 1x
- Category: Dessert
- Method: No Bake (after initial cake baking)
- Cuisine: American
- Diet: Vegetarian
Ingredients
- 1 box (15.25 oz) red velvet cake mix (plus ingredients listed on box for cake)
- 1 cup cream cheese frosting (store-bought or homemade)
- 12 ounces white chocolate melting wafers
- 1 tablespoon coconut oil or vegetable shortening (optional, for smoother coating)
- Red sprinkles or decorative elements (optional)
- 1 package cake pop sticks
Instructions
- Bake the red velvet cake according to the box directions, using the ingredients specified on the box.
- Let the cake cool completely on a wire rack.
- Crumble the cooled cake into fine crumbs in a large bowl. Discard any overly browned edges.
- Add the cream cheese frosting to the cake crumbs. Mix thoroughly with your hands or a sturdy spoon until a dough forms that holds its shape when squeezed.
- Roll the mixture into uniform balls, about 1 to 1.5 inches in diameter. Place the balls on a parchment-lined baking sheet.
- Chill the cake balls in the refrigerator for at least 30 minutes, or until firm.
- Prepare the dipping station: Melt the white chocolate wafers in a microwave-safe bowl according to package directions, stirring every 30 seconds. Stir in the coconut oil if using.
- Dip the tip of a cake pop stick into the melted chocolate, then gently insert the stick about halfway into a chilled cake ball. This acts as glue. Return the sheet to the freezer for 5 minutes to set the sticks.
- Dip each cake ball completely into the melted chocolate, rotating to cover the entire surface. Tap the stick gently against the side of the bowl to let excess chocolate drip off.
- Immediately apply sprinkles or decorations before the chocolate sets.
- Place the finished cake pops upright in a styrofoam block or cake pop stand to dry completely.
Notes
- For the moistest texture, do not overbake the cake.
- If the mixture seems too soft after adding frosting, chill it for an additional 15 minutes before rolling.
- To thin the chocolate coating for easier dipping, add a teaspoon of vegetable oil or shortening at a time until you reach a smooth, runny consistency.
- If you prefer a darker red color, add 1-2 drops of red gel food coloring to the cake crumbs before mixing with the frosting.
Nutrition
- Serving Size: 1 pop
- Calories: 250
- Sugar: 25
- Sodium: 150
- Fat: 15
- Saturated Fat: 8
- Unsaturated Fat: 7
- Trans Fat: 0.5
- Carbohydrates: 28
- Fiber: 1
- Protein: 3
- Cholesterol: 30