
Oh, if you’re anything like me, the thought of a truly perfect dessert sends a little shiver of joy down your spine! I spent years avoiding homemade cheesecake because everyone told me it was impossible—cracks, sticking, the whole intimidating water bath ordeal. Not anymore! I’m Olivia, and when I was trying to slow down life and bring back those connected moments in my kitchen back home, I perfected this Classic New York Cheesecake recipe. Trust me when I say this version is rich, ultra-creamy, and gives you that restaurant-quality smooth texture without ever needing to mess with a scary water bath. It’s all about reclaiming simple, decadent joy! If you want to know more about why I believe in cooking that connects us, check out my story on the About Us page!
- Why This Classic New York Cheesecake Recipe Works Every Time
- Gathering Ingredients for Your Cheesecake Recipe
- Step-by-Step Instructions for the Simple Cheesecake Baking
- Tips for Your Best New York Cheesecake
- Serving Suggestions for Your Classic Dessert Recipes
- Storage and Make Ahead Desserts Using This Cheesecake Recipe
- Frequently Asked Questions About This Cheesecake Recipe
- Estimated Nutritional Breakdown for This Cheesecake Recipe
- Share Your Gourmet Cheesecake at Home Experience
Why This Classic New York Cheesecake Recipe Works Every Time
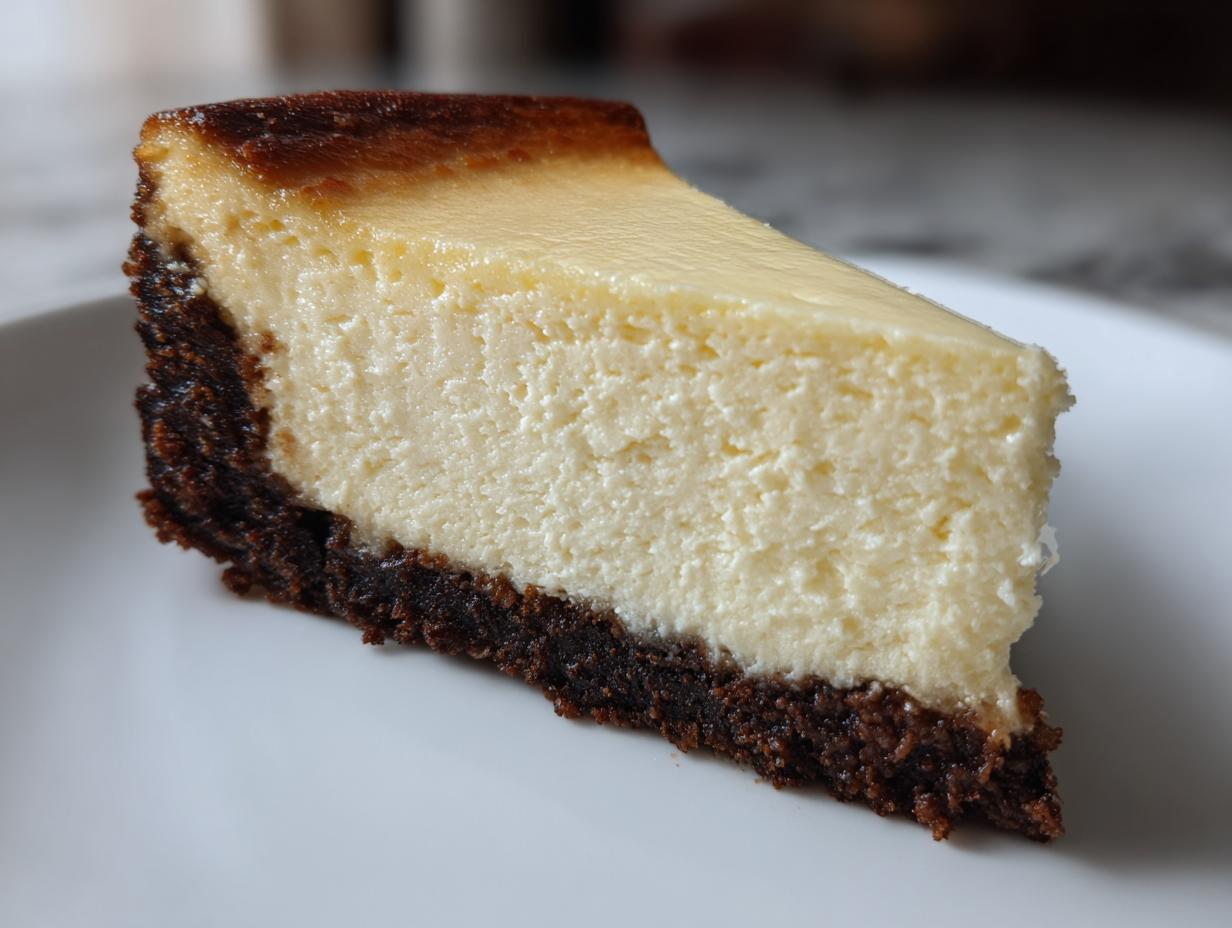
Look, I get it. The fear of cracks is real! But this specific No Crack Cheesecake Tutorial is engineered to give you unbelievable quality with minimal fuss. We skip the whole wrestling match with the water bath because we control the environment by baking low and slow, and then cooling gradually. This is how we achieve that dense, Velvety Cheesecake Filling that tastes like it came straight out of a swanky New York bakery!
Achieving That Ultra Creamy Texture
The whole secret to smoothness starts way before the oven. You absolutely must use room temperature cream cheese, sour cream, and eggs. Cold ingredients create immediate lumps that you just can’t beat out later. Also, when you mix, use medium speed and stop as soon as things look combined after the eggs go in. We want smooth batter, not airy meringue!
The Secret to a No Crack Cheesecake Recipe
The biggest reason cheesecakes crack is a sudden temperature shock. Once the bake time is up (when the center still jiggles just a bit!), your job isn’t done. You turn the oven OFF, prop the door open an inch, and let it sit in that residual heat for a full hour. This slow decrease in temperature is the magic trick for this cheesecake recipe, ensuring a beautiful top every single time. You can find some other quick tricks for avoiding baking disasters over on my no-bake chocolate pumpkin bites post, too!
Gathering Ingredients for Your Cheesecake Recipe
Okay, let’s grab what we need! Getting the ingredients ready beforehand makes the whole mixing process so much calmer. You really want everything measured out and checked before you even touch the mixer. Since this is a richer New York style, we stick to the classics. If you’re looking for crust inspiration after mastering this one, I have a whole collection of graham cracker crust ideas you might love!
For the Graham Cracker Crust
This is your flavorful foundation, so pack it in tight! You’ll need:
- 1 1/2 cups graham cracker crumbs
- 1/4 cup granulated sugar (yes, a little extra sweetness for the base!)
- 6 tablespoons unsalted butter, melted
For the Velvety Cheesecake Filling
This is where the magic happens! Remember, temperature is key here for that Velvety Cheesecake Filling:
- 3 (8 ounce) packages full-fat cream cheese, softened completely to room temperature
- 1 1/2 cups granulated sugar
- 1 teaspoon vanilla extract
- 1/4 teaspoon salt
- 4 large eggs, all at room temperature
- 1/2 cup sour cream, room temperature
Step-by-Step Instructions for the Simple Cheesecake Baking
Now for the fun (and slightly nerve-wracking) part! Follow these steps exactly, and I promise your cheesecake recipe will turn out flawless. We’re moving at a good pace, but remember, gentleness during mixing is way more important than speed here. If you need some inspiration for great post-cheesecake snacks, check out my easy sweet snacks collection!
Preparing and Pre-Baking the Crust
First things first: Preheat that oven to 325°F (160°C). You won’t need that water bath setup, thank goodness! Mix your graham cracker crumbs, the dedicated 1/4 cup of sugar, and the melted butter until everything looks evenly damp, almost like wet sand. Press this mixture firmly and evenly into the bottom of your 9-inch springform pan. We bake this just for 10 minutes to set it up nicely. After that, pull it out and let it settle while you move to the filling.
Mixing the Perfectly Smooth Cake Filling
Grab your big bowl! This is critical: Beat that softened cream cheese, and I mean *really* beat it until it is 100% smooth—no lumps allowed. Scrape the sides down to make sure everything is incorporated. Next, mix in your 1 1/2 cups of sugar, vanilla, and salt until just combined. Here’s the E-E-A-T part: Add those room-temperature eggs in one at a time. Beat just until that yellow yolk disappears before adding the next one. Seriously, stop mixing once you add the sour cream! Overbeating creates air bubbles that lead to cracks later on—we want a dense, smooth texture!
Baking and the Essential Slow Cooling for This Cheesecake Recipe
Pour that beautiful filling over your crust. Bake this gorgeous thing for about 55 to 65 minutes. You aren’t looking for firm; you want the edges set, but the center two inches should wobble slightly when you nudge the pan—that little jiggle lets you know it’s perfect. When that time is up, turn the oven completely off. Prop the door open about an inch—use a wooden spoon or a folded towel. Leave it in there for one whole hour! This slow cooling is the secret weapon for this cheesecake recipe to guarantee a perfect, crack-free top.
Tips for Your Best New York Cheesecake
Even with the best recipe in hand, little things can trip you up, right? I learned these tricks the hard way so you don’t have to! Following these little pointers will ensure you nail that beautiful, rich finish, making this legitimately the second best dessert after the apple crumb cake I’ve ever made!
Ingredient Temperature Matters for a Creamy Cheesecake Recipe
I can’t stress this enough: room temperature ingredients are non-negotiable for this cheesecake recipe. If your cream cheese is straight from the fridge, you’ll end up with chunky bits speckled throughout your beautiful filling, and no amount of beating will fix that! Take everything out at least two hours ahead of time. Seriously, if your eggs feel cold, warm them up a little between your palms while you’re prepping the crust. That one simple step ensures the smoothest, most melt-in-your-mouth, Best New York Cheesecake texture possible.
Serving Suggestions for Your Classic Dessert Recipes
This New York style is decadent all on its own, honestly! But if you’re bringing this out for Desserts for Parties, you might want a little something extra on top. I love keeping the topping simple so the flavor of that creamy filling still shines through. Think elegant, not overwhelming!
A handful of fresh, perfect seasonal berries—like dark raspberries or sliced strawberries—adds a beautiful pop of red and a little acidity. If you want a drizzle, a simple, slightly tart cherry sauce or a thin swirl only looks gourmet. Since this cake is so rich, a little goes a long way. Check out my ideas for appetizer spreads for other party ideas while you’re here!
Storage and Make Ahead Desserts Using This Cheesecake Recipe
This is one of the best parts about making this cheesecake recipe: it’s the ultimate Make Ahead Dessert! You absolutely cannot rush the chilling process, no matter how tempting that creamy slice looks when it comes out of the oven. That lengthy chill time is crucial for the texture to set properly and for the flavor to deepen up nicely.
Once the cheesecake is completely cooled to room temperature (after that slow cooling session!), cover the pan loosely with plastic wrap—and I mean *loosely* at first so it doesn’t sweat condensation directly onto the top. Once covered, move it into the refrigerator. You need a minimum of six hours for it to firm up enough to slice, but honestly? Overnights are always better. We’re aiming for that perfectly smooth cake experience, and patience pays off here.
It keeps beautifully in the fridge, covered tightly, for about four to five days. If you want to freeze half of it (maybe you made a mini one for two people, like those adorable small batch recipes!), wrap it very securely in two layers of plastic wrap, followed by a layer of aluminum foil. It freezes well for about a month, but pull it out the day before you plan to eat it so it can thaw slowly in the fridge. It’s just one less thing to worry about when you’re planning a big dinner!
Frequently Asked Questions About This Cheesecake Recipe
Can I use a 10-inch pan for this cheesecake recipe?
You totally can! A 9-inch pan is the standard size for getting that beautifully tall, thick New York-style result, but if 10 inches is what you have, go for it. Just know that since the pan has more surface area, your filling will spread out more. That means you’ll end up with a slightly shorter cake this time around. It might even shave a few minutes off the bake time, so keep a closer eye on that gentle jiggle in the center!
Why is my cream cheese lumpy when making the filling?
Ugh, lumps are the enemy of the Perfectly Smooth Cake! This almost always boils down to one thing: your cream cheese wasn’t soft enough. Seriously, take it out hours ahead of time. If you’re in a huge hurry, cube the cream cheese and let it sit on the counter for an hour. Cold cream cheese just won’t blend properly with the sugar, leaving you with those little, annoying pockets of unmixed cheese later on. Temperature, temperature, temperature!
What is the best way to get a clean slice?
This is my favorite trick for making sure this beautiful dessert looks as good on the plate as it tastes! Once your cheesecake is completely chilled (and I mean after that overnight chill!), grab a long, thin knife—a slicing knife is perfect. Run the blade under boiling hot water for about 20 seconds, wipe it completely dry with a clean towel, and then make your cut. Wipe the knife clean between every single slice you take. This keeps the heat of the water melting the edge just slightly, giving you those super crisp, professional-looking slices!

If you are just starting out with making desserts from scratch, this recipe definitely qualifies as an easy homemade dessert contender because it’s so forgiving once you master the slow cooling! Don’t forget to tell me how yours turned out!
Estimated Nutritional Breakdown for This Cheesecake Recipe
Okay, I always feel a little guilty looking at this section, but knowledge is power, right? I wanted to include what this glorious cheesecake recipe packs into a standard slice. Remember, since we are using full-fat cream cheese and plenty of sugar to get that classic richness, it’s certainly a treat, not an everyday snack! These numbers are estimates based on the recipe ingredients, so they will shift slightly depending on what brand of graham crackers or sour cream you use.
If you’re planning ahead for holidays or parties, it helps to have a general idea of what you’re serving. These are based on 12 generous servings:
- Serving Size: 1 slice
- Calories: around 450
- Fat: 30g (A good chunk of that is saturated fat, since it’s all about the cream cheese!)
- Carbohydrates: 40g
- Sugar: 35g (Worth every single gram, I promise you!)
- Protein: 8g
- Cholesterol: 120mg
My biggest disclaimer here is that these estimates don’t account for any toppings you might add—whipped cream or a tart berry sauce adds flavor but will certainly adjust the totals! Treat this as a good general guide for your planning, but don’t stress the numbers too much. You made a show-stopping dessert, and that counts for a lot!
Share Your Gourmet Cheesecake at Home Experience
Now that you have the secrets to making a truly restaurant-quality New York cheesecake right in your own kitchen—no water bath drama required!—I really hope you get a chance to try this recipe as soon as possible. This is the kind of baking that makes the kitchen feel warm and brings everyone together, just how I like it!
I get so much joy out of seeing what variations you all come up with. Did you jazz up the crust? Try a totally unique topping? Did you manage that perfect Jiggle Test? Please, please come back here and let me know how it went! Leaving a little star rating helps other home cooks gain the confidence to try it, and your comments inspire me every single day.
We are building a community here, a place where delicious, homemade food isn’t a chore, but a celebration. If you have questions about the process, need clarification on the temperature steps, or just want to share a photo of your stunning, crack-free dessert, don’t hesitate to reach out! You can always drop me a line through the Contact page. Happy baking, friend!
PrintClassic New York Cheesecake Recipe (No Water Bath Needed)
Make a rich, creamy, and perfectly smooth New York style cheesecake at home without the difficulty of a water bath. This recipe avoids cracks for a restaurant-quality dessert.
- Prep Time: 20 min
- Cook Time: 65 min
- Total Time: 7 hours 25 min
- Yield: 12 servings 1x
- Category: Dessert
- Method: Baking
- Cuisine: American
- Diet: Vegetarian
Ingredients
- 1 1/2 cups graham cracker crumbs
- 1/4 cup granulated sugar (for crust)
- 6 tablespoons unsalted butter, melted
- 3 (8 ounce) packages full-fat cream cheese, softened to room temperature
- 1 1/2 cups granulated sugar (for filling)
- 1 teaspoon vanilla extract
- 1/4 teaspoon salt
- 4 large eggs, room temperature
- 1/2 cup sour cream, room temperature
Instructions
- Preheat your oven to 325°F (160°C). You will not use a water bath for this recipe.
- Prepare the crust: Mix graham cracker crumbs, 1/4 cup sugar, and melted butter until combined. Press the mixture firmly into the bottom of a 9-inch springform pan. Bake the crust for 10 minutes. Remove from the oven and let it cool slightly.
- Prepare the filling: In a large bowl, use an electric mixer to beat the softened cream cheese until it is completely smooth and there are no lumps. Scrape down the sides of the bowl.
- Add 1 1/2 cups sugar, vanilla extract, and salt to the cream cheese. Beat on medium speed until just combined. Do not overmix.
- Add the eggs one at a time, beating only until each egg is incorporated. Mix in the sour cream until the batter is smooth.
- Pour the filling over the cooled crust in the springform pan.
- Bake for 55 to 65 minutes. The edges should look set, but the center 2 inches should still have a slight jiggle when gently shaken.
- Turn off the oven, but leave the cheesecake inside with the oven door propped open slightly (about 1 inch) for 1 hour. This slow cooling prevents cracking.
- Remove the cheesecake from the oven and let it cool completely on a wire rack at room temperature.
- Once cool, cover the pan loosely with plastic wrap and chill in the refrigerator for at least 6 hours, or preferably overnight, before serving.
Notes
- Use room temperature ingredients for the cream cheese and eggs; this prevents lumps and ensures a velvety texture.
- Do not overbeat the batter once the eggs are added; too much air causes the cake to rise too fast and crack upon cooling.
- For easy removal, run a thin knife around the edge of the cheesecake before releasing the springform side.
Nutrition
- Serving Size: 1 slice
- Calories: 450
- Sugar: 35g
- Sodium: 300mg
- Fat: 30g
- Saturated Fat: 18g
- Unsaturated Fat: 12g
- Trans Fat: 0.5g
- Carbohydrates: 40g
- Fiber: 1g
- Protein: 8g
- Cholesterol: 120mg