
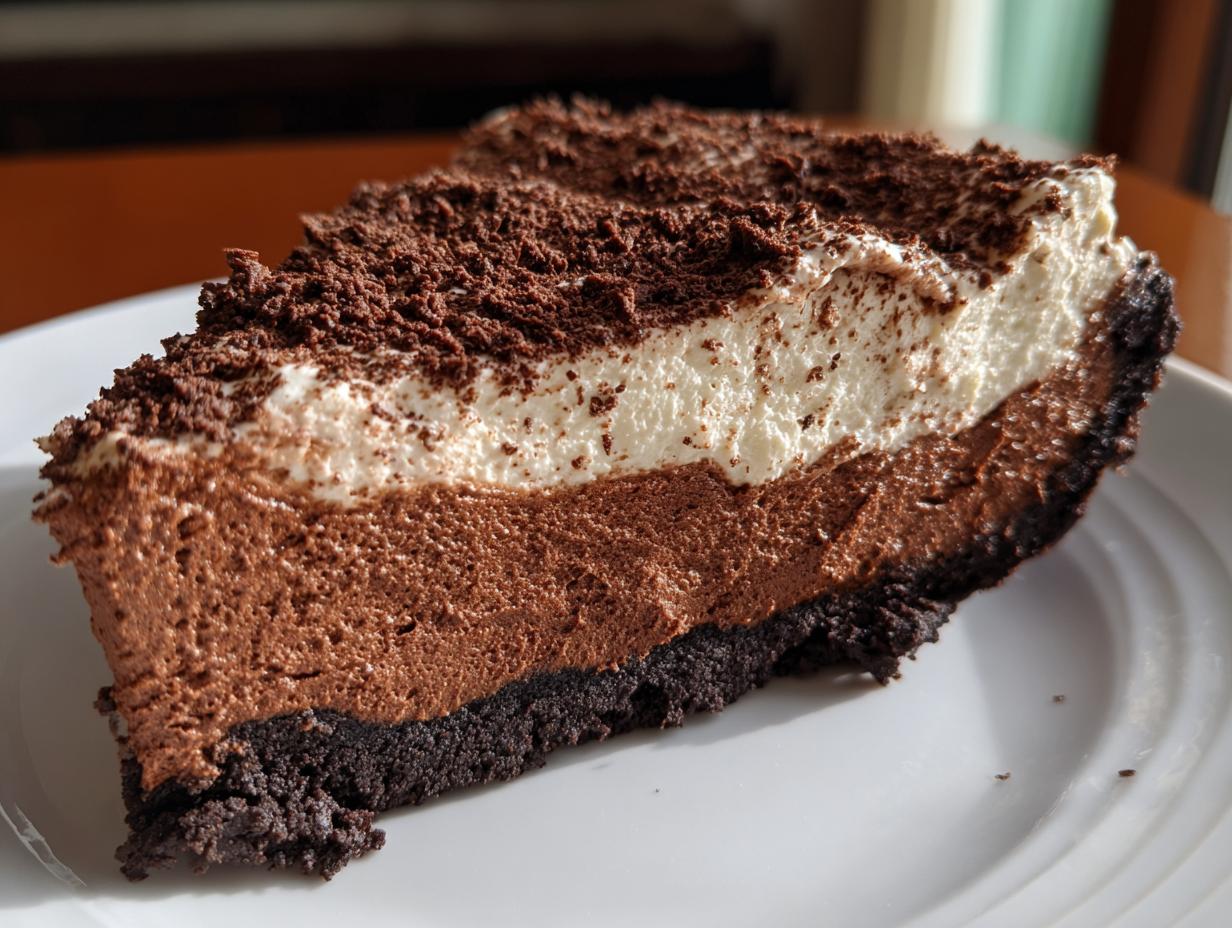
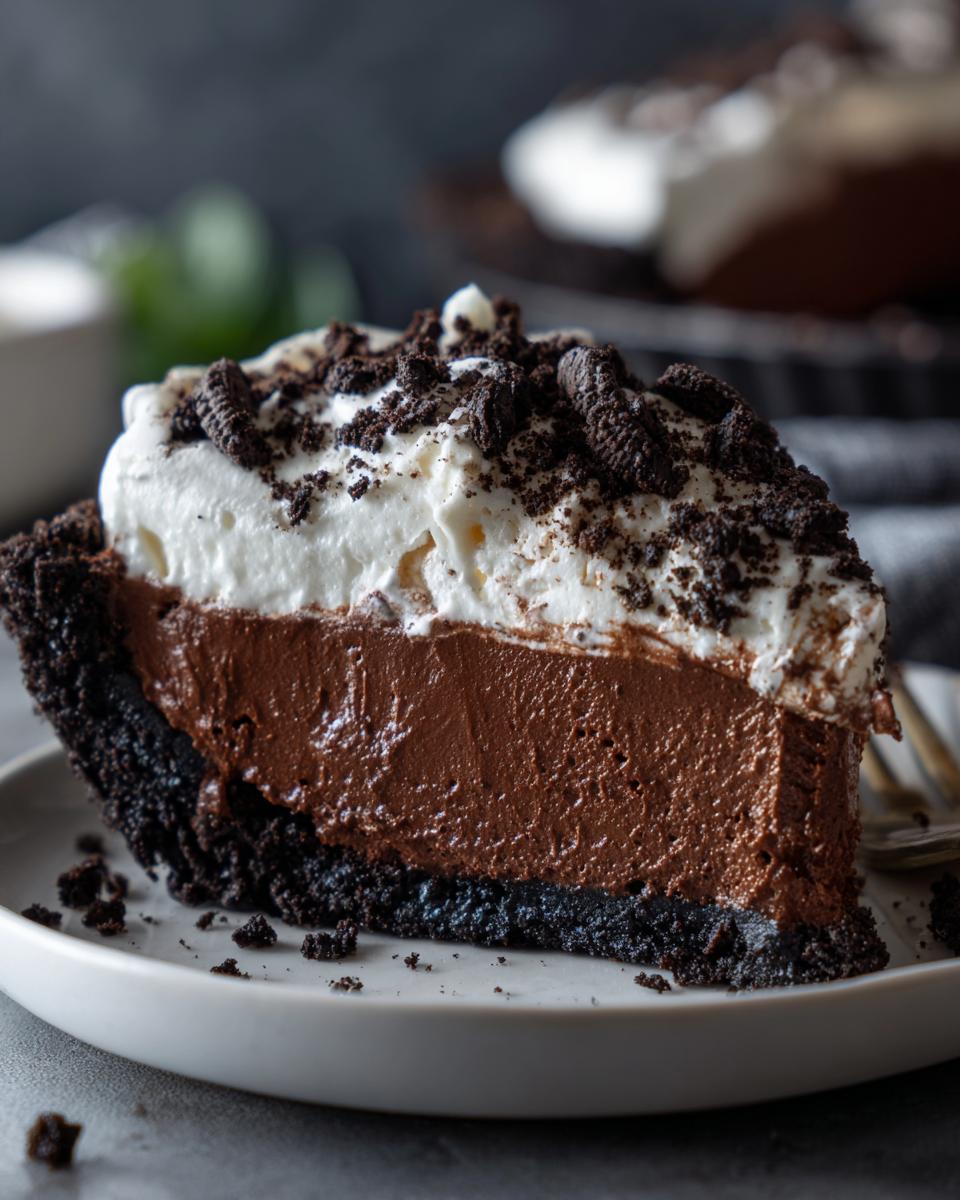
Oh my goodness, are you ever just *crashing* from one of those days where you need deep, dark, unbelievably luxurious chocolate, but you absolutely cannot face turning on the oven? I totally get it! That’s why I am obsessed with bringing you the Ultimate Easy No-Bake Chocolate Mousse Pie. Seriously, forget complicated baking; this recipe is pure magic. We start with that salty-sweet crunch of an Oreo crust and top it with a filling so silky and fluffy, you’ll wonder if you accidentally cheated the system.
Here at DelishCraze, Olivia Rosewood’s whole mission is making sure those fantastic, comforting slices of American classics fit right into your busy life. This chocolate mousse pie is proof! It comes together in maybe 20 minutes of active time, sets beautifully in the fridge, and delivers that incredible melt-in-your-mouth experience every single time. You need this in your dessert rotation, trust me.
If you loved how wonderfully gooey the chocolate poke cake turned out, you are going to flip for this one!
- Why This is the Best No Bake Chocolate Mousse Pie Recipe
- Ingredients for Your Ultimate Chocolate Mousse Pie
- How to Prepare the Easy Chocolate Mousse Pie
- Tips for the Perfect Silky Smooth Chocolate Mousse Dessert
- Make Ahead Pies: Storing Your Chocolate Mousse Pie
- Variations for Your Creamy Chocolate Dessert
- Frequently Asked Questions About This Chocolate Mousse Pie
- Estimated Nutritional Information for the Decadent Chocolate Pie
- Share Your Ultimate Chocolate Pie Experience
- Share Your Ultimate Chocolate Pie Experience
Why This is the Best No Bake Chocolate Mousse Pie Recipe
When I tell you this is the best, I mean it! This No Bake Chocolate Mousse Pie slides right into your weeknight rotation or saves your party spread without any fuss. Why go complicated when you can have decadence this easily?
- It’s ridiculously fast! Active prep time is just about 20 minutes.
- Zero oven required, which is a lifesaver, especially in the summer.
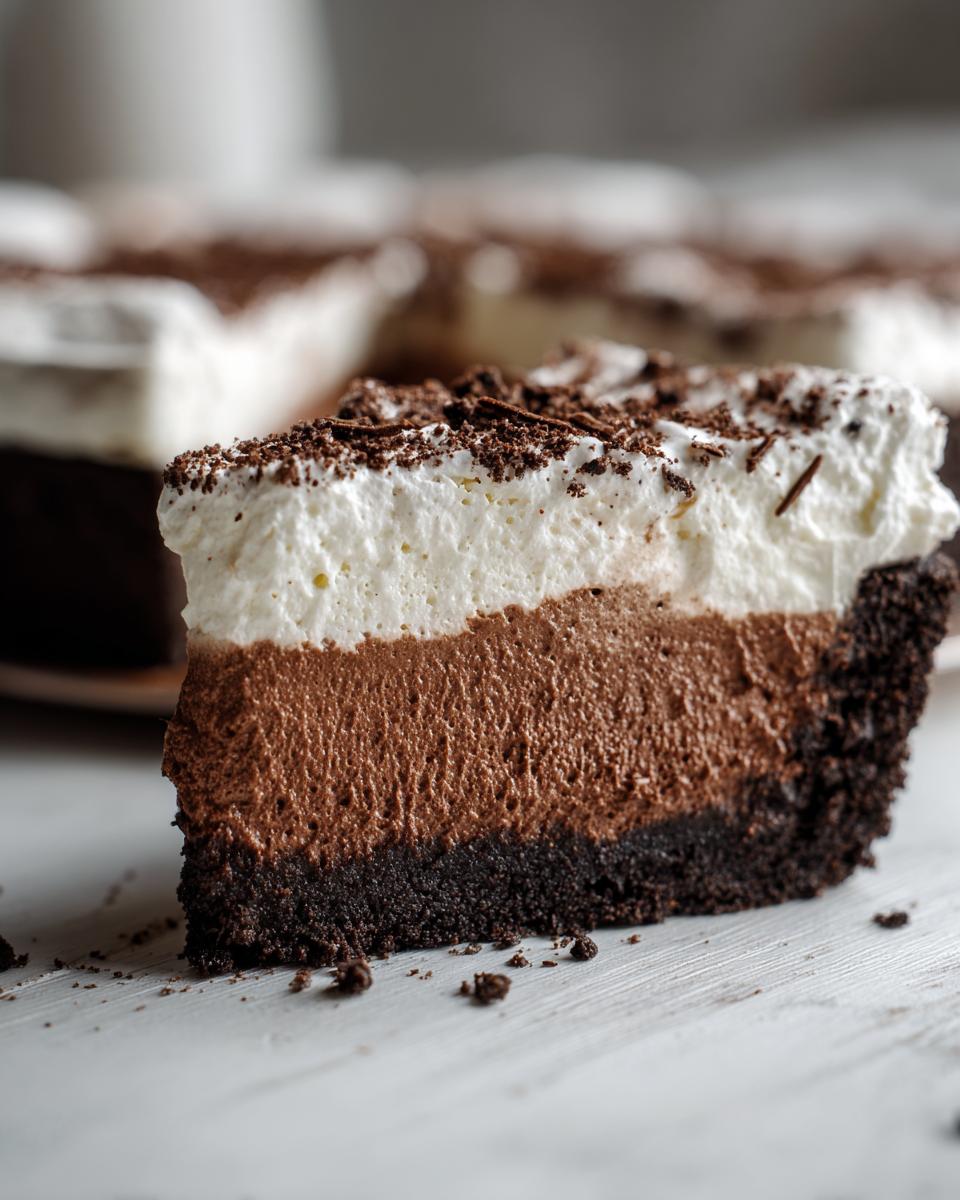
- The texture is everything—you get that crisp Oreo Crust followed by filling that is unbelievably creamy and fluffy.
- It’s a perfect make-ahead pie; the chilling time just deepens that rich, chocolatey flavor.
If you need a dessert that looks like you scrimped and saved all afternoon but took no actual effort, you need this recipe. You can check out how simple my no-bake eclair cake is, too, for more oven-free wins!
Ingredients for Your Ultimate Chocolate Mousse Pie
Okay, let’s talk about what you need. Since this is a no-bake marvel, the ingredients really shine because there’s nowhere for off-flavors or poor texture to hide! I wrote all these measurements down exactly how I use them for the perfect results. Honestly, if you can follow a shopping list, you can make this pie.
When you get these home, pop over to the ‘Tips’ section later because I’ll tell you why using quality dark chocolate really makes a difference to the final flavor of this decadent chocolate pie.
- 24 Oreo cookies, finely crushed (that’s most of a standard package, just check!)
- 6 tbsp unsalted butter, melted
- 1 (8 ounce) package cream cheese, softened completely
- 1 cup powdered sugar
- 1 tsp vanilla extract
- 1 (12 ounce) container frozen whipped topping (like Cool Whip), thawed, and you’ll use half now and half later
- 1 (3.9 ounce) package instant chocolate pudding mix
- 1 1/2 cups cold milk
- 4 ounces unsweetened chocolate, melted and cooled slightly
- Chocolate shavings or extra whipped topping for garnish (totally optional, but highly encouraged!)
If you’re looking for more incredible chocolate pairings, you absolutely have to check out my recipe for the chocolate peanut butter cake. It uses a few of these rich components in a whole new way!
How to Prepare the Easy Chocolate Mousse Pie
I know you’re anxious to dig in, but trust me, the short time it takes for this easy chocolate mousse pie recipe to set up is worth every second of waiting. Remember, there’s no baking here, just layering and chilling! It becomes a beautiful, make-ahead pie if you plan ahead just a little bit.
When I tell you this is the best, I mean it! This No Bake Chocolate Mousse Pie slides right into your weeknight rotation or saves your party spread without any fuss. Why go complicated when you can have decadence this easily?
- It’s ridiculously fast! Active prep time is just about 20 minutes.
- Zero oven required, which is a lifesaver, especially in the summer.
- The texture is everything—you get that crisp Oreo Crust followed by filling that is unbelievably creamy and fluffy.
- It’s a perfect make-ahead pie; the chilling time just deepens that rich, chocolatey flavor.
Making the Oreo Crust for Your Chocolate Mousse Pie
Step one gets us grounded! Grab those crushed Oreos and mix them up really well with the melted butter. You want everything evenly coated—no dry crumbs floating around. Once it looks like wet sand, press it firmly into your 9-inch pie plate. I mean firmly! Use the bottom of a measuring cup to really pack it down on the bottom and up the sides. Then, immediately shove that crust into the freezer while you work on the layers above it.
Assembling the Cream Cheese Layer
While the crust is chilling, we make our stabilizing layer. Beat that softened cream cheese, powdered sugar, and vanilla until it’s smooth as silk—no lumps allowed! Now, here is where you need the gentle hand: take half of your thawed whipped topping and *gently fold* it in. We don’t want to punch all the air out! Spread that beautiful cream cheese layer into the chilled crust. Pop the whole thing back into the freezer for just ten minutes while we whip up the star of the show.
Creating the Rich Chocolate Mousse Filling
Time for the chocolate goodness! In a separate bowl, whisk up the instant chocolate pudding mix and the cold milk. Whisk it hard for about two full minutes until it starts grabbing onto the whisk and getting thick. Here’s my pro insider tip for that perfect fluffy texture: make sure your 4 ounces of unsweetened chocolate are melted, and then let it cool down for a good five minutes before adding it to the pudding. If it’s piping hot, it’ll deflate your pudding! Once it’s just warm, mix it in completely.
Finally, carefully fold in the remaining half of your thawed whipped topping. This folding motion is what creates that truly fluffy chocolate pie filling! We want air incorporated, not beaten out.
Final Assembly and Chilling the Chocolate Mousse Pie
Gently pour that gorgeous chocolate mousse filling right over the cream cheese layer you chilled down. Smooth the top out nicely with an offset spatula. Now comes the hardest part: patience! Cover the pie loosely and put it in the refrigerator for a minimum of four hours. Honestly, if you can leave this chocolate mousse pie overnight, it sets up even better and the flavors just deepen beautifully.
Don’t forget that after chilling, you can top it with extra whipped cream or some delicate chocolate shavings before slicing!
Tips for the Perfect Silky Smooth Chocolate Mousse Dessert
Listen, making a creamy chocolate dessert like this should feel fun, not stressful! Since we skip the whole oven step, the quality of our ingredients and how we handle them becomes super important for getting that melt-in-your-mouth result. I’ve gathered the little secret notes I took over the years of perfecting this ultimate chocolate pie for you right here.
If you want to see how I handle texture in a completely different way—like how to get the creamiest eggs ever—check out my guide to creamy, fluffy scrambled eggs. It’s all about gentle handling!
First off, let’s talk about the crust variations. While the Oreo is iconic, you can absolutely use chocolate wafer cookies instead. It gives the crust a slightly different, almost deeper chocolate note. Just remember, if you make any swaps, make sure the volume stays about the same so your filling has enough room to shine!
The key to that beautiful, light structure—what makes it a true mousse and not just thick pudding—is your folding technique. You saw me mention folding the whipped topping in two parts. That first half is easier, but for the second half, be patient! Use a big rubber spatula and scoop from the bottom up, cutting gently through the middle. Don’t stir aggressively! We are preserving those little air bubbles trapped in the whipped topping—they are what create that airy lift.
Also, about that unsweetened chocolate: if you use the cheapest stuff, your rich chocolate pie filling will taste flat. Since there are so few major flavor components here, snag the highest quality dark or unsweetened chocolate you can find. It makes the depth of flavor soar.
And finally, if you’re looking for extra crunch and zing, feel free to fold in a teaspoon of instant espresso powder along with your melted chocolate. It won’t taste like coffee, I promise, but it sure does boost the chocolate flavor! For more inspiration on easy, delicious no-bake magic, you can see this great recipe for an Oreo Chocolate Mousse Pie online.
Make Ahead Pies: Storing Your Chocolate Mousse Pie
One of the biggest reasons I adore making this chocolate mousse pie is that it is truly a dream as far as make ahead pies go. Forget scrambling at the last minute! This dessert actually gets better with time, which is such a gift when you’re planning a party or just want a ready-made treat for dessert later in the week.
Because the filling combines the richness of cream cheese with the lightness of whipped topping and pudding, it needs a solid set time. If you’re serving it the next day, that is honestly the sweet spot. The minimum time in the fridge is four hours, but if you can cover it gently and leave it overnight in the refrigerator, you’ll find the mousse filling firms up perfectly, giving you that fantastic, clean slice every time. It holds its shape beautifully, making it ideal for transporting to potlucks or family gatherings.
How long does it last? Well, the instant pudding mix and the cream cheese act as great stabilizers. I find that storing my easy chocolate mousse pie recipe tightly covered in the fridge, it stays absolutely delicious for up to three days. After that, the whipped topping might start to lose a little volume, but it’s still perfectly safe and tasty!
If you are looking for other great make-ahead ideas that save your sanity, you should definitely check out my recipe for easy pecan pie bars—those are also fantastic to make a day ahead!
Don’t forget, when you serve it straight from the fridge, the chocolate crust is extra crisp and that mousse is wonderfully cool. If you want it slightly softer, just let the whole decadent chocolate pie sit on the counter for about 15 minutes before slicing. For serving inspiration, take a look at some gorgeous ideas for a silky, no-bake dessert online. It’s the perfect balance of easy prep and impressive result!
Variations for Your Creamy Chocolate Dessert
Now that you have the absolute blueprint for the best chocolate mousse pie—the one with the crunchy Oreo crust and the cloud-like filling—we can start having some fun tweaking it! Cooking should always feel personal, right? I rarely make the exact same thing twice because tweaking one or two things can completely change the vibe of this quick chocolate dessert.
Don’t be afraid to try these! They keep the integrity of the pie—it’s still no-bake and still incredibly rich—but they add little pops of flavor that keep things interesting.
If you love dipping your toes into creative chocolate recipes, you *must* try my white hot chocolate sometime. It’s a completely different kind of cozy!
So, here are my favorite ways to switch things up when I’m making this fluffy chocolate pie:
Change Up the Crust Flavor Profile
The Oreo crust is classic for a reason, but maybe you’re feeling festive or adventurous. If you swap out the Oreos for Nilla Wafers, you get a much lighter, buttery base. It lets the chocolate filling take front and center stage, making it taste even more like a traditional mousse!
Another fun one is using gingersnap cookies instead of Oreos. The slight spiciness of the ginger cuts through the richness of that chocolate mousse filling so perfectly. Just swap the cookies, use the same amount of melted butter, and press it in as usual. Trust me, it’s unexpected and wonderful.
Boosting the Chocolate Depth
For real chocolate fanatics—you know who you are—we can boost that richness up a notch in the mousse layer itself. While I already told you that using good quality unsweetened chocolate is key, you can also add a little something extra when you mix in that chocolate.
Try dissolving just half a teaspoon of instant espresso powder right into the cold milk before you whisk in the pudding mix. It deepens the cocoa flavor significantly without making the pie taste like coffee at all. It just makes the chocolate taste *more* like chocolate, which is exactly what we want in a decadent chocolate pie!
Dressing It Up: Topping Ideas
If you follow the recipe, you get that lovely topping of simple whipped cream or shavings. But if company is coming over, we have to step it up! My new favorite way to top this creamy chocolate dessert is with a thin layer of chocolate ganache poured over the top once the pie is fully set.
To make a quick ganache, just heat up half a cup of heavy cream until it’s just simmering, then pour it over 4 ounces of chopped semi-sweet chocolate. Let it sit for five minutes, whisk it until smooth, and then allow it to cool slightly until it drizzles nicely before pouring it over the chilled pie. It adds a glossy, professional finish that makes everyone think you stopped off at a fancy bakery!
Frequently Asked Questions About This Chocolate Mousse Pie
I get so many questions every time I post this No Bake Chocolate Mousse Pie because everyone wants that perfect slice! It’s all about texture in a dessert like this, so let’s clear up the most common concerns so you can achieve that amazing, fluffy chocolate pie result!
Can I use a graham cracker crust instead of Oreos for this chocolate mousse pie?
Oh gosh, absolutely yes! The beauty of this cookie crust pie is its flexibility. If you decide graham crackers are more your jam, just use about 1 1/2 cups of fine graham cracker crumbs. Since graham crackers are a little drier than Oreos (especially if you remove the filling!), you might need just a tiny bit more melted butter—maybe 7 tablespoons instead of 6—to get that nice, wet sand texture we talked about. Pack it in the same way, and you are good to go!
How do I get the mousse to be extra fluffy?
This is the crucial moment for achieving that light, airy mouthfeel! It absolutely comes down to two things. First, you have to let that melted unsweetened chocolate cool down until it’s just lukewarm before you add it to the pudding mixture—hot chocolate will melt the air right out of the pudding base. Second, and this is huge, you have to treat that final half of the thawed whipped topping like it’s spun glass! You must fold it gently, scooping from the bottom and folding over the top, until you see no streaks of white. Do not beat it! That gentle folding action traps the air that gives you that incredible, unbelievably silky smooth mousse dessert texture.
That’s why I always recommend looking at resources like the guide over at Practically Homemade for extra visual tips on folding techniques if you’re nervous!
If you’re whipping up this amazing pie, don’t forget to check out my recipe for homemade chocolate milk—it’s the perfect refreshing pairing!
Estimated Nutritional Information for the Decadent Chocolate Pie
Okay, let’s talk fuel! Since this is such a rich and decadent chocolate pie, I know some of you are curious about the breakdown. As always when we talk about home recipes like our easy chocolate mousse pie recipe, these numbers are just estimates, okay? I calculated them based on the specific ingredients listed above, assuming 8 equal servings. You know how it is—if you use extra-thick whipping cream or really rich dark chocolate, your counts might hop up a little bit!
But here is the general idea for one hearty slice of this magnificent creamy chocolate dessert:
- Serving Size: 1 slice
- Calories: 450
- Sugar: 35g (A little high, but oh so worth it!)
- Fat: 28g
- Saturated Fat: 15g
- Carbohydrates: 45g
- Protein: 6g
See? It’s a fantastic treat for when you really need that chocolate hit. Don’t sweat the numbers too much—just enjoy every single bite of that fluffy, no-bake goodness!
Share Your Ultimate Chocolate Pie Experience
Alright, you’ve mixed, you’ve whipped, you’ve chilled, and now you’ve tasted perfection! I really, truly hope you loved making this chocolate mousse pie as much as I loved sharing the secrets with you. This recipe is one of my favorites to whip up when I need something impressive fast, and I can’t wait to hear what you think.
Did you try the espresso powder trick in the filling? Did you go all out with the ganache topping? You simply have to tell me! Head down into the comments below. Seriously, leave a rating—even just five stars without saying a word tells me you loved it! I read every single comment, and it makes my day to see your beautiful pies.
If you’re looking for more quick, satisfying meals to pair with such a luxurious dessert, you should browse my creamy chicken alfredo recipe—it’s another weeknight winner that cooks up faster than this pie chills!
Happy baking (or, you know, *no-baking*)!
PrintUltimate Easy No-Bake Chocolate Mousse Pie with Oreo Crust

Make this rich, creamy, and fluffy chocolate mousse pie without turning on your oven. It features a simple Oreo cookie crust and a decadent filling that sets perfectly.
- Prep Time: 20 min
- Cook Time: 0 min
- Total Time: 4 hr 20 min
- Yield: 8 servings 1x
- Category: Dessert
- Method: No-Bake
- Cuisine: American
- Diet: Vegetarian
Ingredients
- 24 Oreo cookies, finely crushed
- 6 tbsp unsalted butter, melted
- 1 (8 ounce) package cream cheese, softened
- 1 cup powdered sugar
- 1 tsp vanilla extract
- 1 (12 ounce) container frozen whipped topping (like Cool Whip), thawed, divided
- 1 (3.9 ounce) package instant chocolate pudding mix
- 1 1/2 cups cold milk
- 4 ounces unsweetened chocolate, melted and cooled slightly
- Chocolate shavings or extra whipped topping for garnish
Instructions
- Prepare the crust: Combine the crushed Oreo cookies and melted butter in a bowl. Press the mixture firmly into the bottom and up the sides of a 9-inch pie plate. Place the crust in the freezer while you prepare the filling.
- Make the cream cheese layer: In a large bowl, beat the softened cream cheese, powdered sugar, and vanilla extract until smooth. Gently fold in half of the thawed whipped topping until just combined. Spread this mixture evenly over the chilled Oreo crust.
- Chill the crust layer: Return the pie to the freezer for 10 minutes to firm up while you prepare the mousse.
- Prepare the chocolate mousse: In a separate bowl, whisk together the instant chocolate pudding mix and cold milk for 2 minutes until it begins to thicken.
- Add the melted chocolate: Stir the slightly cooled melted unsweetened chocolate into the pudding mixture until fully incorporated.
- Fold in the remaining whipped topping: Gently fold the remaining half of the thawed whipped topping into the chocolate mixture until no white streaks remain, creating a light, fluffy mousse.
- Assemble the pie: Pour the chocolate mousse filling over the cream cheese layer in the pie crust. Smooth the top with a spatula.
- Chill: Cover the pie loosely with plastic wrap and refrigerate for at least 4 hours, or preferably overnight, until the mousse is completely set.
- Serve: Before serving, top the pie with additional whipped topping or chocolate shavings. Slice and serve cold.
Notes
- For an even richer crust flavor, use chocolate wafer cookies instead of Oreos.
- Use high-quality dark chocolate for the best depth of flavor in the mousse.
- If you need to speed up the chilling time, place the pie in the freezer for 1 hour, then move it to the refrigerator.
Nutrition
- Serving Size: 1 slice
- Calories: 450
- Sugar: 35g
- Sodium: 320mg
- Fat: 28g
- Saturated Fat: 15g
- Unsaturated Fat: 13g
- Trans Fat: 0.5g
- Carbohydrates: 45g
- Fiber: 2g
- Protein: 6g
- Cholesterol: 35mg