
Oh, my friends, do I have a chocolate dream for you today! If you think you know dedication, wait until you meet this dessert. We’re ditching complicated baking projects and diving headfirst into the ultimate indulgence that comes together faster than you think: the Decadent Chocolate Poke Cake with Marshmallow Fluff and Hot Fudge Topping. This recipe is pure magic—it’s the quick chocolate dessert necessity for when only the richest, fudgiest thing will do!
When Olivia Rosewood started DelishCraze, she wanted recipes that felt like coming home—reliable American comfort food that didn’t require you to spend all day in the kitchen. Trust me, this chocolate poke cake fits that bill perfectly. It takes that standard box mix and turns it into something utterly show-stopping. You’re going to love watching the fillings soak right down into those little pockets we make. It’s dessert perfection, honestly!
- Why This Decadent Chocolate Poke Cake Recipe Works For You
- Gathering Ingredients for Your Chocolate Poke Cake
- How to Make the Best Chocolate Poke Cake Step-by-Step
- Tips for the Ultimate Chocolate Poke Cake Success
- Variations on the Classic Chocolate Poke Cake
- Serving Suggestions for this Crowd Pleasing Chocolate Poke Cake
- Storage and Keeping Your Chocolate Poke Cake Fresh
- Frequently Asked Questions About Chocolate Poke Cake
- Estimated Nutritional Data for this Chocolate Poke Cake
- Share Your Decadent Chocolate Poke Cake Creations
Why This Decadent Chocolate Poke Cake Recipe Works For You
I know you want dessert that tastes like you spent all day on it, but secretly, you need something super fast, right? That’s why this recipe shines! When you’re craving something truly decadent that still gets on the table fast, this is your go-to. It delivers incredible flavor without the marathon baking session. You’ll be handing out slices before you know it!
- It’s the perfect easy chocolate poke cake recipe for busy nights or when you decide at 4 PM you need a showstopper for dinner.
- It’s guaranteed to be a hit because it’s rich, fudgy, and unbelievably satisfying—truly crowd pleasing chocolate desserts!
- You get the absolute best chocolate poke cake recipe because the soaking process guarantees moisture in every piece.
If you’re looking for more quick ideas after mastering this one, don’t forget to check out some of my other easy dessert ideas!
Quick Preparation for a Rich Fudgy Cake
Seriously, the prep time is barely 20 minutes! We’re starting with a boxed Devil’s Food cake mix, which is totally my secret weapon for a quick chocolate dessert when I need a win. Total time is under three hours, but about 90% of that is just chilling time. You aren’t watching this cake closely; it bakes, you poke, you chill. Easy peasy!
The Ultimate Moist Chocolate Poke Cake Texture
This is where the magic happens and why people always ask for the method. We aren’t just throwing frosting on top; we are driving moisture deep inside. That layer of sweetened condensed milk completely bathes the cake in rich, gooey goodness. It transforms that standard bake into the truly moist chocolate poke cake everyone dreams about!
Gathering Ingredients for Your Chocolate Poke Cake
Okay, listen up! The best part about this whole *decadent chocolate poke cake* situation is that you don’t need any fancy equipment or obscure ingredients. This is pure American comfort food, meaning everything should be easy to find at your regular grocery store. We rely on quality standards here, like using that standard Devil’s Food mix, but we know exactly how to elevate it. If you can run to the store once, you can make this amazing dessert!
Cake Base and Soaking Agents
This is the backbone of the whole thing, so pay attention to those quantities. We need moisture, and we get it right here!
- 1 box (15.25 ounces) devil’s food cake mix
- Water, eggs, and oil (Use exactly what the box tells you to use—don’t guess here!)
- 1 can (14 ounces) sweetened condensed milk (See? This is essential for that soak!)
Marshmallow Fluff and Hot Fudge Topping
This is where the goo factor ramps up! Make sure your hot fudge topping is a thick, good quality one because we want that rich chocolate vibe when we drizzle it on later.
- 1 cup marshmallow fluff (Yes, the whole jar contents if you’re feeling extra festive!)
- 1 cup hot fudge topping (Remember, we warm this right before serving!)
Whipped Topping Ingredients
We are making real whipped cream here, not cheating with store-bought aerosol stuff. It takes two minutes, and the texture difference is unbelievable. This topping needs to stand proud!
- 1 cup heavy cream (Make sure it’s cold, cold, cold!)
- 1/4 cup powdered sugar
- 1 teaspoon vanilla extract
- Optional: Mini marshmallows or chocolate shavings for garnish
How to Make the Best Chocolate Poke Cake Step-by-Step
Ready to finally learn exactly how to make chocolate poke cake that tastes like it came from a high-end bakery? Don’t worry, this is where we get down to business. While the list of ingredients might look layered, the actual process is super straightforward. Just take it one step at a time, and you’ll have the most decadent dessert on the block!
Baking and Prepping the Cake Base
First things first, we need that base cooked perfectly. Preheat your oven right to 350°F (175°C). Get that 9×13 inch pan greased up and floured—I like a good coating so I don’t have to stress later! Mix your devil’s food cake according to the box, but here’s a little cheat I learned: if you substitute half the required water with strong, cooled, brewed coffee? Wow. It deepens that chocolate flavor so much. Bake it until your toothpick comes out clean, signaling it’s done. If you are diving into advanced baking, I have tons of great tips for other baking techniques!
The Essential Poke and Pour Technique for this Chocolate Poke Cake
This is the moment of truth! Let the cake cool for about 15 minutes—it needs to be warm, but not scalding hot. Grab the handle end of a wooden spoon or a large fork, and start poking! You want holes all over the top, spaced about an inch apart. Make sure you poke them deep, but don’t push all the way through the bottom, okay? We want the goodness *in* the cake, not running onto the bottom of the pan. Once you’ve poked generously, slowly pour that can of sweetened condensed milk evenly over the whole surface. Watch it disappear—that’s the magic beginning!
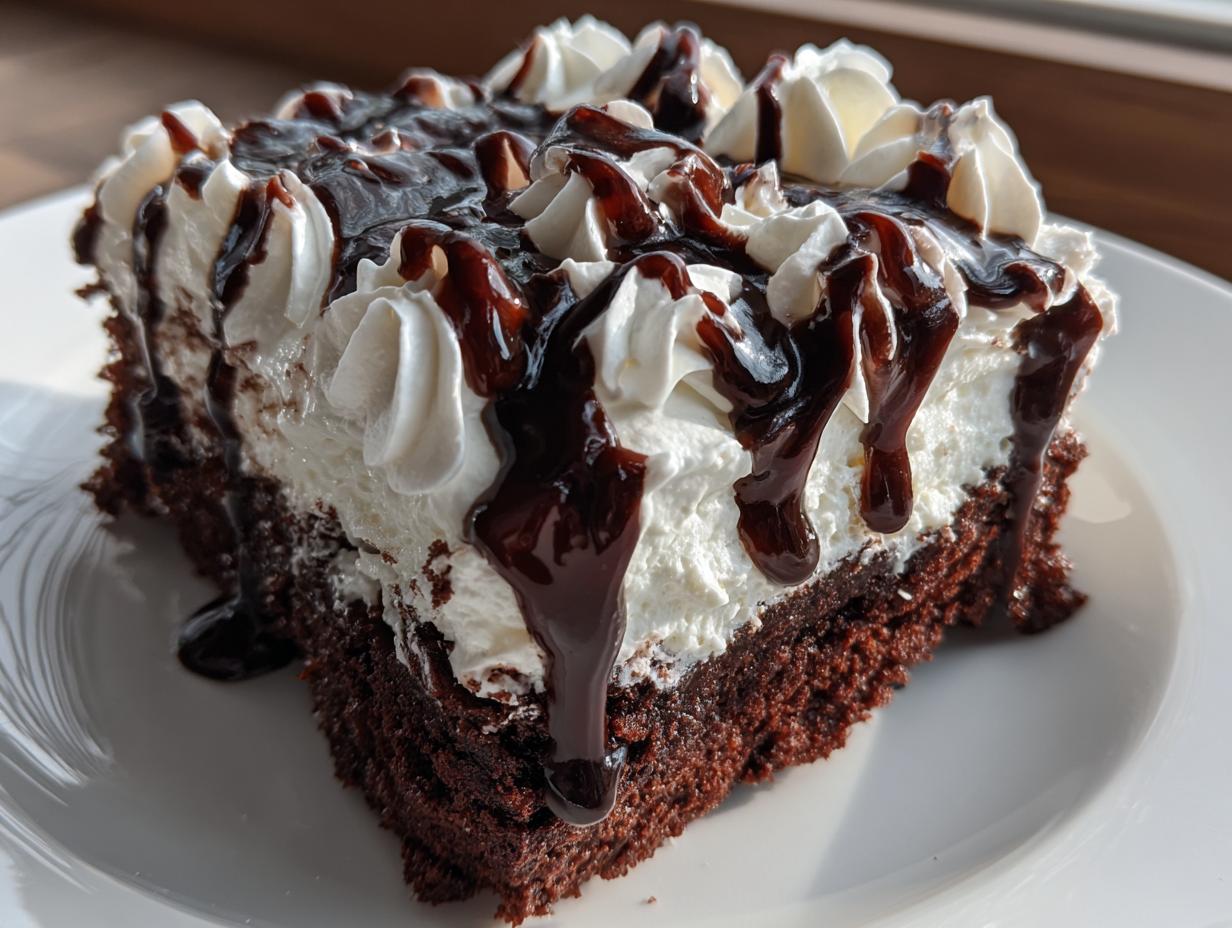
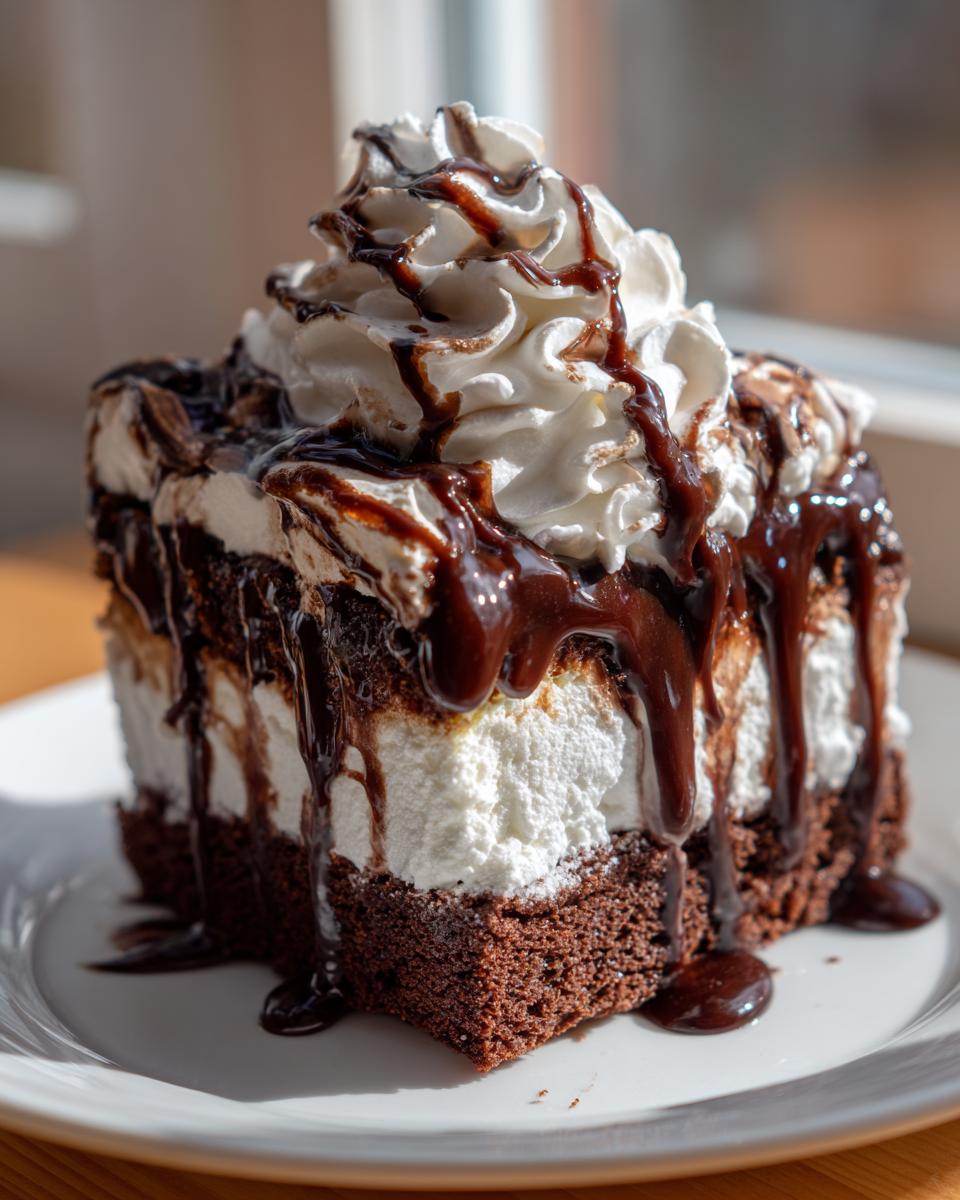
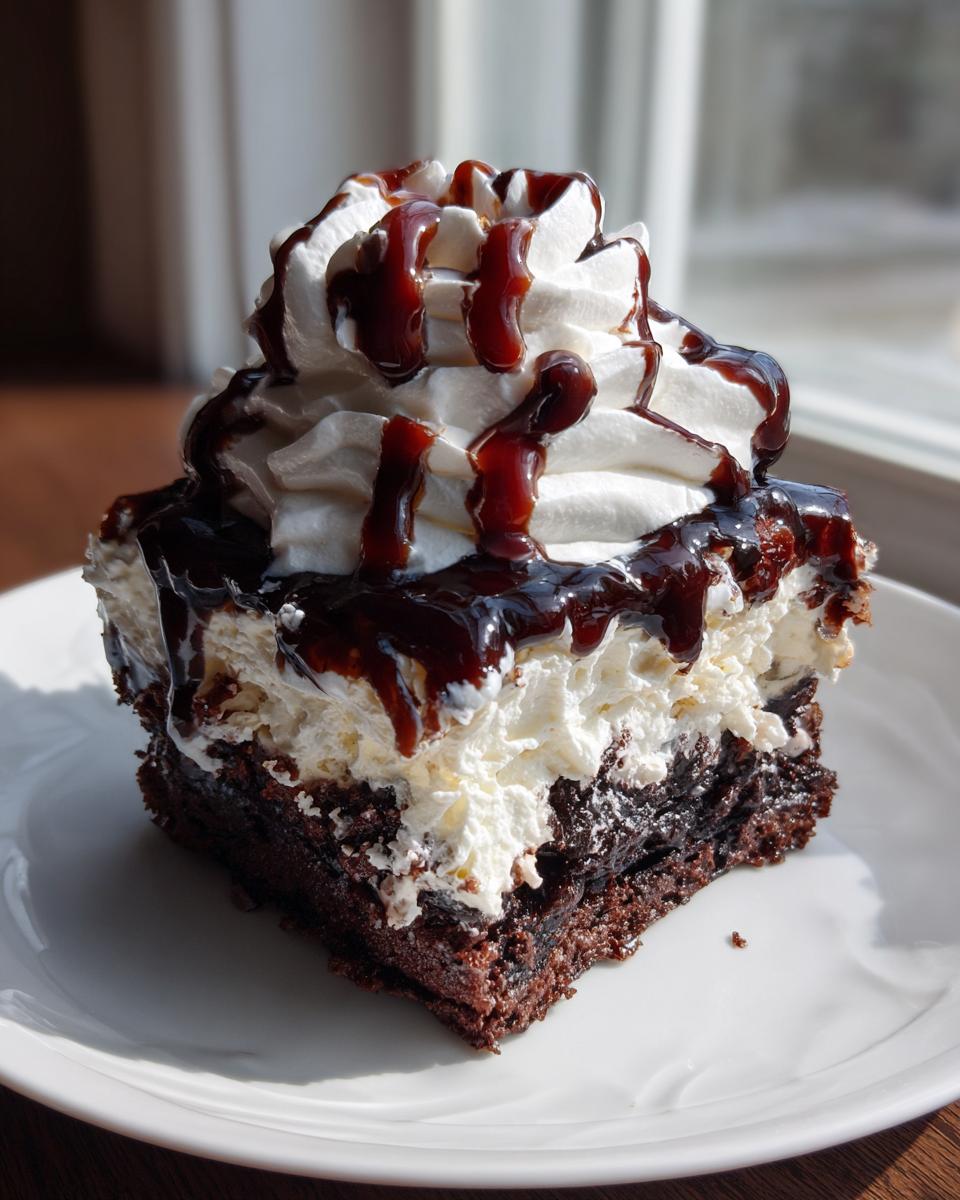
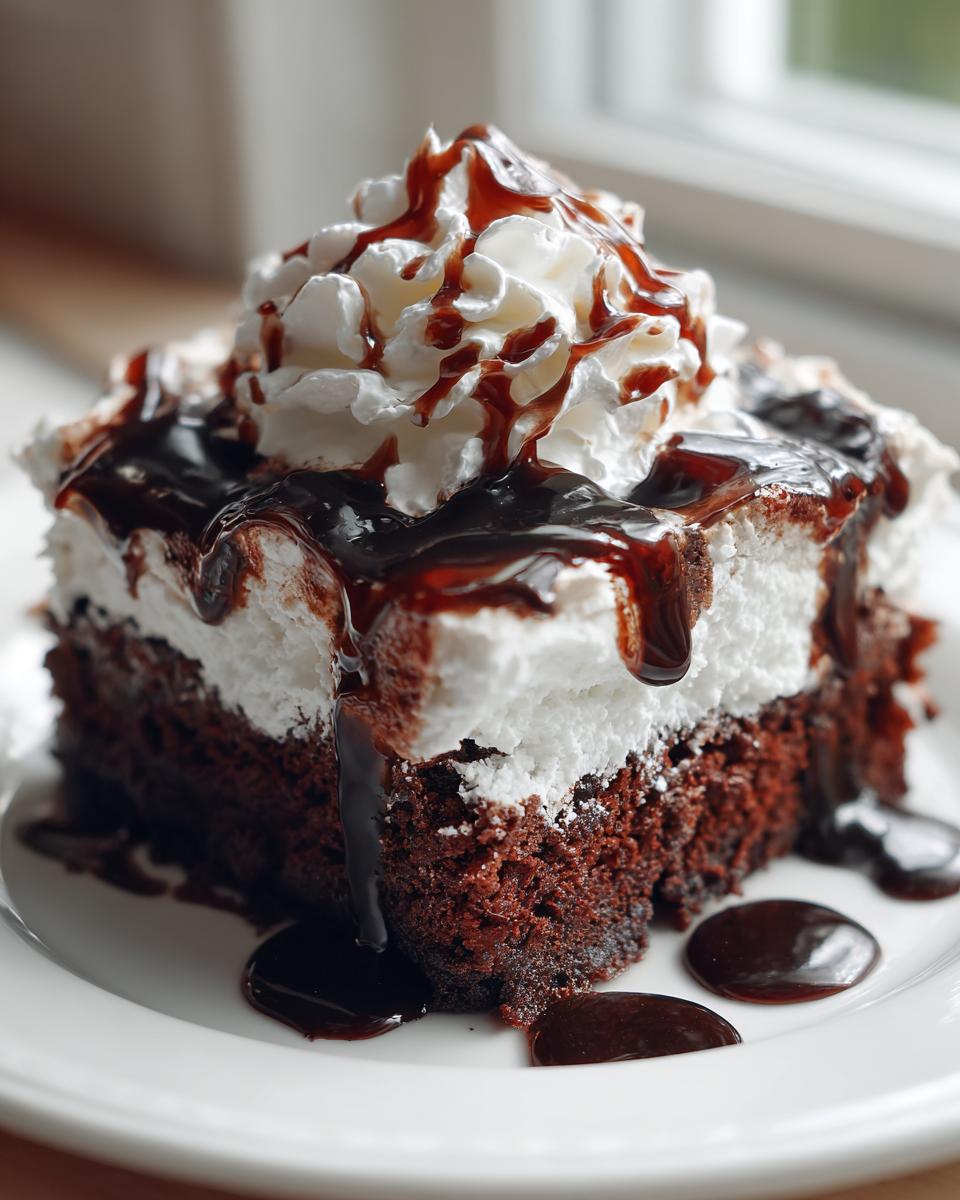
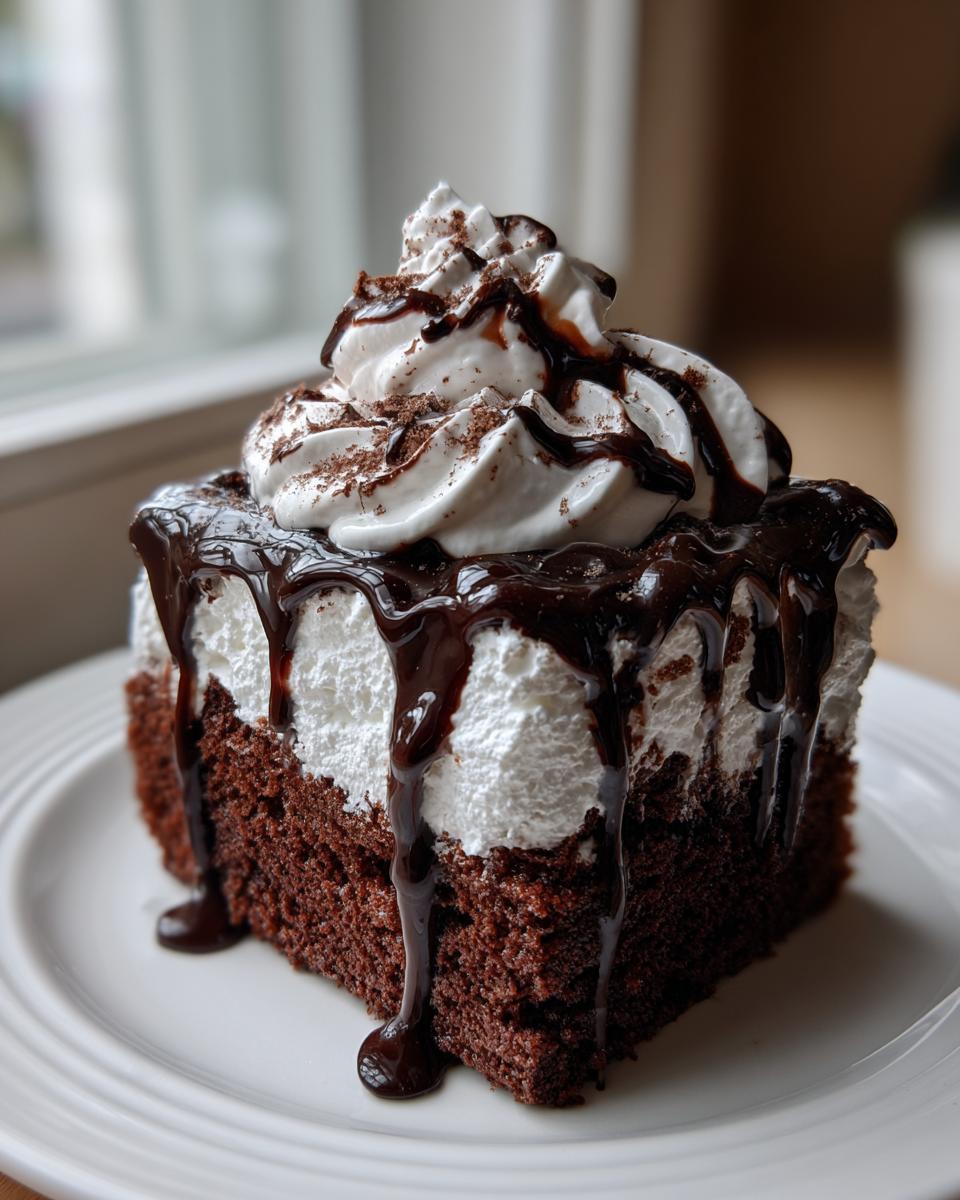
Layering the Marshmallow and Whipped Topping
Next up is the fluff! Gently spread that cup of marshmallow fluff right over the top of the soaked cake. It might fight you a little, but use an offset spatula to make it even. Now, for the topping: In a separate, very cold bowl, whip your heavy cream, powdered sugar, and vanilla until you hit those stiff peaks. You know they’re ready when you lift the whisk straight up, and the cream holds its shape. Spread this lovely whipped topping over the marshmallow layer.
For the ultimate touch, check out this pin for visual reference, because seeing it helps! Then, gently warm up that hot fudge topping so it drizzles beautifully. Drizzle generously over the whipped cream—maybe garnish with a few mini marshmallows!
Finishing and Chilling the Decadent Chocolate Poke Cake
Almost there! If you’re adding any chocolate shavings or extra marshmallows, do that now! But here is the hardest part, honey: you *must* let this chill. Pop it into the fridge for at least two hours. This gives the condensed milk time to fully settle and set up the whole structure. Resist the urge to cut it early; you need that chill time for the decadent chocolate poke cake to become perfectly sliceable!
Tips for the Ultimate Chocolate Poke Cake Success
We’ve got the recipe down, but let me give you two little whispers that take this from good to truly the ultimate chocolate poke cake. Avoiding small mistakes at the beginning means you skip any risk of a sad, dry corner or a soupy topping later on. A little foresight goes a long way in making sure this cake is perfect every time you bake it.
Achieving Maximum Soak in Your Chocolate Poke Cake
Do not wait until the cake is cold to poke those holes! That condensed milk needs warmth to travel down those tunnels efficiently. You want it warm enough that the holes close nicely around the liquid, but definitely not so hot that you burn yourself. About 15 minutes out of the oven is my sweet spot.
Whipped Cream Stability
If you want that gorgeous, fluffy topping to hold its shape, this is non-negotiable: your heavy cream must be ice-cold. I swear by chilling my mixing bowl and my whisk attachment in the freezer for a good ten minutes before I even start whipping. That simple chill makes sure you get those beautiful stiff peaks fast. If you’re needing another stabilized topping idea, maybe check out my Christmas Toffee Crunch Cake for inspiration!
Variations on the Classic Chocolate Poke Cake
Okay, you nailed the recipe once, and now you want to try something slightly different next time? I get it! While this version with the marshmallow fluff is honestly my favorite chocolate poke cake, it’s way too fun not to mess around with the fillings a bit. Since we built a solid, moist base, we can totally swap out what we pour into those holes for a whole new experience. It’s all about how much chocolate madness you can handle!
Substituting the Filling in Your Chocolate Poke Cake
If you’re looking for something a little less sticky-sweet than milk and fluff, you can absolutely go the pudding route. This hits that spot for those who want a pure, classic chocolate flavor soaking in. For this variation, skip the sweetened condensed milk *and* the marshmallow fluff.
Instead, once the cake is cooled slightly, use a large box of instant chocolate pudding. Mix that pudding according to the package directions—sometimes they call for cold milk—and then pour that prepared pudding right over the warm cake base. It’s important that the cake is still warm so the pudding sinks in nicely. That gives you a fantastic chocolate poke cake with pudding filling that is super rich but a bit silkier when sliced.
Making a Turtle Chocolate Poke Cake Addition
If you love caramel and pecans, we need to make a quick detour toward the infamous *Turtle Chocolate Poke Cake* flavor profile. This is so easy to layer into our existing formula. After you pour in the sweetened condensed milk and it soaks for about five minutes, drizzle a nice amount of caramel sauce (store-bought is fine!) over the top. Then, sprinkle your chopped pecans everywhere.
You can go ahead and layer the marshmallow fluff and whipped cream on top of that, just like the main recipe description says. The caramel and nuts mingle wonderfully with the condensed milk soak below. If you want to see how someone else created something similar, check out this German Chocolate adaptation for inspiration on alternative toppings!
For a different kind of drizzle, if you’ve made my fudge sauce recipe before, it works brilliantly here instead of the standard hot fudge!
Serving Suggestions for this Crowd Pleasing Chocolate Poke Cake
When you bring this beauty out, folks are going to lose their minds! Since this is such an easy recipe to scale up, it’s my absolute favorite for crowd pleasing chocolate desserts at any gathering. The best way to serve it is straight from the 9×13 pan while it’s still chilled—that keeps the whipped topping firm and the fudge drizzle looking perfect.
If you want to make it look extra special, use a warm, sharp knife to cut clean squares. For holiday parties, I sometimes put a single candied cherry right on top of each slice! If you need other ideas for easy entertaining, take a peek at my guide for putting together a great snack platter too!
Storage and Keeping Your Chocolate Poke Cake Fresh
Now, let’s talk about leftovers, because if you do this right, you might actually have some! Because we used real heavy cream for that light, airy topping, this chocolate poke cake isn’t something we leave sitting out on the counter. Heat will make that whipped cream weep faster than I do when I run out of chocolate chips.
You need to treat this like what it is—a magnificent, layered dream that needs to stay cool. It’s always best served cold anyway, remember? That chill time is crucial for the filling to firm up and not just slide off when someone goes for a slice.
Refrigeration Requirements for Chocolate Poke Cake
The rule here is simple: into the fridge she goes! Cover your pan tightly with plastic wrap—I usually use plastic wrap directly on the surface of the whipped topping, and *then* I add a lid or foil over that to prevent any freezer burn smell from getting in. Because of the cream, this is best eaten within three or maybe four days max. The cake itself stays incredibly moist thanks to that wonderful soak, so don’t worry about the cake drying out that quickly.
Honestly, I’ve found that the second day is the absolute peak for this dessert. The flavors have really settled in, and the marshmallow fluff has integrated perfectly with the condensed milk. It’s divine. When you pull it out, just let it sit on the counter for about 15 minutes before slicing, just so the cold doesn’t dull the chocolate flavor too much!
Frequently Asked Questions About Chocolate Poke Cake
When you are making something as universally loved as dessert, people always have questions! I totally get it. It’s better to ask before you bake, right? We have covered the big stuff, but here are a few speedy answers about making sure your chocolate poke cake turns out incredible, especially if you’re trying something slightly different than the recipe above. I promise these little details make a huge difference!
Can I use a different cake mix for this chocolate poke cake recipe?
You absolutely can! We love Devil’s food because it gives that deep, rich chocolate baseline, but if that’s what you have, feel free to grab a standard chocolate cake mix instead. If you use a basic chocolate mix, your cake will be slightly sweeter and less intense than the fudgy result we get with Devil’s Food. Yellow cake works in a pinch, but honestly, you’ll lose a lot of the deep chocolate flavor that makes this dessert so decadent. Stick to chocolate if you can!
What is the best way to poke holes in the cake?
The goal is depth without destroying the structure! I use the handle end of a wooden spoon—the smooth, rounded tip works perfectly to make substantial holes that go down deep into the cake base to grab all that delicious condensed milk. You can also use a thin wooden dowel if you have one handy. Just make sure your holes are spaced nicely about an inch apart. Don’t just stab gently on the surface; you need to reach the center of the cake!
Can I make this chocolate poke cake ahead of time?
Yes, and I highly recommend it! This is one of those great crowd pleasing chocolate desserts that actually tastes better the next day. You can bake the cake, poke it, pour the condensed milk, spread the marshmallow fluff, and put on the whipped topping all the way through, cover it tightly, and chill it overnight. However, here is my one firm rule: wait until about 30 minutes before you plan to serve it before you drizzle on that warm hot fudge topping. If you put the fudge on too soon, it chills and gets too hard to eat cleanly!
If you’re interested in other simple baking hacks that save time, you might find my guide on easy assembly methods helpful for other uses!
Estimated Nutritional Data for this Chocolate Poke Cake
Now, I have to put a big, bold disclaimer here right at the start: the nutritional panel you see below is an *estimate*. This isn’t a lab-tested analysis, folks! It’s based on the assumption we’re cutting this 9×13 cake into 12 decent-sized squares, following the ingredient amounts exactly, and it uses standard averages for cake mix and toppings.
Because this is such a rich, decadent chocolate poke cake, packed with milk, fluff, and whipped cream, the numbers are what you’d expect for a special occasion treat. You definitely want to enjoy this when the craving hits, but keep in mind it’s a celebration dish!
- Serving Size: 1 slice (of 12)
- Calories: Roughly 450 per slice
- Fat: Around 24g (Yeah, there’s that rich butter/oil/cream working hard!)
- Carbohydrates: About 58g
- Protein: Approximately 5g
If you cut the cake into smaller pieces, say 16 servings instead of 12, you obviously lower those numbers! But if you’re serving this at a party, trust me, no one is counting calories when they are digging into the fudge and marshmallow layer. You deserve this rich fudgy chocolate cake!
Share Your Decadent Chocolate Poke Cake Creations
Now that you have all the secrets to making an unbelievably moist and decadent chocolate poke cake, I really, really want to see what you bake up! We talked about how DelishCraze is all about using food to connect, right? Making this recipe is just the first step—the real joy is sharing it with the people you love.
When you finish wrestling with that marshmallow fluff and get that perfect drizzle of hot fudge on top, please come back here and leave a star rating. Tell me honestly: Did it impress your crowd? Did you manage to save any for the next day? I read every single comment you leave!
If you managed to snap a picture of your masterpiece, you can send it over to us through the contact page. I love seeing how everyone’s dessert turns out—maybe you tried one of the turtle variations or went for the pudding filling! Let’s keep this tradition of simple, delicious American comfort food alive together. Happy baking, sweet friend!
PrintDecadent Chocolate Poke Cake with Marshmallow Fluff and Hot Fudge Topping

Make this easy chocolate poke cake for a rich, fudgy dessert. This recipe features a moist devil’s food cake base filled with gooey marshmallow fluff and topped with a warm hot fudge sauce, making it a crowd-pleasing treat.
- Prep Time: 20 min
- Cook Time: 35 min
- Total Time: 2 hours 55 min
- Yield: 12 servings 1x
- Category: Dessert
- Method: Baking
- Cuisine: American
- Diet: Vegetarian
Ingredients
- 1 box (15.25 ounces) devil’s food cake mix
- Water, eggs, and oil (as required by cake mix instructions)
- 1 can (14 ounces) sweetened condensed milk
- 1 cup marshmallow fluff
- 1 cup hot fudge topping (warmed)
- 1 cup heavy cream
- 1/4 cup powdered sugar
- 1 teaspoon vanilla extract
- Optional: Mini marshmallows or chocolate shavings for garnish
Instructions
- Prepare the cake: Preheat your oven to 350°F (175°C). Grease and flour a 9×13 inch baking pan.
- Mix and bake the cake according to the cake mix package directions. Bake until a toothpick inserted into the center comes out clean.
- Cool the cake slightly, about 15 minutes, while still in the pan.
- Poke holes: Use the handle of a wooden spoon or a large fork to poke holes all over the top of the warm cake, spacing them about 1 inch apart. Poke deep, but do not go all the way through the bottom.
- Pour the filling: Slowly pour the can of sweetened condensed milk evenly over the entire cake, allowing it to seep into the holes.
- Spread the marshmallow fluff over the cake surface.
- Prepare the topping: In a medium bowl, beat the heavy cream, powdered sugar, and vanilla extract until stiff peaks form. This is your whipped topping.
- Spread the whipped topping over the marshmallow layer.
- Warm the hot fudge topping slightly so it is pourable. Drizzle the warm hot fudge over the whipped topping.
- Garnish with mini marshmallows or chocolate shavings, if desired.
- Chill the cake for at least 2 hours before serving to allow the filling to set.
Notes
- For extra moisture, you can substitute half the water required by the cake mix with strong brewed coffee.
- If you prefer a pudding filling, substitute the sweetened condensed milk with 1 large box of prepared chocolate pudding after the cake has cooled slightly.
- Keep leftovers refrigerated due to the whipped cream topping.
Nutrition
- Serving Size: 1 slice
- Calories: 450
- Sugar: 45g
- Sodium: 350mg
- Fat: 24g
- Saturated Fat: 14g
- Unsaturated Fat: 10g
- Trans Fat: 0.5g
- Carbohydrates: 58g
- Fiber: 2g
- Protein: 5g
- Cholesterol: 45mg