
When life gets crazy—and when is it not crazy these days?—I always gravitate back to recipes that feel like a warm hug from my kitchen past. Forget fussy techniques and long bake times; we need treats that deliver maximum payoff with minimum stress! That’s exactly why I’m so excited to share my absolute favorite, ridiculously simple cool whip candy recipe with you today. This isn’t just any sweet; it’s my homemade version of a classic, fluffy chocolate bar, often called the No-Bake 3-Ingredient Chocolate Coated Cool Whip ‘3 Musketeers’ Copycat Candy. At DelishCraze, we believe in recipes that weave seamlessly into your life, meaning reliable, delicious American comfort food that actually fits your busy schedule. If you need more quick ideas that fit into that busy life, check out my thoughts on quick, easy weeknight dinners! Trust me, this candy one is a total showstopper.
- Why This Cool Whip Candy Recipe is Your New Favorite Easy Dessert Idea
- Gathering Ingredients for Your Cool Whip Candy
- Step-by-Step Instructions for No Bake Candy Recipes
- Tips for Perfecting Your Homemade Copycat Cool Whip Candy
- Storage and Make-Ahead Tips for Your Cool Whip Candy
- Frequently Asked Questions About Cool Whip Candy
- Estimated Nutritional Data for Cool Whip Candy
- Share Your Cool Whip Candy Success
Why This Cool Whip Candy Recipe is Your New Favorite Easy Dessert Idea
Honestly, this is the recipe I turn to when I need to look like I spent hours in the kitchen, but really, I spent maybe fifteen minutes. That’s the beauty of these easy dessert ideas! When I started out balancing my design career and my growing family, I learned fast that I needed food that spoke of love without stealing my entire evening. This cool whip candy is flavor perfection delivered fast.
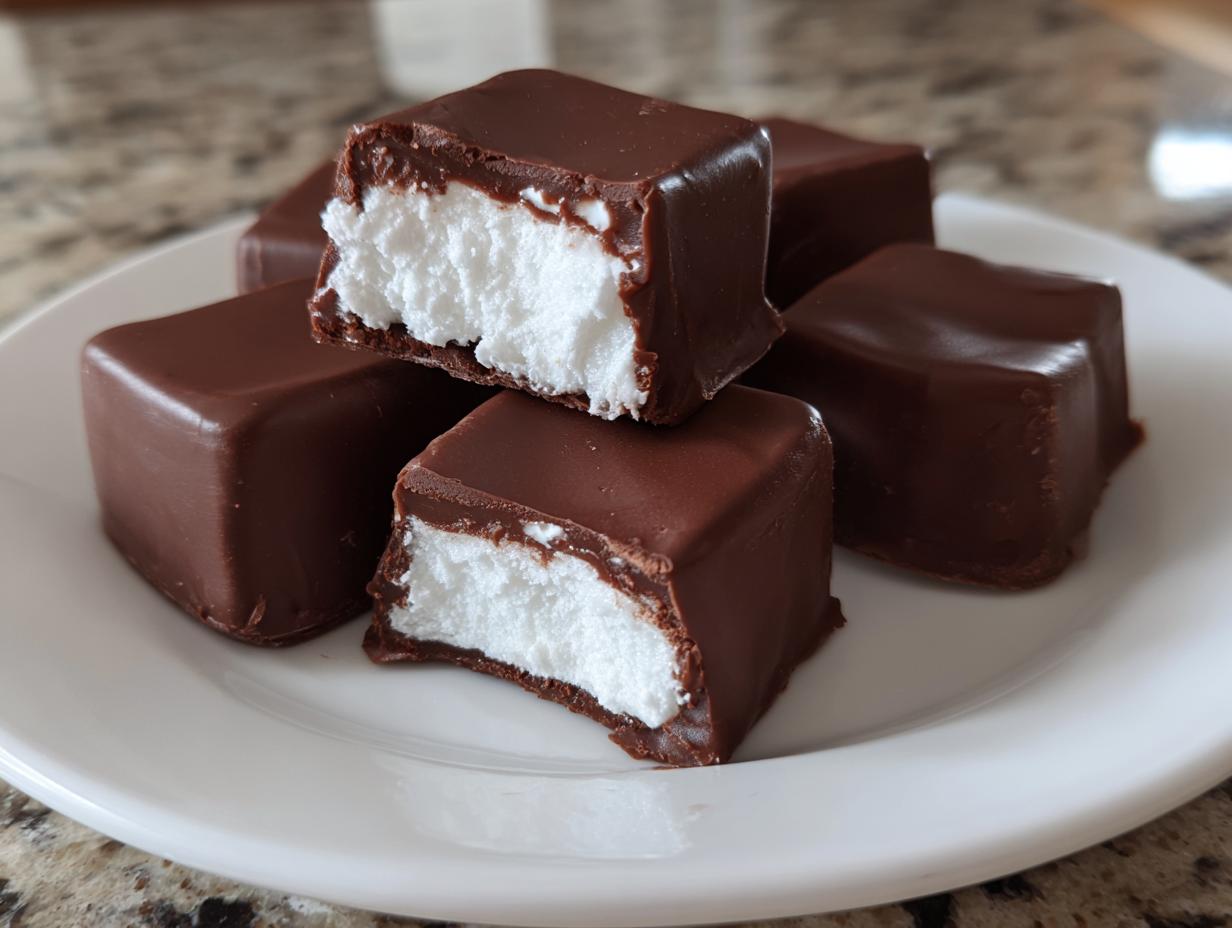
It holds that amazing, recognizable texture we all crave—the kind of fluffy chocolate treats that just dissolve when they hit your tongue. It’s just heavenly!
Minimal Ingredient Sweets for Quick Assembly
It doesn’t get much better than this when it comes to minimal ingredient sweets. You’re really only juggling three core components for the filling, plus whatever amazing chocolate you choose for the coating. Think about that for your next gathering; these are the ultimate quick party sweets because they freeze up overnight!
The Perfect Light and Airy Desserts Texture
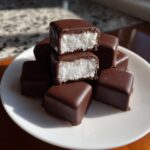
The texture is everything here. It’s not heavy like fudge, and it’s absolutely not dense like a brownie. The secret combination of the fluff and the whipped topping creates these impossibly light and airy desserts once they’re set. Cutting into it feels magical—you get that satisfying crunch of chocolate followed by the interior that truly melts in your mouth, perfectly mimicking those famous candy bars we all grew up loving.
If you like simple, no-fuss desserts that still manage to wow everyone, you absolutely have to try this no-bake Butterfinger pie next time you need an amazing finish to a meal!
Gathering Ingredients for Your Cool Whip Candy
Okay, let’s talk stuff. Since this is basically a 3-ingredient dessert foundation, we need to make sure we have the right bits so the magic happens! Remember, the whipped topping absolutely has to be thawed, otherwise, you’ll fight it the whole time. I always lay everything out before I start mixing, which is what I call my Mise en Place—it just prevents those ‘Oops, I forgot the fluff!’ moments.
Here’s what you’ll need for this lovely base destined to become cool whip candy:
- 1 cup marshmallow fluff (don’t skimp on the good stuff!)
- 1 cup thawed whipped topping (that’s your Cool Whip, friend)
- 1 cup crushed chocolate sandwich cookies (you’ll want to pull the filling out first, trust me!)
And then, of course, the chocolate shower:
- 12 ounces semi-sweet chocolate chips
- 1 tablespoon shortening or coconut oil (this is totally key for the coating!)
Ingredient Notes and Simple Substitutions
I’ve got a few notes scattered through my recipe card about substitutions. If you’re wanting to switch things up for the holidays, try swapping out those crushed cookies for about a cup of finely chopped nuts—pecans work great! Or, if you’re leaning into Christmas vibes, crushed peppermint candies are absolutely divine in here. That little hint of mint with the rich chocolate coating? Perfection!
Also, that tiny bit of shortening or coconut oil in the melted chocolate is so important! It helps keep the chocolate smoothly tempered so it doesn’t seize up when you dip the frozen squares. It keeps that coating shiny and makes these the best melt in your mouth candy pieces!
When you need reliable, make-ahead options that still feel homemade and special, these short ingredient lists are lifesavers. For more great make-ahead ideas, you can look at my guide on easy make-ahead egg muffin recipe for great breakfasts!
Step-by-Step Instructions for No Bake Candy Recipes
Alright, time to get our hands dirty—or maybe not so dirty, since this is a no-bake dream! Following these no bake candy recipes is easy, but you have to respect the timing, especially the freezing part. If you rush the freeze, things get gooey, and we want that lovely, firm texture for dipping, remember? Pay close attention to mixing gently; that’s how we keep the fluffiness in our cool whip candy.
Preparing the Fluffy Cool Whip Candy Base
First things first, get your 8×8 pan lined with parchment paper, making sure you leave a good overhang on the sides. That overhang is your handle later, so don’t skip it! In a big bowl, gently fold together the marshmallow fluff, the thawed whipped topping, and those crushed cookies. I mean seriously gentle mixing, just until you don’t see streaks of white anymore. Over-mixing will deflate your air bubbles, and we want these treats light!
Press that mixture evenly into your prepared pan. Now, this is critical: get that tray into the freezer for a solid two hours, minimum. If you just put it in the fridge, it won’t be firm enough to cut cleanly. Once it’s solid, use those parchment handles to lift the whole candy slab out and slice it into those perfect bite-sized squares.
Mastering the Chocolate Dipped Treats Coating
Now for the decadent part! Put your chocolate chips and that one teaspoon of shortening (or coconut oil, my favorite!) into a safe microwave bowl. You can’t just blast this; you have to treat it kindly. Microwave in 30-second bursts, stirring well after every single one, until it’s beautifully smooth. If you melt it too fast, the chocolate gets mad and seizes up on you—nobody wants rock-hard candy!
Dip each frozen candy square—and I mean frozen, they hold up way better that way—right into that glossy chocolate, letting the extra drip back into the bowl. Set them on a fresh, parchment-lined sheet. Just a quick 15 minutes back in the fridge, and that gorgeous chocolate coating will set beautifully. These become such incredible chocolate dipped treats!

If you’re looking for more chocolatey bliss without turning on the oven, you absolutely need to bookmark my recipe for the classic chocolate peanut butter no-bake cookies. They are an old-school favorite for a reason!
Tips for Perfecting Your Homemade Copycat Cool Whip Candy
Making these is foolproof, but if you want that *professional* candy shop look, I have a couple of little secrets for you! Getting that perfect, clean line when you cut the base is half the battle, right? Because we freeze it firm, you just need a really sharp, heavy knife. Wipe the knife clean between cuts—this stops crumbs from getting stuck in the cuts, giving you those neat edges.
When you’re dipping, a fork works pretty well, but I find a mini offset spatula is a life-saver for making sure you get an even coat of chocolate over the whole cube. Let the extra drip off for a good five seconds before setting it down! This slight drizzle process ensures you get that perfect, thin shell that makes these truly the ultimate melt in your mouth candy.
And hey, if your chocolate seems too thick even with the shortening, just microwave it for another 10 seconds! For more easy finishing touches that make everything taste better, you should look at how I make my easy caramel sauce—it makes everything feel fancy!
Storage and Make-Ahead Tips for Your Cool Whip Candy
This is where the cool whip candy shines as a recipe for planners like me! Seriously, these are amazing because you can whip up a huge batch weeks ahead of any party or holiday event. Since they rely on freezing, they are the definition of set-it-and-forget-it goodness. That makes them perfect additions to your lineup of holiday candy recipes easy to manage!
Once they are fully coated and the chocolate is set, just layer them carefully in an airtight container. I like to put a little bit of parchment paper between the layers, just in case any of that chocolate feels sticky, though they usually don’t!
You can keep these delicious things in the refrigerator for up to a full week. Honestly, they taste just as good on Day Seven as they did right after you dipped them! They are the best make-ahead treat because they never get stale or dry out. For other great make-ahead snacks that impress, you might love my recipe for easy cranberry brie bites!
Frequently Asked Questions About Cool Whip Candy
I know you’re going to have questions because this recipe seems almost too easy to be true! When dealing with freezer candy recipes like this, timing and ingredients matter just a little bit. I’ve gathered the most common things people ask me when they first try making this cool whip candy!
Can I skip the freezing step entirely?
Oh, please don’t try to skip the freeze! If you try to dip the soft, room-temperature mixture, it will just flop apart into the melted chocolate. The freezing step is what solidifies the marshmallow and whipped topping base so it becomes firm enough to cut and dip cleanly. You really need that minimum of two hours for these simple whipped topping recipes to take structure!
Does it matter what brand of whipped topping I use?
Not really, but I swear by the original whipped topping (the brand name!). It seems to hold its structure just a smidge better than some of the lower-fat versions when it comes to freezing and thawing for dipping. If you use a homemade stabilized whipped cream, make sure it’s extra stiff!
Can I use dark chocolate instead of semi-sweet?
Absolutely! This is where you make these totally yours. Semi-sweet is traditionally used to balance the sweetness of the marshmallow fluff, but if you like a richer bite, dark chocolate is fantastic. Just remember that dark chocolate sometimes sets up a tiny bit harder, so make sure you add that teaspoon of shortening to keep it glossy and flowing nicely when you dip!
How do I get the coating perfectly smooth?
Smoothness is all about gentle heating for the chocolate. I really stress using those short 30-second bursts in the microwave and stirring thoroughly between each one. If the chocolate looks too thick for dipping, add just a *tiny* drop more shortening, stir it in well, and microwave for 10 more seconds. You want it liquid but not watery. It’s worth the extra minute of gentle stirring!
When you’re experimenting with different treats, you might find my guide on making easy cheesy rice balls helpful for mastering timing in savory dishes, too!
Estimated Nutritional Data for Cool Whip Candy
We all love indulging in treats like this amazing cool whip candy, but I know some of you want the details! Here’s a quick look at what’s generally inside one of these melt-in-your-mouth squares, based on the ingredient amounts listed.
- Calories: 150
- Sugar: 18g
- Fat: 8g
- Protein: 2g
Now, please remember that these numbers are just my best estimates using standard brands for the ingredients listed. Depending on whether you use extra-dark chocolate or a different brand of whipped topping, those values bounce around a little bit! But hey, for a homemade candy that tastes this divine, I think these numbers are pretty fantastic!
Share Your Cool Whip Candy Success
Well, that’s it! You’ve done the work, and now you have a whole batch of the most ridiculously easy, fluffy, and delicious cool whip candy sitting pretty in your fridge, waiting to be devoured. I truly hope you love it as much as my family does!
Now comes the fun part for me! I absolutely live to hear how your batches turned out. Did you go with the crushed Oreos, or did you try the peppermint substitution? Please, please, please take a moment and leave a comment below letting me know what you thought. A quick 5-star rating really helps other folks find this simple recipe, too.
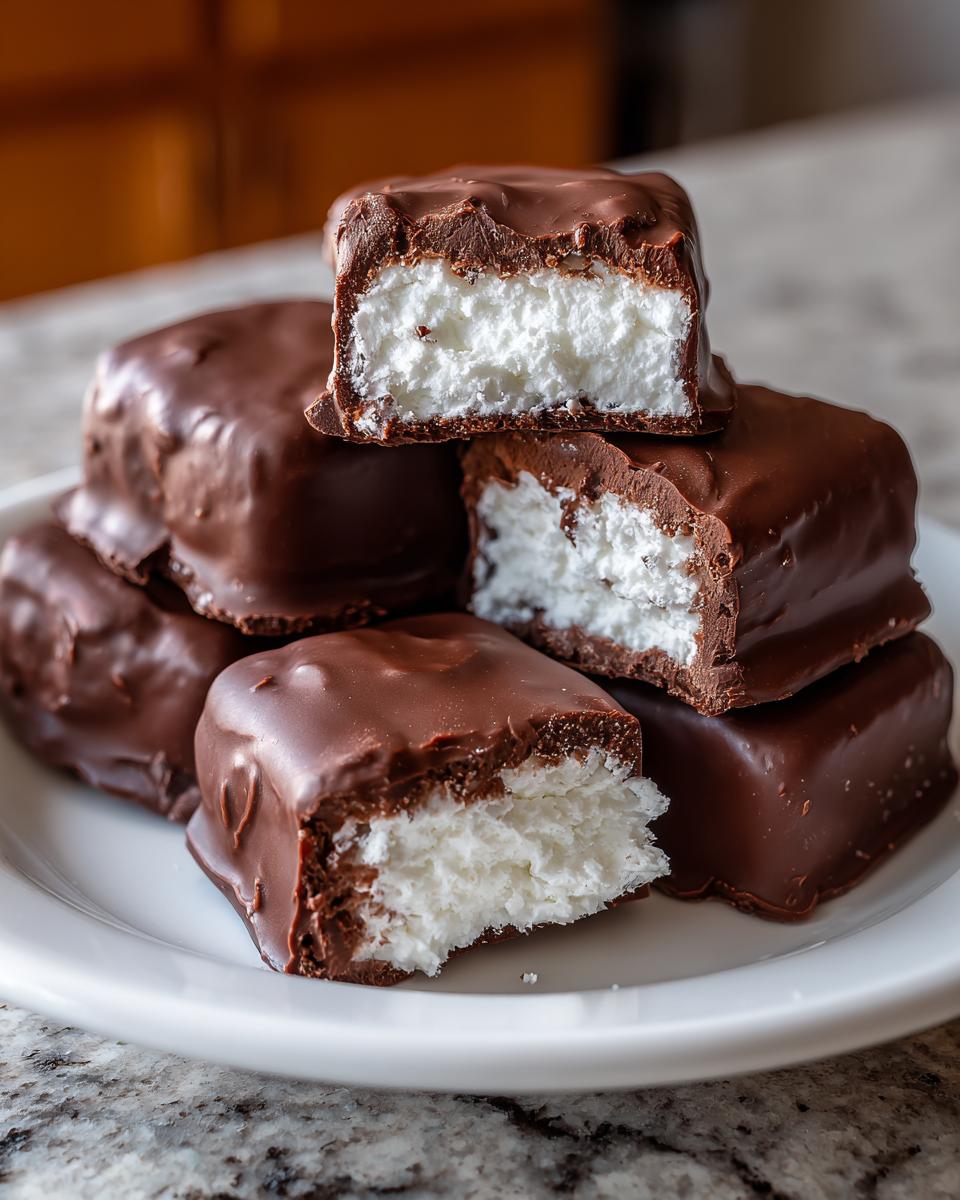
And if you snap a picture of your gorgeous chocolate-dipped squares—maybe all piled up on a holiday platter—don’t forget to tag me on social media! I love seeing how my recipes fit into your kitchen celebrations. If you ever need to reach out directly with a question or just want to chat recipes further, you can always find my contact page right here on the site. Happy snacking!
PrintEasy Cool Whip Candy Copycat
Make this simple, no-bake Cool Whip Candy that tastes like a classic fluffy chocolate bar. This recipe uses minimal ingredients for a quick, melt-in-your-mouth treat perfect for parties or snacking.
- Prep Time: 15 min
- Cook Time: 5 min
- Total Time: 2 hours 20 min
- Yield: About 36 pieces 1x
- Category: Dessert
- Method: No-Bake/Freezing
- Cuisine: American
- Diet: Vegetarian
Ingredients
- 1 cup marshmallow fluff
- 1 cup thawed whipped topping (Cool Whip)
- 1 cup crushed chocolate sandwich cookies (like Oreos, filling removed)
- 12 ounces semi-sweet chocolate chips
- 1 tablespoon shortening or coconut oil
Instructions
- Line an 8×8 inch baking pan with parchment paper, leaving an overhang for easy removal.
- In a large bowl, combine the marshmallow fluff, thawed whipped topping, and crushed cookies. Mix gently until just combined. Do not overmix.
- Press the mixture evenly into the prepared pan.
- Place the pan in the freezer for at least 2 hours, or until firm.
- Once firm, lift the candy out of the pan using the parchment overhang and cut into small, bite-sized squares.
- In a microwave-safe bowl, combine the chocolate chips and shortening (or coconut oil). Microwave in 30-second intervals, stirring well after each, until the chocolate is smooth and fully melted.
- Dip each frozen candy square into the melted chocolate, letting excess drip off. Place the coated candy back onto a parchment-lined baking sheet.
- Refrigerate the finished candy for about 15 minutes, or until the chocolate coating sets.
Notes
- For a different texture, substitute the crushed cookies with 1 cup of finely chopped nuts or crushed peppermint candies.
- If you want a thicker chocolate coating, use only 1 teaspoon of shortening or skip it entirely, but you may need to microwave the chocolate longer to keep it fluid.
- Store the finished Cool Whip Candy in an airtight container in the refrigerator for up to one week.
Nutrition
- Serving Size: 1 square
- Calories: 150
- Sugar: 18g
- Sodium: 55mg
- Fat: 8g
- Saturated Fat: 5g
- Unsaturated Fat: 3g
- Trans Fat: 0g
- Carbohydrates: 19g
- Fiber: 1g
- Protein: 2g
- Cholesterol: 5mg