
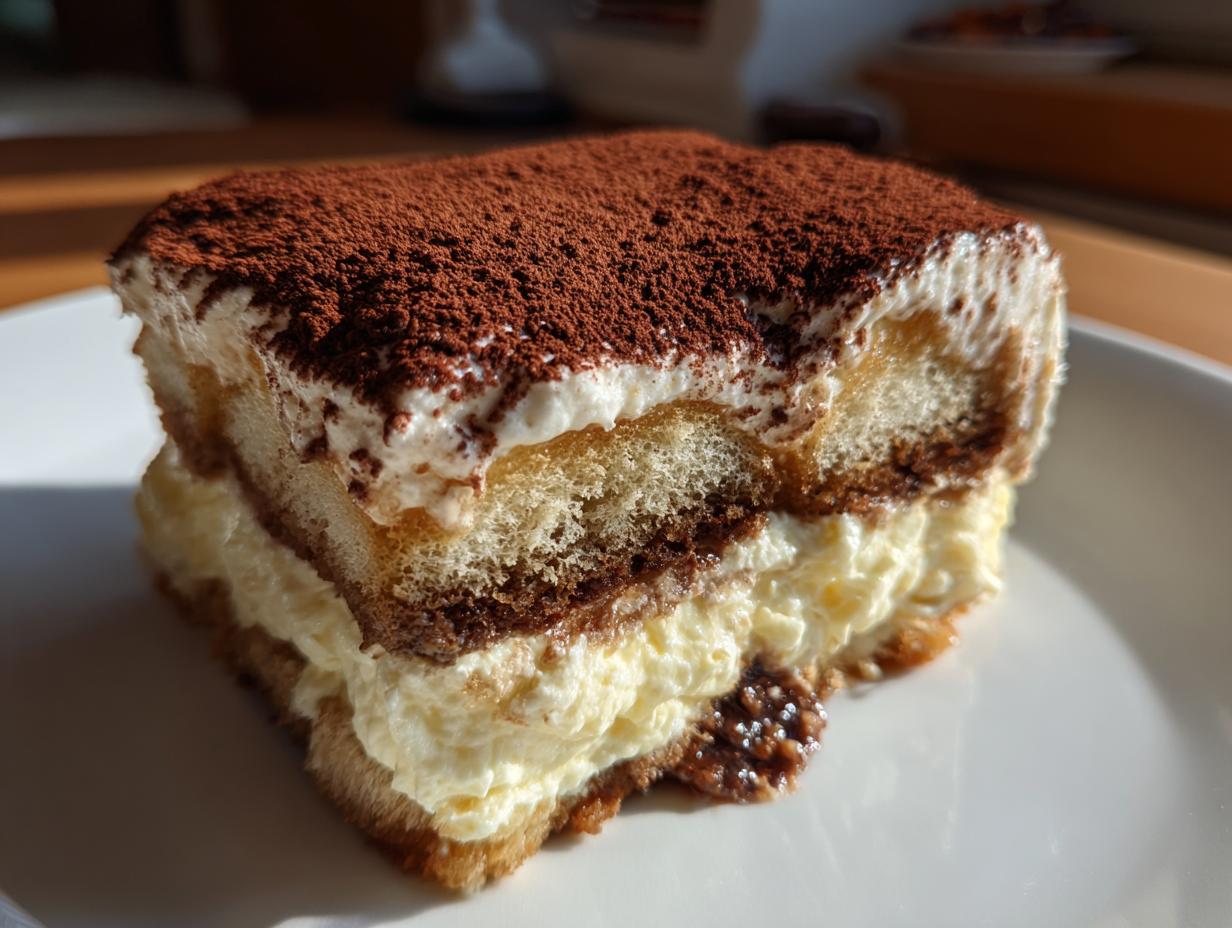
Oh, you are going to seriously adore this one! There is just something magical that happens when you mix strong coffee with sweet cream, isn’t there? Italian desserts always feel so special, like you pulled off something truly elegant with just a few simple moves. That’s why I’m so thrilled to share my absolute go-to tiramisu recipe with you today. Forget complicated baking; this is easily the creamiest, most classic version you’ll ever whip up, and the best part? It’s completely no-bake and you must make it ahead of time! Here at DelishCraze, Olivia Rosewood pours her heart into making sure reliability and amazing flavor go hand-in-hand, and this dessert proves that connecting over incredible food doesn’t have to mean hours in the oven. You can read more about our philosophy right here.
This is truly the easiest way to get that perfect layered coffee dessert onto your table.
- Why This is the Best Classic Tiramisu Recipe You Will Make
- Gathering Ingredients for Your Tiramisu Recipe
- Step-by-Step Guide for the Easiest Tiramisu
- Chilling and Serving Your Homemade Tiramisu Recipe
- Tips for the Best Tiramisu Ever
- Variations on the Classic Tiramisu Recipe
- Frequently Asked Questions About This Tiramisu Recipe
- Estimated Nutritional Data for This Tiramisu Recipe
- Share Your Experience Making This Italian Sweet Treat
Why This is the Best Classic Tiramisu Recipe You Will Make
I know everyone claims their recipe is the best, but honestly, this one is a lifesaver for me, especially when company is coming over. It hits every single point you want in an amazing, show-stopping indulgence. It’s genuinely foolproof, which is what I aim for in all my recipes here at DelishCraze. If you loved how simple those no-bake protein balls were, you’ll adore this one too, because it shares that ‘set it and forget it’ vibe.
- It’s completely no-bake! No oven worries, ever.
- It’s a fantastic make-ahead dessert; in fact, it tastes better the next day.
- The final texture is luxuriously creamy—you won’t believe how easy it is.
Simple Tiramisu Instructions for Beginners
If you’re new to Italian sweet treats, don’t sweat it! This is structured assembly, not complex baking. We’re just dipping, layering, and chilling. That’s it! You don’t need any fancy techniques or weird tools. If you can handle dipping a cookie gently, you can conquer this layered coffee dessert. It’s the quickest route to a holiday-worthy feast for your friends!
Achieving the Perfect Mascarpone Cream Dessert Texture
The secret sauce to that cloud-like filling is temperature control. When you are working on your mascarpone cream dessert, everything needs to be cold—I mean fridge-cold! Your heavy whipping cream and that lovely mascarpone cheese need to be chilled thoroughly. When you beat them properly, they hold those gorgeous peaks that give the whole thing its signature elegant structure. Trust me, zero warmth allowed in that mixture!
Gathering Ingredients for Your Tiramisu Recipe
Okay, let’s talk ingredients! To make this truly feel like an Authentic Tiramisu, we really only need a handful of components, but the quality of those components matters a bunch. Because this is mostly assembly, there isn’t much hiding behind the curtain, so let’s grab everything we need for this incredible *tiramisu recipe*.
I pulled the specific amounts for the 8×8 dish assembly right here for you, but here’s the rundown on what you’ll be looking for:
- You absolutely need strong brewed espresso, and this must be cooled down well beforehand.
- We use the granulated sugar to stabilize the egg yolks, so grab that sugar!
- Cold heavy whipping cream—I mean, ice-cold—is essential for our volume.
- The star, of course, is the cold mascarpone cheese.
- And don’t forget the ladyfingers (Savoiardi) and a good dusting of cocoa powder.
If you are looking for other classic, comforting sweets made from scratch, you should definitely check out my homemade chocolate pudding tutorial next—it shares that same devotion to quality base ingredients!
Ingredient Notes and Substitutions for this Tiramisu Recipe
This is where I give you the insider scoop on making sure your *Classic Tiramisu Recipe* turns out perfect. First, the coffee: if your home brew isn’t hitting that super strong profile, you might need to use slightly less liquid in your dip, or even use a tiny bit of instant espresso powder mixed into hot water. We need that bold coffee flavor to cut through the richness!
That alcohol we add? The coffee liqueur or dark rum is totally optional, but it really deepens the flavor around the ladyfingers. If you skip it, add a teaspoon of almond extract to your cooled coffee dip instead—it offers a lovely, subtle aromatic depth.
Now, about the mascarpone. Listen, I’m going to be honest: this dessert needs mascarpone. It’s just not Tiramisu without it. If you absolutely can’t find it (which is rare these days!), look for Italian-style cream cheese, but absolutely do not try to substitute regular American cream cheese. It just won’t whip up right for this kind of **Mascarpone Cream Dessert**.
Step-by-Step Guide for the Easiest Tiramisu
Alright, deep breath! This is where our magic really happens. Following this set of **tiramisu recipe** instructions guarantees you’ll have an incredibly stable and creamy dessert that looks like it took days to perfect. Since nothing is going into an oven, our real focus here is preparation and gentle mixing. We’ve got five main parts: the coffee dip, making the yolk base, whipping the cream, folding it all together, and then, the fun part, assembly!
Here are the easy steps you’ll follow from start to finish:
- First, get your coffee dip ready. In a shallow bowl—something easy to work with—mix up that cooled espresso with your optional liqueur or rum. Set that mixture right next to your workspace.
- Now for the structure of the cream base. In a separate bowl, you’re whisking those egg yolks and the sugar together like mad. You need to beat them until they get pale yellow and look noticeably thick. Whisk in the vanilla extract quickly after that.
- In a clean, large bowl, take that cold heavy whipping cream and bring it up to stiff peaks. Don’t stop until it looks beautiful and firm; this is what lightens up our whole filling!
- Next, gently fold your cold mascarpone cheese into your yolk and sugar mixture until it’s just smooth. Seriously, stop mixing as soon as it looks uniform—overmixing mascarpone gets weirdly loose, and we don’t want that!
- Take that glorious whipped cream and fold it into the mascarpone mix in about two additions. Use a spatula, cutting down the middle and sweeping up the side. We are preserving every single air bubble we just worked so hard to create!
If you need a great make-ahead side dish for your dinner party, check out my egg muffin recipe for breakfast the next day!
Creating the Espresso Soaked Dessert Base
This is the most critical part where everyone tends to panic, but don’t! Taking our ladyfingers for a dip into that coffee mixture needs to be lightning-fast. We are aiming for a gentle kiss of coffee, not a drowning session. If your ladyfingers get too saturated, they turn into mush, and your beautiful **Layered Coffee Dessert** will just weep liquid everywhere. Dip one side, flip immediately, and pull it out. That quick two-count total is usually all you need for them to be perfectly moist without being soggy.
Assembling Your No Bake Italian Dessert Layers
Grab your 8×8 dish—this size is perfect for a standard package of ladyfingers. Dip your first batch of ladyfingers and lay them neatly across the bottom. If you need to break a few pieces to fill gaps, that’s totally fine; just make sure they cover the base well. Spread exactly half of your amazing, airy mascarpone mixture over that first cookie layer. Then, repeat! Dip the rest of those cookies and place them on top of the cream layer, smoothing the remaining cream over the very top. For assembly inspiration, you can see a great video example over at Natasha’s Kitchen, which really helps visualize the dipping process here.
Chilling and Serving Your Homemade Tiramisu Recipe
Okay, you’ve done the layering work, and the construction looks gorgeous! But trust me, hiding this beauty away is the hardest—and most important—part of making this make ahead dessert. You have to let it chill. Even if you’re tempted to grab a spoon right now, don’t do it! That minimum chilling time of six hours, or ideally overnight, is non-negotiable for a truly spectacular finish.
Why the wait? While the tiramisu chills, two major things happen: first, the ladyfingers fully absorb all that flavorful espresso and liqueur mixture, becoming perfectly soft and cake-like rather than just soggy cookies. Second, the mascarpone cream firms up beautifully against the cold, giving you those clean, elegant slices you dream of. If you rush this, you’ll end up with a lovely bowl of coffee-flavored soup, and we simply can’t have that happen to this *tiramisu recipe*!
When it comes to serving, timing your final step is everything. You want to dust that top layer with cocoa powder right before you bring it to the table. If you dust it when you put it in the fridge, the moisture from the cream will soak up the cocoa, turning it into a dark, weirdly wet patch instead of that fluffy, rich brown color. Just pull that dish out, grab a fine-mesh sieve, and give it a very generous, even coating of unsweetened cocoa powder. It absolutely makes the presentation pop!
If you’re looking for other recipes that shine when made ahead of time, my amazing mud pie is another winner that always impresses guests without stressing me out on party day. For more on getting that perfect texture, Sarah’s Best Recipes has some great tips on setting the layers here.
Tips for the Best Tiramisu Ever
Even though this *tiramisu recipe* is designed to be super simple, I’ve picked up a few tricks over the years that really elevate it from ‘good’ to ‘I need the recipe, now!’ status. These little tweaks moved this dessert from my family gatherings to becoming one of my most requested recipes when I was still deep in my hectic graphic design career. These aren’t in the main recipe steps, but they are absolute game-changers for mastering this Elegant Dessert Idea.
I remember setting up for one big dinner party years ago—I tested this recipe three times because the cream just kept weeping at me! Finally, I realized my mistake, and since then, every single batch has been perfect. Here are those hard-won lessons I want to pass along to you as you create your own delicious Homemade Tiramisu.
- Don’t Skimp on the Coffee Strength: Seriously, invest in good beans or use that instant espresso powder that claims to be “double strength.” If your coffee dipping liquid isn’t intensely flavored, the mascarpone and sugar will completely overpower it once chilled. We need that bitter counterpoint! If you struggle with getting the right texture in breakfast items, perhaps testing out my fluffy French toast first will get your whipping technique dialed in!
- Whip Your Cream in a Very Cold Bowl: This is a temperature control secret, the same principal I use when I whip up my cream for other desserts. Before using, pop your mixing bowl and the whisk attachment—even if it’s metal—into the freezer for about 15 minutes. That initial cold shock helps the heavy cream incorporate air faster and hold those stiff peaks longer. This keeps your final mixture from settling down too much.
- The Perfect Ladyfinger Dip: I mentioned this before, but it deserves its own point because it’s vital for any Ladyfinger Dessert. I learned this the hard way! I was trying to get extra flavor in one batch, and I let the cookies sit for just a second too long. Big mistake. They get heavy and soggy right at the bottom of the dish, creating that soupy layer. A lightning-fast, almost single-second dip is all you need for that perfect infusion.
- Let It Rest, Then Dust: I always try to make this at least 24 hours before serving if possible, not just the minimum 6 hours. The flavor really melds then. However, resist the urge to dust with cocoa until the very last moment before serving. I learned that if you dust it too early, the cocoa powder turns damp and almost black against the moist cream, losing that lovely visual contrast.
For more inspiration on achieving classic, rich results, check out the tips on ingredient quality from My Home Made Dishes on making an amazing base here.
Variations on the Classic Tiramisu Recipe
While I absolutely adore keeping things classic—because, honestly, this *tiramisu recipe* is perfect as is—I know we home cooks love to put our own spin on things! Part of the fun of making any of these wonderful Traditional Italian Desserts is seeing how you can twist the base structure to suit whatever flavors you’re craving. Keep your mascarpone cream method the same, though! We aren’t messing with that creamy magic.
I often play with the dip, especially if I’m making one for the kids or if I just fancy a change from that deep, bold espresso flavor. If you’re looking for some fun, quick swaps, here are a couple of ideas that work beautifully while maintaining that essential structure. If you’re already experimenting in the kitchen, perhaps moving on to some other Italian sweets, my recipe for Italian butter cookies is a lovely companion treat!
For a completely different vibe, I once made an entire batch using finely crushed peppermint candies mixed into the whipped portion of the cream for a holiday version. It was unexpected, but delicious! If you’re ever interested in seeing a totally different—but equally creamy—take on this dessert, my recipe for Tiramisu Cheesecake blows people away.
Here are my favorite ways to adjust the dipping sauce:
- For Grown-Up Parties: Instead of rum or coffee liqueur, try soaking those ladyfingers in a mix of chilled Kahlúa and a touch of Bailey’s. It gives the finished dessert a lovely, almost caramel-like undertone that pairs so well with the cocoa dust.
- A Lighter Touch: If you want to skip the alcohol and the heavy caffeine buzz, brew up some Earl Grey tea very strongly, let it cool completely, and use that as your liquid base. The bergamot notes add such a sophisticated, fragrant layer that’s surprisingly elegant.
- Adding Chocolate Dimension: This is an easy one. During assembly, right after spreading the first layer of cream, sprinkle a very light layer of finely grated dark chocolate shavings over the cream before adding your second layer of dipped ladyfingers. It gives a wonderful texture pop when you finally dig in!
No matter which variation you choose, just remember the core rule: quick dip, cold cream stabilization, and plenty of chill time for the best results!
Frequently Asked Questions About This Tiramisu Recipe
It’s funny how many questions pop up once you start making a dish like this a staple! Since everyone has slightly different needs, especially when it comes to food safety or timing for a big event, I wanted to tackle a few of the most common things I hear about assembling a truly Easy Tiramisu. If you’re wondering about the coffee, or just how long it lasts, this section is for you!
I truly want you to feel confident stepping into the kitchen for this, so let’s clear up those last few hurdles right here. This advice applies whether you are making this simple *tiramisu recipe* for a Tuesday night treat or a major holiday!
Can I make this tiramisu recipe without raw eggs?
That is a fantastic and very smart question. Yes, you absolutely can, and this specific method is developed to give you that creamy texture safely! In this version, we’re taking the egg yolks and heating them with sugar—we are essentially making a quick, stabilized sabayon base before folding in the cold ingredients. Even though we are cooking the yolks slightly with the sugar whisking, this recipe still achieves that signature richness you expect from a great **Mascarpone Cream Dessert** without the worry of using raw yolks. If you are still nervous, you could skip the yolks entirely and rely 100% on the stability of the whipped heavy cream and the cold mascarpone, though you lose a little bit of the traditional richness.
How far in advance can I prepare this make ahead dessert?
This is where this dessert becomes a party planning dream! Because it’s essentially a chilled layered creation, the flavors actually deepen and marry the longer it sits. I mentioned overnight is best—that’s typically 12 to 18 hours—and the structure is absolutely flawless when you slice it. You can safely prepare this entire make ahead dessert up to 24 hours in advance. If you try to push it past 30 hours, the ladyfingers might start to get too soft, and that beautiful dusting of cocoa powder we put on top won’t look its best.
If you are looking for other reliable options for making food ahead of the rush, check out my recipe for a creamy cheesy vegetable casserole; it saves so much time on the actual day of serving!
If you’re already thinking about other impressive, simple desserts, perhaps our next look should be at a fantastic **Coffee Dessert Recipe**!
Estimated Nutritional Data for This Tiramisu Recipe
I always feel it’s important to share a general idea of what you’re diving into, especially with something as rich and delicious as this *tiramisu recipe*. Remember, these numbers are just estimates because how much cocoa powder you dust on top, or the exact brand of mascarpone you use, can change things slightly. But this gives you a ballpark for a single serving slice based on our 8-serving yield.
When you’re making a homemade treat like this, you know exactly what’s going into it, which is so much better than store-bought versions! If you are looking for something slightly lighter but still wonderfully comforting, you have to try my creamy roasted squash soup as a contrast to this sweet finish.
Here are the estimated values for one slice of this No Bake Italian Dessert:
- Serving Size: 1 slice
- Calories: 410
- Sugar: 28g
- Sodium: 110mg
- Fat: 28g
- Saturated Fat: 17g
- Unsaturated Fat: 11g
- Trans Fat: 0.5g
- Carbohydrates: 30g
- Fiber: 1g
- Protein: 9g
- Cholesterol: 155mg
Please keep in mind these figures are estimates for general informational purposes only. We believe in transparency, but the beauty of home cooking is tailoring it to your own needs!
Share Your Experience Making This Italian Sweet Treat
And that’s it! You have officially made the creamiest, dreamiest *tiramisu recipe* known to man, and you didn’t even have to turn on the oven! Doesn’t that feel amazing? When I think back to those times I felt completely overwhelmed in the kitchen before starting DelishCraze, sharing something this delicious and elegant without the stress of baking is exactly what I wanted to achieve.
I truly hope this simple assembly process has brought a little bit of that slow, satisfying joy from my kitchen into yours. This is the kind of Italian Sweet Treat that always gets me compliments, and I just know it will for you too! If you gave this a try, please take a moment and leave me a rating below. I love seeing how many people are still making these classic, wonderful desserts. Don’t forget, if you’ve made any fun tweaks—maybe you used a different liqueur or tried an extra heavy dusting of cocoa—drop those ideas in the comments!
Need something speedy for the night before you serve this amazing dessert? You can check out my guide to quick and easy weeknight dinners to keep things simple all week long. And hey, if you need more inspiration on quick, delightful sweets that wow the crowd, Flavor Nectar has some great ideas for an easy tiramisu version that might spark your next creation!
Happy layering, everyone!
PrintThe Easiest, Creamiest Classic Tiramisu Recipe (No-Bake & Make-Ahead)

Make this classic Italian dessert easily. You get creamy mascarpone layers, espresso-soaked ladyfingers, and a cocoa dusting in this simple, no-bake recipe perfect for any gathering.
- Prep Time: 25 min
- Cook Time: 0 min
- Total Time: 6 hr 25 min
- Yield: 8 servings 1x
- Category: Dessert
- Method: No-Bake Assembly
- Cuisine: Italian
- Diet: Vegetarian
Ingredients
- 1 cup strong brewed espresso, cooled
- 1/4 cup coffee liqueur or dark rum (optional)
- 2 large egg yolks
- 1/2 cup granulated sugar
- 1 teaspoon vanilla extract
- 16 ounces mascarpone cheese, cold
- 1 1/2 cups heavy whipping cream, cold
- 1 package (7 ounces) ladyfingers (Savoiardi)
- Unsweetened cocoa powder, for dusting
Instructions
- Prepare the coffee dip: In a shallow bowl, combine the cooled espresso and coffee liqueur, if using. Set aside.
- Make the mascarpone cream base: In a medium bowl, whisk the egg yolks and granulated sugar together until the mixture is pale yellow and thick. Whisk in the vanilla extract.
- In a separate large bowl, beat the cold heavy whipping cream until stiff peaks form. Set aside.
- Gently fold the cold mascarpone cheese into the egg yolk mixture until just combined and smooth. Do not overmix.
- Carefully fold the whipped cream into the mascarpone mixture in two additions until you have a uniform, creamy texture.
- Assemble the tiramisu: Quickly dip one side of a ladyfinger into the espresso mixture for just a second or two. You want it moist, not soggy.
- Arrange a single layer of dipped ladyfingers in the bottom of an 8×8 inch baking dish. Break them if necessary to fit.
- Spread half of the mascarpone cream mixture evenly over the layer of ladyfingers.
- Repeat the process: Dip and layer the remaining ladyfingers over the cream.
- Spread the remaining mascarpone cream evenly over the second layer of ladyfingers.
- Cover the dish tightly with plastic wrap. Chill in the refrigerator for at least 6 hours, or preferably overnight, to allow the dessert to set and the flavors to blend.
- Before serving, generously dust the top layer with unsweetened cocoa powder using a fine-mesh sieve. Slice and serve your homemade tiramisu.
Notes
- For a richer flavor, use very strong, freshly brewed espresso.
- If you skip the alcohol, add 1 teaspoon of almond extract to the coffee dip for depth.
- Make sure your heavy cream and mascarpone are very cold for the best whipping results.
- This make-ahead dessert tastes best after chilling overnight.
Nutrition
- Serving Size: 1 slice
- Calories: 410
- Sugar: 28
- Sodium: 110
- Fat: 28
- Saturated Fat: 17
- Unsaturated Fat: 11
- Trans Fat: 0.5
- Carbohydrates: 30
- Fiber: 1
- Protein: 9
- Cholesterol: 155