
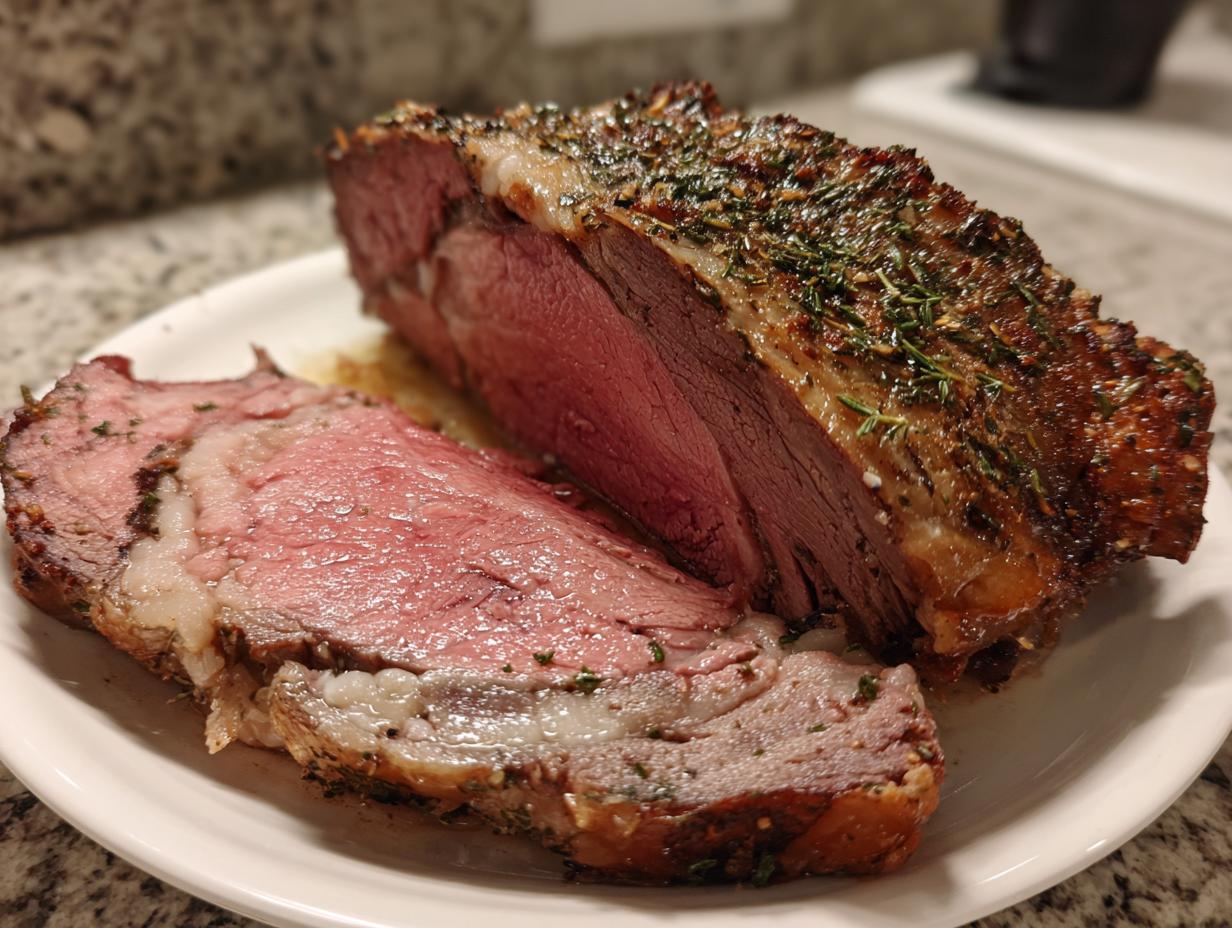
Honestly, there are dishes that look like they belong only on fancy restaurant menus, right? Things that feel way too intimidating to attempt on a busy holiday, but that feeling stops here. I’m Olivia Rosewood, and my whole mission at DelishCraze is to take those show-stopping meals and make them completely achievable right in your own home. If you’ve ever wanted to serve the most impressive, melt-in-your-mouth standing rib roast without the stress of dry edges and uneven cooking, you’ve come to the right place. We are mastering the reverse sear method today, which is genuinely my secret weapon for guaranteeing a perfectly juicy beef roast every single time. Trust me, this is the centerpiece your special occasion deserves!
- Why This Is the Ultimate Foolproof Standing Rib Roast Recipe
- Ingredients for Your Standing Rib Roast
- How to Prepare the Perfect Standing Rib Roast
- Tips for the Best Way to Cook Prime Rib
- Serving Suggestions for Your Holiday Roast Centerpiece
- Storing and Reheating Leftover Standing Rib Roast
- Frequently Asked Questions About Your Standing Rib Roast
- Nutritional Information for This Oven Roasted Prime Rib
- Share Your Holiday Beef Dinner Success
Why This Is the Ultimate Foolproof Standing Rib Roast Recipe
Look, I get it. Cooking a prime rib can feel like walking a tightrope, especially when you’re hosting a crowd. But that’s exactly why this recipe is my favorite way to tackle this showstopper roast recipe. We aren’t just throwing it in the heat and hoping for the best. We use the reverse sear, and it’s a game-changer for anyone wanting a truly **juicy beef roast**. It’s so reliable, even if you need a stunning main dish like an easy classic cheese ball appetizer to keep everyone busy while this cooks!
The whole method is designed to eliminate stress and guarantee beautiful, edge-to-edge results. Forget those thick, unappetizing gray bands you sometimes see near the exterior. This is precision cooking made simple!
Achieving Medium Rare Roast Beef Perfection Every Time
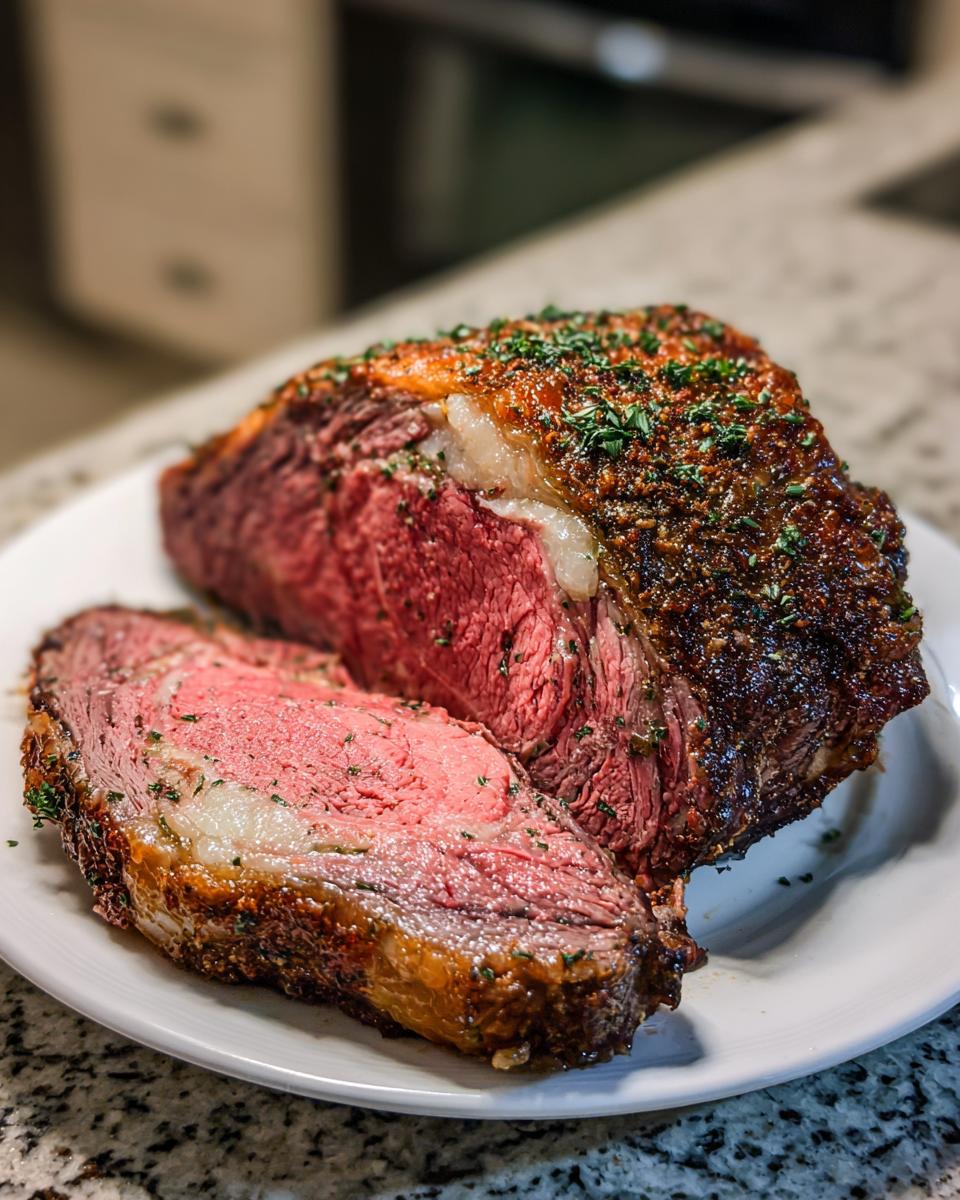
The secret sauce here is temperature control, my friend. We start super low—think 250°F—which gently coaxes the inside of the meat up to just shy of done. This slow process evens out the temperature gradient dramatically. When you finally hit it with that blasting 450°F heat at the end, you aren’t trying to cook the center; you are just coloring the outside for that incredible texture. It’s the best way to get a consistently perfect **medium rare roast beef** without anyone guessing!
The Flavorful Garlic Herb Roast Crust
Who wants plain roast beef when you can have an explosion of flavor on the outside? The garlic and herb butter we mix up isn’t just for looks, either. It melts gently during that slow cook, seeping into the meat, and then in that final blast of high heat, it crisps up into the most amazing, savory shell. This garlic herb roast crust locks in the juices beautifully. You’ll never go back to plain salt and pepper again, I promise!
Ingredients for Your Standing Rib Roast
Okay, now that you know this technique is totally foolproof, let’s talk ingredients. When you’re making a showstopper like this standing rib roast, you want quality, but trust me, the ingredient list itself couldn’t be simpler! That’s the beauty of focusing on fantastic technique over a million fussy additions. We are keeping things clean so that that gorgeous beef flavor truly shines through, supported by our simple but mighty garlic herb mix. You only need a few things to make this your best holiday roast centerpiece yet!
- 1 (5-7 pound) bone-in standing rib roast (prime rib), 2-3 ribs
- 3 tablespoons kosher salt
- 1 tablespoon freshly ground black pepper
- 1 tablespoon dried thyme
- 1 tablespoon dried rosemary
- 1 tablespoon garlic powder
- 1/2 cup unsalted butter, softened
- 6 cloves garlic, minced
How to Prepare the Perfect Standing Rib Roast
This is where we go from having nice ingredients to having an absolute masterpiece on the table! Because we are using the reverse sear method for our standing rib roast, the cooking process is split into two very distinct, but equally important, parts. You absolutely *must* use a reliable meat thermometer here—it’s the key to knowing exactly when your meat needs to move from the slow cook phase to the final sear. Don’t rely on look or time alone, especially for a premium cut like this! I often look up quick guides for temperature checks, like the helpful hints found over at Simple Whisk, just to double-check my thinking.
Preparing the Roast and Herb Butter
First things first: pull that beautiful hunk of beef out of the fridge early! Step one says let it sit out for 2 to 3 hours. This tempering gets the chill off so it cooks more evenly—trust me, cold meat hitting a hot oven is a recipe for unevenness. While that’s happening, whip up your butter paste. I mix the softened butter with the minced garlic and all our lovely dried herbs and spices until it’s thick. Then, and this is important for that gorgeous exterior, you have to pat the entire roast aggressively dry with paper towels. A dry surface equals a crust you can snap! Now, slather that herb butter all over, followed by a very generous coating of salt and pepper. That’s steps 1 through 5 done!
The Low-Temperature Cook for a Juicy Beef Roast
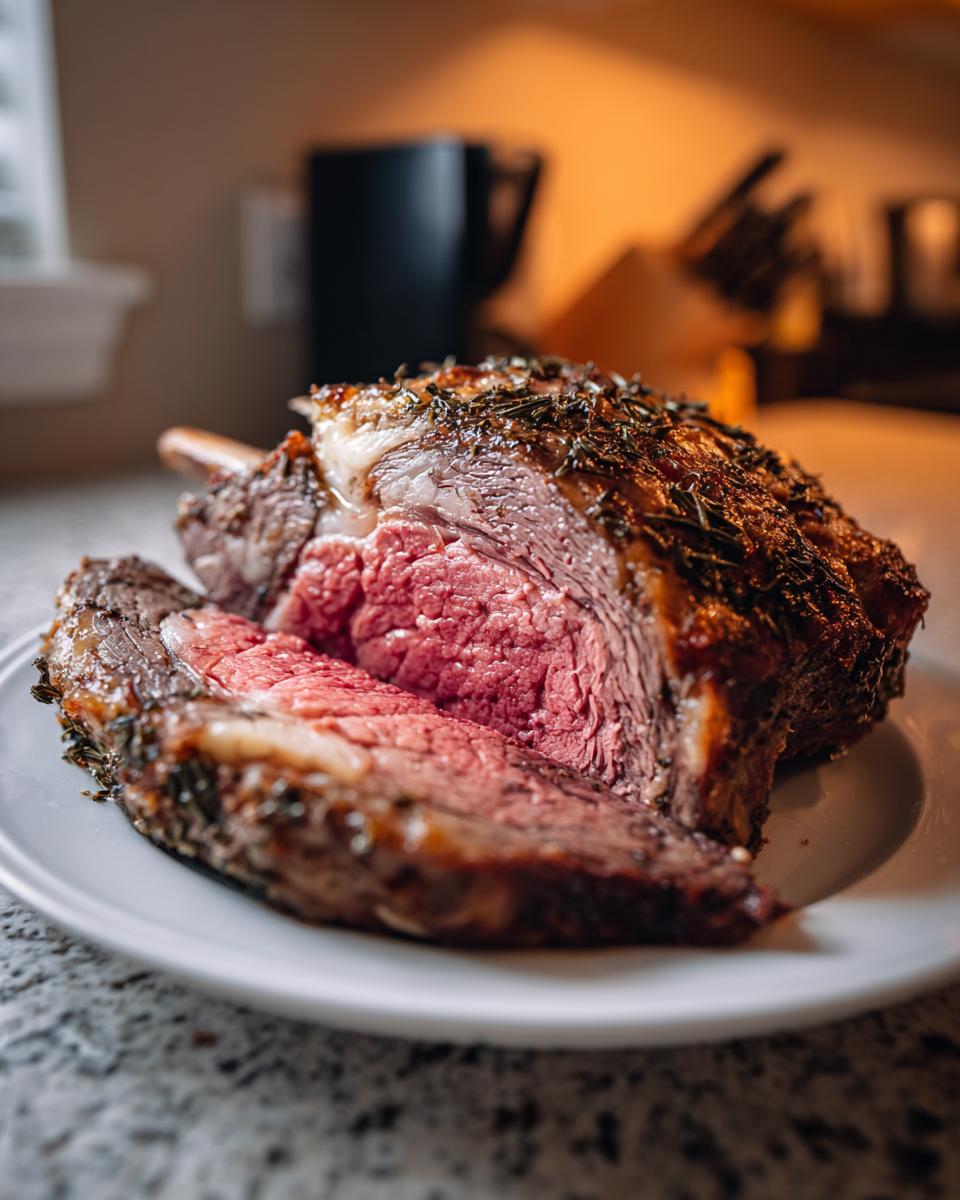
Time for the long, slow bake. Get your oven set to a cozy 250°F. Put that roast fat-side-up on a wire rack in your roasting pan. Now, we wait patiently. This is the ‘low and slow’ part of learning **how to cook standing rib roast**. We are aiming for an internal temperature of 115°F. It’ll take hours—maybe close to four!—but this slow bath ensures the meat cooks uniformly, giving you that beautiful, tender result. Don’t rush it! If you’re aiming for medium-rare, 115°F is your target before moving on.
The High-Heat Sear for the Standing Rib Roast Crust
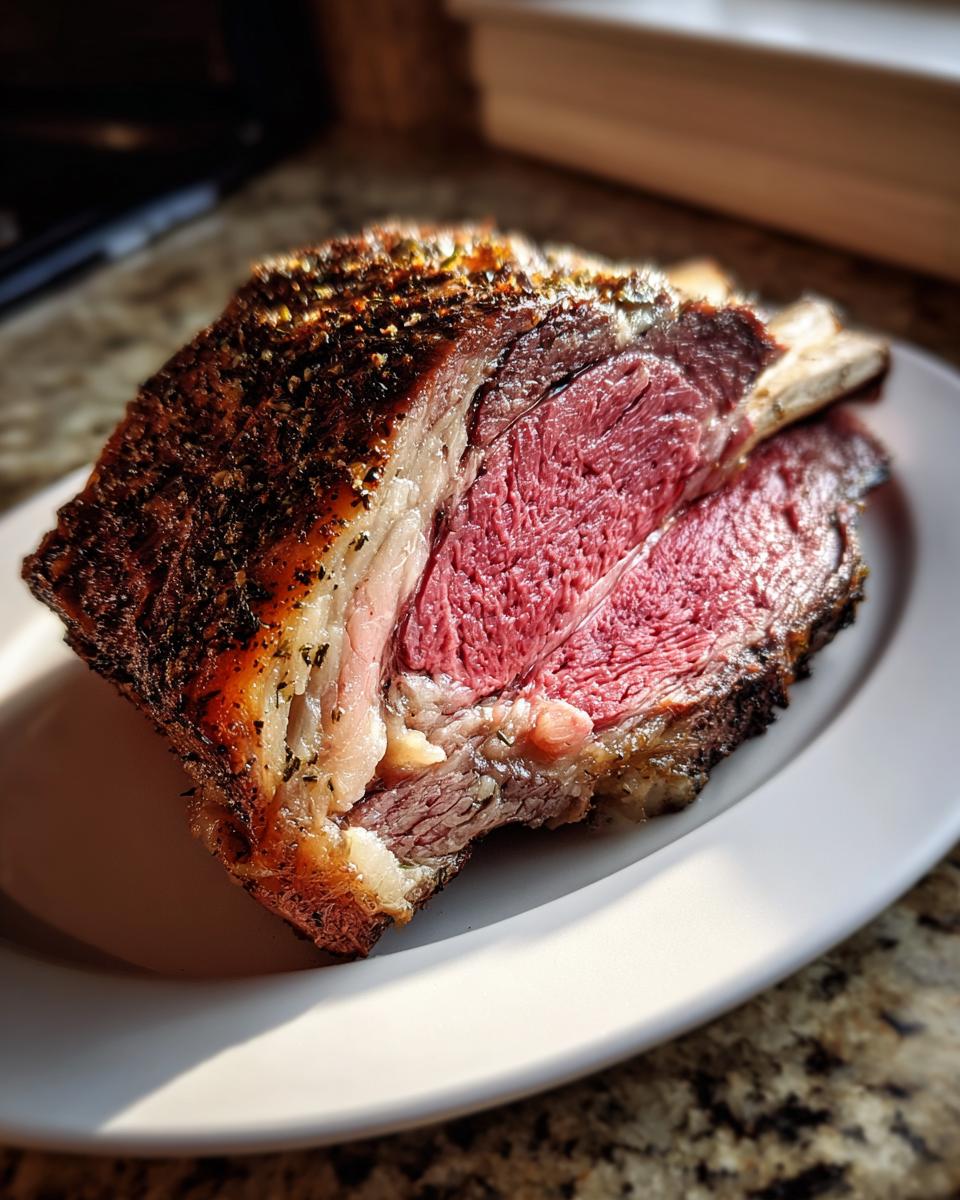
Once we hit that 115°F mark, quickly pull the roast out. Now, crank that oven up! We’re going from gentle warmth to a roaring 450°F. While the oven is doing its thing, let the roast sit on the counter for about 15 minutes; this slight rest keeps things from shocking too much. Once the oven is piping hot, pop the roast back in for just 10 to 15 minutes. This is purely for developing that deep brown, flavorful crust. Watch it closely during these minutes; we want color, not char! Step 10 means pulling it when it hits that final 125 to 130°F mark for medium-rare.
Resting and Slicing Your Standing Rib Roast
The single hardest step? Waiting! You absolutely must let your stunning roast rest for a minimum of 20 minutes after it comes out of the high heat. Tent it loosely with foil—don’t wrap it tight, or that crust will steam right off! During this rest, the juices, which have been pushed to the center during cooking, redistribute back through the meat. This process is called carryover cooking, and it raises the internal temperature a few more degrees, locking in the juiciness. For serving, make sure you slice carefully right between those main bones. If you need a tasty little something to go with it next week, check out my quick creamy dip recipe while you contemplate your next amazing meal!
Tips for the Best Way to Cook Prime Rib
Now that you’ve mastered the low-and-slow technique, I want to share a few extra little nuggets of wisdom from my early years experimenting with this big cut of beef. These are the things I learned the hard way, so you don’t have to! If you’re wondering about the absolute best way to cook prime rib, these notes about searing and drippings are critical for maximizing flavor.
One thing to know upfront is that the only mandatory part of this **oven roasted prime rib** is the reverse sear method we just used. If you want to go all out, you *can* sear the roast on the stovetop first in a very hot cast-iron skillet before it hits that low oven. I’ve tried it, and while it creates a monster crust quickly, honestly, the high-heat finish in the oven handles the browning perfectly well without all the extra splatter and fuss. It’s totally optional for this method!
Also, make sure you keep an eye on the final temperature versus what you want. While this recipe targets that dreamy medium-rare (125-130°F after the final sear), if you have guests who prefer their beef a little more done, just pull it when the thermometer reads 135°F for a solid medium. The resting period is key here, as it still allows the texture to set up nicely.
My favorite part, though? The drippings! That roasting pan is going to be filled with glorious, flavorful liquid gold. Don’t waste a drop! Those drippings are the base for the absolute best gravy you’ll ever make. I have a fantastic recipe for foolproof gravy from drippings that works magically with beef stock instead of turkey stock. It’s spectacular alongside the roast. Or, if you’re looking for a lighter pairing, check out an external resource like A Fork in the Tale for some inspiration on side dishes.
Serving Suggestions for Your Holiday Roast Centerpiece
Whew! You’ve got this incredible, perfectly cooked standing rib roast sitting on the board, and now you need sides worthy of that main event! This rich, savory roast needs complements that can stand up to its flavor without overpowering that beautiful **garlic herb roast** crust. Think classic, comforting pairings because this is your ultimate holiday roast centerpiece, after all.
Creamy, buttery mashed potatoes are a non-negotiable classic for soaking up any stray juices—seriously, don’t skip them! I also love leaning into seasonal vegetables. Roasted root vegetables, like carrots and parsnips tossed in a little olive oil and salt, caramelize so nicely right alongside the beef cooking smells. They add that perfect touch of earthy sweetness.
For something a little lighter but still festive, I often make my roasted sweet potato and kale salad. The slight acid from a light vinaigrette really cuts through the richness of the prime rib beautifully. Whatever you choose, make sure it feels celebratory—you deserve it after nailing this recipe!

Storing and Reheating Leftover Standing Rib Roast
Don’t you hate that moment when the feast is over, and you’re looking at the grand prize—the leftovers? The good news is that this prime rib recipe stores like a dream, provided you handle it right! The key to enjoying your juicy beef roast a few days later is twofold: proper storage and gentle reheating. You’ll want to treat those slices with the same respect you gave the whole roast initially!
For storage, immediate refrigeration is your best friend. Slice the roast first—don’t store the massive hunk whole if you can avoid it. Slicing lets you control the amount you reheat later, which prevents drying out the entire slab. I always store the slices in an airtight container. If you have a lot, layer the slices with a small piece of parchment or wax paper between them to stop them from sticking together horribly when cold. It should keep beautifully in the fridge for 3 to 4 days.
Now, for reheating this precious leftover beef. The biggest mistake people make is throwing thick slices back into the oven or microwave until they are steaming hot all the way through. That’s a guaranteed way to turn perfectly cooked meat into shoe leather!
The best method, hands down, is low and slow in a skillet or Dutch oven. You want to slice the leftovers thinly—thinner than you carved it, actually. Lay the thin slices in the pan, add just a splash of broth or water (or even better, beef stock made from your pan drippings!), cover the pan, and warm it gently over medium-low heat until just heated through. This gentle steam bath keeps every slice incredibly tender.
If you happen to have an excessive amount of leftovers, think about transforming them! My recipe for easy leftover soup is perfect for slicing up some of that leftover roast and turning it into a delicious, comforting meal later. Otherwise, just enjoy those perfectly medium-rare slices warmed up gently—they’re almost as good as the first night!
Frequently Asked Questions About Your Standing Rib Roast
When you invest in a gorgeous cut of meat like this, you want to make absolutely sure you get every step right! It’s totally normal to have a few last-minute jitters before cooking a huge holiday roast centerpiece. I’ve gathered up the questions I get asked the most from folks trying this **oven roasted prime rib** technique for the first time. Hopefully, these quick tips give you the last bit of confidence you need to pull off something amazing!
What is the correct internal temperature for a medium rare roast beef?
This is the most crucial question, honestly! Since the reverse sear cooks so evenly, you nail the temperature much easier than traditional methods. Remember, the temperature listed here is the *final* temperature after resting, which will be a few degrees higher than when you pull it out. For that perfect pink center, aim for these final internal temperatures:
- Rare: 120–125°F
- Medium-Rare: 130–135°F (This is generally the sweet spot for a **medium rare roast beef**!)
- Medium: 135–140°F
Always check with a good digital thermometer inserted into the thickest part, avoiding the bone!
Do I need to use a bone-in rib roast recipe?
You absolutely don’t *have* to use a bone-in cut, but why wouldn’t you? This exact recipe is designed around a bone-in rib roast recipe because the bones act like little natural insulation shields around the meatiest parts. This helps prevent the edges from overcooking while the center slowly catches up. It also adds flavor, which is always a bonus in my book when dealing with beef!
If you happen to buy a boneless roast, you’ll notice it cooks a bit faster, and you might even need to reduce the initial low-temperature cooking time. But honestly, for the sheer showmanship and slight texture benefit, I stick with the bone-in when I make this feast! If you want to look up some other great culinary tips, I always enjoy browsing the general baking advice over at DelishCraze, even though it’s not about beef; good technique translates everywhere!
Nutritional Information for This Oven Roasted Prime Rib
Now, I know you’re going to be focused on making this the most delicious thing on the table, but for those of you tracking macros or just curious about what you’re serving up, here’s a quick look at the estimates for this incredible oven roasted prime rib. When you’re dealing with an indulgent meal like this, it’s good to have an idea, but please remember, this data is based on a 6-ounce cooked serving size and standard ingredient estimations.
The final count can swing depending on how fatty your specific cut of prime rib is, or how much of that gorgeous garlic butter you manage to slather on or leave behind in the pan! It varies based on fat rendering during the cook.
- Serving Size: 6 oz cooked
- Calories: 450
- Sugar: 0
- Sodium: 350
- Fat: 30
- Saturated Fat: 14
- Unsaturated Fat: 16
- Trans Fat: 0
- Carbohydrates: 0
- Fiber: 0
- Protein: 45
- Cholesterol: 150
A quick note from me: These figures represent the meat and the flavor compounds from the rub. If you use every single bit of that flavorful butter for brushing during the sear, these numbers will shift slightly upwards, which, frankly, is totally worth it for the flavor boost! If you’re serving this incredible centerpiece with my maple brown sugar cookies for dessert, you’ll definitely want to factor those in too!
Share Your Holiday Beef Dinner Success
Well, we did it! We took a massive, gorgeous piece of beef, used the magic of the reverse sear, and ended up with a truly tender, juicy, and perfectly crusted standing rib roast. I can almost smell that rosemary and garlic from here! Now that you’ve conquered this amazing holiday roast centerpiece, I really, truly want to hear about it. Don’t keep this success story to yourself!
Please take a moment right after you’ve carved the meat and give this recipe a star rating right below—it helps other home cooks see that this isn’t just some fancy trick; it’s reliably delicious! And if you have a minute more, drop a comment letting me know how that final internal temperature worked out for you. Was it every bit as juicy as you’d hoped? I live for hearing about those moments when you realize, “Wow, I actually cooked a perfect prime rib!”
If you plan on making a dessert that follows up this amazing main—and you should!—make sure you check out my maple brown sugar cookies. It’s the perfect sweet note to end a serious celebratory dinner. Happy cooking, everyone, and thank you for trusting me with your big holiday meals!
PrintThe Ultimate Foolproof Standing Rib Roast with Garlic Herb Butter

Create a show-stopping, juicy, and tender standing rib roast with a flavorful garlic herb crust using the reliable reverse sear method. This recipe simplifies cooking a premium centerpiece for your holiday dinner or special occasion.
- Prep Time: 20 min
- Cook Time: 3 hr 30 min
- Total Time: 4 hr 10 min
- Yield: 6-8 servings 1x
- Category: Main Course
- Method: Reverse Sear
- Cuisine: American
- Diet: Low Fat
Ingredients
- 1 (5-7 pound) bone-in standing rib roast (prime rib), 2-3 ribs
- 3 tablespoons kosher salt
- 1 tablespoon freshly ground black pepper
- 1 tablespoon dried thyme
- 1 tablespoon dried rosemary
- 1 tablespoon garlic powder
- 1/2 cup unsalted butter, softened
- 6 cloves garlic, minced
Instructions
- Remove the standing rib roast from the refrigerator 2 to 3 hours before cooking to allow it to come close to room temperature.
- Preheat your oven to 250 degrees Fahrenheit. This is the low-temperature phase of the reverse sear.
- In a small bowl, combine the softened butter, minced garlic, dried thyme, dried rosemary, and garlic powder. Mix until you form a thick herb butter paste.
- Pat the entire surface of the roast dry with paper towels. Season generously all over with kosher salt and black pepper.
- Rub the garlic herb butter mixture evenly over the entire surface of the roast.
- Place the roast, fat side up, on a wire rack set inside a sturdy roasting pan.
- Place the pan in the preheated 250°F oven. Cook until the internal temperature reaches 115 degrees Fahrenheit for medium-rare, checking with a meat thermometer inserted into the thickest part of the meat, avoiding the bone. This low-temperature cooking can take 2.5 to 4 hours depending on the size of your roast.
- Once the roast reaches 115°F, carefully remove it from the oven. Increase the oven temperature to 450 degrees Fahrenheit.
- Let the roast rest on the counter for 15 minutes while the oven heats up.
- Return the roast to the 450°F oven. Roast for 10 to 15 minutes, or until the exterior develops a deep brown, flavorful crust. Monitor closely to prevent burning.
- Remove the roast from the oven when the internal temperature reaches 125 to 130 degrees Fahrenheit for a perfect medium-rare finish.
- Transfer the roast to a cutting board. Tent it loosely with foil and let it rest for at least 20 minutes before slicing between the bones and serving. The internal temperature will rise during resting.
Notes
- For a richer crust flavor, you can sear the roast on the stovetop in a hot, oiled cast-iron skillet before the low oven cook, but this is optional for the reverse sear method.
- If you prefer medium doneness, pull the roast from the oven at 135°F after the high-heat sear.
- Save the pan drippings to make a simple red wine pan gravy to serve alongside your juicy beef roast.
Nutrition
- Serving Size: 6 oz cooked
- Calories: 450
- Sugar: 0
- Sodium: 350
- Fat: 30
- Saturated Fat: 14
- Unsaturated Fat: 16
- Trans Fat: 0
- Carbohydrates: 0
- Fiber: 0
- Protein: 45
- Cholesterol: 150