
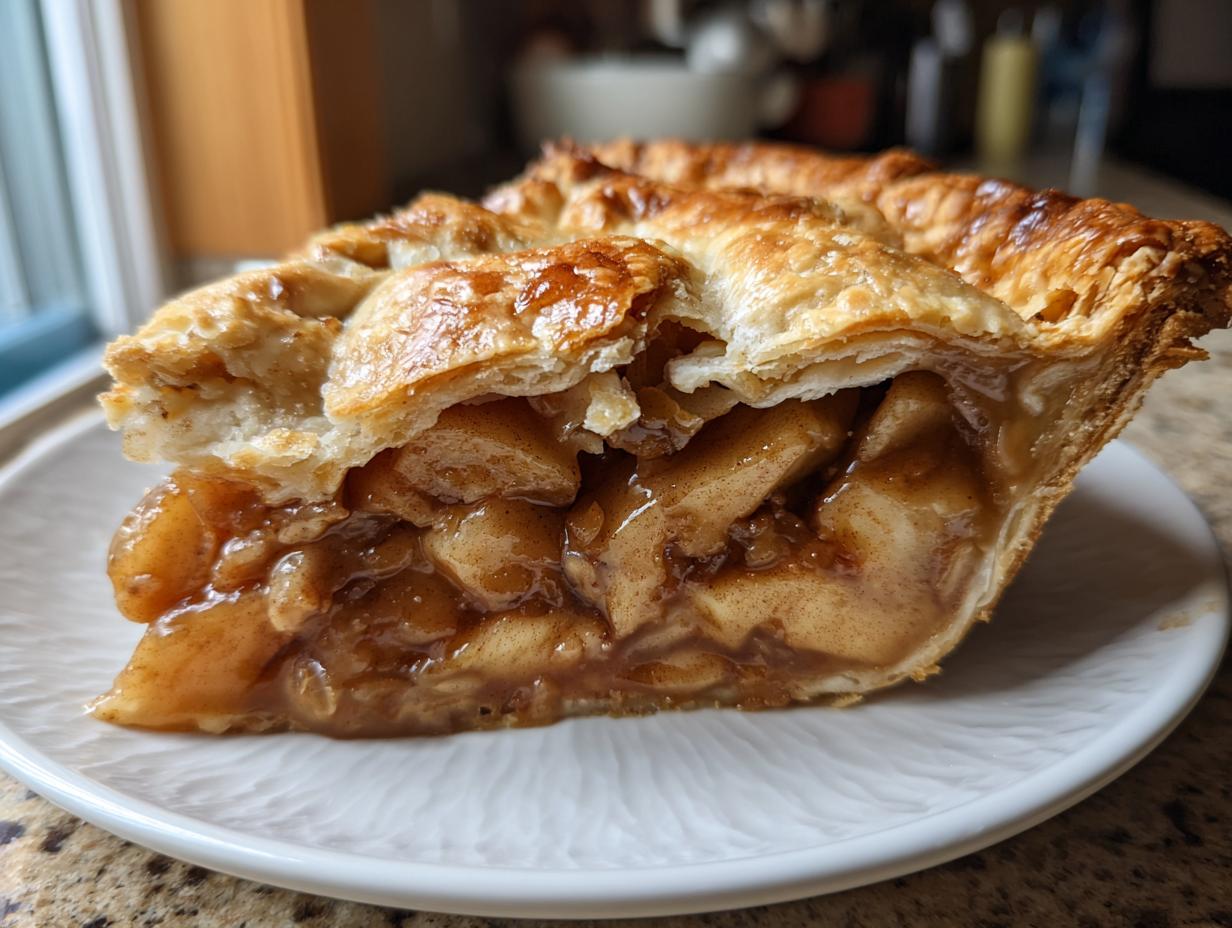
Oh, there is nothing that says home, comfort, and that sweet slowness of life quite like a freshly baked apple pie cooling on the rack. When I first started DelishCraze, I promised myself I would share recipes that felt real, the kind that actually bring joy without creating a mountain of stress. That’s why this classic apple pie recipe is so important to me. It’s more than just dessert; it’s about reclaiming those warm, kitchen-centered moments I missed so much in my old design career. Mastering this ultimate apple pie recipe with its perfectly flaky double crust is easier than you think, and it’s the kind of tradition you’ll want to pass down for years to come. If you want to know more about why I started this journey reclaiming food as family language, you can always check out my story on the About Page. I’m Olivia, and I can’t wait for you to try the one that started it all for me.
- Why This Classic Apple Pie Recipe Is Your New Go-To
- Ingredients for Your Homemade Pie From Scratch
- How to Prepare This Easy Homemade Apple Pie
- Tips for Success with Your Apple Pie Recipe
- Storage and Reheating Instructions for this Classic Apple Pie Recipe
- Serving Suggestions for Comfort Food Desserts
- Frequently Asked Questions About This Apple Pie Recipe
- Nutritional Estimates for This Classic Apple Pie Recipe
- Share Your Perfect Apple Pie Recipe Creations
Why This Classic Apple Pie Recipe Is Your New Go-To
I know there are a million out there when you search for an apple pie recipe, but trust me, this one rises above the rest. We focused on the two things that always trip people up: the crust and the filling texture. If you are looking for a truly no-fail apple pie recipe that delivers that classic flavor we all crave, you’ve found it.
- It guarantees that beautiful, shatteringly flaky double crust every single time.
- The filling is perfectly spiced—warm, sweet, but never mushy!
- It’s the definitive classic apple pie recipe for any holiday table.
The Secret to a Perfectly Flaky Pie Crust Tutorial
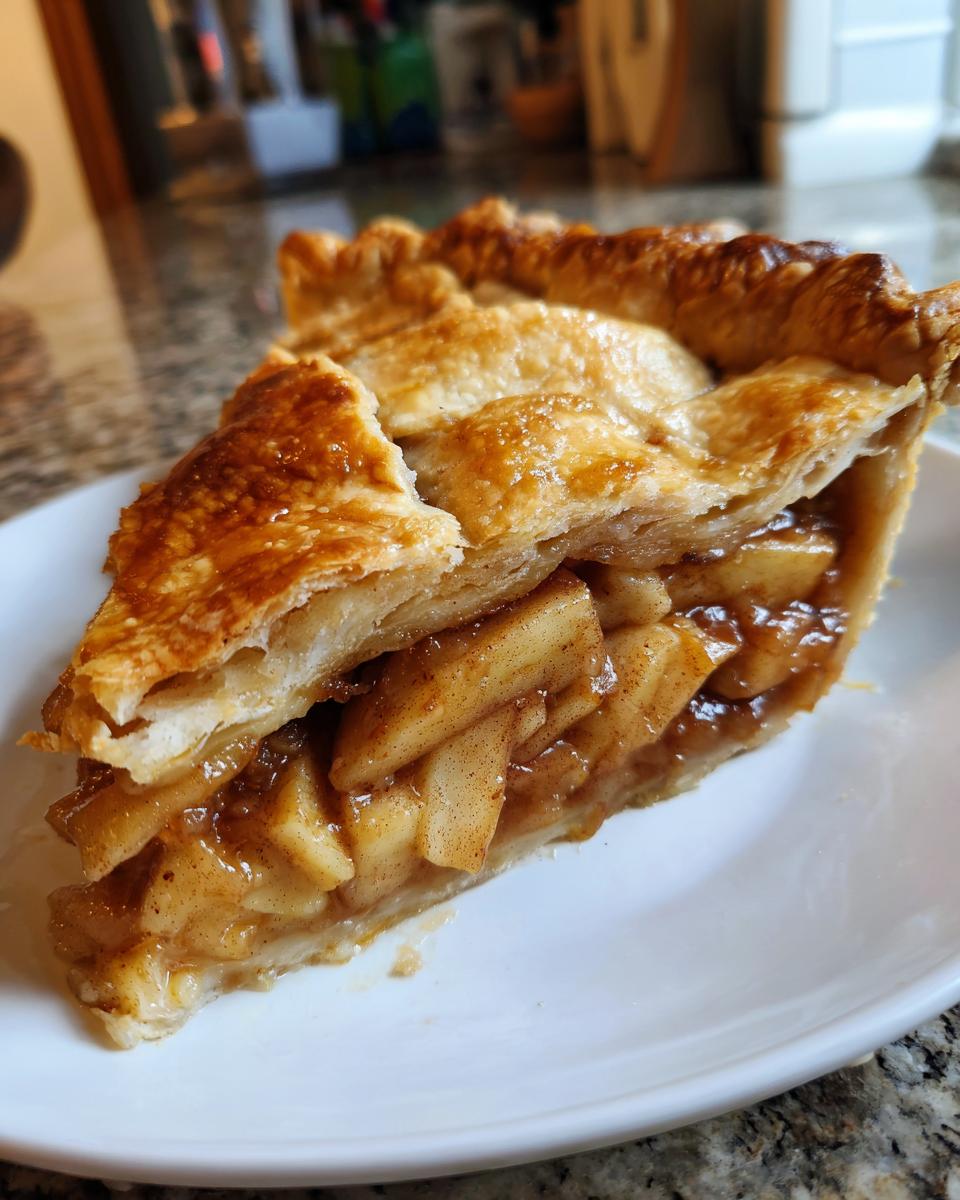
The secret to the flakiest crust in this apple pie recipe is temperature, temperature, temperature! You absolutely must use very cold, cubed butter and ice-cold water. When those cold pieces of butter hit the hot oven, they steam, creating those wonderful layers that give you that lovely shatter when you cut into it. Don’t rush the chilling process—that’s my biggest piece of advice for your flaky pie crust tutorial experience. It’s worth the wait, truly!
Achieving the Best Apple Pie Filling
I don’t mess around with the apples, and neither should you! For the best apple pie filling, we use a mix of Granny Smith for that lovely tartness and Honeycrisp for a bit of sweetness and structure. Combining that with the perfect blend of cinnamon, nutmeg, and allspice gives you that classic flavor profile you expect from a great apple pie recipe. It’s balanced, warm, and stays perfectly bright.
Ingredients for Your Homemade Pie From Scratch
When you’re tackling a homemade pie from scratch, clarity with your ingredients is everything. You need to see exactly what we are working with before we jump into the magic. Seeing these components laid out really gives you confidence, right? It shows you that this isn’t some complicated pastry chef invention; it’s just good, honest food. If you’ve been practicing your applesauce game, you might already have some of the fruit flavors down perfectly! My simple homemade applesauce recipe uses sweetness beautifully, which is related to what we are doing here with the filling.
For the Double Crust Dough
For the dough that gives us that amazing flaky result, keep everything arctic cold. You need two and a half cups of all-purpose flour, one teaspoon of salt, and a full cup—that’s two sticks—of unsalted butter, kept very cold and cubed up small. Remember to have about a half-cup of ice water ready to go, but we’ll only use just enough of it to bring the dough together. That’s the key!
For the Cinnamon Spice Apple Pie Filling
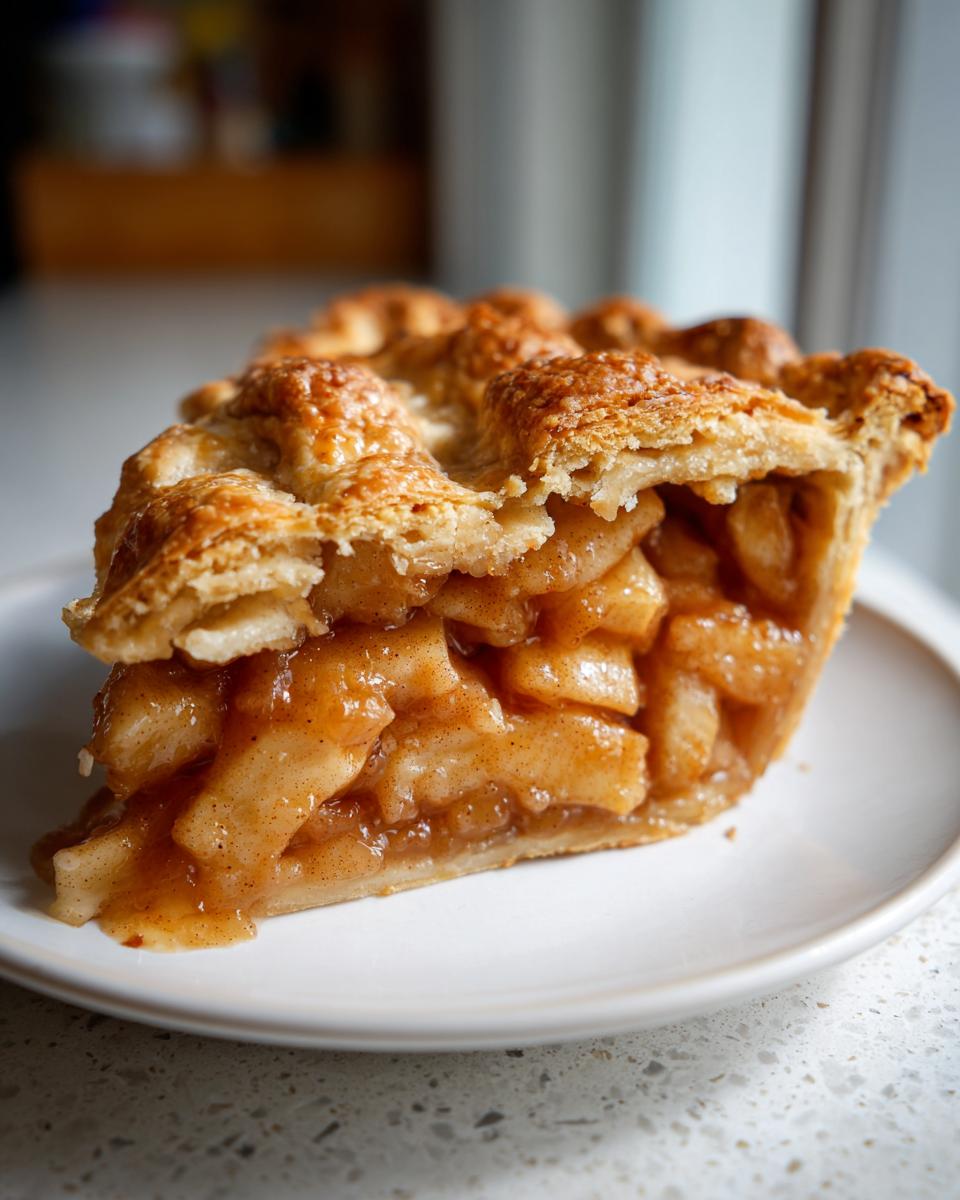
The filling is where all that cozy, classic flavor comes from in this apple pie recipe. We are combining six large Granny Smith apples with two large Honeycrisp apples, all peeled, cored, and sliced really uniformly, about a quarter-inch thick. Then, we balance out three-quarters cup of granulated sugar with a quarter-cup of light brown sugar. We thicken it beautifully with a quarter-cup of flour, and then we bring in the spice: cinnamon, nutmeg, and a touch of allspice, plus one tablespoon of bright lemon juice. Don’t forget those two tablespoons of extra butter to dot the very top before sealing it up!
How to Prepare This Easy Homemade Apple Pie
See? I told you this wouldn’t be hard, even though we are making a spectacular homemade pie from scratch! The process flows really smoothly once you have your ingredients ready. We focus on keeping things cold for the crust and building flavor in the filling before we even turn the oven on. If you can handle mixing, chilling, and waiting, you can master this recipe. Having a good pan release lined up helps, too! If you want a quick win while your dough chills, check out my recipe for easy homemade pita bread—it’s a totally different kind of baking joy!
Making the Flaky Pie Crust Tutorial Dough
First things first: the dough. You want to whisk your dry ingredients, and then it’s time to get your hands in there to cut in that cold butter. Use your fingers or a pastry blender until it looks like coarse crumbs; you need those pea-sized butter chunks! Add your ice water slowly, just a tablespoon at a time, only until it finally holds together. Don’t squeeze it like play-dough! Divide it into two flat disks, wrap them tight, and get them into the fridge for a solid hour minimum. That chilling time is crucial for your flaky pie crust tutorial success.
Mixing and Assembling the Apple Pie Recipe Filling
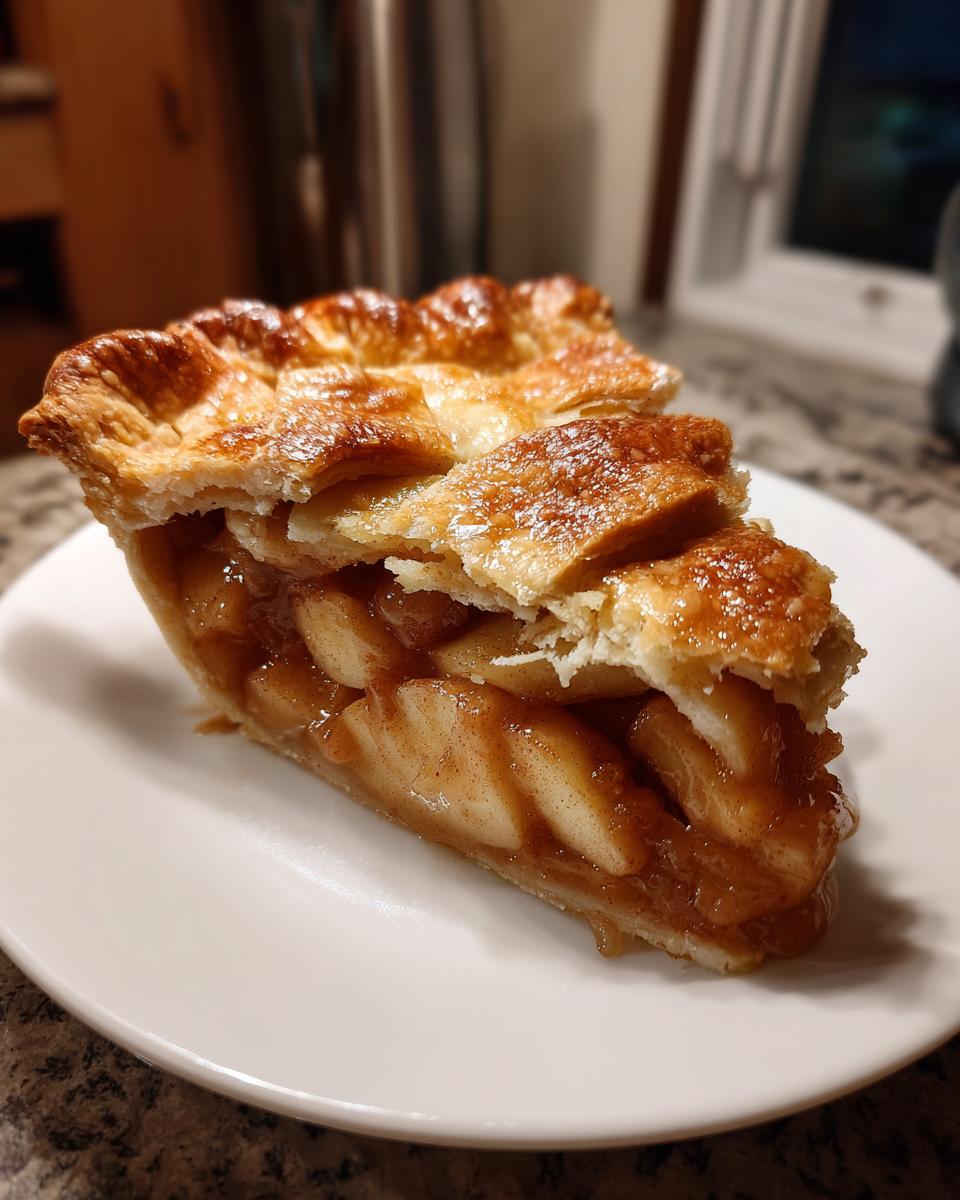
While that dough is resting up, make the star! Toss those beautiful apple slices in a big bowl with both sugars, the flour for thickening, and all those cozy spices—think cinnamon and nutmeg. Gently coat everything! Once you roll out that first chilled disk, ease it into your pie plate. Now, pour in all your spiced apples, stacking them high in the middle. Before you put the top layer on, dot the apples with those little pieces of butter; they melt right into the filling for extra silkiness. Lay your top crust over, crimp those edges tight to seal them up, and please, for the love of pie, cut some vents on top so the steam can escape!
Baking and Resting the Double Crust Apple Pie
Time for the oven! Preheat it to 425 degrees Fahrenheit first. Bake the pie at that high heat for just 15 minutes—this gives you that initial crust puff. Then, knock that heat down to 375 degrees Fahrenheit and let it bake another 40 to 50 minutes until it’s bubbling happily. If the edges start looking too brown (they always do!), just drape some foil loosely over them. The absolute hardest part of this entire apple pie recipe is next: you MUST let it cool for three full hours. Seriously. If you slice it early, the filling just runs everywhere. Patience makes your double crust apple pie perfect!
Tips for Success with Your Apple Pie Recipe
Even with the best instructions, sometimes baking throws a curveball! That’s why sharing tips from my own failures—and successes—is so important to me. We want you to feel confident tackling this amazing apple pie recipe, knowing you can troubleshoot anything. I try to keep backups for my backups, especially when baking for holidays like Thanksgiving. For other simple, comforting baking projects, you can always check out my steps for the best flaky buttermilk scones, too!
Choosing the Best Apple Variety for Pie
This is critical for avoiding that dreaded soupy, mushy filling. For my recipe, I always insist on a blend. You need the tartness and structure of Granny Smiths to hold up under heat. But you need the sweetness and slight firmness of something like Honeycrisp—or Fuji if you can’t find them—to balance the whole thing out. Those two types play together perfectly, ensuring your filling has texture and amazing flavor in every slice of your apple pie recipe.
Making an Old Fashioned Apple Pie with a Lattice (Variation)
If you’re going for that beautiful, rustic apple pie recipe vibe, forget the top sheet of dough and weave a lattice instead. It looks so impressive but is surprisingly easy once you get the hang of it! You just cut strips out of your second dough disk and weave them over the filling. This still works perfectly for our apple pie recipe, and honestly, it lets you see those gorgeous spiced apples underneath, which I love.
Storage and Reheating Instructions for this Classic Apple Pie Recipe
Once you’ve managed to wait for it to cool completely, storing this apple pie recipe is simple. Because the filling is nicely set, you can actually keep the whole pie covered on the counter at room temperature for up to two days. If it’s super hot in your kitchen, though, or if you made the cream cheese variation (which I sometimes sneak onto leftovers!), pop it in the fridge. For reheating, I always grab a slice and microwave it for just 15 or 20 seconds. That little blast warms the filling, but if you want that crust crisp, give it 5 minutes in a 350-degree toaster oven instead!
Serving Suggestions for Comfort Food Desserts
A slice of this pie is wonderful all by itself, especially warmed up, but you know me—I love dressing up my comfort food desserts! The cinnamon spice apple pie filling sings when it has a cool counterpart. My go-to, without fail, is a scoop of really good vanilla bean ice cream that slowly melts into all those spicy juices. But if you want something truly old-fashioned and maybe a little unexpected, try a thin slice of sharp cheddar cheese tucked right on top. It sounds wild, but that salty tang elevates the sweet apples beautifully. We enjoy this tradition here! If you are looking for something sweet to save for later, check out my recipe for best white chocolate fudge.

Frequently Asked Questions About This Apple Pie Recipe
I always get so many great questions after folks try making this pie for the first time! Baking pies can feel intimidating, but once you know the tricks, it’s always smooth sailing. We want your experience with this apple pie recipe to be as wonderful as mine is every single fall. If you are baking for celebrations, you might also like checking out some of my tips on easy holiday baking projects for when you need to make multiple things at once!
Can I use store-bought crust for this apple pie recipe?
Oh, absolutely! If you are looking to make an easy homemade apple pie in a pinch, store-bought crust works just fine. Trust me, I’ve done it when time was super tight! However, you will notice a huge difference in flavor and texture compared to the crust detailed in this recipe. My scratch-made dough uses that super-cold butter, and that’s what gives you those amazing, verifiable flakes. It’s worth the extra 20 minutes of chilling, I promise!
How long does the apple pie filling need to cool before slicing?
This is the step where so many home bakers get impatient, and I totally get it—it smells amazing! But you must let the pie cool on a rack for a minimum of three hours after it comes out of the oven. If you cut into it sooner, all those glorious, thickened fruit juices won’t have time to set up properly. You’ll end up with a beautiful pile of delicious, messy apples instead of clean slices for your dessert plate.
What is the best way to prevent a soggy bottom crust?
Soggy bottoms are the enemy of every good baker! The best prevention method is twofold. First, make sure that pastry shell that lines your pie plate is super cold when you pour in the filling—it needs that cold temperature shock. Second, try this trick: pop your pie plate onto a baking sheet that you’ve already placed in the oven while it preheats. Baking the bottom crust directly on a hot surface helps cook it through faster and shields it from the liquid bubbling up from the filling.
Nutritional Estimates for This Classic Apple Pie Recipe
Now, since this is a traditional, rich apple pie recipe made with sticks of butter and plenty of sugar, we know we aren’t exactly aiming for diet food! Think of this as pure comfort. These numbers are just estimates for one generous slice, based on the ingredients used in this full recipe. Enjoy it guilt-free; you earned it!
- Serving Size: 1 slice
- Calories: 450
- Fat: 25g (with 15g Saturated Fat)
- Carbohydrates: 58g
- Sugar: 35g
- Protein: 5g
Share Your Perfect Apple Pie Recipe Creations
I put my heart into making this the best apple pie recipe for you, and now I’d love to see what you create! Please come back and leave me a rating—five stars if you loved it, of course! It really helps others find this classic recipe. If you made any adjustments, or if your family has a favorite way to eat this pie, let me know in the comments below. When you share photos on social media, tag me! I thrive on seeing your beautiful, flaky pies. It’s so fun to build this community of home bakers. If you are looking for another great dish to round out your meal, maybe try out my easy creamy cheesy vegetable casserole next!
PrintClassic Homemade Apple Pie Recipe with Perfectly Flaky Double Crust

This is the ultimate classic apple pie recipe, featuring a buttery, flaky double crust and a sweet, cinnamon-spiced filling made from scratch. It is designed to be a reliable, no-fail recipe for a traditional, comforting dessert perfect for holidays or any cozy occasion.
- Prep Time: 45 min
- Cook Time: 65 min
- Total Time: 110 min
- Yield: 8 servings 1x
- Category: Dessert
- Method: Baking
- Cuisine: American
- Diet: Vegetarian
Ingredients
- 2 1/2 cups all-purpose flour
- 1 teaspoon salt
- 1 cup (2 sticks) unsalted butter, very cold and cubed
- 1/2 cup ice water, plus more if needed
- 6 large Granny Smith apples, peeled, cored, and sliced 1/4 inch thick
- 2 large Honeycrisp apples, peeled, cored, and sliced 1/4 inch thick
- 3/4 cup granulated sugar
- 1/4 cup packed light brown sugar
- 1/4 cup all-purpose flour (for filling)
- 1 teaspoon ground cinnamon
- 1/4 teaspoon ground nutmeg
- 1/8 teaspoon ground allspice
- 1 tablespoon lemon juice
- 2 tablespoons unsalted butter, cut into small pieces (for dotting)
- 1 large egg, beaten with 1 teaspoon water (for egg wash)
- 1 tablespoon coarse sugar (for sprinkling)
Instructions
- Prepare the Pie Dough: In a large bowl, whisk together the 2 1/2 cups flour and 1 teaspoon salt. Cut in the cold, cubed butter using a pastry blender or your fingers until the mixture resembles coarse crumbs with some pea-sized pieces of butter remaining. Gradually add the ice water, one tablespoon at a time, mixing until the dough just comes together. Do not overmix. Divide the dough in half, flatten each half into a disk, wrap in plastic, and chill for at least 1 hour.
- Prepare the Apple Filling: In a large bowl, combine the sliced apples, granulated sugar, brown sugar, 1/4 cup flour, cinnamon, nutmeg, allspice, and lemon juice. Toss gently until the apples are evenly coated. Set aside while you roll out the bottom crust.
- Assemble the Bottom Crust: On a lightly floured surface, roll out one disk of dough into a 12-inch circle. Carefully transfer the dough to a 9-inch pie plate. Trim the edges, leaving a 1-inch overhang. Place the pie plate in the refrigerator.
- Assemble the Pie: Pour the apple filling into the chilled bottom crust, mounding the apples slightly in the center. Dot the top of the filling with the 2 tablespoons of small butter pieces.
- Add the Top Crust: Roll out the second disk of dough into an 11-inch circle. Place it over the filling. Trim the top crust overhang to match the bottom crust. Crimp the edges together to seal. Cut several slits in the top crust to allow steam to escape.
- Chill and Bake: Brush the top crust with the egg wash and sprinkle with coarse sugar. Chill the assembled pie in the refrigerator for 15 minutes before baking. Preheat your oven to 425 degrees Fahrenheit.
- Bake: Place the pie on a baking sheet to catch any drips. Bake at 425 degrees Fahrenheit for 15 minutes. Reduce the oven temperature to 375 degrees Fahrenheit and continue baking for 40 to 50 minutes more, or until the crust is golden brown and the filling is bubbly. If the edges brown too quickly, cover them loosely with foil.
- Cool: Let the apple pie cool on a wire rack for at least 3 hours before slicing and serving. This allows the filling to set properly.
Notes
- For the flakiest crust, keep all your butter and water as cold as possible.
- Use a mix of tart and sweet apples for the best flavor balance in your filling.
- If you prefer a rustic apple pie look, you can cut the top crust into strips and weave a lattice instead of using a full top crust.
Nutrition
- Serving Size: 1 slice
- Calories: 450
- Sugar: 35g
- Sodium: 250mg
- Fat: 25g
- Saturated Fat: 15g
- Unsaturated Fat: 10g
- Trans Fat: 0g
- Carbohydrates: 58g
- Fiber: 3g
- Protein: 5g
- Cholesterol: 60mg