
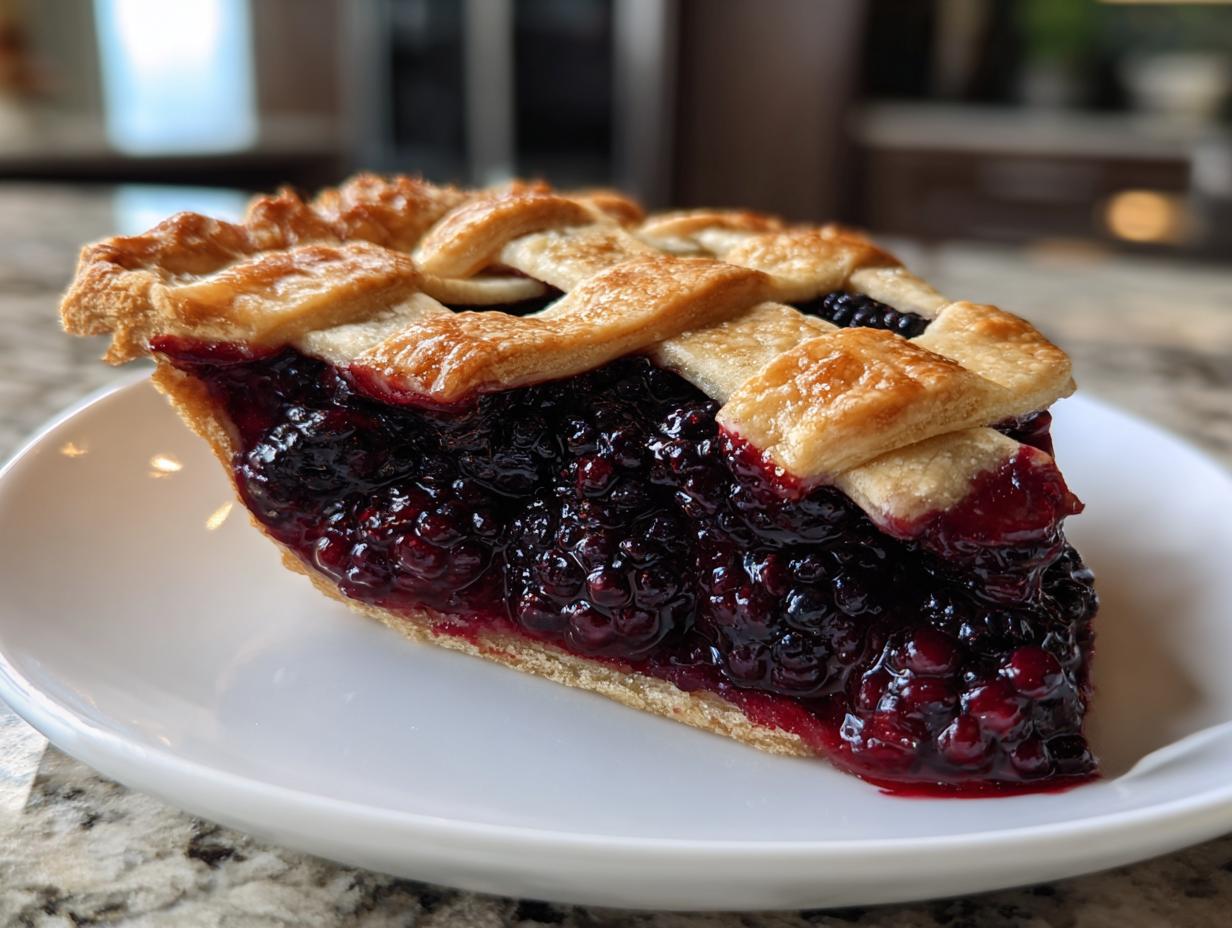
There is just something magical about pulling a perfect, bubbling fruit pie out of the oven, isn’t there? Forget those sad, store-bought slices! For me, reclaiming the joy of cooking meant mastering the classics, and nothing says simple, profound joy like a gorgeous, homemade blackberry pie. This recipe is the one I spent months perfecting—it delivers the flakiest, butteriest crust you can imagine wrapped around a filling so deeply juicy and tart, it tastes like summer sunshine. When my life got too fast, baking pies like this brought me right back to my center. Trust me, this is officially the best homemade blackberry pie recipe you’ll ever need. We’re ditching complicated chores and embracing that incredible feeling of making something truly wonderful from scratch.
- Why This Classic Blackberry Pie Recipe is Your New Favorite
- Gathering Ingredients for Your Homemade Blackberry Pie
- How to Prepare the Flaky Pie Crust for Your Blackberry Pie
- Assembling the Best Juicy Blackberry Filling and Pie
- Baking Instructions for the Perfect Blackberry Pie
- Cooling and Serving Your Old Fashioned Fruit Pie
- Tips for Success with Your Classic Blackberry Pie Recipe
- Frequently Asked Questions About Blackberry Pie
- Sharing Your Easy Homemade Pie Recipe Experience
Why This Classic Blackberry Pie Recipe is Your New Favorite
I’ve tried every fancy trick out there, but this classic blackberry pie recipe always wins. It’s truly the essence of an old fashioned fruit pie, but made surprisingly simple for a busy cook like me. This is the dessert I turn to when I want maximum flavor with minimum stress.
- It guarantees that elusive, thick, juicy filling every single time.
- The crust flakes up beautifully—no gummy bottoms here!
- It works perfectly whether you pick berries this morning or pull them from the freezer.
Achieving the Best Juicy Blackberry Filling
Listen, the number one complaint about fruit pies is that soupy mess lurking at the bottom. Not here! We use cornstarch because it thickens up beautifully as it bakes and achieves that perfect, jammy texture. And here’s my favorite part—if you’re using frozen blackberries straight from the freezer bag, your filling will be just as thick. The cold berries prevent the sugar from dissolving too fast, keeping everything balanced. Easy peasy!
The Secrets to a Flaky Pie Crust Tutorial
If you want those beautiful layers in your crust, you absolutely must follow the chilly guidelines for making the dough. This isn’t fussy work; it’s essential chemistry! The key to a great flaky pie crust tutorial is keeping every single component—the butter, the flour, and even the water—ice cold. That cold butter melts into steam in the oven, creating those wonderful air pockets. Don’t be shy with the ice water; it’s what holds the dough together just enough.
Gathering Ingredients for Your Homemade Blackberry Pie
Okay, let’s get organized! I always find that having everything measured out before I even touch the flour makes the whole process feel so much calmer and honestly, faster. This is where we build the foundation for that incredible easy homemade pie recipe. I lay everything out on the counter, and I know I’m set!
For the Buttery Pie Crust Secrets
Remember, the #1 rule for a truly buttery pie crust secret is cold, cold, cold! Don’t let anything warm up while you are working on this part.
- 2 1/2 cups all-purpose flour
- 1 teaspoon salt
- 1 cup (2 sticks) cold unsalted butter, cut into cubes
- 1/2 cup ice water (plus more if needed—keep that ice handy!)
For the Best Juicy Blackberry Filling
This filling is where all the amazing summer flavor lives. That little bit of lemon juice is crucial; it wakes up the blackberries without making the pie taste sour. It just helps everything sing!
- 6 cups fresh or frozen blackberries
- 1 1/2 cups granulated sugar
- 1/4 cup cornstarch (our secret weapon for thickness!)
- 1 tablespoon lemon juice
- 1 teaspoon vanilla extract
Oh, and don’t forget the finishing touches—you’ll need 1 large egg, beaten, for the egg wash to make that lattice top shiny, and about 1 tablespoon of coarse sugar for sprinkling on top. That crunch is pure happiness.
How to Prepare the Flaky Pie Crust for Your Blackberry Pie
Alright, let’s tackle the structure of this incredible blackberry pie—the crust! This is where some people get nervous, but honestly, it’s just about keeping things cold and being gentle. I always start by grabbing my biggest, chillest bowl. Remember what I said about my best flaky buttermilk scones recipe? The same cold-butter rule applies here 100 percent!
First things first: whisk that flour and salt together. Now for the butter. You want your butter cubed and ice cold—if it’s even slightly soft, stick it back in the freezer for ten minutes. You need to cut that butter into the flour mixture. I prefer using a pastry blender; it keeps my fingers from warming things up too much. You’re aiming for a mix that looks wonderfully rough—think coarse crumbs with some visible chunks about the size of small peas. Those pea-sized bits are totally crucial; they make the flakes!
Next comes the ice water, and this requires patience, my friend. Add it just a tablespoon at a time. You don’t want to pour it all in at once, or you’ll lose all that air you just worked to create with the butter! Mix it lightly until the dough starts to look shaggy and you can just squeeze a handful together without it falling apart. Stop right there! The second it mostly clings together, that’s when you turn it out onto the counter.
Divide the dough neatly in half. Gently shape each half into a flat disk—don’t knead it or try to make it perfect! Just wrap them tight in plastic wrap. Now, this next step is non-negotiable if you want that flaky texture: Chill them out! They need at least an hour in the fridge. This lets the gluten relax and hardens the butter up again before we roll. Seriously, don’t skip that chilling time; your easy homemade pie recipe deserves that hour of rest!
Assembling the Best Juicy Blackberry Filling and Pie
Now that the dough is perfectly chilled and happy in the fridge, we can move onto the star of the show: those glorious blackberries! This step is ridiculously easy, which is why I love this blackberry pie so much. It’s all payoff with minimal fuss.
First, grab your filling ingredients. In a big bowl, gently toss those beautiful berries—fresh or frozen, remember!—with the sugar, cornstarch, lemon juice, and vanilla. I mean gently! You don’t want to mash them up and turn the whole thing into juice yet; we want whole berries that burst during baking. Just enough stirring to make sure that cornstarch coats everything evenly. Set that aside while you roll out the bottom crust.
Time to roll out the first dough disk. Dust your counter lightly and get that dough flattened into a circle bigger than your 9-inch pie plate—aim for about 12 inches. It’s so satisfying to carefully lift that cold dough and lay it right into the plate. Don’t stretch it when you lay it in; just ease it into the bottom and up the sides. Trim the edge, leaving an inch or so hanging over the side. Pop this whole thing back in the fridge while you deal with the top. Keeping it cold prevents slumping later on!
Next up is the fun part: the top crust! If you want that classic, show-stopping look, now is the time to follow my little lattice top pie guide. Roll your second disk out to about 11 inches and cut strips, aim for about 3/4 inch wide. Weaving them over the filling is just like braiding hair, honestly, and looks so professional. Just weave one strip over, then the next strip under, alternating with each row. It locks in all that amazing fruity flavor.
If a lattice seems like too much fuss today, I totally get it! You absolutely can ditch the strips and just lay the second dough circle right over the filling. Just remember to cut several vents—maybe four or five slits—in the top with a sharp knife. This lets the steam escape, turning your pie into a wonderful, juicy, rustic blackberry pie. Either way, make sure you crimp the top and bottom edges together firmly so that filling stays exactly where it belongs!
Baking Instructions for the Perfect Blackberry Pie
It is time to turn on the heat and watch the magic happen! We aren’t just slapping this pie in the oven; we are using a two-stage temperature technique that I learned the hard way—you have to shock the crust into flakiness before you let it gently finish cooking the filling. This is where your easy apple crumble recipe knowledge about temperature control will really come in handy!
Make sure your oven is fully preheated to 400 degrees Fahrenheit (200 Celsius). Before that pie goes in, you need to place it on a sturdy baking sheet. I know, it feels like an extra step, but trust me, if you have a slow ooze from that lattice top, you do not want that sugary mess hardening all over the bottom of your oven rack. The baking sheet saves future cleanup!
Brush the entire surface of your lattice top (or your vented top crust, if you went rustic!) with that beaten egg wash. The egg gives it that gorgeous golden sheen that makes the pie look professional, and the coarse sugar sprinkled on top catches the light and adds a wonderful little crunch. Don’t skimp on that sprinkle!
Bake the blackberry pie at that hot 400°F for exactly 20 minutes. That initial blast of heat sets the structure—it makes the butter expand rapidly, creating those lovely flaky layers in the crust almost instantly. Once those 20 minutes are up, you need to drop the temperature down to 375 degrees Fahrenheit (190 Celsius). Slow and steady wins the race for the next 35 to 45 minutes.
This is also when you need to watch your edges! That buttery crust can go from golden to burnt surprisingly fast. If you notice the edges looking deep brown and beautiful around the 30-minute mark of the second bake, just tear off small pieces of aluminum foil and carefully cover just the rim of the pie plate. This protects that beautiful crust while the center filling bubbles away until it’s thick and glorious. You’ll know it’s done when the filling is bubbling vigorously through the slits—that means the cornstarch has fully activated and you’ll get that perfect, thick texture later!
Cooling and Serving Your Old Fashioned Fruit Pie
Okay, listen up, because this is the hardest part of making any amazing old fashioned fruit pie—waiting! Step seven in the instructions is non-negotiable: you must resist the urge to cut into this pie right away. I know, the smell alone is driving you crazy, but if you slice into this blackberry pie while it’s hot, you’re going to end up with a beautiful, runny mess.
The reason we have to wait at least four hours—and honestly, if you can manage overnight, even better!—is all about that magnificent filling. Remember how we used cornstarch to thicken the mixture? Well, that starch needs time and cooling temperatures to fully gel and create that thick, set texture we crave in the best juicy blackberry filling. If you slice it too soon, the liquid berries just run right out onto your plate. It’s frustrating, and you deserve better than a runny pie!
So, take the pie out of the oven and set it gently on a wire cooling rack. You want air circulating underneath it, not just sitting on a solid countertop. You can watch that lovely bubbling slow down and the whole structure firm up. It’s like watching something important settle in place; it takes patience, but the payoff is worth every single minute!
Now, how to serve this masterpiece? While Grandma always said dessert should be eaten as is, I must insist that a slice of this warm (but set!) pie screaming for a classic companion. You absolutely need a scoop of good quality vanilla ice cream melting slowly down the sides. The cool, creamy vanilla against the warm, tart blackberries? That combination is heaven on a plate. If you’re feeling extra fancy, a tiny dollop of homemade whipped cream works wonders too, but for me, it’s always top-tier blackberry pie with vanilla ice cream. You did the hard work; now enjoy the reward!
Tips for Success with Your Classic Blackberry Pie Recipe
You’ve got the recipe down, but sometimes the difference between good and *spectacular* in an easy make-ahead egg muffin recipe—or in this case, pie—comes down to those little details. I’ve compiled the advice I always give my friends when they ask how I keep achieving that perfect, shatteringly flaky crust and those wonderfully sweet-tart berries anytime I make my classic blackberry pie recipe.
Think of these as the little insider secrets that take all the guesswork out for you. These aren’t really steps; they’re checks to make sure your ingredients are cooperating with you!
First off, let’s talk temperature because this matters more than anything else for that flaky crust. If you feel your kitchen is getting a little warm while you’re cutting the butter, or if you notice your hands are naturally quite warm, just pause! Stick your bowl setup—the flour, the butter, whatever you are currently working with—into the freezer for five minutes. Seriously, five minutes! Having those cold hands and cold ingredients stops the butter from melting into the flour before it even hits the oven, which keeps your crust from getting tough.
Now, about those berries! My biggest note in the recipe is about using frozen blackberries, and I want to double down here. Do not thaw them first! If you let frozen berries sit out and release all their liquid on the counter, you’ll mess with the sugar ratio, and you might end up with too much liquid for the cornstarch to handle, even though we already added some. Pop them straight from the freezer bag into the dry sugar mixture. If you need to, just stir them a little extra gently to get the sugar coating evenly distributed. They thaw perfectly in the oven while baking and keep that filling thick and delicious.
And finally, if you decide you don’t want to weave that beautiful lattice—maybe you’re aiming for that ultra-quick, wonderfully rustic feel—pay attention to your vents. If you just cover the whole top with dough, you are trapping steam. Steam equals moisture, and moisture equals a soggy bottom, which we absolutely cannot have on this beautiful dessert! Make at least four good cuts with a sharp paring knife right through the center of that top crust before it ever sees the oven. This simple step ensures that steam escapes gracefully, leaving you with a crispy, golden, and perfectly baked top for your homemade blackberry pie.
Frequently Asked Questions About Blackberry Pie
I always get so many wonderful emails after people try this recipe, and usually, the questions center on ingredients or timing! That’s totally normal when you are trying to perfect an old fashioned fruit pie. Here are the things I hear most often about making this the best, juiciest pie possible!
Can I use frozen blackberries in this blackberry pie?
Yes, absolutely! I mentioned this above, but honestly, sometimes fresh wild berries just aren’t available, and frozen ones are fantastic. The key is remembering what I said in the tips section: DO NOT thaw them first! Toss those frozen berries straight out of the bag into the sugar and cornstarch mixture. They might release a tiny bit more liquid than fresh berries, but the cornstarch in this recipe is designed to handle it. If you thaw them first, you’ll just have a soupy mess when you go to roll out your crusts!
How far ahead can I make the blackberry pie filling?
This is a great question if you are planning a big holiday meal, maybe for Thanksgiving dessert! You can absolutely make the filling ahead of time. I often prepare the filling mixture—the berries, sugar, cornstarch—and store it in a sealed container in the fridge for up to 24 to 36 hours. You might want to give it a very gentle stir right before putting it into your pie shell, just to redistribute things, but it holds up beautifully. If you are looking for even more advanced prep, you can actually look up a separate make-ahead blackberry pie filling recipe that involves cooking it slightly first, but for this specific recipe, just mixing it and chilling it works perfectly!
Also, people often ask about topping variations, and yes, you can alter the style. While my favorite is the classic lattice, if you want something similar to a blackberry pie with cream cheese swirl, you would need to adjust the recipe significantly! For this specific flaky crust recipe, I stick to the classic fruit filling to ensure that crust stays buttery and crisp underneath.
Lastly, if you want to make sure you get that perfect, melt-in-your-mouth goodness, serving it right next to cold vanilla ice cream is the way to go. You just can’t beat that contrast when you dig into a slice of this perfect easy summer baking treat!
Sharing Your Easy Homemade Pie Recipe Experience
Now that your kitchen smells like the best summer day and you’ve waited (impossibly!) for that pie to cool down, I would absolutely love to hear from you! This whole process, from designing the recipe to presenting it here, is about building a community of cooks who aren’t afraid to make incredible food without all the fuss.
So please, once you have baked this easy homemade pie recipe, come back and tell me how it went! Did your lattice turn out perfectly? Did your family fight over the last slice? Drop your ratings and comments below. I read every single one, and your feedback helps me know which classics we need to tackle next!
And if you took a gorgeous glamour shot of your bubbling, golden-brown pie—especially if you served it up with that scoop of ice cream like I suggested—please share it on social media and tag me! Seeing your success baking this truly homemade blackberry pie from scratch is the absolute best part of running DelishCraze. Head over to my About page if you want to know more about why I cook the way I do. Happy baking, friends—let’s keep the traditional flavors alive together!
PrintThe Best Homemade Blackberry Pie with Flaky Lattice Crust

Make an old-fashioned blackberry pie with a wonderfully fruity, juicy filling and a buttery, flaky crust. This classic summer dessert is easy to make from scratch.
- Prep Time: 45 min
- Cook Time: 1 hr 10 min
- Total Time: 2 hr 55 min
- Yield: 8 servings 1x
- Category: Dessert
- Method: Baking
- Cuisine: American
- Diet: Vegetarian
Ingredients
- 2 1/2 cups all-purpose flour
- 1 teaspoon salt
- 1 cup (2 sticks) cold unsalted butter, cut into cubes
- 1/2 cup ice water (plus more if needed)
- 6 cups fresh or frozen blackberries
- 1 1/2 cups granulated sugar
- 1/4 cup cornstarch
- 1 tablespoon lemon juice
- 1 teaspoon vanilla extract
- 1 large egg, beaten (for egg wash)
- 1 tablespoon coarse sugar (for sprinkling)
Instructions
- Prepare the Pie Crust: In a large bowl, whisk together the flour and salt. Cut in the cold butter using a pastry blender or your fingers until the mixture resembles coarse crumbs with some pea-sized pieces of butter remaining. Gradually add the ice water, one tablespoon at a time, mixing until the dough just comes together. Do not overmix. Divide the dough in half, flatten each half into a disk, wrap in plastic, and chill for at least 1 hour.
- Prepare the Filling: In a separate bowl, gently combine the blackberries, granulated sugar, cornstarch, lemon juice, and vanilla extract. Set aside while you roll out the bottom crust.
- Assemble the Bottom Crust: On a lightly floured surface, roll out one disk of dough into a 12-inch circle. Carefully transfer the dough to a 9-inch pie plate. Trim the edges, leaving a 1-inch overhang. Place the pie plate in the refrigerator.
- Create the Lattice Top: Roll out the second disk of dough into an 11-inch circle. Cut the dough into even strips, about 3/4 inch wide. Weave the strips over the filling in a lattice pattern. Trim the strips and crimp the top and bottom crust edges together to seal.
- Bake the Pie: Preheat your oven to 400 degrees Fahrenheit (200 degrees Celsius). Brush the lattice top with the beaten egg wash and sprinkle with coarse sugar. Place the pie on a baking sheet to catch any drips.
- Bake for 20 minutes at 400°F. Reduce the oven temperature to 375 degrees Fahrenheit (190 degrees Celsius) and continue baking for another 35 to 45 minutes, or until the crust is golden brown and the filling is bubbling thickly. If the edges brown too quickly, cover them loosely with foil.
- Cool Completely: Remove the pie from the oven and place it on a wire rack. You must let the pie cool completely, at least 4 hours, so the juicy filling sets properly. Serve with vanilla ice cream.
Notes
- If you use frozen blackberries, do not thaw them first; add them directly to the sugar mixture. You may need to add 5-10 minutes to the total cook time.
- For an extra flaky pie crust, keep all ingredients, including your hands, as cold as possible during mixing.
- This recipe works well for a rustic top; simply place the top crust over the filling and cut several vents for steam release instead of making a lattice.
Nutrition
- Serving Size: 1 slice
- Calories: 350
- Sugar: 35g
- Sodium: 150mg
- Fat: 18g
- Saturated Fat: 11g
- Unsaturated Fat: 7g
- Trans Fat: 0g
- Carbohydrates: 48g
- Fiber: 4g
- Protein: 4g
- Cholesterol: 45mg