
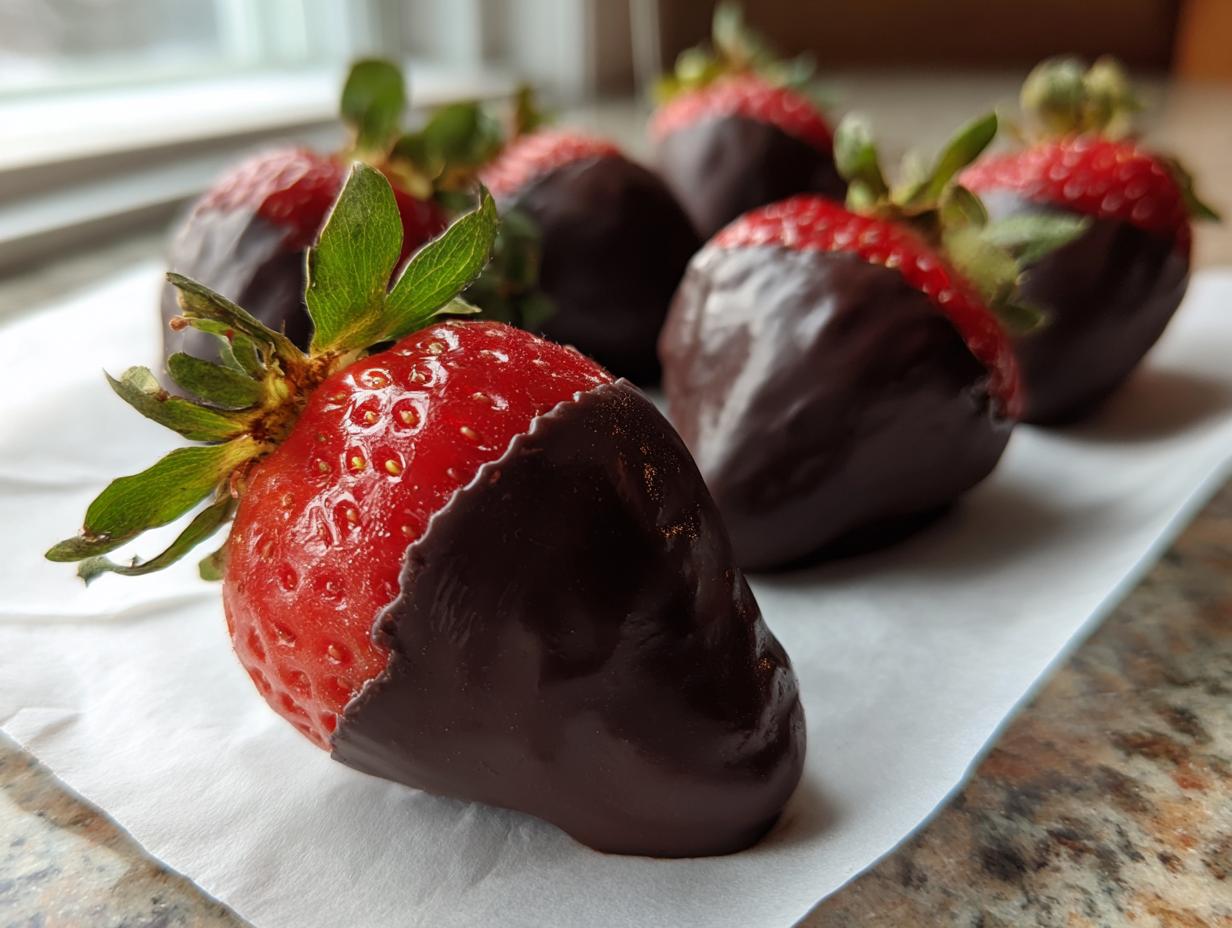
Oh, you just can’t beat the classics, can you? There’s something so magically elegant about fresh strawberries dipped in rich, dark chocolate. They look like they belong in a fancy boutique window, but trust me, making perfect chocolate covered strawberries at home is easier than you think! For me, reclaiming these simple, joyful recipes is what DelishCraze is all about, especially when life starts moving too fast. I spent ages perfecting this method so you can forget wrestling with melted chocolate that splits or slides right off the berry. This guide is my foolproof way to guarantee you get that gorgeous, shiny coating every single time, avoiding all those frustrating dipping disasters.
- Why This is the Ultimate Guide to Chocolate Covered Strawberries
- Gathering Your Ingredients for Perfect Chocolate Covered Strawberries
- Step-by-Step: How to Dip Strawberries in Chocolate
- Troubleshooting Common Issues with Chocolate Covered Strawberries
- Gourmet Toppings and Variations for Your Chocolate Covered Strawberries
- How to Store Chocolate Covered Strawberries for Maximum Freshness
- Quick Dessert Recipes: Enjoying Homemade Chocolate Strawberries Today
- Frequently Asked Questions About Chocolate Covered Strawberries
- Share Your Perfect Chocolate Covered Strawberries Creations
Why This is the Ultimate Guide to Chocolate Covered Strawberries
Listen, I’ve ditched recipes that require you to spend an hour tempering chocolate just for a handful of berries. That’s just not how we do things here at the DelishCraze kitchen! What sets this guide apart is that we focus on fixing the problems everyone runs into: dull chocolate, or worse, that sad puddle of melted goodness sliding down the parchment paper. We get that perfect, glossy finish without all the drama you see in complex pastry videos. Trust me, the few tweaks I share here make all the difference when you’re aiming for gourmet results.
If you’re looking for a simple, reliable chocolate dip alternative, check out my recipe for easy chocolate dip recipe—it works wonders, but for strawberries, the basics below are key.
Achieving That Bakery-Quality Shiny Chocolate Coating for Strawberries
The shine factor is huge, isn’t it? You want that smooth, reflective look that screams ‘expensive’! The secret here often comes down to the chocolate quality or a little helper. I specify using high-quality melting chocolate—it just melts cleaner, period. But if you look at my ingredient list, you noticed the tiny bit of coconut oil? That’s a game-changer! It helps thin the chocolate just enough so it coats thinly and sets up wonderfully glossy. If you really want to go pro, you can temper, of course, but the oil hack gets you 99% of the way there with almost zero extra work.
The Essential Secret to Perfect Chocolate Covered Strawberries
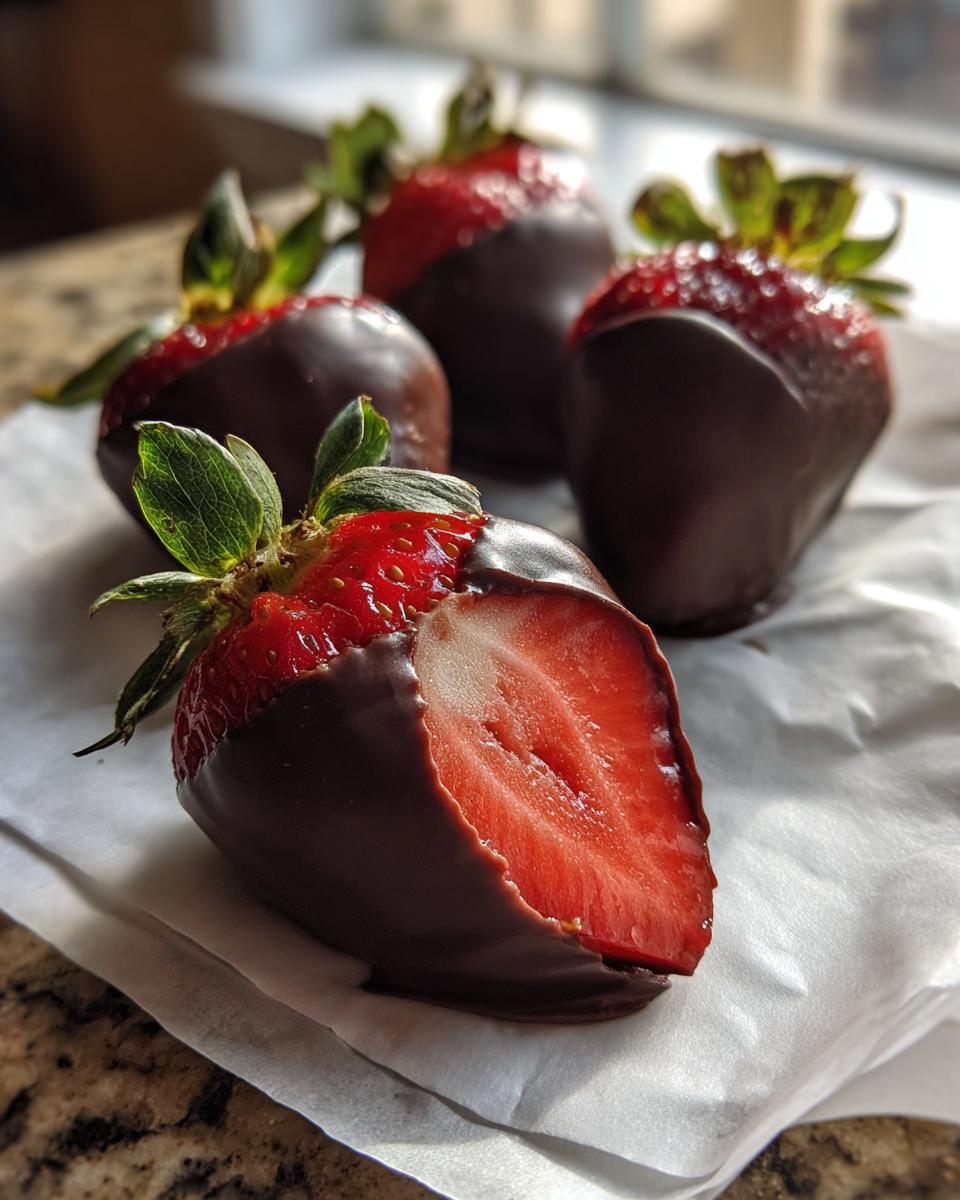
Okay, here’s where we build our authority because this simple step is non-negotiable: You must dry your strawberries until they are bone dry. I mean *bone dry*. If there is even one rogue drop of water on that berry, the chocolate will absolutely hate you. Moisture causes the chocolate to seize up instantly—it turns gritty and thick—or it causes the final coat to just slide right off once it hits the paper. We need that chocolate to grip the fruit!
Gathering Your Ingredients for Perfect Chocolate Covered Strawberries
Before we even think about melting anything, we need gorgeous raw materials! Making these treasures look gourmet starts long before the stovetop. We need beautiful, plump strawberries—nothing too small or mushy, please! And crucially, we need the right chocolate. This really isn’t the time to skimp, because the flavor of the chocolate is the star of the show, second only to that sweet fruit inside.
Ingredient Breakdown and Sourcing Tips
For the strawberries, aim for medium-to-large ones that are perfectly ripe, vibrant red, and firm. Make sure you leave those bright green caps on because you need something to hold onto—it’s the best way to handle them without messing up your gorgeous clean dips! When it comes to the chocolate, I only suggest high-quality melting chocolate. If you decide to use the secret weapon (the optional coconut oil), remember it’s there to help stabilize the melt and encourage that beautiful shine, making the dipping process so much smoother.
Step-by-Step: How to Dip Strawberries in Chocolate
Alright, now that we have our supplies ready and our berries screaming dry, let’s get to the fun part! Learning how to dip strawberries in chocolate is a little like learning to swim—once you get the rhythm down, you’ll be gliding through this recipe. We’ll cover prepping the fruit, melting the chocolate perfectly, the dipping action itself, and getting them set up to look fantastic. Follow these steps closely, and you’ll have a tray of stunning homemade chocolate strawberries in no time flat!
Preparing the Fruit: The Key to Non-Sliding Chocolate Covered Strawberries
Remember what I said about moisture? This step is where you prove you listened! Wash your berries gently, and then you need patience, my friend. Lay them out on paper towels and pat them down. Seriously, I press on mine until I’m convinced they are dry, and then I let them sit for another ten minutes. Also, here’s a pro tip: if your berries feel chilly (maybe straight from the fridge), let them sit on the counter for about 15 minutes before dipping. Room temperature fruit bonds better with the chocolate, stopping that dreaded slide.
Melting and Cooling the Chocolate for Easy Chocolate Dipped Strawberries
Melting the chocolate is where people rush, and rushing leads to grainy chocolate. Don’t overheat it! If you’re using the microwave like I usually do for speed, use short bursts—30 seconds max—and stir, stir, stir every time. You want it mostly melted, then stir until the residual heat finishes the job. Once it’s totally smooth, take it off the heat and let it hang out for about five to ten minutes. If the chocolate is too hot, it just slides right off the cool berries. A slightly cooler, thicker consistency grabs onto the fruit better. Trust me on the cooling time!

Troubleshooting Common Issues with Chocolate Covered Strawberries
Even when you follow the directions perfectly, sometimes chocolate just has a mind of its own! Let’s talk about the three big villains in the chocolate-dipped world: the dreaded slide, the sticky sweat, and the awful crack. If you’ve done everything right—especially those dry berries—you’ve probably already won half the battle. But if you’re still running into trouble, I have some quick fixes that work wonders. We definitely don’t want weeping berries ruining a beautiful presentation.
If you’re trying to figure out how to prevent chocolate covered strawberries from sweating, the biggest thing is temperature control, both when you’re dipping and when you’re storing them. If you’re worried about them looking damp later, make sure you let that chocolate set up completely on the counter, not in the fridge, for the first half hour after dipping.
Fixing Chocolate That Slides Off Chocolate Covered Strawberries
If your chocolate is sliding off like it’s wearing tiny ice skates, nine times out of ten it’s temperature related. Your chocolate was either way too hot when you dipped, or your strawberries were still cold from the fridge, causing the chocolate to set up almost instantly on the outside while the inside liquid stays runny. Next time, wait that extra five minutes for the chocolate to cool down slightly before dipping. If you’ve already dipped a batch and it’s sliding, you can carefully pop them into the fridge for just 5 minutes to firm up that coating, then let them come back to room temperature briefly before adding any toppings. Sometimes, just a tiny second dip after the first layer sets, very quickly, helps anchor it down. For more great dipping advice, check out what the folks over at Grain-Free Table suggest for avoiding that sliding mess!
Gourmet Toppings and Variations for Your Chocolate Covered Strawberries
Okay, we have our perfectly dipped, glossy beauties setting up—now comes the fun part where we make them uniquely ours! This is where we get to decorate and play around with different kinds of chocolate. You can keep it classic with just dark chocolate, or you can get playful. Sprinkles are always a winner, especially if you’re making these for a party or a holiday like Valentine’s Day. Chopped nuts or little sea salt flakes are fantastic if you like that salty-sweet contrast.
If you want that super professional look, you absolutely must try contrasting chocolate drizzles for berries. It takes two types of chocolate to pull that off perfectly. You can find tons of creative looks over at Sarah’s Scoop, but honestly, a simple drizzle done with a fork against the set chocolate looks amazing.
Making White Chocolate Covered Strawberries
White chocolate is lovely, but it can be a little fussier than dark or milk chocolate, so treat it gently! It tends to have a lower melting point than the bitter dark stuff, so you have to be super careful not to scorch it. Sometimes, white chocolate wafers—like candy melts—work way better than actual white chocolate bars because they contain stabilizers that keep them smooth without needing extra help. If you are sticking to baking chocolate, melt it low and slow, just like we did with the dark chocolate, and maybe let it cool just a touch longer before dipping your berries. They pair beautifully if you want to make a ‘zebra’ effect!
How to Store Chocolate Covered Strawberries for Maximum Freshness
Once you’ve made these beauties, the big question is keeping them perfect! Since we want that amazing texture and shine, storage is crucial. Honestly, the absolute best way to enjoy them is the day you make them, sitting right there on the counter, maybe after setting up on the parchment paper. But if you need to save some for later—maybe for a party the next day—you have to be careful.
If you chilled yours to set the chocolate, let them sit out at room temperature for about 20 minutes before serving. For short storage, like a few hours until the party starts, keeping them in a single layer in a cool, dry place works wonders. When figuring out how to store chocolate covered strawberries longer than a day, the fridge is tricky because of condensation, but it might be necessary sometimes. Just make sure they are in a single layer in an airtight container, maybe with a paper towel underneath to catch any accidental moisture.
Quick Dessert Recipes: Enjoying Homemade Chocolate Strawberries Today
Doesn’t it feel good to whip up something elegant when you really didn’t have much time? That’s the magic here! This whole process, from washing the berries to putting a drizzle on top, takes us just about 20 minutes total. If you’re looking for more incredibly fast ways to satisfy that sweet tooth, you should definitely bookmark my recipe for easy 3-ingredient fudge recipe, but right now, let’s focus on these berries.
Because this is a no-bake treat that comes together so fast, it’s perfect for those sudden cravings or when unexpected guests drop by. You get that fancy, decadent feel without needing to turn on the oven or wait forever for things to set!
Frequently Asked Questions About Chocolate Covered Strawberries
We’ve covered all the secrets to getting that perfect, shiny coat, but I know you might still have a few lingering questions. That’s totally normal! The difference between a good dipped strawberry and a *great* one is usually in the tiny details. I gathered up the questions I get asked most often, because solving these little mysteries is how we build confidence in the kitchen, right? If you want to dive deeper into other chocolate recipes afterward, you can always check out my chocolate brownie cookies recipe!
Can I make chocolate covered strawberries ahead of time?
Yes, you absolutely can, but you have to be strategic! If you plan on serving them the next day, they are best stored in a single layer in a cool, dry place or the absolute coldest part of your fridge, making sure the container is truly airtight. If you tempered your chocolate like a pastry chef, they will hold up fantastically for 2 to 3 days. If you used the coconut oil trick like I showed you, they are best kept within 24 hours for the absolute prettiest look, as sometimes refrigeration can cause slight condensation (sweating) over longer periods.
What is the best chocolate for dipping strawberries?
This is a huge one! Look for high-quality compound coating or chocolate that says it’s designed for melting or dipping. Real chocolate bars (like good quality chips) are delicious, but they often contain less cocoa butter, which means they can get thick or seize up on you. If you stick to real chocolate, you need to use a little fat—like that coconut oil I mentioned—or go the extra mile and temper it properly for that professional, hard snap. Compound coatings are super easy because they are designed to set hard without any fuss, so they are great for beginners!
Why did my chocolate coating crack on the chocolate covered strawberries?
Cracking is almost always about temperature shock! If you dip your berry, which is likely room temperature or slightly cool, and then immediately rush it into a super cold refrigerator to set fast, the chocolate contracts too quickly, and *snap*—it cracks. Also, residual moisture trapped inside the berry, or on the outside after washing, can cause hairline fractures later on. To prevent this, always let them set up for at least 30 minutes on the counter first, or let the berries warm up slightly before dipping!
Share Your Perfect Chocolate Covered Strawberries Creations
I truly hope this guide has given you the confidence you need to create the most beautiful, glossy chocolate covered strawberries! Honestly, there’s nothing better than tasting a fresh, perfectly dipped berry you made with your own hands. It just tastes better when you make it yourself, doesn’t it?
Now that you’ve mastered the dipping technique and avoided all the sliding disasters, I would absolutely love to hear about it! Drop a rating below—five stars if you think they were perfection! And please, if you made them, share a picture with me on Instagram and tag DelishCraze; seeing your creations really makes my day and keeps me inspired to share more simple, yet special, cooking secrets.
If you still need more dipping inspiration for other snacks, you know I always have your back, so check out my thoughts on the easy chocolate dip recipe to use with pretzels or cookies next!
PrintThe Ultimate Guide: Perfect Chocolate Covered Strawberries (With Pro Dipping Tips)

Make impressive, bakery-quality chocolate covered strawberries at home. This guide provides simple steps for dipping and expert tips to achieve a smooth, shiny coating that sets perfectly, avoiding common issues like sliding or sweating chocolate.
- Prep Time: 15 min
- Cook Time: 5 min
- Total Time: 20 min
- Yield: About 2 dozen 1x
- Category: Dessert
- Method: Dipping
- Cuisine: American
- Diet: Vegetarian
Ingredients
- 1 pound fresh strawberries, washed and completely dried
- 12 ounces high-quality melting chocolate (dark, milk, or white)
- 1 teaspoon coconut oil (optional, for extra shine and smoother dipping)
Instructions
- Prepare the strawberries: Wash the strawberries gently and dry them thoroughly. Moisture causes chocolate to seize or slide off. Leave the green stems intact for easy dipping and presentation.
- Melt the chocolate: Place the chocolate (and coconut oil, if using) in a microwave-safe bowl. Microwave in 30-second intervals, stirring well after each interval, until the chocolate is mostly melted and smooth. Do not overheat. Alternatively, melt the chocolate using a double boiler until smooth.
- Cool the chocolate slightly: Allow the melted chocolate to cool for 5 to 10 minutes. It should still be liquid but not hot. Cooler chocolate adheres better to the strawberries.
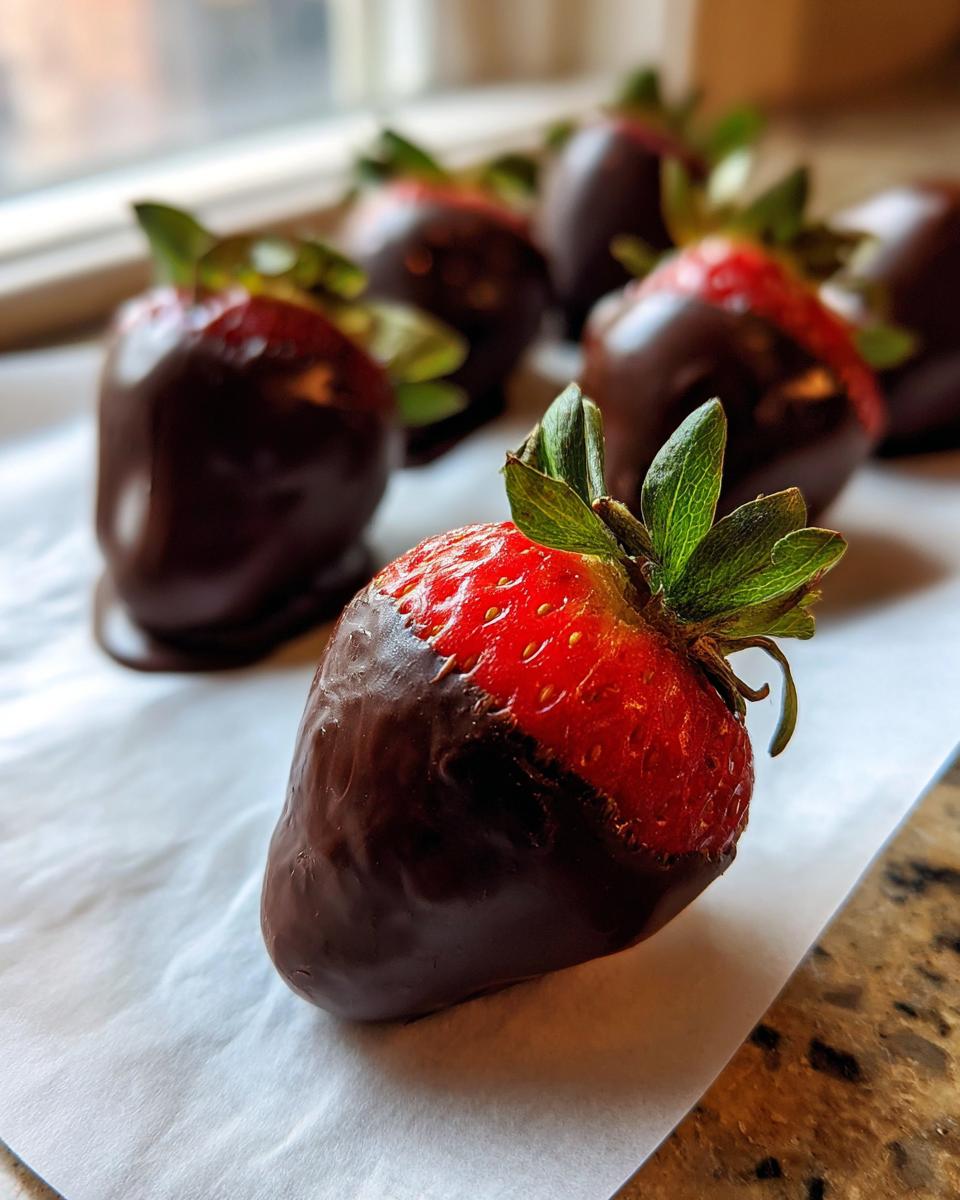
- Dip the strawberries: Hold a strawberry by the stem. Dip it into the melted chocolate, tilting the bowl slightly if needed to cover most of the berry. Leave a small area of red berry exposed at the top for contrast.
- Remove excess chocolate: Gently lift the strawberry out and lightly tap the wrist holding the berry against the side of the bowl to let excess chocolate drip off.
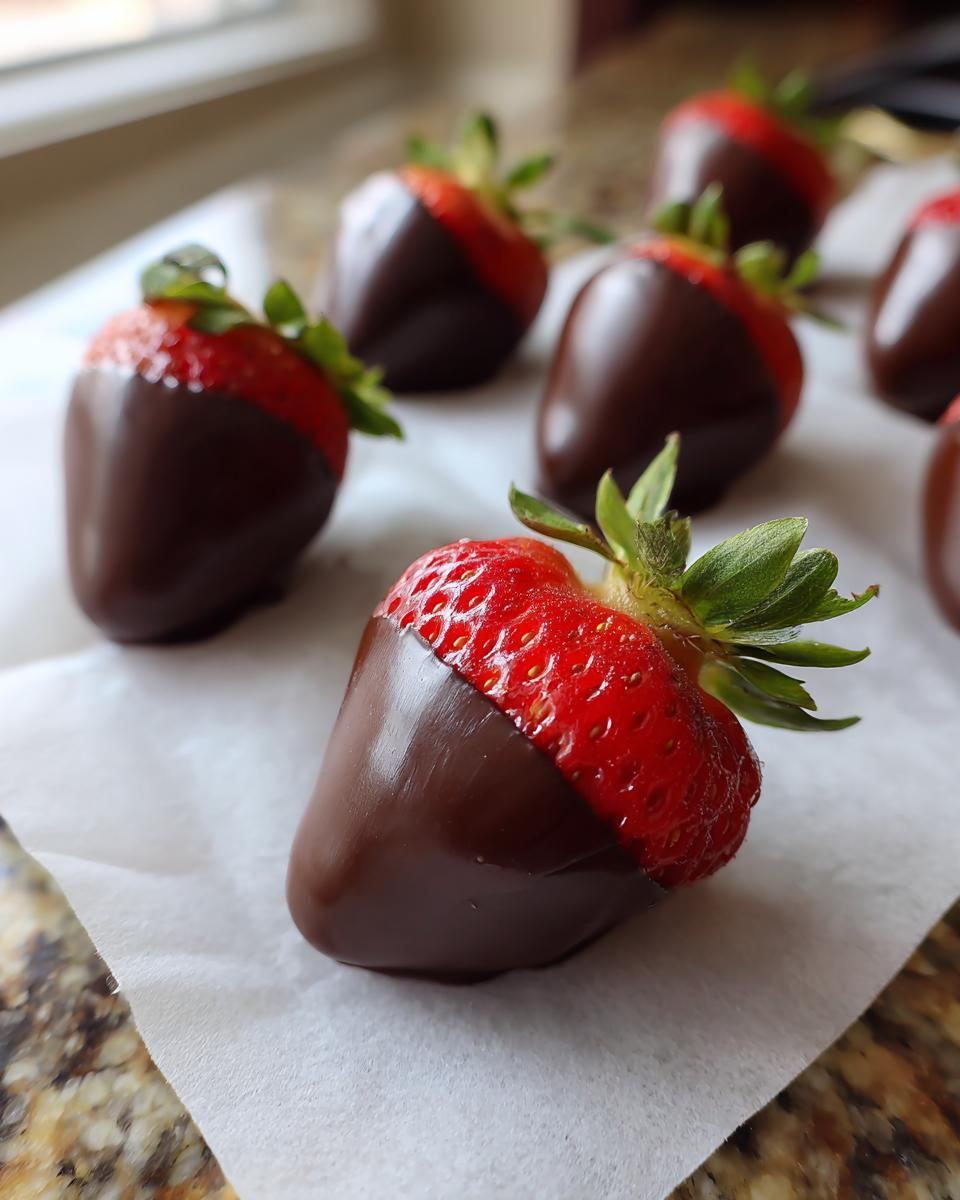
- Set the coating: Place the dipped strawberries, chocolate side up, on a baking sheet lined with parchment paper or wax paper.
- Add toppings (optional): If you want toppings like sprinkles or chopped nuts, add them immediately while the chocolate is still wet. For a drizzle effect, wait until the first layer is completely set, then drizzle with contrasting chocolate.
- Set completely: Allow the chocolate covered strawberries to set at room temperature for about 30 minutes, or place them in the refrigerator for 10 to 15 minutes until the chocolate is firm.
Notes
- For a guaranteed shiny, hard shell, you can temper your chocolate instead of using coconut oil.
- To prevent sweating (condensation), ensure the strawberries are completely dry and avoid storing them in the refrigerator until the chocolate is fully set. If storing long-term, place them in an airtight container in a cool, dry place.
- If the chocolate thickens while you work, reheat it gently in 15-second bursts.
- Use high-quality chocolate for the best flavor and melting consistency.
Nutrition
- Serving Size: 1 strawberry
- Calories: 75
- Sugar: 8
- Sodium: 5
- Fat: 4
- Saturated Fat: 2.5
- Unsaturated Fat: 1.5
- Trans Fat: 0
- Carbohydrates: 10
- Fiber: 1
- Protein: 1
- Cholesterol: 5