
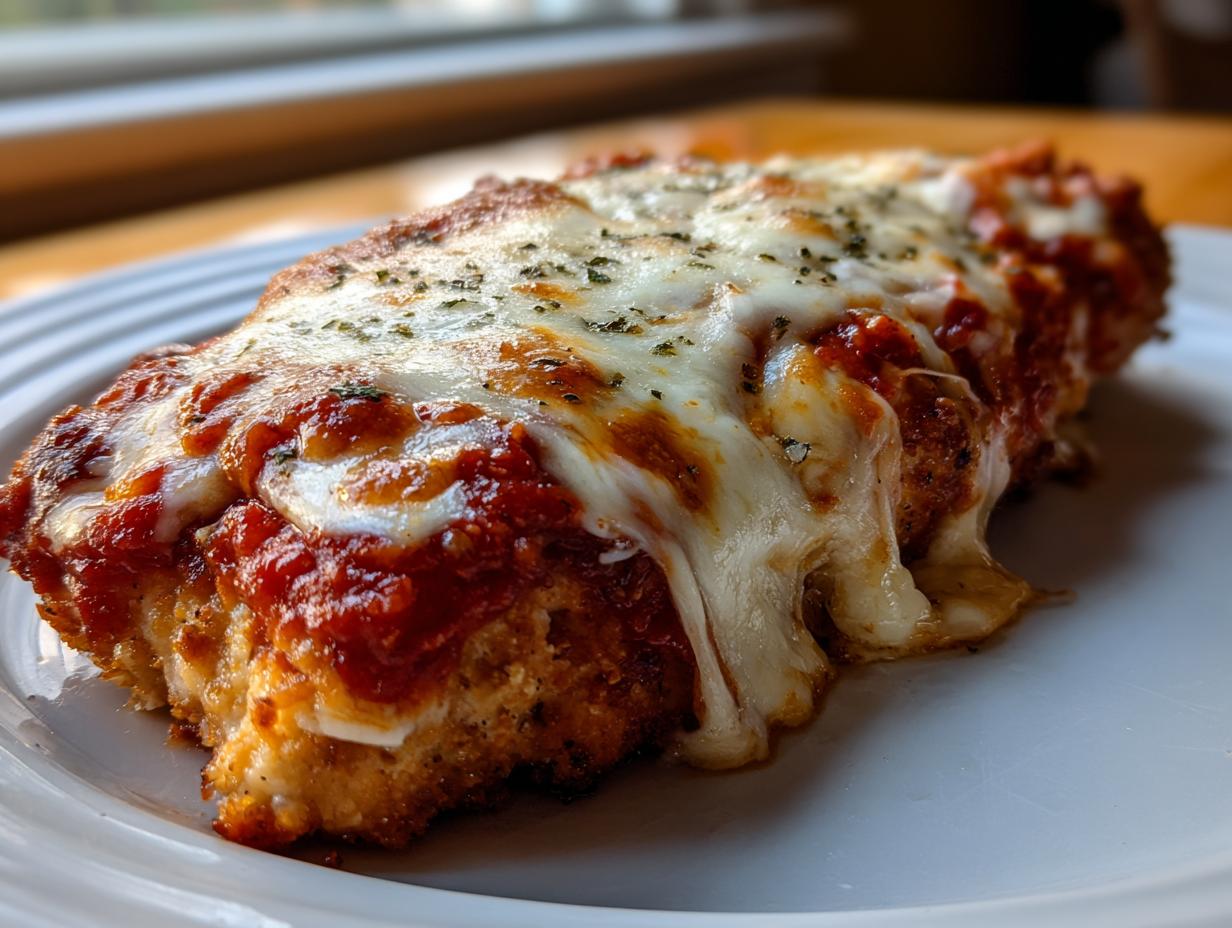
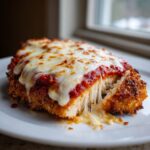
Oh, doesn’t everyone get that deep, unavoidable yearning for Italian comfort food sometimes? I used to think that means ordering out or spending what felt like an hour dealing with oil splatters. Not anymore! When building DelishCraze, I made it my mission to conquer the classics, and this Easy Chicken Parmesan recipe is proof you can have that crispy, cheesy restaurant experience right on a Tuesday night.
Seriously, ditch the frying pan! This is my absolute favorite way to make Chicken Parm because we bake it. You still get that perfectly crunchy crust and gooey mozzarella topping—trust me, it’s amazing—but with totally minimal fuss. It’s about reclaiming those weeknight moments. If you’re looking to simplify your dinner routine, check out my guide on quick, easy weeknight dinners. This Parm recipe always steals the show!
- Why This Easy Chicken Parmesan Is Your New Weeknight Staple
- Ingredients Needed for Easy Chicken Parmesan
- Essential Equipment for Your Baked Chicken Parm Recipe
- Step-by-Step Instructions for Easy Chicken Parmesan
- Tips for Perfect Crispy Easy Chicken Parmesan
- Serving Suggestions for Your Easy Chicken Dinner Idea
- Storing and Reheating Your Leftover Easy Chicken Parmesan
- Frequently Asked Questions About This Italian Comfort Food at Home
- Nutritional Estimate for This Dish
Why This Easy Chicken Parmesan Is Your New Weeknight Staple
Listen, I didn’t develop this recipe to keep me chained to the stove on a Friday night. If you’re looking for restaurant-quality flavor without the hassle, this is it. Forget heavy frying; we’re going to bake our way to perfection while keeping things super simple.
- It delivers that satisfying crunch you crave without dirtying a whole skillet full of oil.
- This recipe truly speeds things up for busy evenings.
Quick Chicken Parmesan Prep Time
The beauty here is the speed! You’re only looking at about 15 minutes of actual prep time. Then, it bakes up in just about 25 minutes total. That’s right—dinner on the table in under an hour. That makes this a fantastic quick chicken parmesan option!
Achieving Crispy Breaded Chicken Breast Without Frying
The secret to that fantastic crunch, even when baking? Panko breadcrumbs and that quick drizzle of oil right before it goes in the oven. Also, remember to pound those chicken breasts evenly, aiming for about half an inch thick. When they are uniform, they cook perfectly and stay juicy!
Ingredients Needed for Easy Chicken Parmesan
Okay, let’s talk about what you need to grab before you even think about setting up that breading station. The great news is that for this easy chicken parmesan, we aren’t using anything exotic. It’s all about using quality versions of pantry staples! I just listed everything out below so you can quickly grab what you need. I promise, this list is straightforward.
- 4 boneless, skinless chicken breasts, pounded to 1/2 inch thickness
- 1 cup all-purpose flour
- 2 large eggs, beaten
- 1 1/2 cups panko breadcrumbs
- 1/2 cup grated Parmesan cheese, plus more for topping
- 1 teaspoon dried Italian seasoning
- 1/2 teaspoon garlic powder
- Salt and black pepper to taste
- 1 tablespoon olive oil
- 24 ounces marinara sauce
- 8 ounces fresh mozzarella cheese, sliced
- Fresh basil for garnish (optional)
Ingredient Notes and Substitutions for Easy Chicken Parmesan
There are a few little details here—my non-negotiables, if you will—that make sure we nail that crispy crust. First, you absolutely must use Panko breadcrumbs! They are lighter and crunchier than regular breadcrumbs, which is key for this baked approach.
When it comes to the cheese, while fresh mozzarella is dreamy when it melts, if you’re in a rush, Provolone works beautifully as a substitute; it melts just as well. And please, on the sauce: choose the absolute best marinara you can find. Since there are only a few flavor components, the quality of that sauce really shines through in the final result. It makes all the difference in making this truly taste like Italian comfort food at home.
Essential Equipment for Your Baked Chicken Parm Recipe
You don’t need specialty gear for this recipe, which is another reason I love it so much for weeknights. Preparation means getting your little assembly line ready to go! Before you even start pounding the chicken, make sure you have these items lined up on your counter.
The biggest thing you’ll need is a reliable baking sheet. Since we are baking this to keep things neat, a rimmed sheet pan is the best choice to catch any stray sauce drizzle or escaping crumbs. We’ll need parchment paper to line it, which is non-negotiable for easy cleanup!
- A rimmed baking sheet (lined with parchment paper, please!)
- Three shallow dishes or pie plates. These are crucial for setting up your efficient breading station without making a massive mess.
- A sturdy mixing bowl for tossing the flour mixture, and a separate small bowl for the eggs.
- A meat mallet or the bottom of a heavy pan. You need to get those chicken breasts nice and thin—about 1/2 inch—so they cook through quickly and evenly in the oven.
That’s truly it! No fancy deep fryers or specialized racks required. Just simple tools that I bet you already have sitting in your kitchen cabinets right now.
Step-by-Step Instructions for Easy Chicken Parmesan
Okay, here we go! This is where the magic happens, and trust me, if you stick to the sequence, you won’t mess it up. Time to get organized before you touch that poor chicken breast! You want everything ready to go because once you start breading, you have to move fast so the coating doesn’t get gummy.
- First things first: Crank that oven up to 400 degrees Fahrenheit. While it’s heating, quickly grease your baking sheet or lay down that parchment paper we talked about—it saves so much scrubbing later.
- Now, build your assembly line! This breading station is non-negotiable for quick work. You need three shallow dishes lined up in order. Dish one gets your flour mixed with salt and pepper. Dish two is just for the beaten eggs. Dish three is the star: panko, that half cup of grated Parmesan, garlic powder, and Italian seasoning all tossed together.
If you’re looking for another simple, flavor-packed meal to add to your rotation, check out my Bruschetta Chicken Recipe, which is another great option when you want Italian flavors without deep-frying.
Preparing the Chicken and Setting Up the Breading Station
Take those chicken breasts and pound them carefully until they are all roughly a half-inch thick. This is so important! If one side is thick and one is thin, you’ll end up with dry parts and raw parts. We aim for evenness!
Start dipping! First, dredge that chicken piece in the flour—shake off the extra dust, really—then dunk it fully into the egg. Finally, press it firmly into that crunchy Panko mix. Make sure you press well so that the crumbs stick everywhere! Don’t worry, a little excess breading falling off onto the sheet is totally normal.
Baking and Finishing Your Cheesy Chicken Cutlets
Lay those beautifully coated cutlets onto your prepared sheet. Drizzle a tiny bit of olive oil right over the top of the breading—this is how we trick the oven into making it golden brown! Pop them in the hot oven for 15 minutes. Don’t peek too much!
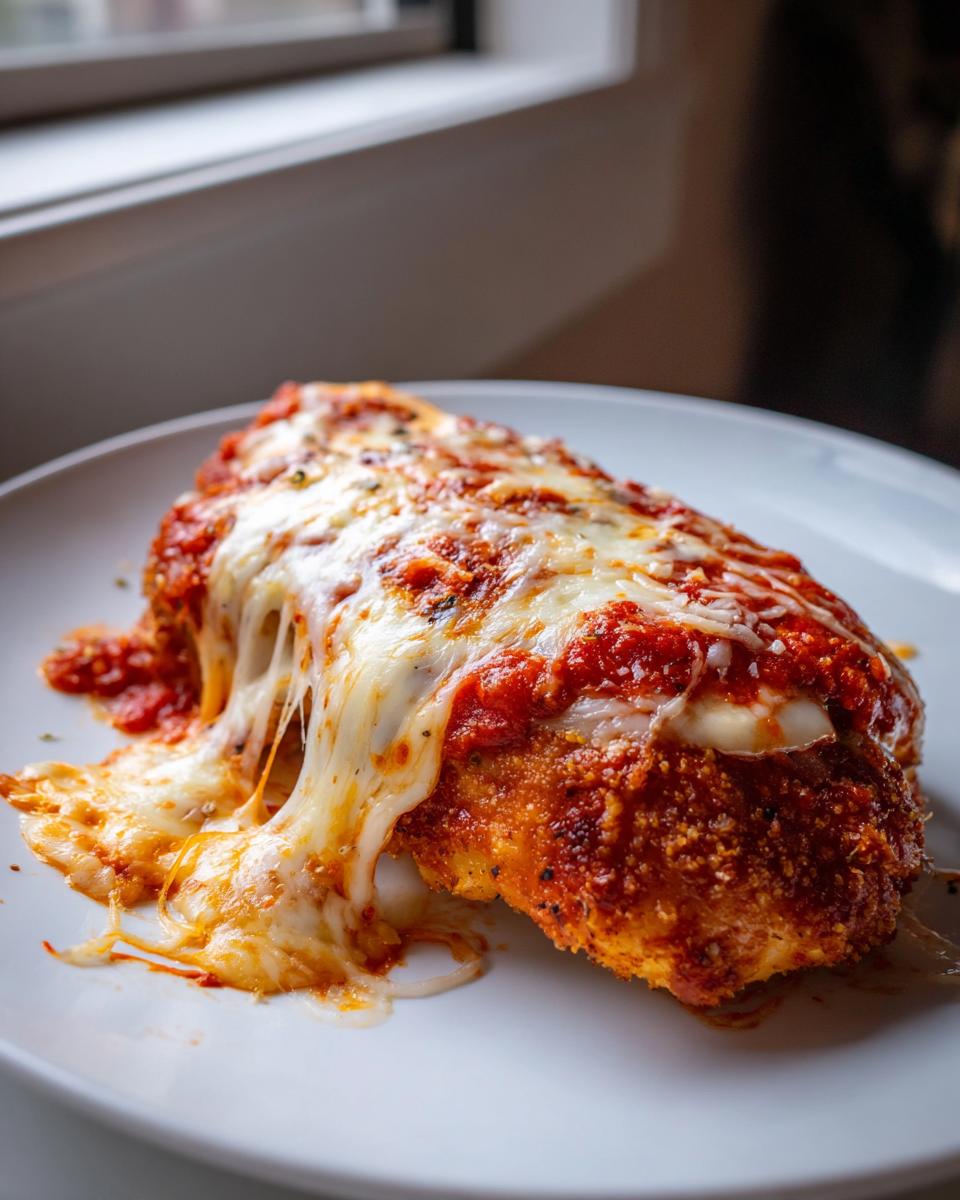
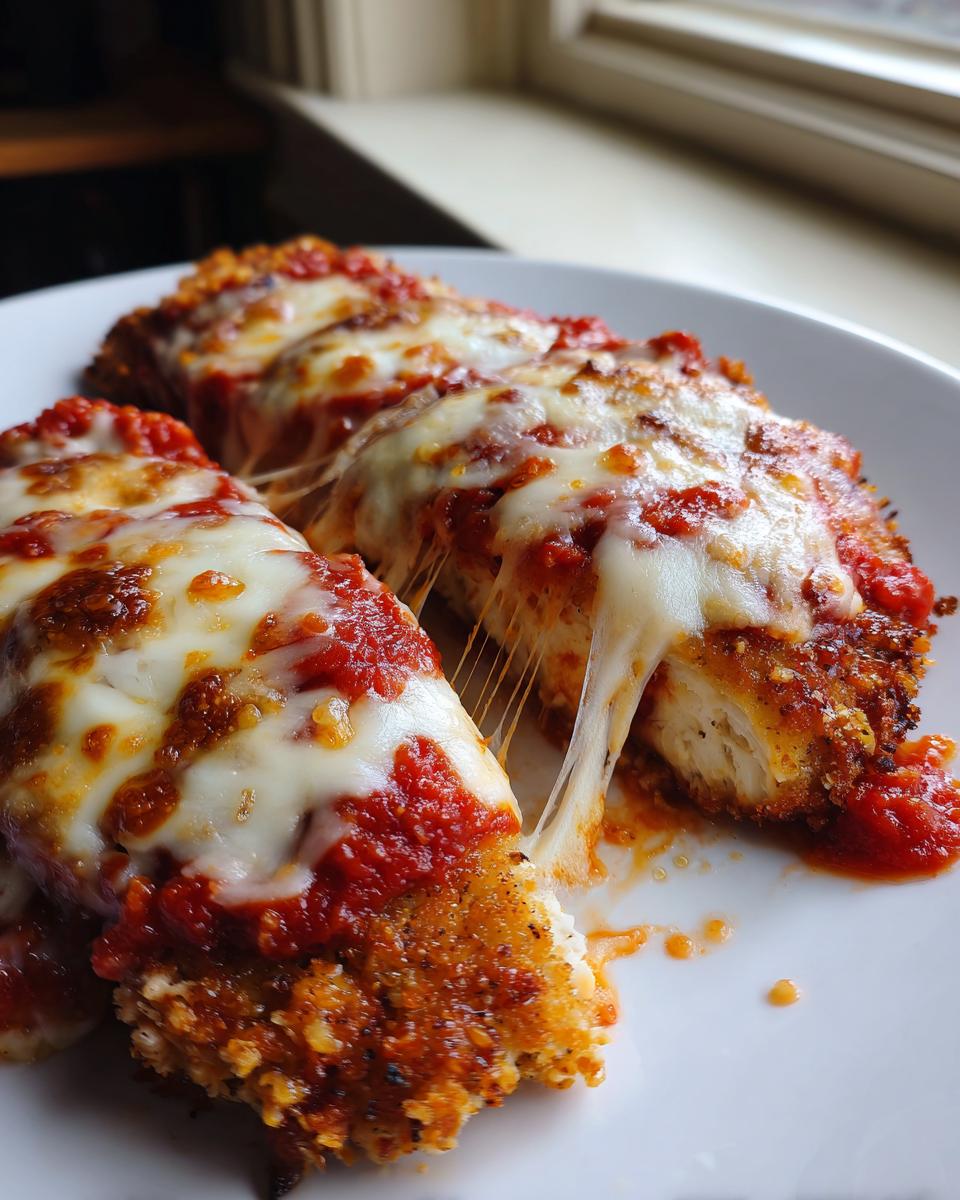
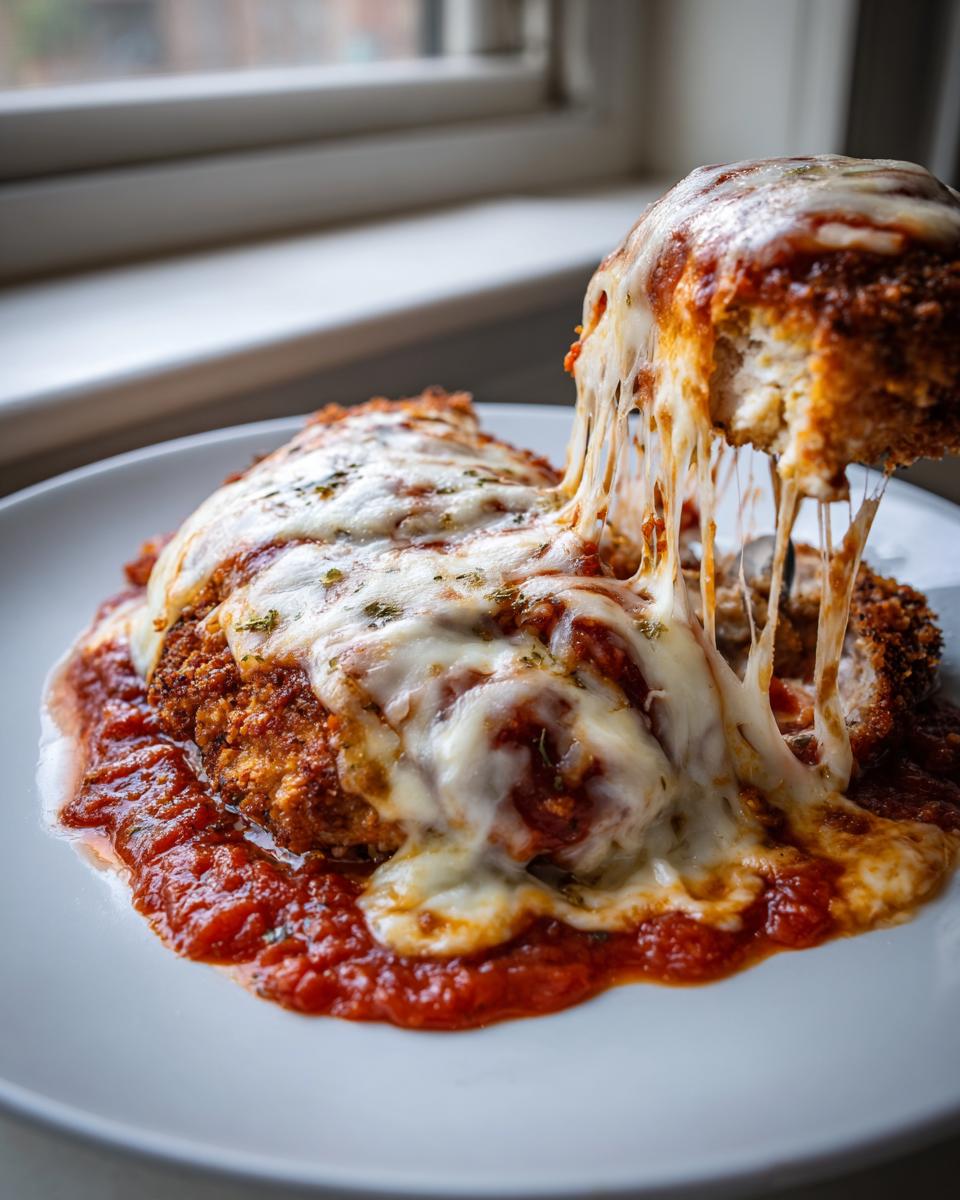
After 15 minutes, pull them out. Now, spoon about a quarter cup of your favorite marinara sauce over each piece. Top that sauce with slices of that creamy mozzarella and another light shower of Parmesan over the top. Back into the oven they go for another 5 to 8 minutes. You are done when that cheese is bubbly and oozing, and your chicken officially hits 165 degrees internally. Seriously, wait 5 minutes before slicing into them; that resting time keeps all the yummy juices where they belong!
Tips for Perfect Crispy Easy Chicken Parmesan
Okay, so we are baking, and that’s what makes this recipe easier, but let’s be honest—sometimes baked coatings aren’t quite as outrageously crunchy as fried ones. I’ve done the testing for you, and I have a little kitchen hack if you are truly serious about getting those golden, shattering edges on your chicken. For me, since I’m aiming for that perfect crispy breaded chicken breast texture, I use a hybrid method sometimes.
This is the secret tip Grandma Rosewood would have hated because it uses the stove, but hey, it works! Just before those breaded pieces go into the oven, heat a tablespoon of oil in a skillet over medium-high heat. Quickly sear the cutlets for just one minute per side. That oil hits the coating and immediately locks in that crunch. After one minute on each side—just enough to get some color—transfer them straight to your oven sheet pan and finish baking as directed.
Don’t load up the oven once you do this, or the internal steam will soften the coating right back up! Keep that baking time tight once they hit the heat.
Also, just a quick reminder: since we are already making a comfort masterpiece, why not pair it with some amazing comfort sides? You might want to check out my recipe for Garlic Parmesan Mashed Potatoes—they pair perfectly with all that extra cheese and sauce!
Another small thing that makes a difference in achieving that perfect texture for your easy chicken parmesan? Make sure your breadcrumb mix has enough salt and that grated Parmesan cheese mixed in. That flavor right in the coating really pops when you bite in!
Serving Suggestions for Your Easy Chicken Dinner Idea
You’ve got this gorgeous, cheesy, crispy chicken, and now you need the supporting cast! This is where your truly delicious easy chicken dinner idea comes together seamlessly. While this is amazing on its own, it was really designed to sit proudly on top of something starchy—or beside something green—right?
The obvious classic pairings are always classics for a reason. A big mound of spaghetti tossed in a little garlic and oil is what I usually aim for. Just make sure you don’t drown the chicken in sauce before serving; we want to maintain our hard-earned crispiness even when we pair it with pasta!
If you’re looking for something lighter than pasta for a weeknight, toss up a simple salad. A little mixed green salad with a bright vinaigrette is the perfect palate cleanser after all that rich cheese and tomato sauce. I love making something like this Mediterranean Lemon Rice on the side, too, if you want a carb that isn’t pasta but still feels special.
Honestly, I think the best way to serve this is straight out of the oven, sliced right onto a bed of your preferred starch, and then let people spoon extra sauce sauce over their own plate. It keeps things neat and lets everyone customize their plate!
Storing and Reheating Your Leftover Easy Chicken Parmesan
When I make this easy chicken parmesan, I’m usually aiming for leftovers because honestly, it tastes fantastic the next day too! But you can’t just leave it sitting out, right? We need to treat those beautiful cheesy cutlets right so they don’t turn into sad, soggy strips by morning.
The golden rule for storage is to let the chicken cool down completely first. If you cover it while it’s still steaming, you are basically creating a steam room inside your container, and that guarantees a soft coating! Once it’s at room temperature, pop the pieces into an airtight container. You might want to layer them with small pieces of parchment or paper towel between the cutlets just to absorb any residual moisture. Pop that container in the fridge, and it should be good for about three to four days.
Now, reheating is where most people mess up and ruin perfectly good leftovers! Please, please trust me on this: skip the microwave if you can. Microwaves are fantastic for warming up soup, but they are the enemy of anything crispy. That heat turns the crust soggy faster than you can say ‘Provolone.’
The absolute best way to bring this back to life is back in the oven! Preheat your oven to 350 degrees Fahrenheit. Lay your leftover chicken right on a baking sheet—no need to add more oil unless the crust looks seriously dry. Pop it in for about 10 to 12 minutes. This allows the cheese to melt again nicely and gives the crust a chance to crisp back up just a little bit. If you absolutely must use the microwave because you are running late, use short 20-second bursts, maybe covering the chicken with a paper towel, but know you are sacrificing that perfect crunch we worked so hard for!
Frequently Asked Questions About This Italian Comfort Food at Home
It’s funny, even when a recipe seems super straightforward, people still have questions! I get it; we all want to make sure our Italian comfort food at home turns out exactly right, especially when trying to fit it into a busy schedule. Here are a few things I hear most often about my simple baked method.
Can I prepare the breaded chicken ahead of time?
Yes, you surely can prep the breading station and even get the chicken fully breaded and placed on the baking sheet! That’s a huge time saver come dinnertime. However, I always caution people not to let that breading sit for hours and hours uncovered in the fridge. The moisture from the egg seeps into the Panko, and if it sits too long, you lose some of that beautiful external crispness we rely on in this baked chicken parm recipe. If you prep ahead, try to bake it within an hour or two of breading, or keep it well-covered.
What is the best way to make this recipe faster?
Great question, especially when planning a family friendly pasta night! The main time sink is pounding the chicken, so the biggest time saver is buying chicken breasts that are already cut thin, or pounding them really thin right when you get home from the store so they are ready to go. If your chicken is only a quarter-inch thick instead of a half-inch, your baking time will drop significantly. You might only need 10 minutes for the first bake instead of 15!
Another little trick if you are severely short on time is using pre-shredded, good-quality mozzarella instead of slicing a fresh ball. It melts nearly instantly, shaving a couple of minutes off that final bake time. If you’re looking for even faster dinner solutions in general, you should take a peek at my guide on easy cheesy chicken enchiladas; that’s my go-to speed meal!
Nutritional Estimate for This Dish
Now, I know some of y’all are tracking macros, and some of you just want to eat your dinner without thinking about the numbers! Either way, I always like to give a general snapshot of what’s going into this deliciousness. Remember, this is just an estimate based on the ingredients I listed—your sauce brand or the exact thickness of your chicken can change things slightly.
We calculate this based on one standard serving, which is one beautiful, cheesy cutlet. I’m pretty thrilled about the protein count here for such an easy baked meal!
- **Serving Size:** 1 cutlet
- **Calories:** About 480
- **Protein:** A healthy 45 grams!
- **Total Fat:** Roughly 20 grams (including about 9 grams of that saturated fat from the cheese and butter content).
- **Carbohydrates:** Around 30 grams.
- **Sugar:** Low, about 8 grams (mostly from the marinara, naturally).
- **Fiber:** A nice little boost, around 3 grams.
See? When you choose to bake instead of fry, you’re already cutting way down on unnecessary oils and soaking up that great protein for a really satisfying dinner. It’s great for a hearty family friendly pasta night without weighing you down too much!
Print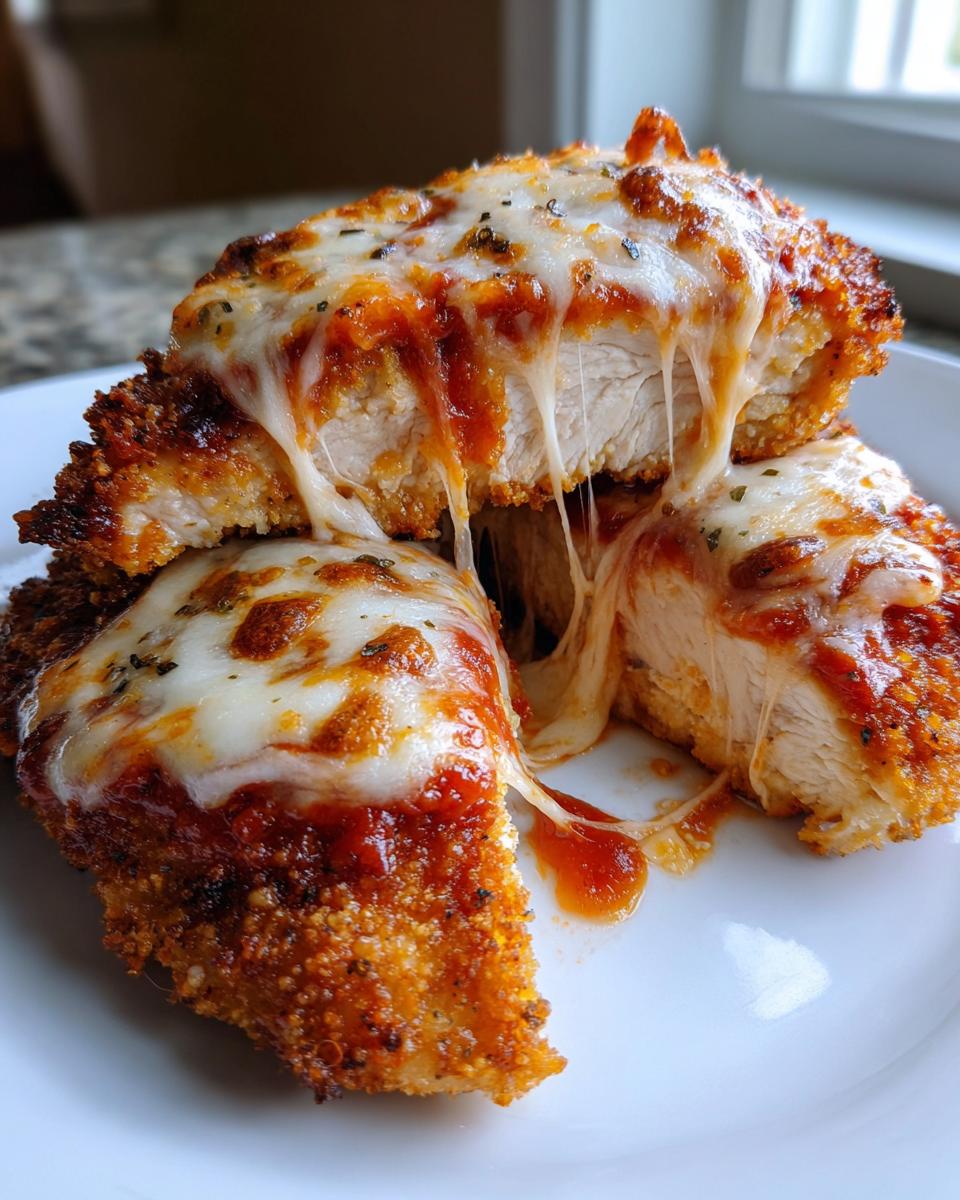
Easy Baked Chicken Parmesan
Make restaurant-quality chicken Parmesan at home with this simple baked recipe. You get crispy, cheesy cutlets without the mess of deep frying.
- Prep Time: 15 min
- Cook Time: 25 min
- Total Time: 40 min
- Yield: 4 servings 1x
- Category: Dinner
- Method: Baking
- Cuisine: Italian
- Diet: Vegetarian
Ingredients
- 4 boneless, skinless chicken breasts, pounded to 1/2 inch thickness
- 1 cup all-purpose flour
- 2 large eggs, beaten
- 1 1/2 cups panko breadcrumbs
- 1/2 cup grated Parmesan cheese, plus more for topping
- 1 teaspoon dried Italian seasoning
- 1/2 teaspoon garlic powder
- Salt and black pepper to taste
- 1 tablespoon olive oil
- 24 ounces marinara sauce
- 8 ounces fresh mozzarella cheese, sliced
- Fresh basil for garnish (optional)
Instructions
- Preheat your oven to 400 degrees Fahrenheit (200 degrees Celsius). Lightly grease a baking sheet or line it with parchment paper.
- Set up a standard breading station with three shallow dishes. In the first dish, place the flour seasoned with salt and pepper. In the second dish, place the beaten eggs. In the third dish, combine the panko breadcrumbs, 1/2 cup Parmesan cheese, Italian seasoning, and garlic powder.
- Dredge each chicken cutlet first in the flour, shaking off excess. Dip it into the egg mixture, letting excess drip off. Finally, press the cutlet firmly into the breadcrumb mixture to coat both sides completely.
- Place the breaded cutlets on the prepared baking sheet. Drizzle the tops lightly with olive oil.
- Bake for 15 minutes.
- Remove the chicken from the oven. Spoon about 1/4 cup of marinara sauce over each cutlet. Top each with slices of fresh mozzarella cheese and a sprinkle of extra Parmesan.
- Return the chicken to the oven and bake for another 5 to 8 minutes, or until the cheese is melted and bubbly and the chicken reaches an internal temperature of 165 degrees Fahrenheit.
- Let the chicken rest for 5 minutes before serving. Garnish with fresh basil if you wish. Serve over pasta or with a side salad.
Notes
- For extra crispy edges, you can briefly pan-fry the breaded cutlets in a skillet with a little oil for 1 minute per side before baking.
- Use high-quality marinara sauce for the best flavor.
- If you prefer a different cheese, provolone works well in place of mozzarella.
Nutrition
- Serving Size: 1 cutlet
- Calories: 480
- Sugar: 8
- Sodium: 650
- Fat: 20
- Saturated Fat: 9
- Unsaturated Fat: 8
- Trans Fat: 0.5
- Carbohydrates: 30
- Fiber: 3
- Protein: 45
- Cholesterol: 130