
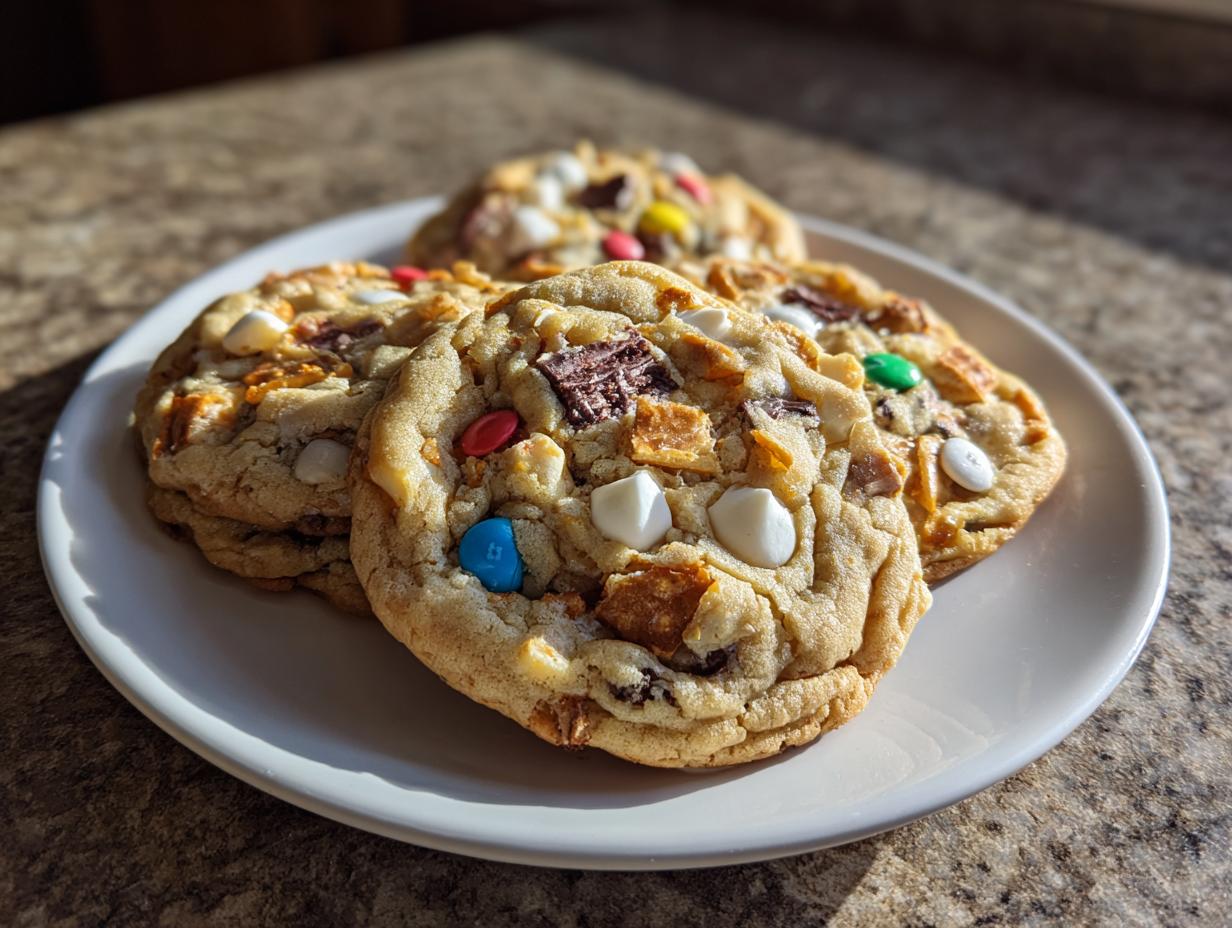
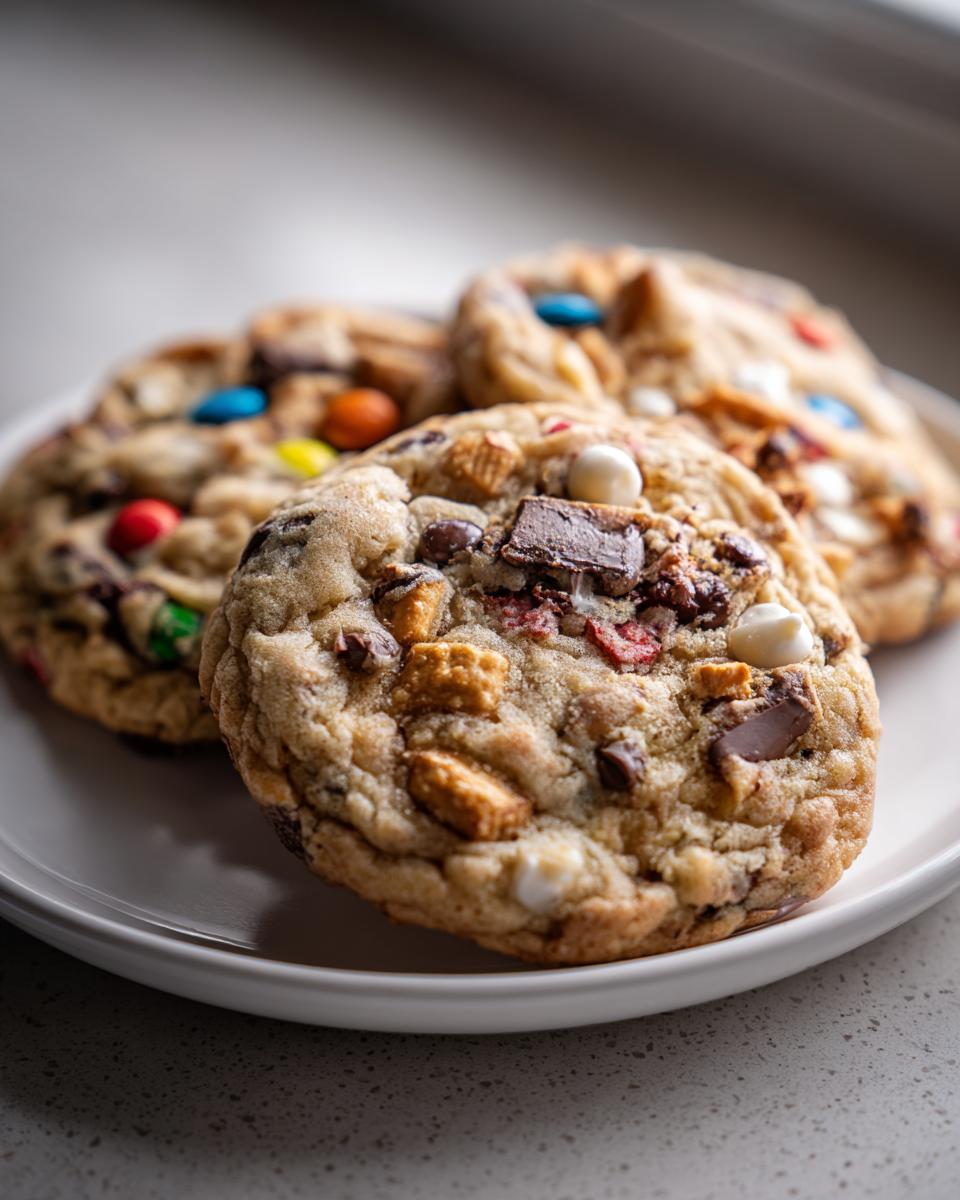
Oh, my goodness, are you ready to just throw caution to the wind and absolutely load up a cookie? When it comes to baking, sometimes you just have to embrace the chaos! That’s why I absolutely adore what we call **kitchen sink cookies** here at DelishCraze. They are the ultimate customizable treat—if you have it, you toss it in! After years of trying to nail that perfect balance of crunch, chew, and sheer decadence, I think Olivia finally landed on the Ultimate Kitchen Sink Cookie Recipe. Trust me on this, folks: the secret sauce isn’t just the sheer volume of mix-ins, it’s getting that perfect texture: delightfully chewy centers paired with edges that snap just right. This is baking without rules, but following my guidelines ensures it’s delicious chaos!
- Why This is the Ultimate Kitchen Sink Cookie Recipe
- Essential Kitchen Sink Cookie Ingredients Guide
- Step-by-Step Instructions for Easy One Bowl Kitchen Sink Cookies
- Tips for Success Making Chewy Kitchen Sink Cookies with Mix-ins
- Holiday Kitchen Sink Cookies Variation: Festive Ideas
- Making the Best Homemade Kitchen Sink Cookies Last: Storage and Reheating
- Frequently Asked Questions About Kitchen Sink Cookies
- Estimated Nutritional Data for Kitchen Sink Cookies
- Share Your Ultimate Kitchen Sink Cookie Creations
Why This is the Ultimate Kitchen Sink Cookie Recipe
I call this the ultimate because honestly, it’s the only cookie recipe you’ll ever need to keep in your back pocket. Why bother with a dozen different recipes when this one lets you throw in everything but the actual kitchen sink? It’s designed to be completely over-the-top, which automatically makes it one of the most crowd pleasing cookie recipes you can bring to any party, holiday or otherwise. But before we get crazy, let’s look at the structure. I spent way too much time trying to figure out how to keep the pretzels from going completely soggy while still making the middle gooey. For more thoughts on achieving cookie perfection, check out my tips on thick, chewy cookies!
Olivia found that sweet spot for us when developing this, noting the key is balancing the molasses in the brown sugar against the saltiness of the crushed chips and pretzels—that combo just makes everything taste brighter! If you skip getting that sweet and salty mix right, you miss the whole point of the cookie.
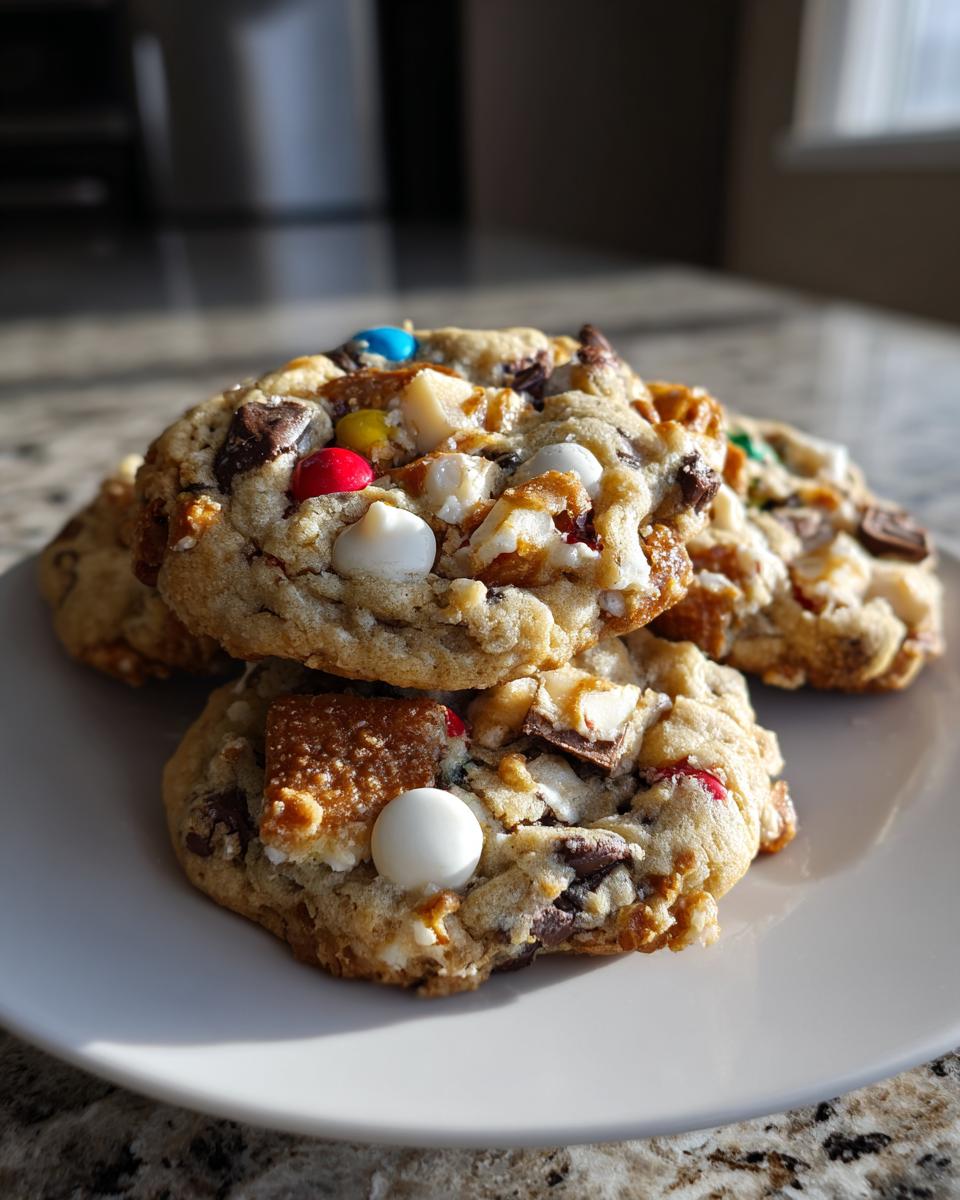
Texture Perfection: Chewy Centers and Crispy Edges
How do we get this magic duality? It’s all in the sugar ratio—we use more brown sugar than white! The brown sugar holds onto moisture, keeping the middle soft and pliable even after they cool down. Then, we bake them just shy of done, pulling them out when the middles are slightly puffed and look a tiny bit pale. That guarantees that satisfying chewiness when you bite in, while those edges get delightfully crisp!
Customizable Mix-Ins for Your Kitchen Sink Cookies
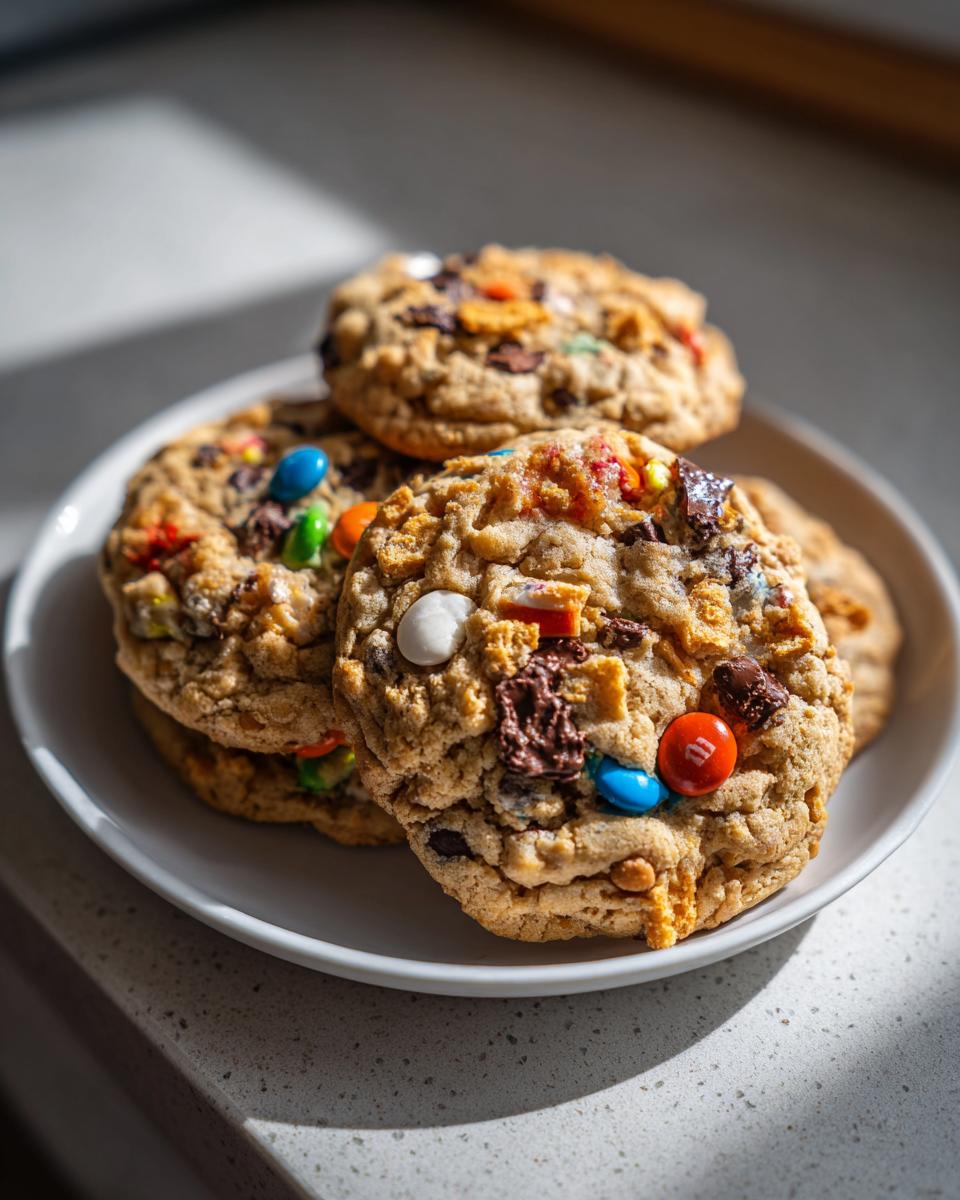
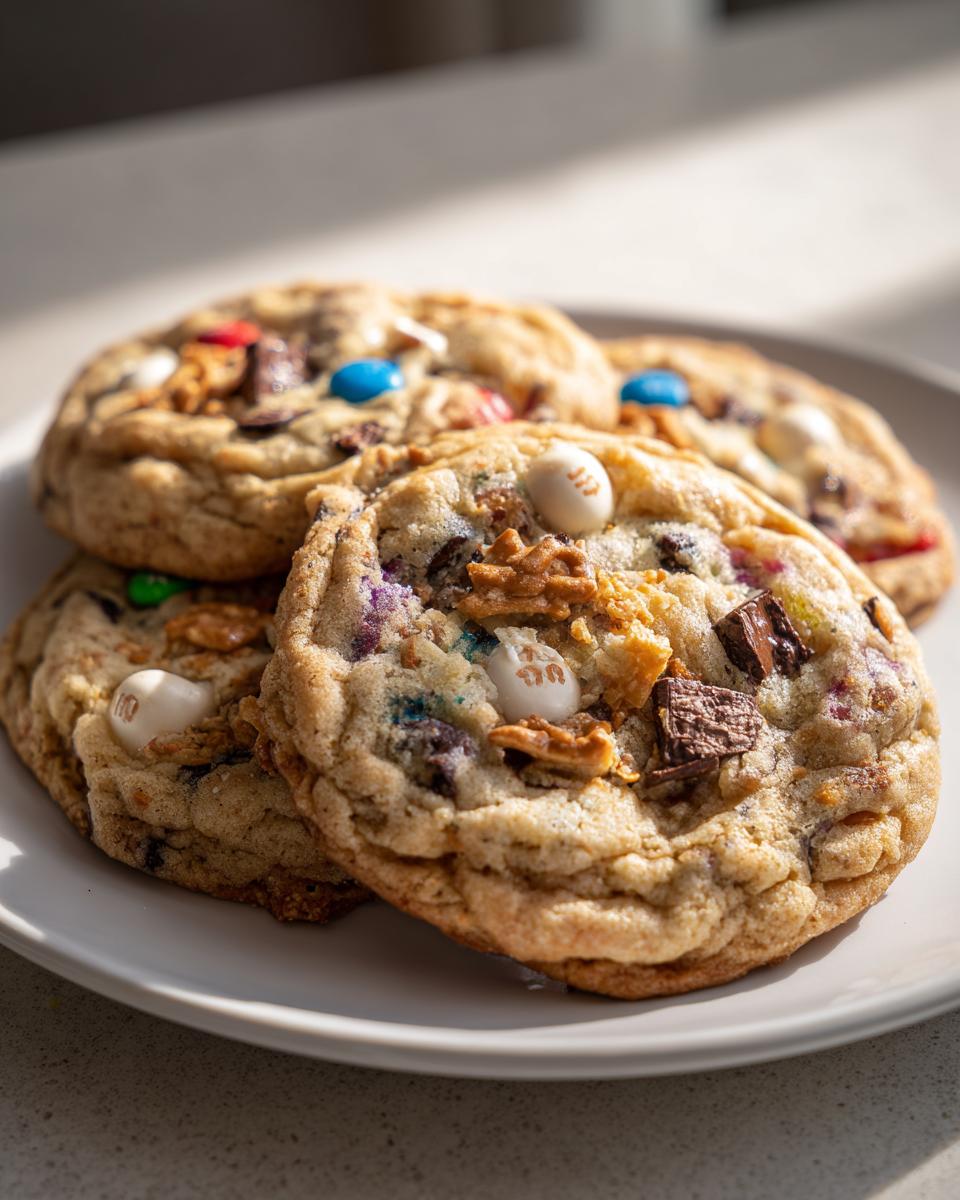
One of the best parts of this recipe is realizing you don’t need to shop for specific items. Seriously, look in your pantry! If you don’t have white chocolate, use peanut butter chips! If you’re out of M&M’s, use chopped-up toffee bits—whatever works! This is the definition of Customizable Mix-In Cookies. Just make sure you hit that sweet spot of salty items (pretzels, chips) versus the sweet inclusions (candies, chocolate).
Essential Kitchen Sink Cookie Ingredients Guide
Okay, deep breath! While these are called that because you can throw anything in them, having a solid base is key to achieving the Ultimate Kitchen Sink Cookie Recipe we’ve nailed down here. I’ve listed everything you need to create that signature sweet-and-salty explosion. Remember when you’re measuring things like brown sugar, you really need to pack it down—a light scoop won’t cut it for the texture we want! If you’re looking for another one of my favorite textured cookies, you absolutely have to try my crispy oatmeal lace cookies next!
- 1 cup unsalted butter, softened
- ¾ cup granulated sugar
- ¾ cup packed brown sugar
- 2 large eggs
- 1 tablespoon vanilla extract
- 2 ¼ cups all-purpose flour
- 1 teaspoon baking soda
- ½ teaspoon salt
- 1 cup semi-sweet chocolate chips
- 1 cup white chocolate chips
- 1 cup M&M’s candies (or holiday colors for variation)
- 1 cup crushed pretzels
- 1 cup potato chips, lightly crushed
- ½ cup sprinkles (optional, use holiday colors for Christmas cookies)
Step-by-Step Instructions for Easy One Bowl Kitchen Sink Cookies
I know the list of ingredients looks long, but don’t let that scare you! We’re using a single bowl for most of this, which keeps cleanup manageable. First things first: get your oven preheated to 350°F (175°C) and line those baking sheets with parchment paper—this style of cookie spreads a bit, and parchment helps keep the bottoms from burning before the middle is done. Now we move to the mixing, which is where we really set the texture for these glorious piles of goodness!
Mixing the Wet and Dry Bases
Start by taking your softened butter, granulated sugar, and that lovely packed brown sugar and creaming them together until they look light, almost fluffy. Beat in your eggs one at a time, making sure each one is fully incorporated before adding the next, followed by your vanilla. THEN, mix your flour, baking soda, and salt in a separate little bowl—it’s important to whisk those dry leaveners together! Now, add the dry stuff to the wet mixture gradually. Stop mixing the *second* you don’t see white streaks of flour anymore! If you work the dough too much once the flour is in, you’ll develop gluten and end up with hard little hockey pucks instead of the soft cookies you deserve. I learned that the hard way!
Folding in the Sweet and Salty Cookies with Mix-ins
This is the fun part! Take every single delightful thing you gathered—the chips, the chips again, the M&M’s, all those salty crushed pretzels, and those potato chips—and gently, gently fold them in. Don’t use the electric mixer here! We are just encouraging everything to come together. Use a big rubber spatula and make sure everything is distributed evenly so every single cookie gets a crunch and a salty hit. Once it’s just combined, you’re ready to scoop and bake! For the best results, check out my tips on making a classic chocolate chip cookie, because those base rules still apply!
Tips for Success Making Chewy Kitchen Sink Cookies with Mix-ins
Now that you have the dough mixed up, I want to let you in on two little secrets that really elevate these from good to absolutely unforgettable. If you have the time—and seriously, try to rearrange your schedule for this—you *must* chill your dough. I know, waiting is the worst part of baking, but letting this dough rest in the fridge for at least an hour, or even overnight, helps the flour hydrate better. This does two huge things: it stops the cookies from spreading into thin pancakes, and it really concentrates that amazing flavor profile you just built.
When it comes to baking variations, remember that slightly underdone is your friend for chewiness. If you’re worried about timing, try flattening your dough balls just a little bit before they go into the oven—they’ll bake faster and you’ll get those crispy edges even quicker. For even more inspiration on incredible texture, you should definitely check out my recipe for chewy snickerdoodle blondies. These little tricks make baking these wildly customized cookies feel totally foolproof!
Holiday Kitchen Sink Cookies Variation: Festive Ideas
Okay, listen up, because this is where we lean right into the festive fun! Since so many people look for Christmas Kitchen Sink Cookies, I wanted to make sure this recipe is ready for gifting or bringing to your holiday parties. It’s so easy to transform this recipe into a stunning plate of Christmas Everything Cookies. The easiest swap? The M&M’s! Ditch the rainbow stash and grab a bag of red and green ones—instant holiday vibe! You can also use festive sprinkles instead of the basic ones, making them look totally intentional and beautiful stacked up on a platter.
If you want to bring the mint flavor in, you can swap out half the semi-sweet chips for dark chocolate peppermint pieces. Oh my gosh, that combination of salty pretzel crunch with cool mint is just divine! For more peppermint magic during the holidays, you have to try my chocolate peppermint cookie recipe sometime soon. It feels so special!
Making the Best Homemade Kitchen Sink Cookies Last: Storage and Reheating
You made a giant batch—which is the only way to make these, let’s be honest—and now you have to save some! The main goal here is making sure these amazing sweet and salty monsters don’t go rock hard on you. The texture is so critical with these cookies, especially since they have all those different chips and candies in there that can dry out easily.
For storage, you absolutely need an airtight container. Don’t try to use a tin with a loose lid or store them in a plastic baggie; they need to be sealed up tight. I usually let them cool completely first—and I mean completely, room temperature all the way—because any lingering warmth will create steam inside the container and make your lovely crispy edges go soft overnight. Keep them on the counter for up to four or five days. I’ve never had luck freezing them long-term because the pretzels and chips get a little weird in the freezer, but a few days on the counter is perfect.
Now for the best part: reheating! If you’ve had them for a couple of days and they’re starting to feel a little firm, we can bring them right back to life. Forget the microwave, unless you only want 30 seconds of chewiness before they turn rubbery. Pop one single cookie (or two, don’t judge!) on a small baking tray and put it in a 300°F oven for about five minutes. The brief blast of heat melts the chips again just slightly, softens the center, and crisps up those edges like they just came out of the oven. It’s wonderful! If you’re planning ahead, maybe check out my tips on make-ahead breakfast muffins for another easy win!
Frequently Asked Questions About Kitchen Sink Cookies
I totally get it—when you have a recipe this loaded, you have questions! It’s one thing to mix a few things in; it’s another to try and get those Cookies with Pretzels and Chips just right so they bake evenly. I’ve gathered the most common things folks ask me when they’re about to jump into making these amazing **Kitchen Sink Cookies Everything Cookies** at home. Hopefully, this clears everything up so your baking session is smooth sailing!
Can I use only one type of chip in my kitchen sink cookies?
You totally *can*, yes! If you only have semi-sweet chips, go for it! But let me tell you why I insist on using at least two types—usually semi-sweet and white chocolate. When you bake them together, you get this layered flavor profile: the white chocolate melts into these sweet little pockets of bliss, while the semi-sweet chocolate stays a bit firmer. If you only use one kind, you lose that depth. It’s designed for variety, but if your heart is set on just one, it’ll still be delicious!
What is the best way to crush pretzels and chips for these cookies?
This seems simple, but getting this right keeps your cookie structure intact! Don’t put them in the food processor; that just turns them into salty dust, and we don’t want that! Instead, take your pretzels and your potato chips—I use plain, ruffled chips for extra crunch—and toss them into a sturdy zip-top freezer bag. Seal it, leaving a little bit of air inside, and then go at it gently with a rolling pin or even the bottom of one of your heavy measuring cups. You want nice, jagged, bite-sized chunks—not powder. That way, you get that satisfying *crunch* in every bite, just like the recipe intends!
Do I need to chill the dough for the best kitchen sink cookies?
I always tell people that chilling is optional, but if you want truly fantastic results—especially if your kitchen runs warm or you want those perfectly thick cookies—you absolutely should chill the dough. If you’re doing this on a busy day and need to bake right away, go ahead and scoop it! But if you can let it rest in the fridge for an hour, you’ll see a huge difference. Chilling minimizes spread so your cookies stay thicker, and honestly, it lets all those amazing flavors from the salt and sugar meld together beautifully before they even hit the heat. It’s a small step that delivers a massive texture payoff!
If you decide to dive into even quicker baking projects after this, maybe check out my tips on quick and easy weeknight meals next time you need a break from sweets!
Estimated Nutritional Data for Kitchen Sink Cookies
Now, I know what you’re thinking: with all that goodness piled into these cookies, they must be off the charts, right? Well, they are definitely a treat, not an everyday snack, but seeing the numbers laid out is always good! Keep in mind that because these are the Ultimate Customizable Kitchen Sink Cookies, these figures are just estimates based on the ingredient list I shared and assume a yield of about 3 dozen cookies.
If you swap out ingredients—say, you use peanut butter chips instead of white chocolate, or skip the sprinkles—these numbers will shift a little bit. But for a base idea of what you’re enjoying with that perfect sweet and salty bite, here is the general breakdown:
- Serving Size: 1 cookie
- Calories: 210
- Sugar: 15g
- Sodium: 150mg
- Fat: 12g
- Saturated Fat: 7g
- Carbohydrates: 25g
- Protein: 3g
We tried our best to give you accurate estimates, but remember, baking is an exact science that tastes amazing! Treat yourself, because you absolutely deserve a cookie this loaded after all that hard work mixing!
Share Your Ultimate Kitchen Sink Cookie Creations
Whew! We did it! You now have the blueprint for what I truly believe is the most fun, over-the-top, and absolutely delicious cookie you can possibly bake. The beauty of these cookies is that they instantly become *your* recipe once you start customizing them. Did you add toasted coconut? Did you use peppermint bark instead of plain white chocolate? Did you manage to sneak in some chopped-up caramel candies?
I am dying to know what chaotic, wonderful ingredients you deemed essential for your own batch of Best Homemade Kitchen Sink Cookies! Please, please let me know down in the comments below exactly what mix-ins made the cut for your family. I love reading how everyone adapts these core recipes to fit what they have on hand or what their kids are obsessed with right now. It’s all about making food that connects us, you know? If you have any feedback or want to share a picture of your creation, feel free to reach out through our contact page!
Don’t forget to leave a rating for the recipe—even just five stars for the sheer fun factor! Happy baking, and I can’t wait to see what you’ve got brewing in your kitchen!
PrintUltimate Customizable Kitchen Sink Cookies

Make these ultimate kitchen sink cookies packed with sweet and salty mix-ins. This recipe yields chewy centers and crispy edges, perfect for any occasion, including holiday baking.
- Prep Time: 20 min
- Cook Time: 12 min
- Total Time: 32 min
- Yield: About 3 dozen cookies 1x
- Category: Dessert
- Method: Baking
- Cuisine: American
- Diet: Vegetarian
Ingredients
- 1 cup unsalted butter, softened
- ¾ cup granulated sugar
- ¾ cup packed brown sugar
- 2 large eggs
- 1 tablespoon vanilla extract
- 2 ¼ cups all-purpose flour
- 1 teaspoon baking soda
- ½ teaspoon salt
- 1 cup semi-sweet chocolate chips
- 1 cup white chocolate chips
- 1 cup M&M’s candies (or holiday colors for variation)
- 1 cup crushed pretzels
- 1 cup potato chips, lightly crushed
- ½ cup sprinkles (optional, use holiday colors for Christmas cookies)
Instructions
- Preheat your oven to 350°F (175°C). Line baking sheets with parchment paper.
- In a large bowl, cream together the softened butter, granulated sugar, and brown sugar until light and fluffy.
- Beat in the eggs one at a time, then mix in the vanilla extract.
- In a separate bowl, whisk together the flour, baking soda, and salt. Gradually add the dry ingredients to the wet ingredients, mixing until just combined. Do not overmix.
- Fold in all your mix-ins: chocolate chips, white chocolate chips, M&M’s, crushed pretzels, crushed potato chips, and sprinkles.
- Drop rounded tablespoons of dough onto the prepared baking sheets, spacing them about 2 inches apart.
- Bake for 10 to 12 minutes, or until the edges are golden brown and the centers look slightly underdone for a chewy texture.
- Let the cookies cool on the baking sheets for 5 minutes before transferring them to a wire rack to cool completely.
Notes
- For the chewiest cookies, chill the dough for at least 30 minutes before baking.
- Customize your mix-ins based on preference; use oatmeal, different chips, or nuts.
- For a holiday version, use only red and green M&M’s and festive sprinkles.
- If you want extra crispy edges, slightly flatten the dough balls before baking.
Nutrition
- Serving Size: 1 cookie
- Calories: 210
- Sugar: 15
- Sodium: 150
- Fat: 12
- Saturated Fat: 7
- Unsaturated Fat: 5
- Trans Fat: 0.1
- Carbohydrates: 25
- Fiber: 1
- Protein: 3
- Cholesterol: 25