
Listen up, because I’m about to share one of those secret weapons that just *makes* a gathering feel special. Forget choosing between that amazing, rich cocoa flavor dessert or a perfectly tangy cheesecake. We’re combining them! This ultimate red velvet cake and cheesecake fusion is pure decadence, striking that vibrant red color that just pops on the table. I know life gets busy, which is why I follow Olivia’s philosophy here at DelishCraze: making truly showstopping desserts shouldn’t require a professional pastry degree. We’re going to conquer this layered creation together, and trust me, it’s easier than it looks!
- Why This Layered red velvet cheesecake Recipe is a Showstopper
- Gathering Ingredients for Your red velvet cheesecake
- Step-by-Step Instructions for the Ultimate red velvet cheesecake
- Tips for a Showstopping red velvet cheesecake Success
- Serving and Storing Your Decadent Cheesecake Ideas
- Frequently Asked Questions about red velvet cheesecake
- Nutritional Estimates for This Indulgent Baked Goods Slice
- Share Your Culinary Creations
Why This Layered red velvet cheesecake Recipe is a Showstopper
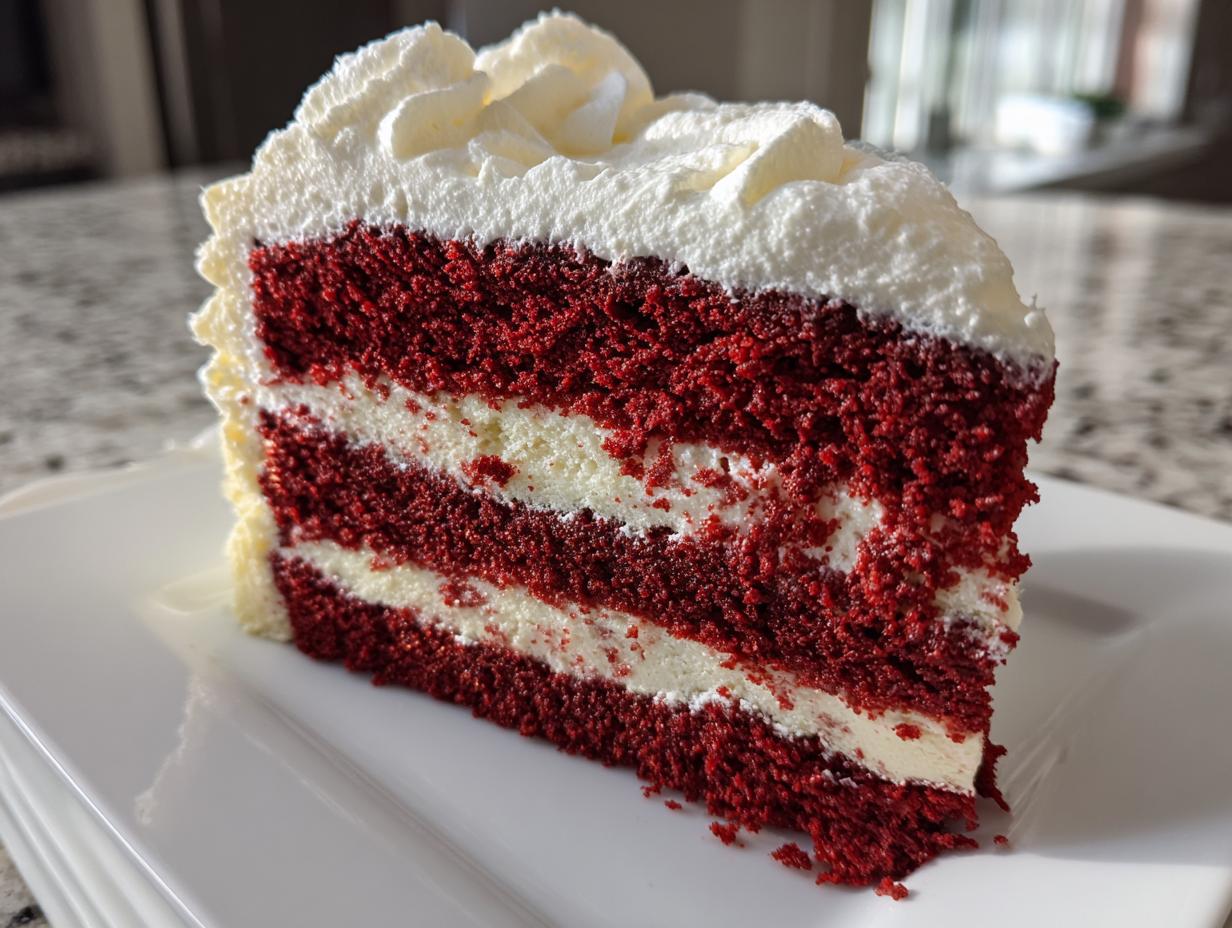
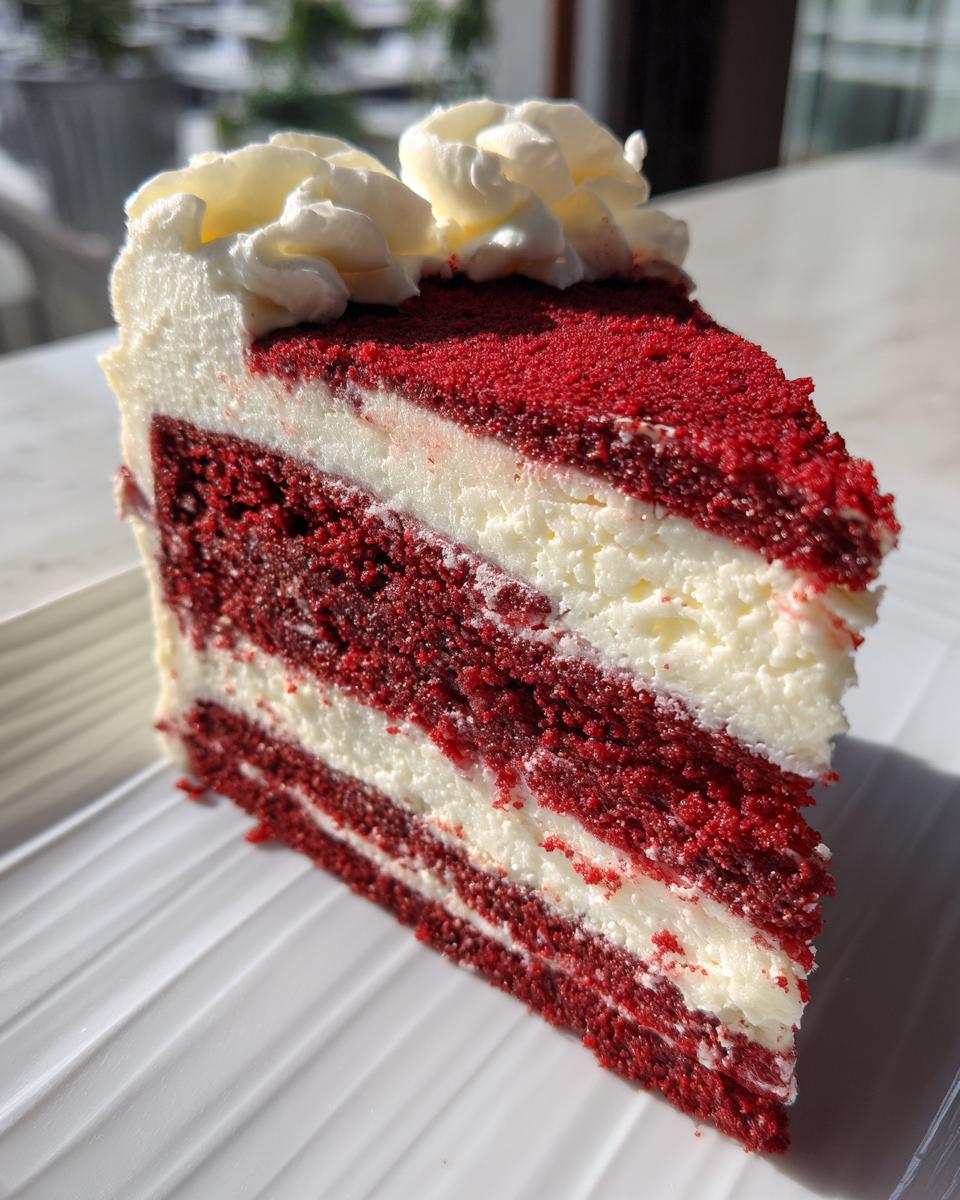
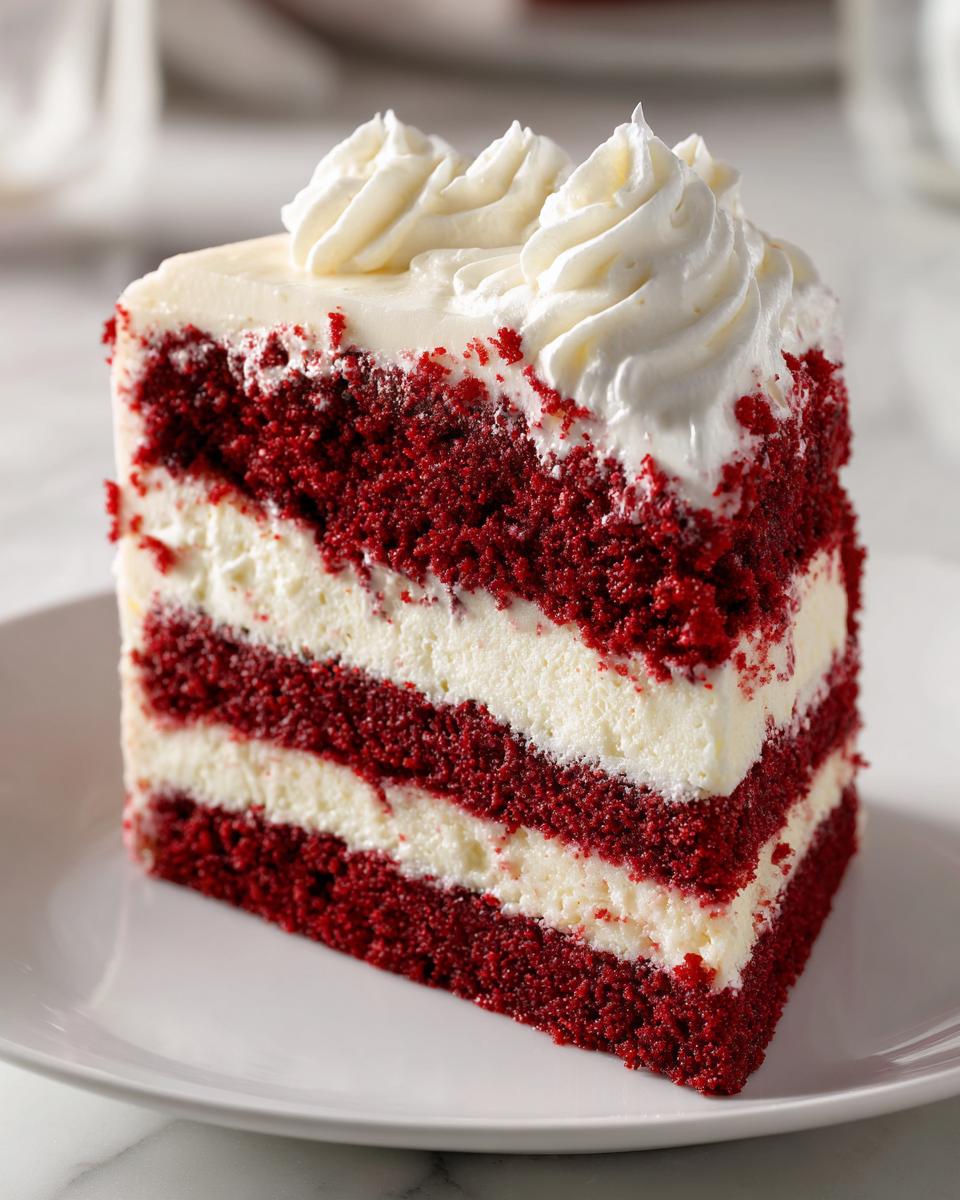
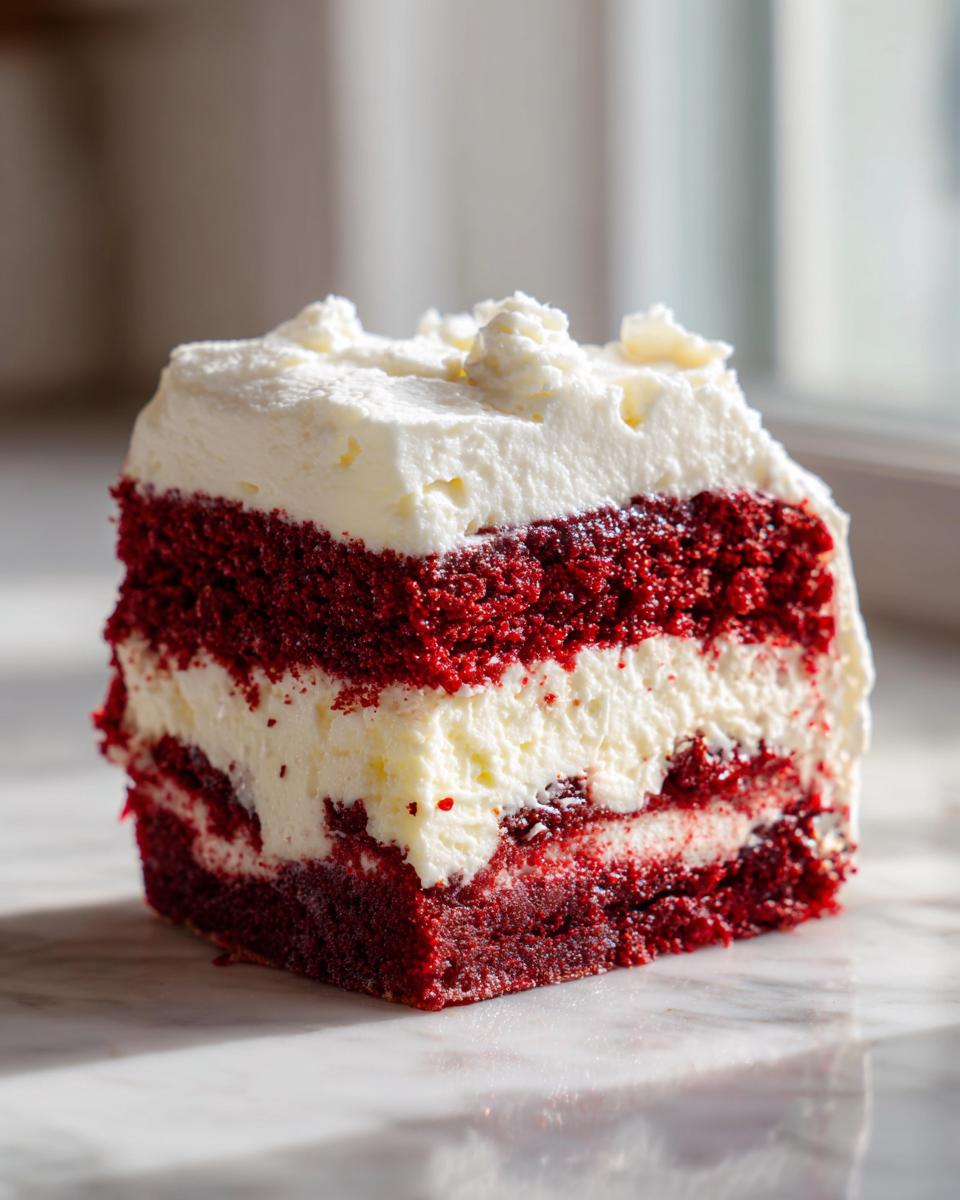
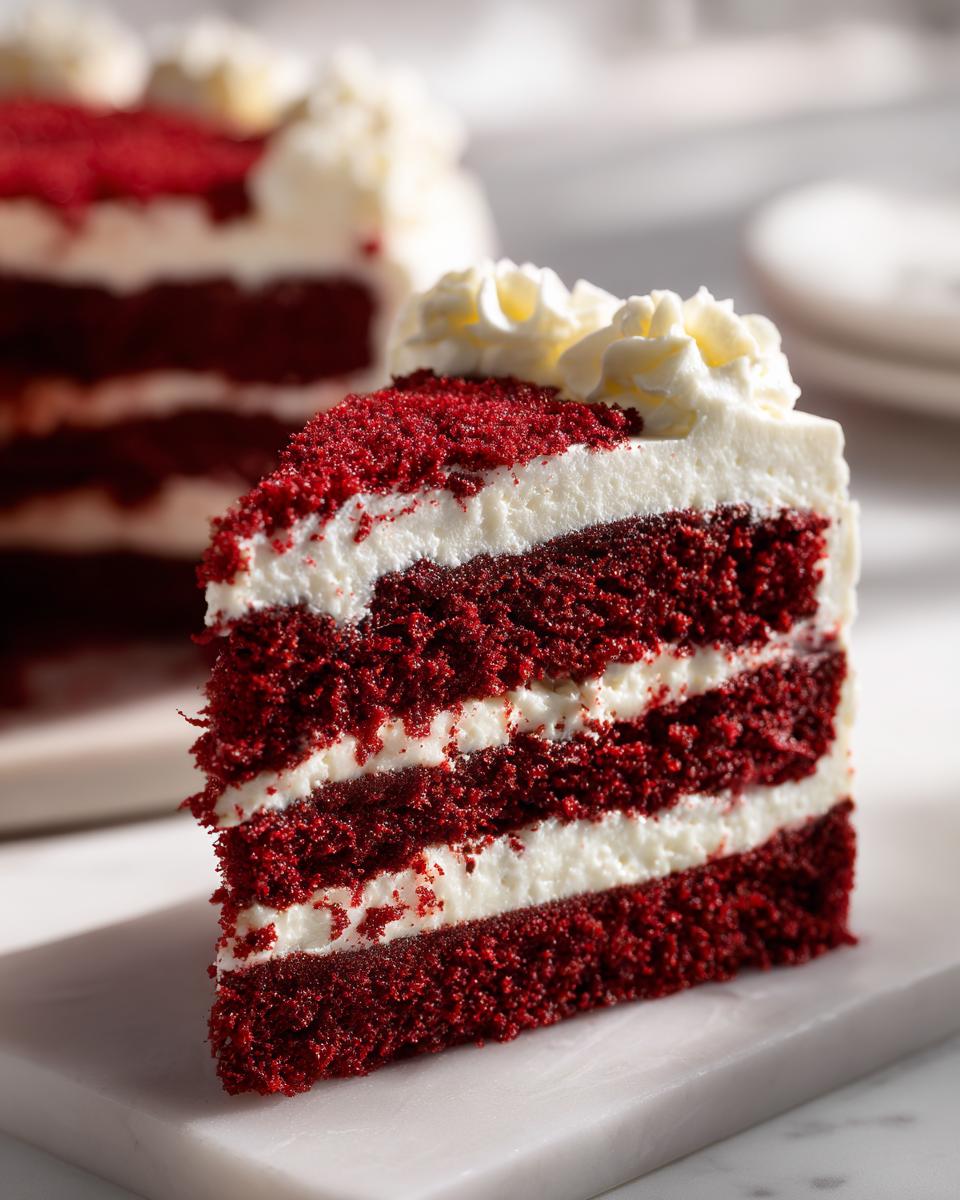
If you’ve ever stood in the bakery case agonizing over whether to get cake or cheesecake, darling, this recipe ends the debate! This layered red velvet cheesecake is designed to be the absolute centerpiece. The way those layers stack up—that vibrant red next to beautiful creamy white—it just begs for a photo. It’s the kind of decadent cheesecake idea that makes people stop talking when you bring it out.
The Perfect red velvet cake and cheesecake Fusion
Honestly, what is better than the slight tang of cream cheese dancing with the deep, moist crumb of red velvet? That signature rich cocoa flavor dessert base gets totally elevated by that smooth, tangy cheesecake portion. It’s not just one texture; it’s a whole journey in one bite. When you bake both these icons together, something magic happens where they support each other perfectly.
Holiday Cheesecake Recipes Ready for Your Table
This isn’t just an everyday treat; this belongs on your special occasion table! Seriously, if you need stunning holiday cheesecake recipes, this is it. Picture this vibrating against a festive background—perfect for Valentine’s Day or sitting right next to your Christmas cookies. It immediately says, “I made an effort, and it was worth it!”
Gathering Ingredients for Your red velvet cheesecake
Okay, grab your apron! Before we even think about mixing, we need to take inventory. The secret to making this the ultimate red velvet cheesecake dessert is making sure your cream cheese is actually soft. I mean *soft*. Not melted, not jiggly soft, but the kind that leaves a fingerprint when you touch it lightly. That’s non-negotiable for the filling!
Ingredients for the red velvet cheesecake Dessert Base
Since we’re using a box mix shortcut—which I absolutely approve of for this layered wonder—we just need the mix itself, plus the eggs, oil, and water it calls for. For the cheesecake portion, stock up on 8 ounces of softened cream cheese, a half cup of sugar, a quarter cup of sour cream for that lovely tang, one teaspoon of vanilla, and two large eggs. Make sure those eggs are room temp too—it really helps them blend better!
Optional Oreo Crust Cheesecake Ingredients
If you want that satisfying, crunchy base that so many people love, grab a cup of crushed Oreos—and yes, the whole cookie, filling and all! You’ll also need two tablespoons of melted butter to bind those crumbs together into a perfect, pressable disc for your springform pan.
Cream Cheese Frosting Dessert Topping
For the final flourish, we whip up a simple, gorgeous topping. You’ll need one cup of heavy whipping cream and two tablespoons of powdered sugar. That’s it! Whip this slowly, and you’ll have the fluffiest crown for your cheesecake.
Step-by-Step Instructions for the Ultimate red velvet cheesecake
Alright, deep breath! This is where the show really starts, but don’t panic about the layers. We are keeping it straightforward, I promise. First things first, get that oven preheating to 325°F (160°C). If you skipped the Oreos, just lightly grease and flour that 9-inch springform pan. We need everything ready to go before things get too exciting!
Preparing the Crust and Cake Batter
If you’re using the Oreo crust, mix those crushed cookies with the melted butter until everything looks like damp sand. Press it down *firmly* into the bottom of your pan—use the bottom of a flat measuring cup for a really solid base. Now for the red velvet, mix up the cake batter exactly how the box says, but only use the eggs, oil, and water listed. Don’t add extra liquid! Set that batter aside so it waits patiently by the stove.
Creating the Creamy Cheesecake Filling
Time for the cheesecake magic! Put your softened cream cheese, sugar, and sour cream in a clean bowl. Beat it until it looks completely uniform and smooth—no lumps allowed! Then, and this part is key: add those two large eggs one at a time. Beat in the first egg until it just disappears, then add the second. We want creamy, not fluffy, so stop mixing as soon as they’re incorporated!
Layering and Swirling the red velvet cheesecake
Now we become abstract artists! Pour about half of your creamy cheesecake mix right over that Oreo crust. Then, gently spoon half of your red velvet cake batter on top of that. Repeat the layers with the remaining cheesecake and cake batter. Don’t just dump it! To get that gorgeous swirl effect, take a butter knife and just gently drag it through the layers two or three times in a figure-eight motion. Resist the urge to over-swirl, or the colors just blend into mud!
Baking and Cooling for a Perfect Texture
Because we want that super creamy cheesecake dessert texture, we need a water bath! Wrap the bottom of your springform pan tightly in heavy-duty foil (this keeps water out!). Place the wrapped pan inside a larger roasting pan, and pour boiling water into the roasting pan until it comes about halfway up the sides of your springform. Bake for 60 to 75 minutes. When the sides look set but the middle still wobbles a tiny bit, turn the oven OFF. Crack the door open just a smidge—like, stick a wooden spoon in the door—and let it hang out in that warm oven for a full hour. This slow cool-down is vital to keep your beautiful cheesecake from cracking. Then, cool completely on the counter before chilling overnight. Don’t rush the chill!
Tips for a Showstopping red velvet cheesecake Success
Now that you’ve done the hard part—the layering!—we need to talk about pulling off that showstopper look. It’s all about the final details, honestly. People see the color and the layers first, so let’s nail those things so you get the bragging rights you deserve!
Ingredient Notes and Substitutions for red velvet cheesecake
If your red velvet cake batter looks a little pale, don’t fret! Usually, using a really high-quality mix helps a ton, or you can always add a little extra red food coloring gel if you want that *wow* vibrance for your special occasion dessert. Just remember, if you decide to skip the Oreo crust, make sure you generously grease and flour your pan; cheesecake batter loves to stick when it doesn’t have a crust anchor!
Also, I mentioned this before, but I can’t say it enough: your cream cheese, sour cream, and eggs for the filling MUST be at room temperature. Cold ingredients hate each other, and if they don’t fully come together, you end up with lumpy, sad cheesecake, and we are making gorgeous, creamy dessert perfection here!
Achieving the Creamy Cheesecake Dessert Texture
The secret to that perfectly smooth, dense slice? Time! Don’t even dream about cutting into this beautiful creation straight out of the oven. The absolute, non-negotiable rule is chilling time. That long rest in the fridge—seriously, give it 6 hours minimum, but overnight is better—firms everything up just right. That chill is what turns that wobbly baked center into that irresistible creamy cheesecake dessert that slices so cleanly.
Serving and Storing Your Decadent Cheesecake Ideas
We’ve waited ages, and finally, that beautiful red velvet cheesecake is perfectly chilled! This is the moment you reveal the layers to the world. Before slicing, you absolutely must finish it with that sweet, fluffy cloud we mixed up earlier. Don’t skip this step; it brings everything together and makes it look professionally done.
Final Assembly: Cream Cheese Frosting Dessert Topping
Once your cheesecake is rock solid from the fridge, take your whipped cream mixture—which should have stiff peaks now—and spread it gently over the top. I like using an offset spatula or the back of a spoon to create lovely, soft waves. It looks so much nicer than just smoothing it flat! For an extra punch, crumble up a tiny bit of leftover red velvet cake or a few extra Oreo crumbs right on top before you slice. This takes your decadent cheesecake idea over the top! Store any leftovers covered tightly back in the fridge, though honestly, good luck having any left!
Frequently Asked Questions about red velvet cheesecake
Oh, I get so many questions about this beauty! This is designed to be a baked layer dessert, so we need that oven time for the cake base to cook up properly alongside the cheesecake. So, unfortunately, you can’t really turn this specific red velvet cake and cheesecake fusion into a no bake red velvet cheesecake because that cake mix layer needs heat to set up right. If you’re desperate for no-bake though, look up just a simple no-bake cheesecake and flavor that with red velvet mix instead!
Can I make this a no bake red velvet cheesecake?
As mentioned, this recipe is baked because we’re fusing a cake component in there! If you try skipping the baking step, the cake mix part turns into a dense, gummy mess, and that’s just not what we want for a **creamy cheesecake dessert**. Stick to the recipe, and you’ll get that beautiful texture the first time around.
How far ahead can I prepare this homemade baked cheesecake?
This is where you get a head start! You absolutely *must* prepare this dessert a day ahead if you can. While the recipe says you can get away with 6 hours of chilling time, trust me, overnight is so much better. Chilling allows the cheesecake portion to fully firm up so when you slice it, you get those gorgeous, clean layers you worked so hard to create on your homemade baked cheesecake. Plan to bake it one day and serve it the next!
Nutritional Estimates for This Indulgent Baked Goods Slice
Now, nobody is making this showstopper because it’s celery sticks, let’s be real! But for those moments when you need to know exactly what kind of lovely indulgence you’re serving up, here’s a quick look. Remember, these numbers are just estimates based on standard ingredients, so your results might vary slightly depending on the exact cake mix or brand of Oreos you use. Still, it gives you the general idea of this *indulgent baked goods* slice!
- Serving Size: 1 slice
- Calories: Roughly 450
- Sugar: About 35g
- Fat: Around 28g
Share Your Culinary Creations
Now that you’ve got this stunning, vibrant treat cooling in the fridge, I absolutely insist you tell me how it went! Don’t just admire it quietly in your kitchen. Did those layers swirl perfectly for you? Did the Oreo crust give it the crunch you were hoping for?
I live for hearing about your successes! Please hop down to the comments below, give this ultimate layered dessert recipe a star rating, and share any little tweaks you made along the way. If you took a picture of this majestic layered red velvet cheesecake, tag me on social media! I want to see your showstoppers! Seeing your desserts come to life is the best part of sharing these recipes!
PrintThe Ultimate Layered Red Velvet Cheesecake

Create a showstopping dessert that combines rich red velvet cake flavor with a creamy, smooth cheesecake filling. This recipe provides clear steps for a visually appealing, decadent treat perfect for holidays or celebrations.
- Prep Time: 30 min
- Cook Time: 75 min
- Total Time: 195 min
- Yield: 12 servings 1x
- Category: Dessert
- Method: Baking
- Cuisine: American
- Diet: Vegetarian
Ingredients
- 1 box red velvet cake mix (plus eggs, oil, and water as directed)
- 1 cup crushed Oreo cookies (for crust variation)
- 8 oz cream cheese, softened
- 1/2 cup granulated sugar
- 1/4 cup sour cream
- 1 teaspoon vanilla extract
- 2 large eggs
- 1 cup heavy whipping cream
- 2 tablespoons powdered sugar
Instructions
- Prepare the red velvet cake batter according to the box directions, using only the required eggs, oil, and water. Set aside.
- Prepare an Oreo crust by mixing crushed cookies with 2 tablespoons of melted butter, then press firmly into the bottom of a 9-inch springform pan.
- In a separate bowl, beat the softened cream cheese, granulated sugar, sour cream, and vanilla extract until smooth. Beat in the 2 large eggs one at a time until just combined.
- Pour half of the cream cheese mixture over the crust. Gently pour half of the prepared red velvet cake batter over the cheesecake layer. Repeat with the remaining cheesecake mixture and then the remaining cake batter.
- To create a swirl effect, gently run a knife through the layers a few times.
- Bake in a water bath at 325°F (160°C) for 60 to 75 minutes, or until the center is mostly set.
- Turn off the oven, crack the door open, and let the cheesecake cool inside for one hour.
- Remove from the oven and cool completely on a wire rack. Chill in the refrigerator for at least 6 hours or overnight.
- Before serving, whip the heavy whipping cream and powdered sugar until stiff peaks form. Spread over the chilled cheesecake.
Notes
- For a vibrant red color, use a high-quality red velvet cake mix.
- If you skip the Oreo crust, lightly grease and flour the springform pan bottom.
- Chill time is crucial for the best texture and clean slices.
Nutrition
- Serving Size: 1 slice
- Calories: 450
- Sugar: 35g
- Sodium: 350mg
- Fat: 28g
- Saturated Fat: 16g
- Unsaturated Fat: 12g
- Trans Fat: 0.5g
- Carbohydrates: 42g
- Fiber: 1g
- Protein: 7g
- Cholesterol: 95mg