
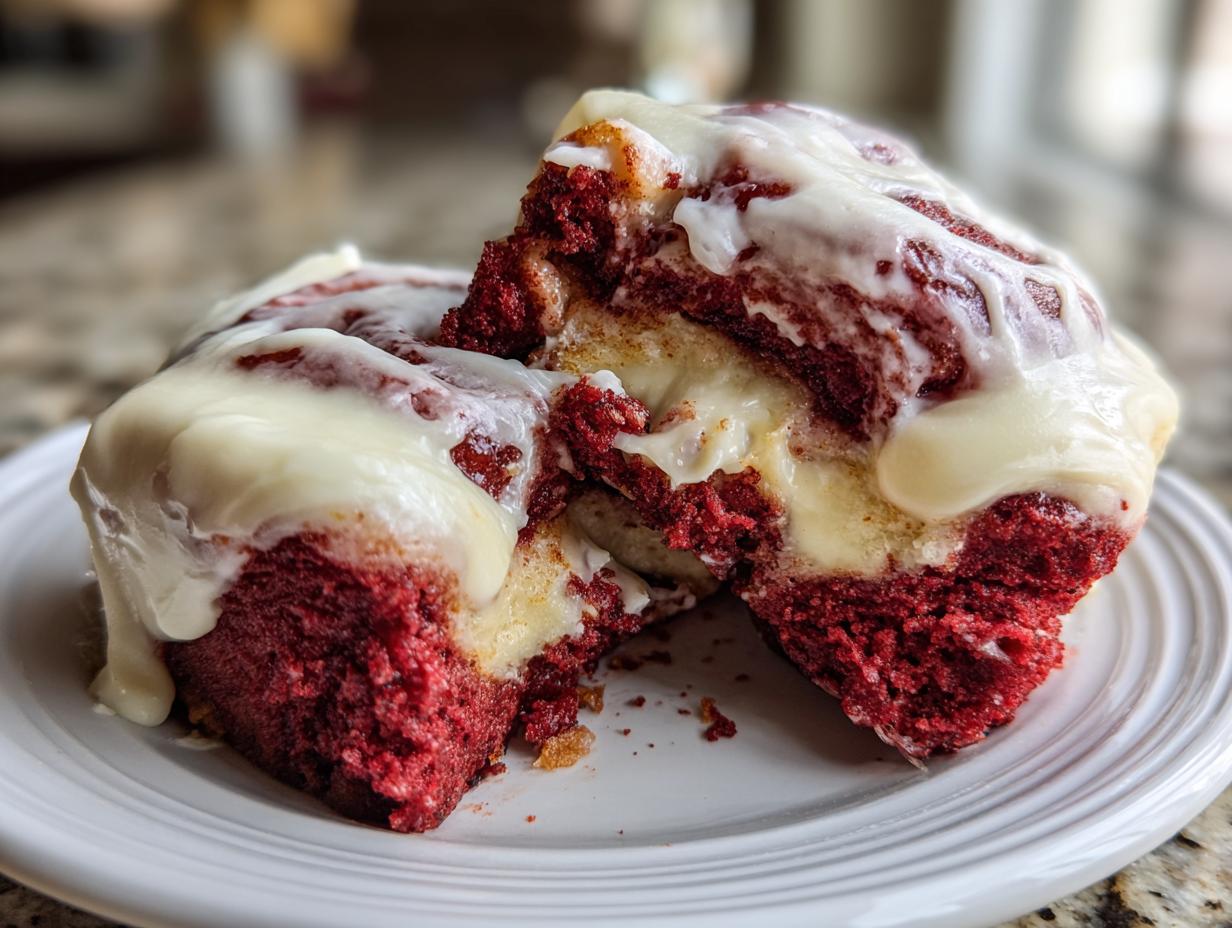
You know those moments when you need a bake that just stops everyone in their tracks? When plain cinnamon rolls just won’t cut it, but you still crave that warm, gooey comfort? That’s exactly when I reach for this recipe for red velvet cinnamon rolls. They are pure indulgence wrapped up with that signature, rich red color. When I first started baking again, stepping away from my hectic design career, I realized I needed recipes that felt special enough for a holiday brunch or a Valentine’s Day breakfast, but that didn’t need a pastry chef’s training.
These rolls hit that sweet spot. I call them bakery-style because they are ridiculously soft and pillowy—not dense or dry like some recipes sadly turn out. Trust me, getting that vibrant color and pairing it with a sharp, tangy cream cheese frosting is my favorite way to bring a little bit of that special occasion feeling right into our busy weeknight routine. They are showstoppers, plain and simple.
- Why This Bakery-Style red velvet cinnamon rolls Recipe Works
- Gathering Ingredients for Heavenly red velvet cinnamon rolls
- Step-by-Step Instructions for Perfect red velvet cinnamon rolls
- Tips for Success with Your red velvet cinnamon rolls Recipe
- Serving Suggestions for these red velvet cinnamon rolls
- Storage and Reheating red velvet cinnamon rolls
- Frequently Asked Questions about red velvet cinnamon rolls recipe
- Sharing Your Homemade red velvet cinnamon rolls Experience
- Estimated Nutritional Data for red velvet cinnamon rolls
Why This Bakery-Style red velvet cinnamon rolls Recipe Works
I get it; there are a million cinnamon roll recipes out there. So why bother with mine? Because this recipe is my personal, tried-and-true formula for bakery-style rolls that people actually talk about later. I developed this over many frustrating weekends until I finally cracked the code for something truly easy and reliable. You get that gorgeous, deep red contrast against the creamy white icing, and nobody leaves the table hungry!
- The dough is unbelievably soft and reliably rises—it never collapses on me.
- The color is rich and deep thanks to the cocoa powder and coloring working together.
- The cream cheese frosting has just enough tang to cut through all that sweetness.
- Plus, it’s honestly a no-fail method, especially if you use the tips I share below. You can even check out the guide I wrote for perfect soft dough baking if you’re keen on the science behind soft yeast breads!
Achieving Fluffy red velvet rolls Texture
The secret to those dreamy, fluffy red velvet rolls isn’t just one thing; it’s the combination of steps. First, we use the right temperature water for the yeast—too hot, and you kill your bubbles, too cold, and nothing happens! Then comes the kneading.
You really need to commit to that 5-7 minutes of kneading until the dough feels smooth and slightly elastic. That work develops the gluten structure that traps all the gas during the first rise. Don’t rush that first big bubble under the towel; a slow, warm rise is what guarantees those airy layers you want when you pull them apart.
Gathering Ingredients for Heavenly red velvet cinnamon rolls
Okay, stop right there before you grab your apron! For these roles to live up to the “Heavenly” title, we can’t be lazy with the ingredients. Good baking is all about respecting proportions, especially when we are dealing with a yeast dough that needs to look like velvet. We are dividing our shopping list into three main components: the dough itself, the glorious cinnamon filling, and that essential, tangy frosting that ties it all together. For more general tips on making frosted favorites, check out my guide on my favorite spice cakes!
For the Red Velvet Dough
This section is where the magic starts. Make sure you have everything measured out precisely. The temperature of the water for the yeast is crucial—you want it warm enough to wake up the yeast, but not so hot it kills it off. Aim for that 105°F to 115°F range—think slightly warmer than bathwater.
- 1 cup warm water (aiming for 105-115°F)
- 2 1/4 teaspoons active dry yeast
- 1/2 cup granulated sugar, plus 1 tablespoon reserved just for the yeast
- 1/2 cup unsalted butter, melted
- 1 large egg
- 1 teaspoon vanilla extract
- 1 teaspoon white vinegar—don’t skip this, it helps activate the red velvet flavor!
- 2 tablespoons red food coloring (If you use gel paste, you’ll get that incredibly vibrant color you see in the pictures; liquid coloring can sometimes fall flat.)
- 1/2 teaspoon salt
- 3 1/2 to 4 cups all-purpose flour (We start with 3.5 and add more as needed)
- 1/4 cup unsweetened cocoa powder
For the Warm Cinnamon Filling
This filling is what gives us that recognizable warmth against the slight chocolate tang of the dough. The key here is making sure your butter is perfectly softened. I mean soft enough to squish with two fingers, but not melted and oily. That way, it spreads beautifully without tearing the delicate dough layer.
- 1/2 cup unsalted butter, softened
- 1 cup packed light brown sugar
- 2 tablespoons ground cinnamon
For the Tangy Cream Cheese Icing Recipes
I always insist on using real cream cheese and real butter for this topping. It makes all the difference in flavor and texture! And please, please sift your powdered sugar. It saves you from having to dig out lumps later when you’re trying to get that perfect smooth glaze.
- 8 ounces cream cheese, softened
- 1/2 cup unsalted butter, softened
- 3 cups powdered sugar, sifted
- 1 teaspoon vanilla extract
- 1-2 tablespoons milk or heavy cream (We start with one tablespoon and add the second only if needed)
Step-by-Step Instructions for Perfect red velvet cinnamon rolls
This is where the planning pays off, friends! Baking yeast rolls takes a little time, but the actual hands-on work is super simple if you follow these steps exactly. Don’t try to rush the rising, though! That’s the part that separates a good batch from a truly phenomenal, soft batch. For more straightforward baking recipes, check out my guide to easy sweet rolls recipes.
Making and Proofing the Red Velvet Dough
First things first, we have to wake up that yeast. That’s Step 1: Combine your warm water, just one tablespoon of sugar, and the yeast in a big bowl. Let it sit until it gets foamy—if it doesn’t foam up in about 10 minutes, your water was either too cold or too hot, and you’ll need to give that batch another shot!
Once it’s nice and foamy, go ahead and mix in the melted butter, the rest of the sugar, the egg, vanilla, vinegar, salt, cocoa powder, and all that gorgeous red coloring. Now for the flour (Step 3)! Add it slowly, about a cup at a time, mixing until a soft, sticky dough starts to pull away from the sides of the bowl. It should still feel a little tacky, but not so sticky that it’s glued to your fingers.
Time to knead! Turn it out onto a lightly floured surface and work it for a solid 5 to 7 minutes until it’s smooth and elastic. If you gently poke it and the indentation springs back slowly, you’ve done a great job! Place that beautiful red ball into an oiled bowl, cover it up, and let it sit in a warm spot for 1 to 1.5 hours, or until it has happily doubled in size.
Assembling and Cutting the red velvet cinnamon rolls
While that dough is getting cozy, mix up your filling ingredients until you have that creamy, cinnamon-butter spread ready to go. This is Step 6!
Once the dough has puffed up, give it a gentle punch down—bye-bye trapped air! Flour your work surface lightly and carefully roll that dough out into a big rectangle, making sure it measures about 12 inches by 18 inches. Now, generously spread that filling paste over the entire surface, but leave about a half-inch border bare along one of the long sides. This border acts like the glue for our seam!
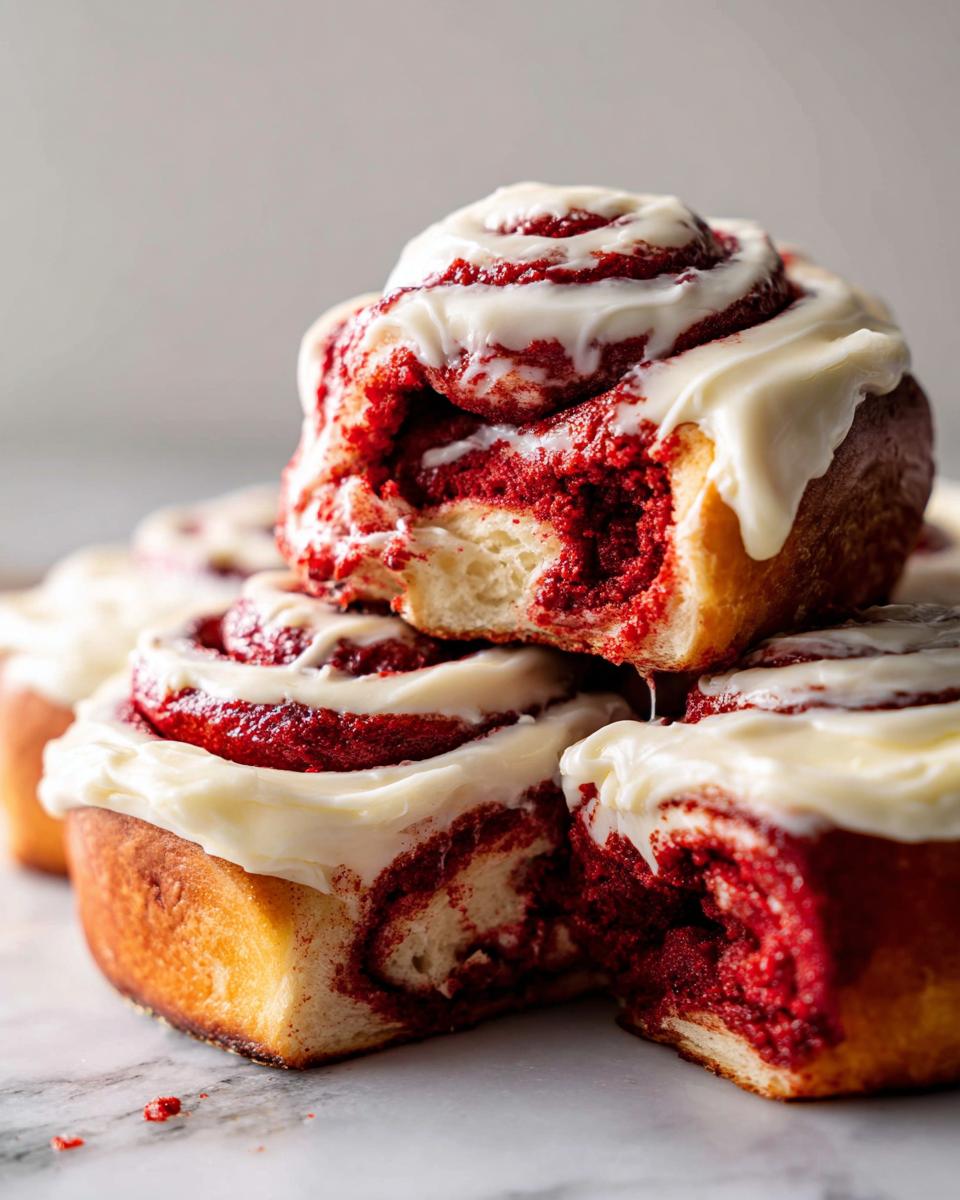
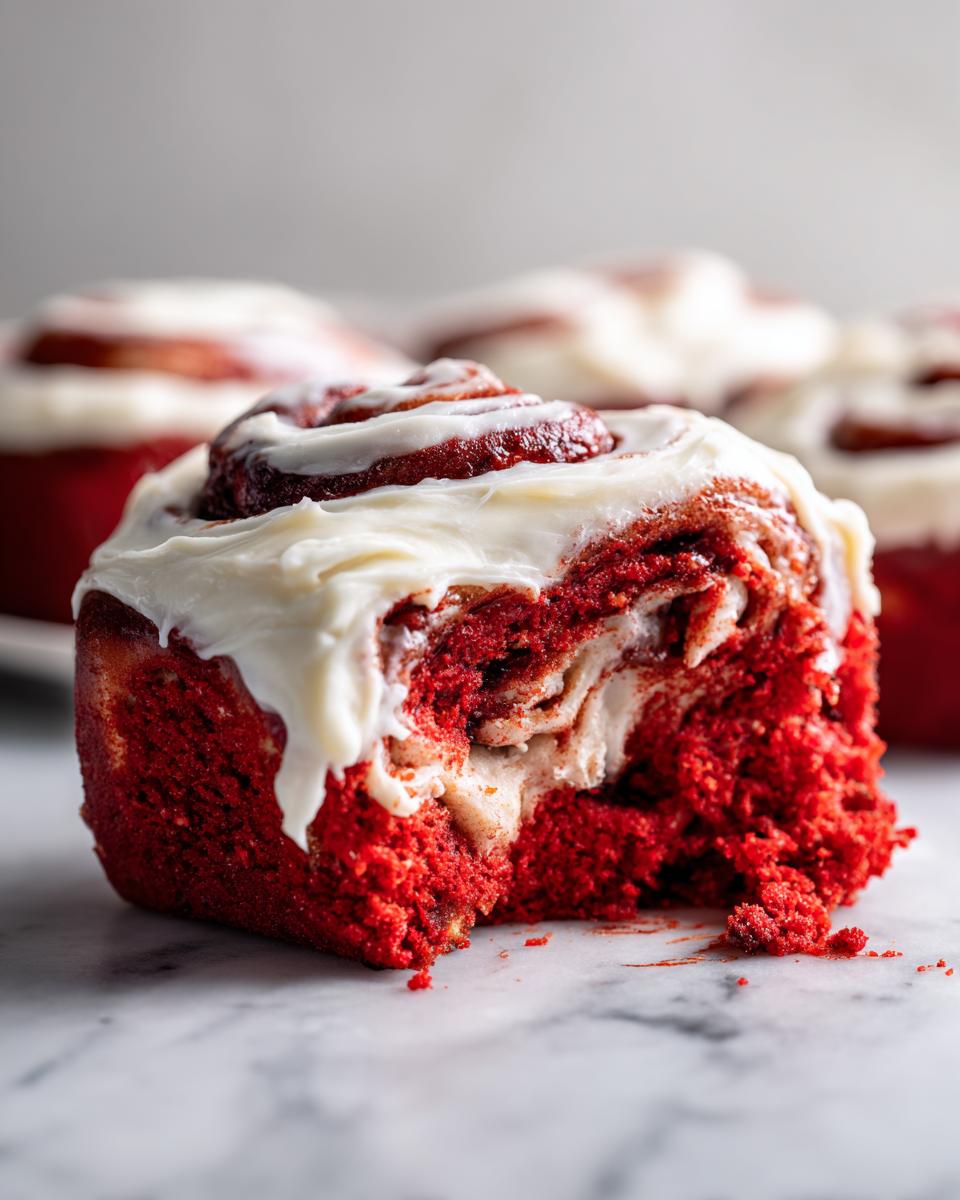
Starting on the side opposite that border, roll the dough up as tightly as you can into a long log. Pinch that seam closed really well so it doesn’t pop open while baking. To cut them into 12 perfect rolls, I swear by using unflavored dental floss—it slides through without squishing the swirl. See how clean the cut is? Place all 12 rolls cut-side up into your greased 9×13 pan.
Baking and Frosting These Festive Morning Treats
Now we cover them again (Step 10) and let them sit for just 30 to 45 minutes so they get nice and puffy for their second rise. While they are doing that, get your oven preheated to 375°F (190°C).
Bake them for about 20 to 25 minutes (Step 11). You want them lightly golden, but don’t let them sit in there too long, or they will dry out—we’re aiming for moist, remember? As soon as they come out, start making that icing while they cool just slightly. Beat that softened cream cheese and butter until fluffy, then slowly add in your sifted powdered sugar and vanilla (Step 12). Add milk slowly until it’s spreadable.
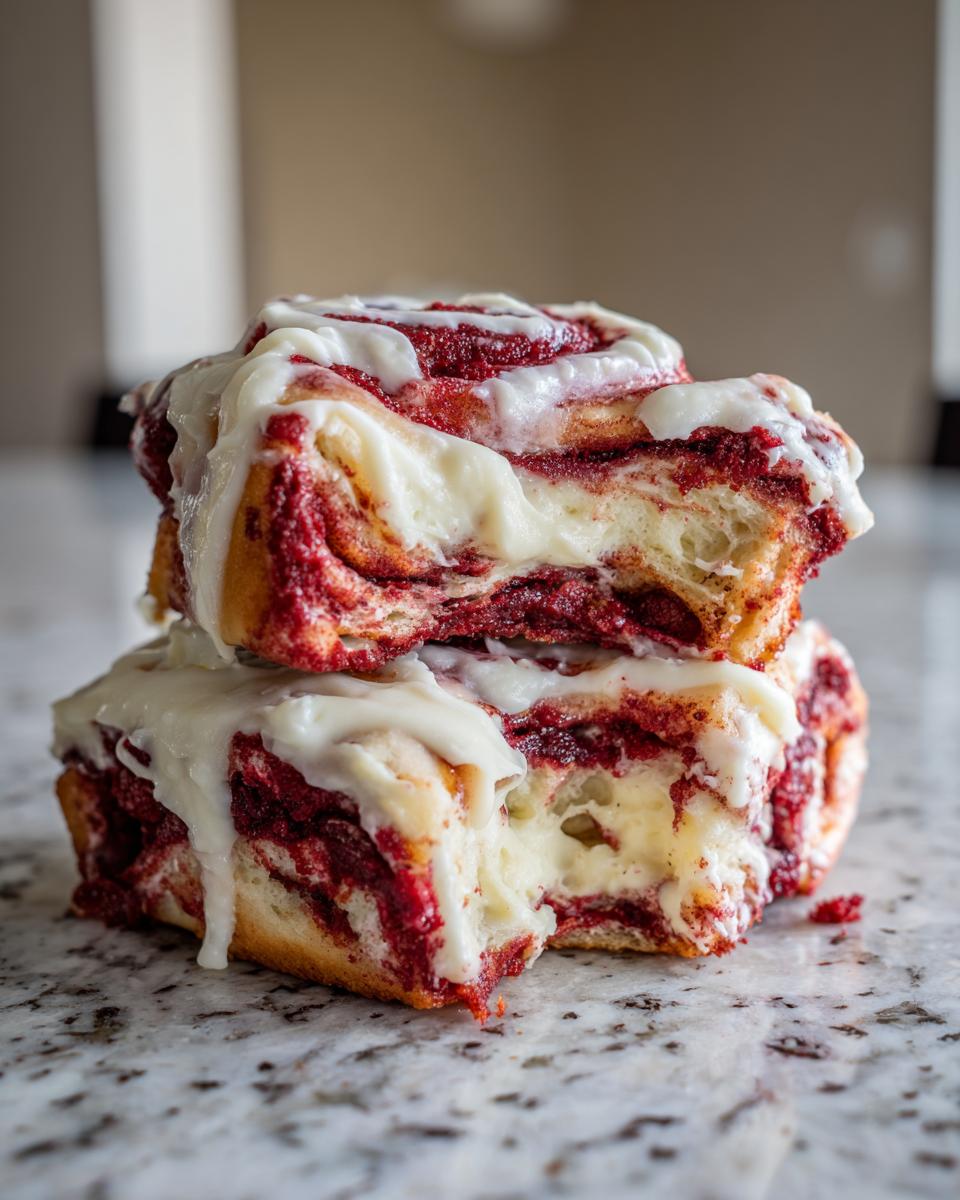
Finally, the best part! Drench those warm festive morning treats in the cream cheese frosting (Step 13). It melts slightly into all those warm layers. Oh my goodness, they smell divine!
Tips for Success with Your red velvet cinnamon rolls Recipe
You’ve got the dough made, they’re baked beautifully, but maybe you want to tweak things for next time, or perhaps you need a super cheat version for a last-minute brunch! Baking is all about learning little tricks, and I have a couple of essential pointers to make sure these red velvet cinnamon rolls are perfect every single time. If you want to see how I approach reliability in baking generally, check out my guide for a no-fail cinnamon roll recipe.
Color Intensity and Ingredient Swaps
Let’s talk about that dazzling color first. If your rolls didn’t come out the vibrant red you were dreaming of, I bet you reached for the standard liquid food coloring. Big mistake! Liquid coloring is mostly water and it really waters down the pigment when mixed into fatty doughs. For maximum saturation and that true show-stopping red, you absolutely must invest in a good quality red gel food coloring paste. A tiny little dab goes a long way toward creating that perfect look!
Now, for those mornings when you’re short on time—I totally get it. If you’re looking for an easy sweet rolls recipe, I included a little note for a reason: you can absolutely use a box of Duncan Hines red velvet cake mix! Instead of mixing the yeast dough from scratch, you use the cake mix as your base and mix it with the yeast/water/egg/butter/coloring according to the recipe card. It’s a fantastic shortcut for speed, though I still think the yeast dough from scratch has a slightly better, chewier crumb.
Preventing Dry red velvet cinnamon rolls
Nothing ruins a sweet roll faster than a dry texture. Remember, yeast doughs are tricky because they have a lot of rising power, which can lead to over-proofing or over-baking if you aren’t paying attention. The biggest no-no is leaving them in the oven even five minutes too long. We are looking for golden edges, but the center should still feel soft and bouncy when you gently press the top. They will continue to cook slightly once they are out of the oven.
The other trick to ensuring every bite is a perfect, moist red velvet dessert is the icing application. Don’t skimp! Wait until the rolls are *just* warm—not piping hot, or the frosting melts right off—and then spread that tangy cream cheese frosting generously over the top. The fat and sugar in that icing seal in the moisture from the steam trapped inside the rolls. It’s delicious insurance against dryness!
Serving Suggestions for these red velvet cinnamon rolls
Okay, so you have these show-stopping, intensely delicious red velvet cinnamon rolls now, and you need to figure out what else goes on the table. Don’t sabotage the main event with boring sides! Since these rolls are so rich—they satisfy that craving for festive morning treats all by themselves—you want to balance them out, especially if you’re serving them up for a big holiday brunch or a special weekend breakfast.
Here are my favorite ways to round out the spread when these beauties starring role:
- The Coffee Bar Boost: You absolutely need a strong, dark roast coffee. The bitterness cuts right through the sweetness of the rolls and the frosting. If you’re serving brunch, think about setting up a small station with flavored syrups and maybe some whipped cream.
- Brighten Things Up with Fruit: Since the rolls are deep red and chocolatey, a platter of bright, fresh fruit is a must for visual appeal and cutting the richness. Think crisp green grapes, sliced kiwi, or a big bowl of fresh raspberries—they really complement that red velvet shade perfectly.
- A Savory Counterpoint: If this is for a big spread like Christmas morning, you need something savory so people don’t crash after one roll! I love keeping it simple: crispy bacon or some light egg bites. This way, everyone gets a little bit of salty before diving headfirst into that glaze.
Honestly, even just microwaving one for about 15 seconds until it’s wonderfully warm before slathering on extra cream cheese icing is a perfect serving suggestion all by itself!
Storage and Reheating red velvet cinnamon rolls
Don’t worry if you can’t devour the entire batch in one sitting—which, let’s be real, is a tough challenge with these! These red velvet cinnamon rolls actually hold up incredibly well, which makes them perfect for making ahead for a special holiday morning when you don’t want to be in the kitchen.
The best way to handle leftovers is to keep them stored properly right away. Once they have cooled down completely from that fresh-from-the-oven warmth, cover the baking dish tightly with plastic wrap or carefully transfer the rolls into an airtight container. You can keep them covered on the counter at room temperature for about two full days. I’ve found that they stay wonderfully soft this way. If you plan on saving them longer than that, slide them into the refrigerator, still covered well, for up to five days.
The great news? That tangy cream cheese frosting we worked so hard on is quite stable and doesn’t separate or weep when refrigerated, which is a huge win for homemade sweet rolls!
Waking Up Those Leftover Rolls
Reheating them is key to bringing back that magical, soft texture. Microwaving is definitely the fastest route, but you have to be careful not to turn them into hot rubber bands! Take one roll—or whatever portion you need—and place it on a microwave-safe plate. Pop it in for just 15 to 20 seconds on medium power. You want them warm through, not sizzling hot. This brief burst of heat softens the dough right back up!
If you don’t mind waiting an extra minute or two, the oven is my personal preference for reviving a whole batch or when you want that extra pillowy experience. Just preheat your oven to a low temperature, maybe 300°F (150°C). Place the rolls on a baking sheet and heat them for about 8 to 10 minutes. This gentle heat warms the interior evenly without drying out the edges.
And honestly, even if they are slightly cold from the fridge, a gentle reheating followed by an extra dollop of your favorite homemade cream cheese icing makes them taste like they were baked that very minute. Enjoy those leftovers!
Frequently Asked Questions about red velvet cinnamon rolls recipe
When I first started experimenting with yeast doughs—especially when trying to get that vibrant red color right—I had a million little questions pop up. It’s totally normal! Here are the top things readers always ask me about making these red velvet cinnamon rolls recipe turns out perfectly soft and beautiful every time.
Can I make the dough for these red velvet cinnamon rolls ahead of time?
Oh yes, you absolutely can! While I prefer the flavor that comes from the initial rise at room temperature, yeast doughs are fantastic partners for meal prepping. You can complete all the steps right up to cutting the rolls (Step 9). After you’ve sliced them, place them snugly in your greased baking dish, cover them tightly, and pop them into the refrigerator overnight. They will go through a slow, cold fermentation, which develops amazing flavor!
In the morning, just pull them out about an hour before you plan to bake them so they can warm up slightly and undergo their second rise. If they look sad or flat after an hour out of the fridge, just give them a little more time in a warm spot. Baking them straight from a cold fridge will require adding about 5-10 minutes to the bake time, so keep an eye on them!
What is the best way to get bakery style cinnamon rolls texture?
Achieving that incredible, pull-apart, bakery style cinnamon rolls texture comes right down to two things: trapping the air and preventing gluten overdevelopment. First, don’t be tempted to add too much flour when kneading! The dough needs to remain slightly sticky—remember, it’s going to rise quite a bit! Too much flour makes them dense right from the start.
Second, and this is crucial, let them have their second rise until they are puffy and look like they *might* collapse if you poke them too hard. That puffiness before they go into the oven leads to those soft, separated layers after baking. If you’re looking for more general sweet roll tips, you might want to check out my advice on making perfect cheese balls—the concept of gentle handling applies to both!

My rolls are not red enough. How do I fix this next time?
This breaks my heart every time because the color is half the fun! If you used standard grocery store liquid food coloring and got more of a pinkish hue, I have great news: this is an easy fix for next time. As I mentioned in the tips section, liquid coloring is mostly water, and it just doesn’t pack the punch needed when diluted into a large batch of dough.
For your next batch, please switch to a concentrated red gel food coloring paste. You only need a few drops, and it provides a far more intense, professional-looking color saturation without altering the dough consistency at all. Trust me, grabbing one of those little tubes of gel coloring is an investment for all your festive baking projects!
Sharing Your Homemade red velvet cinnamon rolls Experience
Well, we did it! We transformed simple flour, sugar, and a little bit of red food coloring into these absolutely show-stopping, melt-in-your-mouth bakery style cinnamon rolls. I truly hope you feel that glow of accomplishment that comes from pulling something this spectacular out of your own oven. I love knowing that my kitchen right now probably smells just as amazing as yours!
Making food is about sharing, isn’t it? When I left the design world behind for the kitchen, it was about connection, and that spirit is what DelishCraze is all about. I want to hear how they turned out for you! Did the cream cheese frosting get a little extra tangy? Did your family manage to wait for them to cool slightly before diving in?
Please, don’t be shy! If you give these red velvet cinnamon rolls recipe a try, I’d be so grateful if you’d leave a star rating right down below—it helps me know what recipes you all love the most, and it helps other bakers know they can trust the method. Bonus points if you snap a photo! You can share them over on social media and tag me; seeing your festive morning treats brightens my whole week. It warms my heart to think that a recipe born from my experimenting can become part of your own family memories, maybe even setting the stage for your next special breakfast tradition.
Happy baking, everyone! I’m already thinking about what comforting classic we can transform next!
Estimated Nutritional Data for red velvet cinnamon rolls
Alright, time for the grown-up talk—calories! I know when we’re making something this decadent, we aren’t expecting a salad, but it’s important to know what we’re working with, especially if you plan on whipping these up for a special occasion like Valentine’s Day or Christmas morning breakfast.
Keep in mind that my recipe uses standard measurements, and where you source your butter or sugar can absolutely shift these numbers. These figures below are based on dividing our ultimate cinnamon rolls recipe into 12 gorgeous servings. For comparison, you can always see how other folks tackle their treats over at Savoring Moments.
Here is the nutritional breakdown, serving size being one glorious roll:
- Serving Size: 1 roll
- Calories: 450
- Sugar: 45g (Yes, it’s a treat, enjoy it!)
- Sodium: 350mg
- Fat: 25g
- Saturated Fat: 15g
- Trans Fat: 0.5g
- Carbohydrates: 55g
- Fiber: 2g
- Protein: 6g
- Cholesterol: 65mg
I always have to add a little disclaimer here: This is an estimate, dear baker! How much cream cheese glaze you heap on top, or even how much flour you end up needing during the kneading process, changes the final tally. But honestly, when they look this good, taste this fluffy, and feel this special, the calories are just part of the celebration, right?
PrintHeavenly Bakery-Style Red Velvet Cinnamon Rolls with Tangy Cream Cheese Frosting

Make soft, fluffy red velvet cinnamon rolls that feature a rich red velvet dough, a warm cinnamon filling, and a tangy cream cheese glaze. These rolls are perfect for holiday brunch or a special dessert.
- Prep Time: 30 min
- Cook Time: 25 min
- Total Time: 135 min
- Yield: 12 servings 1x
- Category: Breakfast
- Method: Baking
- Cuisine: American
- Diet: Vegetarian
Ingredients
- 1 cup warm water (105-115°F)
- 2 1/4 teaspoons active dry yeast
- 1/2 cup granulated sugar, plus 1 tablespoon for yeast
- 1/2 cup unsalted butter, melted
- 1 large egg
- 1 teaspoon vanilla extract
- 1 teaspoon white vinegar
- 2 tablespoons red food coloring (or gel paste)
- 1/2 teaspoon salt
- 3 1/2 to 4 cups all-purpose flour
- 1/4 cup unsweetened cocoa powder
- **For the Filling:**
- 1/2 cup unsalted butter, softened
- 1 cup packed light brown sugar
- 2 tablespoons ground cinnamon
- **For the Cream Cheese Frosting:**
- 8 ounces cream cheese, softened
- 1/2 cup unsalted butter, softened
- 3 cups powdered sugar, sifted
- 1 teaspoon vanilla extract
- 1–2 tablespoons milk or heavy cream
Instructions
- Activate the yeast: In a large bowl, combine the warm water, 1 tablespoon of sugar, and yeast. Let stand for 5-10 minutes until foamy.
- Add the melted butter, remaining 1/2 cup sugar, egg, vanilla extract, vinegar, red food coloring, salt, and cocoa powder to the yeast mixture. Mix well.
- Gradually add the flour, about one cup at a time, mixing until a soft, slightly sticky dough forms. You may not need all the flour.
- Knead the dough: Turn the dough out onto a lightly floured surface and knead for 5-7 minutes until smooth and elastic.
- First rise: Place the dough in a lightly oiled bowl, turning to coat. Cover the bowl with plastic wrap or a clean towel and let it rise in a warm place for 1 to 1.5 hours, or until doubled in size.
- Prepare the filling: While the dough rises, mix the softened butter, brown sugar, and cinnamon together in a small bowl until fully combined. Set aside.
- Roll out the dough: Punch down the risen dough. On a lightly floured surface, roll the dough into a large rectangle, approximately 12×18 inches.
- Spread the filling: Evenly spread the cinnamon-brown sugar filling over the entire surface of the dough, leaving a small border on one long edge.
- Roll and cut: Starting from the long edge opposite the border, tightly roll the dough into a log. Pinch the seam closed. Cut the log into 12 equal rolls using a sharp knife or unflavored dental floss.
- Second rise: Arrange the rolls in a greased 9×13 inch baking dish. Cover and let them rise again for 30-45 minutes until puffy.
- Bake: Preheat your oven to 375°F (190°C). Bake the rolls for 20-25 minutes, or until lightly golden brown and cooked through.
- Make the frosting: While the rolls cool slightly, beat the softened cream cheese and butter together until smooth. Gradually add the sifted powdered sugar and vanilla extract. Add milk or cream, one tablespoon at a time, until you reach a smooth, spreadable consistency.
- Frost and serve: Spread the cream cheese frosting generously over the warm cinnamon rolls. Serve immediately for the best texture.
Notes
- For a vibrant red color, use a high-quality red gel food coloring instead of liquid coloring.
- If you prefer a quicker method, you can substitute the dough ingredients with one box of red velvet cake mix following package directions for a dough base.
- Do not overbake the rolls; they should be soft, not dry.
Nutrition
- Serving Size: 1 roll
- Calories: 450
- Sugar: 45
- Sodium: 350
- Fat: 25
- Saturated Fat: 15
- Unsaturated Fat: 10
- Trans Fat: 0.5
- Carbohydrates: 55
- Fiber: 2
- Protein: 6
- Cholesterol: 65